

Almost everyone has sat in the salon chair, watched the mirror with growing dread, and realised the cut is not what they asked for. Maybe the layers are uneven, the fringe is an inch too short, one side is longer than the other, or the whole shape just sits wrong. A bad haircut feels like a disaster in the moment, but it is almost never permanent — and it is almost never as visible to other people as it is to you. The right hairstyles for a bad haircut can hide the worst of it today, while your hair grows out and a good stylist fixes the shape underneath.
This guide starts with eight practical explainers — what actually counts as a bad haircut, why camouflage styling works, how to assess the damage honestly, how to style around the problem, what to say to your stylist, what to avoid, and how to grow it out — then walks through 40 hairstyles for a bad haircut, from a deep side part and soft curtain bangs to messy buns, braids, scarves and sleek blowouts. Every style notes what it hides, who it suits, how to style it and what to ask for, so you can walk out of the house today feeling like yourself again.
What Counts as a Bad Haircut, Really?

A bad haircut is not just a cut you do not love on day one — it is a cut that fails at its basic job. The shape is uneven, the layers do not connect, the fringe is cut too short to sit properly, the sides do not match, or the length you asked for has simply vanished. Sometimes the problem is technical, like blunt ends that stick out or thinning shears used too aggressively. Sometimes the problem is a mismatch: the stylist gave you the cut they thought you wanted, not the one you described. Both count, and both are fixable, but they need different responses, so the first step is always to name what is actually wrong.
What it means: a cut is genuinely bad when it cannot be styled into the shape you wanted, no matter what you try at home. Signs it is working: if a blow-dry, a different parting or a little product makes it look fine, you probably have a styling problem, not a cutting problem. What to avoid: judging a cut in the first hour — fresh hair sits differently after its first wash, and panic decisions made in the salon chair are the ones most people regret.
Why Camouflage Styling Works (the Hair Logic)
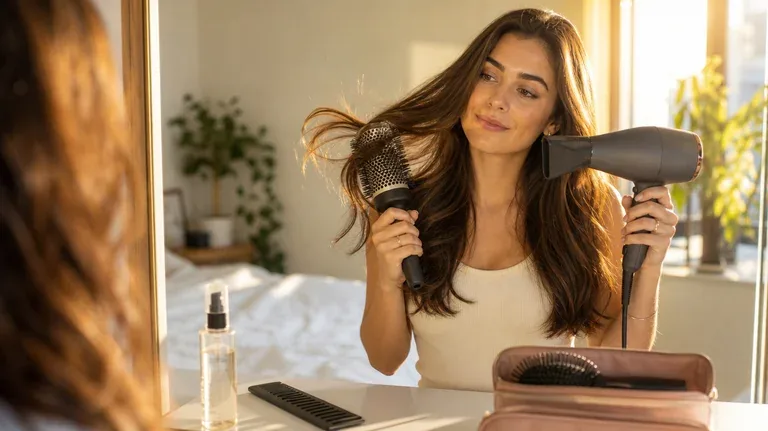
Camouflage styling works because the eye reads a hairstyle as a whole shape, not as a list of individual flaws. A deep side part changes where the eye starts, soft waves break up a harsh straight line, and volume at the crown pulls attention upward, away from uneven ends. Texture is your best friend after a bad cut: curls and waves blur choppy layers, while a sleek, straight finish shows every mistake. That is why the hairstyles for a bad haircut in this guide lean on movement, asymmetry and softness — they give the eye something interesting to follow instead of the flaw.
Why it matters: understanding the logic means you can improvise instead of memorising forty looks — any style that adds texture, redirects the parting or creates a new focal point will help. How to do it: start with the flaw, then pick the opposite quality: blunt and harsh becomes soft and wavy, too short at the front becomes swept to the side, uneven lengths become layered texture. Quick verdict: if a style hides the flaw from three feet away in a mirror, it hides it from everyone else too.
Who These Fixes Suit — Hair Type, Length and Face Shape

The fixes in this guide are grouped by what they hide, not by hair type, because a bad cut can happen to anyone — but your hair type decides which fixes will actually work for you. Fine hair needs volume tricks and light products, because heavy styling will fall flat within an hour. Thick hair can carry bolder camouflage, like a deep side part with a lot of sweep, but it also shows uneven layers more clearly. Curly hair is the most forgiving of all: curls hide almost any cutting mistake, and a few well-placed pins can reshape a whole head. Short hair has the least room to hide, so it leans on accessories, texture and parting tricks instead.
What it means: the best fix is the one that works with your hair’s natural behaviour, not against it — fighting curl into a sleek style the morning after a bad cut is a recipe for frustration. Signs it is working: the style holds for most of the day without constant re-doing, and it looks good from the side and back, not just the front. What to avoid: choosing a fix because it looks easy on someone with completely different hair — a pixie rescue does nothing for waist-length hair, and a braid crown does nothing for a buzz cut.
Assessing the Damage Before You Style

Before you reach for the straighteners or the scissors, take ten honest minutes to assess the damage. Wash your hair, let it dry naturally, and look at it in good light from the front, both sides and the back — use a hand mirror or your phone camera for the back, because that is where the worst surprises live. Note exactly what is wrong: is one side longer, are the layers choppy, is the fringe too short, is there a hole where too much hair was thinned out? Write it down, because a clear list stops you from fixing the wrong thing and helps enormously if you go back to the salon.
How to do it: part your hair the way you normally wear it, then try two other partings — a bad cut often looks dramatically better with a different part, and that costs nothing. When it is hard: if you cannot bear to look at it, ask a trusted friend to take photos from every angle; photos are more honest than mirrors and easier to show a stylist. What to avoid: cutting more hair yourself the same day. Home trimming to “even it out” is how a fixable bad cut becomes a genuinely short one.
How to Style Around a Bad Cut, Step by Step
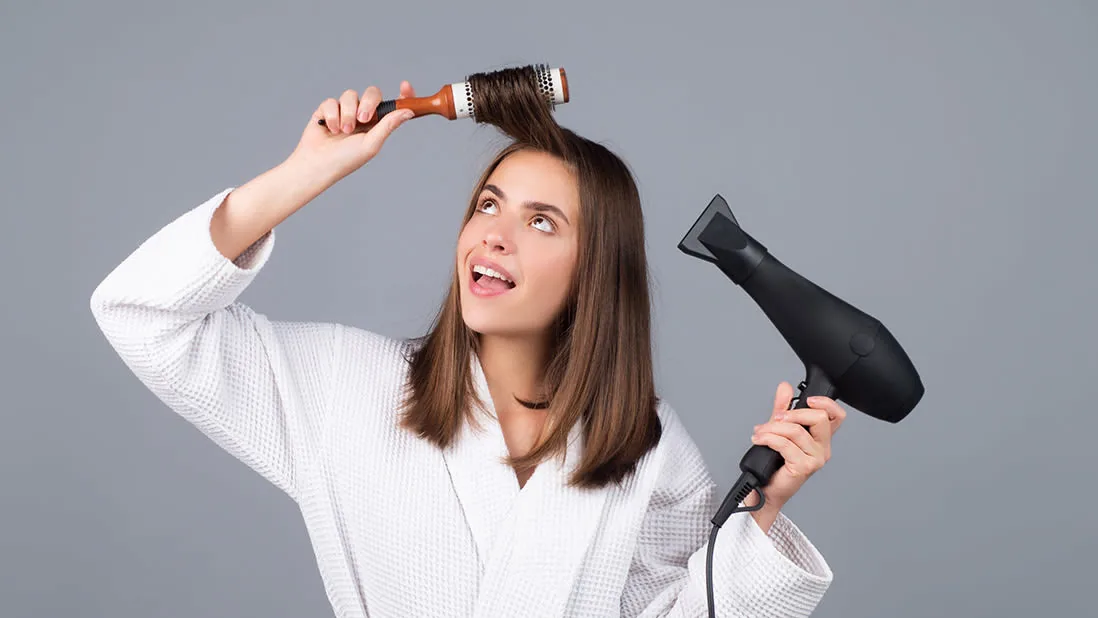
Styling around a bad cut follows the same order every time: start damp, add product, create the shape, then lock it in. Work with damp hair, because wet hair is the only time you can truly redirect a parting or retrain a stubborn fringe. A little mousse or volumising spray at the roots gives fine hair the lift it needs to cover uneven layers, while a smoothing cream tames the flyaways that make choppy ends look worse. Dry with your fingers or a round brush, directing the hair where you want it to sit, and only pick up the straighteners or curling iron once the basic shape is dry — hot tools on wet hair will not fix a shape, they will just set the wrong one.
How to do it: always finish with a cool shot from the dryer and a light-hold spray; heat sets the shape, cold locks it, and a little hold stops the fringe from springing back by lunchtime. Signs it is working: the style survives a walk outside and a few hours of wear without needing a full re-do. What to avoid: loading on heavy wax or gel to force hair into place — it makes hair look greasy and draws the eye straight to the area you are trying to hide.
Talking to Your Stylist About a Fix
Most salons will fix a bad cut for free if you go back within a week, and a calm, specific conversation is far more effective than an angry one. Bring photos: the inspiration picture you showed originally, and a photo of what you actually got, taken in daylight. Describe the problem in concrete terms — “the left side is an inch longer than the right” lands much better than “I hate it” — and say what you want the fix to achieve. A good stylist will listen, apologise, and suggest a correction, which might be a small trim, a re-balance of the layers, or a reshape into a shorter style that actually works.
What to ask for: ask for the most senior available stylist for the correction, and ask them to show you the shape in the mirror before they cut, section by section. When it is hard: if the salon is defensive or dismissive, stay polite, take the free fix if it is offered by someone competent, and take your future business elsewhere. What to avoid: demanding a completely different cut as the fix — corrections work best when they are small, targeted, and done by someone who can see what the first cut was trying to be.
What to Avoid After a Bad Haircut
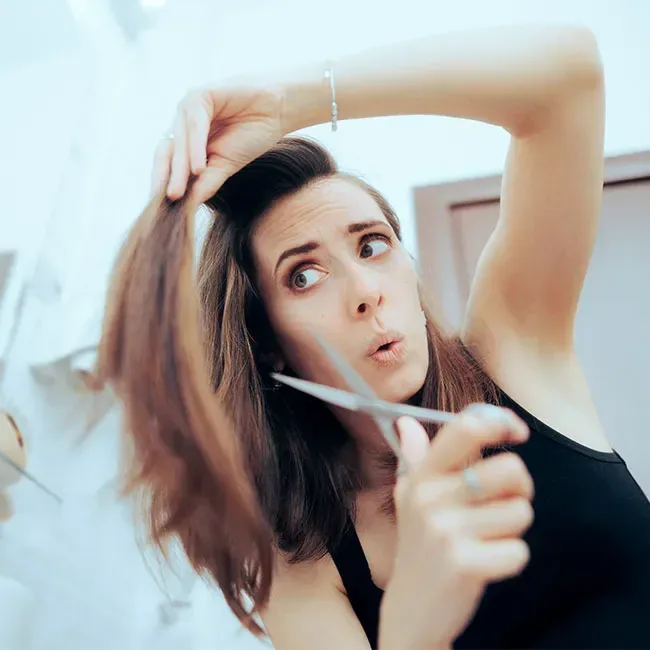
The days after a bad haircut are when most of the real damage happens, and it is rarely the stylist’s fault — it is the well-meaning home rescue. The biggest mistake is cutting more hair yourself to even things out: without sectioning, tension and a proper pair of shears, home trimming almost always makes one side worse and leaves you with less hair for the stylist to fix. The second mistake is a drastic colour change or a chemical treatment to distract from the cut; bleach, dye or a keratin treatment on stressed hair can add breakage to the problem. And the third is hiding under a hat every day, which flattens the hair, traps oil at the roots and makes the shape look worse when the hat comes off.
What it means: your job right now is to protect the hair you have, not to punish it — gentle washing, a little leave-in conditioner, and no aggressive brushing when wet. Signs you are on track: the hair feels healthy even if the shape is wrong, and a stylist can see enough length and texture to work with. What to avoid: heat styling every single day to force the shape — give your hair two or three heat-free days a week, and use a heat protectant every time you do style it.
Growing It Out: The Long Game
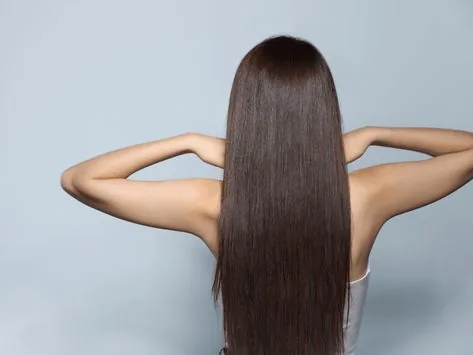
Hair grows about half an inch a month, which means a too-short fringe needs six to eight weeks to reach your eyebrows and a bad bob needs three to four months to become a lob. That sounds like forever on day one, but it is a surprisingly short time when you have a plan: regular tiny trims every six to eight weeks to keep the shape tidy as it grows, a grow-out style for each awkward stage, and a stylist who understands the goal is length, not a new cut. The awkward in-between stages are real — the fringe that will not stay put, the layers that flip out — but each one has a style in this guide, and each one passes.
How to do it: book the trims in advance so you do not skip them, and tell your stylist “I am growing it out, please only take the split ends” at every appointment. Signs it is working: the shape looks intentional again, even if it is not the final length, and you stop thinking about the bad cut every time you pass a mirror. Quick verdict: growing out a bad haircut is mostly a test of patience — and the styles in this guide are how you pass it looking good.
1. The Deep Side Part Switch
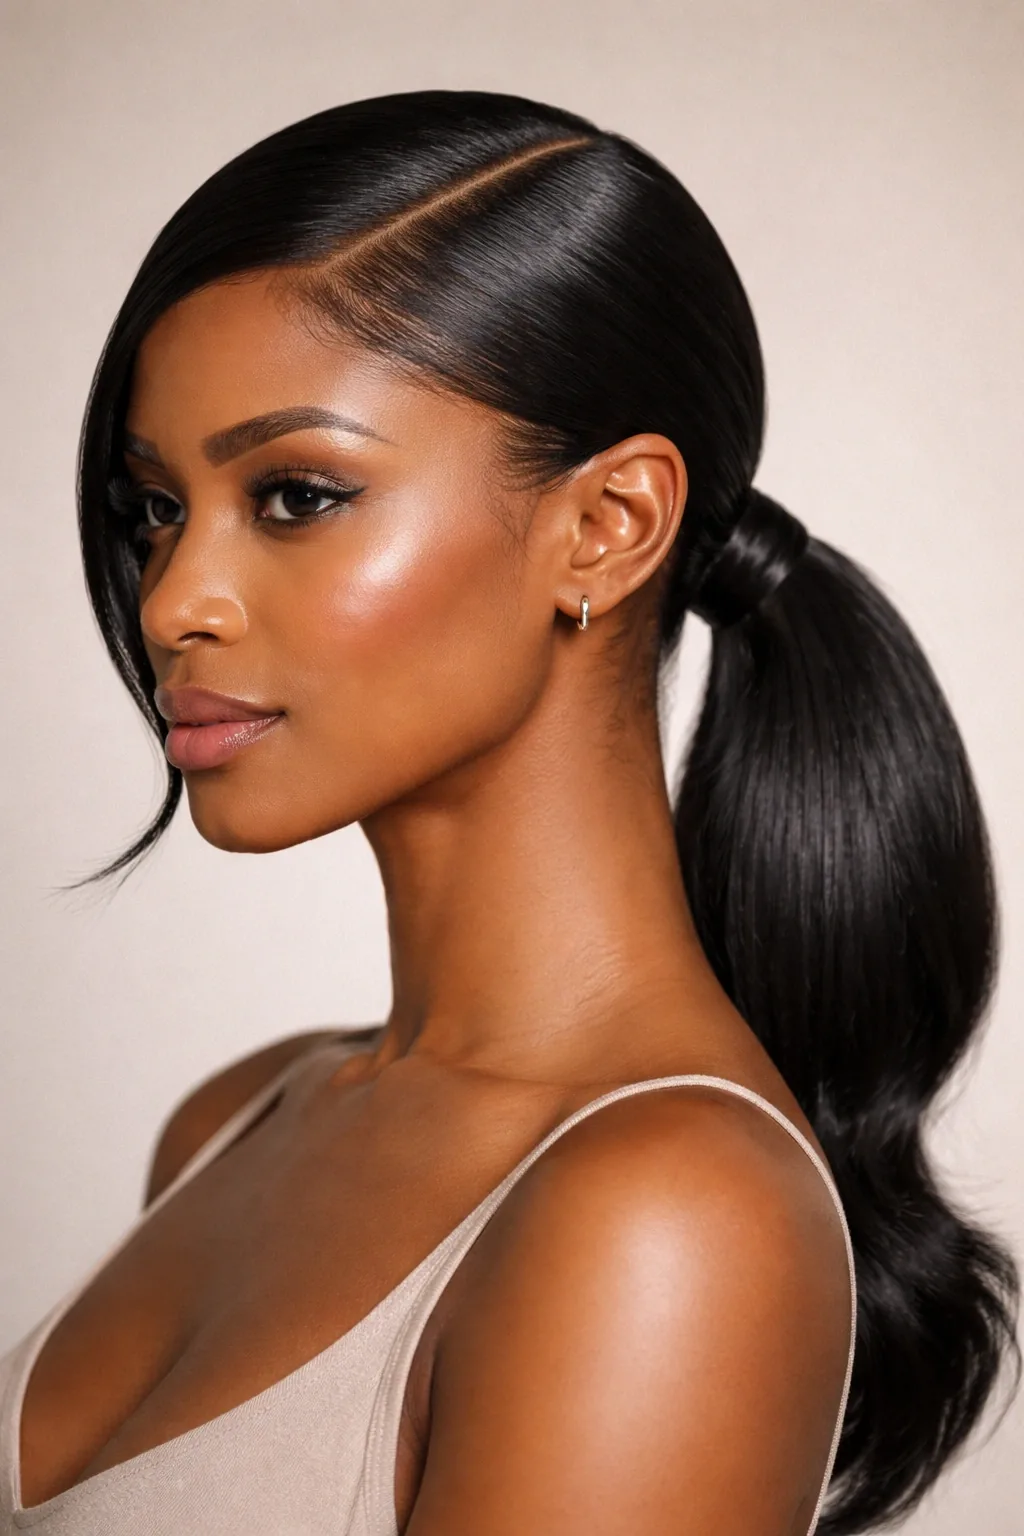
The deep side part is the fastest fix in this entire guide, and it works because it instantly changes the geometry of your hair. By moving the parting several inches to one side, you create a heavy sweep of hair across the forehead that covers a too-short fringe, hides an uneven hairline, and gives flat, choppy layers somewhere to fall. It also adds instant volume at the crown, because hair that has been trained to fall one way resists lying flat when it is swept the other way. On medium and long hair it looks deliberate and glamorous; on a bob it turns a boxy shape into something asymmetric and chic.
How to style it: start with damp hair, comb the part in while the hair is still wet, and blow-dry the heavy side away from the face with a round brush so it holds its sweep. Best for: uneven fringes, lopsided layers, flat roots and anyone whose cut looks worse with a middle part. What to ask for: nothing yet — this is a styling fix, not a cutting fix, which is exactly why it is the first thing to try.
2. Soft Curtain Bangs, Grown In
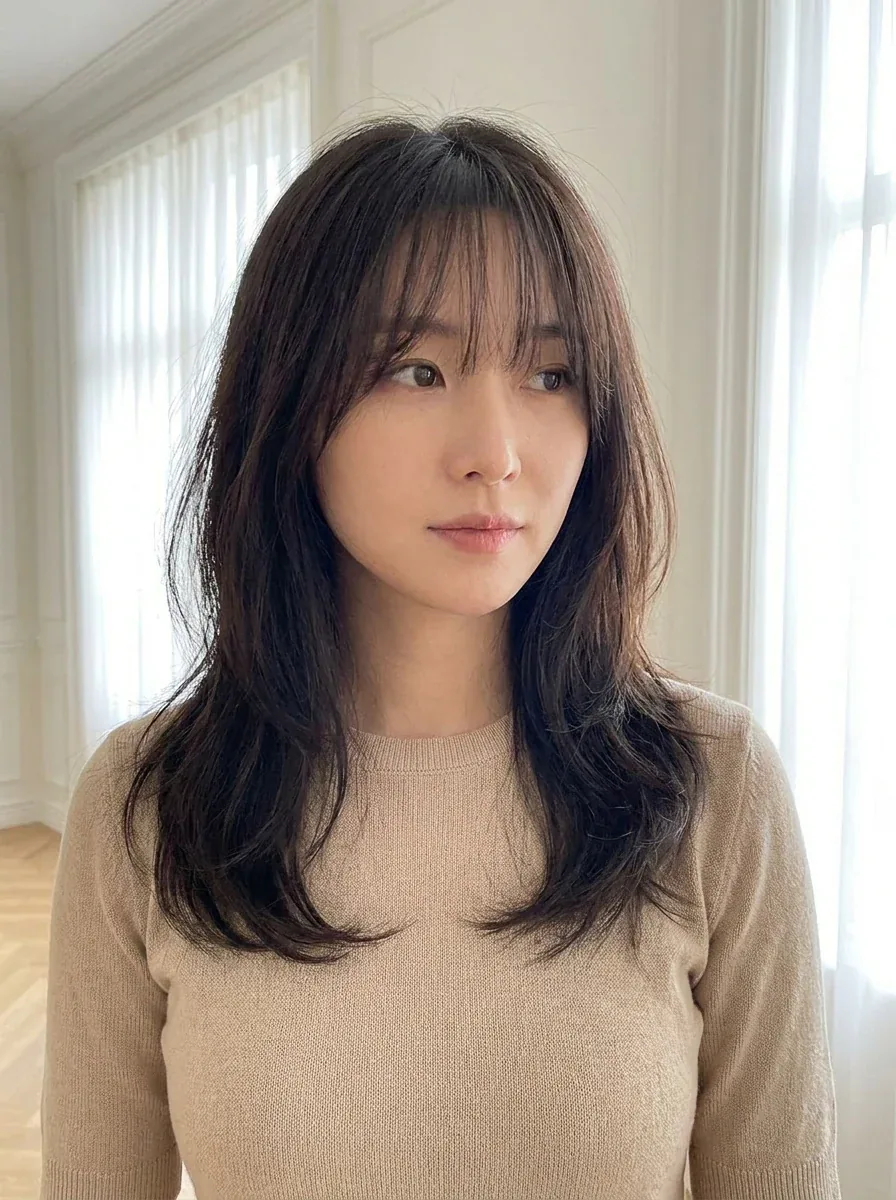
If your fringe came out too short or too blunt, curtain bangs are the gentlest way to live with it while it grows. Instead of fighting a short fringe into a straight line, you part it in the middle and sweep each side outward, so the shortest pieces frame your cheekbones and the longer pieces blend into the rest of your hair. The soft, face-framing shape draws the eye to your eyes and cheekbones instead of to the blunt edge of the fringe, and because curtain bangs are meant to look lived-in, a little unevenness reads as texture rather than a mistake.
How to style it: blow-dry the fringe forward with a round brush, then split it in the middle and flick each side outward, finishing with a tiny drop of styling cream. Pros and cons: the pros are that it works on almost every face shape and grows out gracefully; the only con is that it needs a quick blow-dry most mornings. Maintenance: a five-minute trim every three weeks keeps the shape soft without losing length.
3. Textured Pixie Rescue
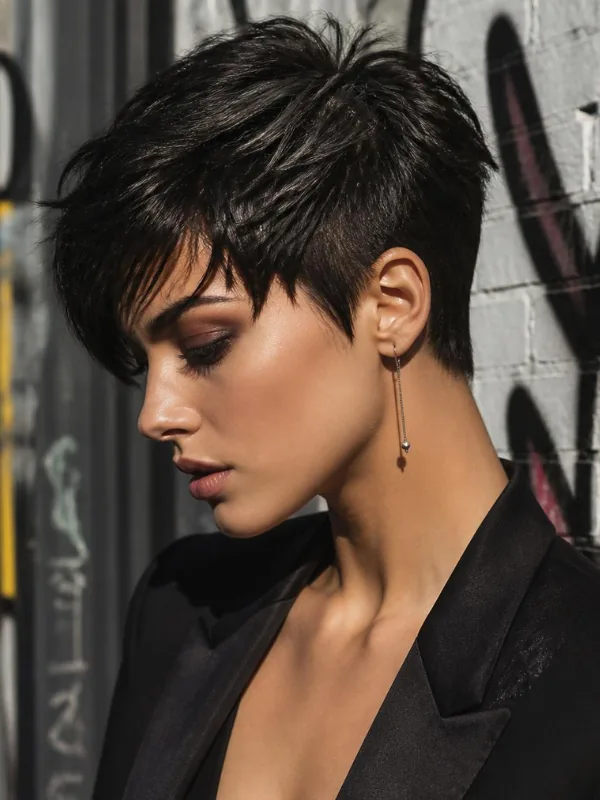
When a short cut goes wrong, the answer is usually more texture, not less hair. A textured pixie rescue takes a choppy, uneven pixie and turns the unevenness into the point: a little pomade, piecey ends, and a deliberate tousle make the cut look edgy and intentional instead of accidental. The trick is to stop trying to make the hair lie smooth — smooth shows every mistake, while texture hides them. Work the product through with your fingers, push the front up or to the side, and let the ends do what they want.
Best for: short cuts that came out too choppy, too flat, or too severe, and anyone who wants a low-effort morning routine. How to style it: use a pea-sized amount of matte paste on dry hair, pinch the ends into pieces, and finish with a light texturising spray. What to ask for: at your fix appointment, ask the stylist to point-cut the ends rather than blunt-cut them — point cutting is what creates the texture in the first place.
4. The Sleek Low Bun
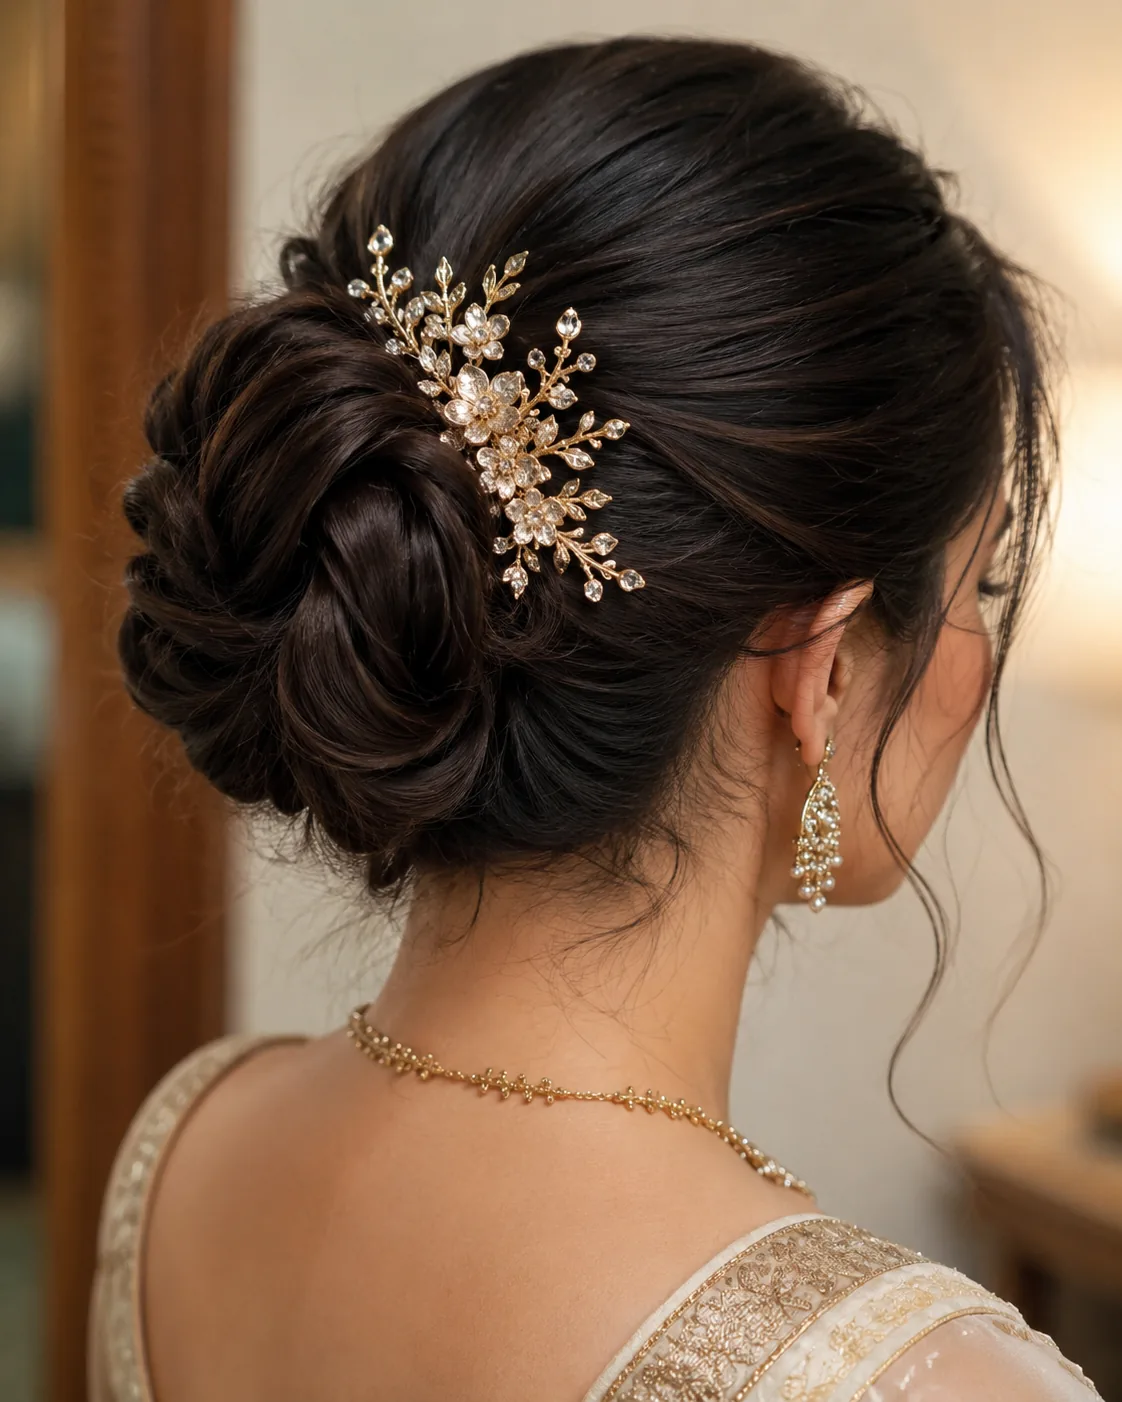
The sleek low bun is the great equaliser: it gathers every uneven layer, every stray end and every lopsided section into one smooth, polished shape at the nape of your neck. Nobody can see that your layers do not match when they are all tucked into a bun, and the sleek finish makes the whole look feel deliberate and elegant rather than like a cover-up. It works for job interviews, weddings, formal dinners and bad hair days alike, and it takes about five minutes once you have practised it twice.
How to style it: brush the hair back with a smoothing cream, secure a low ponytail at the nape, twist it into a bun and pin it flat, then smooth flyaways with a toothbrush sprayed with hairspray. Cost and time: free, five minutes, and a handful of bobby pins — the cheapest fix in this guide. What to avoid: pulling the bun too tight, which causes headaches and can damage the hairline over time.
5. Messy Top Knot Camouflage
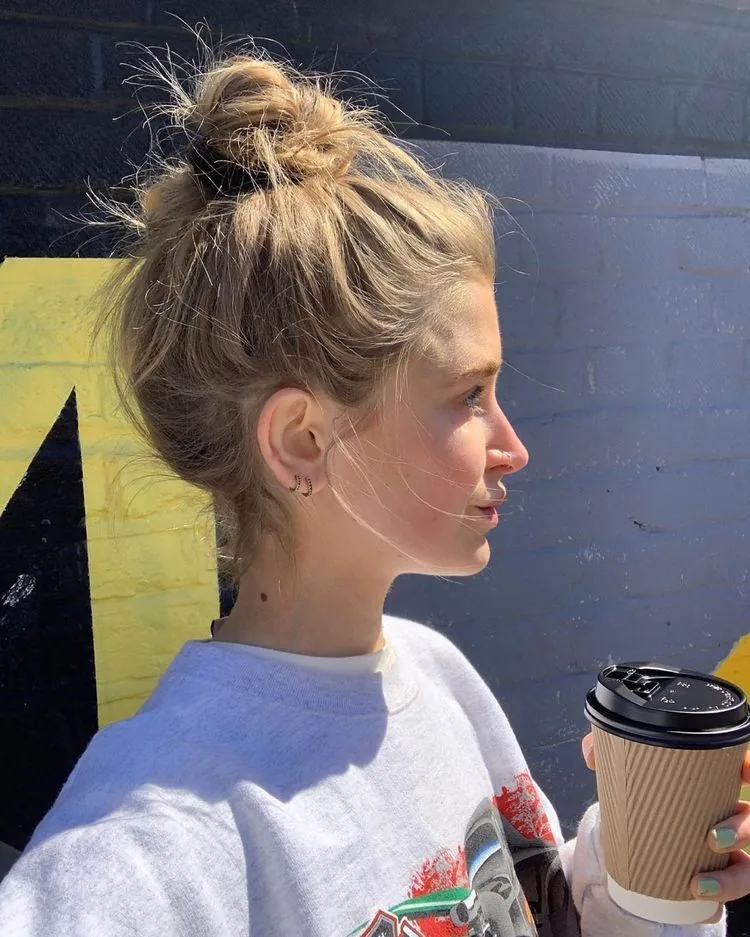
The messy top knot is the sleek bun’s relaxed cousin, and it is even better at hiding a bad cut because the mess is the style. Uneven layers that would show in a polished updo simply disappear into the knot, and the loose, undone texture makes the whole thing look effortless. Pull the hair high, twist it loosely, pin it where it lands, and pull out a few face-framing pieces — the pieces that frame your face will cover a bad fringe beautifully, and the height of the knot draws the eye upward, away from uneven ends.
Best for: medium to long hair with uneven layers, choppy ends or a fringe that will not behave. How to style it: flip your head upside down, gather the hair into a high ponytail, twist loosely and wrap it around itself, securing with pins rather than a tight elastic. Maintenance: none — it is supposed to loosen through the day, and a little looseness only makes it look better.
6. Loose Beach Waves
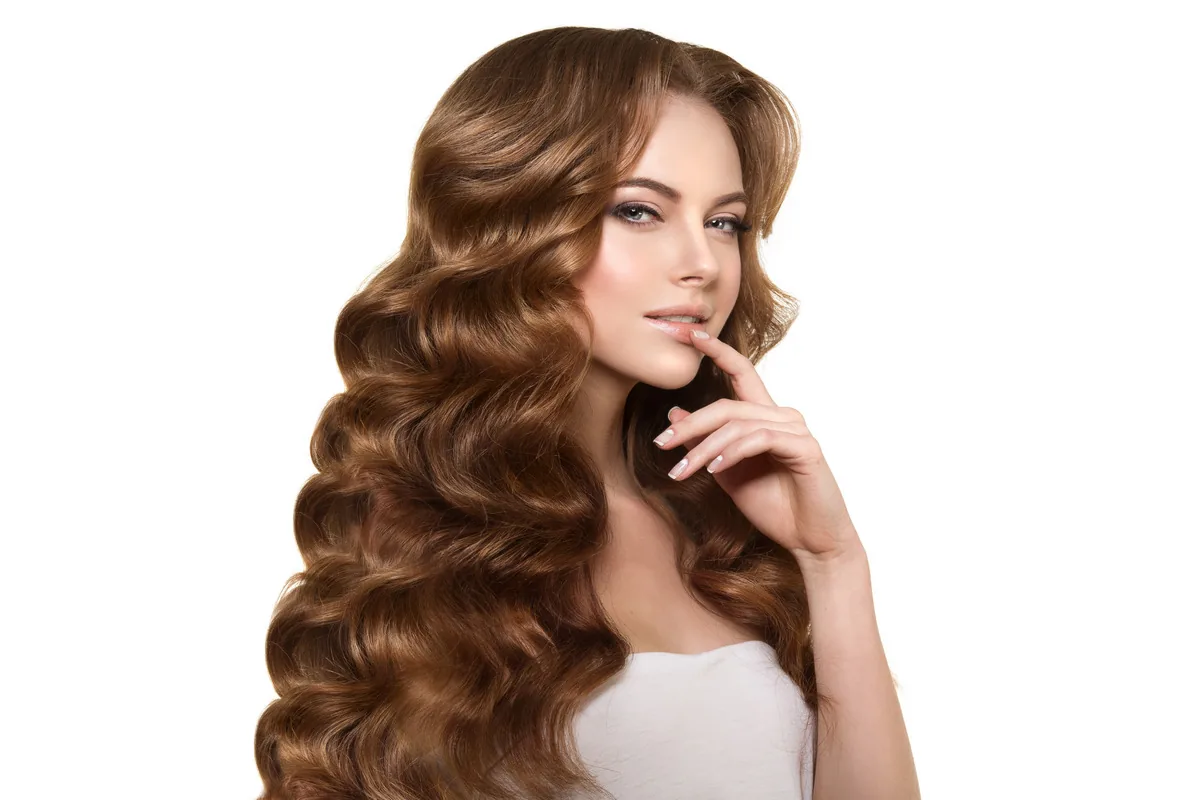
Loose beach waves are the single most forgiving texture you can put into hair after a bad cut. Waves break up straight lines, so a blunt or uneven edge dissolves into movement, and choppy layers that look harsh when straight suddenly look like deliberate, textured layers. The waves also add volume and width, which balances out a cut that came out too narrow or too flat. Use a large-barrel curling iron or a flat iron waved through the lengths, leave the ends straight, and shake the waves out with your fingers for that undone, lived-in finish.
How to style it: curl one-inch sections away from the face, alternating direction, then brush through gently with your fingers and finish with sea salt spray. Pros and cons: the pros are that it hides almost every flaw and suits almost everyone; the con is that it takes fifteen to twenty minutes and needs heat protectant. Best for: blunt bobs, uneven layers, and cuts that look too severe when worn straight.
7. The Side-Swept Fringe
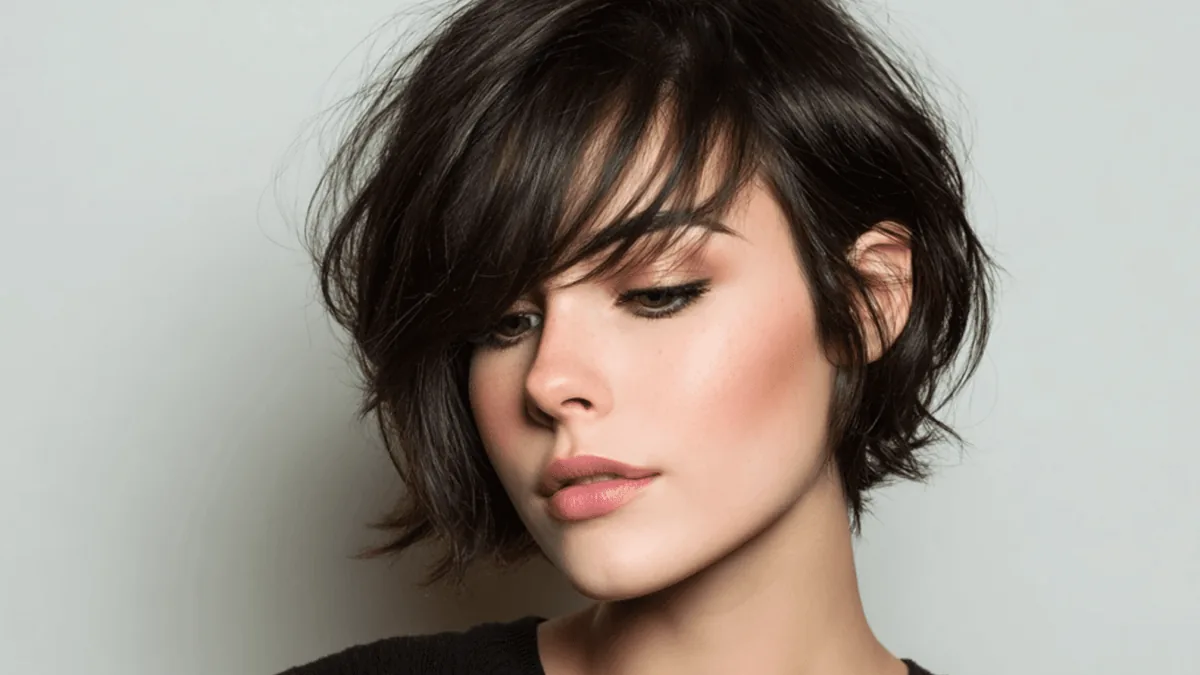
A side-swept fringe is the classic rescue for a fringe cut too short, too blunt or too wide. By sweeping the fringe across the forehead instead of wearing it straight down, you turn the shortest pieces into a soft diagonal that frames one eye and blends into the longer hair at the side. The diagonal line is flattering on almost every face shape, it softens a strong forehead, and it makes a fringe that is too short to sit straight look like a deliberate style choice. It is also the easiest fringe to grow out, because it keeps getting longer and softer instead of hitting an awkward stage.
How to style it: blow-dry the fringe to the side with a round brush while it is damp, directing the roots in the direction you want them to fall. What to ask for: at your next trim, ask the stylist to keep the fringe long at one side and shortest at the inner corner, so the sweep falls naturally. What to avoid: cutting the fringe yourself to make it “even” — that is how a short fringe becomes a micro fringe.
8. Half-Up, Half-Down
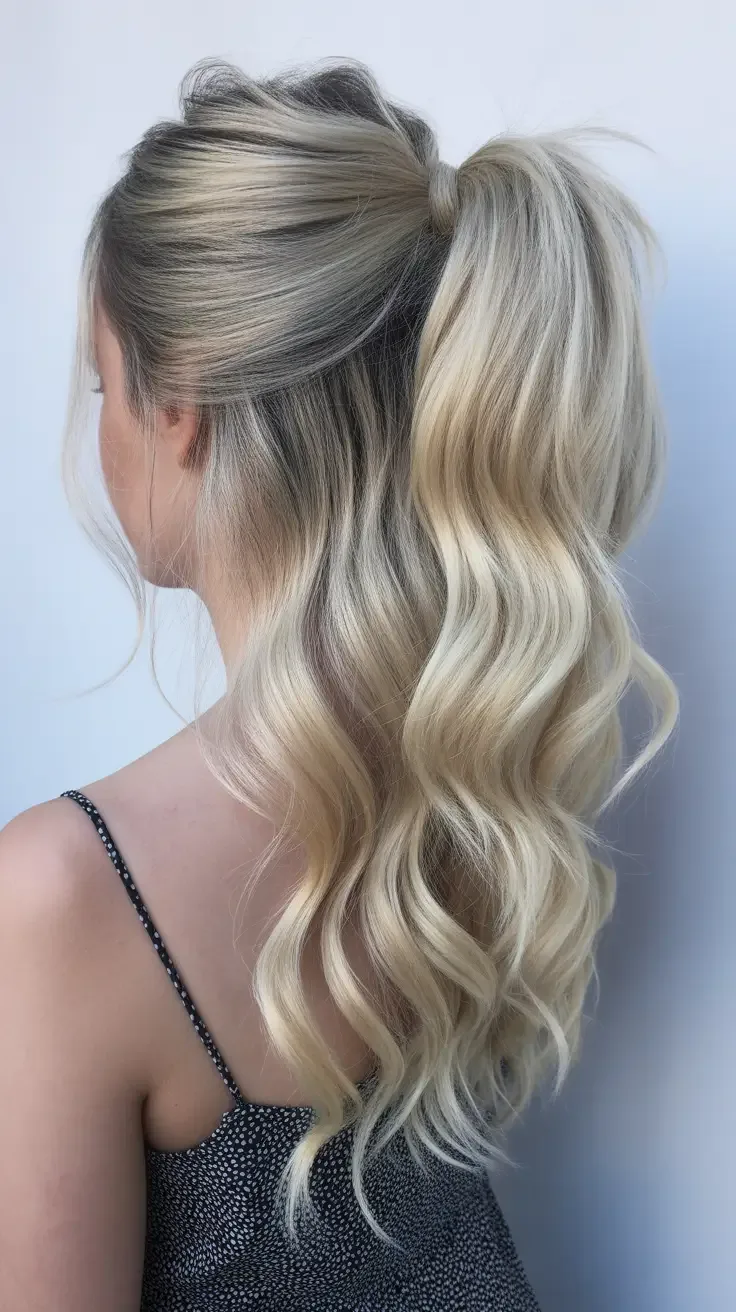
The half-up, half-down style hides a multitude of sins because it splits the hair into two zones: the top half is pulled back and controlled, and the bottom half falls freely and distracts from uneven ends. If the layers at the top are choppy, gathering them into a small knot or twist hides them completely; if the ends are the problem, a little wave in the bottom half softens them. It works on medium and long hair, it looks polished enough for work and pretty enough for a night out, and it takes three minutes.
How to style it: take the top section from temple to temple, twist it once, and pin it at the crown — or tie it into a small knot and leave the ends loose. Best for: uneven top layers, a fringe that needs controlling, and hair that is too short at the front and too long at the back. Maintenance: a couple of bobby pins and a quick check in the mirror at lunchtime are all it needs.
9. Braided Crown
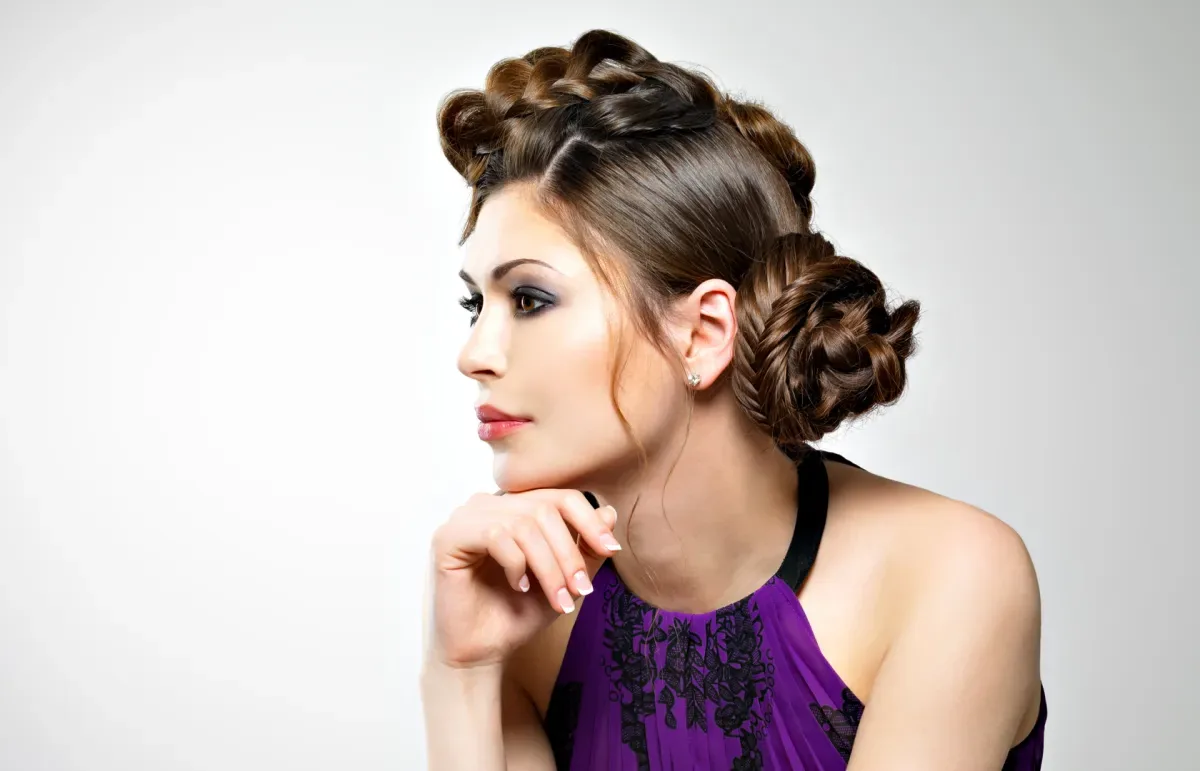
A braided crown is the most romantic fix in this guide, and one of the most effective, because it creates an entirely new focal point: a thick, beautiful braid circling your head. Nobody looks at your uneven layers when there is a braid crown to admire. It works brilliantly on medium and long hair, it hides a bad fringe completely — the fringe is simply braided into the crown — and it stays put all day, which makes it ideal for weddings, festivals and long days when you do not want to think about your hair at all.
How to style it: part the hair in the middle, braid each side from the front to the back, then cross the braids over the top of your head and pin them flat, tucking the ends underneath. Pros and cons: the pros are total coverage and all-day hold; the con is that it takes practice, so try it the night before an important day. Cost and time: free, ten to fifteen minutes, and a few pins.
10. The French Twist
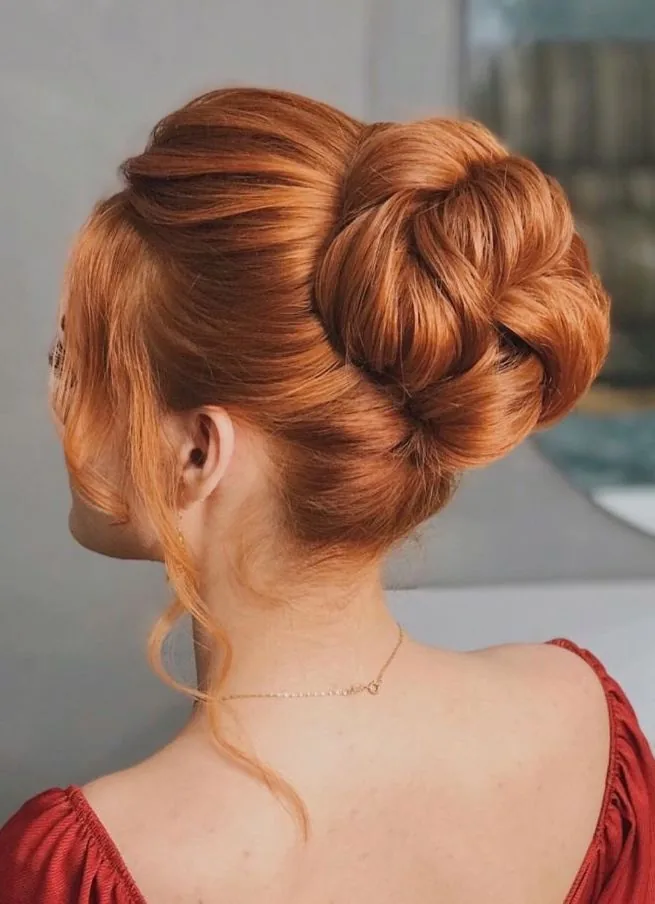
The French twist is the old-school classic that never fails, and after a bad haircut it is worth its weight in gold. By sweeping all the hair up and tucking it into a vertical roll at the back of the head, it hides every uneven layer and every mismatched side in one smooth, elegant shape. The twist works on shoulder-length hair and longer, it looks expensive and intentional, and it is the style to reach for when you need to look polished and you do not trust your hair to behave. A few loose pieces at the front soften the look and cover a bad fringe.
How to style it: gather the hair low, twist it upward against the back of your head, tuck the ends in, and secure with long pins placed vertically along the roll. Best for: formal events, work presentations, and cuts where the back is the worst part. What to avoid: over-combing the twist into stiffness — a slightly soft twist with a few loose strands looks modern, not dated.
11. Voluminous Blowout
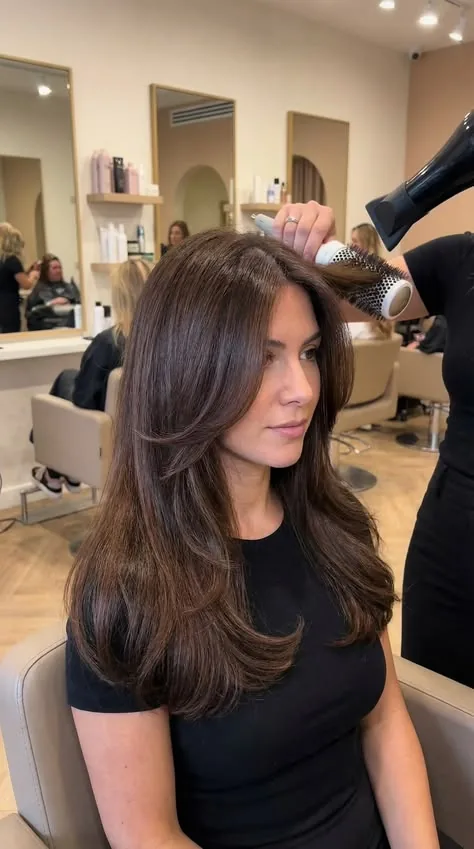
A voluminous blowout is the blow-dry that fixes almost anything, because volume is the great disguiser: lifted roots, curved ends and a lot of movement make uneven layers disappear into the overall shape. The key is to blow-dry with a large round brush, lifting each section at the root and curling the ends under or outward, so the hair has a soft, rounded silhouette instead of a flat, choppy one. A blowout looks salon-finished, it photographs beautifully, and it turns a cut you hate into a style you might actually love for the day.
How to style it: apply volumising mousse to damp roots, blow-dry in sections with a round brush, and finish with a cool shot and a light mist of flexible-hold spray. Pros and cons: the pros are dramatic transformation and all-day volume; the con is that it takes twenty to thirty minutes and a bit of arm strength. Maintenance: a silk pillowcase and a little dry shampoo will stretch a blowout to a second day.
12. Slicked-Back Wet Look
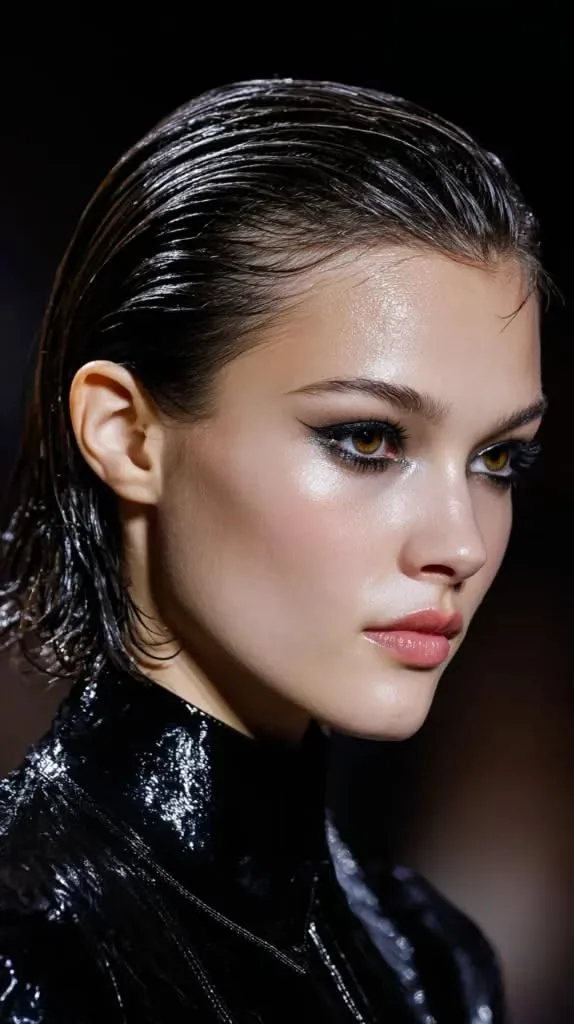
The slicked-back wet look turns a bad cut into a fashion statement by leaning into control instead of fighting it. Gel or pomade combed straight back from the forehead creates a smooth, glossy finish where no layers, no fringe and no uneven ends are visible at all — the hair is simply one sleek shape. It is bold, it is editorial, and it works best on medium and short hair, though a slicked-back bun version works on long hair too. If your cut is so bad that styling it normally feels hopeless, the wet look lets you skip styling altogether and own the drama instead.
Best for: very choppy cuts, uneven fringes, and anyone who wants a striking evening look. How to style it: work a strong-hold gel through damp hair, comb it straight back with a fine-tooth comb, and add a little shine spray for the glossy finish. What to avoid: using too much product, which tips the look from glossy into greasy — start with less than you think you need.
13. The Shaggy Layer Fix
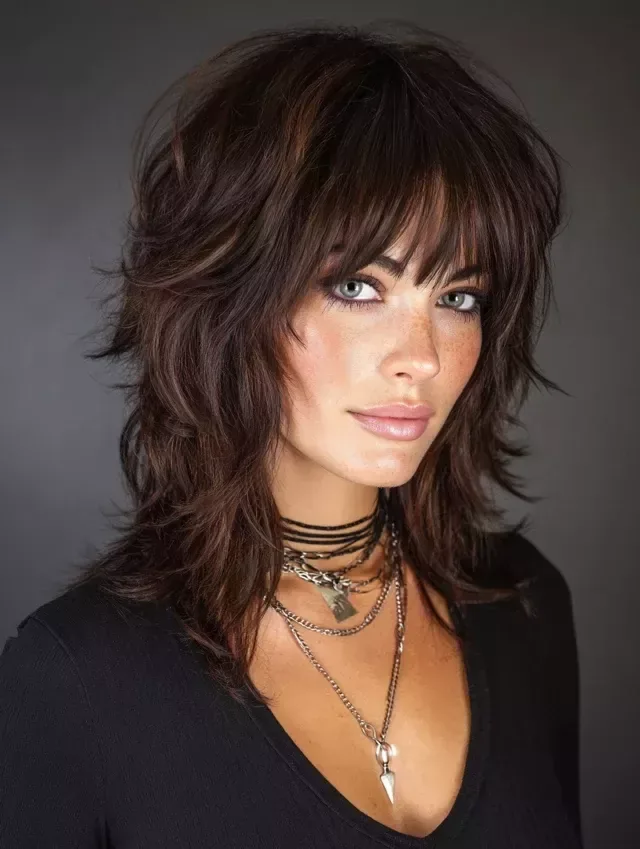
Sometimes the best fix for a bad cut is to turn it into a shag. If your layers came out uneven, a stylist can reshape them into a deliberate shag — choppy layers, feathered ends, curtain bangs and lots of texture — where the unevenness becomes the style instead of the mistake. A shag suits straight, wavy and curly hair, it grows out gracefully, and it is one of the most fashionable cuts of the moment, which means your “bad haircut” can become the haircut everyone is asking about. It is the fix to suggest when the cut is too choppy to save as it is.
What to ask for: ask for a shag with soft, feathered layers and curtain bangs, and ask the stylist to show you the layers from the side before they finish. Pros and cons: the pros are a fashionable, low-maintenance cut that hides flaws; the con is that it needs a little texturising product to look its best. Best for: medium-length hair with uneven layers and anyone happy to go slightly shorter for a better shape.
14. Asymmetrical Bob Rebalance
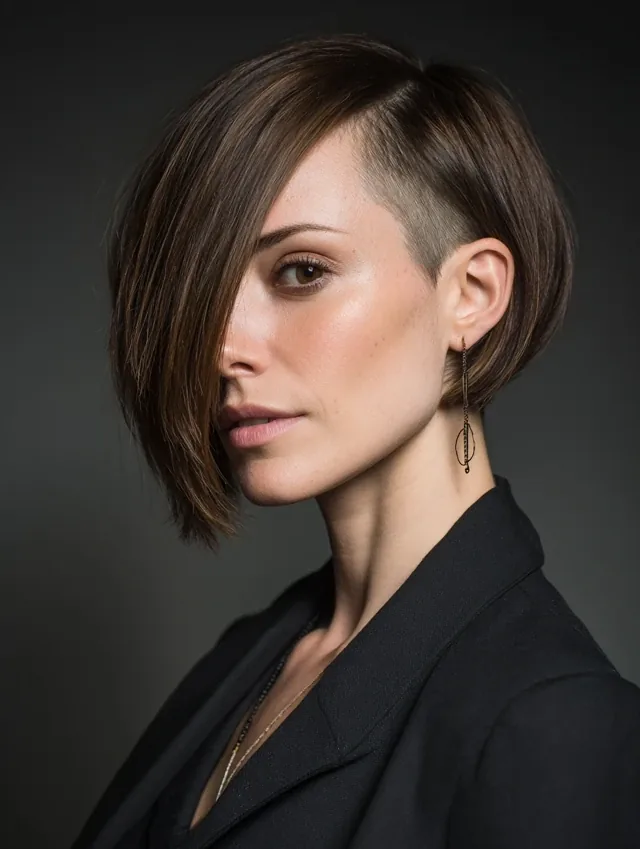
An asymmetrical bob is the cleverest fix for a bob that came out lopsided — instead of trying to even the sides up, you make the asymmetry deliberate. One side stays slightly longer than the other, the longer side is styled sleek and smooth, and suddenly the “mistake” looks like a bold, editorial choice. This works particularly well when one side of the bob is genuinely longer than the other and evening it out would mean losing a lot of length: you keep the length, you gain a style, and nobody is ever the wiser.
What to ask for: ask the stylist to clean up the shorter side and sharpen the angle, so the asymmetry reads as a design choice rather than an accident. How to style it: straighten the longer side smooth and tuck the shorter side behind the ear for contrast. Best for: bobs that came out uneven, and anyone who likes a sharp, modern silhouette.
15. The Wavy Lob
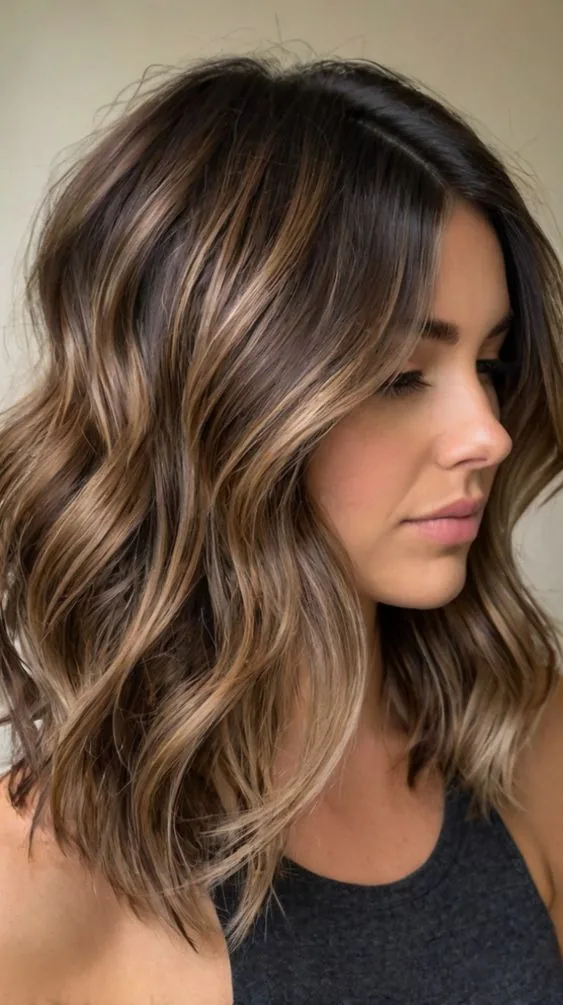
The wavy lob — a long bob that sits at the collarbone — is the most forgiving length in hairdressing, and it is the perfect destination when a shorter cut has gone wrong. A stylist can usually reshape a bad bob or a choppy mid-length cut into a lob without losing much more length, and once the waves go in, any remaining unevenness vanishes. The lob flatters almost every face shape, it is long enough to tie back and short enough to feel fresh, and the waves give it the movement that makes a cut look expensive.
How to style it: curl the mid-lengths with a flat iron, leave the ends out, and shake the waves apart with your fingers for a soft, undone finish. Best for: bobs that came out too blunt, too short or too boxy, and anyone growing out a shorter cut. Maintenance: a trim every six weeks keeps the ends blunt-free and the shape clean.
16. Pin-Curl Vintage Waves
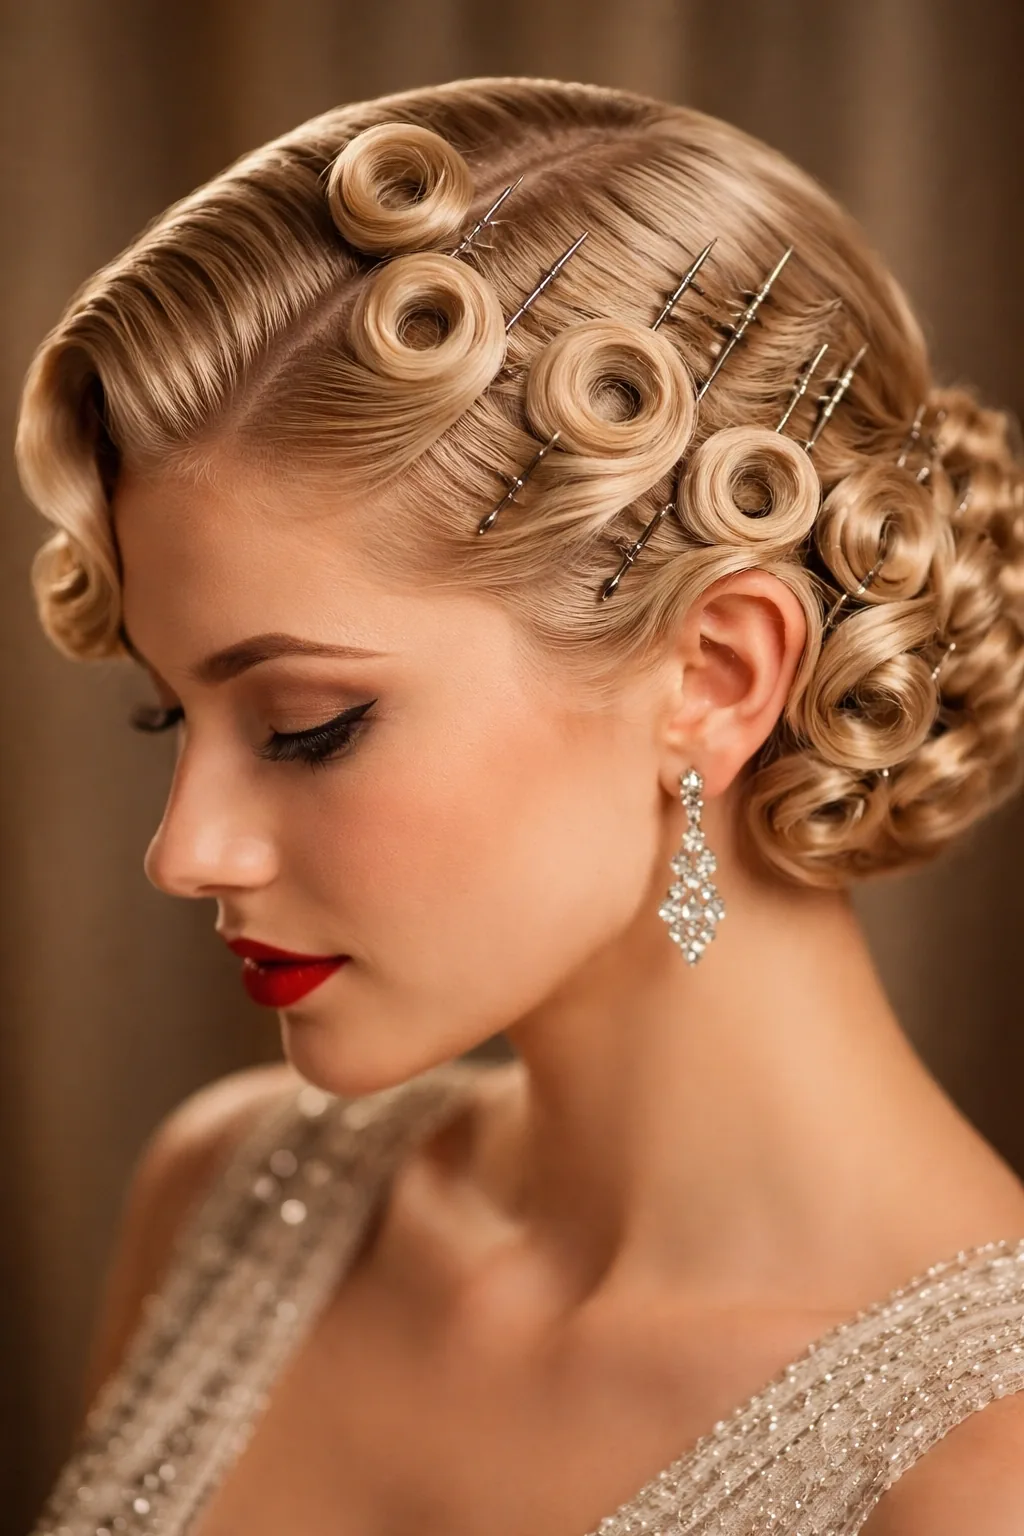
Pin-curl vintage waves are a glamorous, high-coverage fix: the deep waves and sculpted shape completely redraw the silhouette of your hair, so uneven layers and choppy ends simply cease to matter. The style is all about the shape — a deep side part, smooth waves that roll in the same direction, and a polished, finger-waved finish — and it looks stunning at weddings, parties and formal evenings. It also holds for hours, because the waves are set while the hair cools, which means you can stop worrying about your hair and enjoy the event.
How to style it: curl sections with a medium barrel iron, pin each curl to cool, then brush out gently with a soft bristle brush and shape the waves with your fingers. Pros and cons: the pros are total coverage and a show-stopping look; the con is that it takes thirty minutes and some practice. Cost and time: free at home, or a salon blow-dry if you want it perfect for a big occasion.
17. The High Ponytail Lift
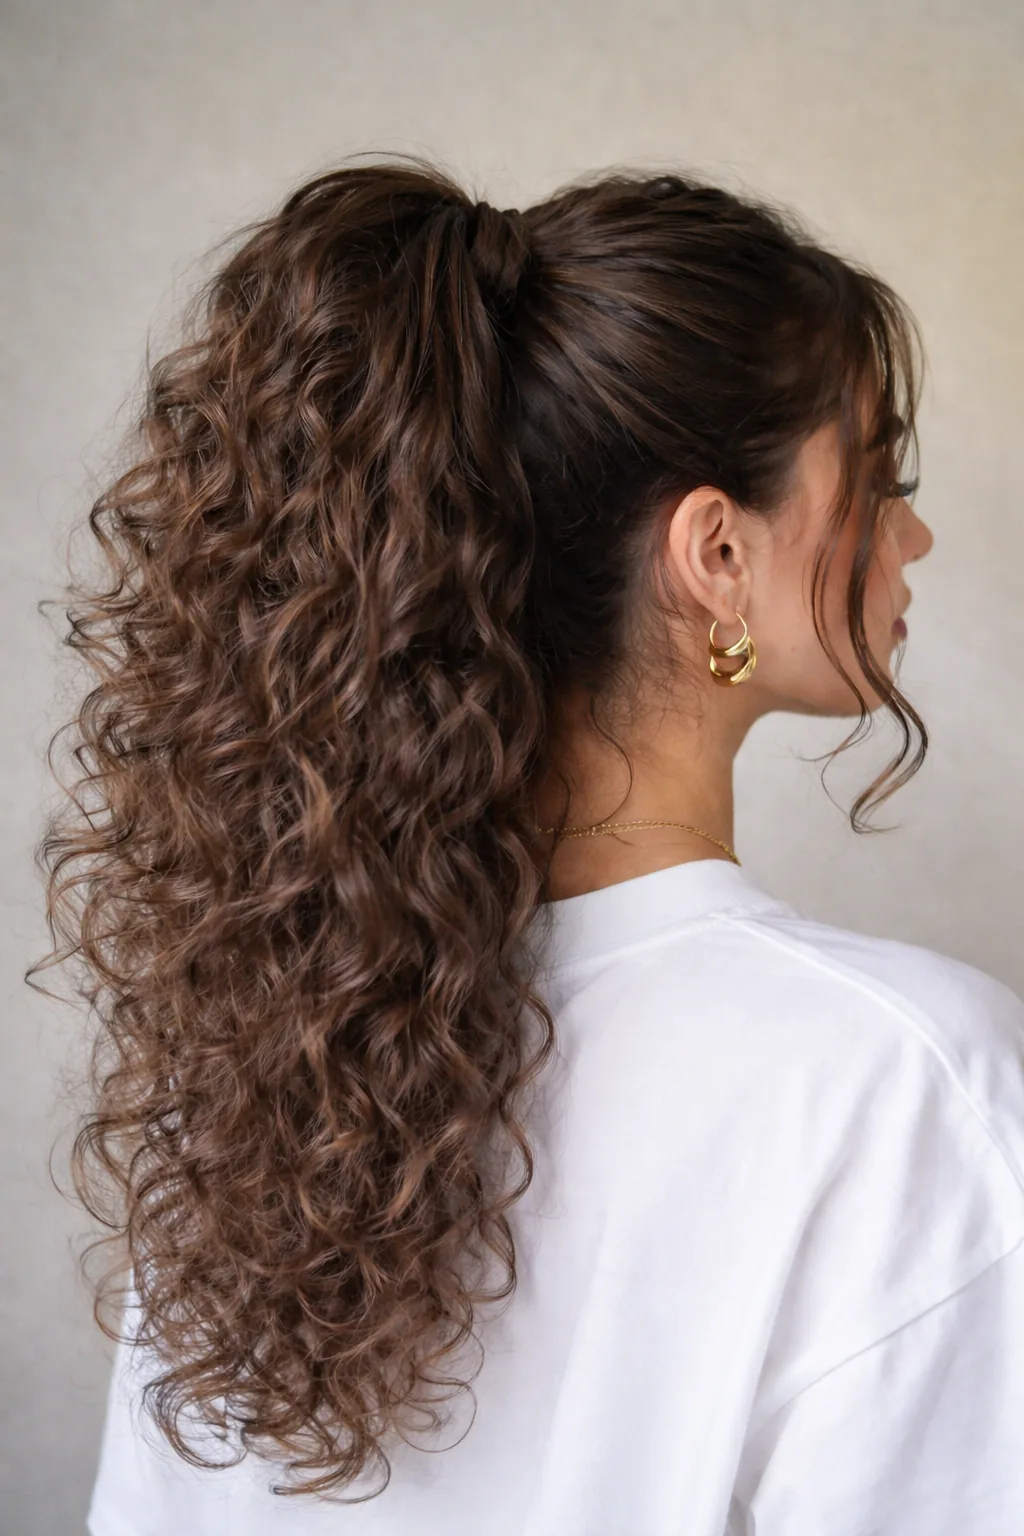
A high ponytail is the instant facelift of hairstyling: it pulls everything up and back, smooths the hairline, hides uneven layers, and gives your whole face a lifted, polished look. It is also one of the quickest fixes in this guide — two minutes, one elastic, and you are done. The trick to making it look intentional rather than like a gym ponytail is the finish: wrap a strand of hair around the elastic to hide it, smooth the front with a little gel, and add a slight bend to the tail with a curling iron so it moves instead of hanging flat.
Best for: medium and long hair with uneven layers, and anyone whose bad cut is worst at the front. How to style it: gather the hair at the crown, secure firmly, wrap a strand around the base, and tease the tail lightly for volume. What to avoid: wearing it very tight every day, which can cause breakage and headaches — vary it with the low ponytail in section 33.
18. Scarf and Headband Cover

When the top of your head is the problem — a bad fringe, a wonky parting, uneven layers at the crown — a scarf or a headband is the fastest cover available. A silk scarf tied as a headband, a wide fabric band, or a knotted bandana can hide the worst of a fringe and a bad hairline in ten seconds, and it looks like a deliberate style choice rather than a cover-up. Scarves come in every colour and pattern, so they are also a way to add personality to an outfit on a day when you do not want your hair to be the focus at all.
How to style it: fold a square scarf into a band, place it just behind the hairline, and tie it at the nape or on top, leaving the rest of the hair down or in a low bun. Pros and cons: the pros are speed, versatility and zero heat; the only con is that it does not hide problems at the ends. Cost and time: one scarf you already own, thirty seconds.
19. The Faux Bob Tuck
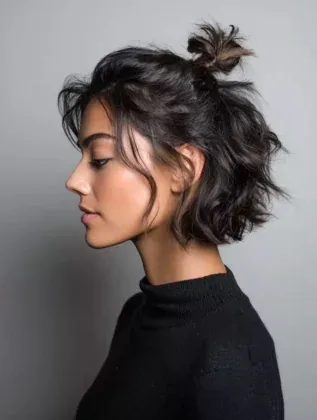
The faux bob is a brilliant piece of deception: it makes long hair look like a chic bob without cutting a single strand. You pin the ends underneath, roll the hair up at the nape, and secure it flat, so the lengths that carry the bad layers are hidden and only a smooth, bob-shaped silhouette shows. It is perfect for testing whether a shorter cut would suit you, for formal occasions, and for days when the ends of your hair are the worst part of the cut. From the front, nobody can tell the length is an illusion.
How to style it: curl the ends lightly, divide the hair into two sections, roll each one up and pin it flat at the nape, then smooth the top layer over the pins. Best for: long hair with bad layers or split ends at the bottom. What to avoid: using too few pins — the tuck needs to be secure, or it will unravel by lunchtime and reveal the hidden ends.
20. Curly Afro Shape-Up
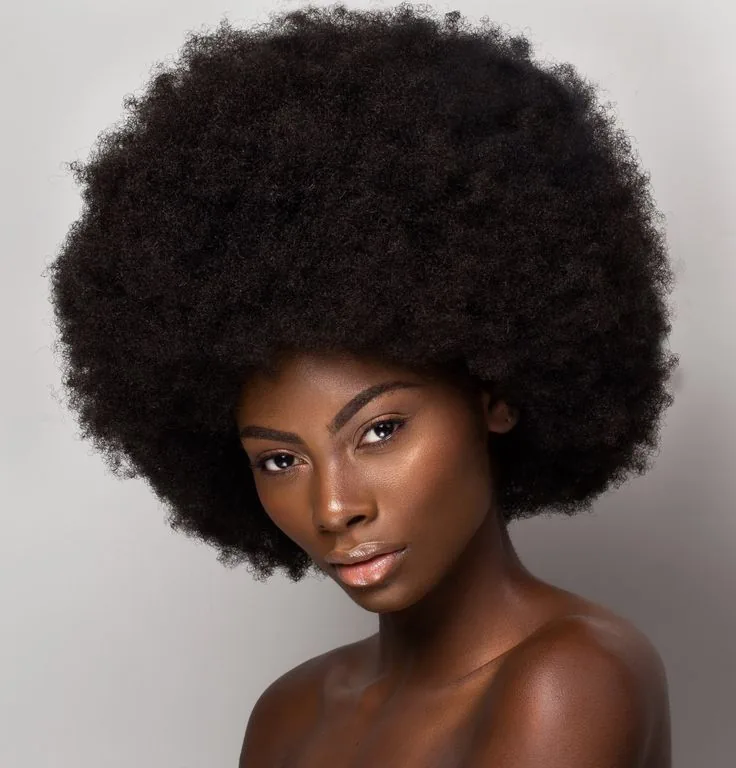
Curly hair is the most forgiving hair type after a bad cut, and an afro shape-up is the fix that proves it. Curls hide uneven layers almost completely, because the eye reads the overall volume and shape rather than the individual ends. A shape-up — a careful trim that rounds out the silhouette and evens the outline — can rescue a curly cut that came out lopsided, and a little curl cream and a pick will define the shape beautifully. The key is to cut curly hair dry, curl by curl, so the stylist can see exactly how each curl falls.
What to ask for: ask for a dry cut, curl by curl, and ask the stylist to shape the silhouette from the front and the side before finishing. How to style it: apply curl cream to damp hair, scrunch upward, and use a pick at the roots for volume once dry. Best for: curly and coily hair with uneven layers, and anyone whose curls were cut wet and sprang up shorter than expected.
21. Finger Waves
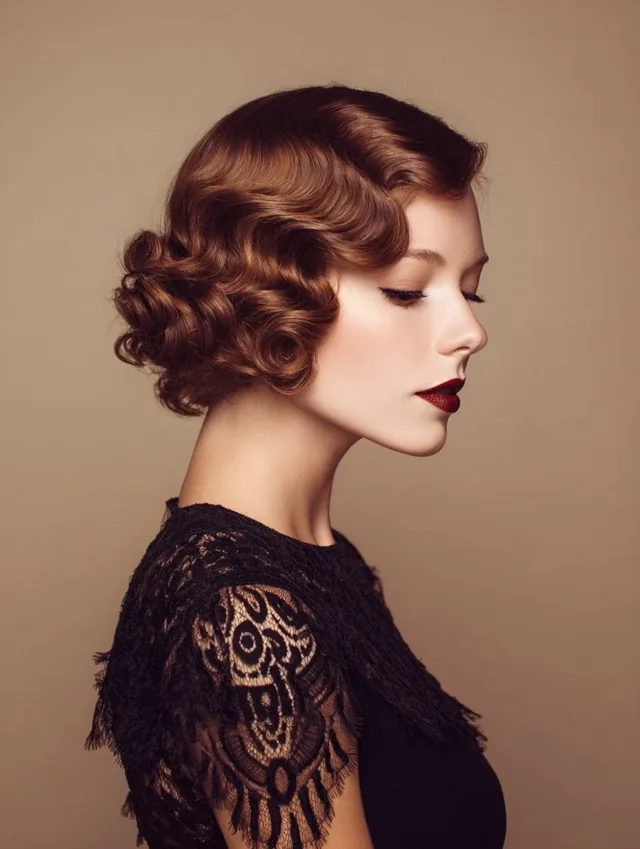
Finger waves are the vintage answer to a short cut gone wrong: sculpted, S-shaped waves pressed close to the head that completely redefine the shape of short hair. Because the waves are moulded with gel and a comb rather than cut, they hide choppy layers and uneven lengths underneath a smooth, glossy surface, and they look utterly glamorous — the kind of style that turns heads at a party. They work best on short to medium hair, and they are the perfect choice when your cut is too short for most updos but you still want a dramatic, polished look.
How to style it: apply strong-hold gel to damp hair, comb it into deep side waves with a fine-tooth comb, and let it set — or use a flat iron to create the waves and brush them into shape. Pros and cons: the pros are total coverage and a show-stopping finish; the con is that it takes time and a steady hand. Best for: short bobs and pixies that came out uneven, and formal occasions.
22. The Textured Crop
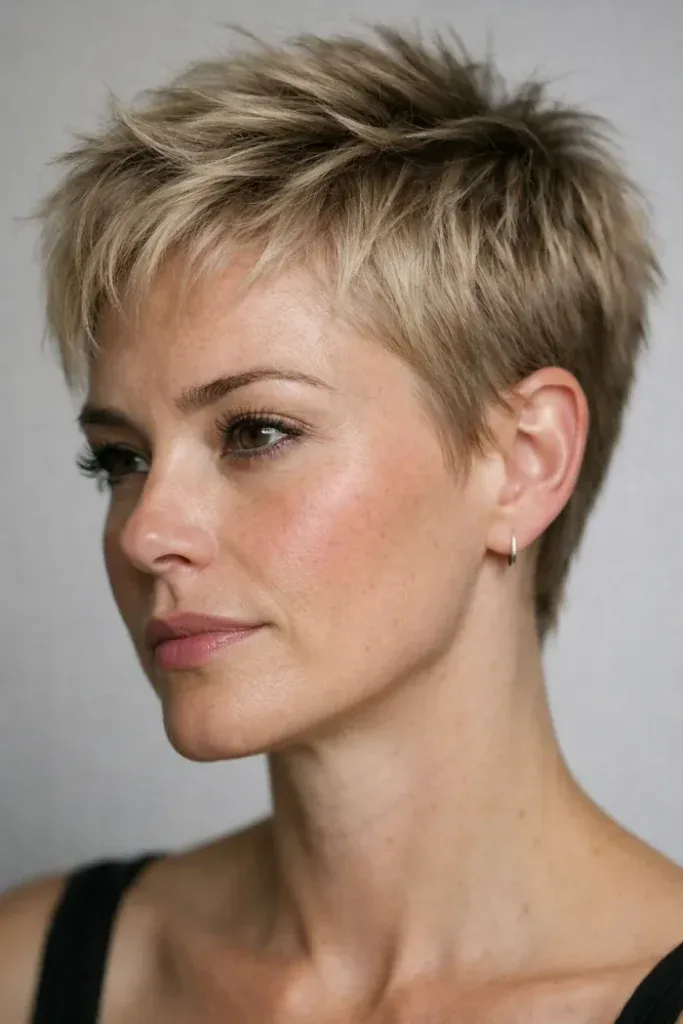
The textured crop takes a short cut that came out too severe and softens it into something modern and wearable. The secret is in the finishing: instead of a blunt, helmet-like shape, the ends are point-cut and the top is tousled with a little matte paste, so the cut looks deliberately undone rather than accidentally harsh. It suits straight and wavy hair, it needs almost no styling in the morning, and it is one of the easiest short styles to grow out, because the texture keeps working as the length increases.
How to style it: rub a pea-sized amount of matte paste between your palms, work it through dry hair, and pinch the ends into pieces. Maintenance: a trim every four weeks keeps the shape from going shaggy. What to ask for: at your fix appointment, ask for point cutting on the ends and a little texturising at the crown, not more length taken off.
23. Side Braid Blend
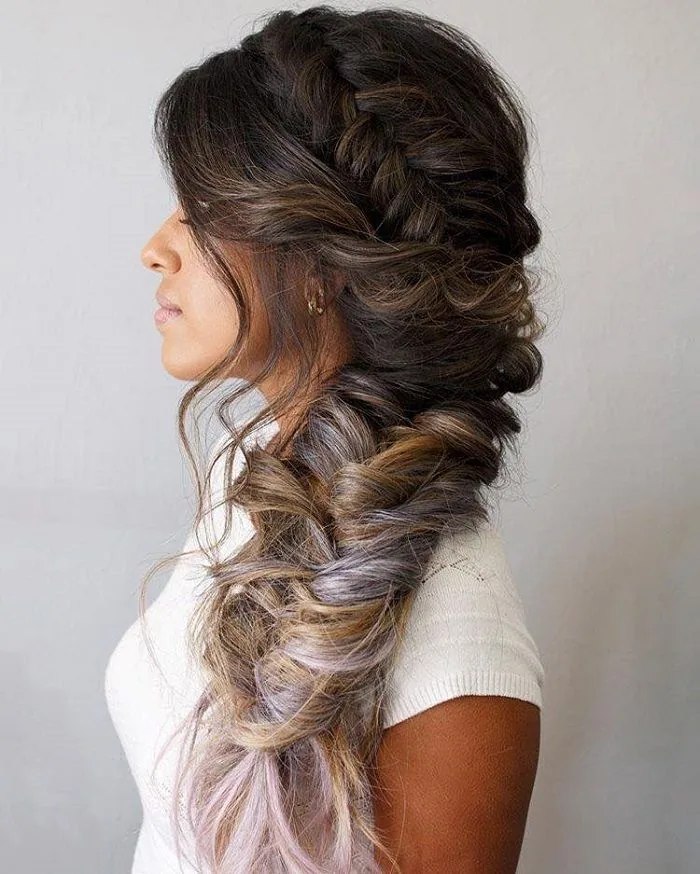
A side braid is a wonderfully forgiving style, because braiding gathers all the uneven layers into one smooth plait and the braid itself becomes the focus. Sweep all the hair to one side, braid it loosely from behind the ear down to the ends, and pull a few strands loose at the face for softness — the result is romantic, practical and completely hiding any unevenness in the lengths. It works on medium and long hair, it survives a whole day without re-doing, and it is the style to choose when your layers are the problem and you want them out of sight.
How to style it: gather the hair over one shoulder, braid loosely, secure with a small elastic, and gently pull the braid apart for fullness. Best for: uneven layers, hair that is too short at the front, and long days when you need a style that stays put. Pros and cons: the pros are simplicity and all-day hold; the only con is that very short hair cannot be braided this way.
24. The Claw Clip Twist
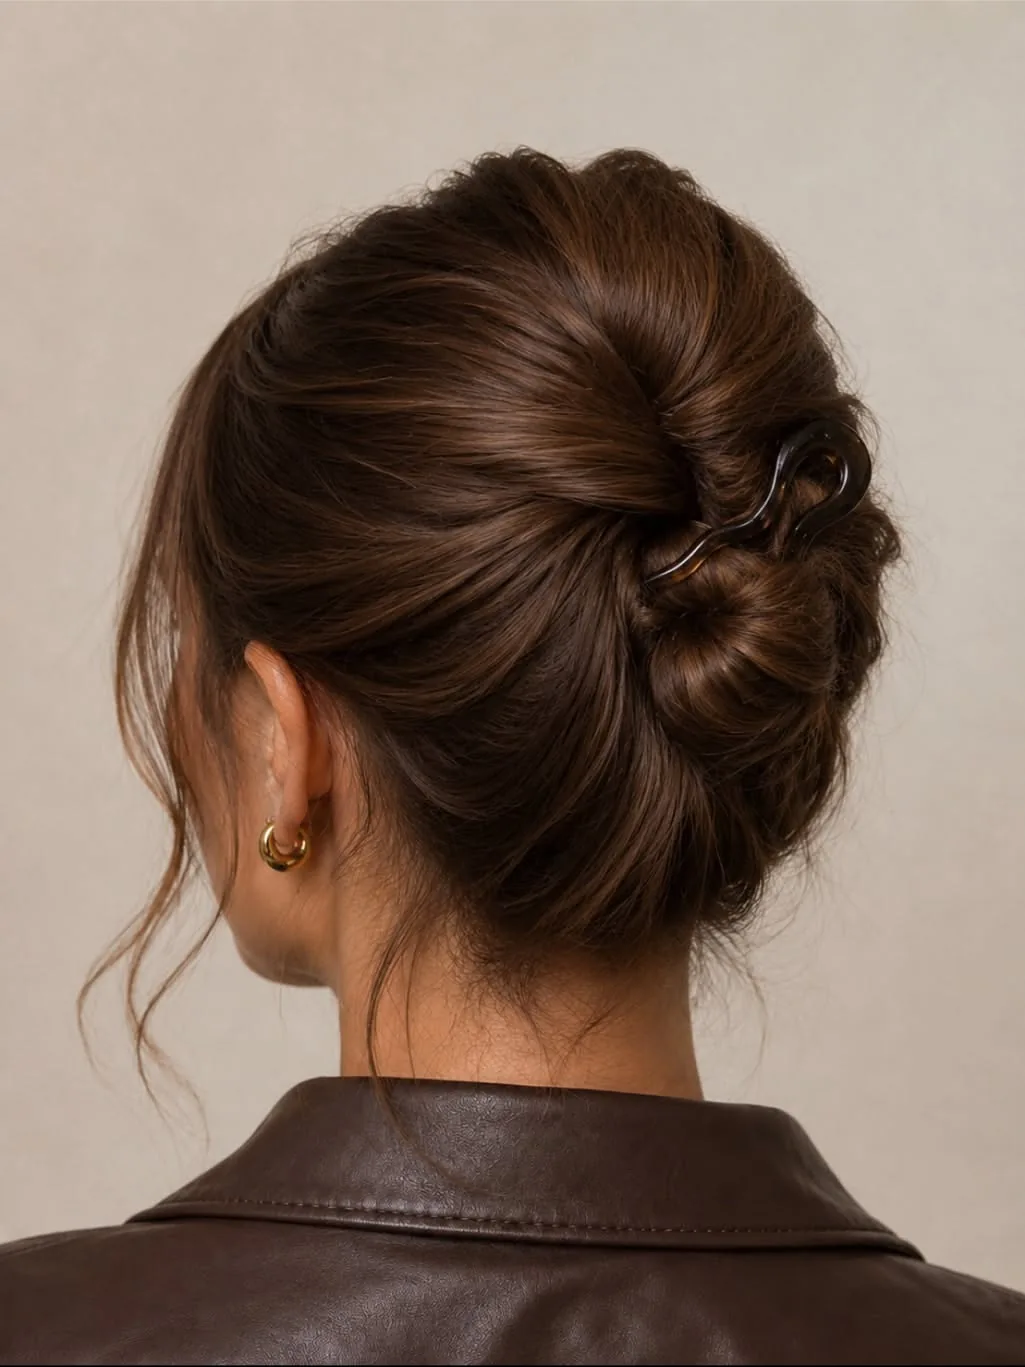
The claw clip twist is the five-second fix that has come back into fashion at exactly the right time. Twist the hair up at the back of your head, clip it in place, and let the ends fan out over the top — every uneven layer is gathered into the twist, the clip hides the rest, and the loose ends look deliberately undone. It works on medium and long hair, it is comfortable enough to wear all day, and it is the style to reach for when you have no time, no patience and a bad haircut to hide before you leave the house.
How to style it: gather the hair at the back, twist it upward, fold it over, and secure with a large claw clip, pulling out a few face-framing strands. Cost and time: one claw clip, under a minute. What to avoid: a clip that is too small for your hair thickness — it will slip, and the twist will fall apart by mid-morning.
25. Curtain Layers with a Middle Part
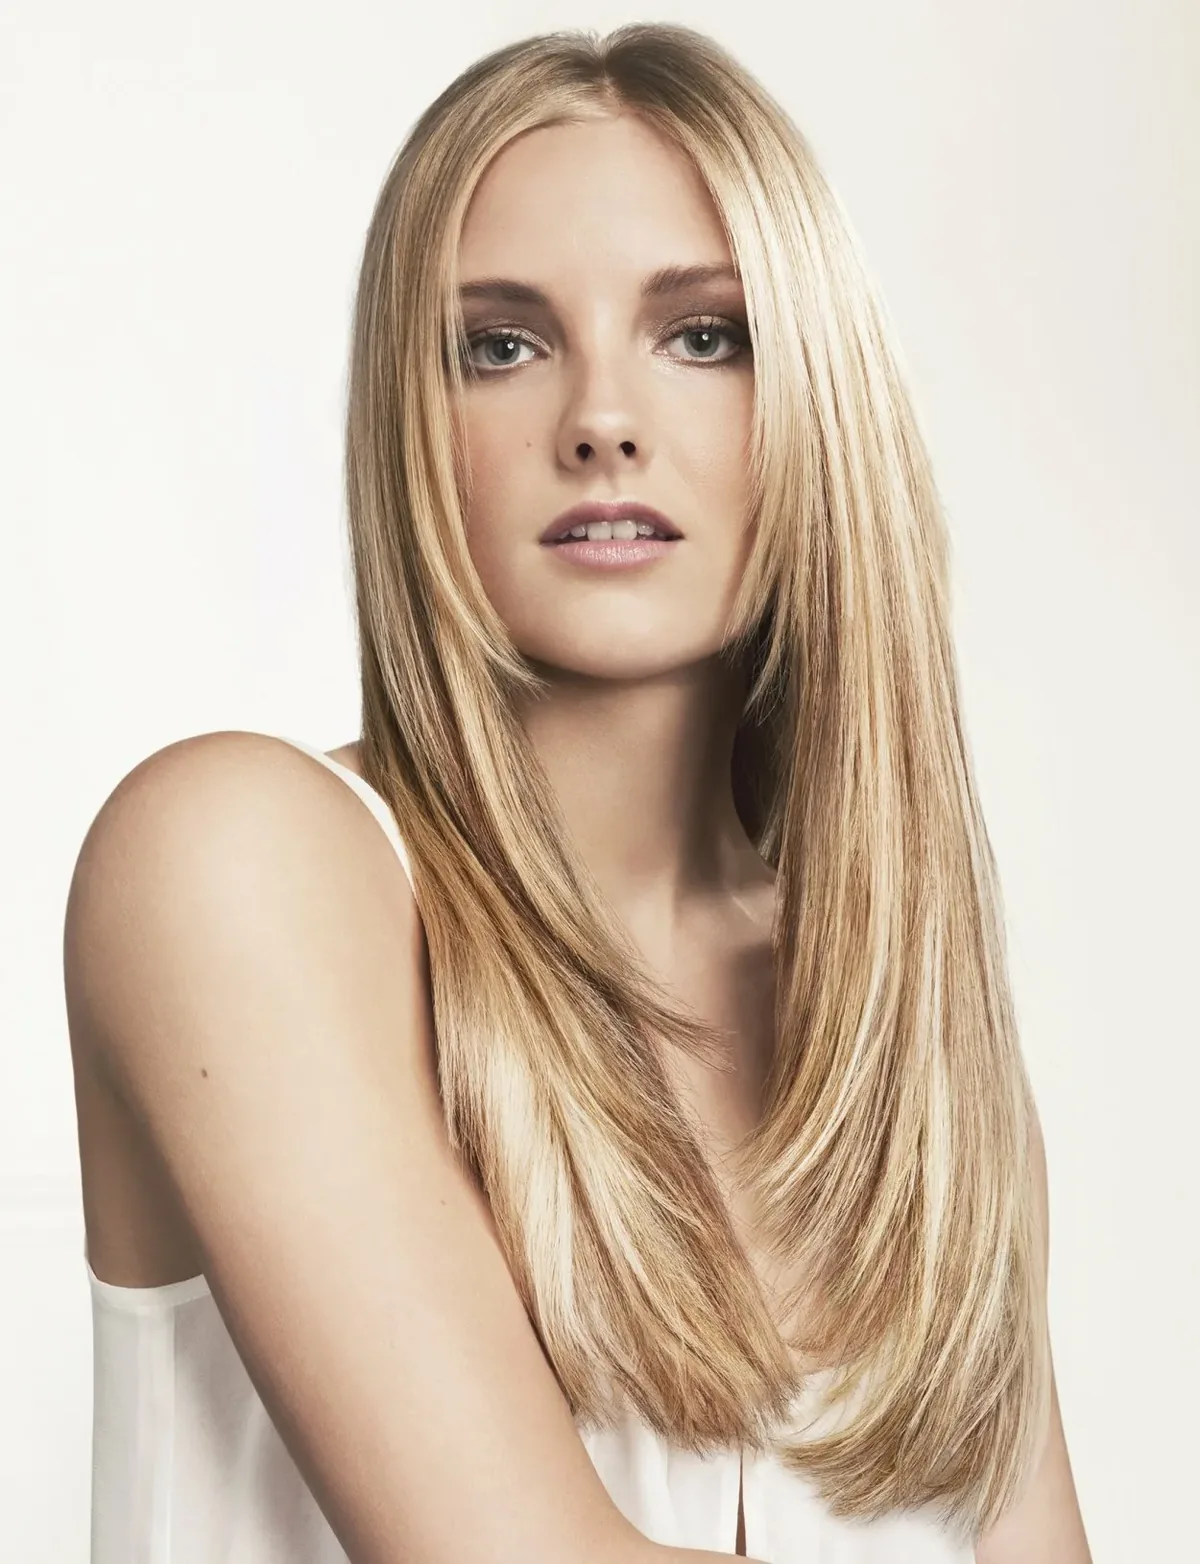
Curtain layers with a middle part are the perfect camouflage for a cut where the front is the problem. The face-framing layers fall on either side of the face like curtains, hiding a bad fringe, softening a strong jawline, and drawing the eye to your eyes and cheekbones. The middle part gives the style symmetry and polish, and because the layers are meant to be soft and blended, any unevenness in the original cut reads as deliberate feathering. It is a style that looks good on almost everyone and grows out beautifully.
How to style it: blow-dry the front layers away from the face with a round brush, so they curve outward and frame the cheekbones. Best for: bad fringes, blunt front layers, and anyone growing out a fringe. What to ask for: ask your stylist to blend the face-framing layers so they connect smoothly with the rest of the hair, rather than sitting as a separate step.
26. The Messy Bun with Face Framing
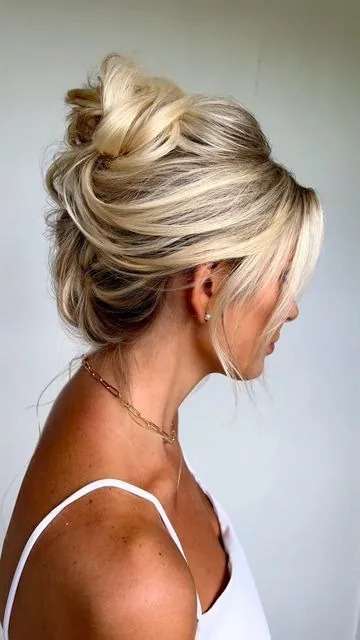
The messy bun with face-framing strands is the relaxed version of the top knot, and it is even better at hiding a bad fringe, because the loose strands in front are the whole point of the style. Gather the hair into a loose, low or high bun, then pull out two soft pieces at the front and let them fall naturally — they will cover a too-short fringe, soften the hairline, and frame the face in a way that looks effortlessly pretty. The bun itself hides the uneven layers at the back, and the overall effect is casual, romantic and completely unbothered.
How to style it: make the bun loose on purpose — a tight bun defeats the point — and curl the face-framing pieces lightly with a flat iron for a soft bend. Pros and cons: the pros are speed and softness; the con is that it can look untidy if the bun is too loose, so secure it with at least three pins. Best for: bad fringes and uneven back layers.
27. Slicked Side Part
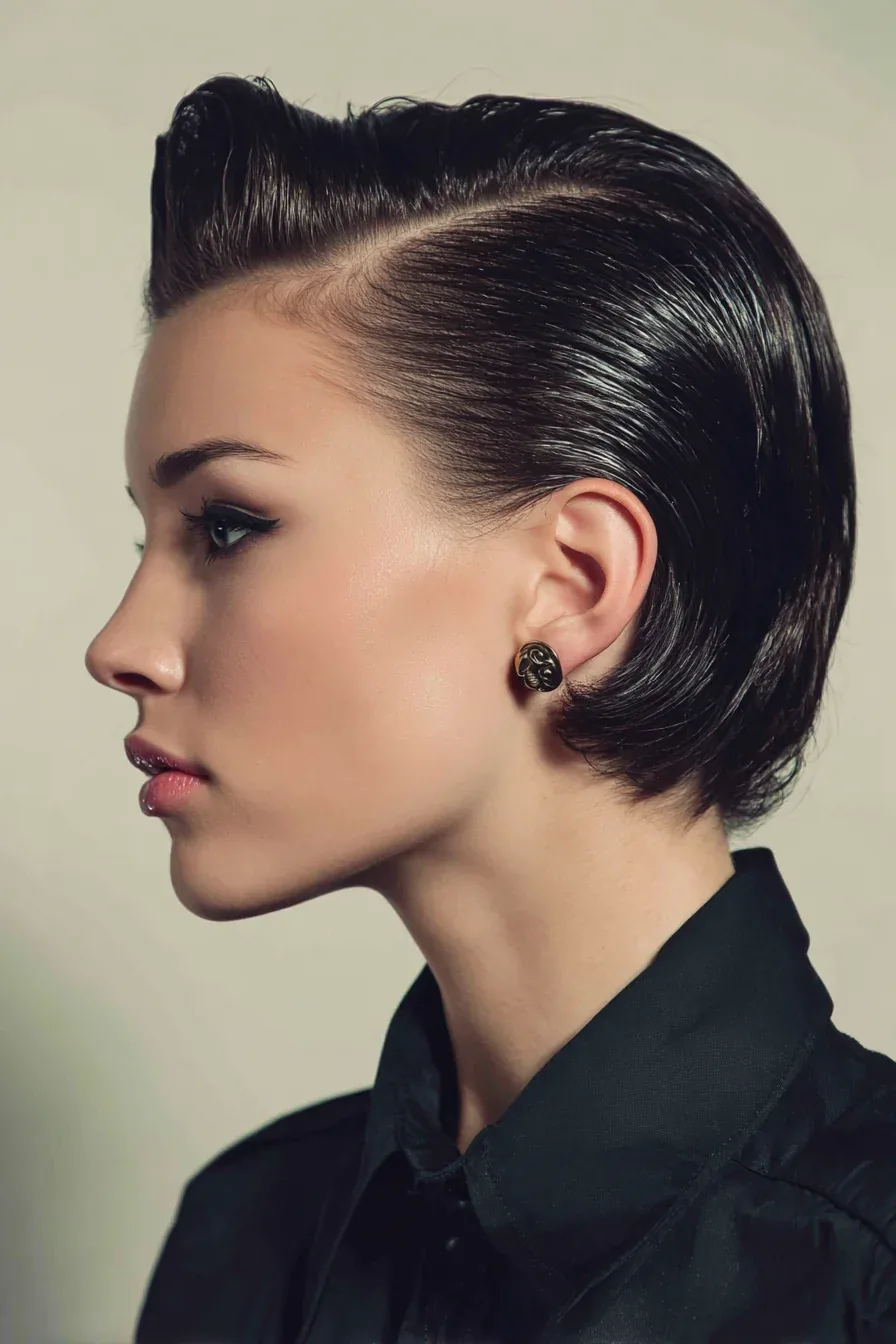
The slicked side part is the polished, grown-up cousin of the deep side part: the hair is swept to one side and smoothed flat against the head with a little gel or cream, creating a sleek, controlled shape that hides uneven layers completely. It looks expensive, it works for the office and for evenings out, and it is one of the few styles that actually looks better when the hair underneath is a little bit wrong — because the slick finish erases all the detail. Pair it with a low bun or a ponytail for full coverage, or wear it loose for a softer take.
How to style it: apply a smoothing cream to damp hair, comb it into a deep side part, and smooth the top layer flat with the back of a brush, finishing with hairspray. Best for: uneven layers, flyaways and frizzy ends that make a bad cut look worse. What to avoid: too much product at the roots, which makes the hair look flat and greasy rather than sleek.
28. The Wispy Pixie with Texture
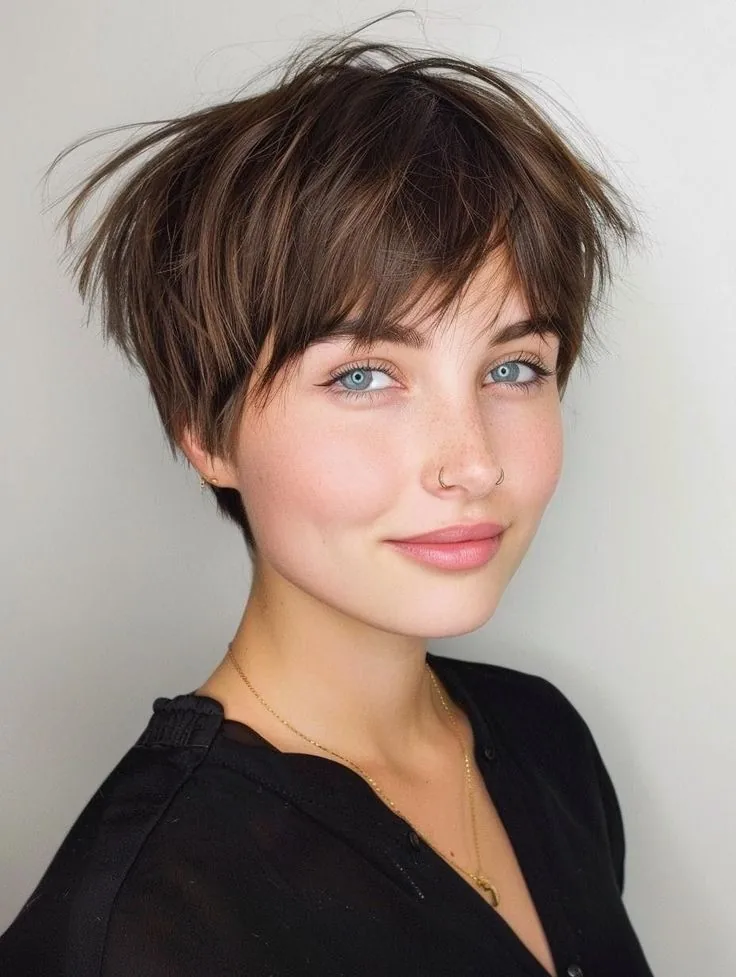
A wispy pixie is the softer answer to a pixie cut gone wrong: instead of a harsh, blunt short cut, the ends are thinned and textured so they fall in soft, feathery pieces around the face. The wisps hide a too-short fringe, soften a strong hairline, and make the whole cut look light and feminine rather than severe. It is a wonderful fix for anyone whose short cut came out too blunt or too heavy, because the texture removes the weight that makes a bad pixie sit like a helmet.
What to ask for: ask for a wispy, textured finish with the ends thinned, and for the fringe to be left long enough to sweep to the side. How to style it: a tiny amount of lightweight wax, scrunched through with your fingers, is all it needs. Maintenance: a trim every three to four weeks keeps the wisps from turning into a shaggy mess.
29. Boho Braids
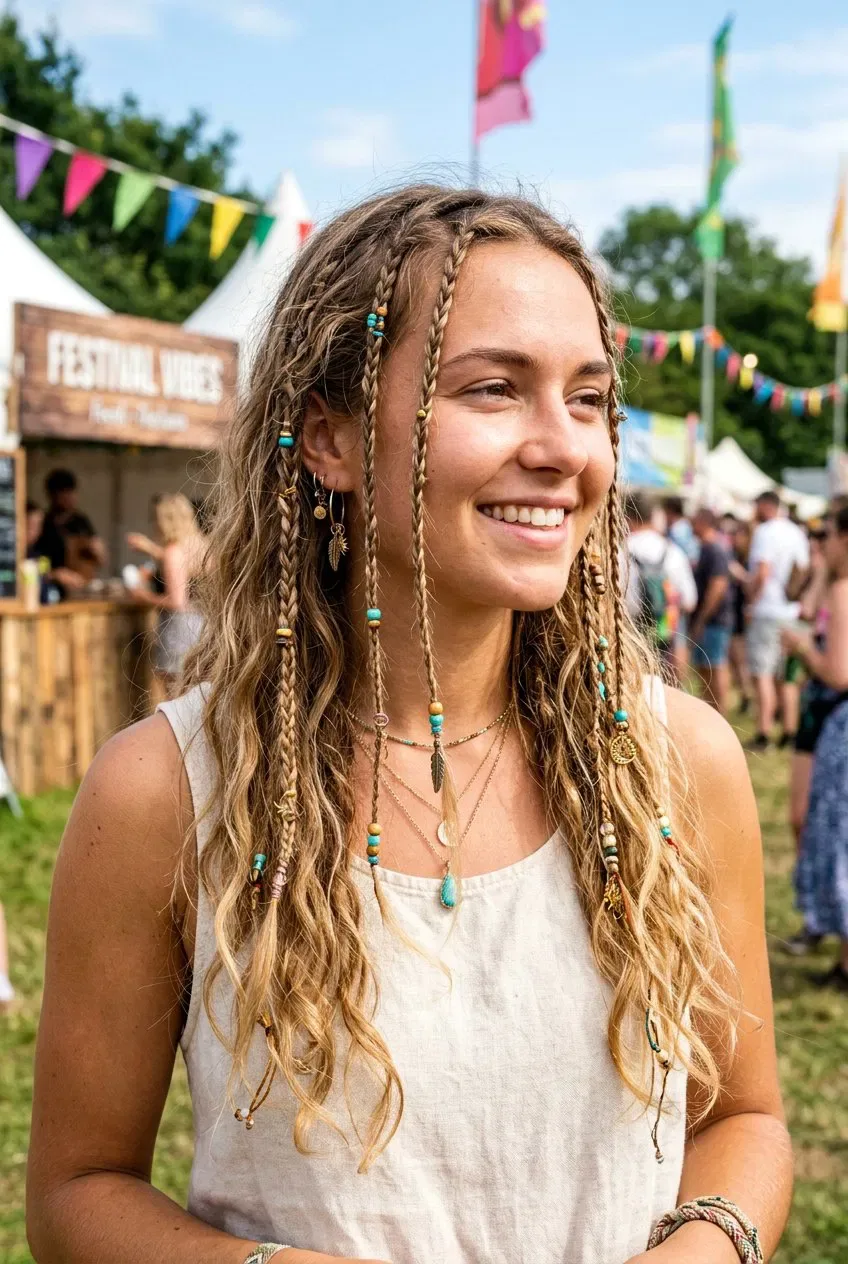
Boho braids are the free-spirited fix: several small, loose braids scattered through the hair, mixed with waves and a little texture, create so much visual interest that nobody notices uneven layers at all. They are perfect for festivals, holidays and casual summer days, they work on medium and long hair, and they hide a bad fringe beautifully, because the fringe is simply braided into the nearest small braid. The more relaxed and imperfect the braids look, the better the style works — which makes it the ideal fix for hair that refuses to behave.
How to style it: braid two or three small sections at random through the hair, secure each with a tiny clear elastic, and wave the rest of the hair loosely. Pros and cons: the pros are total camouflage and a fun, youthful look; the con is that it takes ten minutes and a mirror. Best for: uneven layers, bad fringes, and hair that is growing out in awkward stages.
30. The Pinned-Back Front
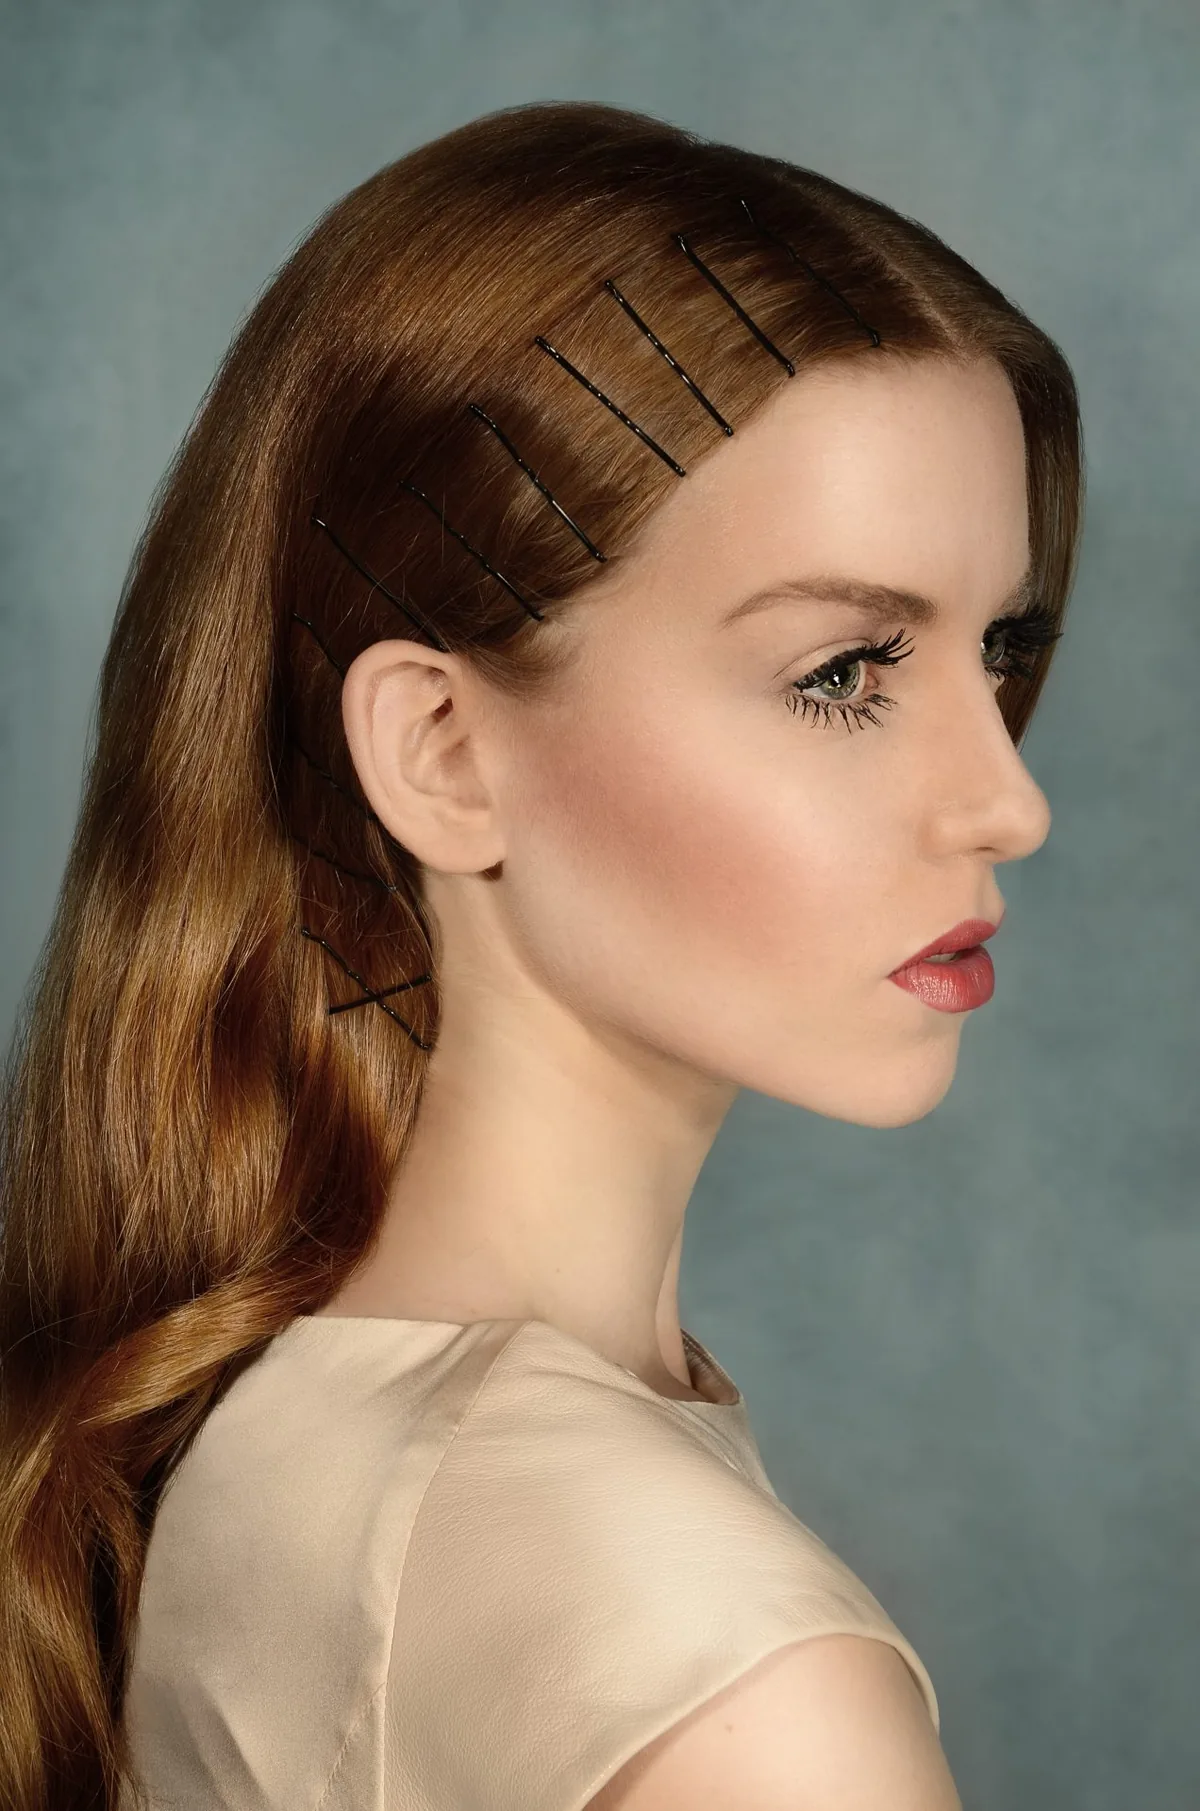
The pinned-back front is the simplest fix in this guide, and sometimes the simplest is the best. If the fringe or the front layers are the problem, pin them back: sweep the front sections away from the face, cross two bobby pins over each other to hold them, and let the rest of the hair fall naturally. It takes thirty seconds, it costs nothing, and it instantly removes the worst part of a bad cut from view. It also looks clean, pretty and deliberate — like a style you chose, not a problem you are hiding.
How to style it: take a small section from each side of the front, twist each one back, and pin them at the crown with crossed bobby pins for grip. Cost and time: two bobby pins, thirty seconds. Best for: too-short fringes, uneven front layers, and days when you need the hair out of your face anyway.
31. Roller Set Volume
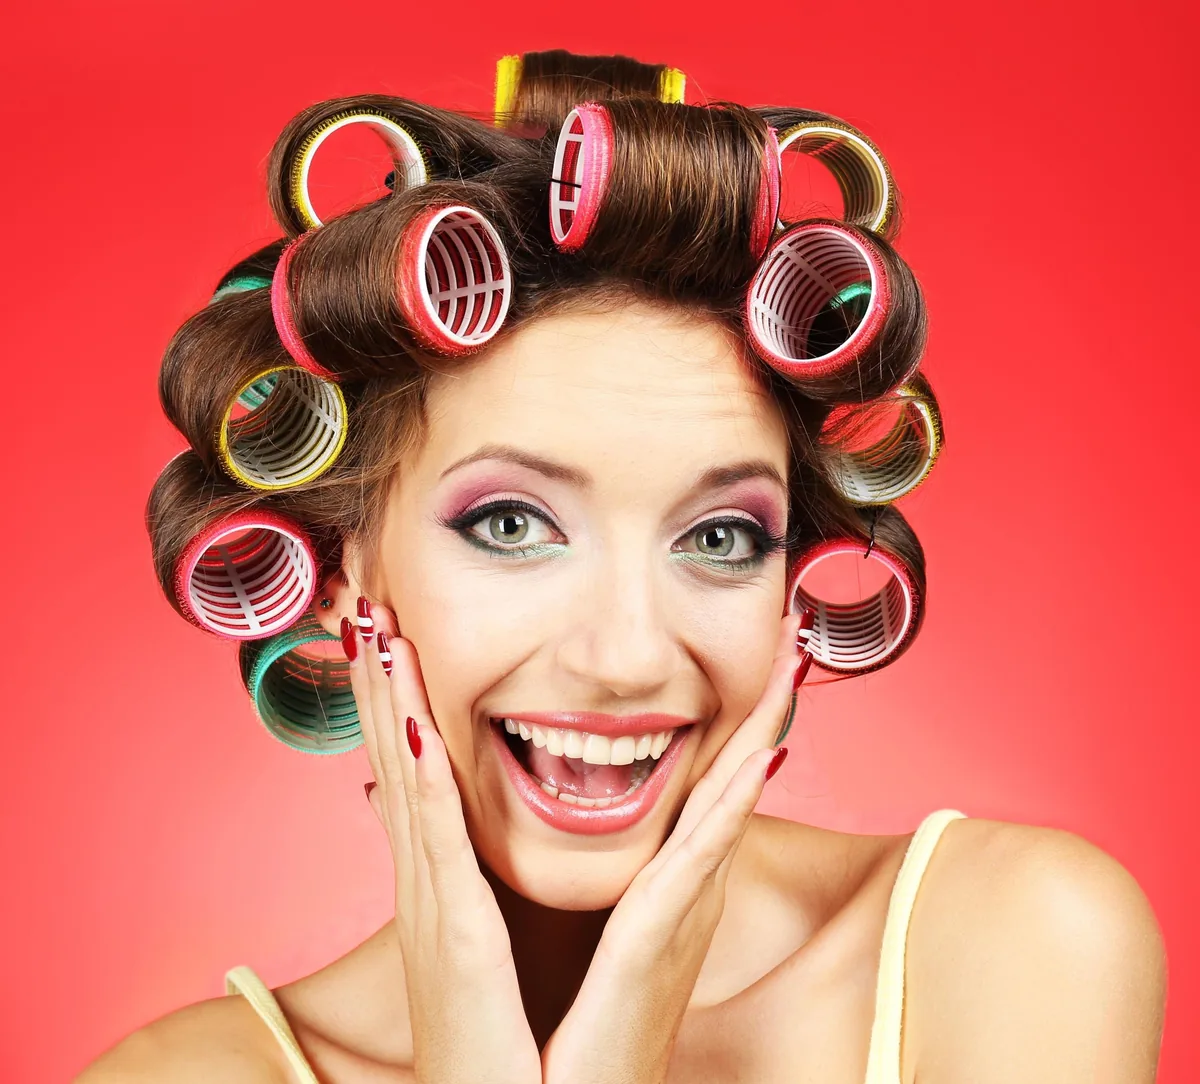
A roller set is the old-fashioned secret to volume that hides a multitude of cutting sins. Hot rollers or velcro rollers lift the roots, round the ends and give the hair a soft, bouncy shape that swallows uneven layers whole. The volume also balances out a cut that came out too flat or too narrow, and the smooth, rounded finish makes the hair look salon-done rather than home-fixed. Rollers take a little patience — twenty minutes while you do your makeup — but the result lasts all day and the hair needs no further styling.
How to style it: roll damp or dry hair in large sections away from the face, let the rollers cool completely, then remove them and brush through gently with your fingers. Pros and cons: the pros are big volume and long-lasting shape; the con is the waiting time. Best for: flat, lifeless cuts, blunt bobs, and hair that needs body to hide its flaws.
32. The Tucked-Behind-Ears Look
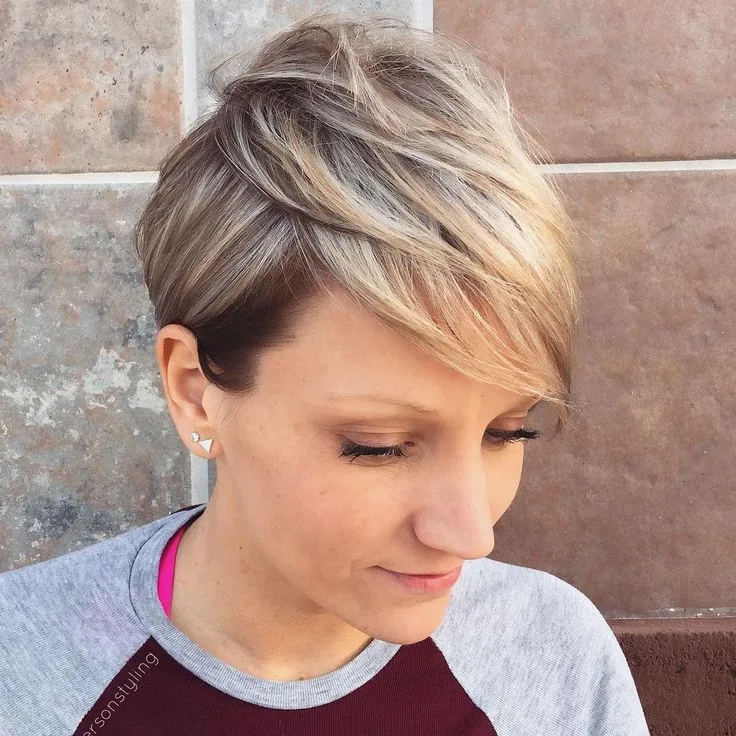
Tucking the hair behind the ears is the most understated fix in this guide, and it works because it changes the shape of the whole head: the hairline is exposed, the face is framed, and the uneven ends at the sides simply disappear behind the ears. It suits straight and wavy hair, it looks clean and modern, and it is the style to choose when the sides of the cut are the problem — too long, too uneven, or sticking out at odd angles. Add a little texture spray first so the tucked hair has something to grip, and it will stay put for hours.
How to style it: part the hair in the middle or to the side, smooth the front sections back, and tuck them firmly behind the ears, securing with a hidden pin if needed. Best for: uneven side layers, hair that sticks out at the sides, and bobs that have lost their shape. What to avoid: tucking hair that is very short at the sides — it will spring straight back out, so pin it instead.
33. The Loose Low Ponytail
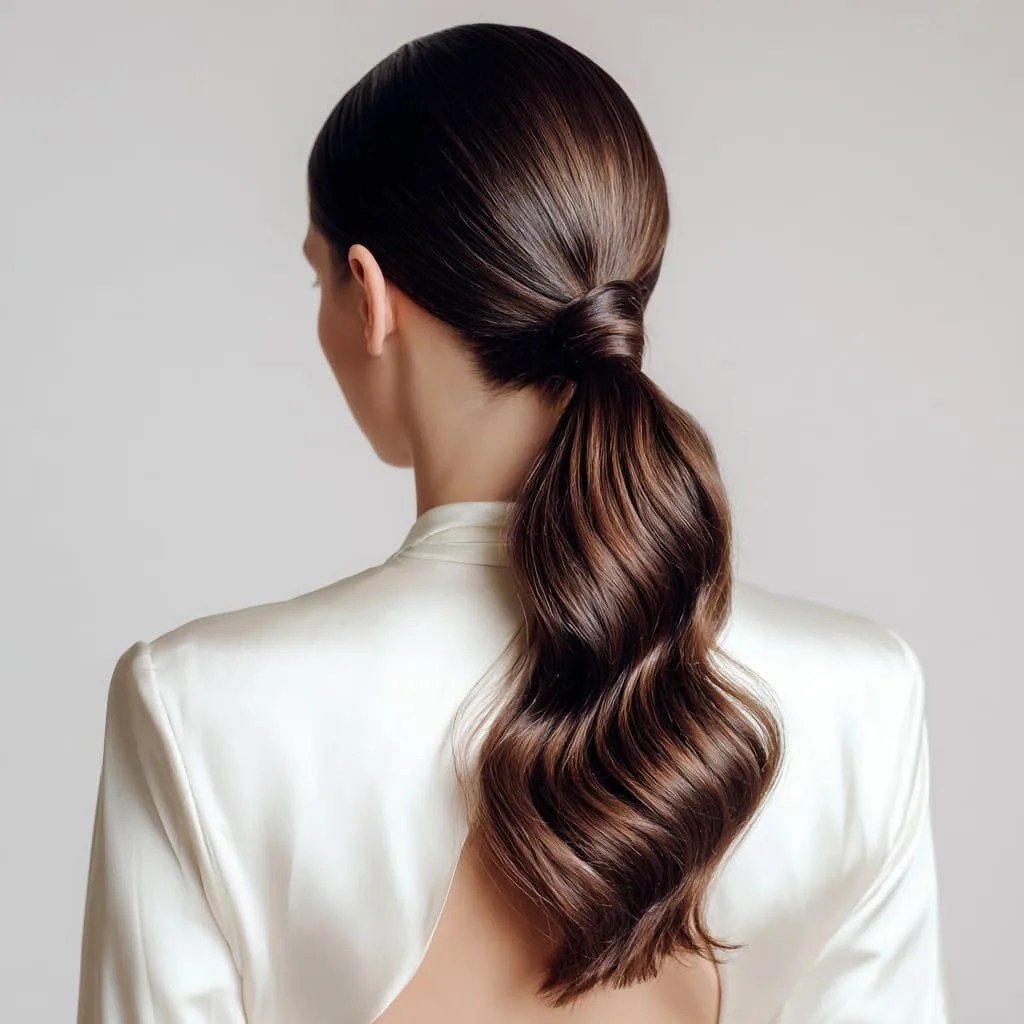
The loose low ponytail is the quiet, elegant answer to a bad cut: gathered at the nape, worn loose rather than tight, it collects every uneven layer into one soft shape and lets a few face-framing pieces fall naturally at the front. It looks polished without looking severe, it works for work, weddings and everyday life, and it is comfortable enough to wear all day. The looseness is the key — a tight ponytail shows every flaw in the hairline, while a loose one forgives them all.
How to style it: gather the hair low, secure it loosely, pull out a few strands at the front, and gently tug the hair above the elastic for a soft, undone finish. Pros and cons: the pros are comfort, elegance and two-minute speed; the con is that it needs a quick re-do if it loosens too much. Maintenance: none — just a spare elastic in your bag.
34. Hat and Cap Styling
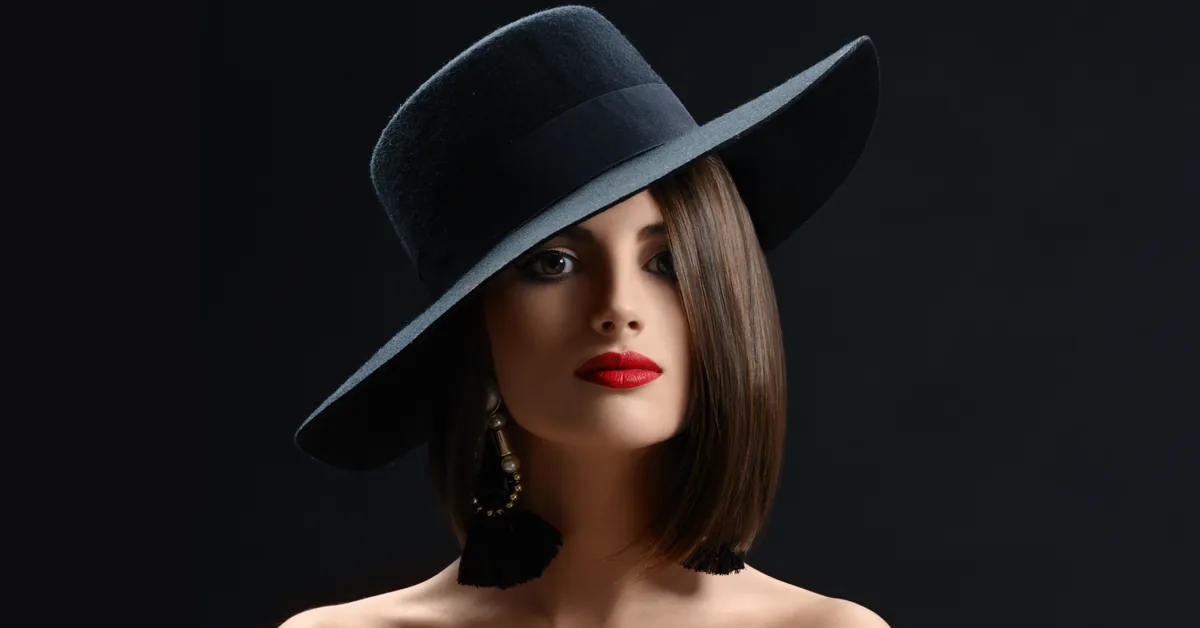
Sometimes the best fix for a bad haircut is not a hairstyle at all — it is a hat. A wide-brimmed hat, a fedora, a beret or even a good baseball cap can hide the worst of a bad cut while looking like a deliberate fashion choice, and on a bad hair day a hat is the fastest confidence boost there is. The trick is to style the hair underneath rather than just hiding it: a low ponytail or loose waves under a hat look intentional, while flat, hat-crushed hair looks like you are hiding something. Wear the hat, own the look, and let the hair grow in peace underneath.
How to style it: choose a hat that suits your face shape, wear the hair loose and wavy or in a low ponytail, and leave a few pieces out at the front for softness. Pros and cons: the pros are instant coverage and style; the con is hat hair when you take it off, so keep a little dry shampoo handy. Best for: the worst first week after a truly bad cut, and sunny days.
35. The Sleek Straight Iron Fix
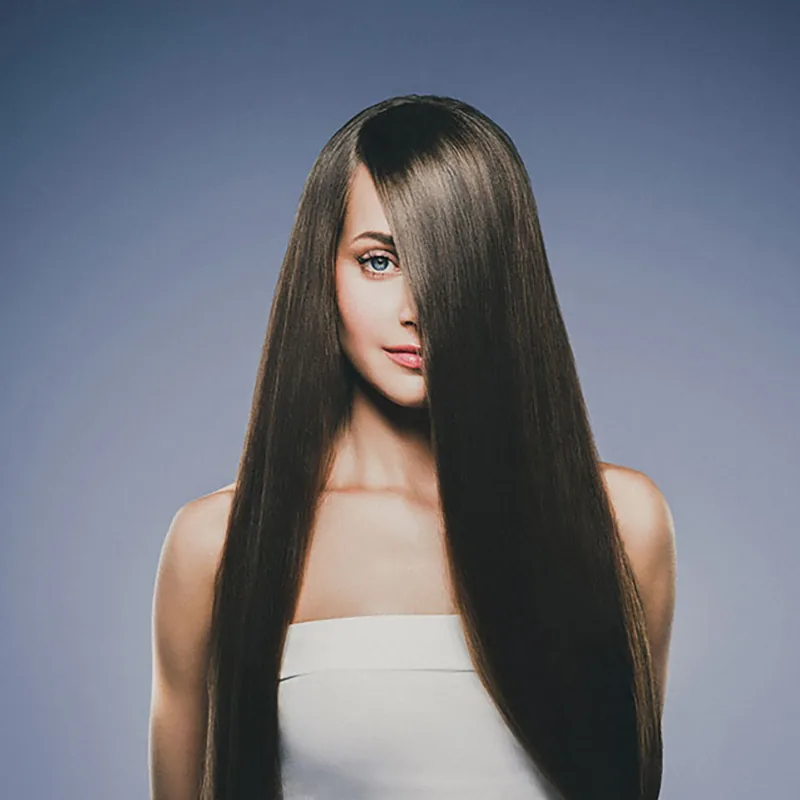
When a cut is uneven, the instinct is often to add texture — but sometimes the opposite works better: a sleek, straight finish with a flat iron can make a choppy cut look sharp and deliberate, like a blunt, editorial style. The key is to straighten in small sections, keep the iron moving so you do not create kinks, and finish with a smoothing serum so the ends look polished rather than frayed. A sleek finish suits strong, straight hair and works beautifully on bobs and lobs, where the straight line becomes the style.
How to style it: apply heat protectant, straighten in one-inch sections, and finish with a drop of serum smoothed over the ends. What to avoid: straightening every day without a break — heat damage will make the ends look worse, not better. Best for: choppy bobs, uneven layers on straight hair, and anyone who wants a sharp, polished look.
36. The Tousled Shag
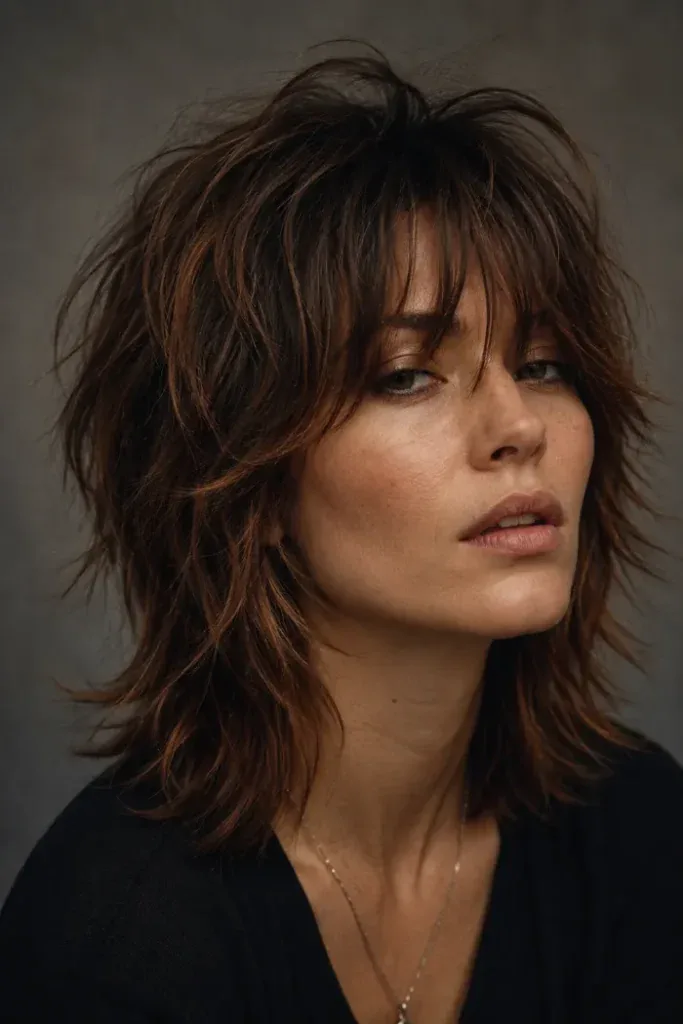
The tousled shag is the lived-in version of the shaggy layer fix, and it is the style to reach for when your cut is already halfway to a shag by accident. Tousle the hair with a little sea salt spray, scrunch it with your fingers, and let it dry naturally — the messy, undone texture turns choppy layers into deliberate shagginess, and the volume at the crown balances out a cut that came out too flat. It is the ultimate low-effort fix: the less you try, the better it looks, which is exactly what you want in the weeks after a bad cut.
How to style it: spray sea salt spray onto damp hair, scrunch upward, and let it air-dry, shaking the roots once dry for volume. Maintenance: almost none — a trim every six weeks and a little dry shampoo on day two. Best for: wavy and straight hair with uneven layers, and anyone who wants a wash-and-go style while their hair grows out.
37. Mini Twists and Bantu Knots
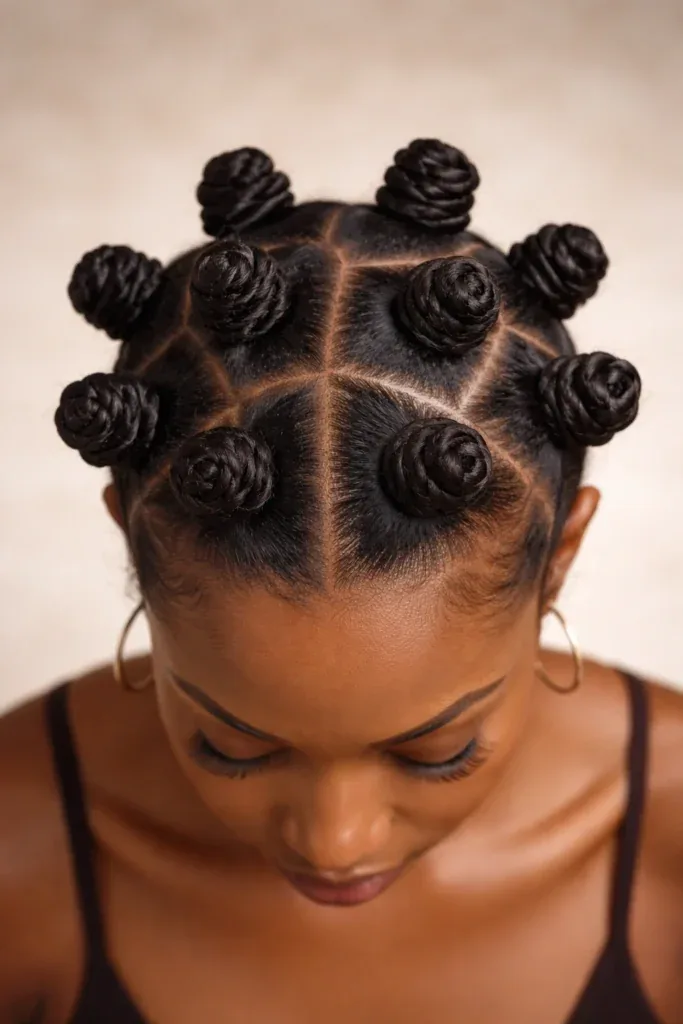
Mini twists and Bantu knots are a beautiful protective fix, and they are one of the most effective ways to hide a bad cut on textured, curly and coily hair. The twists gather the hair into neat, defined sections, so uneven layers disappear completely, and the style protects the ends while the hair grows out — which is exactly what you want after a cut that took off too much length. Bantu knots are the bolder version, worn as a style in themselves or unravelled into gorgeous, defined curls the next day.
How to style it: part the hair into small sections, apply a little curl cream, and twist each section from root to tip, securing the ends — or coil each twist into a small knot and pin it. Pros and cons: the pros are total coverage, protection and versatility; the con is that it takes time to install. Best for: curly and coily hair, and anyone growing out a too-short cut.
38. The Side Ponytail
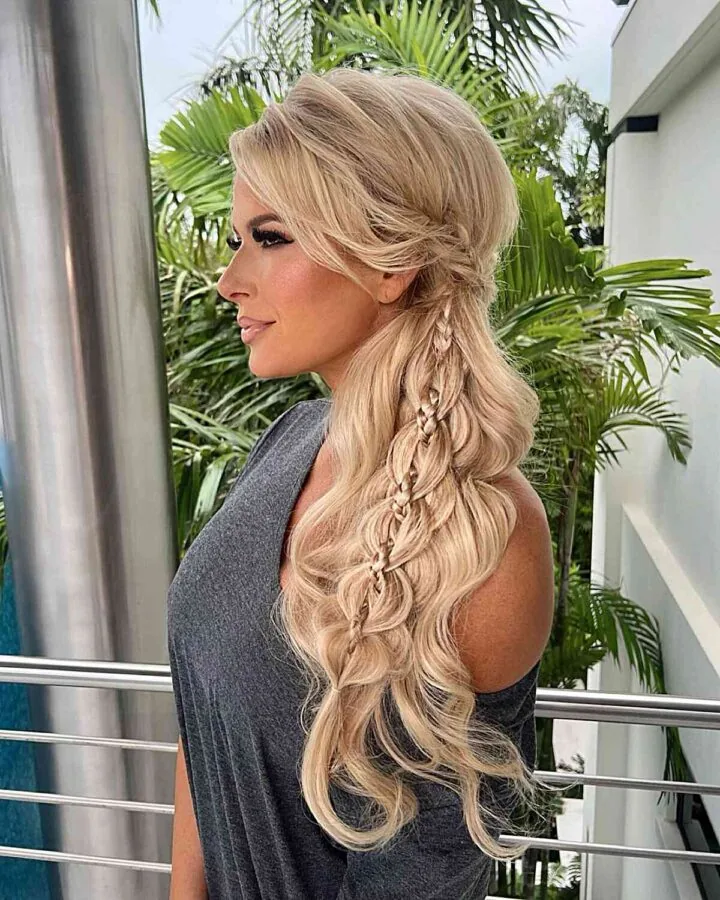
The side ponytail is the playful, romantic cousin of the high ponytail: swept over one shoulder, it gathers all the uneven layers to one side and lets the tail fall in a soft, pretty cascade. It is flattering on almost every face shape, it hides a bad fringe by sweeping it into the ponytail, and it looks lovely with a little wave in the tail or a few loose pieces at the front. It is the style to choose for dates, parties and days when you want your hair to look pretty without spending half an hour on it.
How to style it: sweep all the hair to one side, secure it low behind the ear, wrap a strand around the elastic, and curl the tail lightly for movement. Best for: uneven layers, bad fringes, and medium to long hair. What to avoid: pulling the ponytail too tight, which can make the opposite side look flat and lopsided.
39. The Faux Fringe with a Clip

The faux fringe is the cleverest trick in this guide: a clip-in fringe, or your own front layers pinned forward, gives you a fringe without cutting anything — which is exactly what you need when your real fringe is the problem. If your fringe was cut too short, a clip-in fringe in a matching colour covers it completely and gives you a soft, full fringe in two minutes. If your fringe is too long and heavy, pinning the front layers forward and across creates a faux fringe effect that softens the face. Either way, you get to choose your fringe every morning, and the real one grows out underneath in peace.
How to style it: clip the faux fringe in just behind your hairline, blend it with your own hair using a round brush, and trim the clip-in piece — never your own hair — to the length you want. Cost and time: a clip-in fringe costs little, lasts for months, and takes two minutes to put in. Best for: fringes cut far too short, and anyone who wants to test a fringe before committing.
40. The Layered Grow-Out Lob
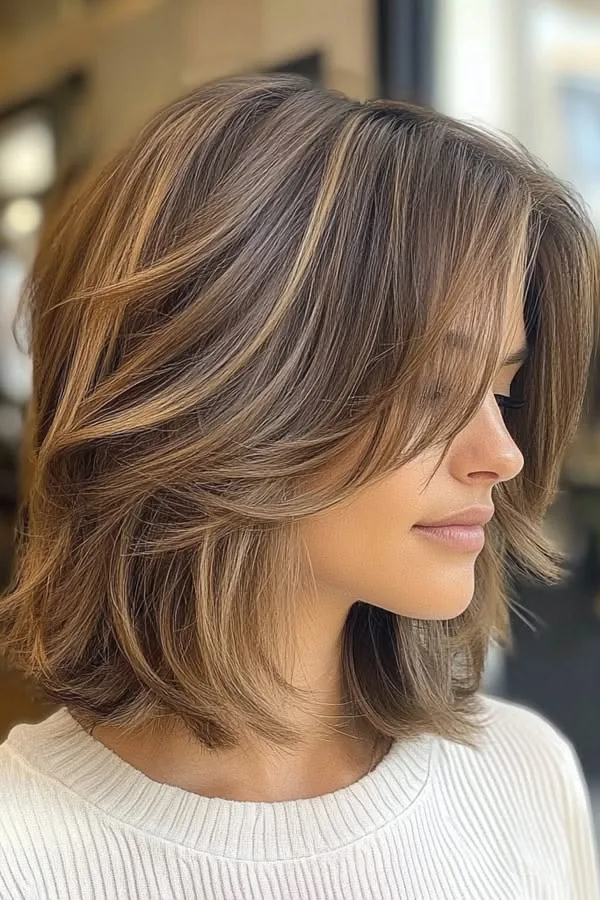
The layered grow-out lob is the destination style for the whole journey: a long bob with soft, blended layers that turns the awkward grow-out stage into a proper haircut. Once your hair has grown past the worst of the bad cut, a stylist can shape it into a lob — collarbone length, layers that connect properly, ends that sit neatly — and suddenly the bad haircut is not a disaster you are hiding, it is just the haircut you had before this one. The lob is versatile, flattering and easy to style, and it is the style that proves the bad cut is finally, truly behind you.
How to style it: blow-dry with a round brush for a smooth finish, or add loose waves for a softer, more casual look. What to ask for: ask for soft, blended layers that start at the chin, and for the ends to be cut blunt enough to look healthy but soft enough to move. Maintenance: a trim every six to eight weeks keeps the lob looking intentional while it grows toward the length you actually want.
Can hairstyles for a bad haircut really hide the damage?
Yes — the right hairstyles for a bad haircut can hide most cutting mistakes completely. Texture, waves and a new parting blur uneven lines, while updos gather the worst layers out of sight entirely. The eye reads a hairstyle as a whole shape, not as a list of flaws, so a style that changes the shape, adds movement or creates a new focal point will make the bad cut invisible to everyone except you.
How long will it take for a bad haircut to grow out?
Hair grows about half an inch a month, so a too-short fringe needs six to eight weeks to reach your eyebrows, and a bad bob needs three to four months to become a lob. The awkward stages in between are real, but each one has a style in this guide, and regular tiny trims every six to eight weeks keep the shape tidy while it grows.
Should I go back to the salon for a free fix?
Yes, in most cases. Most salons will fix a bad cut for free if you return within a week, and a calm, specific conversation works best. Bring photos of what you asked for and what you got, describe the problem in concrete terms, and ask for the most senior stylist available. If the salon is defensive, take the fix if it is offered by someone competent and take your future business elsewhere.
What is the fastest way to hide a bad fringe?
The fastest way to hide a bad fringe is to sweep it to the side, pin it back, or cover it with a scarf or headband — all of which take under a minute. A deep side part and a side-swept fringe are the most flattering options, because they turn the short pieces into a soft diagonal that frames the face. A clip-in faux fringe is the best option if the fringe was cut far too short.
Can I fix a bad haircut myself at home?
You can style around a bad haircut at home, but you should not cut it yourself to fix it. Home trimming almost always makes one side worse and leaves less hair for a stylist to work with. Use the styling fixes in this guide — partings, waves, braids, updos and accessories — and leave the cutting to a professional, ideally the stylist who does the free correction.
What hairstyles hide uneven layers best?
The hairstyles that hide uneven layers best are loose beach waves, a voluminous blowout, a messy bun, a side braid and a braided crown. Waves and texture blur the lines between layers, while updos and braids gather the layers out of sight entirely. The worst choice for uneven layers is a sleek, straight finish, because straight hair shows every mistake.
How do I hide a haircut that is too short?
Hide a too-short haircut with texture, volume and accessories: a textured pixie, a wispy finish, finger waves, a scarf or headband, and a hat on the worst days. For short hair, the fix is in the styling and the finish, not in more cutting. A clip-in fringe or clip-in extensions can also add length and coverage while your own hair grows out.
What should I avoid doing after a bad haircut?
Avoid cutting more hair yourself, getting a drastic colour change or chemical treatment to distract from the cut, heat styling every single day, and hiding under a hat constantly. All of these make the problem worse or damage the hair you have left. Protect your hair with gentle washing, leave-in conditioner and heat protectant, and give it a few heat-free days each week.
Will a bad haircut damage my hair?
A bad haircut does not usually damage the hair itself — it damages the shape. The hair is still healthy underneath, unless the cut involved aggressive thinning or the stylist used hot tools carelessly. Keep the hair healthy while it grows out with gentle care, regular trims to remove split ends, and a break from daily heat styling, and the shape will recover as the length returns.
When should I just get a new haircut instead of hiding the old one?
Get a new haircut when the shape cannot be styled into anything you like, when the layers are so uneven that no amount of texture hides them, or when going shorter would genuinely give you a better shape — a pixie, a shag or a lob. A good stylist can tell you honestly whether the cut is fixable with styling or whether a reshape is the faster route, and a reshape is often the kindest option.
Conclusion: Hairstyles for a Bad Haircut Buy You Time — and Time Fixes Everything
A bad haircut feels enormous on the day it happens, and then, quietly, it stops being enormous. The hairstyles for a bad haircut in this guide — the deep side part, the soft curtain bangs, the messy bun, the beach waves, the braids, the scarves and the sleek low bun — are not just cover-ups. They are ways to feel like yourself again while your hair does the one thing it always does: grow. Pick the fix that matches your flaw, try it tomorrow morning, and give it a few days before you judge it. Book the free correction if your salon offers one, book the tiny trims that keep the shape tidy, and be patient with the awkward stages, because every single one of them passes. In three months, this cut will be a story you tell while laughing — and the style you found while hiding it might just become your new favourite.

