
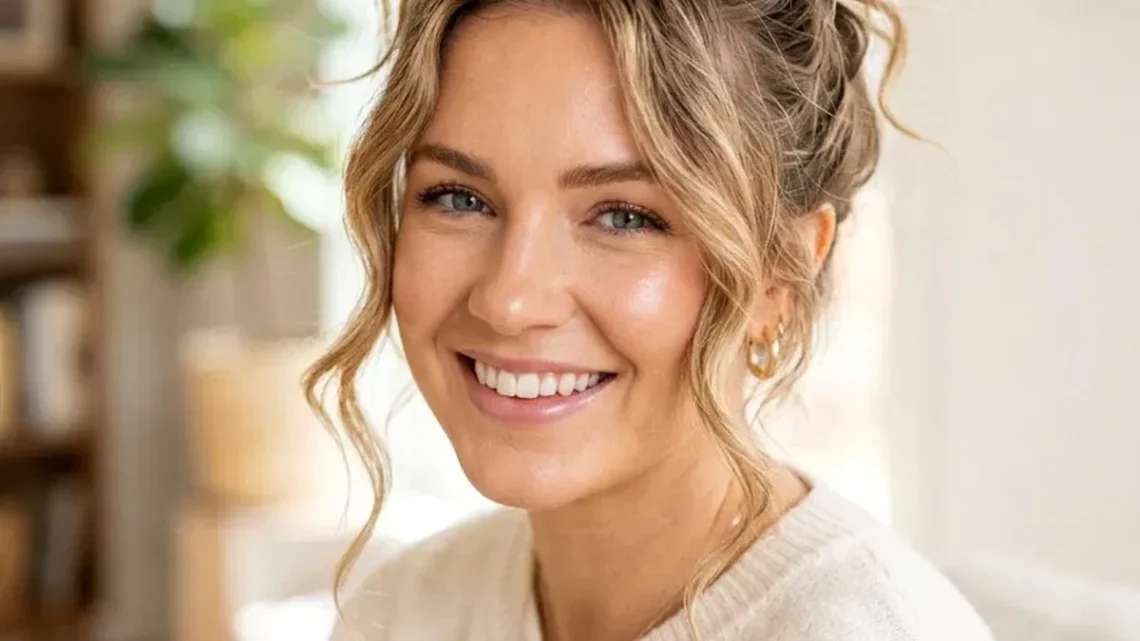
There is a small window every morning when your hair is at its most cooperative, and it is not right after you wash it. Freshly washed hair is slippery, weightless and allergic to pins. Day-two hair is the opposite: it has grip, memory and just enough texture to hold a shape without a fight. The problem is never the second day itself — it is the shine at the roots and the flatness at the crown that make the whole thing read as “didn’t bother” instead of “meant to look like this.” The styles in this guide close that gap.
Here are 31 second day hairstyles built around what unwashed hair does best — lived-in waves, low buns with texture, braids that hide oily roots, claw-clip twists and ponytails with real volume. Each one notes how long it takes, which hair type it flatters, and the dry-shampoo or texture trick that makes it work. Eight guides cover why day-two hair holds styles better, how to use dry shampoo properly, how to absorb oil without a white cast, the difference between texture and grease, refreshing waves without rewashing, when to wash instead of styling through, the updo-versus-down decision, and the mistakes that turn a good second day into a bad one. No style here needs a wash, and most need under five minutes.
Why Day-Two Hair Holds Styles Better Than Fresh Hair
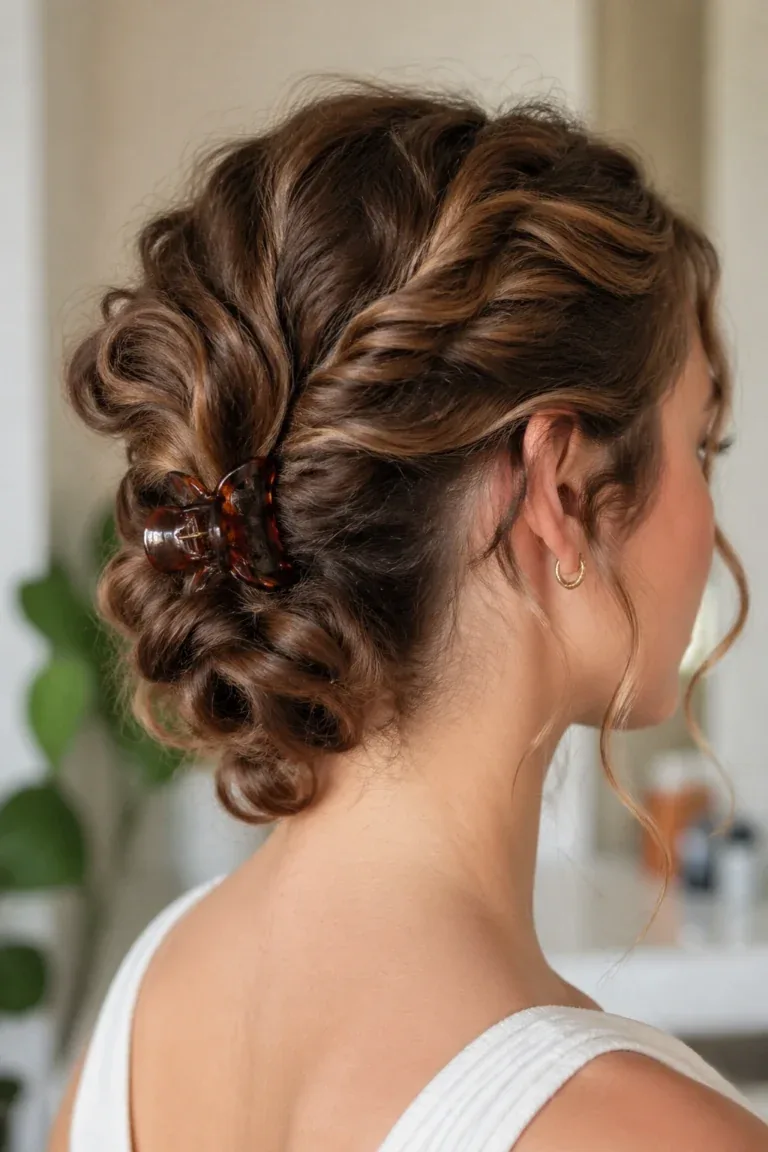
Freshly washed hair is clean, and that is exactly the problem. Clean hair has no grip: the cuticle lies flat, the strands slide against each other, elastics slip, pins slide out, and a bun slowly rotates itself loose by lunchtime. Day-two hair carries a light layer of natural oil at the roots and a little residual product from yesterday, and that combination gives every strand something to hold onto. Braids stay put, twists keep their shape, and a low bun anchors without a dozen pins. Hairstylists know this so well that they often ask clients to arrive with day-old hair before an updo appointment — the hair is simply easier to work with.
The trick is using that grip without letting the oil take over the look. Oil concentrates at the roots and the crown, while the lengths usually still look fine, so a style that lifts, covers or redistributes the roots — a braid starting at the hairline, a bun with volume at the crown, a half-up section — hides the greasiest part and shows off the textured lengths. Think of day two as a styling advantage with one maintenance job attached: manage the roots, and the rest of the hair is already better than it was yesterday. The sections below are ordered so you can pick by how much time you have and how oily the roots feel this morning.
Dry Shampoo Done Right
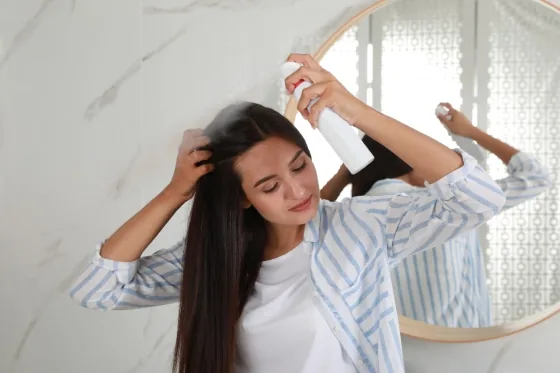
Dry shampoo is the single most useful product for second day hair, and the most commonly misused. The mistake almost everyone makes is spraying it onto visibly greasy roots and expecting instant freshness. It works far better as a preventive step: applied to clean roots the night before, or first thing in the morning before the oil has fully surfaced, it absorbs sebum as it appears instead of trying to mop up a day’s worth at once. Hold the can 15 to 20 centimetres from the head, lift sections, and spray in short bursts at the roots only — never down the lengths, where it just adds dullness.
Then wait. This is the step people skip, and it matters more than the spraying itself. Leave the product alone for two to three minutes so the starch or powder can actually absorb the oil, then massage it in with your fingertips and brush through with a boar-bristle brush or a wide-tooth comb. Brushing distributes the product and removes the excess that causes a white cast, while the massage lifts the roots and restores volume. Used this way, dry shampoo buys you a full extra day; used as a last-minute panic spray on saturated roots, it mostly buys you grey, powdery hair that still looks greasy underneath.
Absorbing Oil Without the White Cast
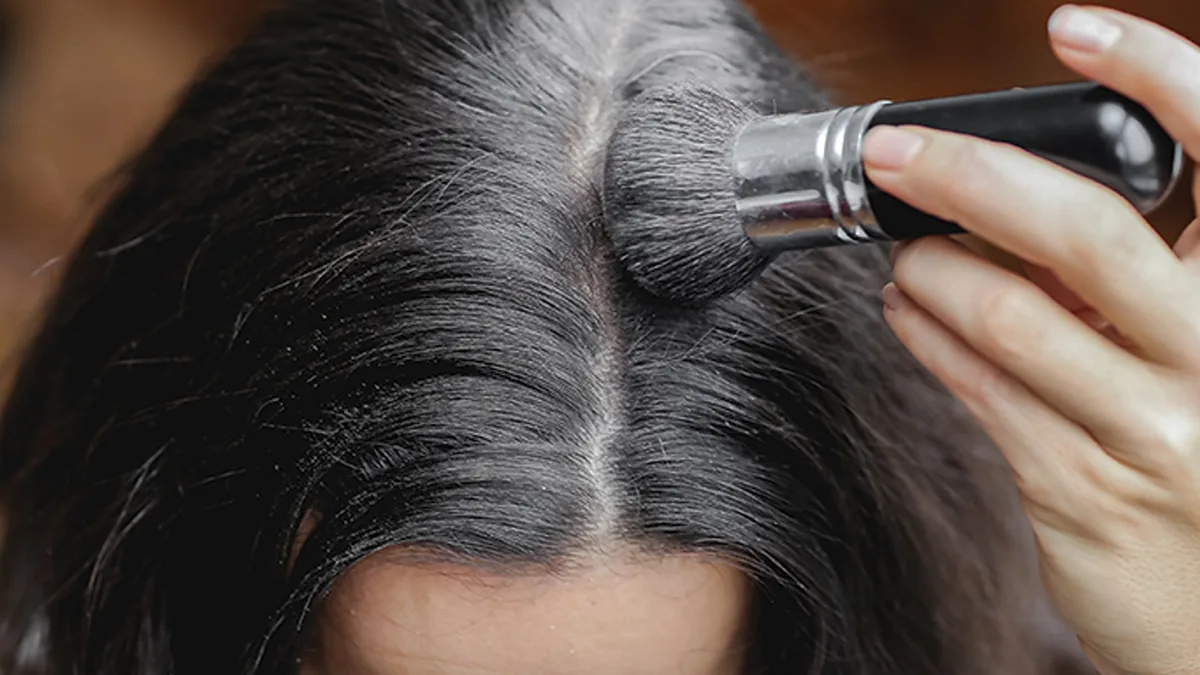
The white cast is the reason many people with dark hair give up on dry shampoo entirely, and it is almost always a technique problem rather than a product problem. The powder shows because it sits on top of the hair instead of being worked into it. Three fixes solve most cases: spray from further away so the product lands as a fine mist rather than a concentrated patch, use less than you think you need and add a second light layer only if the roots still feel damp, and always brush through after the waiting period. A tinted dry shampoo matched to your hair colour is the other reliable fix — brunette and dark-brown formulas exist precisely because white starch on dark hair is so visible.
- Dark hair: tinted dry shampoo, or a translucent formula brushed through thoroughly with a boar-bristle brush.
- Fine hair: the lightest possible application at the roots only; excess powder weighs fine hair down and makes it look duller, not fresher.
- Curly or coily hair: apply to the roots with fingertips rather than spraying over the curls, so the curl pattern is not coated and flattened.
- No dry shampoo at hand: a little cornstarch or baby powder worked into the roots does the same job in a pinch, but brush it out completely.
Texture vs Grease: Telling the Difference
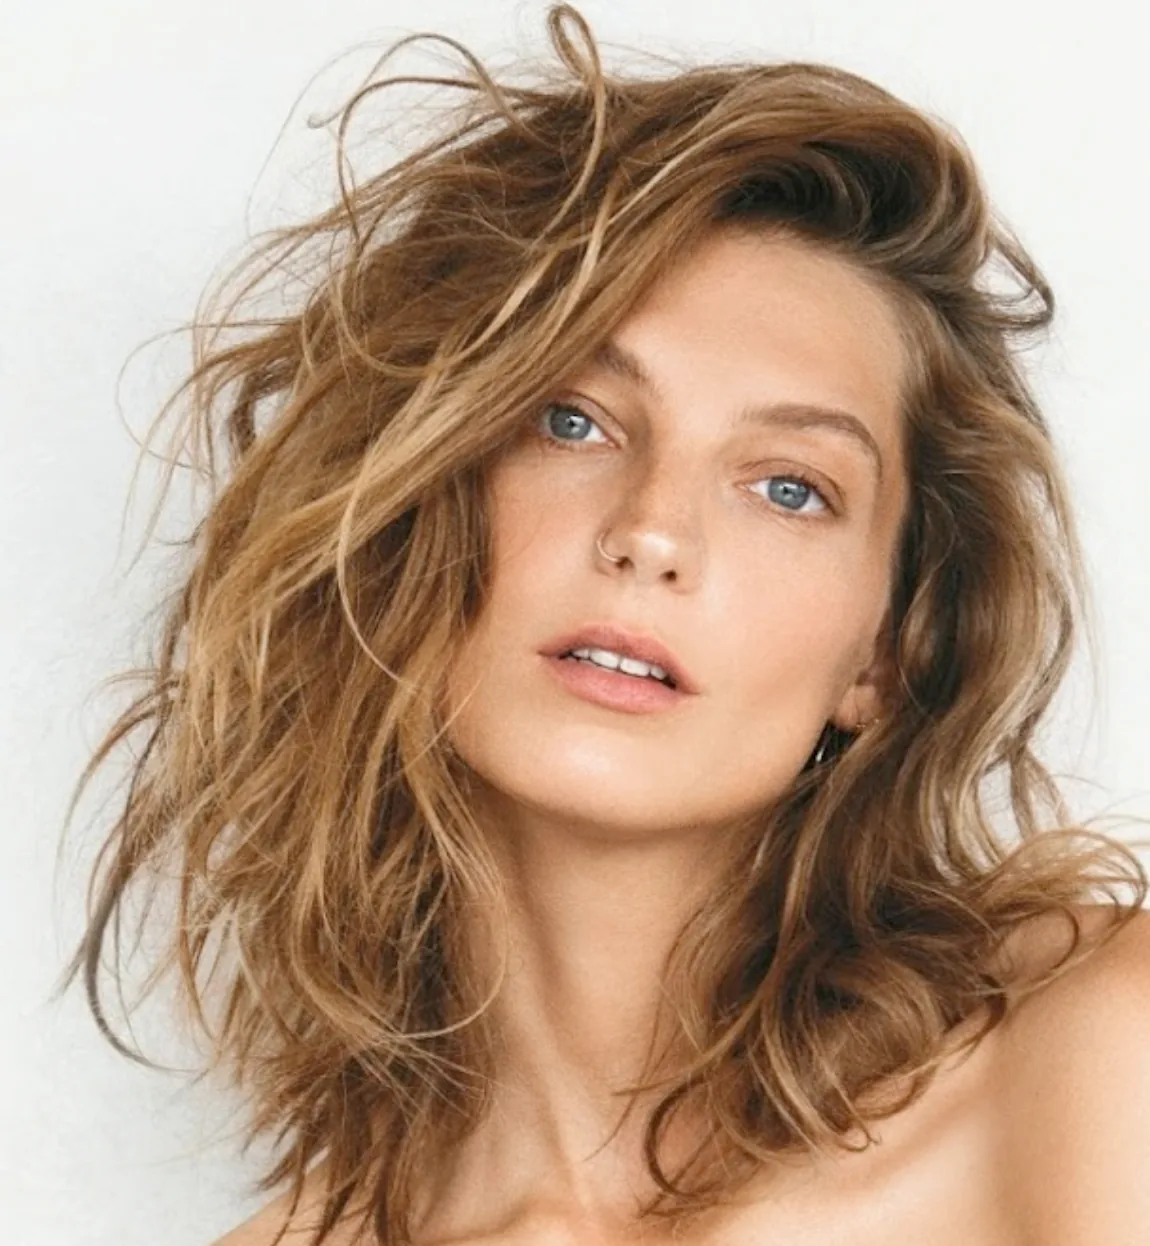
Texture and grease look similar from a distance and feel completely different up close, and knowing which one you are dealing with decides the style. Texture is dry, matte and bendable: the hair holds a wave, the roots lift when you shake them, and the strands separate easily. Grease is damp, shiny and clumped: the roots stick together in sections, the crown lies flat no matter how you lift it, and the hair feels heavy. Day-two hair usually has both — texture through the lengths, grease at the roots — which is why styles that hide the roots and show the lengths work so well.
The quick test takes ten seconds. Lift a section at the crown and let it fall: if it springs back with some body, you have texture and you can wear your hair down with a little dry shampoo at the roots. If it falls in a flat, separated sheet, the roots need absorbing first, and an updo or a braided style is the honest choice. A texturising spray adds grit to the lengths and makes the texture look deliberate, while a shine spray does the opposite — it makes greasy roots look greasier. On day two, matte is your friend and shine is the enemy, at least until the roots are dealt with.
Refreshing Waves Without Rewashing
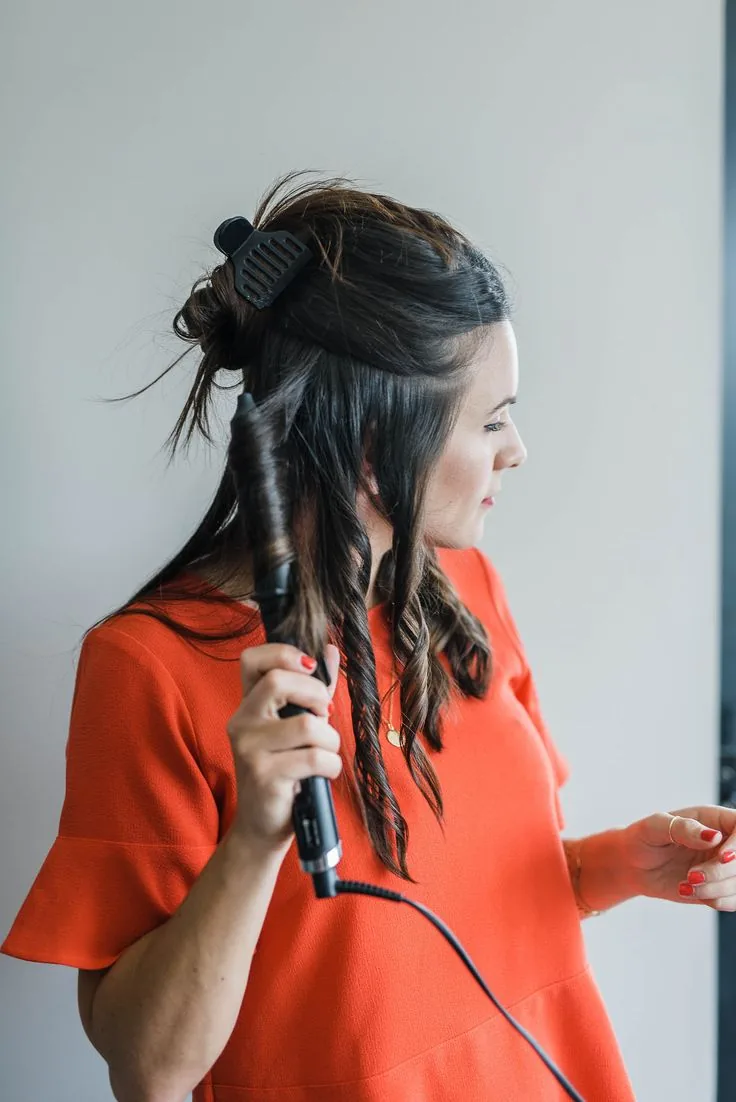
Yesterday’s waves rarely survive the night intact, but they do not need a full re-curl either. The fastest refresh is to re-work only the pieces that flattened: the front sections around the face and the top layer at the crown. Mist those pieces lightly with water or a wave-refresh spray, wrap each one around a curling iron for five seconds, and let it cool in your hand for a few seconds before dropping it. Three or four pieces take two minutes and the rest of the hair — which usually kept most of its wave underneath — suddenly looks intentional again.
Heat-free options work too, and they are better for the hair over a whole week of second days. Braiding damp hair before bed, as section 14 explains, gives you waves to wake up to. A silk scarf or a loose top knot overnight preserves the wave pattern instead of crushing it against the pillow, and a satin pillowcase reduces the friction that turns waves into frizz. Whatever method you use, finish with a light texturising spray rather than hairspray: the goal is movement, not hold, and stiff second-day waves look older than soft ones.
When to Wash Instead of Styling Through
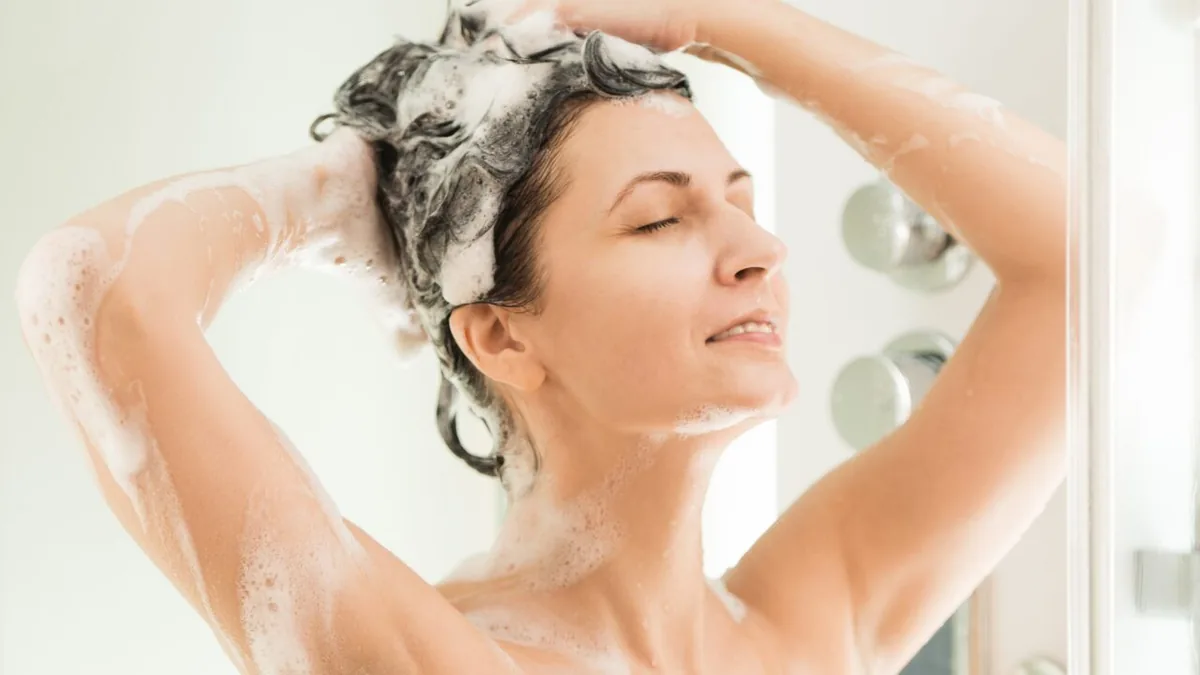
Stretching wash day is a skill, not a virtue, and there is a point where styling through stops working and washing is simply the right call. The clearest sign is the scalp: if it itches, feels tender, or has visible buildup at the parting that dry shampoo no longer lifts, wash. The same goes for smell — hair that has absorbed gym sweat, cooking odours or a long day outdoors will not be rescued by powder, and no updo hides a smell. A third sign is the hair itself: if the roots stay clumped and flat after dry shampoo, brushing and a second application, the oil has won and the style will slide out by midday anyway.
Washing does not have to mean a full routine. A scalp-only wash — leaning over the sink and washing just the roots and crown while leaving the lengths dry — refreshes the greasiest part in three minutes and keeps yesterday’s waves in the lengths intact. Follow with a quick blow-dry at the roots only, and you have effectively reset day one at the top and kept day two at the bottom. Knowing when to wash is what makes the rest of the guide work: second-day styling is a choice, not a punishment, and it works best when the hair underneath is genuinely ready for it.
Updo vs Down on Day Two
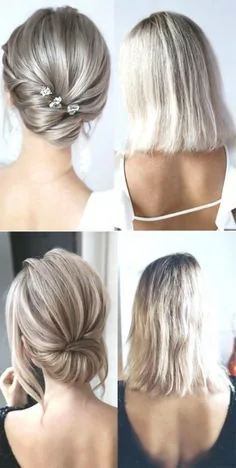
The updo-versus-down decision on day two comes down to one question: how do the roots look right now? If the roots are manageable after dry shampoo — lifted, matte, separated — wearing the hair down shows off the texture and the waves that day two does so well, and sections 7, 17 and 19 are built for exactly that. If the roots are still visibly oily after treatment, an updo is not a defeat, it is the smarter frame: a bun or a braid puts the textured lengths on display and hides the roots entirely, and nobody looking at a good low bun is thinking about your wash schedule.
Half-up styles are the compromise that gets the best of both. A half-up top knot or a braided crown pulls the greasiest section — the crown and the front hairline — up and away, while the lengths stay down and show their waves. They also buy time: a half-up style that starts the day looking fresh can be converted into a full updo in thirty seconds if the roots give up by afternoon. When in doubt, start half-up. It is the most forgiving choice on a second day, and it leaves you an easy upgrade path instead of a midday restart.
Common Second-Day Mistakes

Most second-day disasters come from trying to fix the hair with the same tools that work on wash day. Brushing the hair hard from root to tip on day two spreads the oil from the roots down the lengths, which is the opposite of what you want — brush the roots to distribute dry shampoo, but leave the lengths mostly alone. Touching the hair all day does the same thing from the outside: hands transfer oil and flatten volume, so once the style is in, leave it alone. Overloading the roots with product is the third classic error: dry shampoo, texturising spray, hairspray and serum layered on the same roots produce a dull, heavy buildup that looks worse than the oil did.
- Too much dry shampoo: a grey cast and weighed-down roots — use less, wait, then brush through.
- Heat on already-dry lengths: re-curling everything dries the ends out; re-work only the flattened pieces.
- The same tight ponytail daily: constant tension in one spot causes breakage and headaches; rotate your anchor point.
- Ignoring the scalp: an itchy, flaky scalp is a wash signal, not a styling challenge — wash and reset.
1. The Lived-In Messy Bun
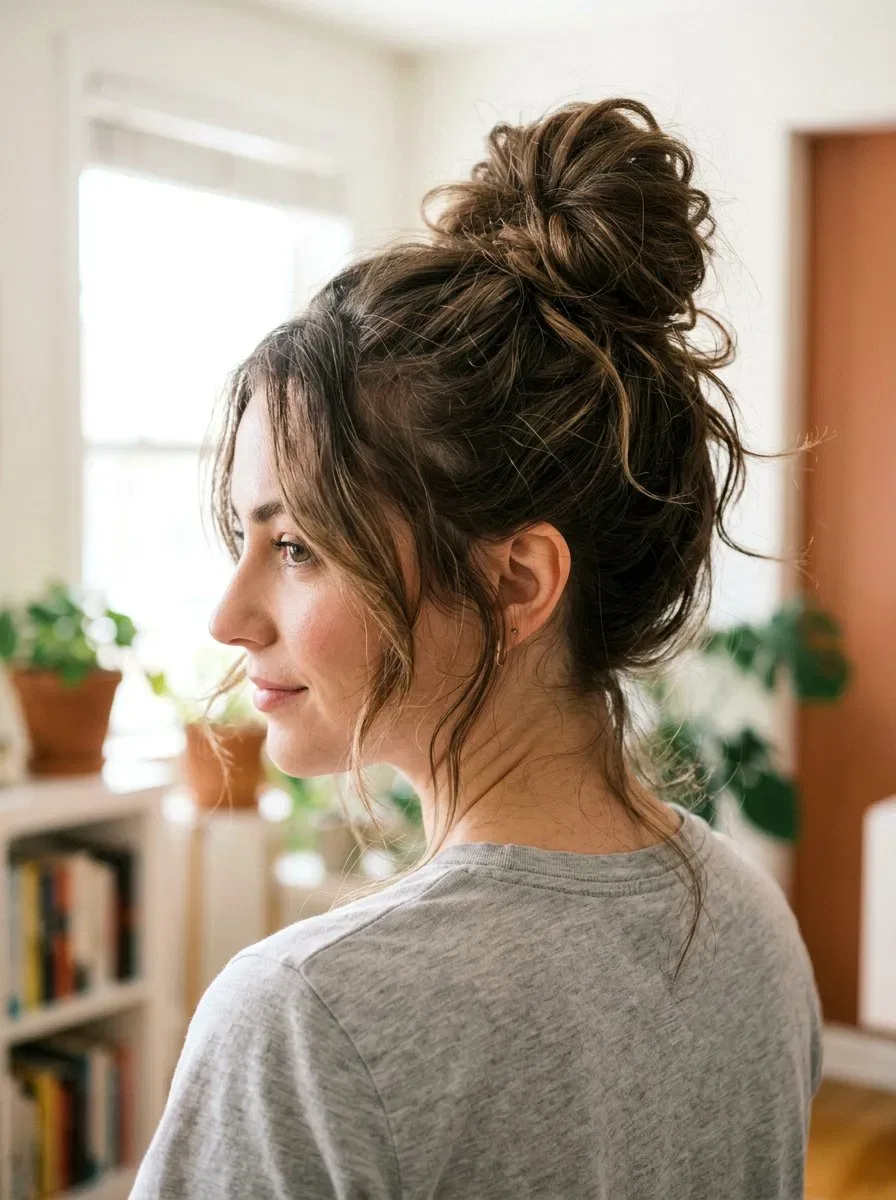
The lived-in messy bun is the default second-day style, and it works precisely because day-two hair has the grip to hold a loose shape. Gather the hair into a high or mid ponytail without brushing it smooth, twist it loosely, coil it around the base and pin it in two or three places — then pull a few pieces free around the face. The slight mess is the point: on day two, a perfectly sleek bun only highlights oily roots, while a soft, textured bun reads as deliberate and effortless. A little dry shampoo at the crown before you gather lifts the roots so the bun sits higher and fuller.
Time needed: 2–3 minutes. Best for: medium to long hair, all textures, mornings with no time to think. Common mistake: making it too neat — a messy bun that is over-pinned and over-smoothed just looks like a failed sleek bun. Leave the flyaways; they are doing the work.
2. The Textured Low Ponytail
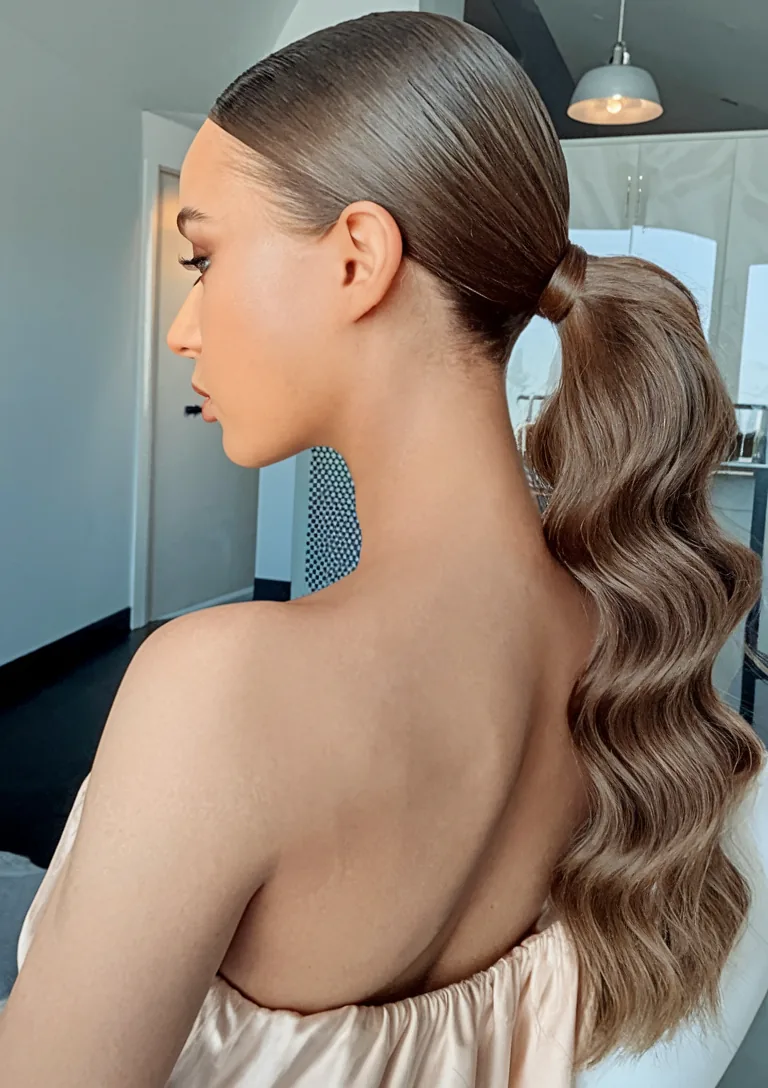
A low ponytail on day two has one big advantage over the same style on wash day: the hair has body. Gather it at the nape, secure it loosely, then gently pull at the hair above the elastic to create soft volume at the crown — day-two texture holds that lift all day, where clean hair would slide flat within an hour. Wrap a thin strand around the elastic to hide it, and let the tail keep yesterday’s waves instead of brushing them out. The result is polished without looking done, and it takes ninety seconds.
How to style it: dry shampoo at the roots, brush through, gather low, lift the crown, wrap the base. Best for: straight to wavy hair, office days, anyone who wants a low-effort style that still looks finished. What to ask a stylist: how to add long layers that give a low ponytail natural movement instead of a flat sheet.
3. The Braided Crown Refresh
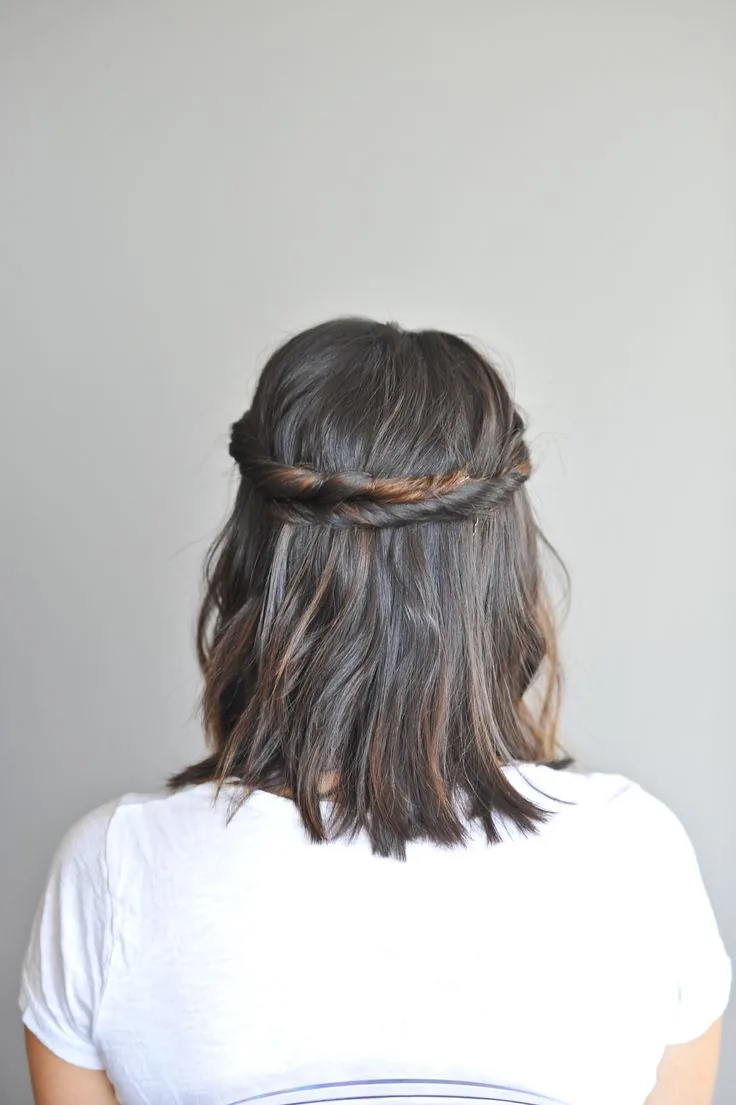
A braided crown is the best disguise for oily roots in this guide, because the braid starts right at the hairline and covers exactly the part of the head that shows the oil. Braid two small sections from behind each ear, bring them across the front hairline, pin them behind the opposite ear, and leave the rest of the hair down in its lived-in waves. The braid reads as a deliberate accessory, the roots are completely covered, and the lengths get to show off their day-two texture. It also works as a refresh for a braid that is already a day old — take the ends out, re-braid loosely, and it looks new.
Time needed: 5–6 minutes. Best for: medium to long hair, anyone whose front hairline gets oily first. Watch out for: braiding too tightly — a loose, slightly pancaked braid looks softer and hides more than a tight one.
4. The Slicked-Back Low Bun
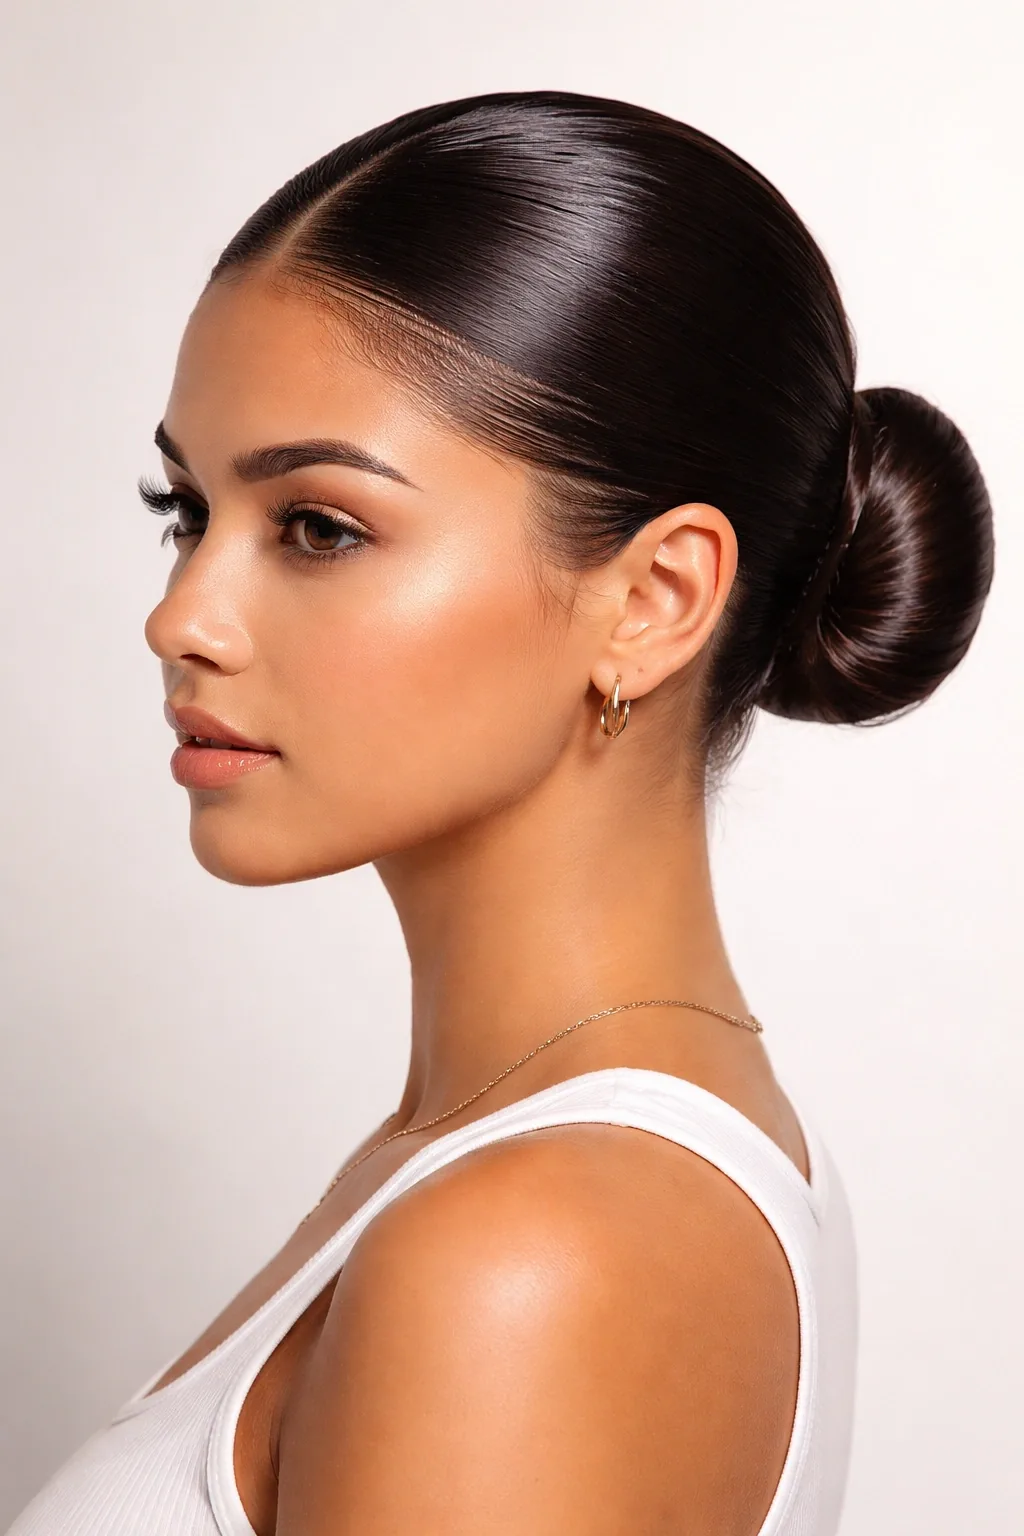
When the roots are too oily to fake with powder, the slicked-back low bun stops fighting the oil and uses it. Smooth the hair back with a little gel or pomade — the natural oil actually helps the sleek finish — gather it low at the nape, twist into a bun and pin. What would look greasy worn down looks intentional and editorial slicked back, because the shine is uniform and controlled instead of patchy. This is the style for the oiliest second days, the ones where dry shampoo has already done all it can.
- Pros: hides heavy oil completely; looks polished and expensive; holds all day.
- Cons: needs gel or pomade; not flattering if you dislike all your hair pulled off your face.
- Quick verdict: the rescue style for the worst second-day roots.
5. The Half-Up Top Knot
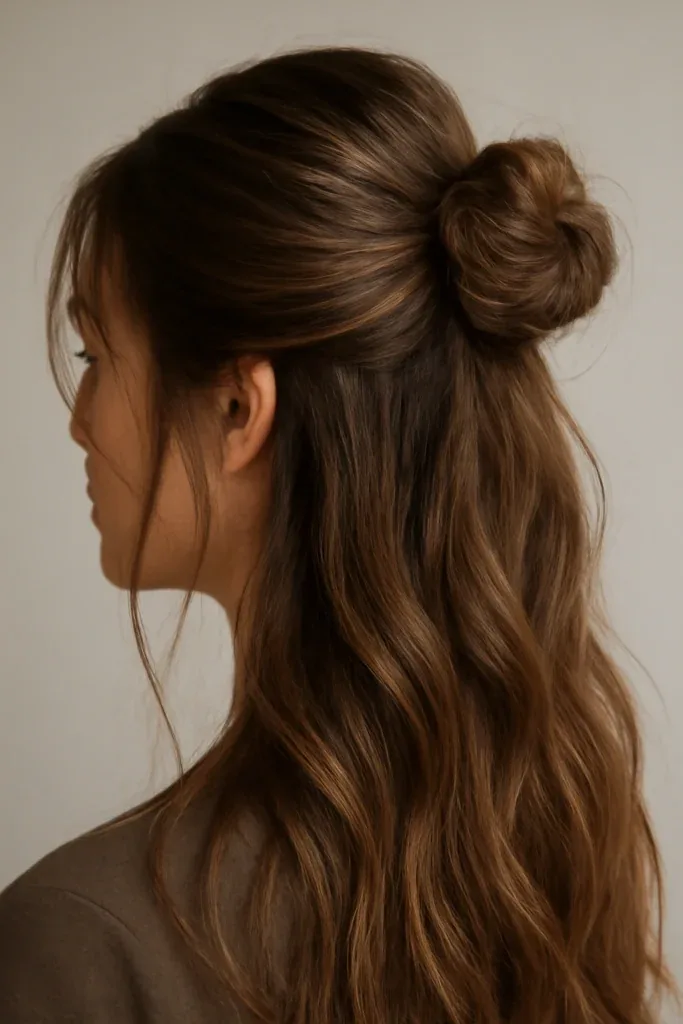
The half-up top knot takes the oiliest section of the head — the crown — and puts it in a bun, while the rest of the hair stays down and shows its waves. Gather the top half from temple to temple, twist it into a small knot at the crown, and pin it. The knot lifts the roots, hides the grease, and adds height, while the lengths keep the soft texture that day two does so well. It is the fastest genuinely stylish second-day option, and it works on nearly every length from a long bob upward.
Time needed: 2 minutes. Best for: wavy and straight hair, casual days, second-day hair that is oily only at the crown. Common mistake: taking too much hair into the knot — keep it to the top third, or the style loses its balance and the knot slides.
6. The French Braid Refresh
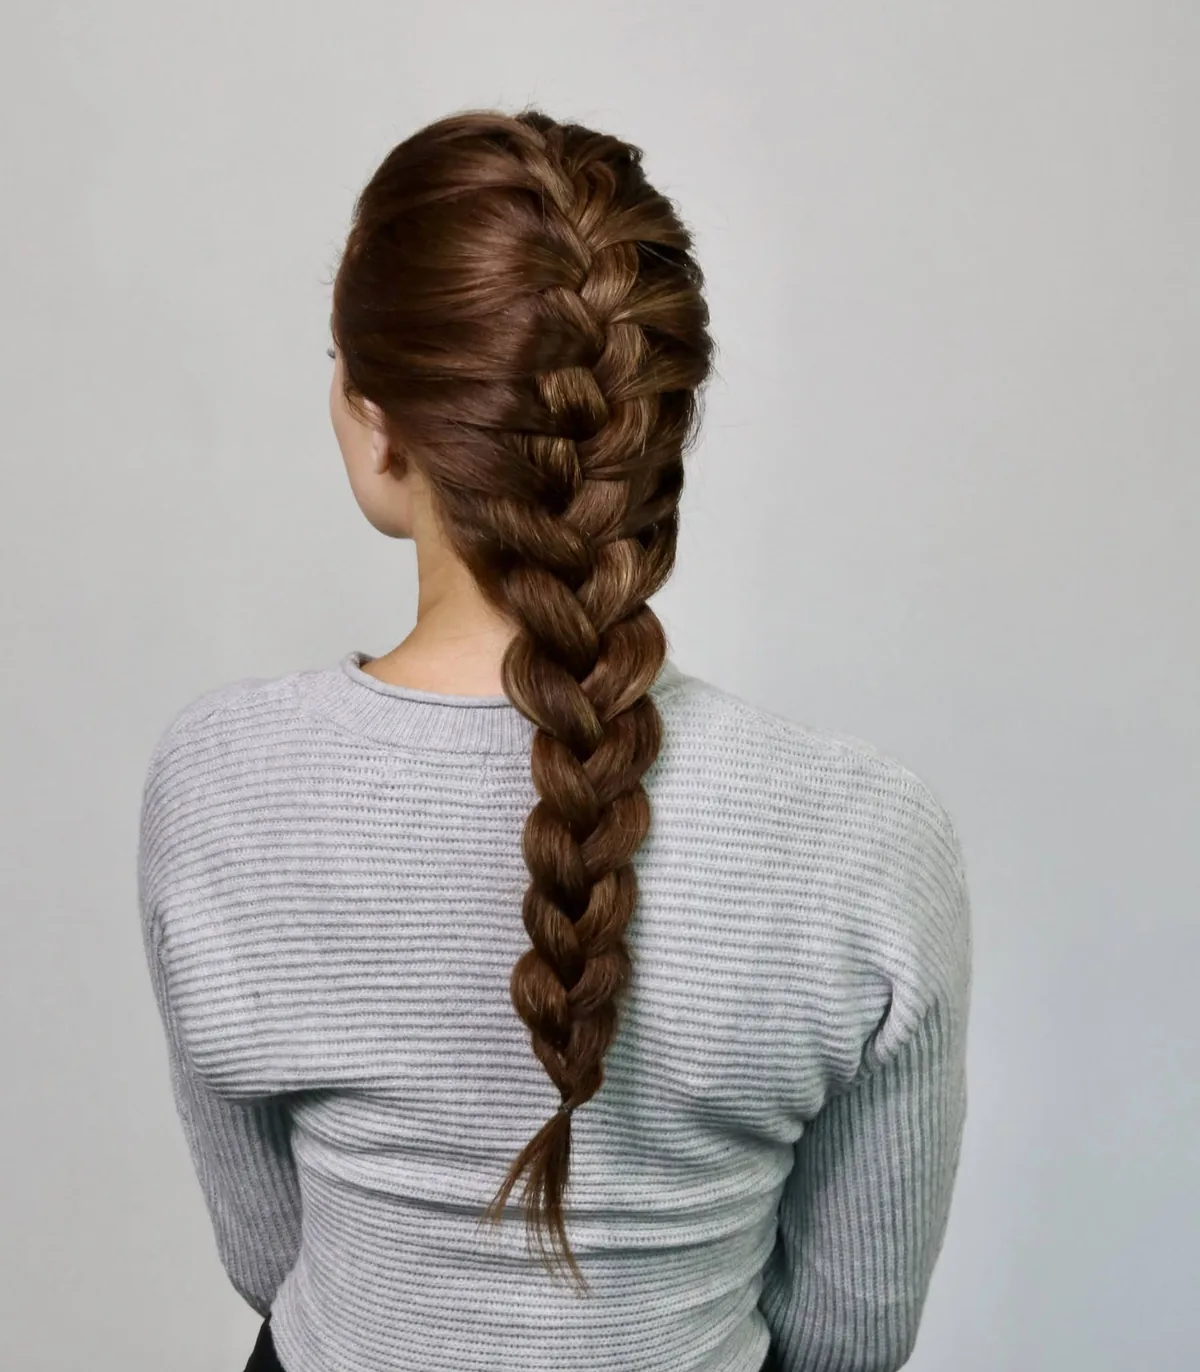
A French braid on day-two hair holds better than it ever does on clean hair, because the strands grip each other instead of slipping out of the plait. Start at the crown, add small sections as you go, and braid all the way to the ends. The braid contains the oily roots from hairline to nape, distributes the oil through the plait so no single section looks greasy, and leaves you with a style that survives the whole day without a touch-up. If yesterday’s braid is still partly in, do not take it out and start over — undo the bottom third, re-braid it, and the top stays intact.
How to style it: dry shampoo at the hairline first, then braid with moderate tension. Best for: medium to long hair, active days, anyone learning to braid — day-two grip is forgiving. What to ask a stylist: whether face-framing layers will escape the braid, and how to pin them back neatly.
7. Lived-In Waves With Dry Shampoo
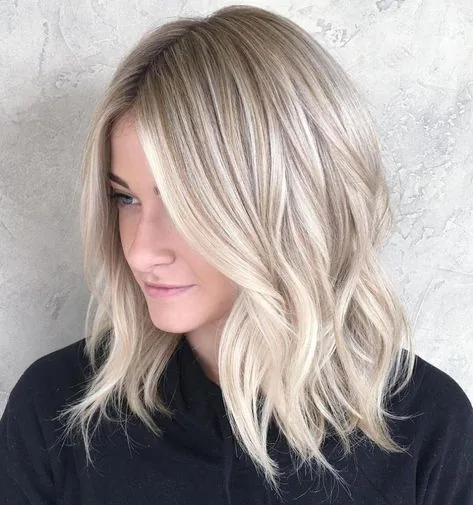
Wearing day-two hair down is entirely possible when the waves are still there and the roots are under control, and this is the style that proves it. Spray dry shampoo at the roots, wait two minutes, massage and brush through, then shake the hair out and scrunch the lengths with a little texturising spray. The waves you slept on become beach waves, the roots lift, and the whole head looks like a style you chose rather than a wash you skipped. The key is the brush-through: unbrushed dry shampoo leaves a visible cast, while brushed-through product disappears and leaves only volume behind.
Time needed: 4–5 minutes. Best for: naturally wavy hair, medium to long lengths, days when the roots are only mildly oily. Watch out for: re-curling everything — re-work only the flattened front pieces, as guide 5 explains, and let the rest stay as it is.
8. The Claw Clip French Twist

Gather the hair, twist it up the back of the head, fold it over and clamp a large claw clip over the fold. The claw clip twist is the fastest updo in this guide, and on day-two hair it holds better than on clean hair because the strands grip the clip’s teeth instead of sliding out. The twist hides the roots, lifts the crown, and leaves the ends tucked away, which is exactly what a second day needs. Add two bobby pins through the fold if the hair is thick or the day will be long, and pull one face-framing piece free on each side for softness.
- Pros: ten-second build; almost no scalp tension; easiest midday fix of any style here.
- Cons: a single clip can loosen on very thick hair; the fold adds bulk at the back.
- Quick verdict: the best emergency second-day style — keep a clip in your bag.
9. The Bubble Braid
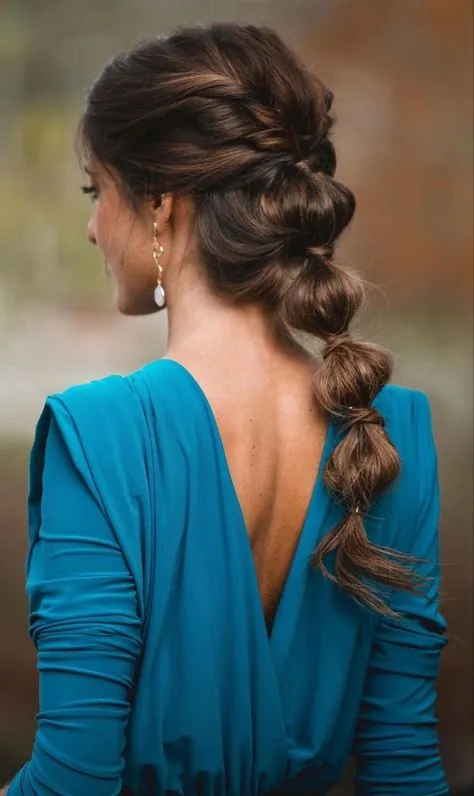
The bubble braid turns a low ponytail into a segmented style that hides a multitude of second-day sins. Secure a low ponytail, add small elastics at intervals down the tail, and gently puff each section between the elastics. The segments stop the tail from looking limp, add volume exactly where day-two hair tends to go flat, and keep the ends controlled. Because the style is built from elastics rather than braiding, it needs no skill at all — and the puffs make the hair look fuller than it is, which is a welcome illusion on a day when the roots are struggling.
Time needed: 3–4 minutes. Best for: medium to long hair, straight hair that goes flat on day two, anyone who cannot braid. Common mistake: too many elastics on fine hair — three or four segments is plenty, and over-segmenting makes the tail look fussy.
10. The Side-Swept Low Ponytail
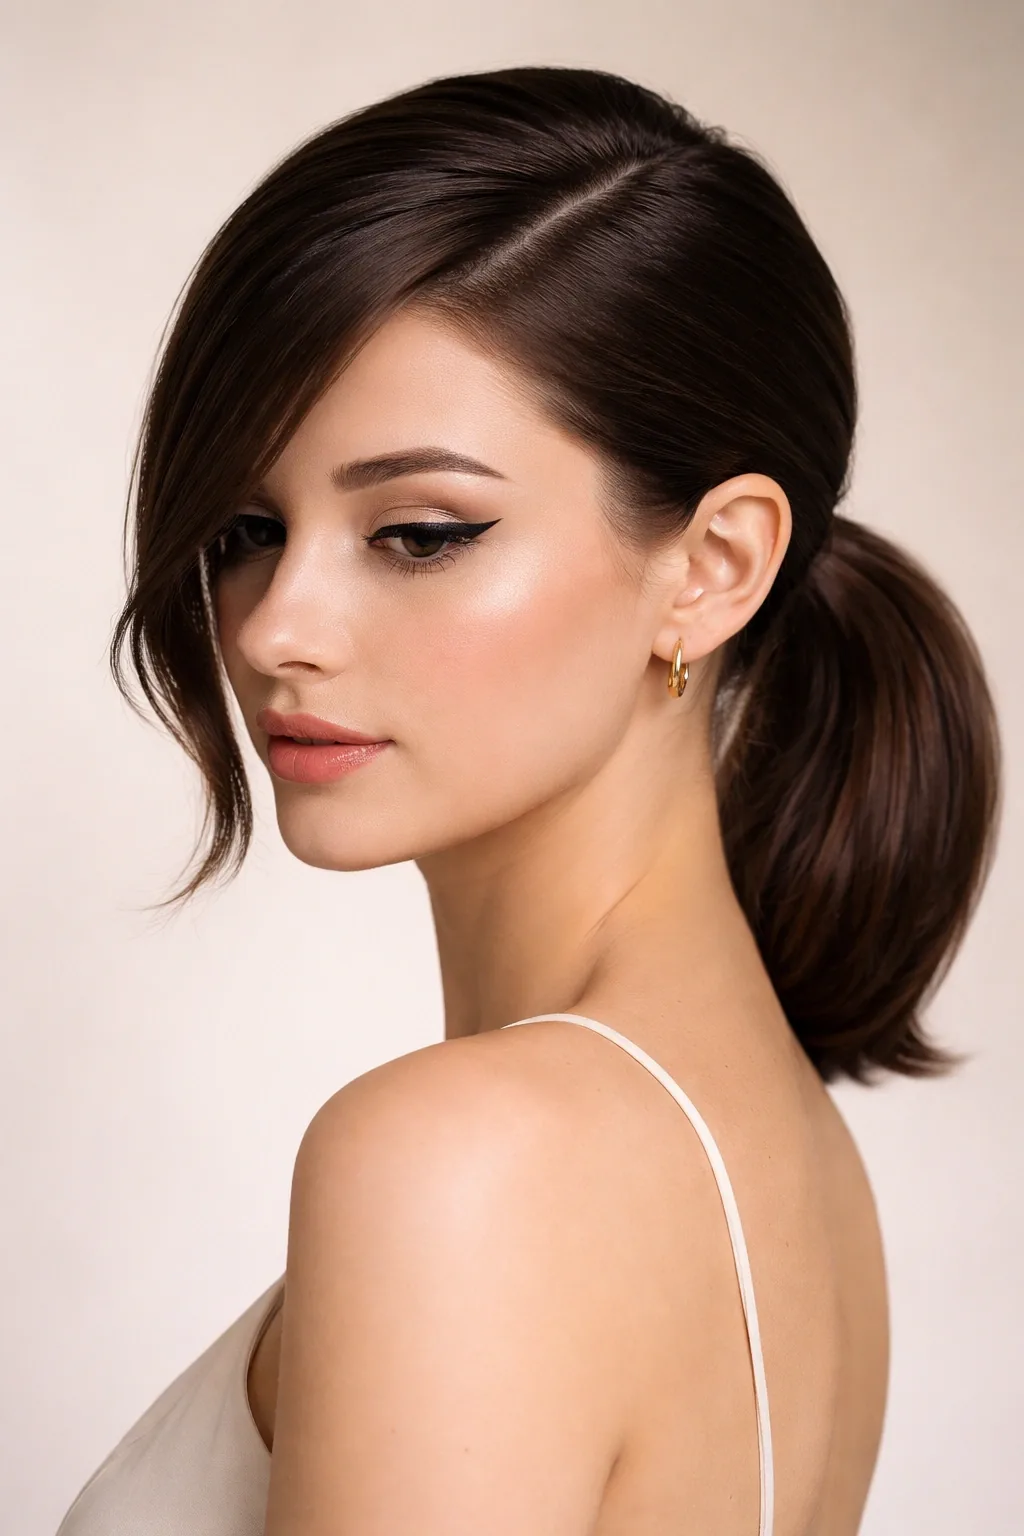
Sweeping the hair to one side changes the whole geometry of a second day: the part moves, the roots are redistributed, and the oil that was concentrated at the usual parting is suddenly spread across fresh hair. Gather the hair low over one shoulder, secure it, and let the tail fall forward. The deep side part adds volume at the crown — the exact spot that goes flat overnight — and the style looks romantic and intentional rather than like a cover-up. A few loose waves in the tail, refreshed with a curling iron for five seconds each, finish it.
How to style it: dry shampoo, deep side part on the opposite side from yesterday, gather low over the shoulder. Best for: medium to long hair, evening plans, anyone whose usual parting has gone flat and oily. What to ask a stylist: whether a deep side part suits your face shape for everyday wear, not just special occasions.
11. Double Dutch Braids
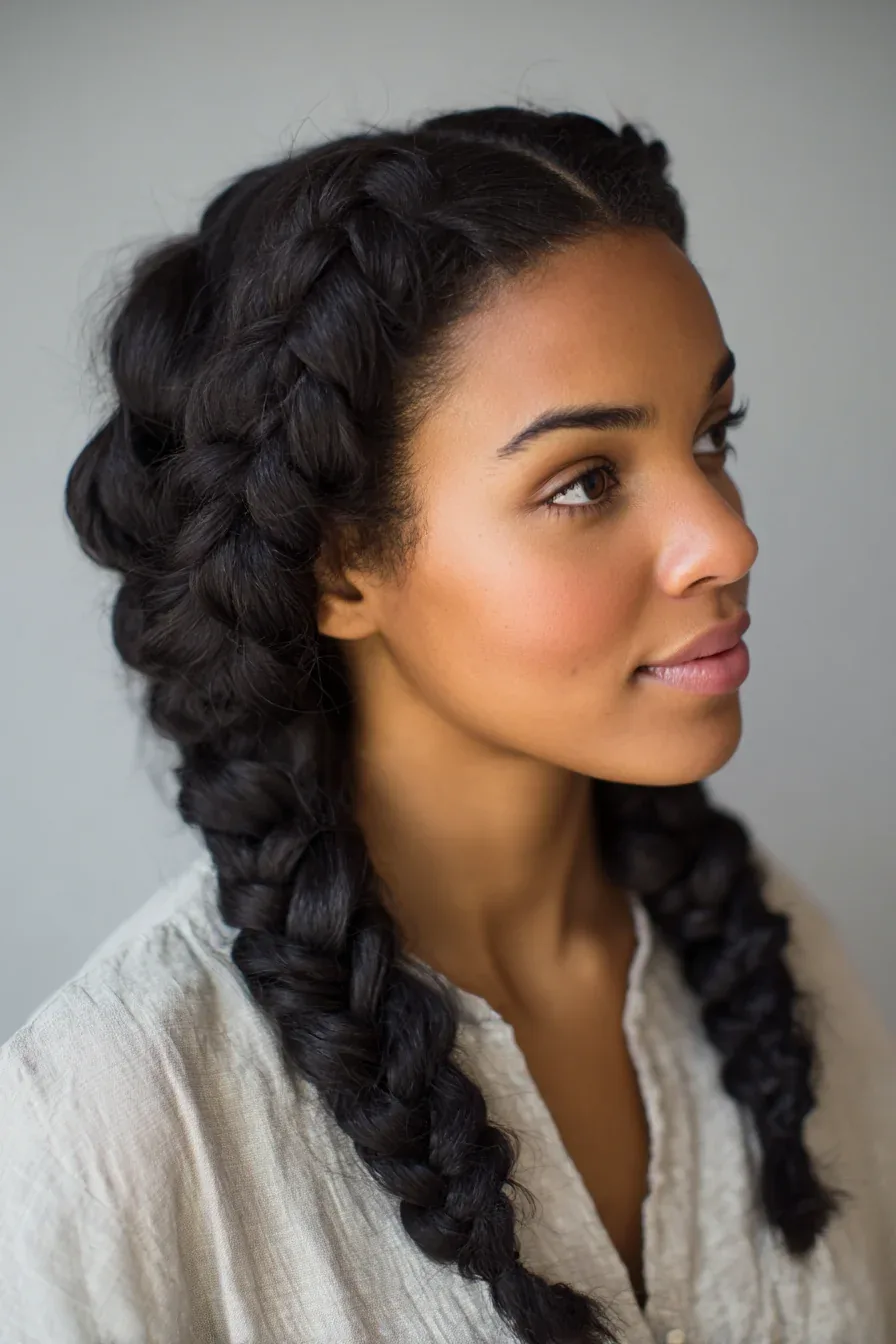
Two Dutch braids, one on each side, are the heavy-duty option for a second day when the roots are oily all over rather than just at the crown. Part the hair down the middle, braid each side from the front hairline to the nape, and secure the tails — or join them into one low bun for a tidier finish. Each braid carries half the weight, so the style holds without pulling, and the braids start right at the hairline on both sides, which means every oily root is woven into the plait and out of sight. The raised Dutch texture also adds visual interest that distracts from any dullness in the lengths.
Time needed: 7–9 minutes once practised. Best for: thick hair, layered cuts, long days when you cannot touch your hair. Watch out for: braiding too tightly at the hairline — firm is good, painful is not, and the braids hold even with moderate tension.
12. The Knotted Low Bun
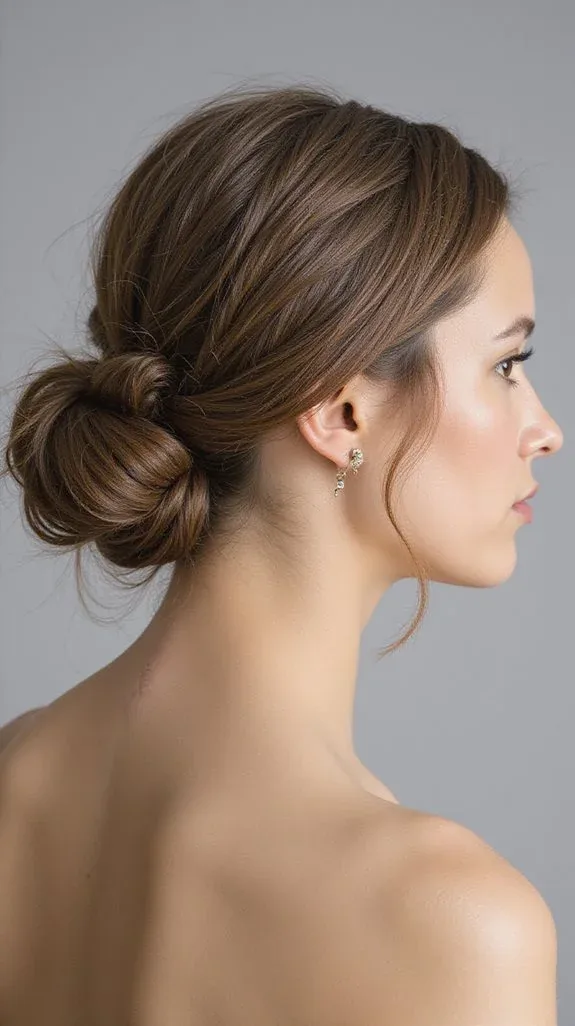
Divide a low ponytail into two sections and tie them in a simple knot, then another if the length allows, and secure with a small elastic hidden underneath. The knots act as physical locks that stop the style from sliding — useful on day two, when oil can make elastics slip — and they give the bun a textured, intentional look. The style needs no braiding skill, works on any hair long enough to knot, and survives the whole day because the knots settle and tighten slightly with movement rather than loosening. Undo them gently at night rather than pulling, to avoid tangles.
Time needed: 2–3 minutes. Best for: medium to long hair, anyone whose ponytails always slip on day two. Common mistake: knotting too high — keep the knot low at the nape, or the style loses its relaxed, lived-in feel.
13. The Scarf-Wrapped Ponytail
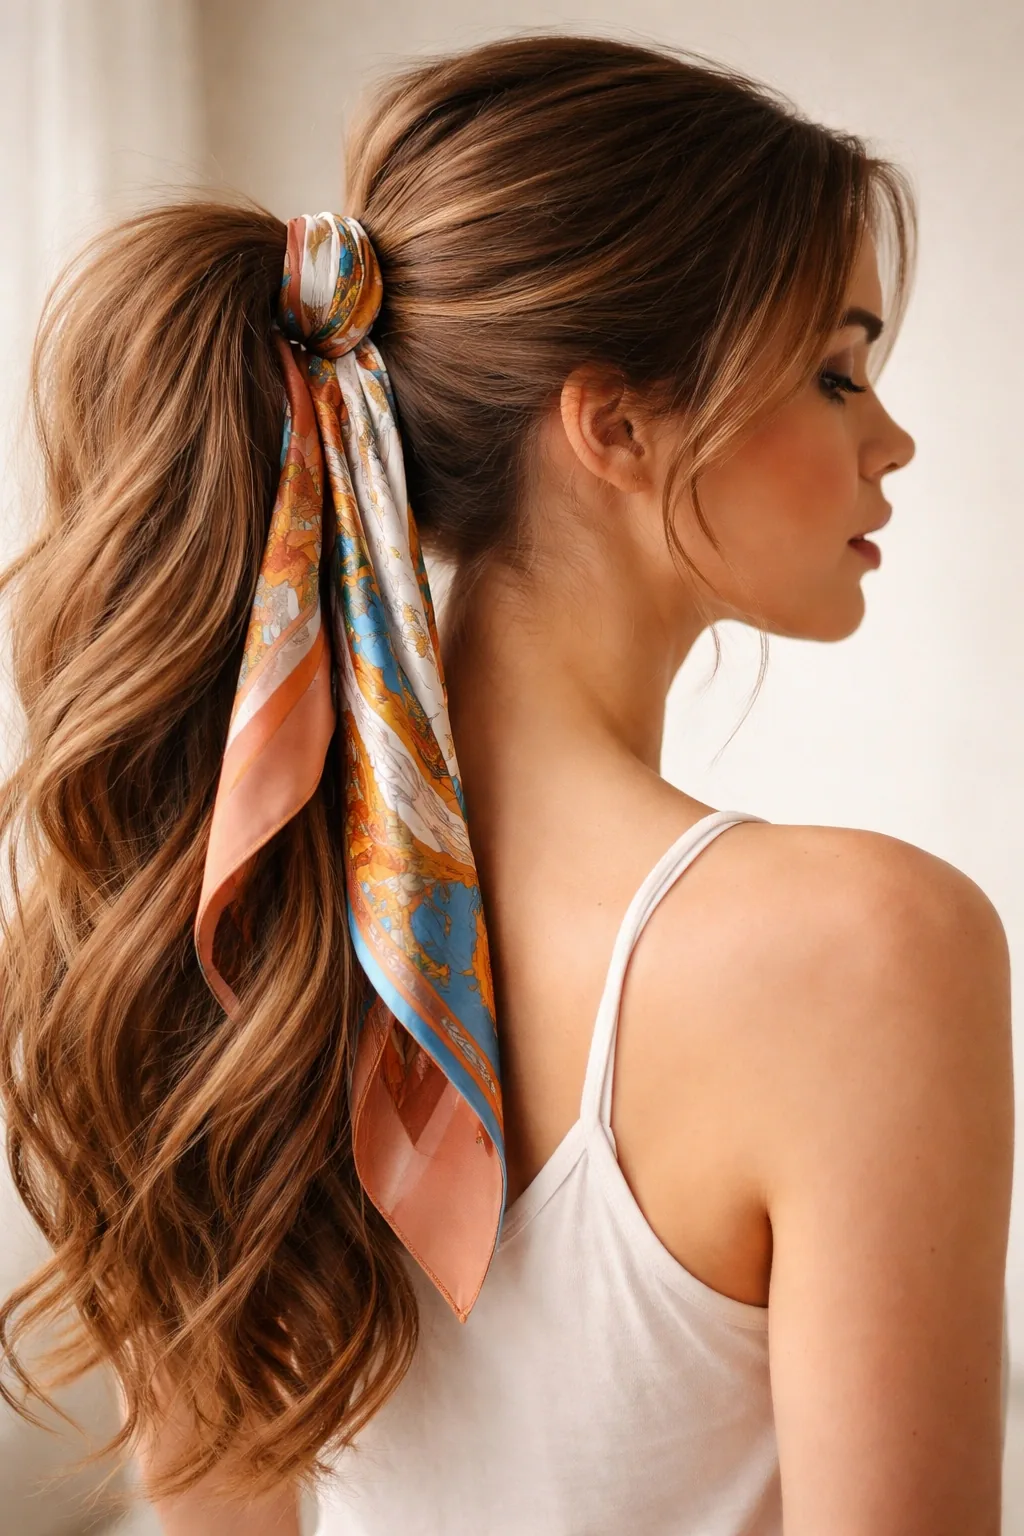
A narrow silk scarf wrapped around the base of a ponytail does three jobs on day two: it hides the elastic and the oiliest hair at the crown, it adds a layer of grip that stops the ponytail sliding, and it turns a basic style into something that looks deliberately accessorised. Gather the hair into a low or mid ponytail, wrap the scarf twice around the base, and tuck the ends in flat — no trailing ends. Choose a small, washable scarf in a colour that works with your outfit, and the whole style reads as a choice rather than a cover-up.
- Pros: hides oily roots at the base; adds grip; looks polished with almost no effort.
- Cons: a scarf that is too wide overwhelms the style; silk slips on very straight hair unless pinned.
- Quick verdict: the prettiest five-minute rescue for a ponytail day.
14. Overnight Braid Waves
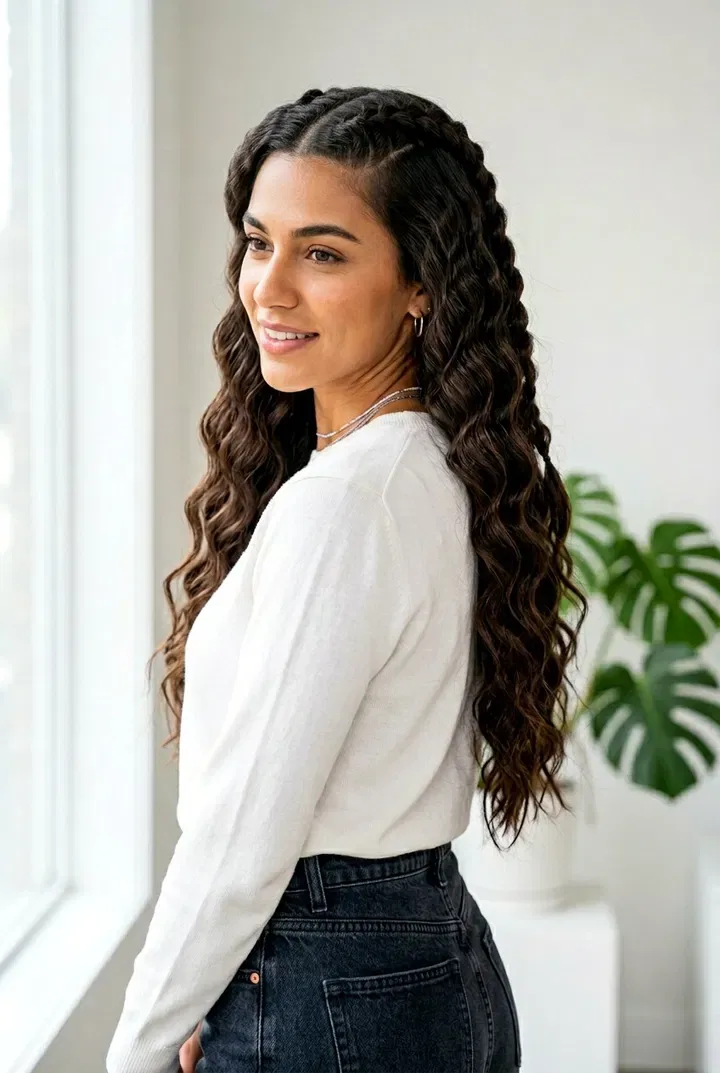
Overnight braid waves are the style you build the night before and wake up wearing, which makes them the laziest second-day option of all. Before bed, mist the hair lightly, braid it into one or two loose braids, and secure the ends. In the morning, take the braids out, shake the hair, add dry shampoo at the roots and a little texturising spray through the lengths. The waves are soft, even and heat-free, and because they were formed overnight, they hold their shape far better than waves made in a morning rush. Two braids give tighter waves; one loose braid gives a gentle bend.
Time needed: 3 minutes at night, 2 minutes in the morning. Best for: straight to wavy hair, anyone who wants to skip morning styling entirely. Watch out for: braiding soaking-wet hair — damp is fine, dripping wet gives frizz and takes too long to dry overnight.
15. The Low Chignon With Texture
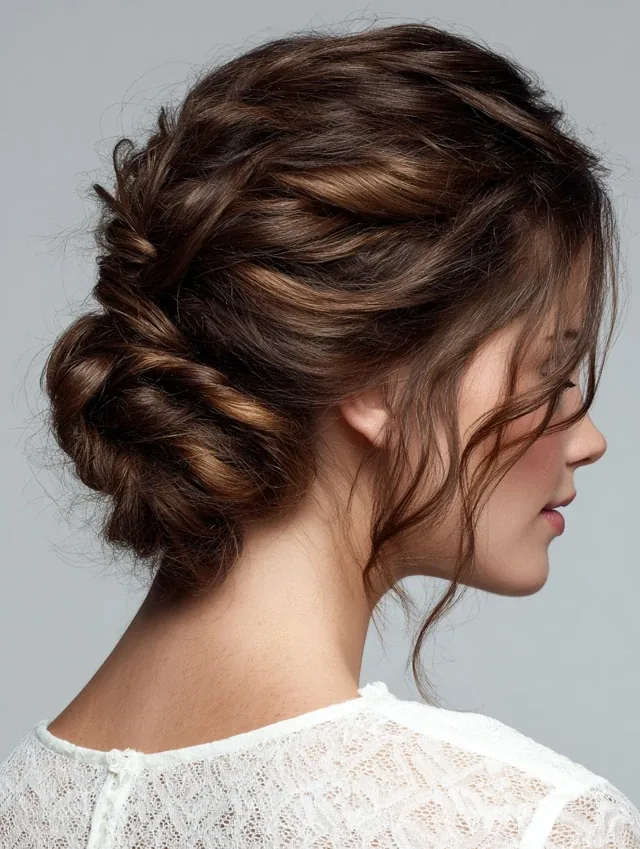
The low chignon is the grown-up version of the messy bun: the same low, nape-sitting shape, but rolled and tucked so it reads as elegant rather than casual. Gather the hair at the nape, twist it upward into a roll, tuck the ends in and pin along the fold. On day-two hair the roll holds its shape with fewer pins than on clean hair, and the natural texture stops it looking too stiff. Leave two soft pieces free at the front and the chignon works for a wedding guest as well as a workday — which is exactly why it earns its place on a second day when you have somewhere to be.
How to style it: dry shampoo at the roots, gather low, roll upward, pin along the fold, loosen the front pieces. Best for: shoulder-length to long hair, formal days, fine hair that slips out of elastics. What to ask a stylist: how to pin a chignon so it survives a full evening without a mirror check.
16. The Rope Braid Ponytail
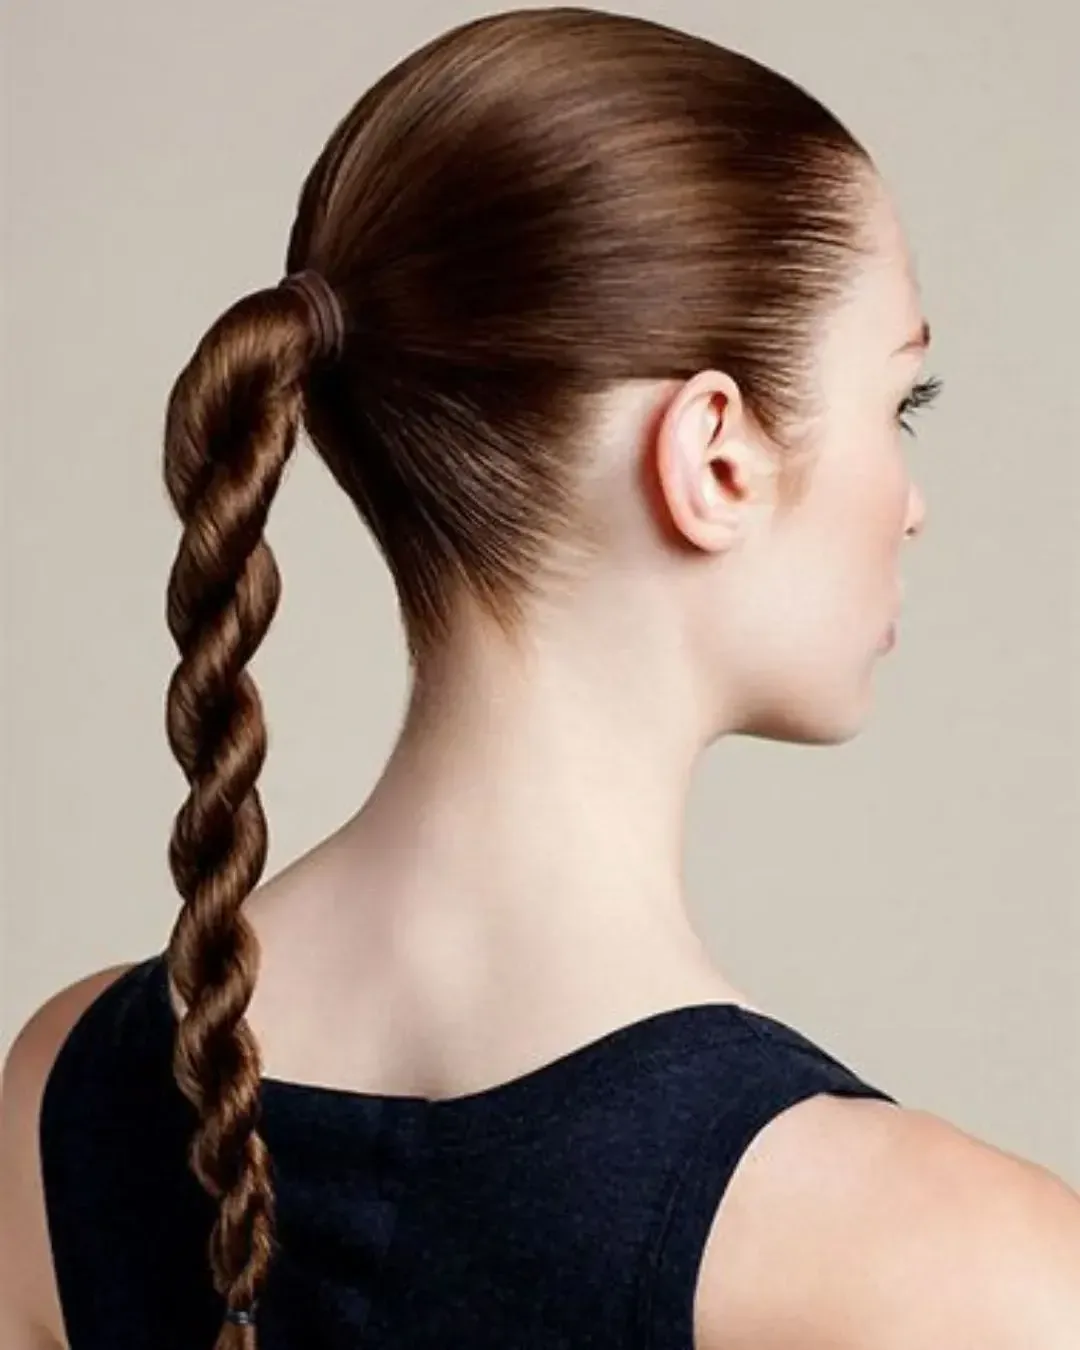
A rope braid is the simplest braid there is — two sections twisted in the same direction, then twisted around each other in the opposite direction — and as a ponytail it is one of the most secure second-day styles. Gather into a low ponytail, divide into two, twist each section clockwise, then wrap them around each other anticlockwise and secure. The opposing twists lock the hair together, so the braid barely loosens all day, and the rope texture keeps the tail compact instead of swinging free. It takes three minutes, needs no braiding skill, and the grip of day-two hair makes it even more reliable.
Time needed: 3–4 minutes. Best for: anyone who struggles with three-strand braids, long hair, humid days when braids frizz. Watch out for: letting go mid-twist — the sections unwind instantly, so keep tension until the elastic is on.
17. The High Pony With Volume
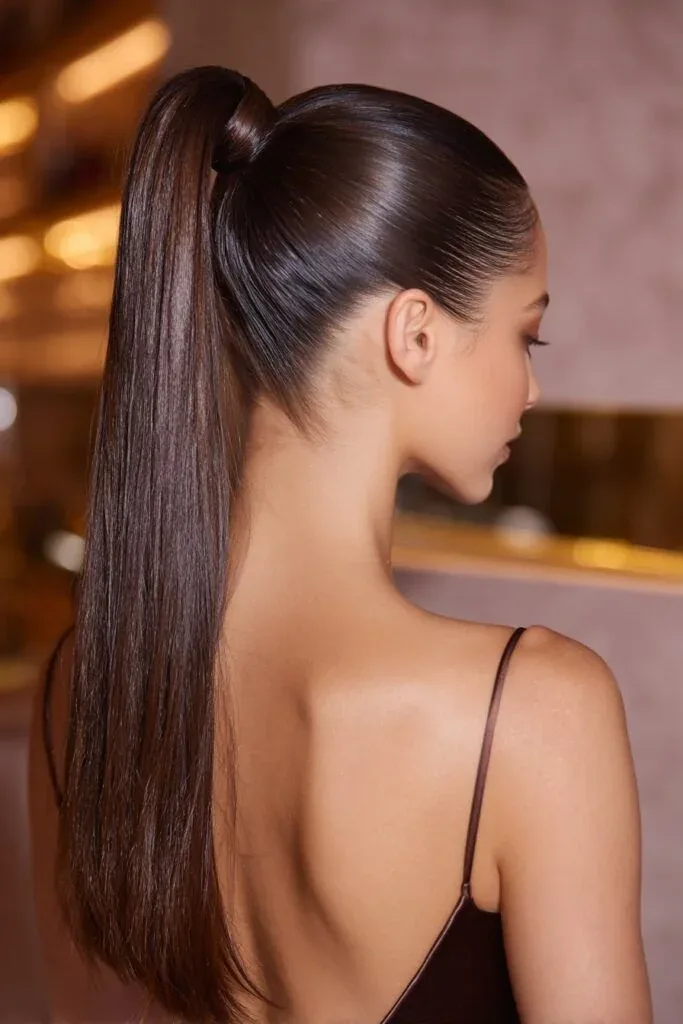
A high ponytail on day two has a secret weapon: the roots already have the lift that clean hair needs backcombing to achieve. Spray dry shampoo at the crown, flip the head upside down, gather high and secure firmly, then gently pull at the hair above the elastic for height. The tail keeps yesterday’s texture, which stops it looking flat and stringy, and the height of the ponytail pulls the face upward in a way a low style never does. Wrap a strand around the base to hide the elastic, and the style goes from gym to evening without a change.
- Pros: instant lift and energy; shows off day-two texture; easy to refresh by re-gathering.
- Cons: a tight high pony can cause a headache by afternoon — keep the tension moderate and vary the anchor point daily.
- Quick verdict: the best high-energy second-day style, best in moderation.
18. The Fishtail Braid, Loosened
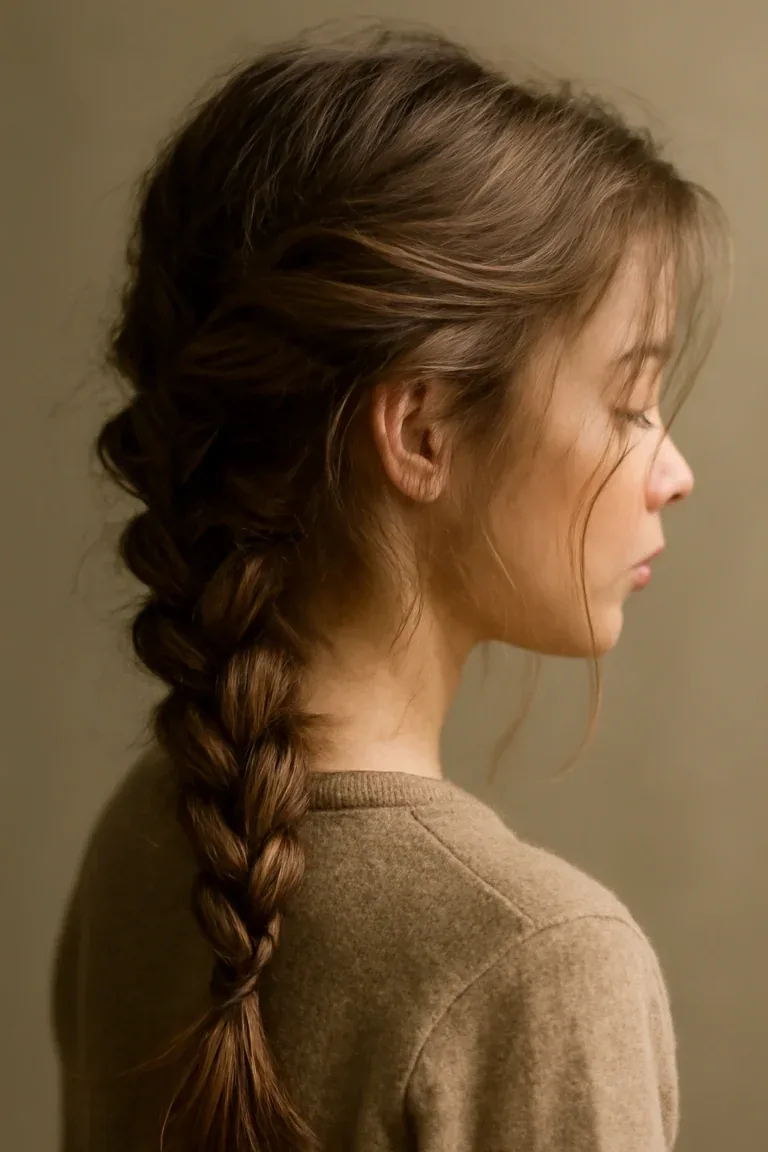
The fishtail braid looks intricate and holds like a seatbelt, and loosening it — gently pulling at the edges of the plait once it is finished, a technique called pancaking — is what makes it a second-day style rather than a formal one. Built from two sections with small pieces crossed over, it creates a dense, flat plait that resists loosening better than a three-strand braid. Start with a low ponytail to make it easier on your own head, braid to the ends, then pancake the edges for softness and volume. The flat profile and the woven texture keep even silky day-two hair contained without much product.
Time needed: 6–9 minutes. Best for: long, silky or slippery hair that escapes from other braids. Skip it if: you are short on time — a standard braid is faster and nearly as secure.
19. The Pinned-Back Bob

Short hair has its own second-day problem: a bob that looked sharp yesterday goes flat and piecey overnight, and there is not enough length to gather into a bun. The pinned-back bob solves it with two flat clips and a little product. Smooth the front sections back with a light styling cream, pin the longer top sections back behind the ears, and let the back keep its shape. The clips hold the greasiest front pieces away from the face, the crown gets a lift from the pinning, and the bob’s natural texture does the rest. A narrow fabric headband is a good alternative on days when clips slip.
Time needed: 2 minutes. Best for: bobs and lobs, short hair, growing-out cuts. Common mistake: using bulky decorative clips — flat, smooth clips sit invisibly and do not dig in.
20. The Headband Tuck
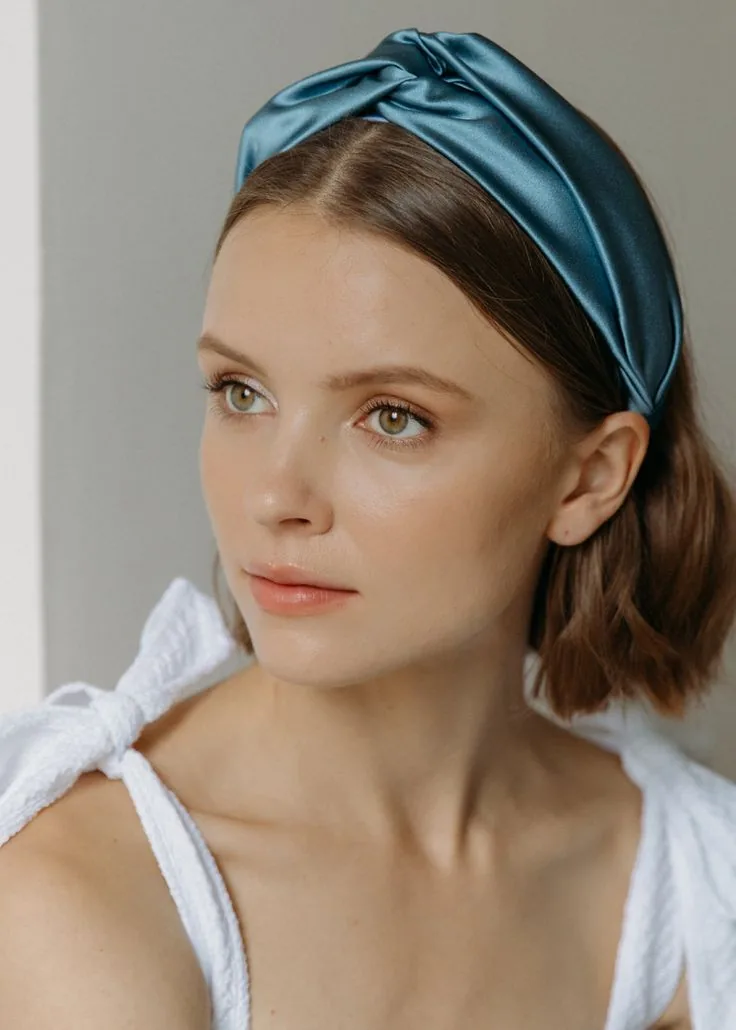
A wide fabric headband does two jobs on day two: it holds back the front hairline — the first place oil shows — and it gives the style a finished frame that makes the rest of the hair look deliberate. Put the headband on first, smooth the front hair back under it, then either leave the lengths down in their waves or tuck the ends up under the band at the nape for a faux bob. The band must be flat and fabric-covered; a hard or ridged band digs in and leaves a mark across the forehead. This is a particularly good option for growing out a fringe, since the headband solves the one problem braids cannot.
Time needed: 2–3 minutes. Best for: growing-out fringes, wavy hair that escapes at the front, bad-root days. Watch out for: headband slippage on silky hair — a band with a silicone grip strip stays put.
21. The Gibson Tuck Refresh
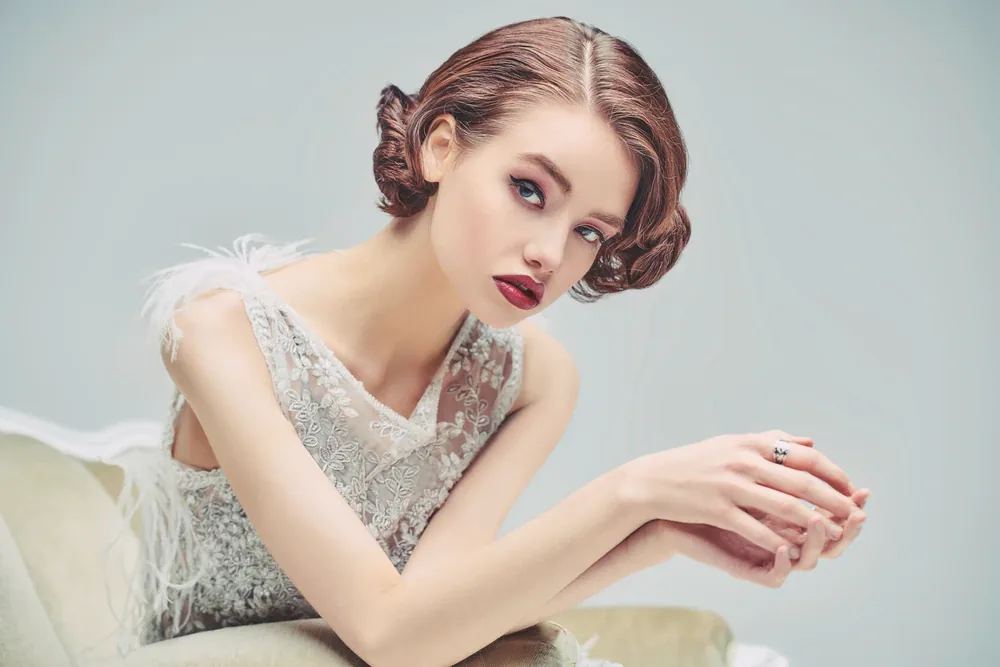
The Gibson tuck is a vintage roll with a modern second-day advantage: the ends are completely hidden inside the roll, so nothing escapes, ever. Gather the hair into a low ponytail, loosen the elastic slightly, part the hair above the elastic, and tuck the whole tail up through the gap, rolling it inward until it sits as a neat horizontal roll at the nape. Pin along the roll. The style is gentle on the hair — no tight coil, no twisting — and it suits medium-length hair that is too short for a full bun. Day-two texture helps the roll hold its shape with fewer pins than clean hair needs.
- Pros: ends fully hidden; gentle tension; elegant finish; works on medium hair.
- Cons: needs several pins on thick hair; can loosen if the initial ponytail is too tight.
- Quick verdict: the prettiest secure style in this guide, and easier than it looks.
22. The Twisted Side Bun
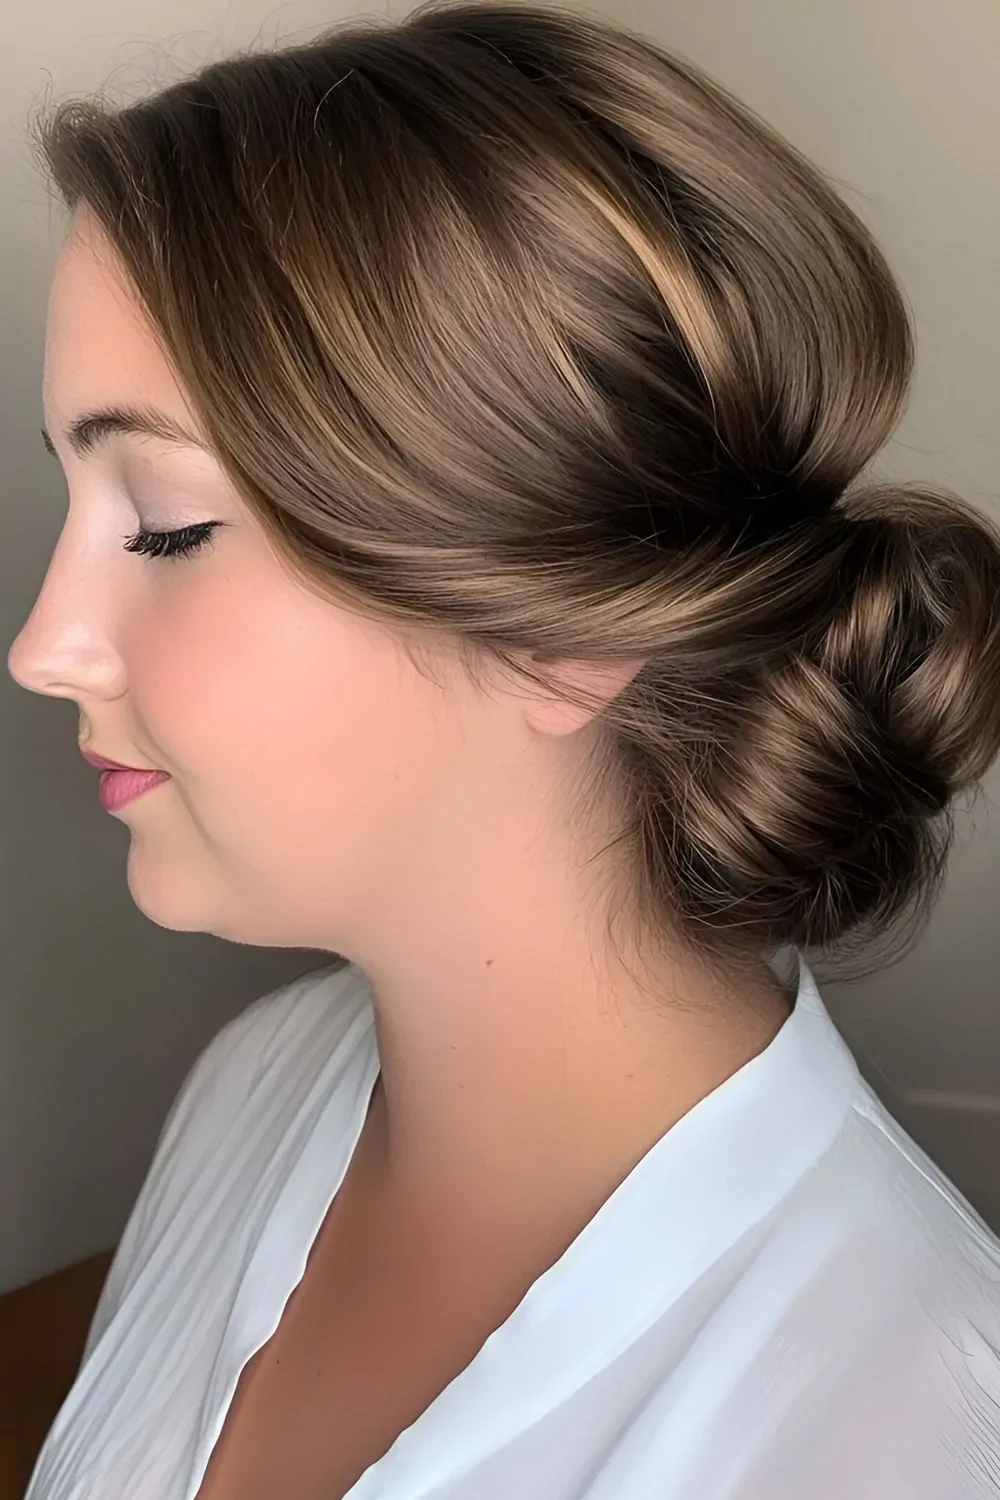
Gather the hair to one side at the nape, twist it into a rope, coil the rope into a bun and pin it. The side placement is the clever part: it moves the weight off-centre, so the bun does not press against a headrest or a pillow, and the diagonal line of the twist adds visual interest that a centred bun lacks. The twist itself gives the style structure — day-two grip keeps the rope from unravelling — and the low side position hides the roots on the fuller side of the part. It suits all textures and is especially flattering on oval and heart-shaped faces, where the asymmetry softens the forehead.
Time needed: 4–5 minutes. Best for: medium to long hair, face-framing layers, evenings out. Watch out for: placing the bun too high — low and close to the nape reads elegant, high and wide reads playful.
23. The Messy Top Knot With Face-Framing Pieces
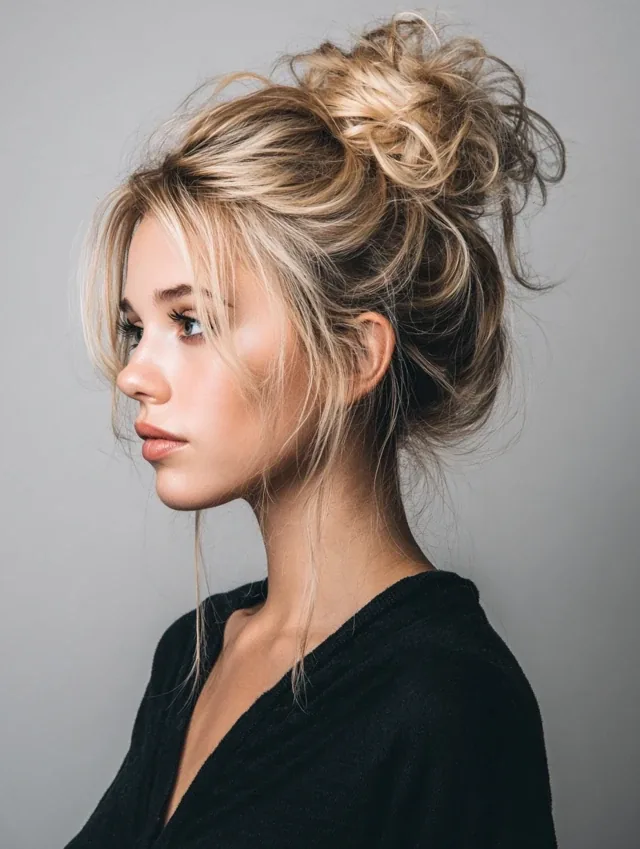
The messy top knot is the high version of section 1, and the face-framing pieces are what keep it from looking severe. Gather the hair high, twist loosely, coil and pin, then deliberately pull two pieces free at the front and let them fall. Those pieces soften the face, hide the hairline — where oil shows first — and make the whole style look relaxed rather than scraped back. A little dry shampoo at the crown before gathering gives the knot height, and the day-two grip means it stays up with three pins instead of six. This is the style for a second day that still has plans.
Time needed: 3 minutes. Best for: medium to long hair, round and square faces that benefit from height, casual-to-smart days. Common mistake: pulling the front pieces too wide — two narrow pieces frame the face; two thick ones just look like escaped hair.
24. The Milkmaid Braid Refresh
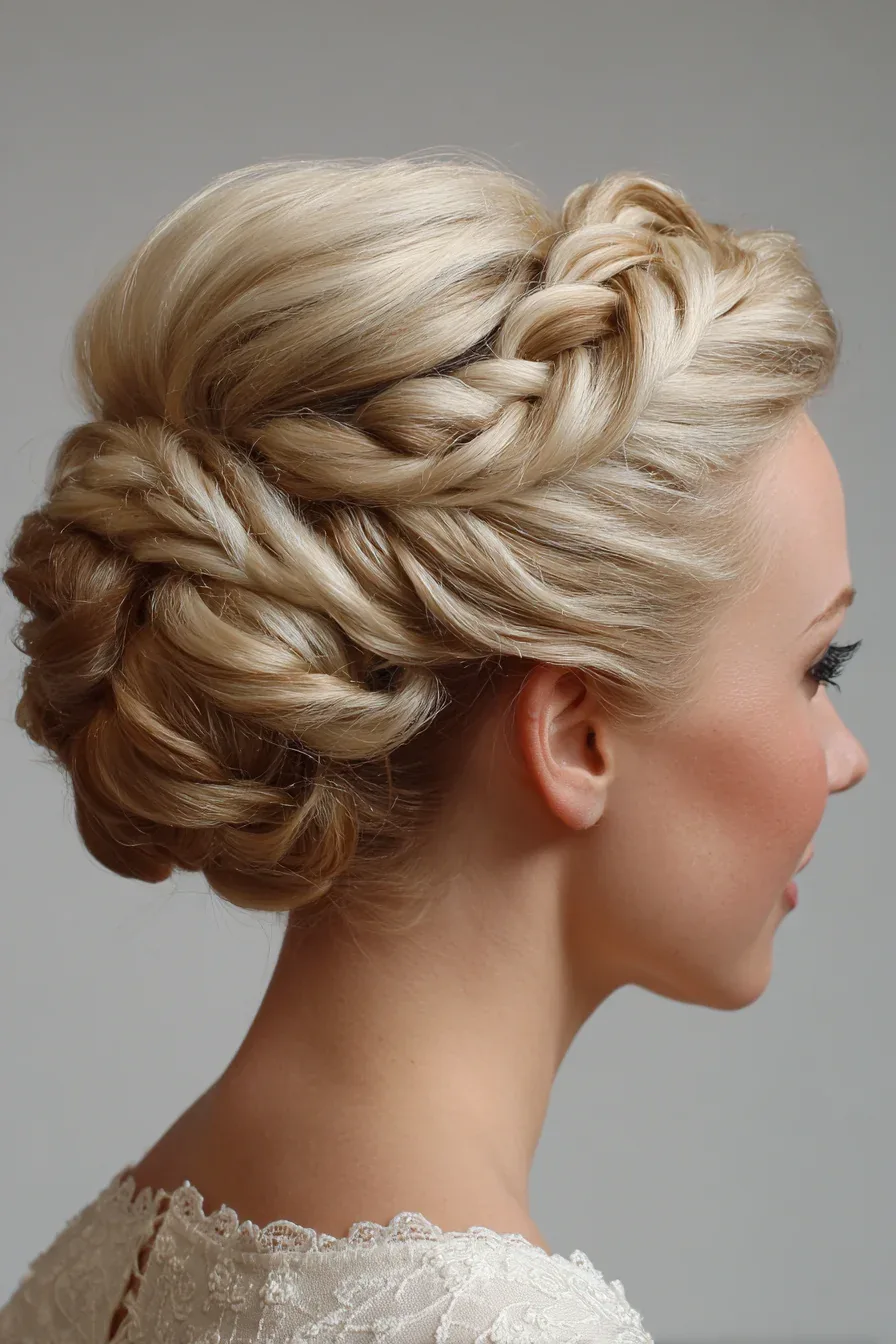
Two braids wrapped up and over the crown, pinned into a halo, give the milkmaid braid its name and its second-day credentials: every strand is up, the style sits close to the skull, and the braided structure holds for hours without attention. Braid two low pigtail braids, cross them over the top of the head, tuck the ends under and pin generously. The result covers the roots completely, keeps the hair off the neck, and looks charming enough that nobody is thinking about your wash day. It works best on medium to long hair; on very long hair the braids overlap more than once, which only makes the style more secure.
Time needed: 6–8 minutes. Best for: medium to long hair, long days, anyone who wants a style that looks special. Watch out for: pinning the ends properly — an untucked braid end is the one thing that will work loose by afternoon.
25. The Sleek Middle-Part Ponytail
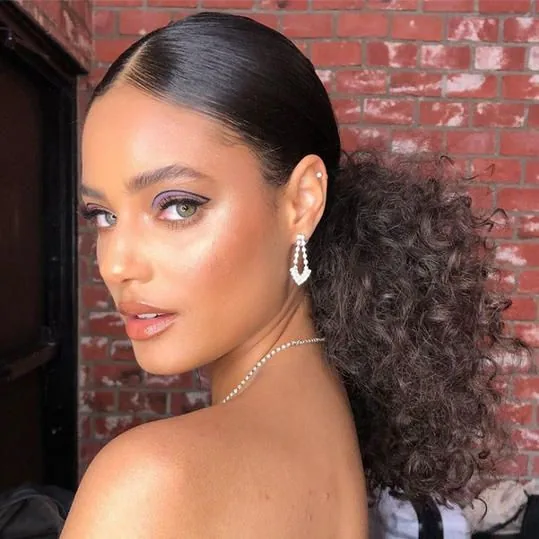
A middle part with a sleek, low ponytail is the minimalist answer to a second day: instead of hiding the oil, the style makes it look like shine. Part the hair cleanly down the middle, smooth both sides back with a little serum or gel, gather low and secure. The symmetry is the point — a neat centre part with smooth sides looks deliberate and editorial, and the ponytail keeps the lengths controlled. This only works when the roots are smoothed uniformly; patchy oil with flyaways just looks greasy. A boar-bristle brush is the tool that makes the difference, smoothing everything into one clean surface.
How to style it: centre part, serum through the roots, brush smooth, gather low, wrap the base. Best for: straight hair, strong features, minimal-look days. Skip it if: the roots are clumped rather than evenly oily — a textured style will hide them better.
26. The Curly Pineapple Refresh
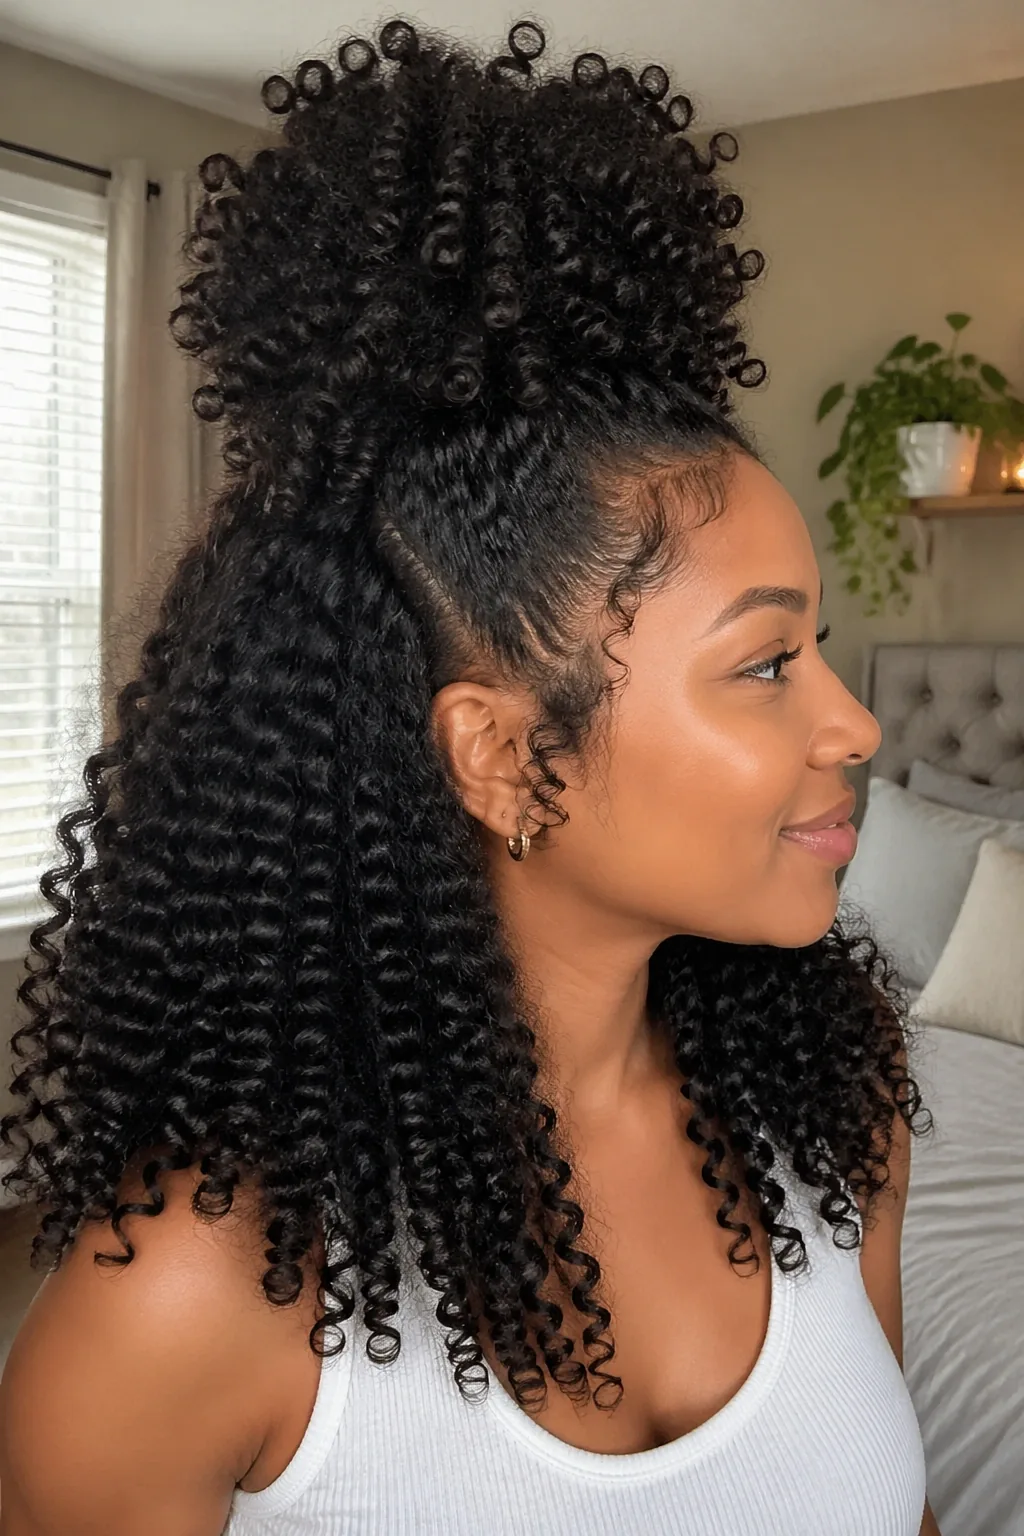
Curly hair has its own second-day logic, and the pineapple refresh respects it. Mist the curls lightly with water or a curl-refresh spray, scrunch in a little leave-in conditioner or curl cream, and gather the curls loosely at the very top of the head with a soft scrunchie, letting them fall forward and outward. The loose, high gather preserves the curl pattern instead of crushing it, keeps every strand off the neck, and revives flattened curls without a wash. The key word is loose: the scrunchie should hold the hair, not compress it, so the curls keep their shape and the scalp stays comfortable.
Time needed: 3–4 minutes. Best for: curly and coily hair, curl-pattern preservation, second-day curls that went flat overnight. Watch out for: ordinary elastics, which snag and break curls — use a scrunchie, a satin band or a spiral tie.
27. The Half-Up Braided Crown
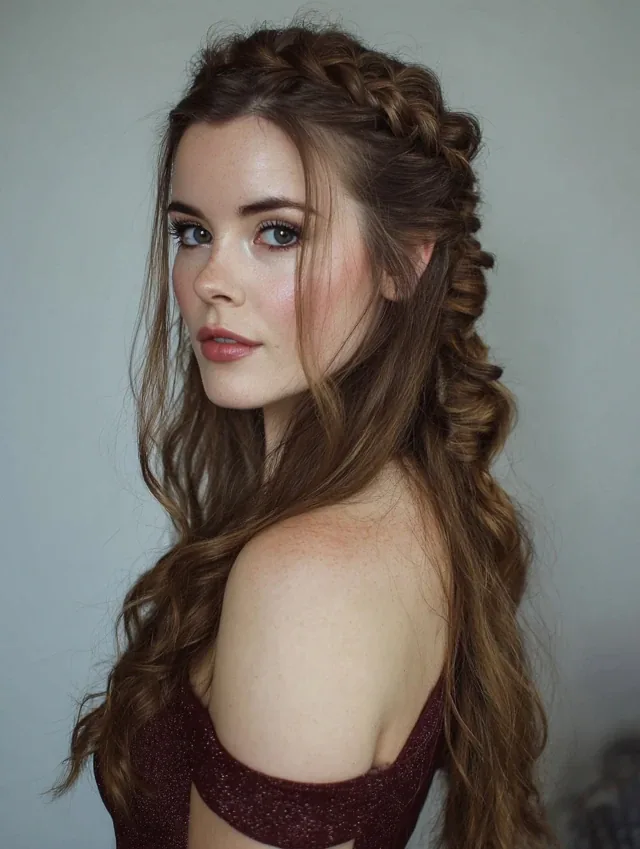
Braid a small section from behind one ear, bring it across the front hairline like a headband, pin it behind the other ear, and leave the rest of the hair down. The braided crown solves the front-hair problem permanently for the day — no fringe falling forward, no flyaways around the face, no oily hairline on show — while the lengths stay down and show their waves. The combination looks thoughtful and finished, and it works on any hair long enough for a small braid. It is particularly useful for curtain bangs or face-framing layers, which are the pieces most likely to escape from every other style in this guide.
Time needed: 4–5 minutes. Best for: bangs, face-framing layers, anyone constantly pushing hair out of their face. Watch out for: braiding the crown too tightly — it should lie flat, not pull the hairline.
28. Low Double Buns, Lived-In

Two small buns at the nape, one on each side, split the hair’s weight in half and sit completely flat — which makes them an unexpectedly practical second-day style. Part the hair down the middle, coil each side into a small loose bun, and pin each in two or three places. The two-bun structure is inherently balanced, neither bun can rotate far because the other braces it, and it handles very thick hair far better than one large bun. The style also keeps the nape clear and cool, and it works on hair too short for a single bun, since each side needs only enough length for a small coil. Keep the buns low and close to the centre for the neatest look.
Time needed: 4–5 minutes. Best for: thick hair, short-to-medium hair, warm days. Common mistake: placing the buns too high or too far apart — low and close reads intentional, high and wide reads playful.
29. The Wrapped High Bun
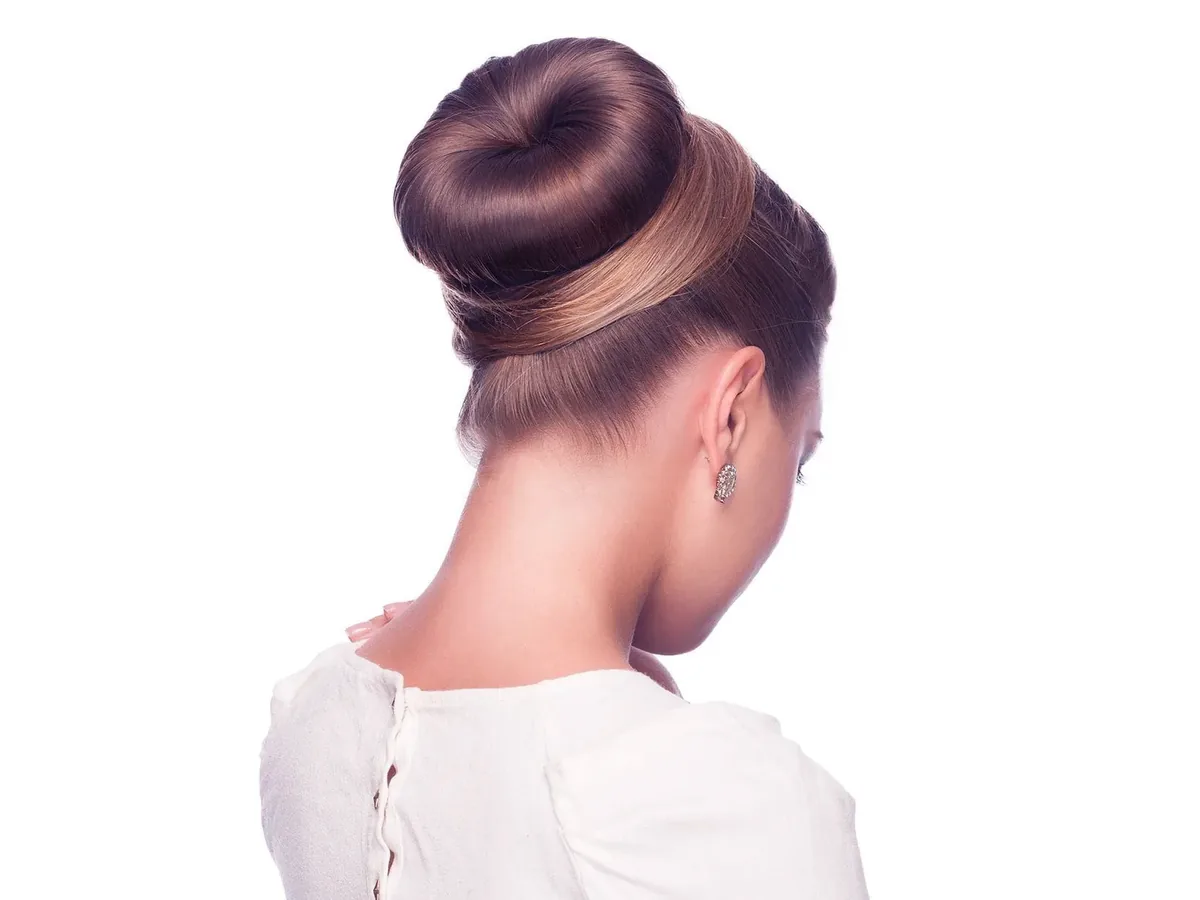
Wrap a thin strand from the ponytail around the base of a high bun and the whole style upgrades from casual to finished. Gather the hair high, twist it into a bun, pin it, then take a strand from underneath, wrap it around the base and pin the end underneath. The wrap hides the elastic, stops the bun from looking homemade, and adds a layer of grip that keeps the bun from rotating. On day-two hair the wrap holds without extra pins, because the strands grip each other. This is the style to choose when a messy bun feels too casual but a sleek bun feels too severe.
Time needed: 3–4 minutes. Best for: medium to long hair, smart-casual days, anyone who wants a bun that looks done without looking stiff. What to ask a stylist: how to wrap the base on layered hair, where short pieces tend to stick out of the wrap.
30. The Side Braid Into a Bun
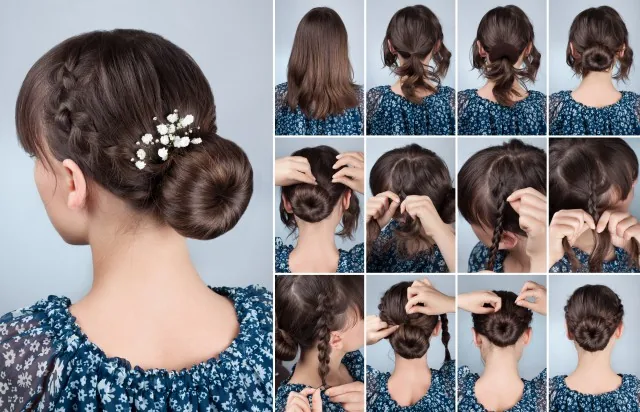
Start a braid at one temple, work it diagonally across the back of the head, and finish it in a low bun at the opposite nape. The diagonal path is the clever part: it pulls the hair in a direction that resists flattening, and it anchors the bun off-centre, where it is less likely to press against a headrest. The style also keeps the front hairline completely tidy — the braid starts right at the hairline, so no pieces fall forward. It suits all textures and is especially flattering on oval and heart-shaped faces, where the diagonal line softens the forehead.
How to style it: side part, French or Dutch braid from the temple across to the opposite nape, coil the remaining length into a bun, pin through the braid. Best for: medium to long hair, face-framing layers, long days. Watch out for: braiding too high — keep the diagonal below the crown so the style sits flat.
31. The Lazy-Day Low Twist
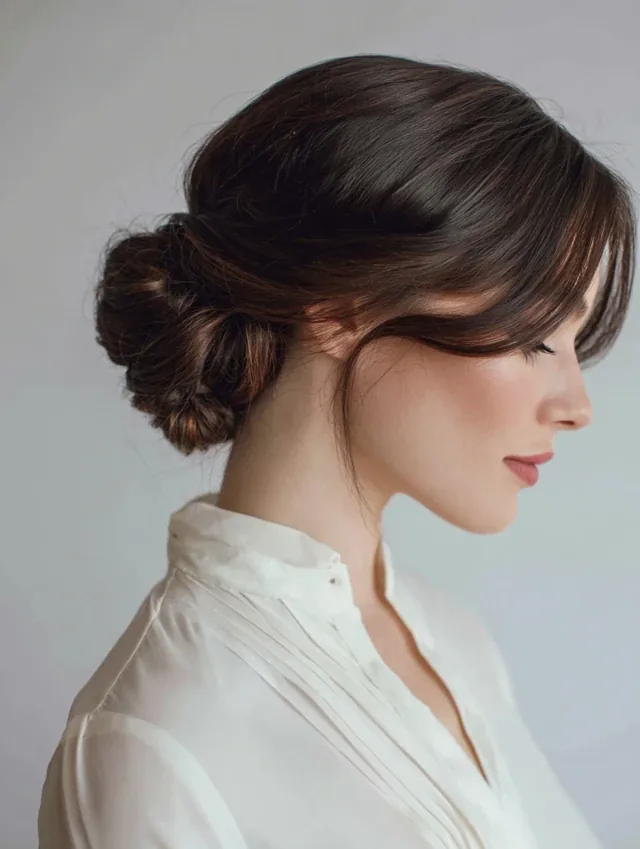
The lazy-day low twist is the last style in this guide because it is the simplest: gather the hair low, twist it once, fold it up against the head and pin it. No braid, no knot, no clip — just a twist and two pins. Day-two grip is what makes it work at all: on clean hair the twist slides out within the hour, but on second-day hair it holds all afternoon. The result is soft, a little undone, and honest about what it is — a five-second style for a day when you have better things to do than your hair. Leave a few pieces free at the front and it looks like a choice, not a surrender.
Time needed: 1 minute. Best for: medium to long hair, lazy days, anyone who has never managed a twist-and-pin style on wash day. Common mistake: twisting too tightly — a loose twist holds better on day-two hair and looks softer doing it.
How can I make second day hair look less greasy?
Apply dry shampoo to the roots, wait two to three minutes, then massage it in and brush through with a boar-bristle brush. That waiting and brushing step is what removes the oil and the white cast. If the roots are still visibly oily, switch to an updo or a braided style that covers them — a braided crown, a low bun or a slicked-back style hides grease far better than wearing the hair down.
Is it OK to wear your hair down on the second day?
Yes, if the roots are manageable after dry shampoo — lifted, matte and separated — the lengths usually look better on day two than on day one, because they have natural texture and waves. If the roots stay clumped and flat after treatment, wear it up instead. Half-up styles are the middle ground: they hide the greasiest section while leaving the lengths down.
How do I use dry shampoo without a white cast?
Spray from 15 to 20 centimetres away in short bursts at the roots only, use less than you think you need, wait two to three minutes, then brush through thoroughly. A tinted dry shampoo matched to your hair colour is the most reliable fix for dark hair, and a boar-bristle brush distributes the product far better than fingers alone.
Can I curl second day hair?
Yes — second day hair actually holds a curl better than clean hair, because it has grip and texture. Re-curl only the flattened pieces, usually the front sections and the top layer, for five seconds each with a curling iron, and let each piece cool in your hand before dropping it. Avoid re-curling everything, which dries out the ends.
What is the best second day hairstyle for oily hair?
A braided style — a French braid, double Dutch braids or a braided crown — because the braid covers the roots from hairline to nape and distributes oil through the plait. If braiding is not an option, a slicked-back low bun turns the oil into a sleek finish, and a claw-clip twist hides the roots in seconds.
How do I refresh second day curls?
Mist the curls lightly with water or a curl-refresh spray, scrunch in a little leave-in conditioner or curl cream, and gather them loosely into a pineapple at the top of the head with a soft scrunchie. Do not brush curly hair on day two — brushing breaks the curl pattern into frizz. A satin pillowcase the night before prevents most of the flattening in the first place.
Should I wash my hair every day instead?
Not necessarily. Daily washing strips natural oils and can leave hair dry and brittle, and many hair types actually look and behave better with a day between washes. The exception is a very oily scalp, heavy sweating, or buildup that dry shampoo no longer lifts — in those cases, wash. A scalp-only wash is a good middle ground: it refreshes the roots in three minutes while keeping yesterday’s waves in the lengths.
Does dry shampoo damage hair?
Used occasionally and brushed out properly, dry shampoo is safe for most hair. Problems come from overuse: heavy buildup at the scalp can clog follicles, cause itching and dull the hair over time. Wash properly at least once or twice a week, do not use dry shampoo three days in a row, and if your scalp itches or flakes, wash and reset rather than adding more product.
What hairstyles work for short second day hair?
A pinned-back bob with flat clips, a headband tuck, or a half-up top knot if the length allows. Short hair cannot be gathered into a bun, so the strategy is different: pin back the greasiest front pieces, lift the crown with dry shampoo, and let the back keep its natural shape. A little styling cream smooths the pieces that stick out overnight.
How do I stop my second day bun from falling out?
Build grip first with dry shampoo or texturising spray, anchor the bun low at the nape, and pin in at least three places spread around the bun. Day-two hair usually holds a bun better than clean hair, so if yours still slides, the hair is probably too oily at the roots — treat the roots first, or switch to a braided bun, which has internal structure that stops rotation.
Conclusion: Day Two Is a Feature, Not a Flaw
Second day hair is not a compromise you endure until wash day — it is the day your hair is easiest to style. It has grip, memory and texture that clean hair simply does not, and the only job is managing the roots: a little dry shampoo, a brush-through, and a style that hides what needs hiding and shows off what already looks good. Start with the easiest styles here — the messy bun, the claw-clip twist, the half-up top knot — and keep the braided options for the days the roots need real cover. Rotate your anchor points, give your scalp a proper wash when it asks for one, and let day two be the day your hair does the work for you. Pick a style from this guide tonight, try it tomorrow morning, and see how quickly unwashed hair starts looking like a choice.

