
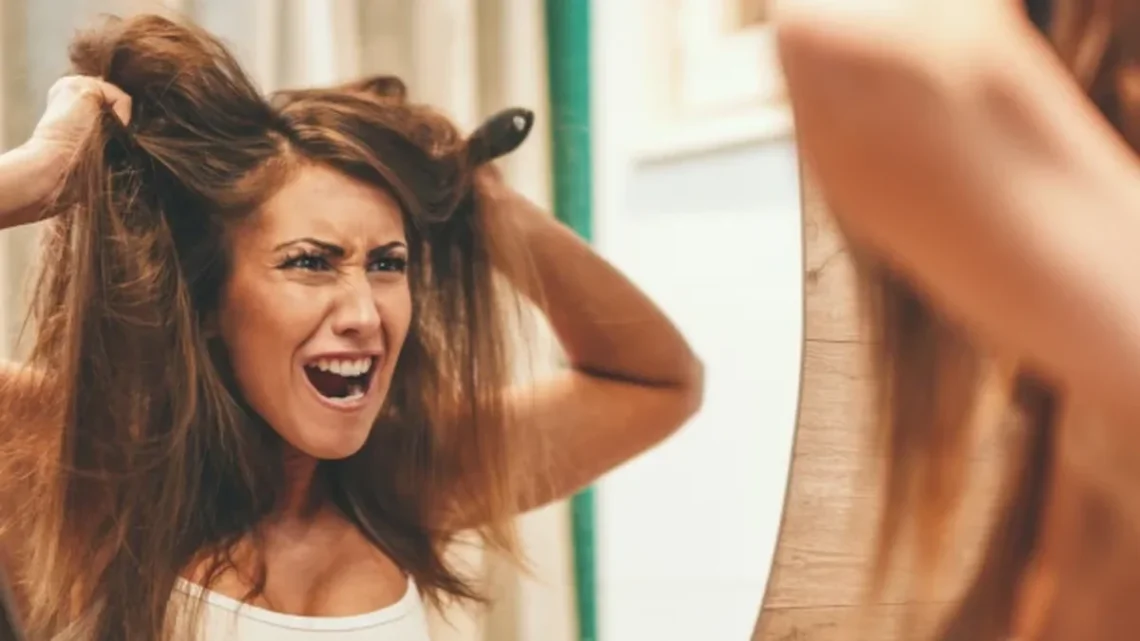
You know the moment. You catch your reflection on the way out the door and your hair has declared itself uncooperative: roots gone flat, ends gone frizzy, yesterday’s wash day a distant memory, and a cowlick standing up like it pays rent. A bad hair day is not a hair emergency — it is a styling problem with a five-minute solution. The trick is not fighting the hair you woke up with. It is picking a style that works with it, hides the worst of it, and looks like you meant it all along.
This guide has 38 bad hair day hairstyles, each one doable in about five minutes with no heat tools and nothing fancier than an elastic, a few pins and maybe a scarf or a hat. Slick-backs tame frizz, braids hide greasy roots, buns rescue flat hair, and scarves and caps cover the days when nothing else will cooperate. Eight rescue guides first show you how to diagnose the problem in thirty seconds, triage frizz against flatness against grease, build a five-minute rescue kit, and avoid the mistakes that make a bad hair day worse. Pick the problem, pick the style, and get out the door.
Diagnose Your Bad Hair Day in 30 Seconds
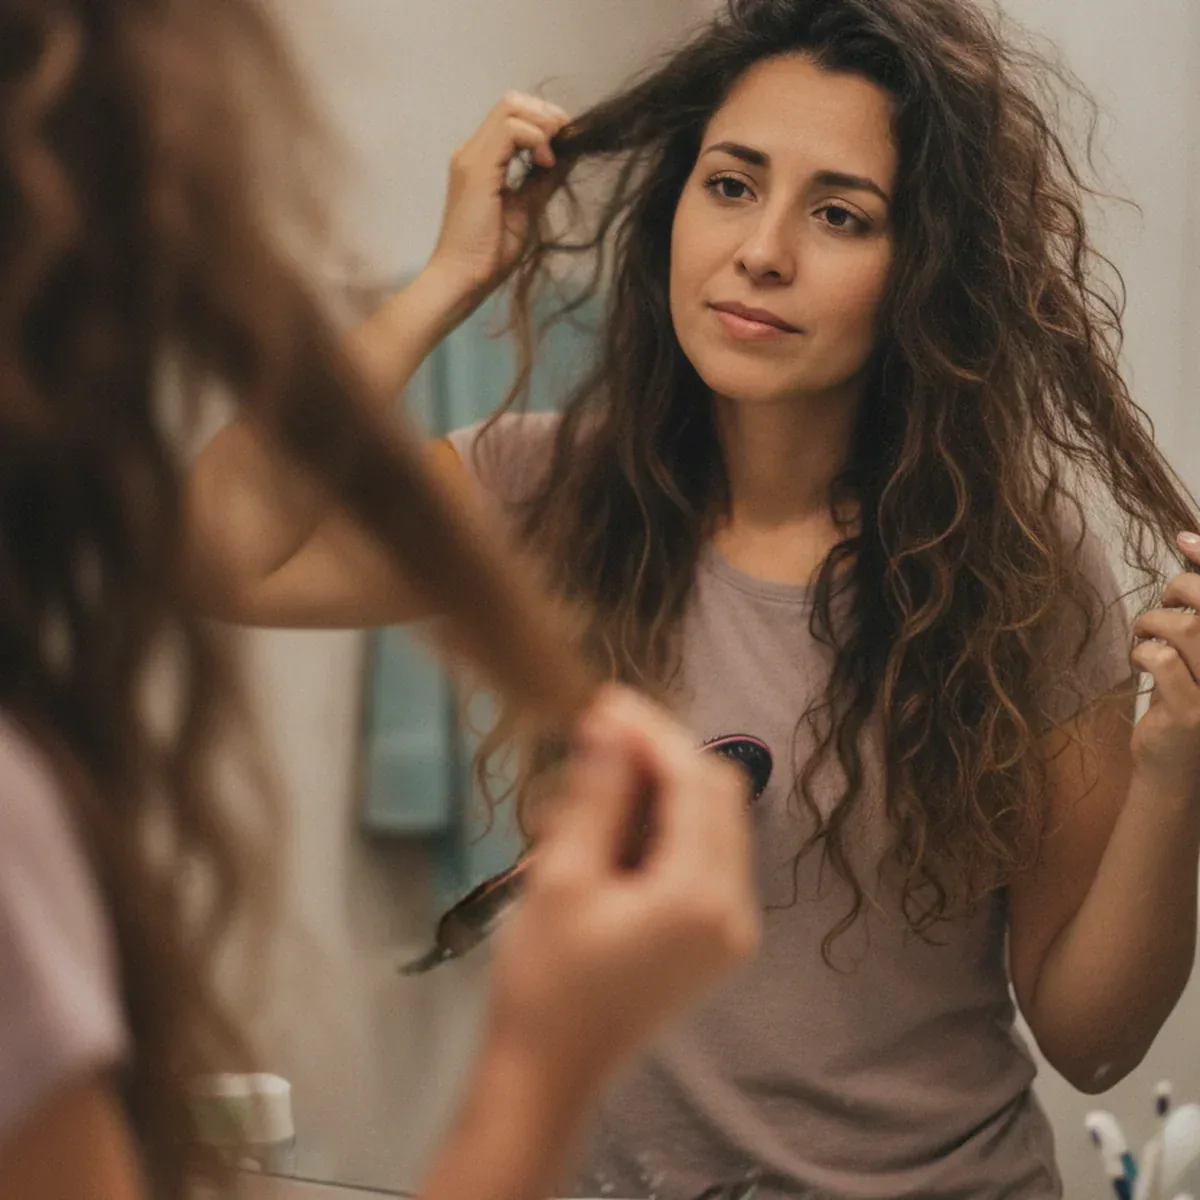
Before you reach for a product or a brush, stand still and look at what is actually wrong — most bad hair days are one of four problems, and each one wants a different fix. Run your fingers through the roots: if they feel oily and the hair clumps together, you have grease. Look at the silhouette: if the crown is flat and the ends are doing nothing, you have flatness. Check the outline around your head: if there is a halo of short flyaway hairs, you have frizz. And if the texture just feels wrong — limp, dull, oddly bent from sleep — you probably have a failed wash day, where yesterday’s style has collapsed overnight. Naming the problem takes thirty seconds and saves you from fixing the wrong thing, like adding volume spray to hair that is actually greasy, which only makes it look worse.
The second thing to check is time. How long do you actually have? If the answer is two minutes, you need a containment style — a bun, a braid, a clip twist — not a restyle. If you have five minutes, you can add dry shampoo, a scarf or a proper slick-back. If you have ten, you can rewet the front sections and rebuild the shape. Match the ambition to the clock and you will never stand in the bathroom making things worse. A good rescue style is one you can build without a mirror check every ten seconds, because the whole point is getting on with your day.
Frizz vs Flatness vs Grease: The Triage
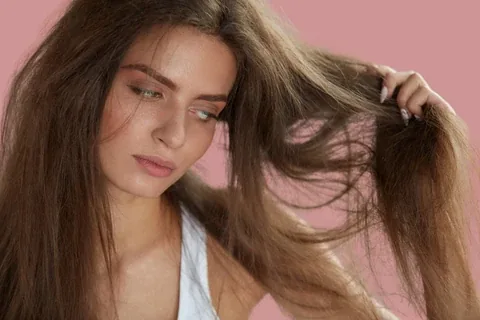
Frizz, flatness and grease look like the same disaster in the mirror, but they are opposites, and the fix for one makes the other worse. Frizz is hair that has too much volume in the wrong places: the cuticle is raised, usually by humidity or dryness, and every short hair sticks out. It wants smoothing — a little cream, gel or oil pressed over the surface, and styles that gather the hair in, like slick-backs, braids and low buns. Flatness is the reverse: hair with no volume where you want it, usually at the roots, often after sleeping on it or wearing a hat. It wants lift and texture — dry shampoo at the roots, a messy bun, a bubble ponytail, anything that breaks up the flat sheet. Grease is oil at the roots, and it wants absorbing and hiding — dry shampoo, a deep part change, a braid that eats the oily sections, or a scarf over the crown.
When two problems arrive together — and they usually do, greasy roots with frizzy ends being the classic combination — treat the roots first and the ends second. Dry shampoo at the roots, a smoothing cream on the ends, and a style that contains both, like a braided low bun or a scarf wrap. The most common triage mistake is brushing everything out to “start fresh”: brushing distributes root oil down the lengths, fluffs frizz into a halo, and kills whatever volume was left. On a bad hair day, the brush is rarely the answer. Your fingers, a wide-tooth comb and the right style are.
The 5-Minute Rescue Kit
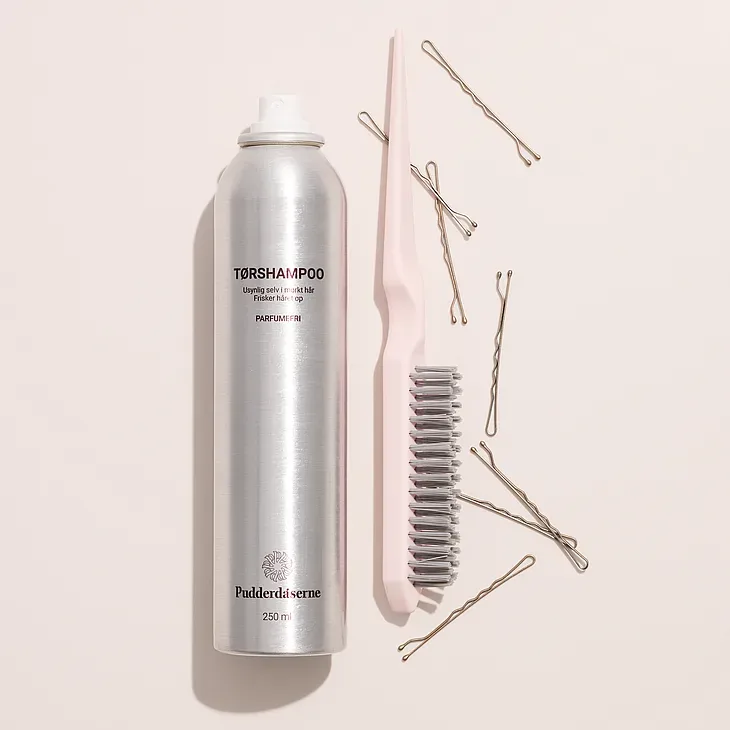
A bad hair day is only a crisis if you have to hunt for the tools to fix it. Keep a small rescue kit in one place — a bathroom drawer, a desk drawer, a bag pouch — and the whole rescue takes five minutes instead of fifteen. The essentials are few: a dry shampoo, three snag-free elastics, six bobby pins, two claw clips in different sizes, a wide-tooth comb, a small tube of styling cream or gel, a silk scarf, and a hat you actually like wearing. That is the whole kit. Everything in this guide can be built from it, and nothing in this guide needs anything else. A travel-size dry shampoo lives in the bag version of the kit, because greasy roots have a habit of announcing themselves at noon.
- Dry shampoo: the single most useful rescue product — absorbs root oil and adds grip and lift in one step.
- Styling cream or gel: smooths frizz and flyaways and gives slick-backs their hold; a pea-sized amount is enough.
- Claw clips and pins: the fastest way to contain hair that will not behave; a large claw clip holds a full twist in ten seconds.
- Scarf and hat: the cover-up option for the days when no style will cooperate — they hide the crown entirely and look deliberate.
- Wide-tooth comb: detangles without fluffing frizz the way a brush does.
Hats and Scarves That Actually Work
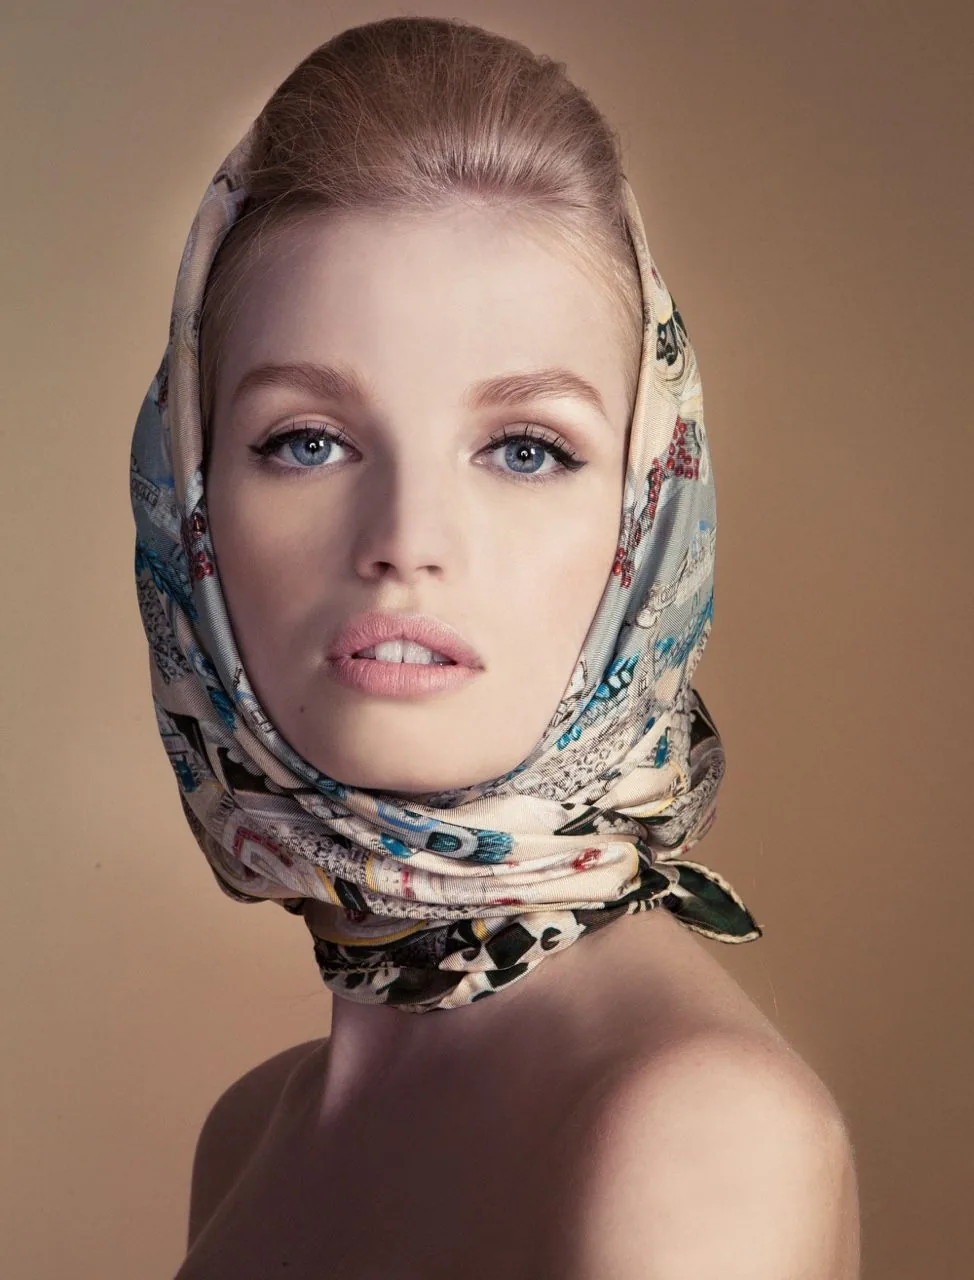
A hat or a scarf is not giving up — it is the oldest bad hair day solution there is, and when it is done well it looks like an outfit choice rather than a cover-up. The styles that work best are the ones that commit: a baseball cap worn with a low ponytail or a braid pulled through the back, a beanie with the front hair tucked in and a few soft pieces left out, a silk scarf tied as a head wrap with the ends knotted at the nape or on top. What makes them look intentional is the rest of the outfit — a cap with a tidy low ponytail reads as sporty, a scarf with simple earrings reads as polished, and both read far better than a hat jammed over loose, unstyled hair.
Choose the cover to match the problem. A cap is best for greasy roots and flat crowns, because it hides the whole top of the head and the brim draws the eye forward. A scarf is best for frizz, because it contains the halo completely and the silk smooths the hair underneath instead of roughing it up. A beanie is best for cold days and very short hair, where it adds warmth and shape at once. One caution: hats flatten hair further, so if you take the hat off later, expect a hat-hair situation — plan to keep it on, or carry a small claw clip for the reveal. And never wear a rough wool hat over dry, frizzy hair without a silk lining or a scarf underneath; the friction will double the frizz by lunchtime.
The Slick-Back Technique, Step by Step
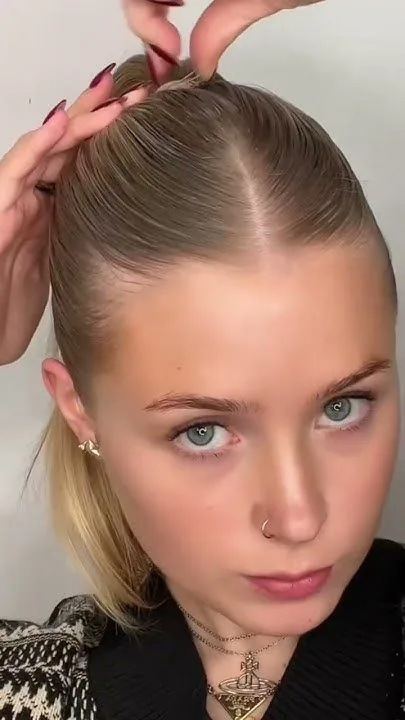
The slick-back is the single most useful bad hair day skill, because it turns frizz and grease — the two hardest problems — into the style itself. Greasy roots become shine, flyaways become gloss, and the whole look reads as deliberate and polished. The technique is simple but the order matters. First, brush the hair straight back with a bristle brush or a fine-tooth comb, from the hairline to the crown, so there are no bumps. Second, work a small amount of gel or styling cream through the top layer only, from the hairline back to the ears, and smooth the surface with the palms of your hands. Third, gather into a low bun or ponytail and secure it — the tension of the gathered style holds the slicked surface in place. Fourth, mist lightly with flexible-hold spray and smooth any last flyaways with a clean toothbrush or a small brush sprayed with hairspray.
The mistakes are all about quantity. Too much gel and the style looks wet and heavy rather than sleek; too little and the frizz returns within the hour. Start with a pea-sized amount and add more only where you need it. Keep the slicked area to the top and sides — slicking the lengths as well makes the whole head look greasy rather than glossy. And choose the right finish for the day: a slicked low bun is office-safe and evening-ready, a slicked high ponytail is sharper and sportier, and the wet-look version in section 29 is the boldest of the three. Once the technique is in your hands, no frizz day can beat you.
Dry Shampoo Rescue, Done Right
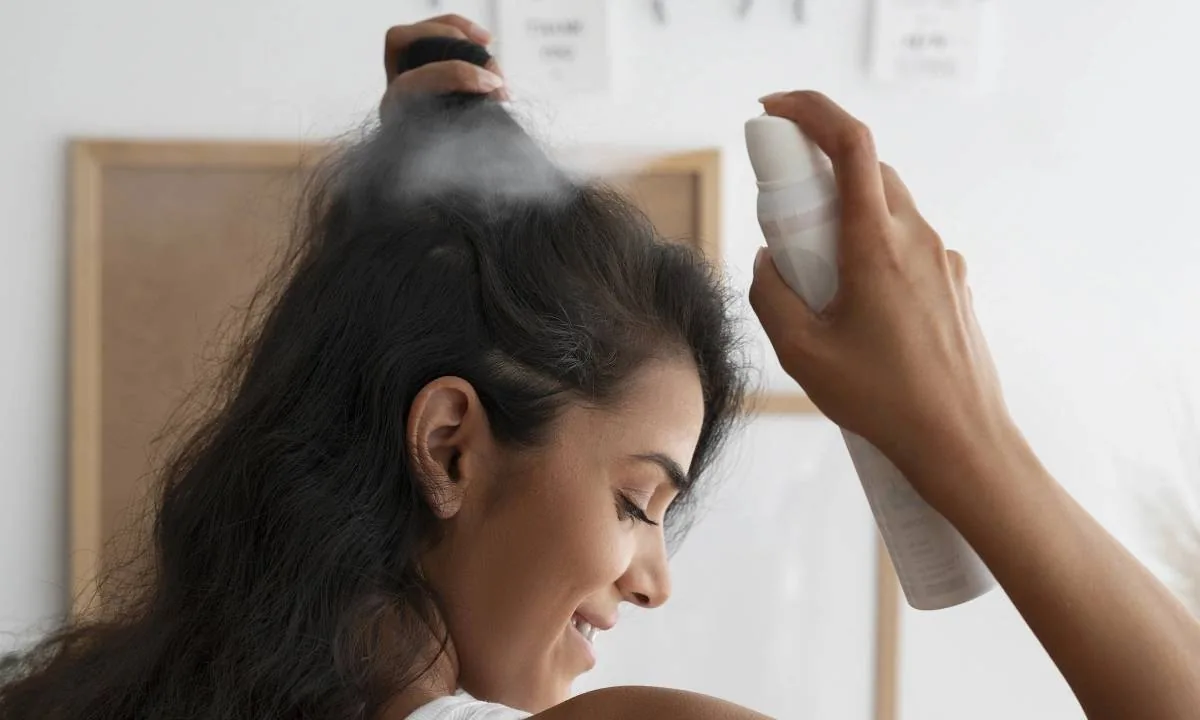
Dry shampoo is the fastest fix for greasy roots, and it is also the most misused product in the rescue kit. Used well, it absorbs oil, adds volume and gives the hair grip so styles hold better. Used badly, it leaves a white cast, a powdery texture and hair that looks duller than before. The right method is section and wait. Lift the hair in sections, spray from about fifteen centimetres away onto the roots only — never onto the lengths — then stop and wait a full minute while the powder absorbs the oil. Only then massage it in with your fingertips and brush the excess out with a wide-tooth comb or a quick blast of cool air from the dryer. The waiting minute is the whole secret; spraying and immediately rubbing just moves wet powder around.
A few rules keep it working for you. Use it on dry hair only — on damp hair it clumps. Apply it before you style, not after, so the style benefits from the grip it adds. On dark hair, use a tinted formula or spray into your palm first and pat it on, to avoid the grey cast. And do not use it two days running as a substitute for washing: it builds up, irritates the scalp and eventually makes the grease worse. One rescue day is fine; two is the limit. If the roots are still visibly oily after a proper application, the rescue style — a braid, a scarf, a slick-back — is the answer, not a second can of spray.
When a Rescue Style Beats a Rewash
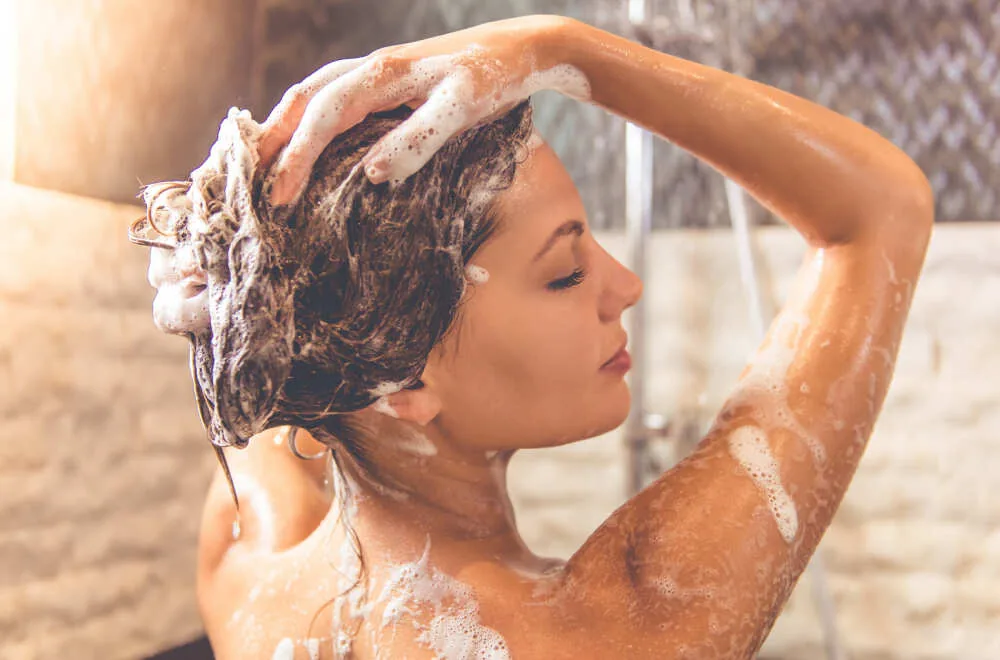
It is tempting to fix every bad hair day by washing it again, but a rewash is not always the better choice. Washing takes time — wash, dry, restyle — and on a busy morning it usually means leaving the house with damp hair, which is how you get a second bad hair day by lunchtime. A rescue style is faster, and it is often kinder to the hair: daily washing strips natural oils, and the heat styling that usually follows a wash adds damage on top. Second- and third-day hair actually holds styles better than freshly washed hair, because it has grip and texture that clean hair lacks. That is why braids, buns and twists all work better on day-two hair.
Rewash when the hair genuinely needs it: when it smells, when it is visibly dirty rather than just oily at the roots, when there is product build-up that dry shampoo cannot absorb, or when you have time to dry it properly. Rescue when the problem is shape, not cleanliness — flatness, frizz, a collapsed style, greasy roots on an otherwise clean head. There is a middle option too: wash only the front section and the fringe at the sink, dry it in two minutes, and rescue the rest with a bun or a braid. That front-section wash fixes the part people actually look at, and it costs a fraction of a full wash. Learn to tell the difference and you will wash less, damage less, and still leave the house on time.
Mistakes That Make a Bad Hair Day Worse
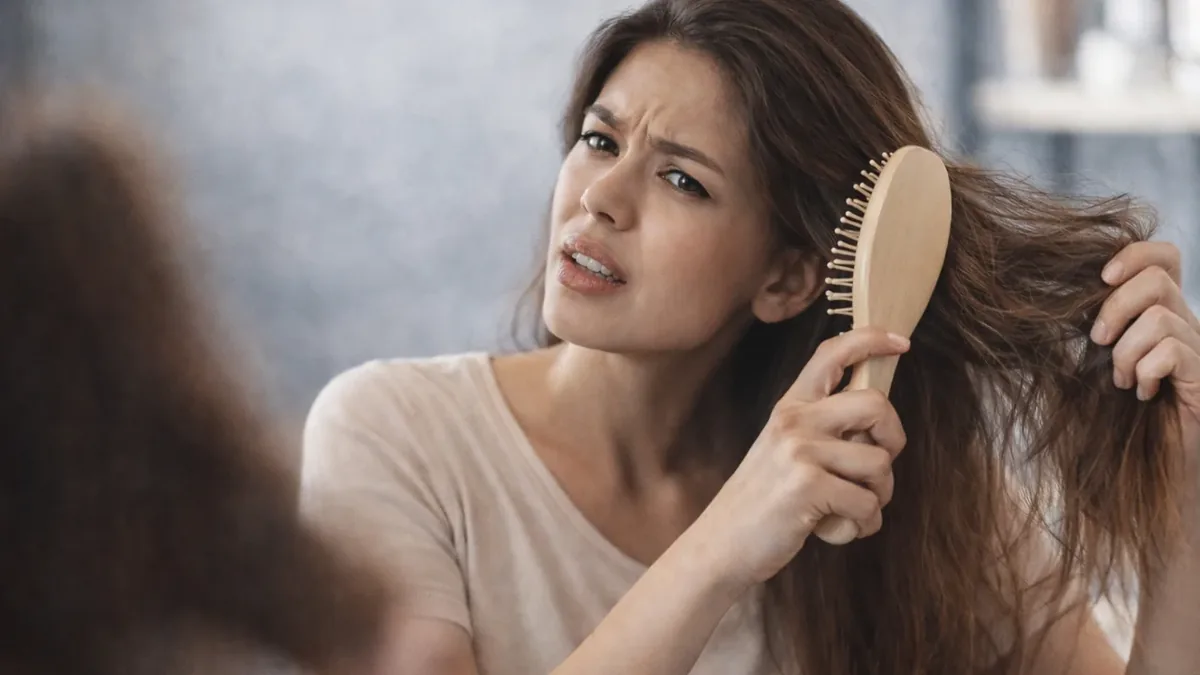
Most bad hair days get worse in the bathroom, not better, because the instinctive fixes are the wrong ones. Brushing dry, frizzy hair from root to tip fluffs it into a halo and distributes root oil down the lengths. Piling on heavy oil to calm frizz leaves the hair looking greasy by midday. Straightening a frizzy section without heat protectant on second-day hair bakes in damage and usually re-frizzes within the hour. And re-doing the same failed style three times — the ponytail that keeps sliding, the bun that keeps unravelling — wastes the morning and frays your patience. The pattern is the same every time: fighting the hair instead of working with it.
- Brushing out frizz: use fingers or a wide-tooth comb, and smooth with cream instead of brushing.
- Too much product: start with a pea-sized amount; you can always add more, but you cannot take it out without washing.
- Over-tight styling: maximum tension causes headaches and breakage, and a style that hurts will be taken down by noon.
- Ignoring the part: the part is where grease and flatness show first — changing it is the fastest single fix in this guide.
- Starting over repeatedly: if a style fails twice, switch to a containment style — a braid, a clip twist, a scarf — instead of a third attempt.
1. The Slicked-Back Low Bun
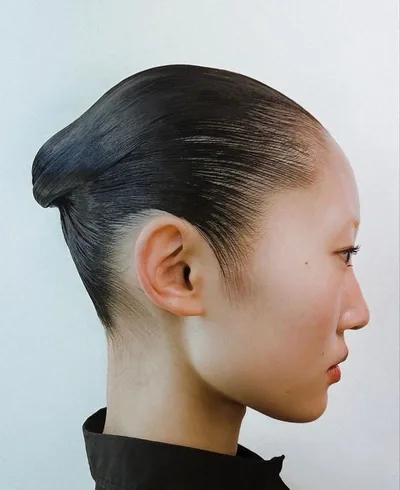
The slicked-back low bun is the first style to reach for on a bad hair day, because it hides every common problem at once. Frizz disappears under the smoothed surface, greasy roots become shine, flat hair gains intention, and the low bun at the nape keeps the whole silhouette neat. Brush the hair straight back, work a small amount of gel or cream over the top layer, gather low, twist into a coil and pin in three places. The whole build takes about three minutes, and it works on medium to long hair of any texture. It is the style that looks most like you planned it, which is exactly what a bad hair day needs.
Time needed: 3 minutes. Best for: frizz, greasy roots, flat crowns, work and formal days. What it hides: flyaways, oily roots, an uneven part. Ask your stylist: for a cut with clean layers at the front, so the slicked surface has no short pieces escaping at the temples.
2. The Messy Top Knot
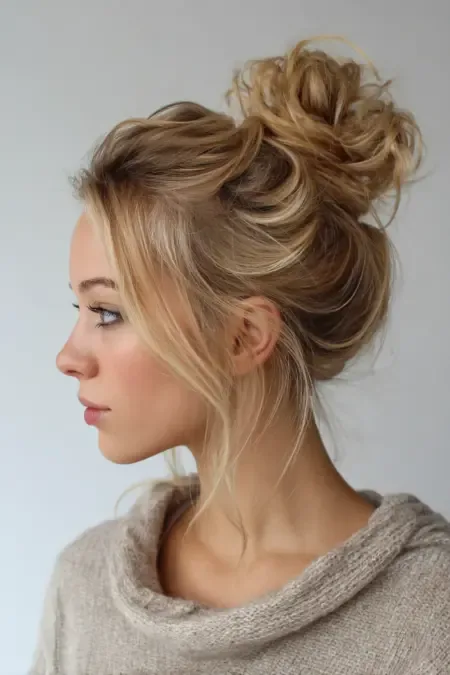
A messy top knot turns chaos into a style by leaning into it. Instead of smoothing the frizz and flattening the texture, you gather everything high, twist loosely, wrap it around its base and let the ends stick out where they like. The looseness is the point: a knot that is meant to look undone hides lumps, bends and sleep creases completely, because there is no smooth surface for them to show against. Pull a few face-framing pieces loose on purpose, and nobody can tell which pieces escaped and which you released. It takes two minutes, needs no mirror, and suits medium to long hair.
- Pros: fastest style in this guide; hides flatness, frizz and bad texture at once; no product needed.
- Cons: too casual for formal settings; heavy hair can slide if it is not pinned in two places.
- Quick verdict: the best two-minute rescue for a day at home, running errands or a casual office.
3. The Low Twisted Ponytail
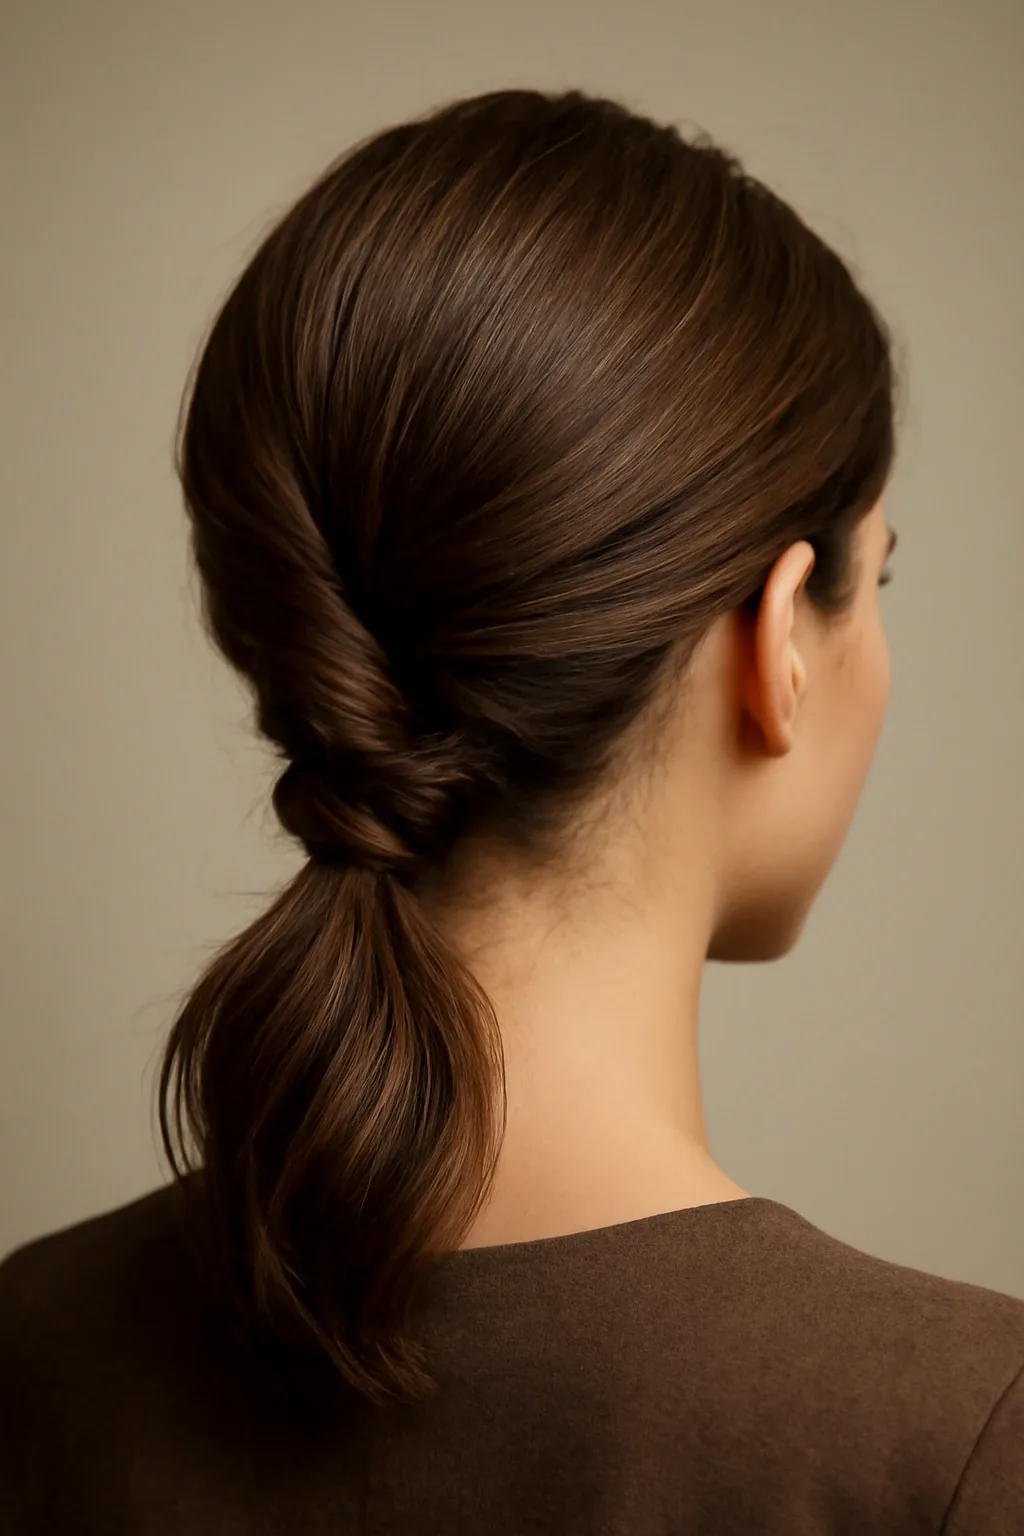
The low twisted ponytail is a plain ponytail with one extra move that changes everything. Gather the hair low, secure it loosely, then split the hair above the elastic into two, flip the tail up and through the gap, and pull it down. The twist sits flat against the head, hides the elastic, and gives the ponytail a finished, deliberate look in about thirty extra seconds. It also solves the two problems that kill plain ponytails on bad hair days: it keeps the crown smooth, because the twist pulls the top layer taut, and it stops the tail from swinging and tangling. It works on shoulder-length to long hair, and it is one of the easiest styles to do without a mirror.
How to style it: low ponytail, flip through the gap above the elastic, tighten gently, and smooth the crown with a little cream. Best for: flat hair, second-day hair, anyone who finds a plain ponytail too boring. Watch out for: pulling the twist too tight — a gentle tug is enough, and over-tightening creates a bump at the crown.
4. The Classic French Braid
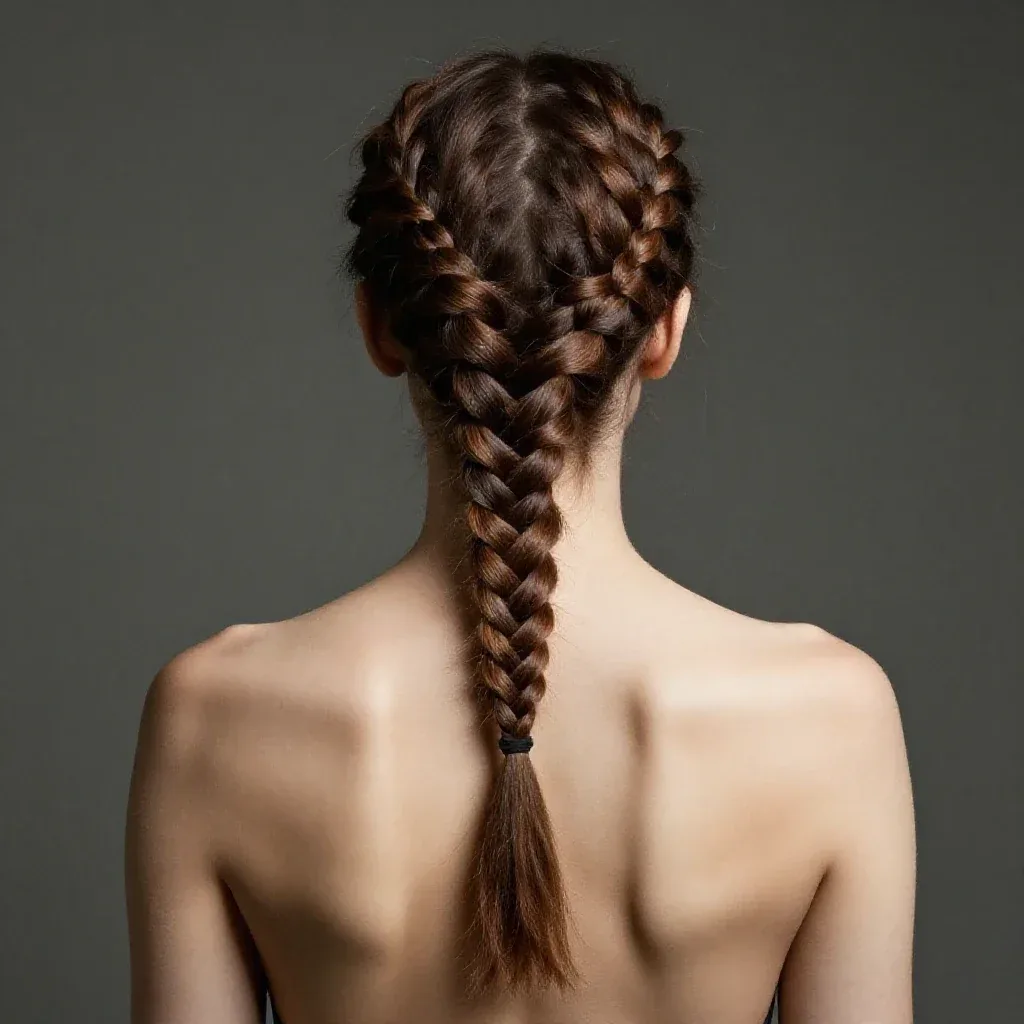
One French braid down the centre of the head is the most reliable bad hair day rescue ever invented, because the braid eats the problem. Greasy roots disappear into the plait, frizz is woven in instead of sticking out, flat hair gains texture and shape, and the whole head is contained from hairline to ends. Start at the crown, add small sections as you go, and braid all the way to the ends. For the tidiest result, fold the tail up and pin it flat at the nape rather than leaving it hanging. It takes about five minutes once you have practised it, and it holds all day without a single re-do.
Time needed: 5 minutes. Best for: greasy roots, frizz, long days, all hair textures. What it hides: oily roots, flyaways, an uneven part, sleep bends. Common mistake: braiding too loosely at the crown — start firm, then loosen the braid slightly for texture once it is secured.
5. The Dutch Braid
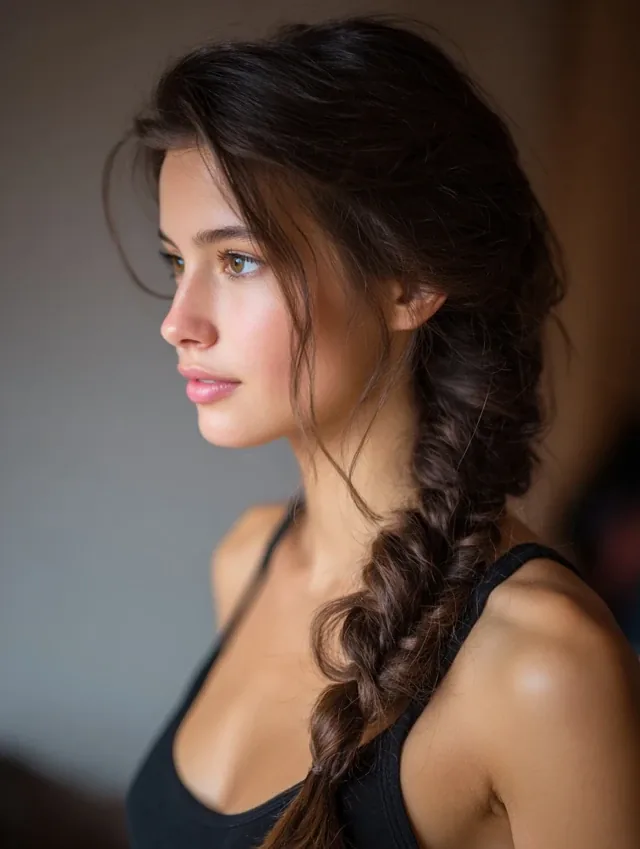
A Dutch braid is the French braid’s bolder cousin: the sections pass under instead of over, so the plait sits raised on the surface of the head instead of lying flat inside it. That raised texture is what makes it such a good bad hair day style — it looks intentional and striking even when the hair underneath is a mess, and the underhand technique grips better than a French braid, so it holds on silky or freshly washed hair that other braids slip out of. It is also one of the best styles for fine hair, because the raised plait creates the illusion of thickness. Braid from the crown to the nape, secure the ends, and either leave the tail loose or fold it up and pin it.
- Pros: grips silky hair, adds visible texture, looks polished with almost no product.
- Cons: takes a little longer than a French braid; the raised braid adds a touch of height under a hat.
- Quick verdict: choose it when the hair is too slippery for a French braid, or when you want the rescue to look like a style.
6. The Loose Side Braid
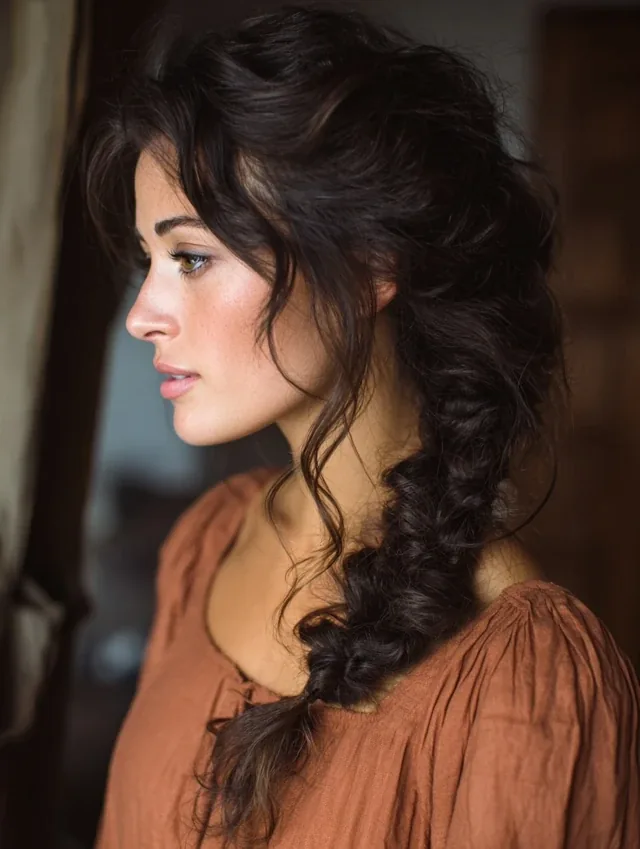
The loose side braid is the gentlest rescue in this guide, and the best one for hair that is frizzy, tired or damaged. Sweep all the hair over one shoulder, braid it loosely, secure the end, and gently pull at the edges of the plait to widen it. The looseness does two things: it hides uneven texture, because nothing is pulled taut enough to show a lump or a bend, and it makes thin or flat hair look fuller, because the widened braid takes up more space. It is also the kindest style for hair that has been over-styled — no tension at the scalp, no heat, no tight elastics. It takes three minutes and suits medium to long hair of every texture.
Time needed: 3 minutes. Best for: frizz, fine or flat hair, damaged hair, relaxed days. What it hides: uneven texture, sleep bends, thin ends. Ask your stylist: for long layers, which give a loose braid its soft, full shape instead of a thin tail.
7. The Fishtail Braid
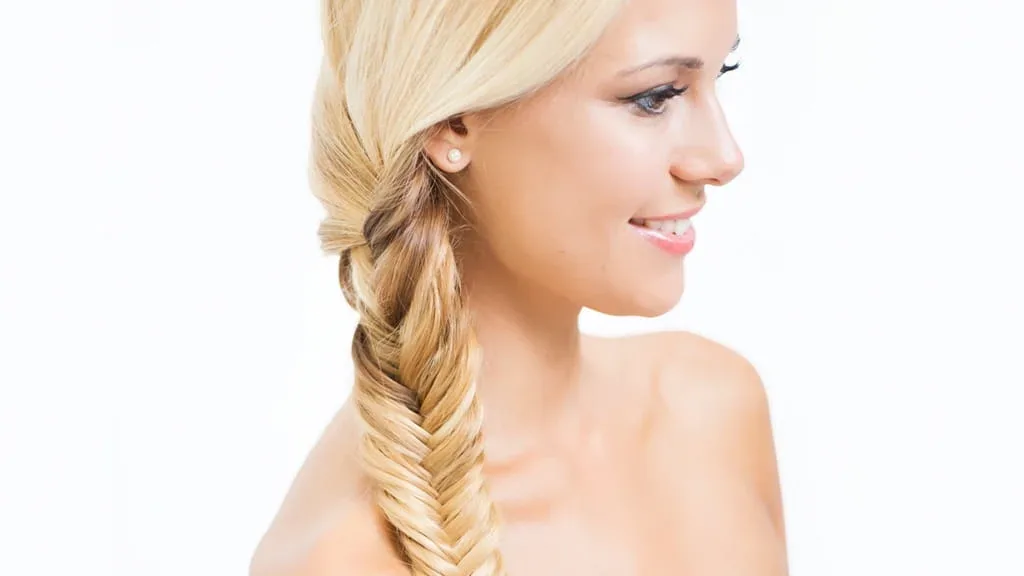
The fishtail braid looks intricate and holds like a seatbelt, which makes it a brilliant rescue for long hair that will not stay put. Built from two sections with small pieces crossed over, it creates a dense, flat plait that resists loosening better than a three-strand braid, and its woven texture keeps even silky hair contained without much product. Start with a low ponytail to make the fishtail easier on your own head, then braid to the ends. On a bad hair day, keep it loose and a little messy — a fishtail that is meant to look relaxed hides frizz and uneven texture far better than a tight, perfect one. It takes six or seven minutes, so save it for the days when you have a little more time.
How to style it: low ponytail base, cross small pieces from each side to the other, secure, then gently pull the braid wider. Best for: long, silky or slippery hair that escapes other braids. Skip it if: you have under five minutes — a French braid is faster and nearly as secure.
8. The Bubble Ponytail
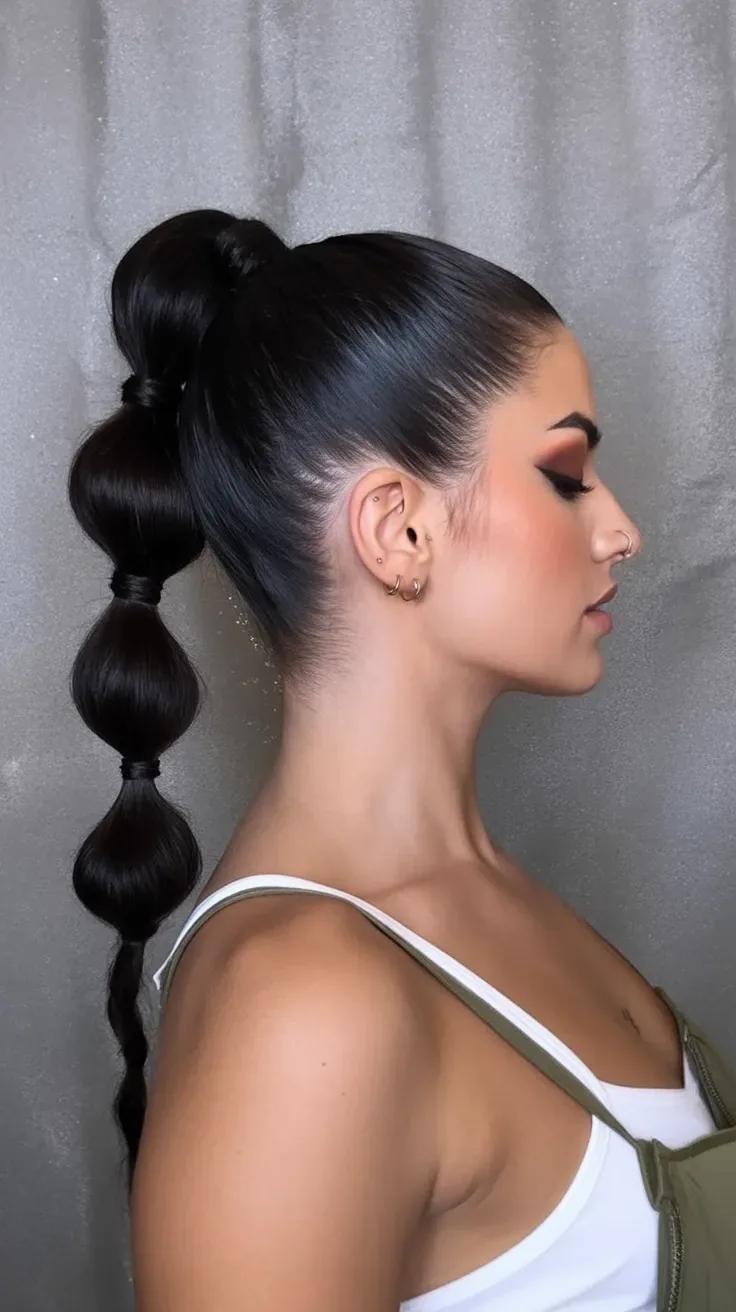
The bubble ponytail is the rescue for flat, limp hair, because it manufactures volume where there is none. Secure a ponytail — low for work, high for a bolder look — then add small elastics at intervals down the tail, gently puffing each section between elastics with your fingertips. The segments stop the tail from tangling, keep the ends controlled, and make thin hair look dramatically fuller. The bubbles also hide uneven texture and sleep bends completely, because the eye reads the shape of the bubbles instead of the condition of the hair. It works on medium to long hair, takes four minutes, and needs nothing more than a handful of small elastics.
- Pros: adds instant volume to flat hair; hides thin ends and bends; fun without being childish when kept low and neat.
- Cons: needs several elastics; can look too playful for formal settings if worn high.
- Quick verdict: the best rescue when the problem is flatness rather than frizz or grease.
9. The Claw Clip Twist
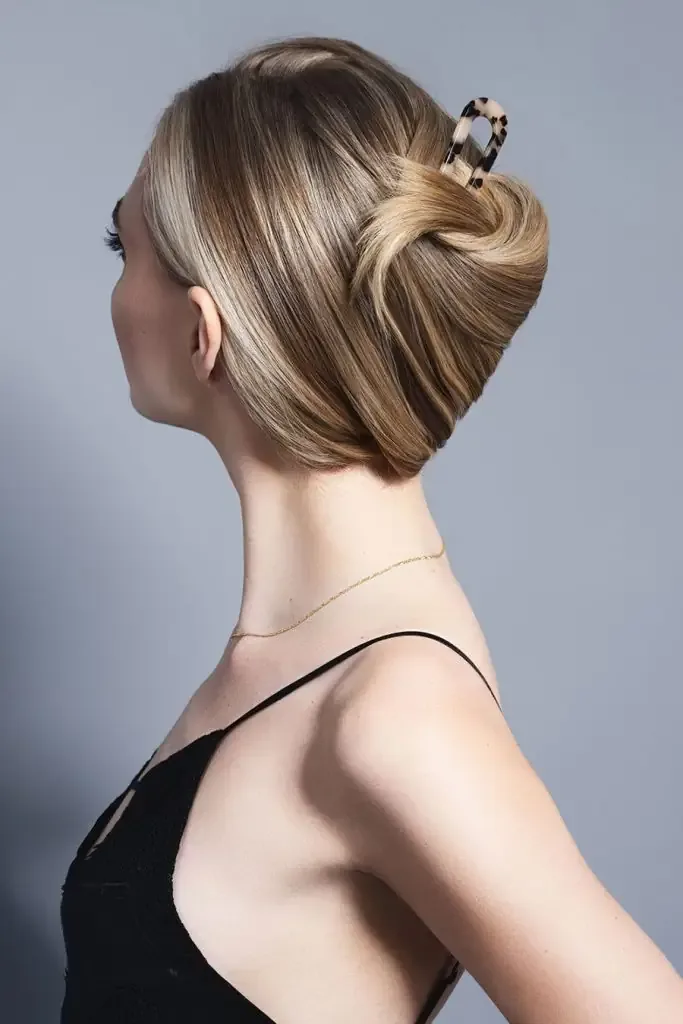
The claw clip twist is the ten-second rescue, and it is the one to learn first if you learn nothing else in this guide. Gather the hair at the back, twist it upward into a roll, fold the ends in, and clamp a large claw clip over the roll. That is the whole style. It hides greasy roots, contains frizz, lifts flat hair off the neck, and looks deliberately undone — the loose pieces around the face are part of the look, not a failure of it. It works on shoulder-length to long hair, needs no elastic and no pins, and it comes out without a fight at the end of the day. Keep a clip in your bag and no bad hair day can strand you.
Time needed: under 1 minute. Best for: greasy roots, frizz, flat hair, busy mornings, all textures. What it hides: oily roots, unwashed lengths, uneven texture. Watch out for: using a clip that is too small for your hair — a large, flat clip holds a full twist; a small one will pop open by noon.
10. The Double Claw Clip Updo
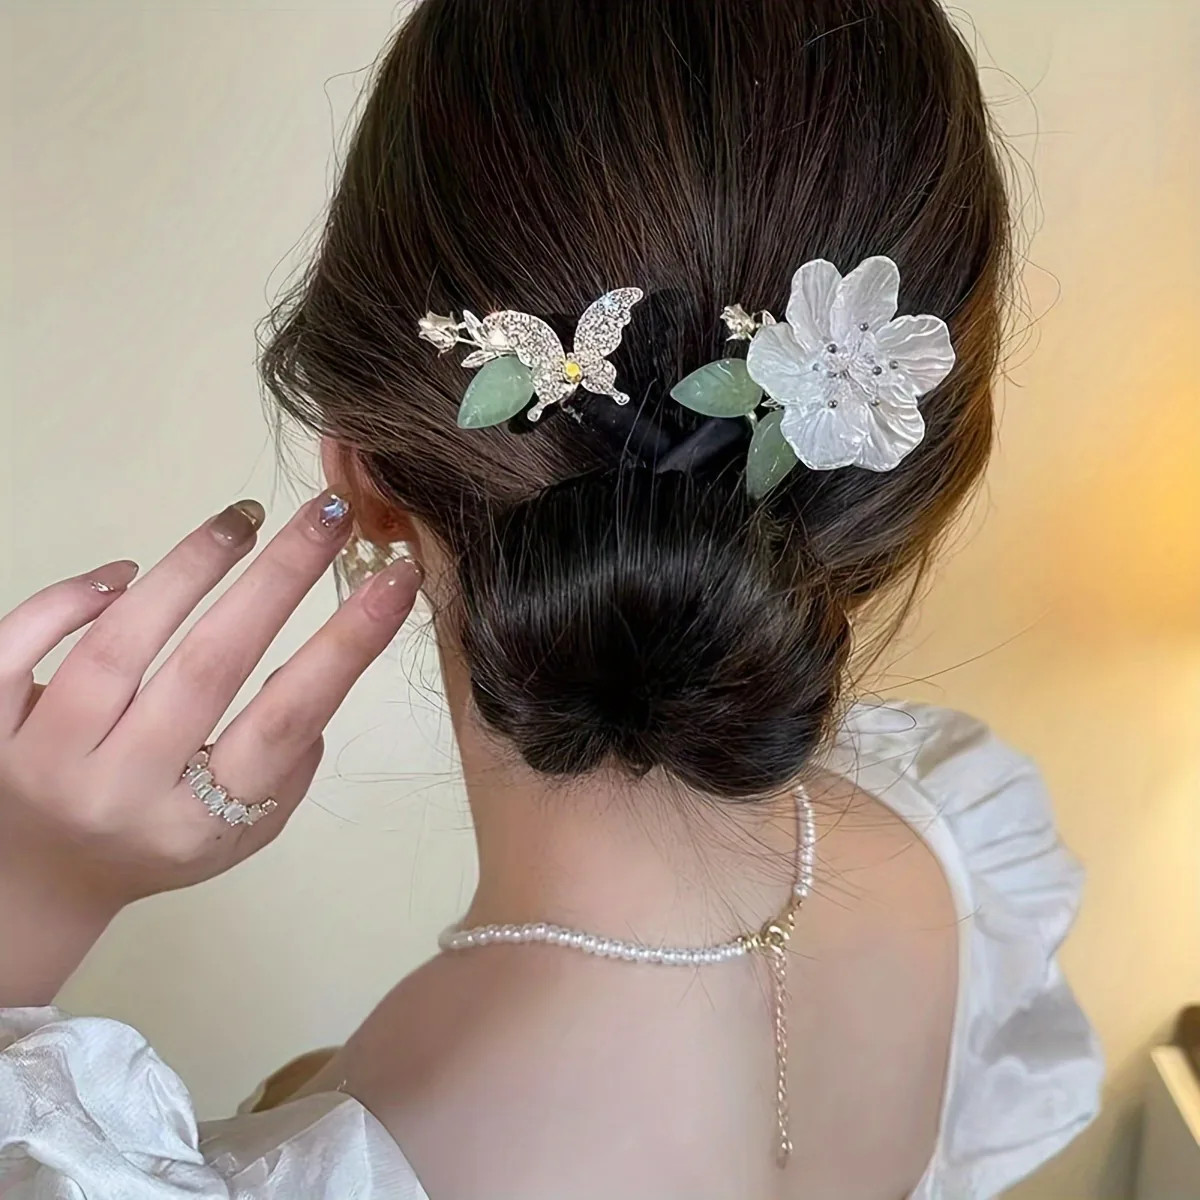
One claw clip is fast; two claw clips are secure. The double claw clip updo splits the hair into two twists — one high, one low — and clips each separately, which distributes the weight and holds thick or heavy hair that a single clip cannot manage. It also looks more finished than a single twist, because the two clips create a structured shape rather than one loose roll. Twist the top section up and clip it, then twist the lower section and clip it just below, tucking the ends of each twist under the next. The style takes about two minutes, works on thick and long hair especially well, and survives a full day of movement without re-clipping.
How to style it: part the hair horizontally, twist and clip the top half, then twist and clip the bottom half underneath it. Best for: thick hair, long hair, all-day wear. Common mistake: clipping both twists in the same direction — clip them toward each other and they brace each other in place.
11. The Silk Scarf Wrap
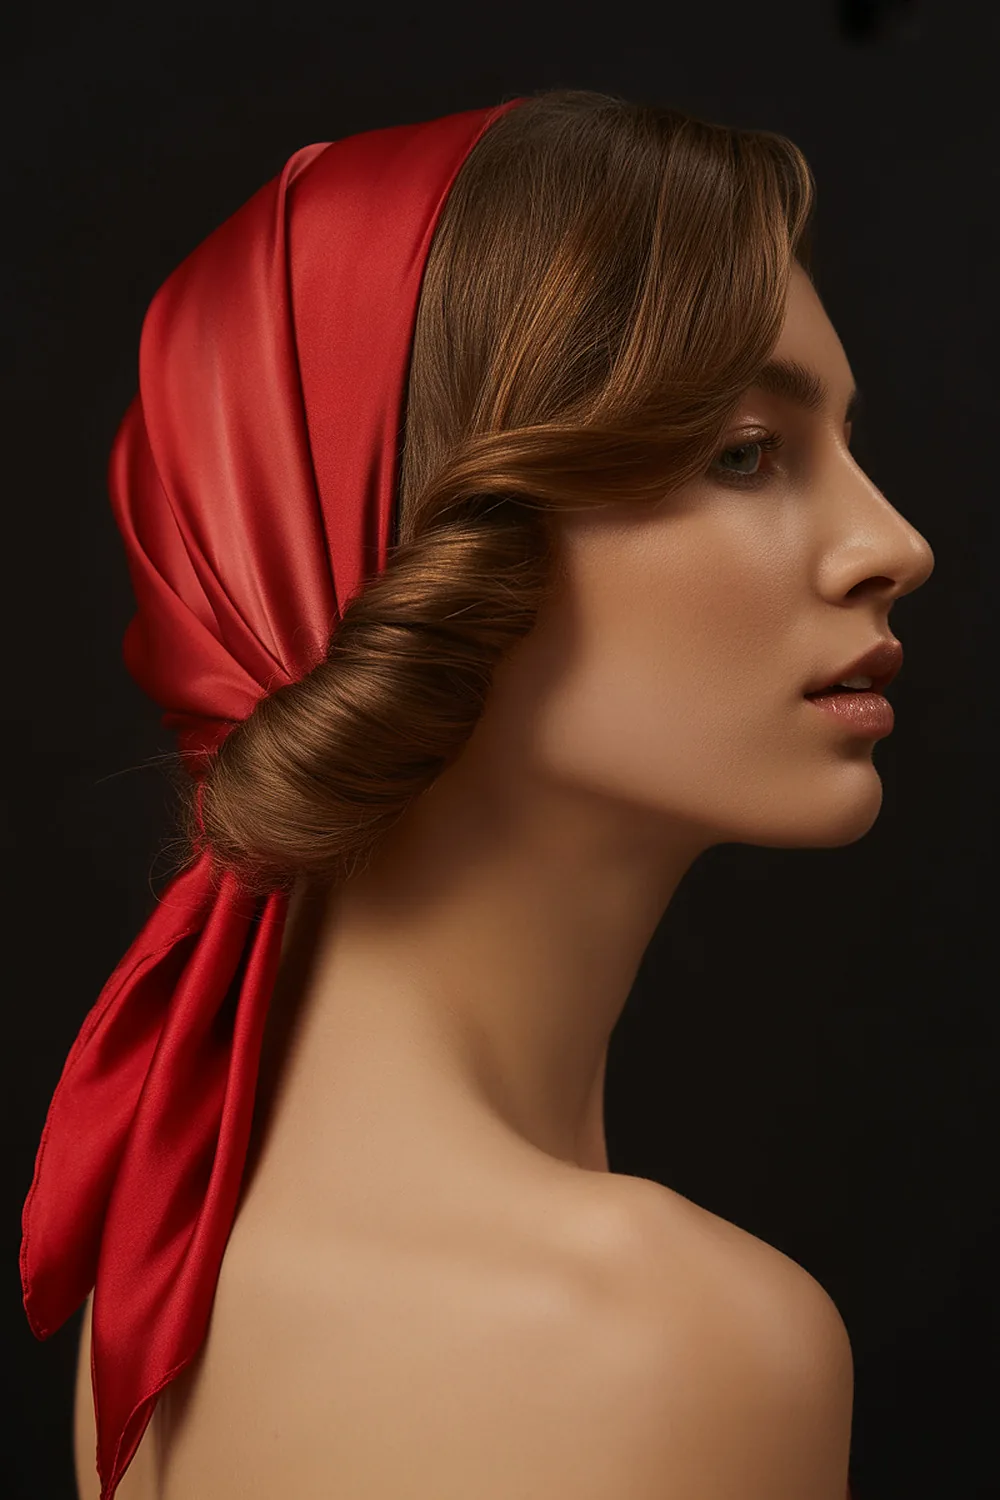
The silk scarf wrap is the cover-up that looks like an outfit choice. Fold a square silk scarf into a triangle, place the long edge at the hairline, tie the ends at the nape or in a knot on top, and tuck the hair underneath. The scarf hides the crown completely — grease, flatness, frizz and all — while the silk smooths the hair underneath instead of roughing it up the way cotton or wool would. It works on every hair length, including short hair and curls, and it suits any season. Choose a scarf in a colour that matches your outfit and the whole look reads as deliberate and polished, not as a hiding place.
Time needed: 2 minutes. Best for: every bad hair day problem at once, short hair, curly hair. What it hides: greasy roots, frizz halo, flat crown, failed wash day. Ask your stylist: nothing — this one needs no haircut, just a scarf you love and a knot that stays put.
12. The Scarf-Wrapped Low Ponytail
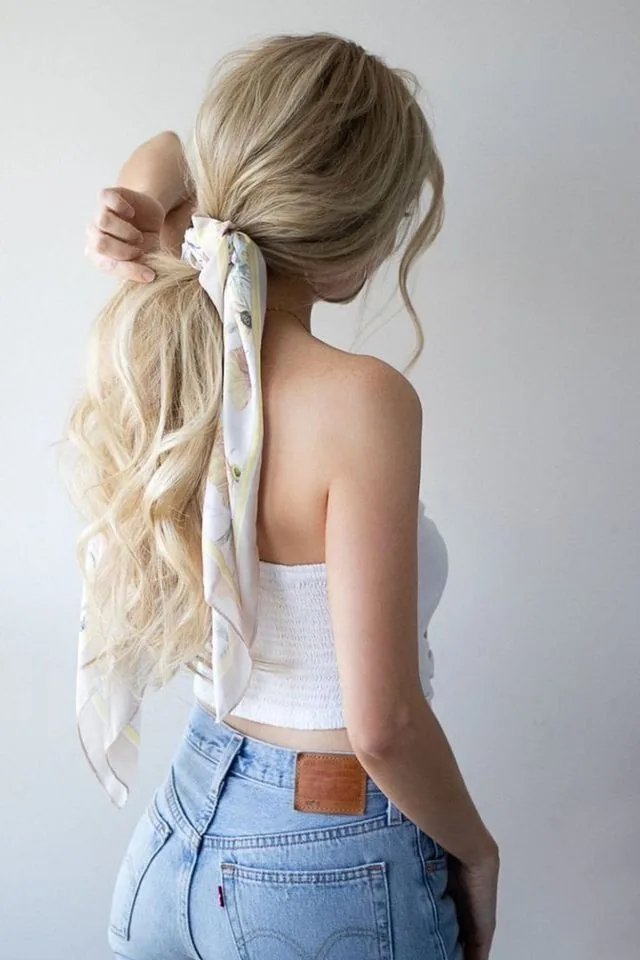
If a full head wrap feels like too much, the scarf-wrapped low ponytail gives you the same cover with a lighter touch. Gather the hair into a low ponytail, then wrap a narrow scarf around the base, tying it in a small bow or knot with the ends left to hang alongside the tail. The scarf hides the elastic, covers the greasiest part of the crown if you drape it a little higher, and adds a finished detail that makes a plain ponytail look styled. It is the best scarf option for work and for days when you want the rescue to be subtle rather than a statement. It takes three minutes and works on shoulder-length to long hair.
- Pros: hides the elastic and the roots; adds colour and polish; quick and subtle.
- Cons: a slippery silk scarf can loosen — knot it twice, or use a cotton scarf for grip.
- Quick verdict: the office-friendly scarf style, and the easiest way to dress up a second-day ponytail.
13. The Baseball Cap Ponytail
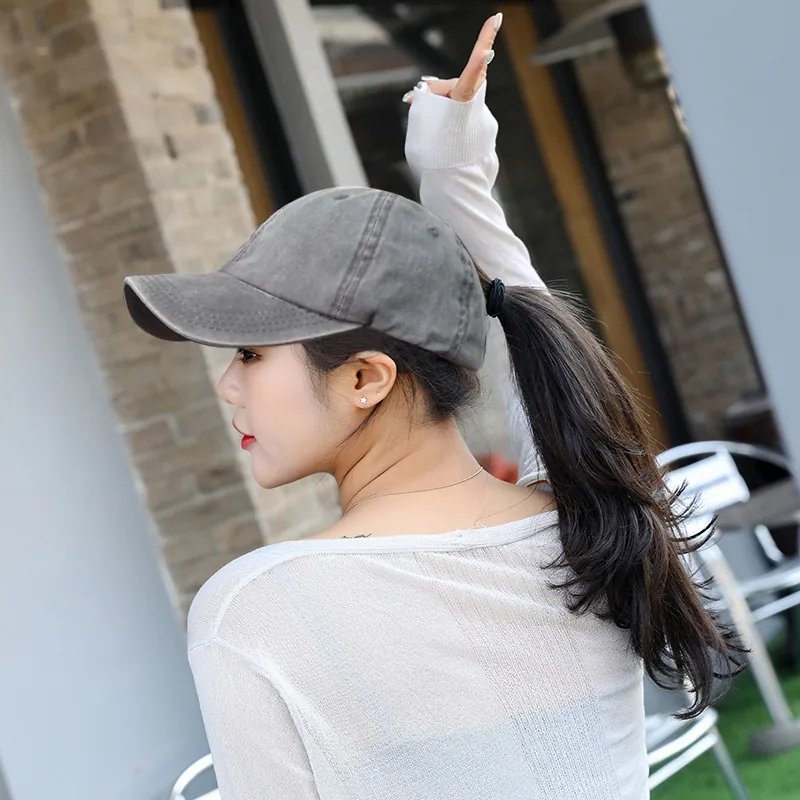
The baseball cap ponytail is the sporty rescue, and it works because the cap does the hiding and the ponytail does the styling. Pull the hair into a low ponytail through the opening at the back of the cap, or wear the ponytail low beneath it, and smooth the front with a little cream so no flyaways poke out under the brim. The cap covers greasy roots and a flat crown completely, the brim draws the eye forward and away from the hair, and the whole look reads as casual and intentional. It is the best rescue for errands, travel, outdoor days and the gym, and it takes about a minute.
Time needed: 1 minute. Best for: greasy roots, flat crowns, casual and outdoor days. What it hides: oily roots, unwashed hair, hat-day flatness. Watch out for: wearing the cap over loose, unstyled hair — the ponytail or braid underneath is what makes it look deliberate.
14. The Beanie Tuck

The beanie tuck is the cold-weather rescue: pull a beanie on, tuck the lengths up inside it at the back, and leave a few soft pieces loose around the face. The tuck hides the ends — the part of the hair that usually looks worst on a bad hair day, dry and bent from sleep — while the beanie covers the crown and the roots. It works on short to medium hair best, because long hair makes too much bulk inside the hat, and it adds warmth at the same time. Choose a beanie that fits snugly but not tightly, and if your hair is prone to frizz, wear a silk scarf underneath the beanie to stop the wool from roughing up the cuticle.
How to style it: beanie on, lengths tucked up at the nape, a few face-framing pieces pulled loose and smoothed with cream. Best for: cold days, short to medium hair, dry or frizzy ends. Common mistake: pulling the beanie too far forward — sit it just behind the hairline so it frames the face instead of hiding it.
15. The Wide Headband Sweep-Back

A wide headband is the fastest way to rescue greasy roots and a messy hairline without covering the whole head. Push the hair back from the face, place a wide fabric or padded headband a couple of centimetres behind the hairline, and let the rest of the hair fall or gather it into a low bun or ponytail. The band hides the oiliest strip of hair at the front, holds back flyaways, and creates a clean, intentional line across the crown that makes everything behind it look tidy by association. It works on every length, including short hair and growing-out bangs, and it takes about thirty seconds.
- Pros: instant, no product needed, works on short hair, hides the greasiest area first.
- Cons: can cause a headache if it is too tight; a narrow band slips and shows more root than a wide one.
- Quick verdict: the best thirty-second fix in this guide — keep a headband in your bag for emergencies.
16. The Half-Up Top Knot
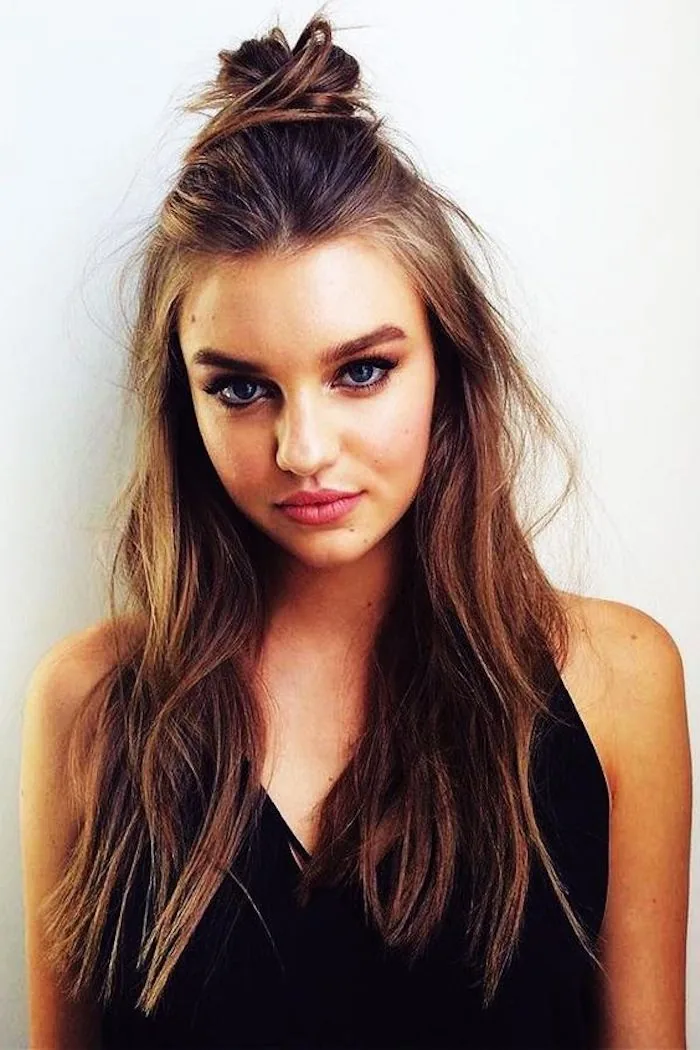
The half-up top knot rescues the top of the head and leaves the rest alone, which is exactly right when only the crown is misbehaving. Gather the top half of the hair — from the temples to the crown — twist it into a small knot and pin it, and leave the bottom half down. The knot hides greasy roots and flatness at the crown, adds height and shape where the hair was limp, and the loose lengths underneath look relaxed rather than unstyled. It takes two minutes, works on medium to long hair, and it is one of the best styles for wavy or curly hair, where the loose lengths keep their natural texture while the knot controls the top.
Time needed: 2 minutes. Best for: greasy crown, flat roots, wavy and curly hair. What it hides: oily roots at the part, flatness at the crown. Ask your stylist: for face-framing layers, which soften the half-up look and stop it reading as severe.
17. The Half-Up Claw Clip
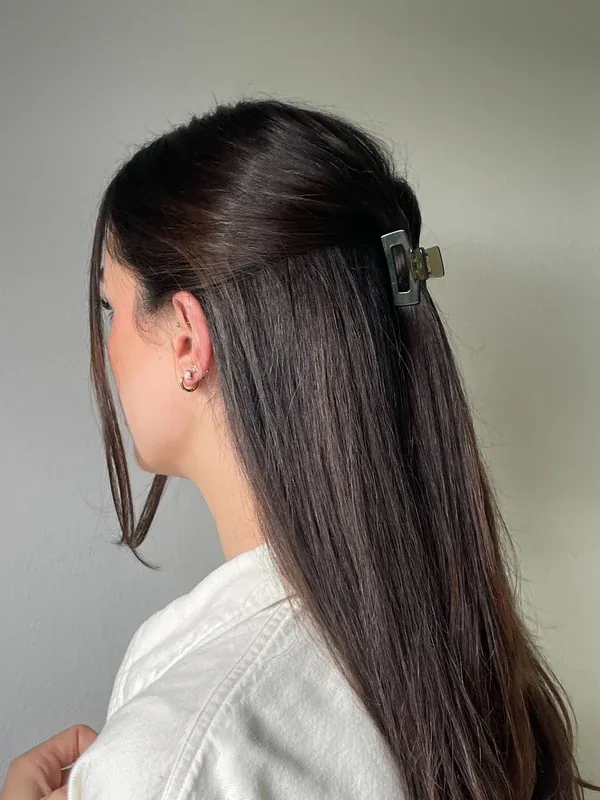
The half-up claw clip is the half-up top knot’s lazier cousin, and it is even faster. Gather the top half of the hair, twist it once, and clamp a medium claw clip over it. The clip holds the twist, lifts the crown, hides the greasiest section at the part, and leaves the rest of the hair down to move naturally. It is the best half-up option for thick hair, because a clip holds a heavy top section better than pins, and it is the best option when you want the rescue to take under a minute. Pull a few pieces loose around the face and the style looks soft and deliberate rather than rushed.
How to style it: top half gathered from temple to temple, one twist, medium claw clip, a few face pieces pulled loose. Best for: thick hair, busy mornings, wavy hair. Watch out for: clipping too far back — place the clip at the crown, not behind it, or the lift disappears.
18. The High Messy Bun
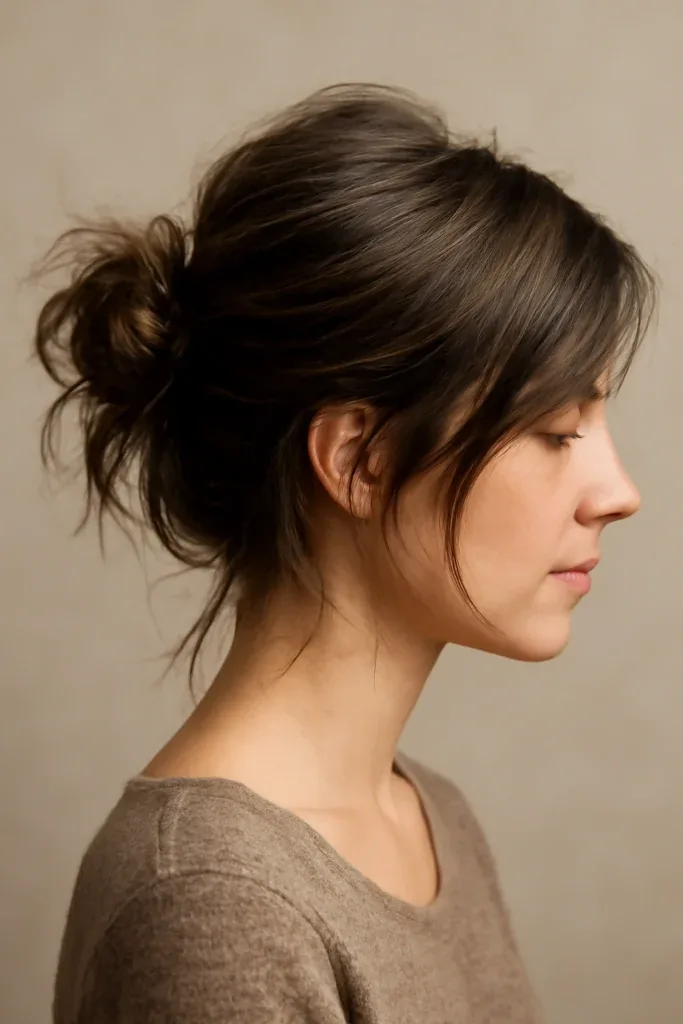
The high messy bun is the classic bad hair day style for a reason: it takes everything that is wrong — frizz, flatness, grease, bends — and piles it on top of the head where it reads as volume and texture. Gather the hair high, twist loosely, wrap it around its base, pin in two places, and pull a few pieces loose around the face and at the nape. The height adds shape that flat hair lacks, the looseness hides uneven texture, and the pinned-up position keeps greasy lengths off the neck and out of sight. It takes two minutes, suits medium to long hair, and it is the style most people reach for first — because it works.
- Pros: adds height to flat hair, hides everything at once, needs no product or mirror.
- Cons: heavy hair can slide and cause a headache; too casual for formal settings.
- Quick verdict: the default rescue — if you only remember one style from this guide, remember this one.
19. The Low Messy Bun
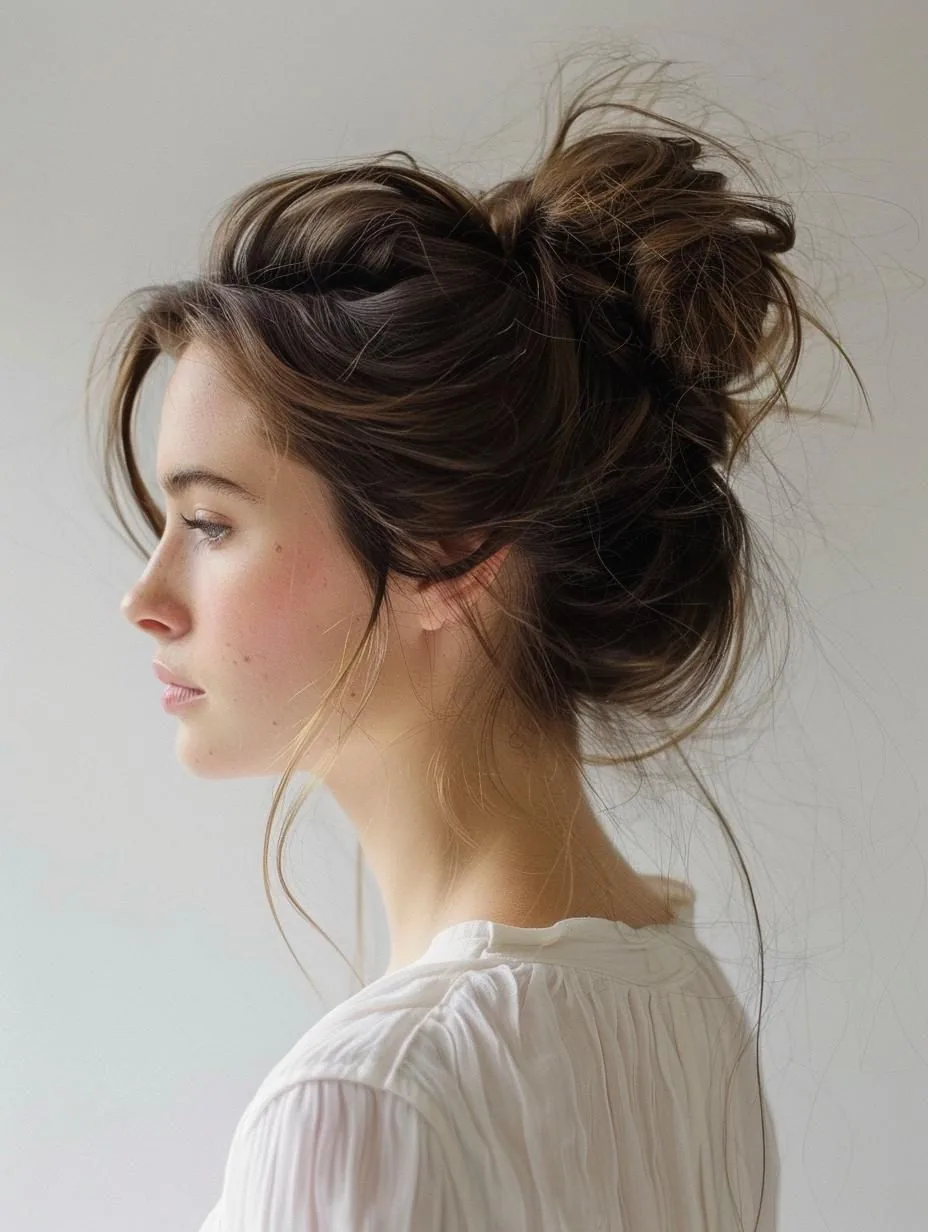
The low messy bun is the high messy bun’s quieter sister, and it is the better choice when the day is formal or the hair is heavy. Gather the hair at the nape, twist it loosely, wrap it around its base and pin it, then pull a few soft pieces loose around the face. The low position keeps the weight off the crown, so it stays comfortable all day and does not slide, and the looseness hides frizz and uneven texture just as well as the high version. It reads as relaxed and elegant rather than casual, which makes it the best messy bun for work, dinners and days when you want to look put-together without trying very hard. It takes three minutes and suits medium to long hair of every texture.
Time needed: 3 minutes. Best for: heavy hair, work days, frizz and uneven texture. What it hides: greasy lengths, sleep bends, frizzy ends. Common mistake: making it too neat — a low bun that is too tight and smooth shows every lump; keep it loose.
20. The Braided Crown
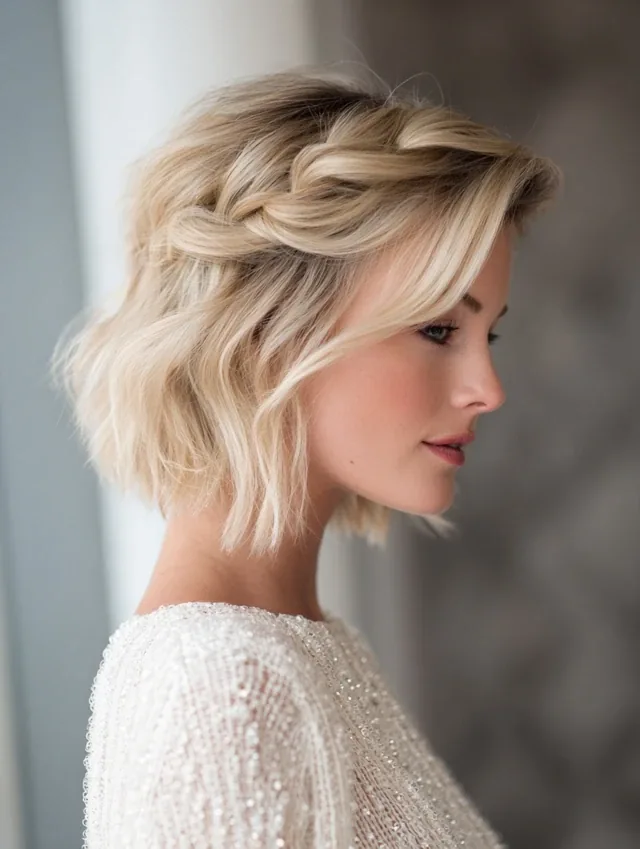
The braided crown — a braid wrapped around the head like a halo — is the rescue that looks like you spent forty minutes on it, and it takes about seven. Braid the hair from one side around the back of the head to the other, or braid two braids and pin them across the crown, tucking the ends underneath. The braid contains the entire hairline, hides greasy roots and flyaways completely, and adds a striking shape that draws the eye away from everything else. It works on medium to long hair, suits formal days and special occasions, and it holds all day because the braid braces itself where the two ends meet. If braiding around your own head feels hard, two side braids pinned across the crown give you the same effect with less skill.
Time needed: 7 minutes. Best for: formal days, greasy roots, frizz, special occasions. What it hides: oily roots, flyaways, an uneven hairline. Ask your stylist: for a lesson in halo braiding — one practice session makes this a five-minute style.
21. The Rope Twist Crown
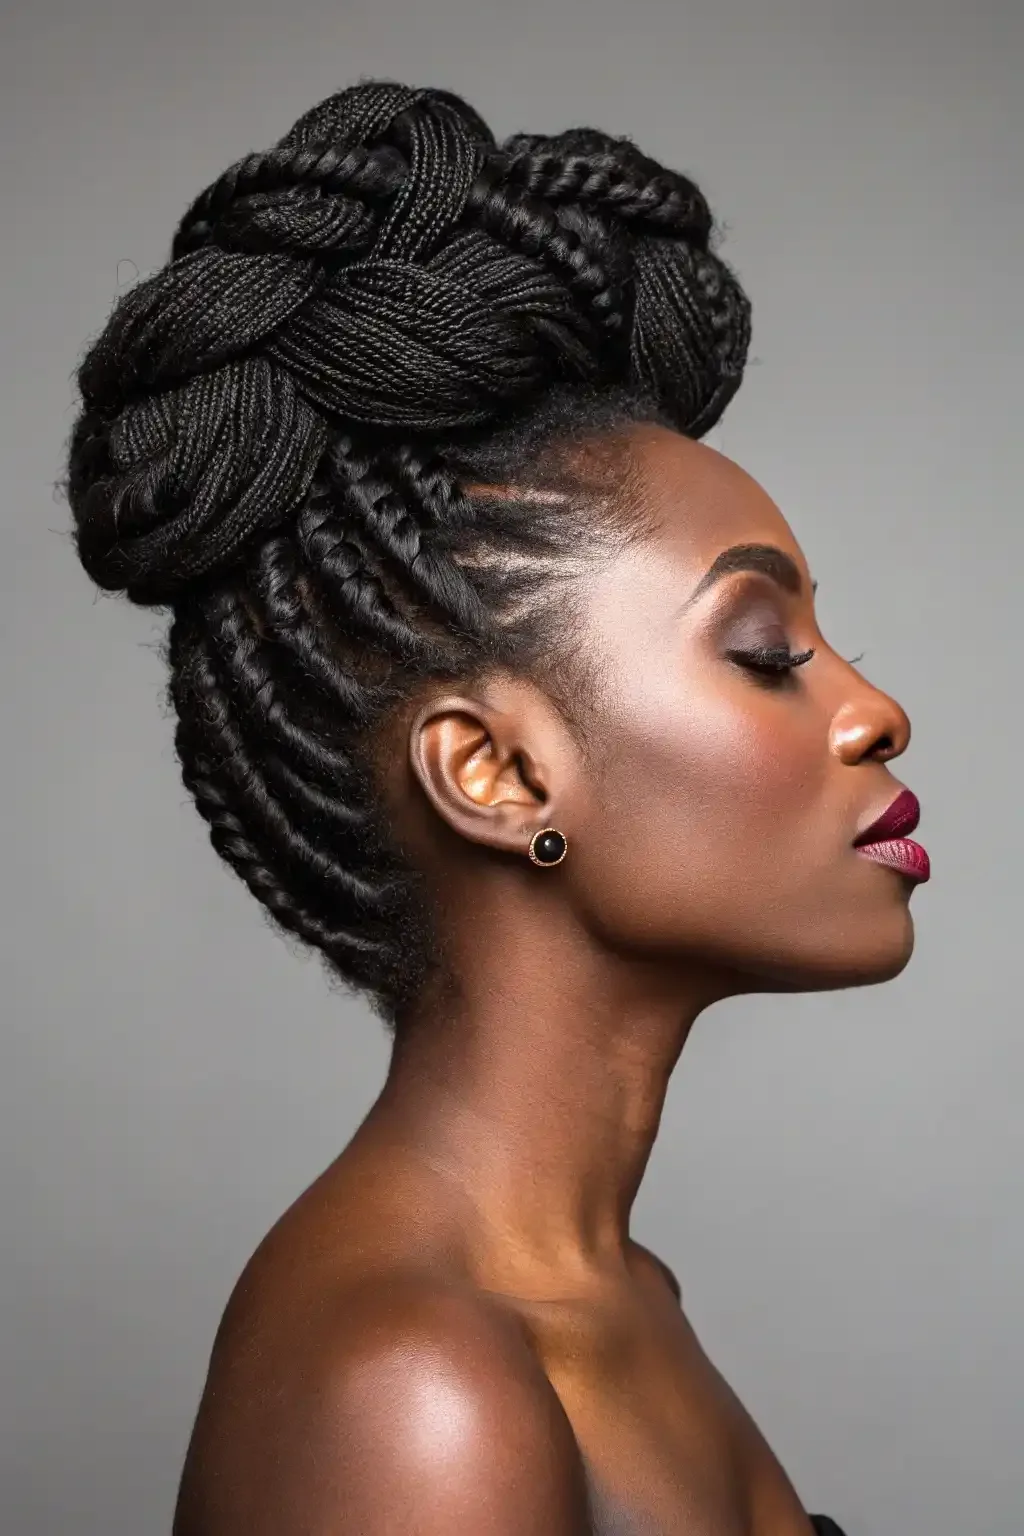
The rope twist crown is the braided crown for people who cannot braid. Take two sections, one from each side of the head, twist each one into a rope by twisting the section and then wrapping it around itself, and pin the two ropes across the crown so they meet at the back. No braiding skill is needed — just twist, wrap, pin, tuck. The twists sit flat, contain the entire hairline, hide greasy roots and flyaways, and hold all day because the two twists brace each other where they meet. It works on medium to long hair of any texture, takes about five minutes, and it is the best halo option for anyone who has never managed a halo braid.
Time needed: 5 minutes. Best for: anyone who cannot braid, greasy roots, frizz. What it hides: oily roots, flyaways, a messy hairline. Watch out for: twists that are too loose — a firm twist holds its shape, a loose one unravels by midday.
22. The Deep Side Part Sweep

Changing the part is the fastest single fix in this guide, and the deep side part sweep is how you do it properly. Move the part far to one side — much further than feels natural — and sweep the larger section across the crown. The new part hides greasy roots, because the hair at the old part has been lying flat and oily all day while the hair at the new part is fresh and lifted. The sweep adds instant volume at the crown, covers a flat spot, and creates a shape that looks styled rather than rescued. It takes thirty seconds, works on every length from a bob upward, and it pairs well with a low bun or ponytail if the lengths still need containing.
- Pros: thirty seconds, no product, hides grease and flatness at the crown, adds volume.
- Cons: the hair may drift back to its old part during the day — a pin at the part keeps it in place.
- Quick verdict: try this first, before any product or style — it fixes more bad hair days than anything else here.
23. The Sleek Centre-Part Low Bun
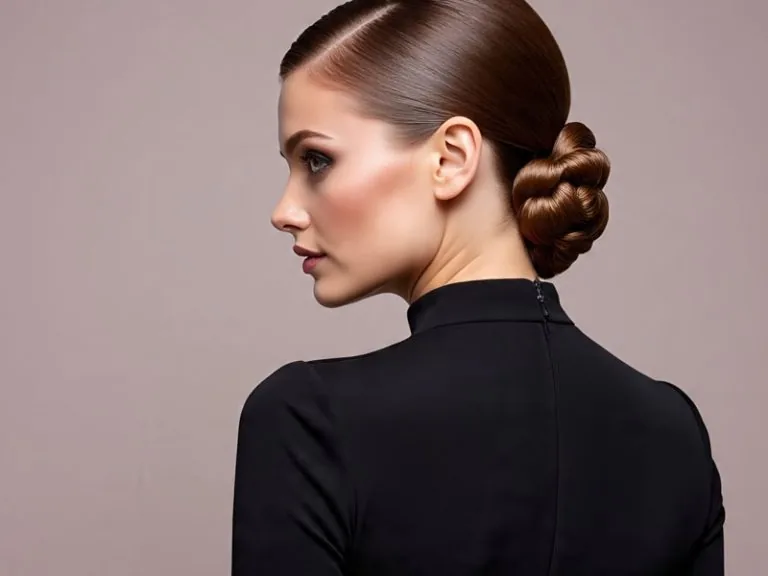
The sleek centre-part low bun is the polished end of the bad hair day spectrum: a sharp middle part, a smooth surface, and a low bun at the nape. Part the hair down the centre, smooth each side back with a little gel or cream, gather low and coil into a bun. The centre part is the key — it divides the hair evenly, hides an uneven or greasy part completely, and gives the style a symmetry that reads as deliberate and expensive. It works on medium to long hair, takes about four minutes, and it suits work, formal days and evenings. Keep the surface smooth and the bun low, and nobody will guess the hair underneath was having a bad day.
Time needed: 4 minutes. Best for: work and formal days, greasy roots, frizz. What it hides: an uneven part, flyaways, oily roots. Ask your stylist: for a cut with a clean centre part line, so the part falls naturally instead of fighting you.
24. The Textured Low Chignon
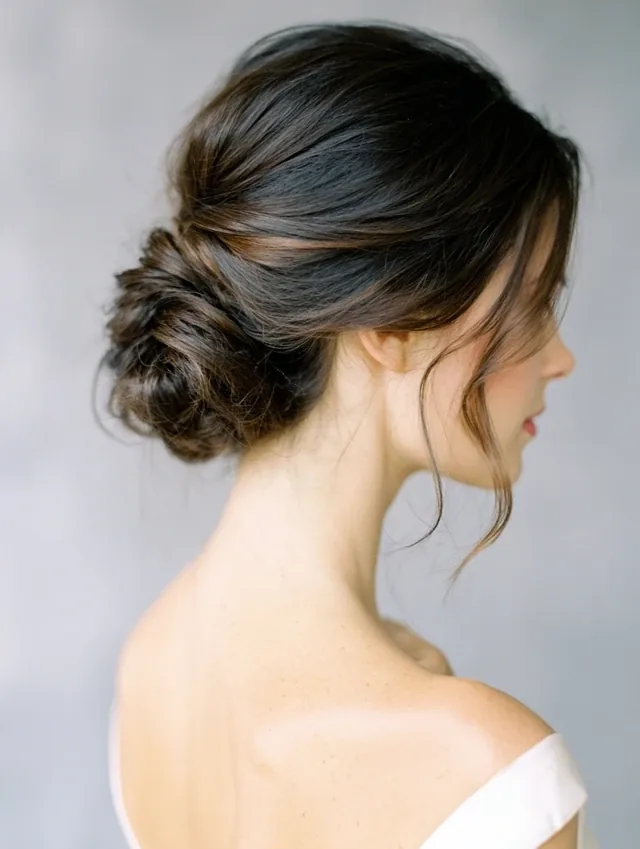
The textured low chignon is the answer for hair that is too short for a proper bun but too long to leave down — and it is a beautiful rescue for frizzy or uneven texture. Gather the hair at the nape, twist it upward into a roll, tuck the ends in, and pin along the fold, then gently pull at the roll to loosen it and add texture. The roll sits flat against the head, needs no elastic at all, and the looseness hides every lump and bend. It looks softer and more finished than its three-minute build time suggests, and it flatters nearly every face shape because the twist follows the natural curve of the head. It works on shoulder-length hair especially well.
How to style it: gather at the nape, twist up, tuck the ends, pin along the fold, then loosen the roll gently for texture. Best for: shoulder-length hair, fine hair that slips out of elastics, formal days. Watch out for: using too few pins on thick hair — work along the whole fold with five or six pins.
25. The Rope Twist Ponytail
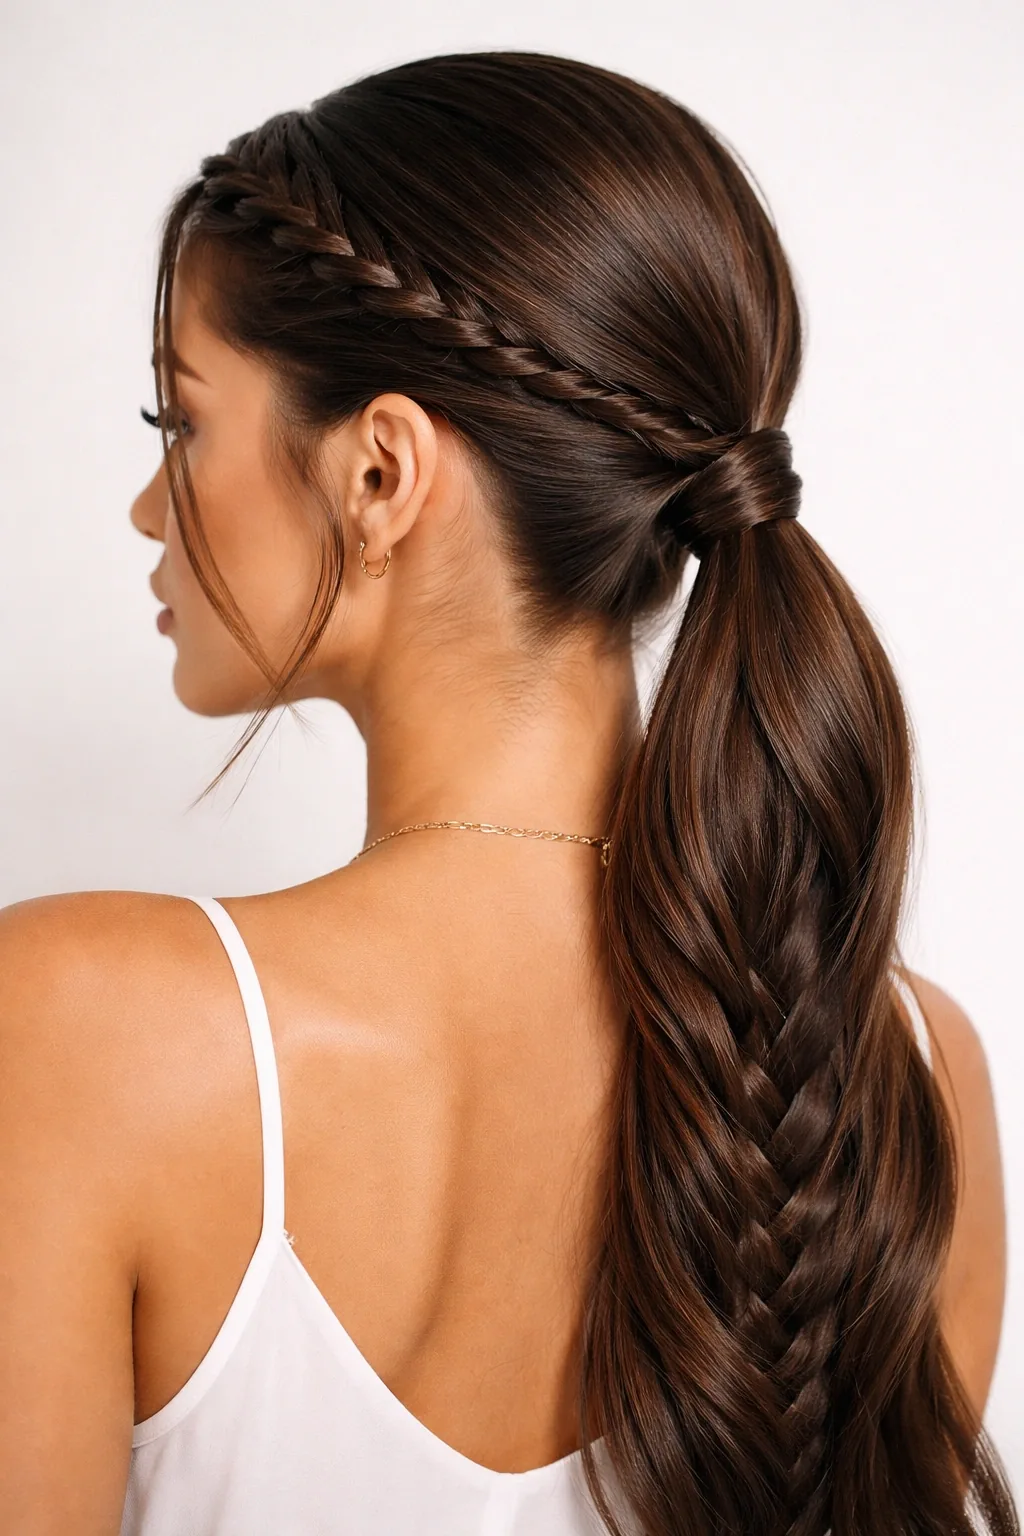
The rope twist ponytail turns a plain ponytail into a style with one technique and no braiding. Gather the hair into a ponytail, split the tail into two sections, twist each section in the same direction, then wrap the two twisted sections around each other in the opposite direction and secure the ends. The rope texture hides unevenness and frizz in the tail, adds grip so the ponytail holds its shape, and looks far more deliberate than a straight ponytail. It takes four minutes, works on medium to long hair, and it is one of the best styles for silky hair that slips out of ordinary ponytails.
- Pros: no braiding needed, grips silky hair, hides frizz in the tail, looks polished.
- Cons: the rope can unravel if the ends are not secured well — use a small elastic and a pin.
- Quick verdict: the ponytail upgrade for days when a plain ponytail feels too plain.
26. The Knotted Ponytail
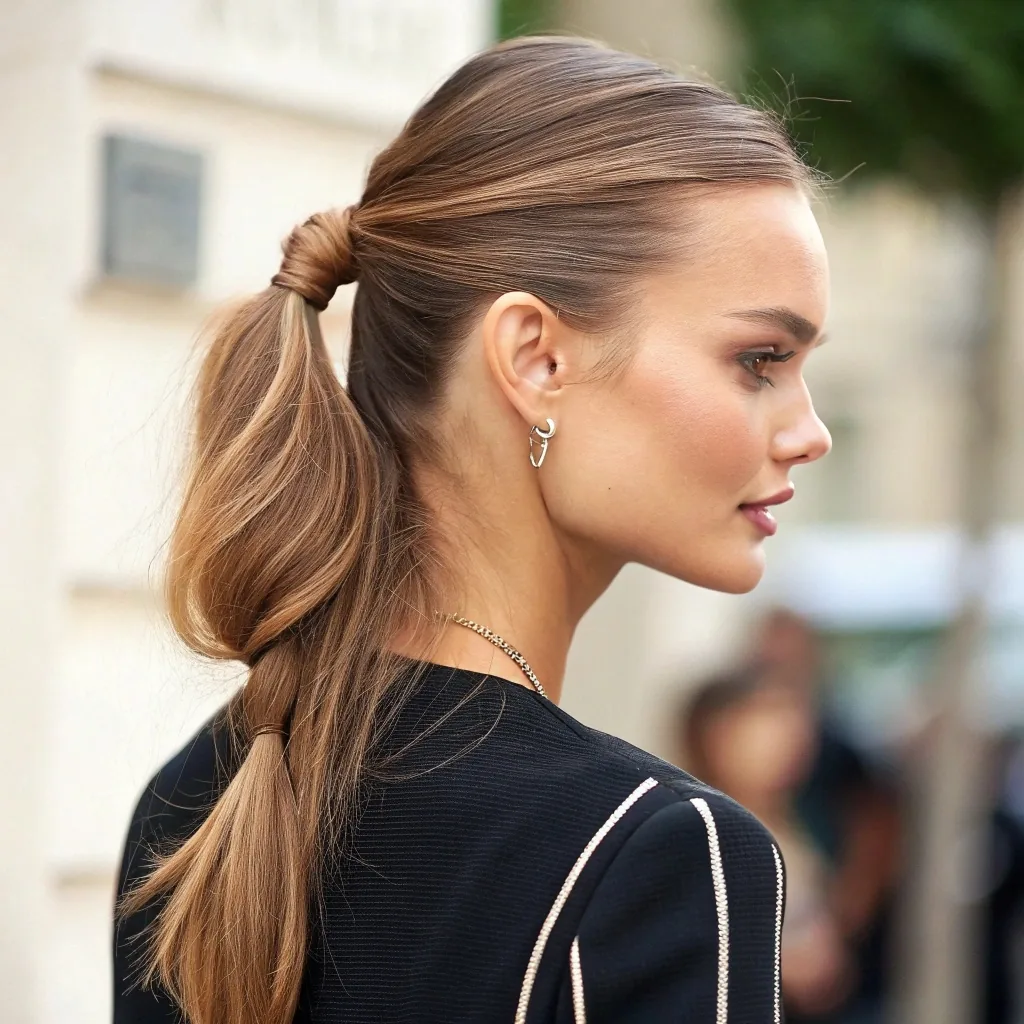
The knotted ponytail is the most forgiving ponytail in this guide, because knots hide everything. Gather the hair low, split the tail into two sections, tie them in a simple knot, then tie a second knot below the first and secure the ends. The knots break up the tail into a textured shape that hides uneven lengths, sleep bends and frizz, and the knot structure holds the ponytail in place better than a single elastic — it cannot slide down the way a plain ponytail does. It takes three minutes, works on medium to long hair, and it reads as modern and intentional rather than rescued.
Time needed: 3 minutes. Best for: uneven texture, sleep bends, long hair that slides out of ponytails. What it hides: frizzy ends, thin tails, a bad haircut growing out. Common mistake: tying the knots too tightly — a loose knot looks softer and holds just as well.
27. The Braided Ponytail
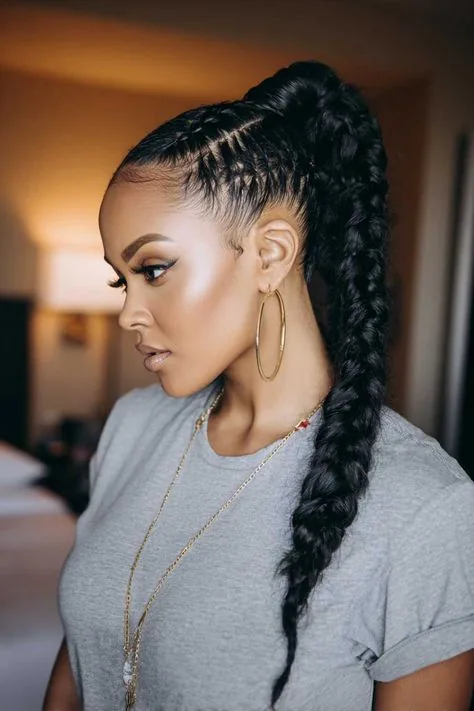
The braided ponytail combines the speed of a ponytail with the staying power of a braid, and it is one of the best all-round rescues here. Gather the hair into a ponytail — high for a bold look, low for work — then braid the tail and secure the ends. The braid contains the lengths completely, so frizz and uneven texture disappear into the plait, and the ponytail base keeps the crown smooth and lifted. It takes four minutes, works on medium to long hair, and it survives wind, workouts and long days far better than a loose ponytail. Wrap a thin strand around the elastic at the base and the whole style looks finished.
How to style it: ponytail first, braid the tail, secure, then wrap a strand around the elastic and pin it underneath. Best for: active days, long hair, frizz. Skip it if: your hair is too short to braid the tail — the rope twist ponytail above is the shorter-hair equivalent.
28. Face-Framing Pieces Pinned Back
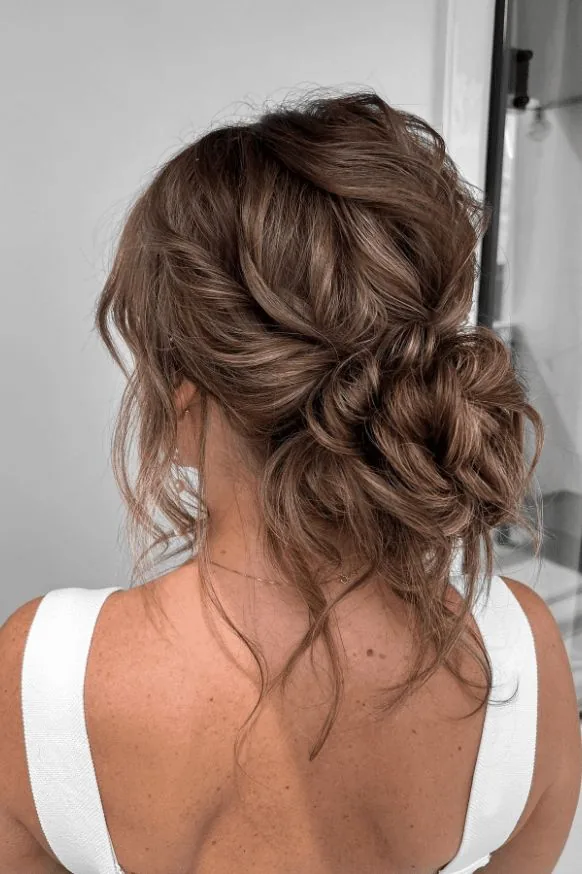
Sometimes the bad hair day is only at the front — the fringe is greasy, the face-framing pieces are frizzy, the rest of the hair is fine. The fix is to deal with the front only: take the two front sections, twist each one back away from the face, and pin them at the temples or behind the ears. The twists hide the greasiest and frizziest hair, open up the face, and leave the rest of the hair down to move naturally. It takes two minutes, works on every length from a bob upward, and it is the best rescue for growing-out bangs, because the pinned-back twists hide the awkward in-between length completely.
Time needed: 2 minutes. Best for: greasy fringe, frizzy front pieces, growing-out bangs. What it hides: oily roots at the hairline, flyaways around the face. Ask your stylist: for long face-framing layers, which pin back neatly instead of springing loose.
29. The Slicked-Back Wet Look
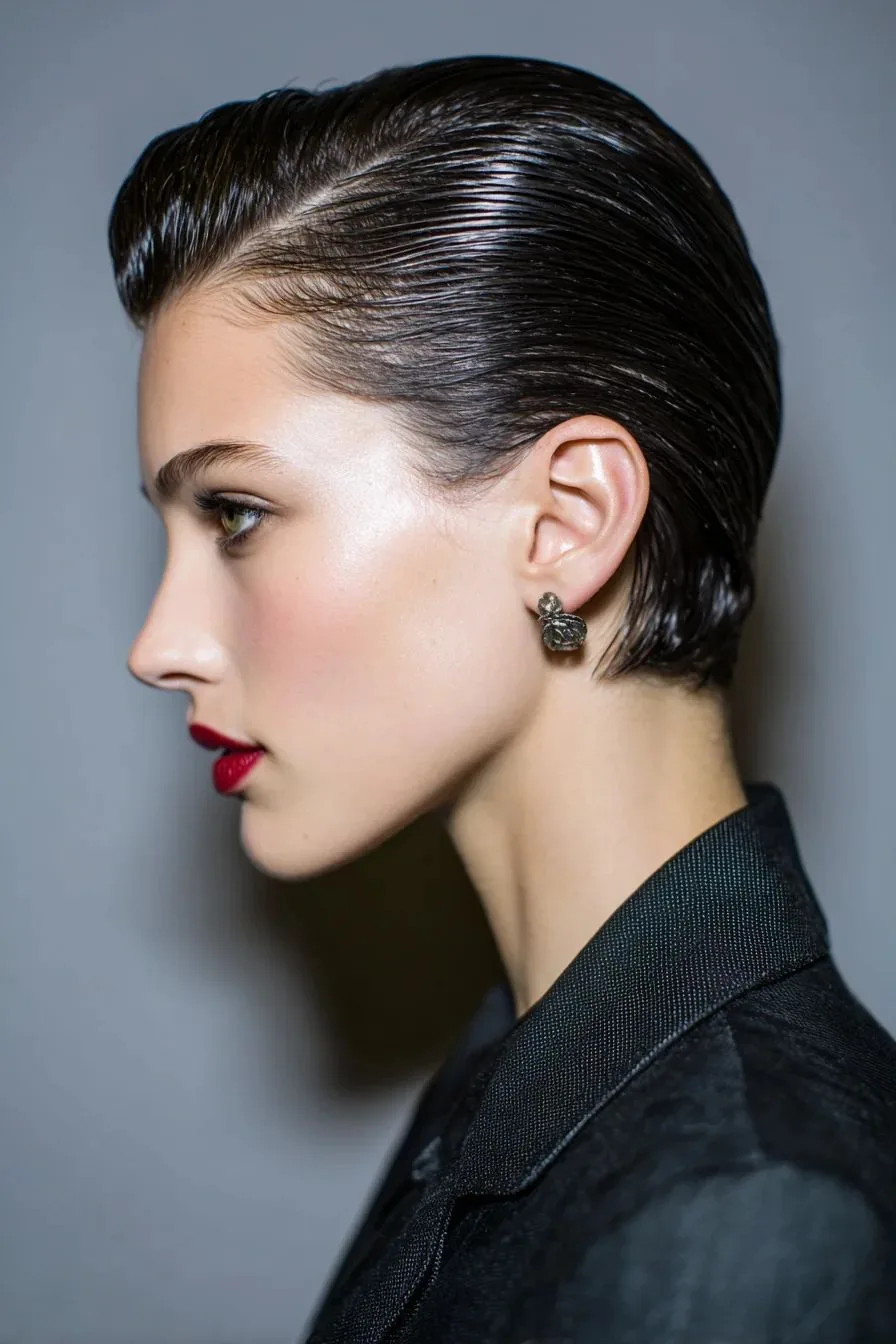
The wet look is the boldest rescue in this guide, because it takes the thing that usually ruins a bad hair day — hair that looks damp and greasy — and turns it into the style. Work a generous amount of gel through damp hair, comb it straight back from the hairline, and let it set into a smooth, glossy shape, either worn down or gathered into a low bun or ponytail. The shine reads as intentional and editorial, and the gel holds frizz and flyaways flat for hours. It takes five minutes, works on medium to long hair, and it suits evenings and occasions best. Keep the gel on the top layer and the roots, not through the whole head, or the look tips from glossy into heavy.
- Pros: turns grease into shine, holds frizz flat for hours, striking and editorial.
- Cons: the boldest style here — too much for a quiet office day; needs a proper wash afterwards.
- Quick verdict: save it for evenings and occasions, when a bad hair day deserves a dramatic answer.
30. The Low Braided Bun
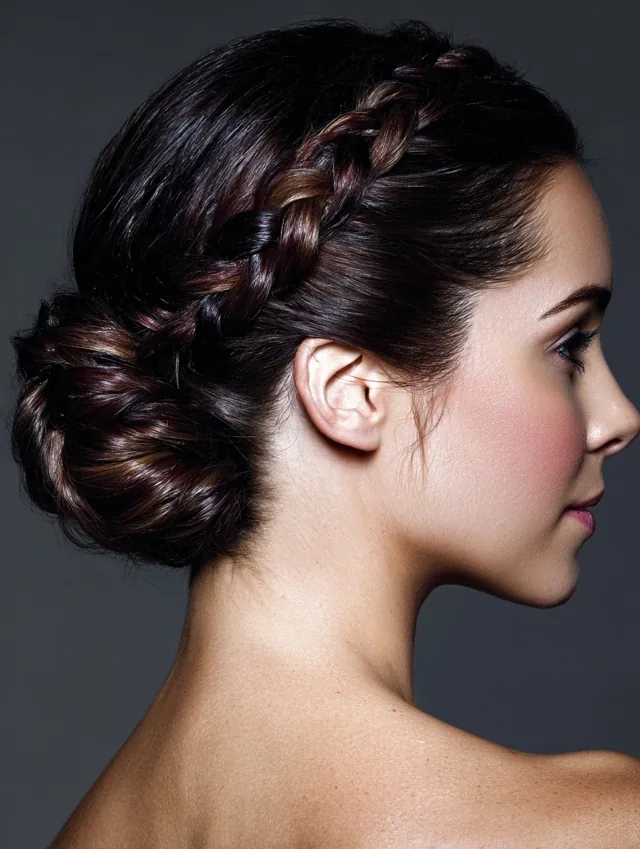
Braid the hair first, then coil the braid into a bun, and you get the neatest rescue in this guide with the best staying power. The braid gives the bun internal structure, so it holds its shape all day without re-pinning, and the plaited texture looks deliberate and polished even after a hat or a scarf has pressed on it. It works on any hair long enough to braid, and it is particularly good for thick hair, where a plain bun can feel heavy and unstable. The braid also solves the flyaway problem: short layers and new growth that escape from a plain bun stay woven into the plait. It takes about five minutes.
How to style it: gather into a low ponytail, braid to the ends, coil the braid flat against the head and pin through the braid itself. Best for: long and thick hair, layered cuts, all-day wear. What it hides: flyaways, greasy roots, uneven texture. Watch out for: pinning only around the bun — pin through the braid for real security.
31. Two Low Space Buns
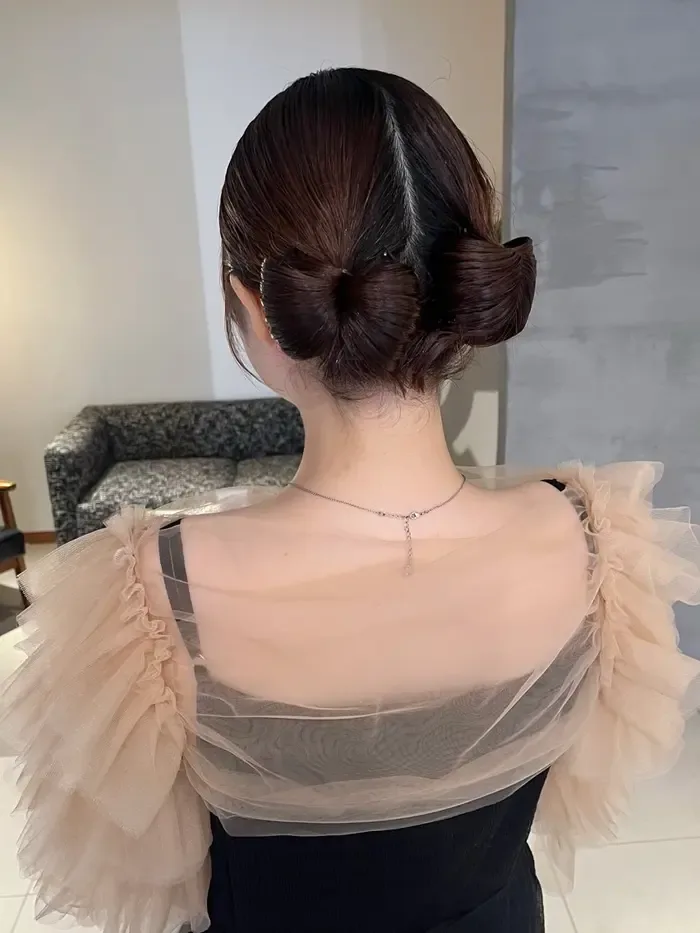
Two low space buns split the hair down the middle and coil each half into a small bun at the nape, and they are a brilliant rescue for thick hair and for hair that will not stay in one bun. Each bun carries half the weight, so nothing slides or pulls, and the centre part hides greasy roots at the part line. The style looks playful but tidy, it contains frizz completely, and it takes about four minutes. It works on medium to long hair, suits casual days and festivals, and it is one of the best styles for very thick hair, where a single bun always feels too heavy. Keep the buns low and close to the head for the neatest result.
Time needed: 4 minutes. Best for: thick hair, casual days, greasy roots at the part. What it hides: oily roots, frizz, uneven texture. Common mistake: placing the buns too high — low buns at the nape look intentional; high ones on a bad hair day can look accidental.
32. Double Pigtail Braids
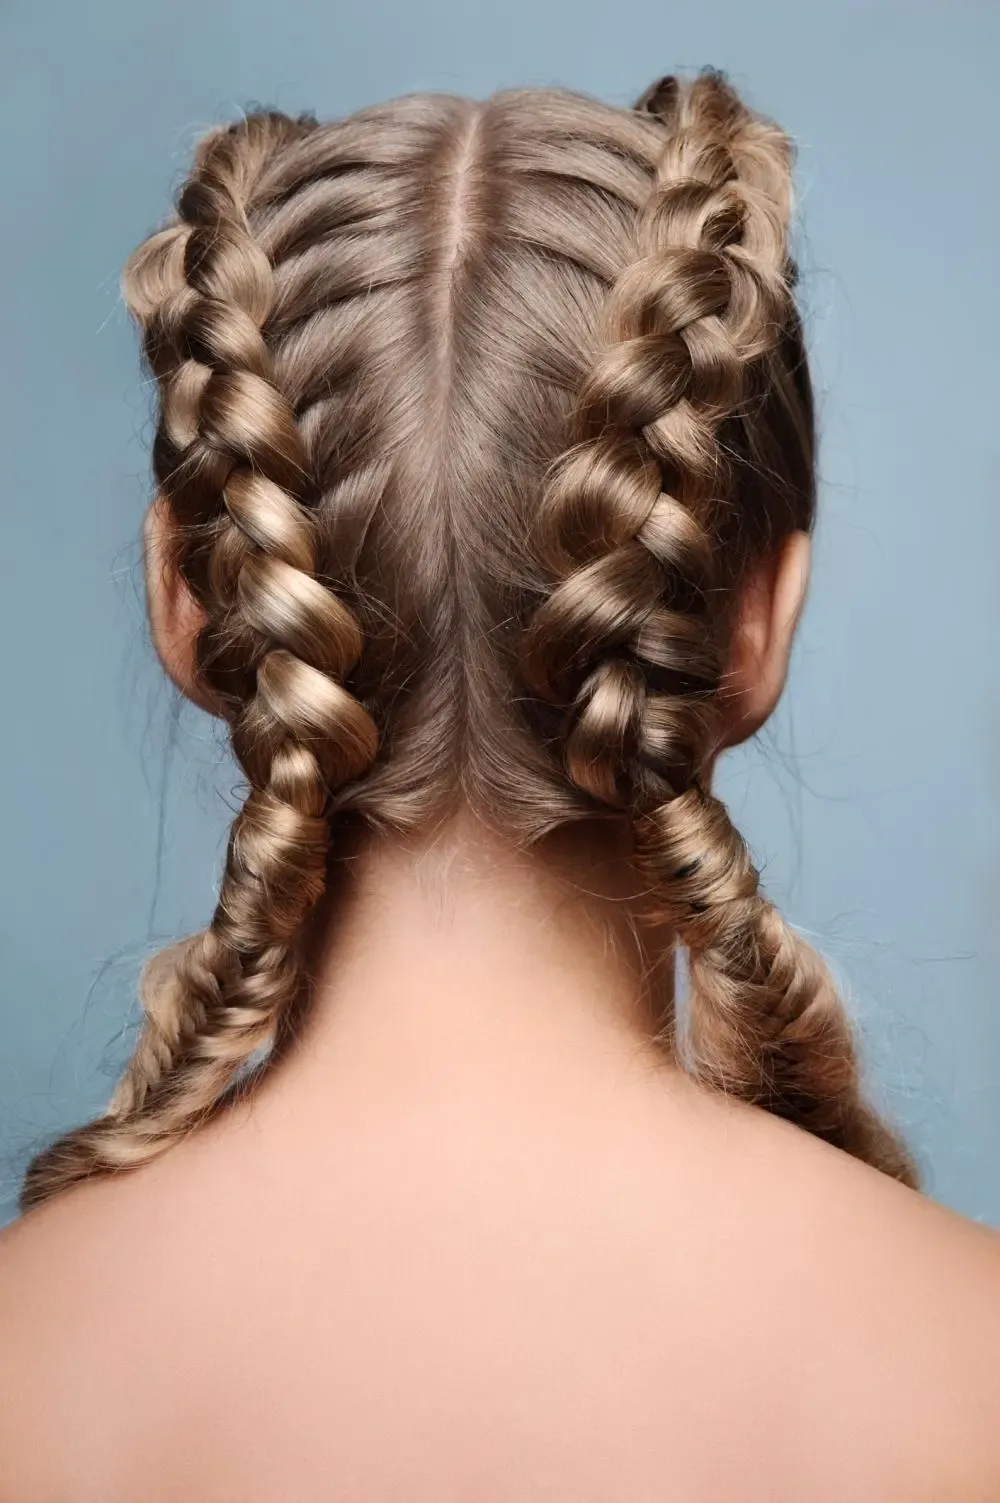
Two braids, one on each side, solve the problems that a single braid cannot. They handle very thick hair better, because each braid carries half the weight; they keep short layers and face-framing pieces contained, because the braids start right at the hairline on both sides; and they sit flatter than one central braid. Part the hair down the middle, braid each side from the front hairline to the nape, and secure the ends — or join the tails into one low bun for the tidiest finish. The style takes six minutes once practised, works on medium to long hair, and it holds all day without a single re-do.
- Pros: best for thick hair and layered cuts, holds all day, contains the whole hairline.
- Cons: takes longer than a single braid; can read as young if worn loose — the joined-bun finish keeps it grown-up.
- Quick verdict: choose it when one braid cannot contain your hair, or when the layers keep escaping.
33. The French Twist
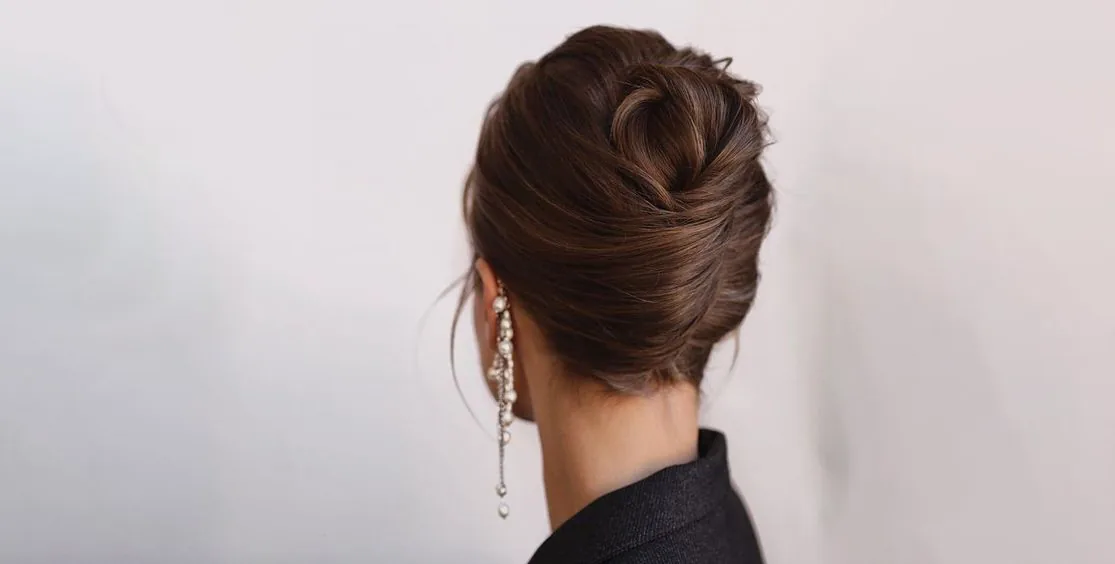
The French twist is the elegant rescue — the style that takes a bad hair day and turns it into an occasion. Gather the hair low, twist it upward into a vertical roll, tuck the ends in, and pin along the fold from top to bottom. The roll contains every strand, hides greasy roots and frizz completely, and creates a clean, sculpted silhouette that looks like it took half an hour. It takes about five minutes once you have practised it, works on shoulder-length to long hair, and it suits formal days, weddings and evenings. The trick is to pin along the whole fold, not just at the top, and to keep the twist close to the head so it cannot shift.
Time needed: 5 minutes. Best for: formal days, shoulder-length to long hair, frizz and grease. What it hides: oily roots, flyaways, uneven lengths. Ask your stylist: for a practice run — one lesson makes the French twist a reliable five-minute style.
34. The Mohawk Braid

The mohawk braid — a Dutch braid running down the centre of the head, with the sides smoothed back into it — is the bold rescue for flat hair, because it builds height and shape where there was none. Braid a wide Dutch braid from the hairline to the crown, gathering the side hair into it as you go, then secure the rest into a low ponytail or bun. The raised braid creates a striking centre line that draws the eye, hides a flat crown completely, and contains the hairline so flyaways disappear. It takes about seven minutes, works on medium to long hair, and it suits days when you want the rescue to look like a statement rather than a cover-up.
How to style it: wide Dutch braid down the centre, sides smoothed back with cream, ends gathered into a low bun or ponytail. Best for: flat hair, bold days, thick hair. Watch out for: braiding too tightly at the hairline — firm is good, painful is not, and the braid holds with moderate tension.
35. The Pineapple Updo for Curls
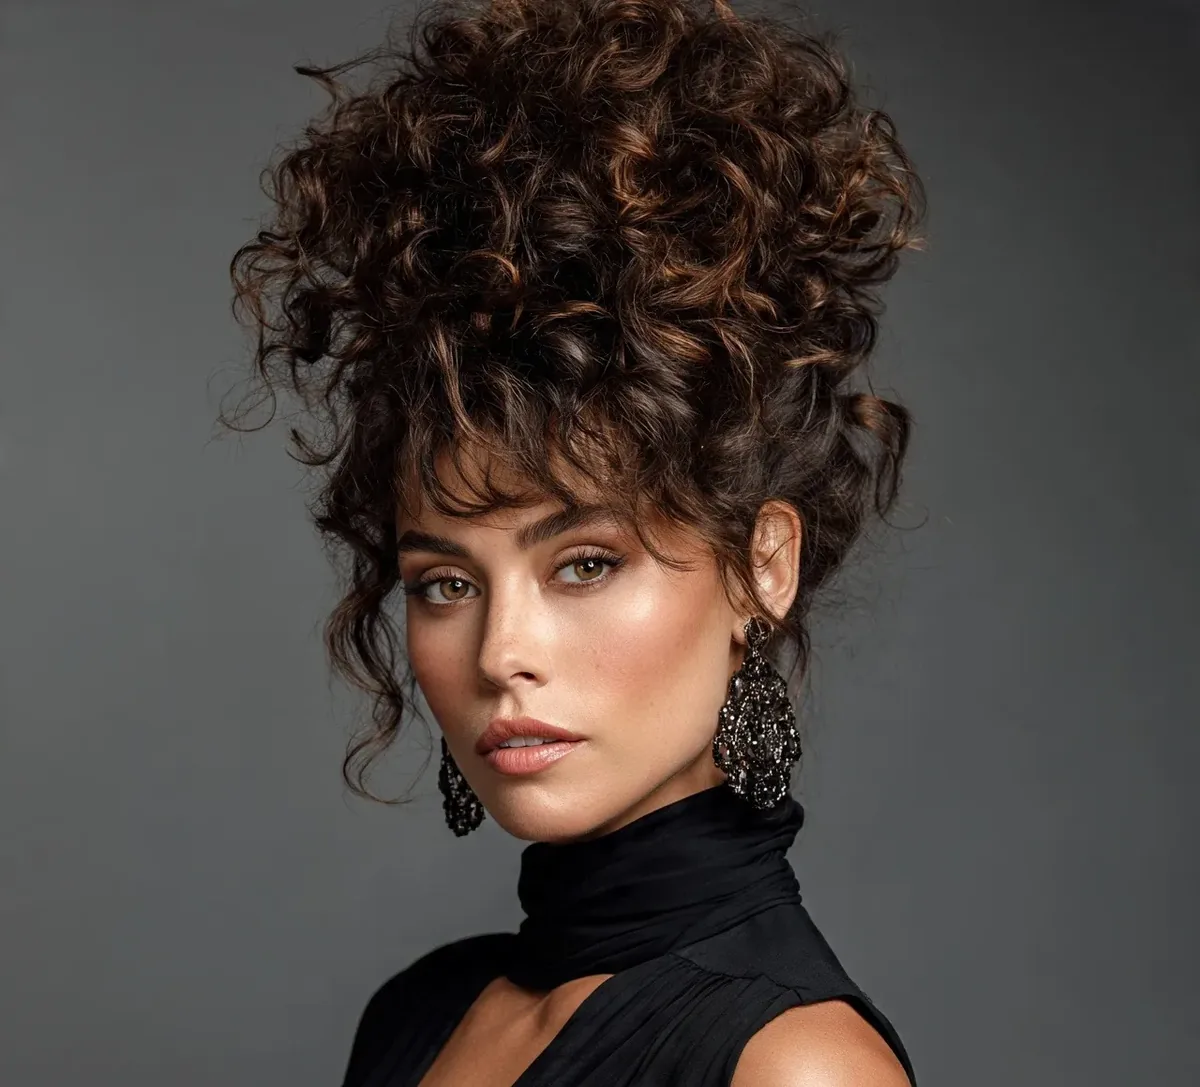
Curly hair has its own bad hair days — flattened curls on one side, frizz on the other, a shape that collapsed overnight — and the pineapple updo is the classic curly rescue. Gather the curls loosely at the very top of the head and secure them with a satin-covered elastic or a wide stretch band, letting the curls fall forward like a pineapple top. The loose gathering preserves the curl pattern instead of crushing it, lifts flat roots, and keeps the curls off the neck and out of the way. It takes two minutes, works on medium to long curly hair, and it is the best style for second- or third-day curls that have lost their shape but are not dirty enough to wash.
- Pros: preserves the curl pattern, lifts flat roots, two minutes, no heat or brushing.
- Cons: too casual for formal settings; very short curls may not gather high enough.
- Quick verdict: the curly-hair default — if your curls have collapsed overnight, pineapple them.
36. The Curly Puff Ponytail
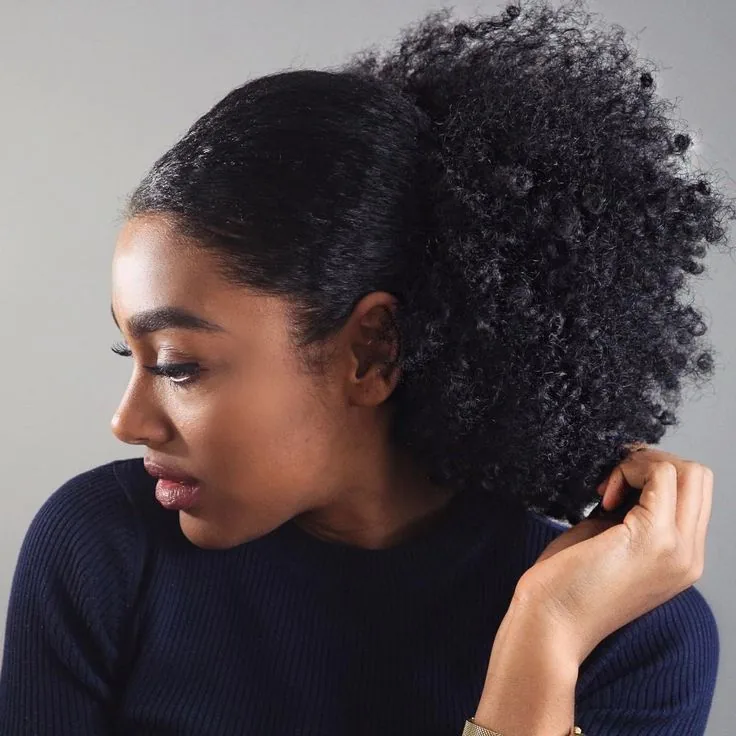
The curly puff ponytail is the rescue for natural and curly hair that has gone flat at the roots and frizzy at the ends. Gather the hair into a high, loose puff with a wide stretch band or a satin scrunchie — never a tight ordinary elastic, which snags and breaks curly hair — and let the curls expand into their full shape. The puff hides flat roots by lifting everything up, contains the frizz inside the curl mass where it reads as texture, and protects the ends by keeping them off the shoulders. It takes two minutes, works on short to long curly and coily hair, and it is one of the kindest styles for hair that is already stressed. Smooth the edges with a little gel on a soft brush for a finished look.
Time needed: 2 minutes. Best for: curly and coily hair, flat roots, frizzy ends. What it hides: collapsed curl shape, dry ends, uneven texture. Common mistake: using a tight elastic — a wide band or satin scrunchie protects the curls and holds just as well.
37. The Sleek High Ponytail
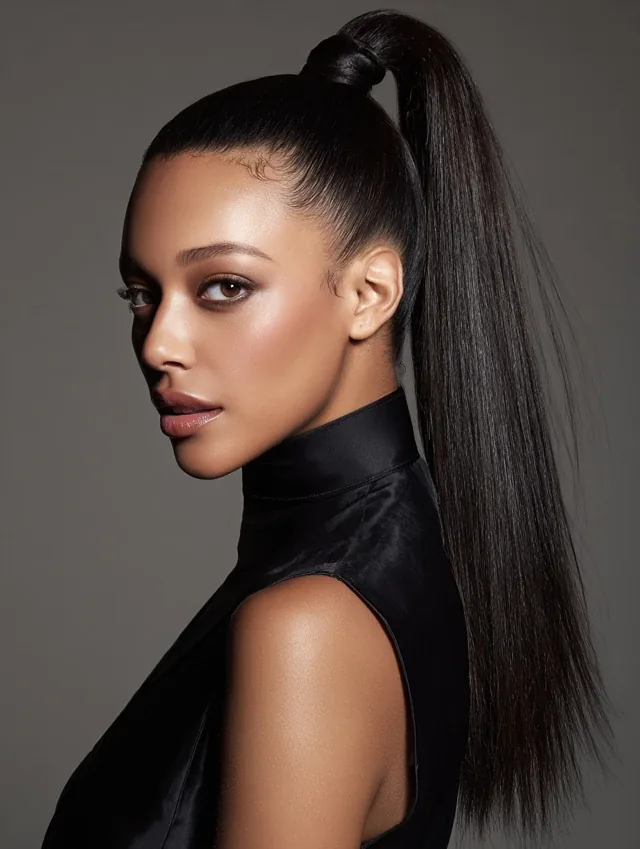
The sleek high ponytail is the sharp rescue: all the hair pulled up and back into a smooth, high tail that looks polished and powerful. Brush the hair up from the nape and the sides, smooth the surface with gel or cream, secure high at the crown, and wrap a strand around the elastic to hide it. The tension of the high gather pulls the crown smooth, hides frizz and flyaways, and turns greasy roots into shine — the same slick-back principle, taken higher. It takes four minutes, works on medium to long hair, and it suits work, evenings and days when you want to look like you mean business. It is not the most comfortable style for all-day wear, so save it for the days that need the impact.
Time needed: 4 minutes. Best for: frizz, greasy roots, bold and polished days. What it hides: flyaways, oily roots, flatness. Watch out for: pulling too tightly — a sleek ponytail should feel firm, not painful, and a headache by noon means it was too tight.
38. The Bandana Knot Updo
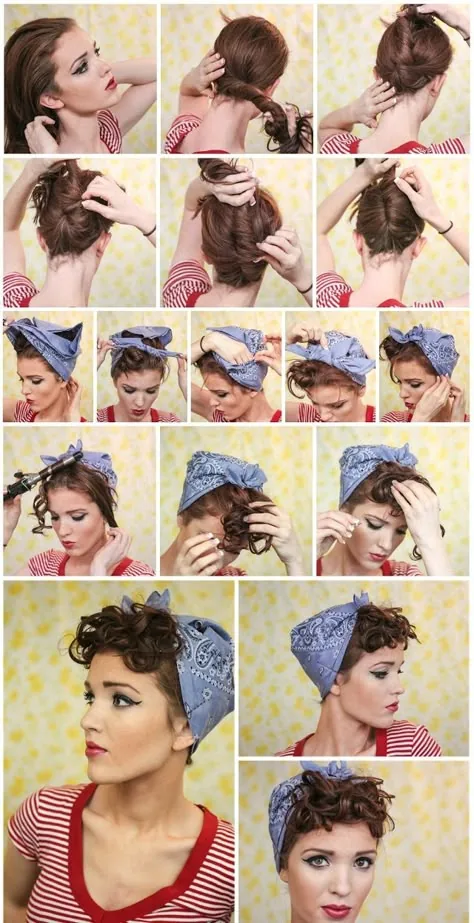
The bandana knot updo finishes this guide with the most cheerful rescue of all: gather the hair into a bun or a twist, then tie a bandana around the head with the knot on top, at the side, or at the nape. The bandana hides the crown completely — grease, flatness, frizz and all — holds back flyaways, and adds a pop of colour that makes the whole look read as a style choice. It works on every hair length, including short hair, and it takes about two minutes. Choose a cotton bandana for grip, or a silk one for smoothness, and match the knot to the day: on top for playful, at the nape for subtle. It is the rescue for the days when nothing else will cooperate and you still want to look like you tried.
Time needed: 2 minutes. Best for: every bad hair day problem at once, short hair, casual days. What it hides: greasy roots, frizz halo, flat crown, failed wash day. Common mistake: tying the bandana over loose, unstyled hair — gather the hair into a bun or twist first, and the bandana finishes the look.
What is the fastest hairstyle for a bad hair day?
The claw clip twist — gather, twist, clip, done in under a minute. It hides greasy roots, contains frizz and lifts flat hair in one move. The messy top knot and the wide headband sweep-back are nearly as fast, at about two minutes and thirty seconds respectively.
What hairstyle hides greasy hair best?
A slicked-back low bun, a French braid, or a scarf wrap. The slick-back turns grease into shine, the braid eats the oily sections into the plait, and a scarf covers the crown completely. Dry shampoo at the roots first makes all three work even better.
How do I hide frizzy hair without washing it?
Smooth a pea-sized amount of styling cream or gel over the surface with your palms, then gather the hair into a slick-back, a braid or a low bun. Do not brush dry frizzy hair — brushing fluffs it into a halo. A silk scarf wrap contains frizz completely when nothing else works.
What hairstyle is best for flat, limp hair?
A bubble ponytail, a messy top knot or a half-up top knot. All three manufacture volume where there is none — the bubbles puff the tail out, the knot piles height on top, and the half-up lifts the crown. Dry shampoo at the roots adds lift before you style.
Can I fix a bad hair day without dry shampoo?
Yes. Change the part, slick the hair back with gel or cream, braid it, or cover the crown with a scarf, headband or hat. Dry shampoo helps with grease and grip, but the styles in this guide work without it — the braid, the claw clip twist and the scarf wrap need no product at all.
What should I do with second-day hair?
Style it, don’t wash it — second-day hair holds styles better than freshly washed hair because it has grip and texture. Dry shampoo at the roots, then choose a braid, a bun or a twist. Only rewash when the hair smells, is visibly dirty, or has product build-up that dry shampoo cannot absorb.
How do I stop my bad hair day style from falling out?
Build grip first with dry shampoo or styling cream, anchor low at the nape for buns, and pin in at least three places spread around the style. Braiding before coiling adds internal structure that stops rotation. If a style still slides, the hair is probably too clean or too silky — second-day hair holds far better.
Are hats bad for your hair on a bad hair day?
Not if you choose well. A cap or a silk scarf protects the hair and hides the problem, but a rough wool hat worn directly over dry, frizzy hair creates friction and doubles the frizz. Wear a silk scarf underneath a wool hat, and plan to keep the hat on — taking it off later leaves hat hair behind.
What hairstyle works for bad hair days with short hair?
A wide headband sweep-back, a silk scarf wrap, a beanie tuck, or a bandana knot updo. All four work on short hair because they control the crown and the hairline rather than needing length to gather. Pinned-back front pieces also rescue a greasy fringe on short hair.
What should I keep in my bag for bad hair day emergencies?
A travel dry shampoo, three snag-free elastics, six bobby pins, a claw clip, a wide headband or a silk scarf, and a small tube of styling cream. That kit fixes greasy roots, frizz, flatness and a collapsed style anywhere, without a mirror or a wash.
Conclusion: The Bad Hair Day Is a Five-Minute Problem
A bad hair day feels like a disaster in the mirror and a five-minute problem everywhere else. The hair you woke up with — frizzy, flat, greasy, bent from sleep — is not a reason to cancel the day. It is a reason to pick a style that works with it: a slick-back that turns grease into shine, a braid that eats the frizz, a bun that hides the flatness, a scarf that covers it all. Start by naming the problem in thirty seconds, match the style to the clock, and stop fighting the hair. Keep the rescue kit in your bag, keep a claw clip and a scarf where you can reach them, and remember the simplest truth in this guide — second-day hair holds a style better than clean hair ever will. Pick a rescue from this list, try it tomorrow morning, and walk out the door knowing your hair looks like you meant it.

