
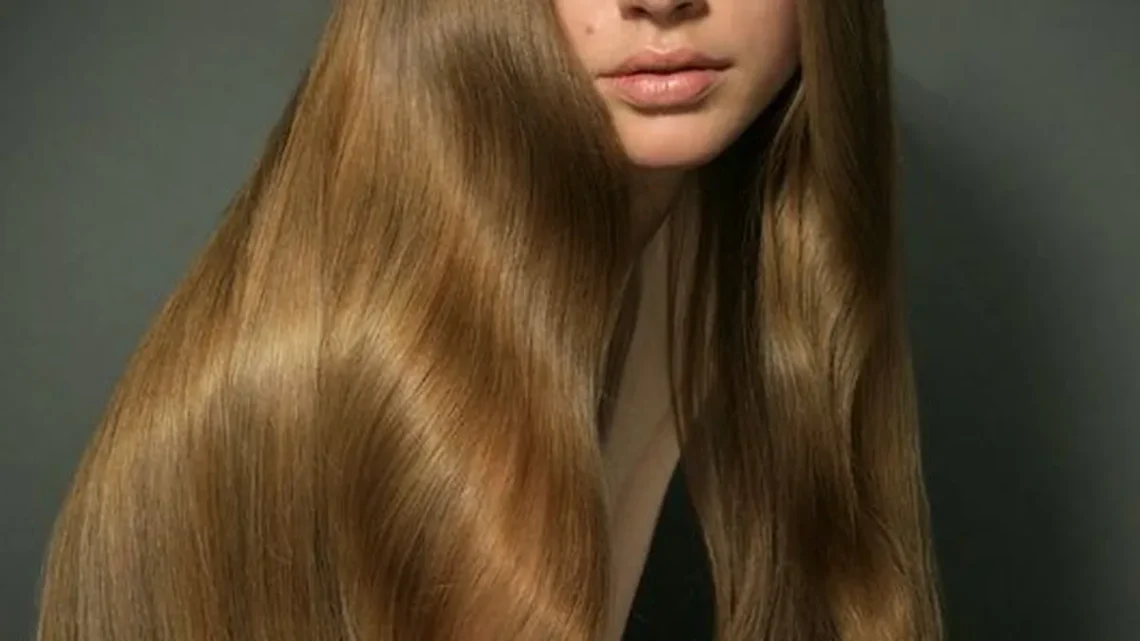
Long, thick hair looks like a dream in photos — and then you try to live with it. The ponytail that slides down by lunchtime, the bun that aches by mid-afternoon, the wash that takes an hour and still is not dry at bedtime, the layers that were supposed to lighten everything but somehow made it puffier: if your hair is both long and thick, you know the weight is real. It is not a styling problem, exactly. It is a weight, bulk and drying-time problem, and the styles that work are the ones that solve those three things first and look good second.
Here are 41 hairstyles for long thick hair, from layered cuts that remove bulk without losing length — the U-cut, the butterfly cut, ghost layers — to braids, buns and ponytails engineered to actually hold heavy hair, each one chosen because it manages weight instead of fighting it. Every style notes why it works for thick long hair, who it suits best, how to style it, and what to ask your stylist for. Eight guides cover why long thick hair is hard to manage, the layers that remove bulk, how to cut drying time in half, choosing a style by occasion, the tools that actually work, the mistakes that make thick hair heavier, thick hair by texture, and a wash-day routine that makes the whole week easier. No style here needs you to thin your hair into nothing — the goal is hair that feels lighter, dries faster and stays put.
Why Long Thick Hair Is Hard to Manage — Weight, Bulk and Drying Time
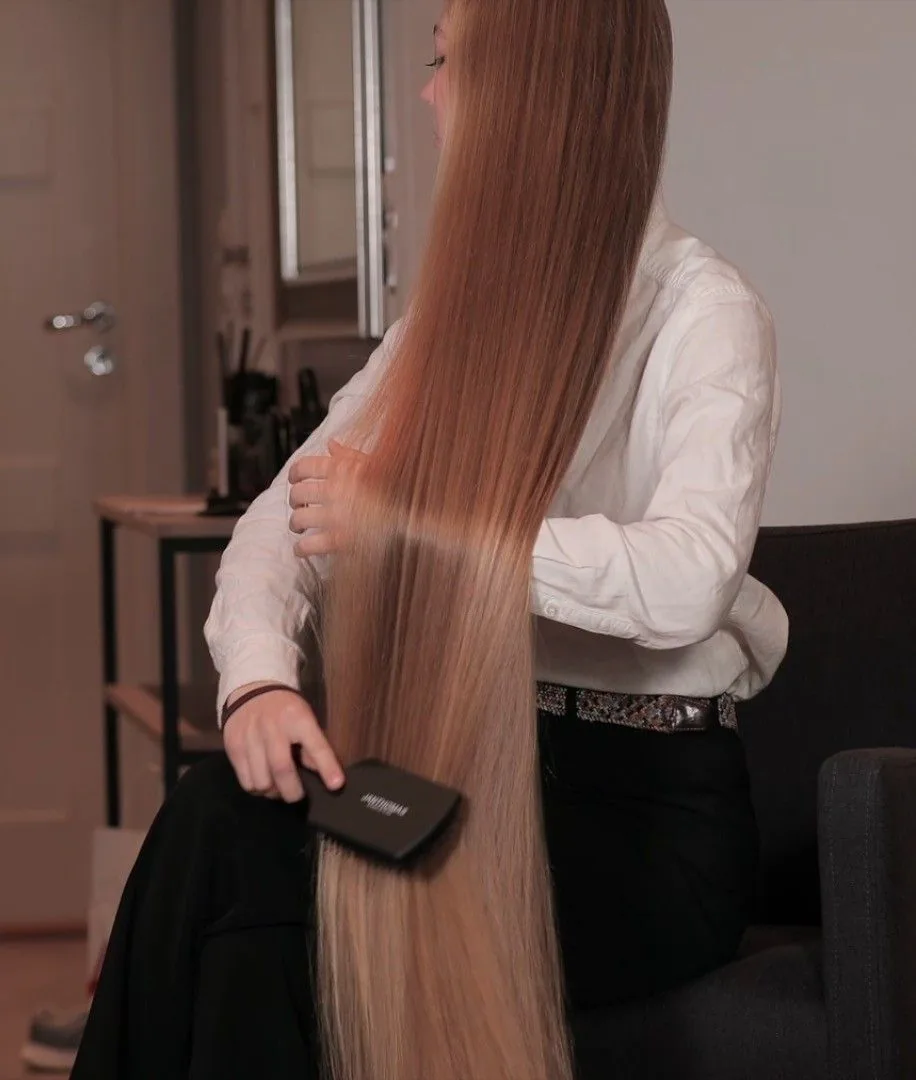
Long thick hair is heavy in a way that is easy to underestimate until you wear it all day. A full head of long, dense hair can weigh noticeably more than fine hair of the same length, and all that weight hangs from the same scalp, pulled by gravity in one direction. That is why a high ponytail aches, why a bun slides, and why a style that looked perfect in the mirror at 8 a.m. has dropped two inches by noon. The weight is not evenly spread either: the bulk sits at the ends and the back, so the hair pulls hardest exactly where elastics and pins are weakest.
Bulk is the second problem, and it is different from weight. Thick hair has volume whether you want it or not, so styles that add more — blunt ends with no layers, a round brush blowout on every layer — turn into a triangle, wide at the bottom and flat at the top. Drying time is the third problem: thick hair holds water deep inside the mass, so the outside can feel dry while the inside is still damp, and that trapped dampness is what makes styles fall flat and frizz by the afternoon. The styles in this guide attack all three: layers remove bulk from the inside, braids and low anchors spread the weight, and sectioned drying gets the inside dry.
Layers That Remove Bulk Without Losing Length
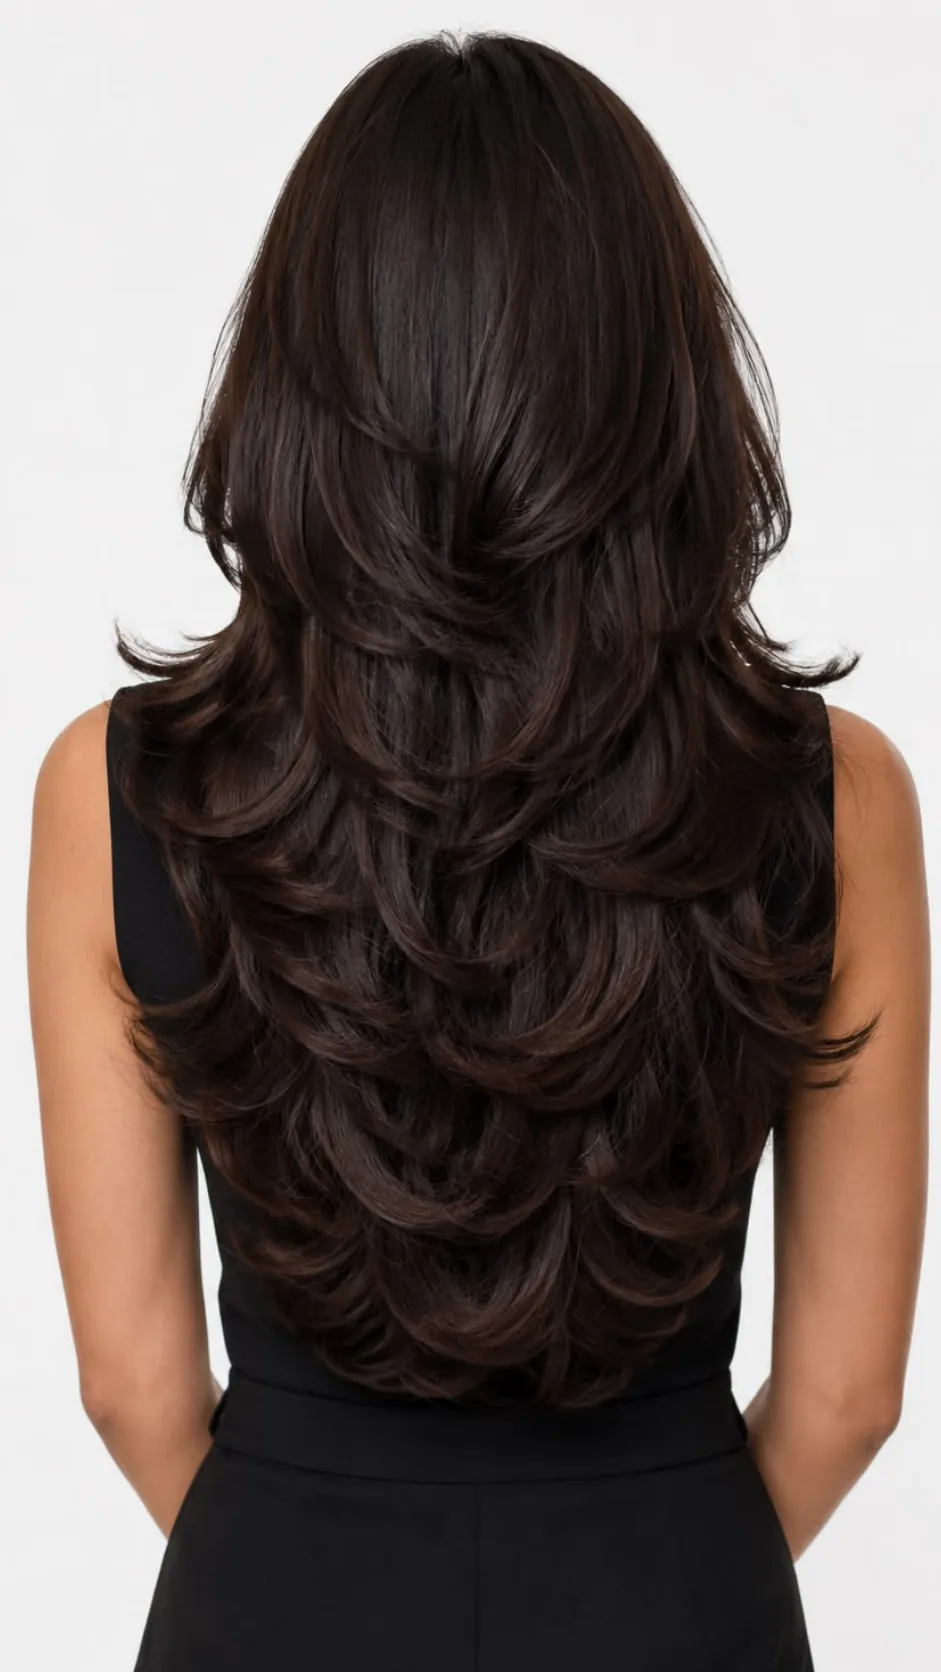
The single most useful thing a stylist can do for long thick hair is remove weight from the inside of the hair, not the length. Internal layers — sometimes called ghost layers or invisible layers — are cut underneath the top layer, so the surface still looks long and full while the hair underneath is lighter and moves more freely. Ask for them by name, and ask the stylist to show you how much they are taking out: a good internal layering removes bulk you can feel when you gather the hair, without changing the outline at all.
Long layers, cut from the cheekbone down, do a different job: they break up the solid mass so the ends taper instead of sitting in one heavy block. The U-cut and V-cut do the same thing from the back, shaping the ends into a curve or a point so the weight is distributed rather than concentrated in a straight line. What you do not want is short layers cut into the top of thick hair — those spring up, create a shelf, and make the hair look wider. The rule is simple: layers should start long, stay hidden underneath, and never be shorter than chin length on thick hair unless you are deliberately cutting a shag.
How to Cut Drying Time in Half
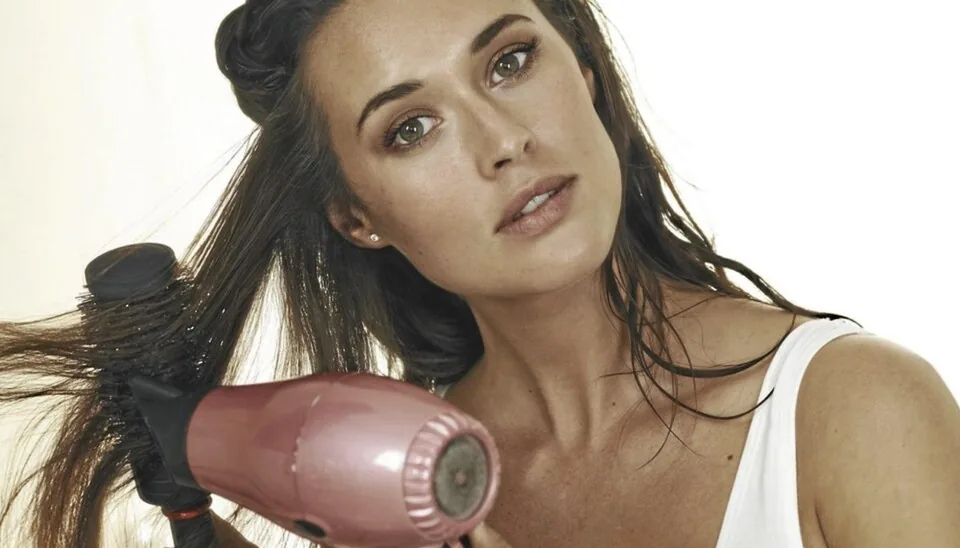
Drying long thick hair is a sectioning job, not a blast-and-hope job. Start by squeezing — never wringing — the water out with a microfibre towel or an old cotton T-shirt, then clip the hair into four sections: two at the front, two at the back. Dry the back sections first, because they are the thickest and the slowest, holding the dryer at the roots and working down in two-inch pieces. A round brush is optional; your fingers, pulling each section straight as you dry, will get you most of the way there, and you will finish in about half the time of drying the whole mass at once.
Two products make a real difference. A lightweight leave-in conditioner or detangling spray applied to damp hair stops the tangles that make drying a fight, and a heat protectant is non-negotiable when you use a dryer on thick hair, because you are applying heat for longer. Wash at night if you can: towel-dry, braid the hair loosely, and let it finish drying overnight — you wake up with soft waves and a scalp that is actually dry. And if your hair takes more than 45 minutes to air-dry, that is a sign it needs internal layers, not a stronger dryer: removing bulk is the only thing that changes drying time permanently.
Choosing Your Style by Occasion: Work, Weddings, Gym and Every Day
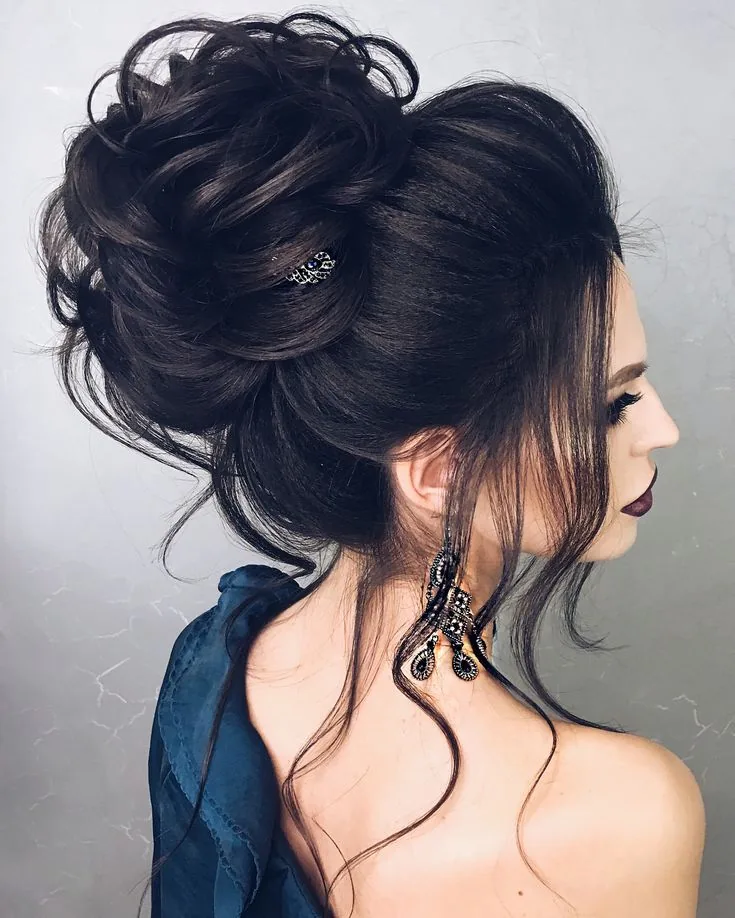
The same long thick hair needs different styles on different days, and the honest way to choose is by how long the style has to last and how much the hair will be moving. For work, you want a style that holds eight hours without a re-do: a low bun, a braided ponytail or a half-up twist, all anchored low at the nape where the weight is supported. For a wedding or a formal event, the weight is your friend — a low chignon or a braided crown uses the thickness to look full and expensive, where fine hair would need padding and pins.
For the gym, forget pretty and think containment: double braids or a braided bun, because a single ponytail on thick hair will slide no matter how tight you tie it. For every day, the best styles are the ones you can do in under five minutes — a claw-clip twist, a low ponytail wrapped with a strand, a loose low braid — because a complicated style you never actually do is worse than a simple one you wear daily. Keep three styles in rotation, one from each category, and your hair stops being a daily decision and starts being a habit.
Tools That Actually Work for Thick Hair
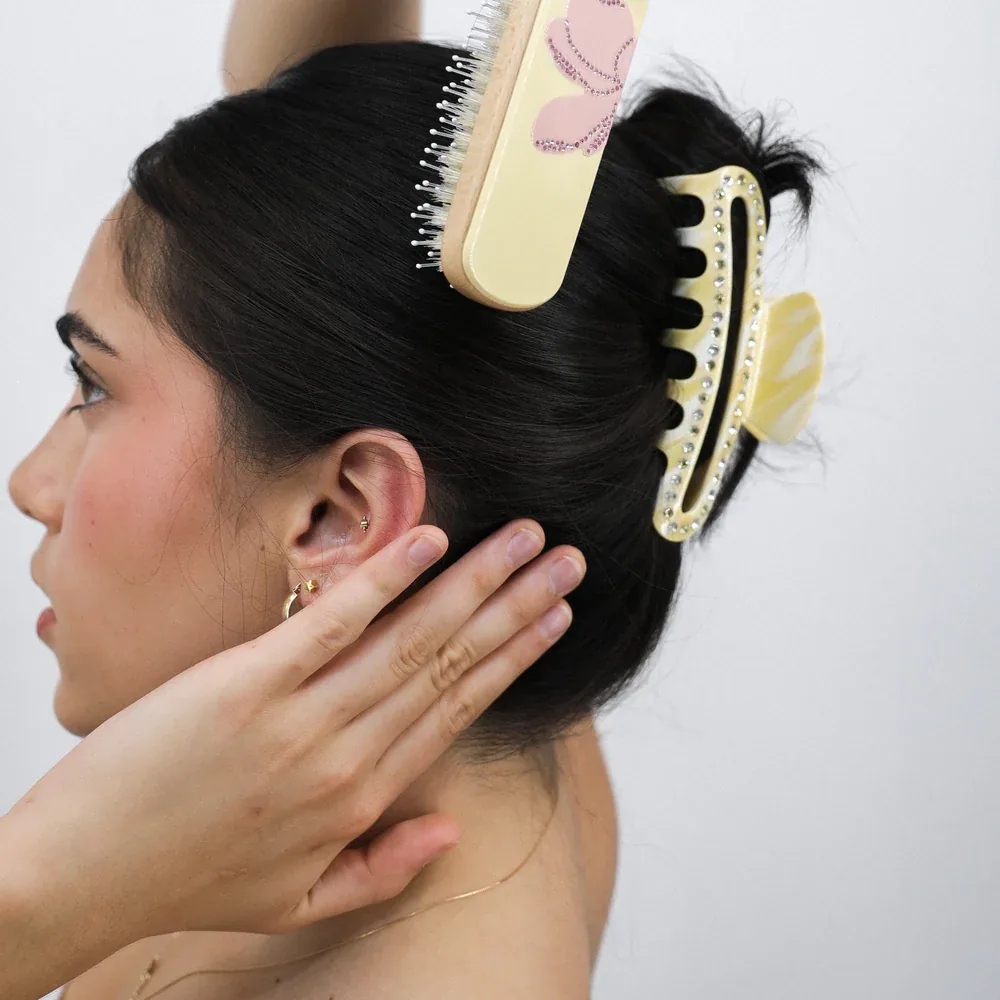
Thick hair breaks ordinary tools, so buying the right ones is not a luxury — it is the difference between a style that holds and one that falls apart. Elastics should be thick, snag-free and fabric-covered; thin elastics snap, and metal joins snag and tear. For a ponytail on long thick hair, use two elastics: one to anchor, one wrapped over it to lock the first in place. Claw clips need to be large — the small ones made for fine hair will pop open on thick hair within minutes — and the best ones have strong springs and teeth that reach through the mass, not just the surface.
Brushes matter too. A wide-tooth comb is the only safe tool for detangling wet thick hair; a fine brush on wet hair snaps it. For blow-drying, a large round brush with a wide barrel covers more hair per pass, and a paddle brush is best for smoothing the lengths once dry. Bobby pins should be long and strong, and they work best when crossed in an X — one pin alone will slide out of thick hair, two crossed pins lock each other in. Buy fewer, better tools, and the styles in this guide will take half the time.
Mistakes That Make Thick Hair Heavier (and Harder to Style)
The most common mistake with long thick hair is piling on product to control it. Heavy oils, thick creams and layer after layer of serum coat the hair, add weight, and make it look greasy by midday — exactly the opposite of what you wanted. Thick hair needs lightweight products, applied to the mid-lengths and ends only, never the roots. A pea-sized amount of cream is enough; if you can feel the product in your hair after styling, you used too much. The second mistake is cutting it blunt with no layers, which leaves all the weight in one solid block at the ends and makes the hair swing like a curtain instead of moving.
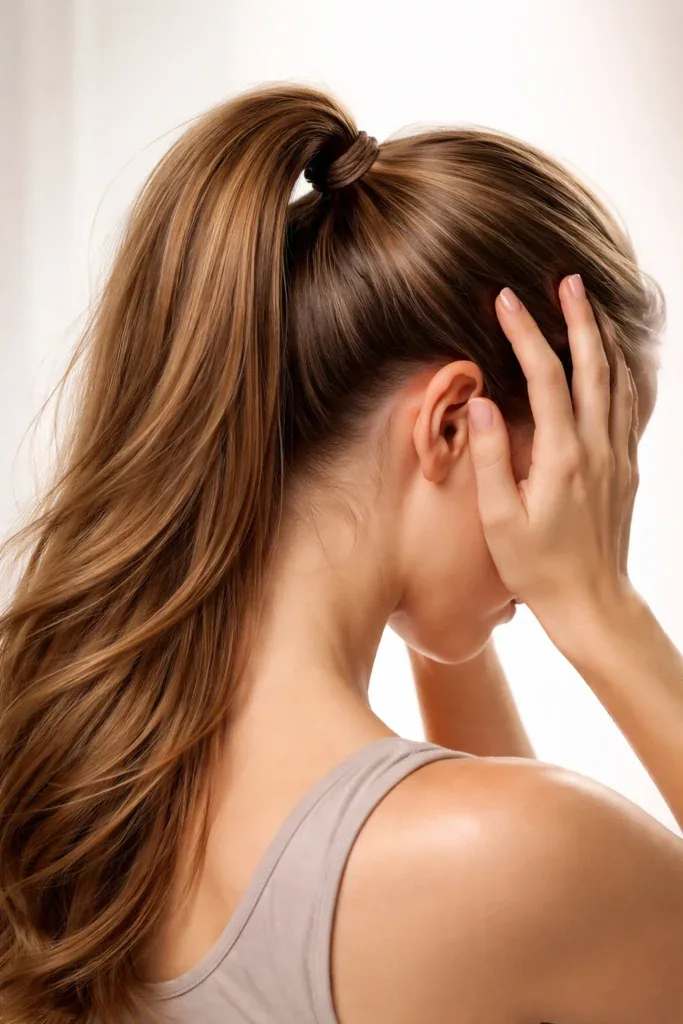
The third mistake is tying it up too tightly. A ponytail pulled as tight as possible feels secure and causes a genuine headache within the hour, because the whole weight of the hair is hanging from one pulled spot — and repeated tight styling in the same place causes breakage at the hairline. The fix is distributed tension: braid before you gather, anchor low, and vary the position. And the fourth mistake is skipping trims: thick hair hides split ends inside the mass, so by the time you notice them the damage has travelled up the strand. A trim every 10 to 12 weeks keeps the ends light and the layers working.
Thick Hair by Texture: Straight, Wavy and Curly
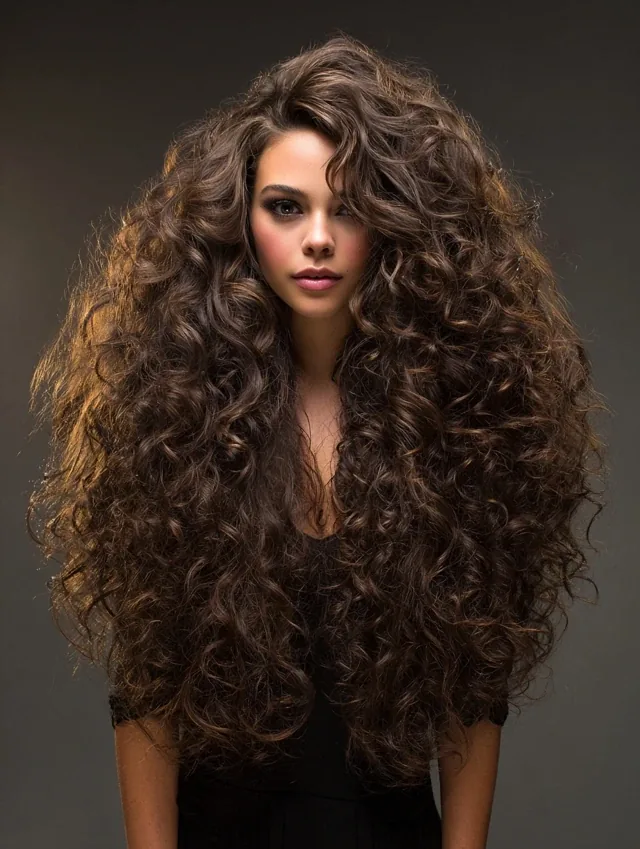
Thick hair is not one thing — texture changes everything about which styles work. Straight thick hair is the heaviest-feeling, because there is no wave to break up the mass, so it benefits most from internal layers and from styles that move, like a layered cut with soft ends or a fishtail braid that breaks the solid line. It also shows grease fastest, so dry shampoo at the roots on day two is your best friend. Wavy thick hair is the easiest to style, because the wave gives natural grip and volume — a half-up style, a loose braid or a layered cut with the waves left natural will hold with almost no effort.
Curly thick hair is the most voluminous and the most fragile. It needs moisture first — a leave-in conditioner on damp hair, and oils only on the ends — and styles that contain it without crushing the curl, like a pineapple updo, a high puff, or two loose braids. Never brush curly thick hair dry: detangle it wet, with conditioner in, using your fingers or a wide-tooth comb. And whatever your texture, remember that thick hair behaves differently on day two than on wash day — it has more grip, more texture, and holds styles better, so the best updos in this guide are built on second-day hair.
A Wash-Day Routine for Long Thick Hair That Makes the Week Easier

Wash day for long thick hair is a project, so treat it like one: plan it, and the rest of the week gets easier. Start by detangling dry hair before it gets wet — a paddle brush through the lengths, working from the ends upward, so the wash does not lock tangles in. Shampoo twice, but only at the scalp: the first wash lifts oil and product, the second actually cleans, and the lengths will get clean enough from the rinse running through them. Conditioner goes on the mid-lengths and ends only, never the roots, and leave it in for three to five minutes while you finish showering.
After the wash, towel-dry in sections, apply a leave-in and a heat protectant, and dry the roots first — the part of the hair that takes longest and causes most of the frizz if left damp. Style it once, properly, into a braid or a low bun, and you have day one covered; day two is the best updo day, because the hair has grip; day three is a dry-shampoo and claw-clip day. Wash every three to four days if you can — daily washing strips the oils that keep thick hair soft, and with the routine above, the hair between washes looks better, not worse.
1. The Layered Long Cut With Face-Framing Layers
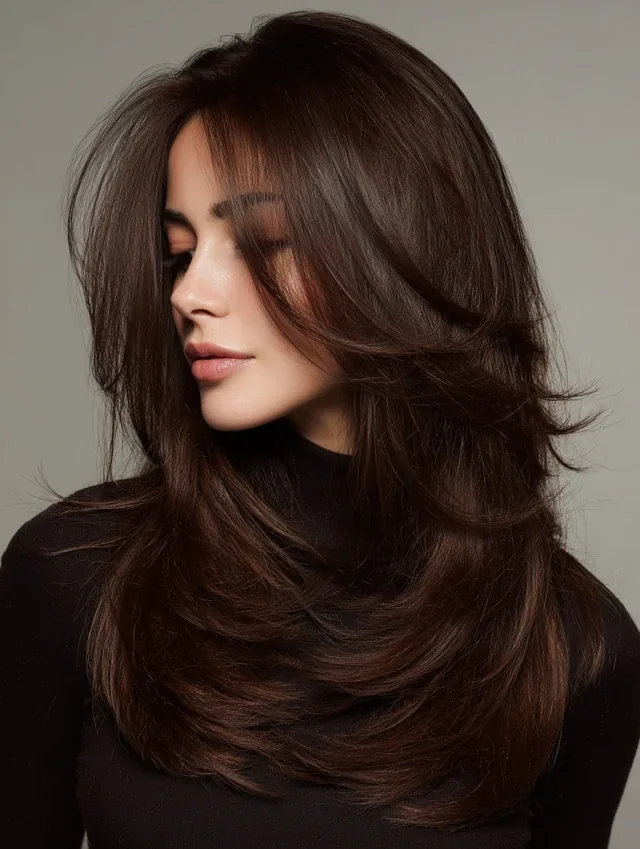
The layered long cut with face-framing layers is the single best starting point for long thick hair, because it removes bulk exactly where you feel it — around the face and through the lengths — while keeping every inch of length. The layers start at the cheekbone and fall in long, soft steps, so the hair moves instead of sitting in one solid sheet, and the face-framing pieces soften the jawline and make the whole head look lighter. Ask your stylist for long layers only, no short pieces, and for the layers to be cut into the hair when it is dry or nearly dry, so they can see how the thickness actually falls.
Why it works for thick long hair: the layers break up the mass without thinning it out, so the hair keeps its fullness but loses the heavy curtain effect. Who it suits: everyone, but especially round and square faces, where the face-framing pieces add length. What to ask for: ‘long layers from the cheekbone down, face-framing pieces, no layers shorter than chin length.’ Drying time: noticeably faster, because air can move between the layers instead of hitting one solid wall of hair.
2. Long Layers With Curtain Bangs

Curtain bangs are the softest way to change long thick hair without losing length: two longer pieces that part in the middle and sweep to each side, framing the face like curtains. On thick hair they need to be cut long — at least cheekbone length when dry — because thick hair springs up as it dries, and short curtain bangs on thick hair become a fringe you did not ask for. Paired with long layers, they give the front of the hair movement and shape while the back keeps its weight and length.
How to style: blow-dry the bangs forward with a round brush, then sweep them to the sides while they are still warm, and they will hold the curve all day. Best for: oval, round and heart-shaped faces, and anyone who wants a change without a commitment — curtain bangs grow out gracefully. Common mistake: cutting them too short on the first visit; ask for them long and trim shorter at the next appointment if you want more drama. Maintenance: a quick trim every six weeks keeps them from falling into your eyes.
3. The U-Cut for Thick Hair
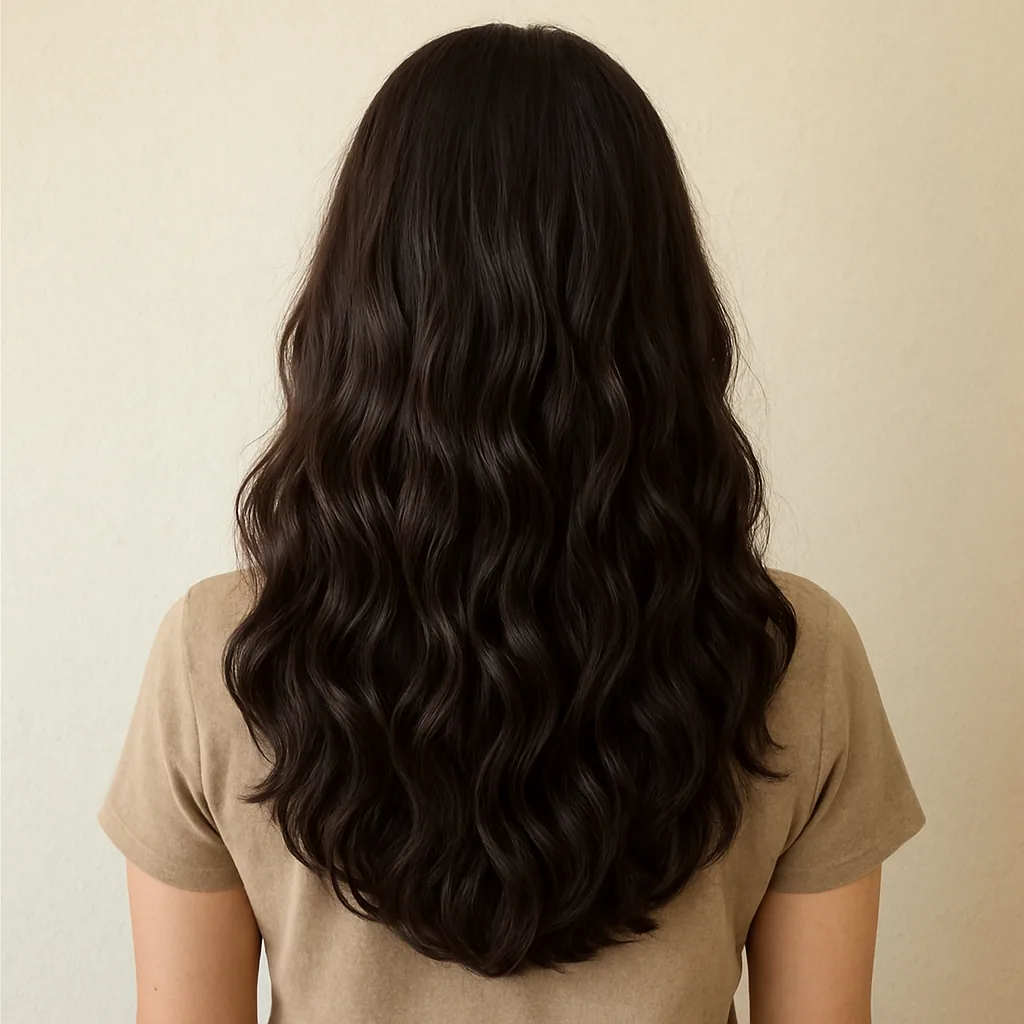
The U-cut shapes the ends of long thick hair into a soft U from the back — shorter at the sides, longest in the middle — and it is the best cut for thick hair that you wear down most of the time. The curved shape spreads the weight so the ends do not sit in one heavy straight line, and it makes the hair look thicker at the bottom instead of thinner, because the curve keeps more hair at the centre. It also photographs beautifully from behind, which is half the point of long hair.
Why it works for thick long hair: the U-shape removes the corners that make blunt thick hair look like a triangle, while keeping the length you grew. Who it suits: straight and wavy thick hair, especially if you wear it down or in a low ponytail. What to ask for: ‘a soft U-shape, longest at the centre back, with the sides angled up by about two inches.’ Styling tip: a large round brush on the ends, curving them under slightly, shows off the shape best.
4. The V-Cut for Long Thick Hair
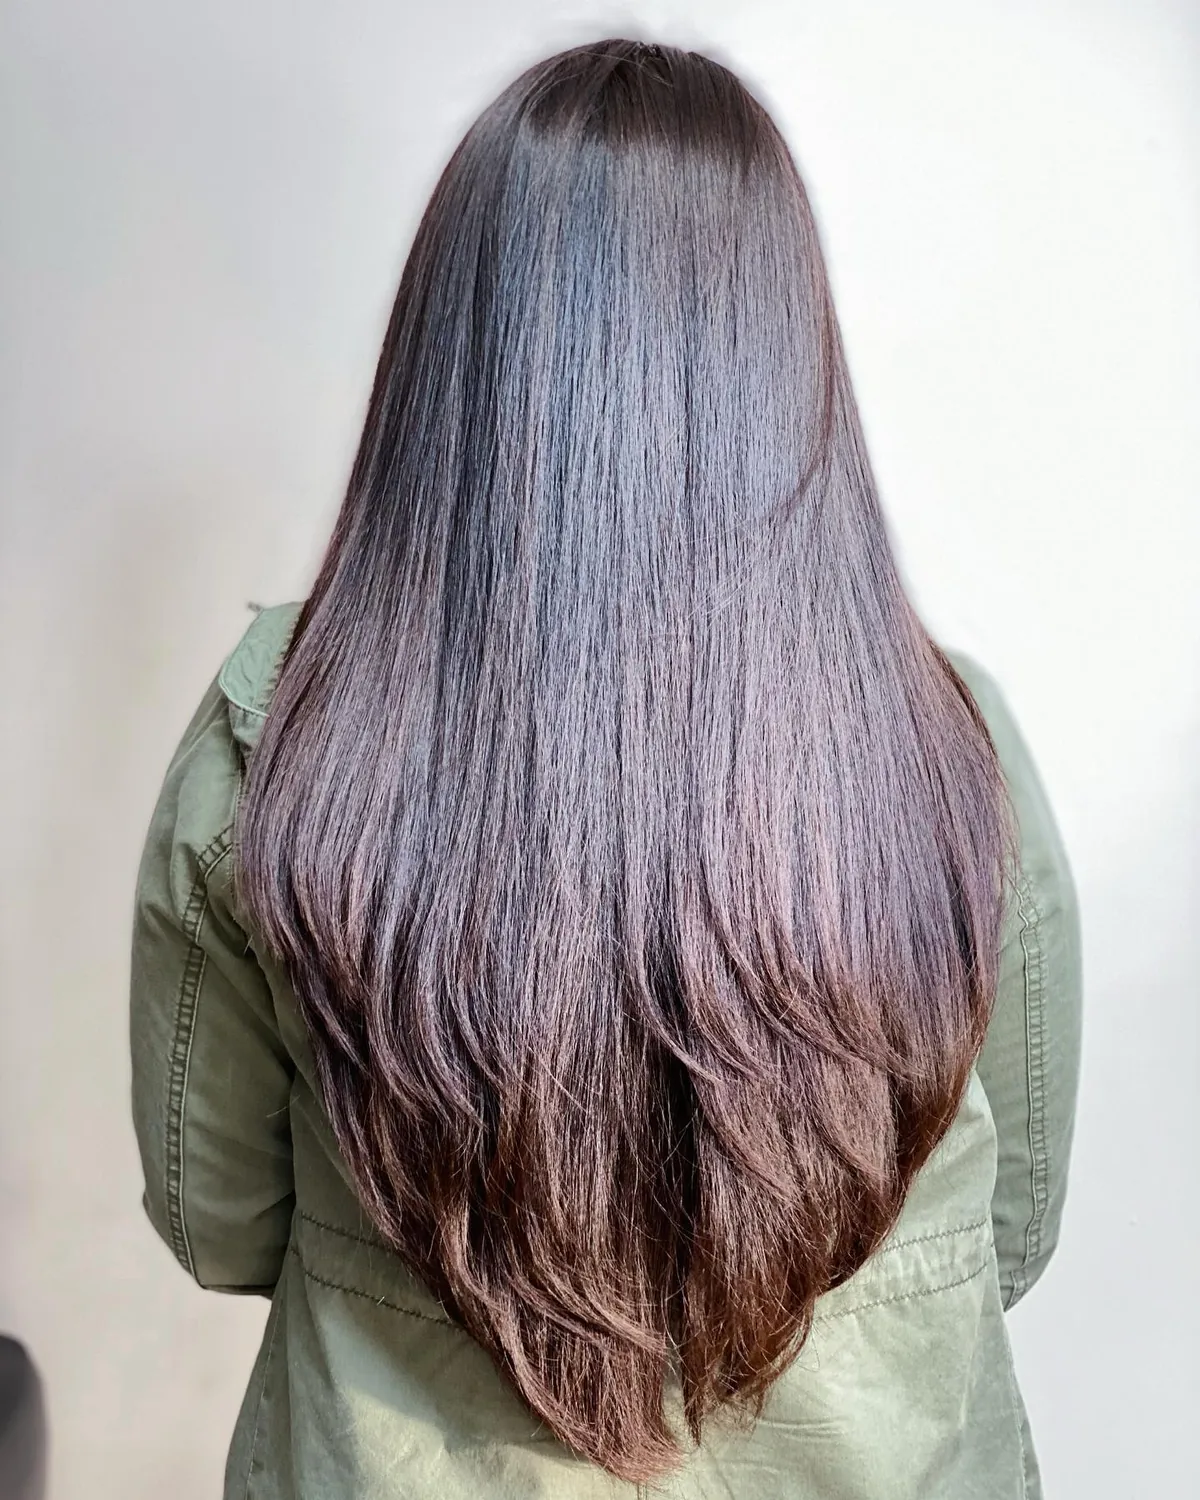
The V-cut is the U-cut’s sharper cousin: the ends come to a soft point at the centre back, with the sides angled up more steeply. On thick hair it is dramatic in the best way — the point draws the eye down and makes the hair look even longer than it is — but it needs layers through the lengths, or the point becomes a thin tail with all the bulk sitting above it. Ask for the V to be soft, not severe, and for long layers to blend the sides into the point.
- Best for: straight thick hair, where the point stays crisp, and anyone who wants maximum length illusion.
- Avoid if: your hair is very curly — the point disappears into the curl pattern, and a U-cut will suit you better.
- Drying time: the tapered ends dry faster than a blunt cut, because there is less hair at the very bottom.
- Maintenance: a trim every 10 weeks keeps the point from splitting into a wispy tail.
5. The Long Blunt Cut
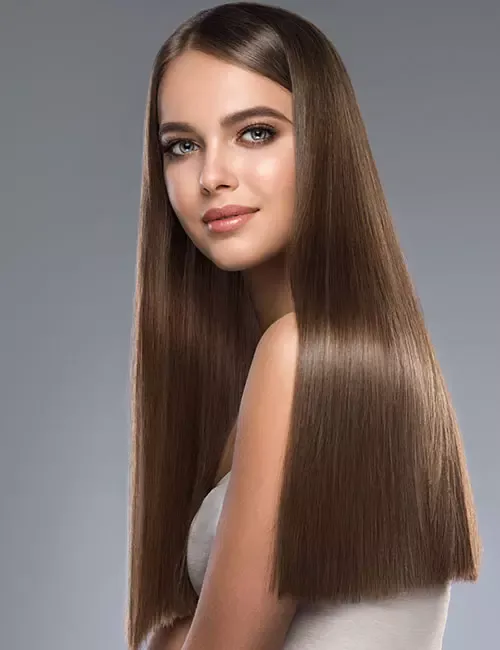
A long blunt cut — one length, no layers, ends cut straight across — sounds like the worst idea for thick hair, and on some people it is. But on straight, healthy thick hair it is the most polished look there is: the blunt ends make the hair look impossibly full and expensive, and the weight of the hair itself keeps it smooth. The trick is that it only works when the hair is genuinely healthy — split ends show immediately on a blunt line — and when you are happy to wear it down, because a blunt cut is harder to gather into an updo.
Who should wear it: straight thick hair with healthy ends, and anyone who loves a sleek, editorial look. Who should avoid it: wavy or curly thick hair, where a blunt cut turns into a triangle, and anyone whose hair tangles easily — the solid mass tangles more than layered hair. How to style: a flat iron on the lengths, a drop of smoothing oil on the ends only, and a centre part for the sharpest line. Styling time: longer than a layered cut, because the whole mass has to be smoothed, not just the surface.
6. The Long Shag With Internal Layers
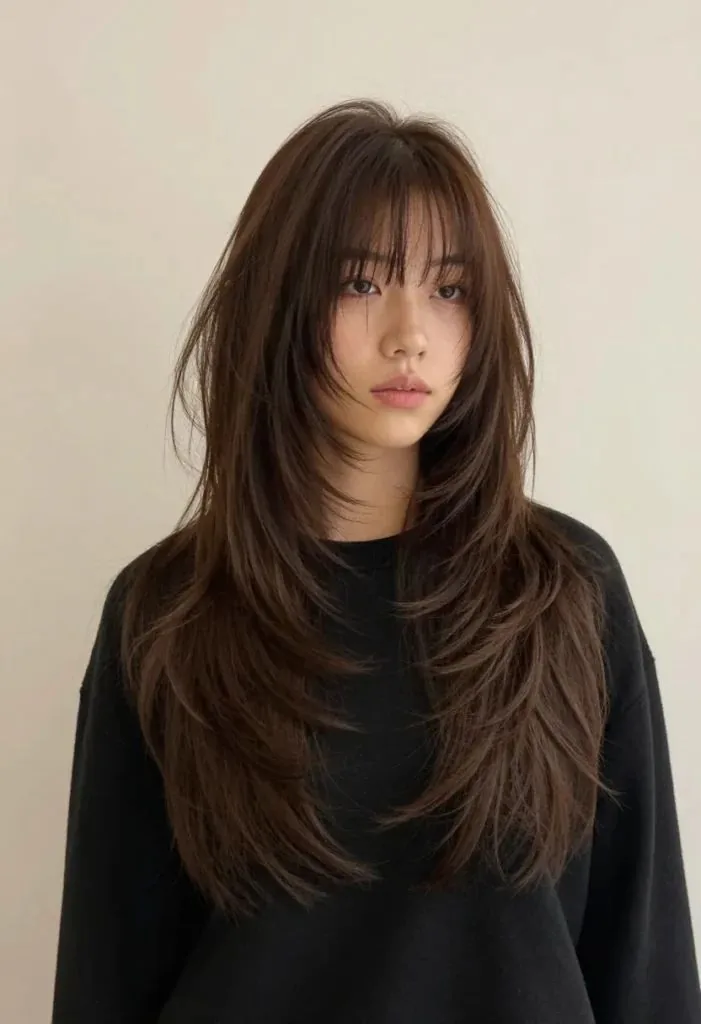
The long shag takes the layered cut and turns the volume up: choppy layers through the lengths, texture at the ends, and a lived-in, undone finish that makes thick hair look intentionally wild instead of accidentally heavy. The key for thick hair is internal layers — weight removed from underneath, so the top layer keeps its length while the hair underneath moves freely. Without them, a shag on thick hair just gets bigger; with them, it gets lighter and more mobile.
Why it works: the choppy texture breaks up the solid mass, so the hair falls in pieces instead of one sheet. Best for: wavy thick hair, where the shag enhances the natural wave, and anyone who wants a low-effort style — a shag looks better slightly messy. What to ask for: ‘a long shag with internal layers and textured ends, no short layers on top.’ Common mistake: cutting the top layers too short, which creates a shelf; keep the shortest layer at chin length or below.
7. The Butterfly Cut for Long Thick Hair
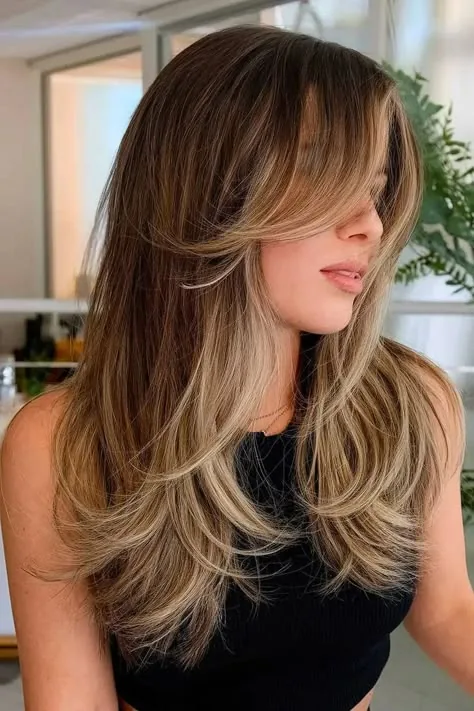
The butterfly cut is the viral cut that actually earns its hype on long thick hair: short, bouncy layers on top that frame the face and fall like wings, over long layers underneath that keep the length. The top layers are cut to about chin or collarbone length, so they move and flip, while the bottom layers stay long — the contrast is what makes the hair look both shorter and longer at the same time. On thick hair it needs the internal layers from the guides above, or the top will puff up instead of falling softly.
How to style: blow-dry the top layers with a round brush, flipping the ends out, and leave the bottom layers to fall straight — the two textures are the whole look. Who it suits: anyone who wants the feeling of short hair without losing length, especially round faces, where the top layers add height. Drying time: faster than a one-length cut, because the shorter top layers dry first and the long layers underneath have air between them. Skip it if: your hair is very curly — the short top layers will shrink up and lose the butterfly shape.
8. The Wolf Cut, Long Version
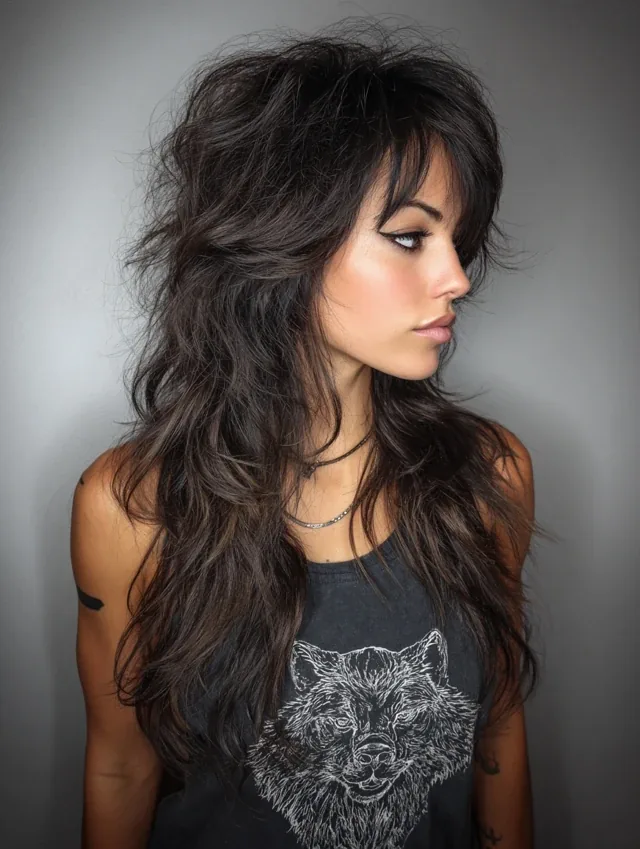
The long wolf cut is a shag with more attitude: heavy texture, disconnected layers, and a shape that is wild on top and long at the bottom. On thick hair it is a bold choice, and it works best when the stylist thins the interior aggressively — the wolf cut’s whole point is removing bulk and creating movement, so a timid version just looks like an uneven layered cut. Ask for it only if you are ready for a style that looks deliberately undone and needs almost no styling to look right.
- Best for: wavy and straight thick hair, and anyone who likes an edgy, low-maintenance look.
- Styling: a little texturising spray on damp hair, scrunch, and let it air-dry — the cut does the work.
- Avoid if: you need a polished work look every day, or your hair is curly enough that the layers will shrink unevenly.
- Grow-out: grows out into a shag, so you will not need a correction cut for months.
9. Long Hair With Ghost Layers
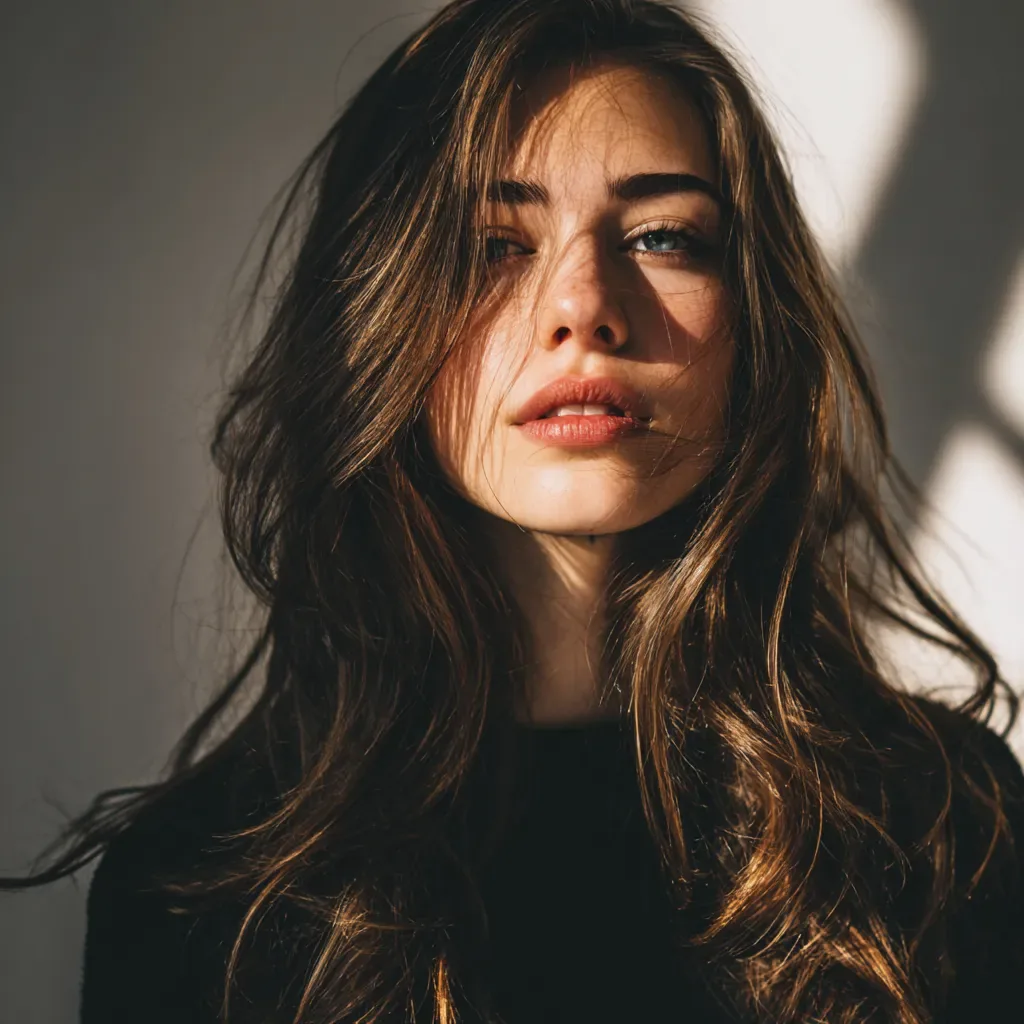
Ghost layers are the secret weapon of long thick hair: layers cut so far underneath the surface that they are invisible from the outside. The top layer stays one length, so the hair looks full and long, while underneath, the layers remove weight and let the hair move. It is the best choice if you love the look of one-length hair but hate the weight of it — you keep the outline and lose the heaviness, and nobody can tell anything was cut.
What to ask for: ‘ghost layers — internal layers underneath, nothing visible on the surface, and no change to the outline.’ Why it works: the weight comes out of the middle of the mass, where it is felt most, instead of the ends, where it shows. Best for: anyone who has tried layers and hated how they looked, and for very straight thick hair where visible layers can look choppy. Maintenance: the layers grow out invisibly, so you can go longer between cuts than with visible layers.
10. Long Layers With Side-Swept Bangs
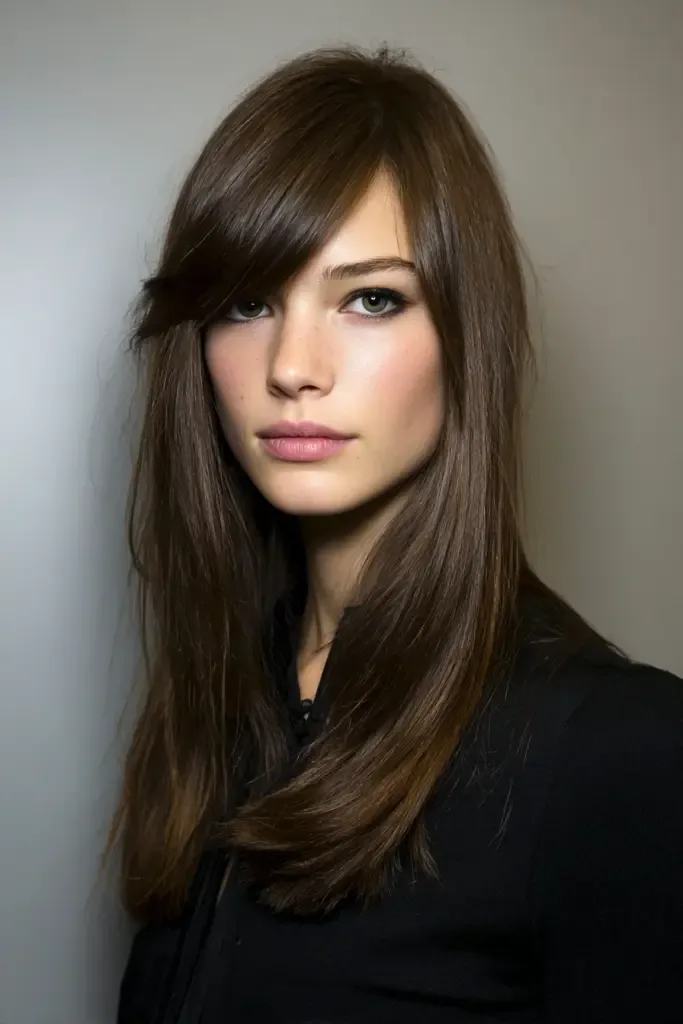
Side-swept bangs on long thick hair are the most forgiving fringe there is: a long, diagonal sweep that starts at the part and falls across the forehead, blending into the face-framing layers. They need to be cut long and on a diagonal, because thick hair has a mind of its own — a short, straight fringe on thick hair will stand up, split, or curl at the ends. A side sweep, by contrast, works with the weight of the hair instead of against it, and it grows out into a face-framing layer without an awkward phase.
How to style: blow-dry the bangs to the side with a round brush, or clip them back while they dry and let them fall naturally. Who it suits: almost everyone, but especially square and heart-shaped faces, where the diagonal softens the forehead. Common mistake: cutting them too thick — ask the stylist to thin the bangs slightly so they lie flat instead of puffing up. Who should avoid it: anyone with a strong cowlick at the front hairline, which will fight a side sweep all day.
11. Thick Hair With Long Wispy Bangs
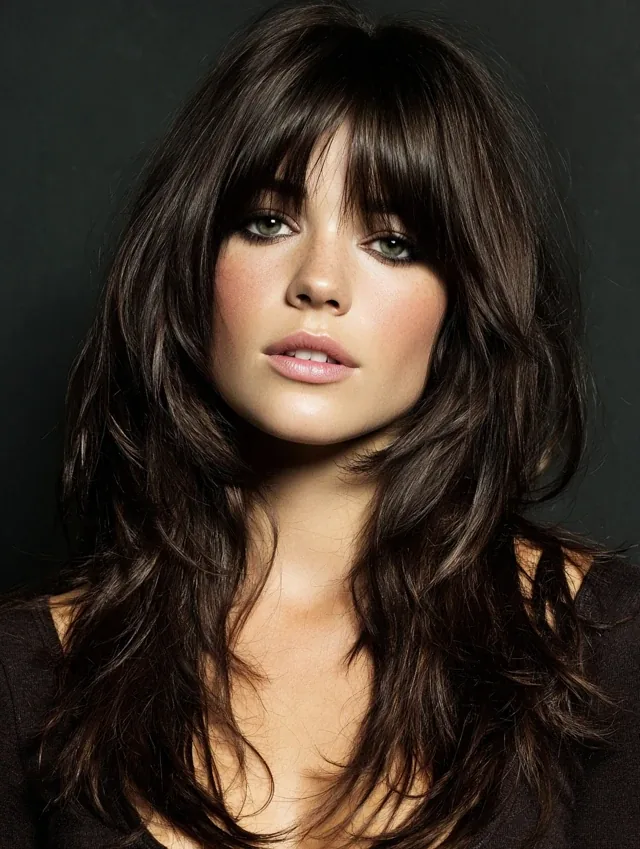
Wispy bangs are the lightest fringe you can get on thick hair: thin, airy pieces that fall softly across the forehead instead of a solid wall. The trick is that the stylist must take very little hair for the bangs — a thin section from the front only — and thin the pieces further, or thick hair will turn wispy bangs into a heavy fringe within a week. Done right, they soften the whole face, make long thick hair feel lighter at the front, and look effortless with the rest of the hair worn down.
Best for: oval and long faces, where a soft fringe shortens the face, and anyone who wants bangs without the commitment of a blunt fringe. Styling: a quick pass with a round brush or a flat iron, curving the ends under slightly — they take thirty seconds. Maintenance: they grow out fast on thick hair, so a trim every four to five weeks keeps them wispy instead of heavy. Avoid if: your hair is very curly at the front, where wispy pieces will shrink and frizz.
12. Long Thick Hair With Choppy Ends
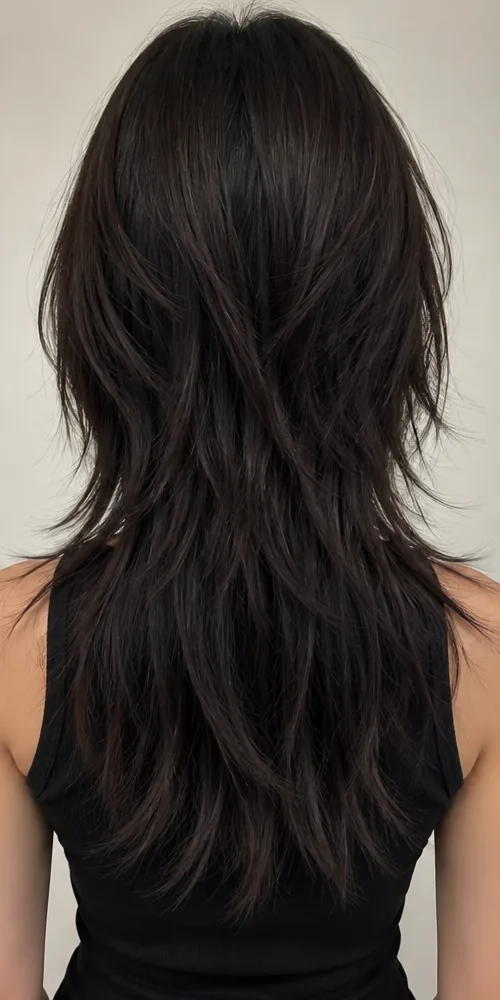
Choppy ends are point-cutting at the very bottom of long thick hair: the stylist cuts into the ends at an angle instead of straight across, so the last inch breaks up into soft, uneven pieces instead of one heavy line. It is the smallest change you can make with the biggest effect on weight — the ends stop swinging like a curtain and start moving in pieces, and the hair looks textured and modern instead of solid. It is also the best fix if your ends feel heavy but you are not ready for layers.
- Why it works: the point-cut ends remove weight exactly where the hair is heaviest, without touching the lengths.
- Best for: straight and wavy thick hair worn down, and anyone growing their hair out who wants movement without a cut.
- Ask for: ‘point-cut, textured ends — no blunt line, no thinning shears on the surface.’
- Watch out: over-texturising can make the ends look wispy, so ask the stylist to show you how much they are taking off.
13. Feathered Long Layers
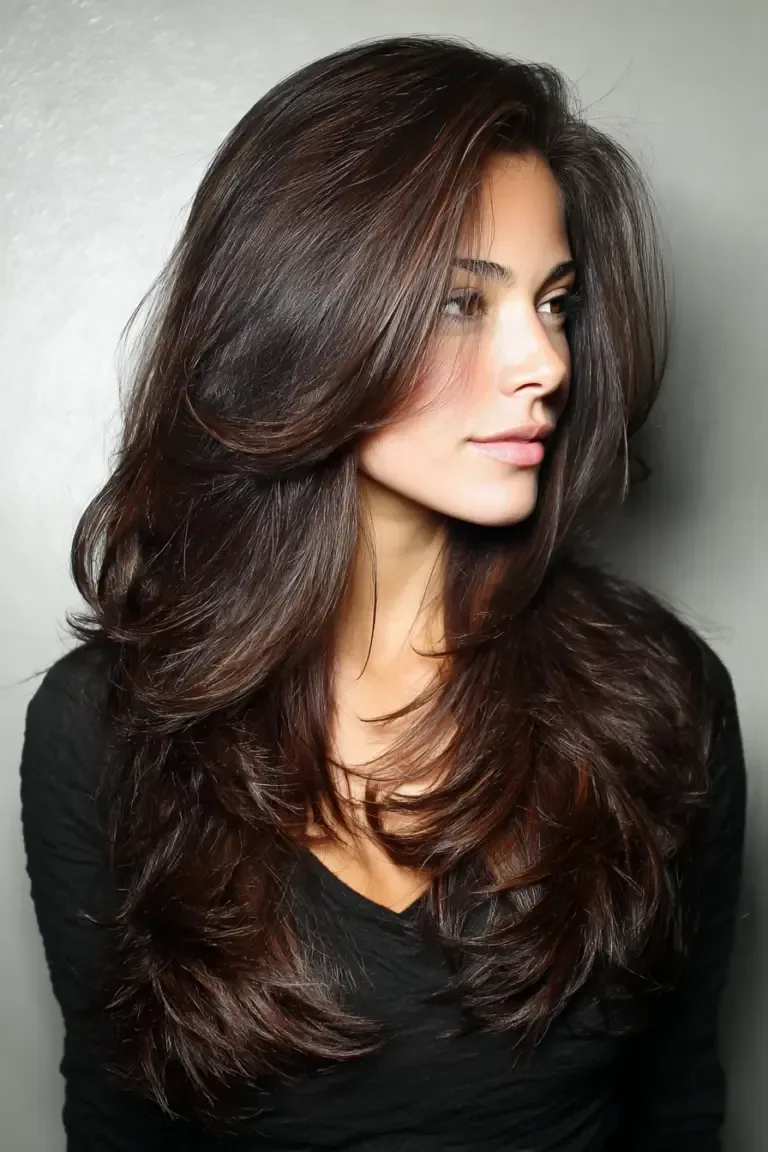
Feathered layers are the softest version of layering: long layers cut so the ends flip and feather outward, giving long thick hair a light, airy finish instead of a heavy one. The feathering is done with a razor or point-cutting on the ends of each layer, so the hair tapers instead of sitting in a block, and the whole style moves when you turn your head — the opposite of the solid curtain that unlayered thick hair becomes. It is a classic for a reason, and it suits thick hair better than almost any other layering technique.
How to style: blow-dry with a round brush, flipping the ends out on the top layers and under on the bottom, or let it air-dry for a softer feather. Who it suits: straight and wavy thick hair, especially longer faces, where the feathering adds width. Drying time: the tapered ends dry noticeably faster than blunt ends. Maintenance: a trim every 10 weeks keeps the feathering from growing into a blunt line.
14. Long Thick Hair With Thinned Ends
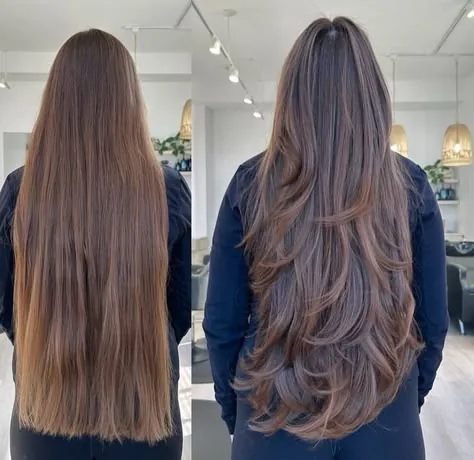
Thinned ends are not the same as thinning the whole head: the stylist uses thinning shears only on the last two or three inches, removing bulk from the very bottom so the ends taper and move. On long thick hair this is transformative — the heavy, blocky ends that make the hair swing like a curtain become soft and light, and ponytails and braids sit flatter because the ends are not fighting the elastic. The key is restraint: thinning shears on the surface or too high up create frizz and a halo of short hairs, so ask for them only at the ends, and only on the underneath layers.
What to ask for: ‘thin only the last two inches, underneath only, no thinning on the top layer.’ Who it suits: very dense, straight thick hair where the ends feel like a wall. Who should avoid it: curly thick hair, where thinned ends frizz, and fine-haired sections mixed with thick hair. Common mistake: letting a stylist thin the whole head to ‘make it manageable’ — that creates frizz and regrowth problems, and it is very hard to grow out.
15. The Half-Up Half-Down for Long Thick Hair
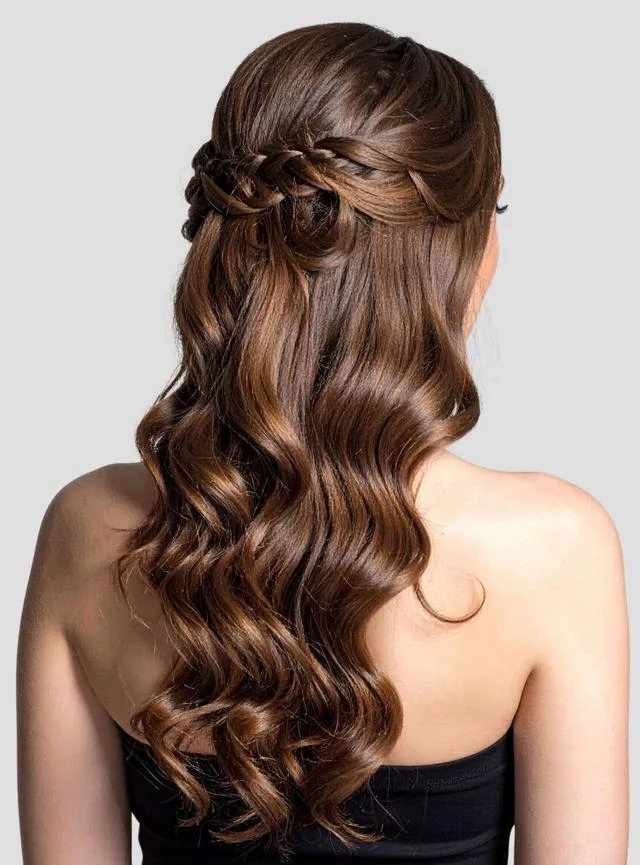
The half-up half-down is the everyday hero for long thick hair: the top half is gathered back and secured, the bottom half falls free, and you get the face-clearing benefit of an updo without the weight of gathering all of it. On thick hair the secret is to take a smaller top section than you think — about a third of the hair, not half — and to secure it with two pins or a small elastic plus a claw clip, because a single elastic will slide under the weight. Twist the top section once before securing it and it will hold twice as long.
Why it works for thick long hair: only a third of the weight is pulled back, so there is no headache and no sliding, and the loose lengths still show off the length. Best for: work, weddings, and every day — it is the most versatile style in this guide. Styling time: two minutes, and it looks better on second-day hair, when the top section has grip. Variation: braid the top section before pinning it back for a style that holds through a whole day.
16. The High Ponytail for Thick Hair
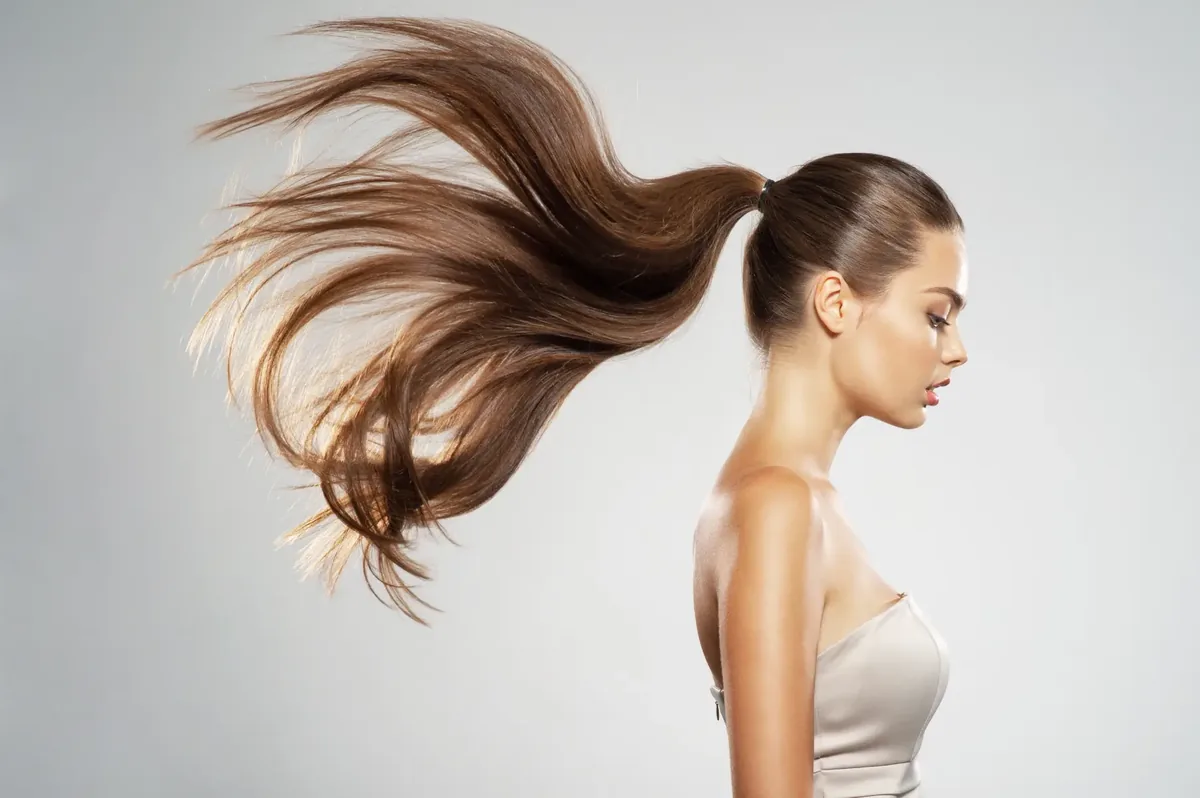
A high ponytail on long thick hair is a different animal from a high ponytail on fine hair: the weight is real, the elastic has to work hard, and a ponytail tied in one spot will slide down within the hour. The fix is to build it in two stages — gather the top half first and secure it, then gather the bottom half up to meet it and secure both together with a second elastic. The two elastics share the weight, the ponytail sits higher, and it stays there. Wrap a strand around the base to hide the elastics and add polish.
Time needed: three minutes once you know the two-stage trick. Best for: workouts, hot days, and anyone who wants the hair completely off the neck. Watch out for: tying it too tightly at one spot, which causes a headache — the two-elastic method exists precisely so you do not have to pull it that tight. Who should avoid it: anyone with a sensitive scalp or a tendency to tension headaches; a low ponytail will be kinder.
17. The Low Ponytail for Heavy Hair
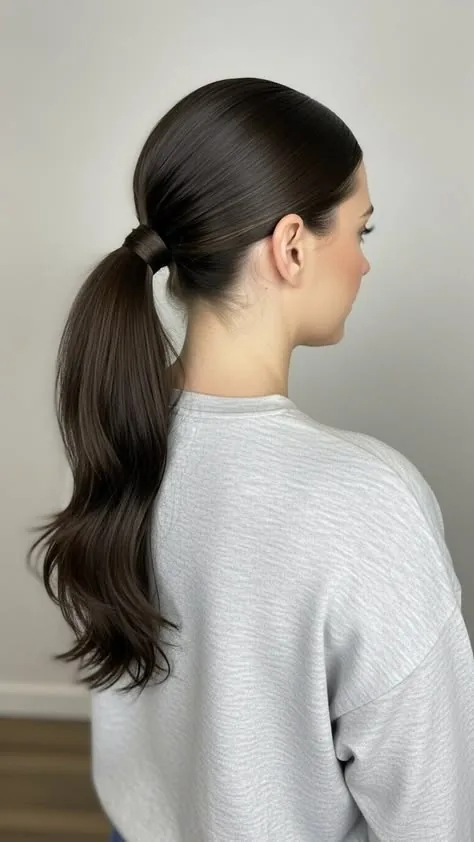
The low ponytail is the kindest ponytail for heavy hair: gathered at the nape, where the weight hangs from the strongest part of the head instead of pulling from the crown. It never gives you a headache, it sits comfortably under headphones and hats, and it looks polished with almost no effort — brush the hair back smoothly, secure it low, and wrap a strand around the elastic. On thick hair, braid the tail loosely or twist it once before tying, and the ponytail will hold its shape instead of splaying out into a heavy fan.
- Pros: no headache, comfortable all day, works under any hat or headphone band.
- Cons: less dramatic than a high ponytail, and the tail can catch on a chair back or a bag strap.
- Best for: work, long days, and anyone whose scalp is sensitive to pulling.
- Quick upgrade: a silk scrunchie instead of an elastic, or a ribbon tied at the base, turns it into an evening look.
18. The Braided Ponytail for Thick Hair
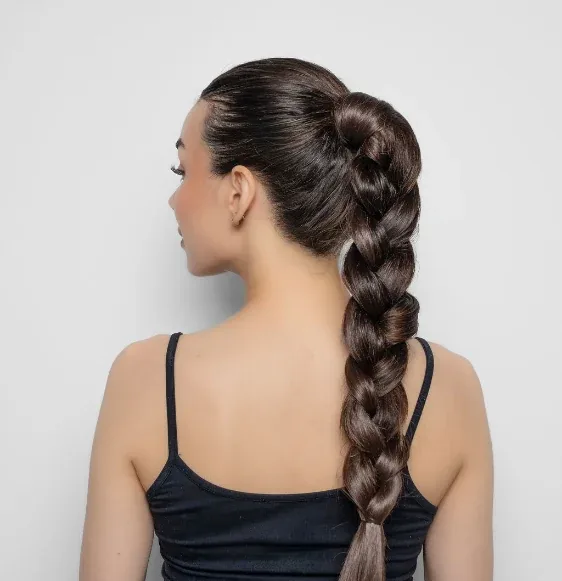
A braided ponytail is a high or low ponytail with the tail braided all the way to the ends, and it is the best ponytail for thick hair because the braid does what an elastic cannot: it contains the weight. A loose thick ponytail swings, tangles and pulls; a braided one moves as a single piece, stays tidy for hours, and looks intentional instead of thrown together. Gather the hair, secure it with two elastics, then braid the tail — a simple three-strand braid is enough — and tie off the end with a small elastic.
Why it works: the braid distributes the weight along its whole length, so no single point is carrying it all. Best for: long days, travel, workouts, and anyone whose ponytail always falls apart by noon. Styling tip: gently pull the braid apart — pancaking — to make it look fuller, but only slightly, or it will loosen. Drying-time bonus: a braided ponytail dries faster than a loose one, because the braid exposes more surface to the air.
19. The Long Bubble Braid
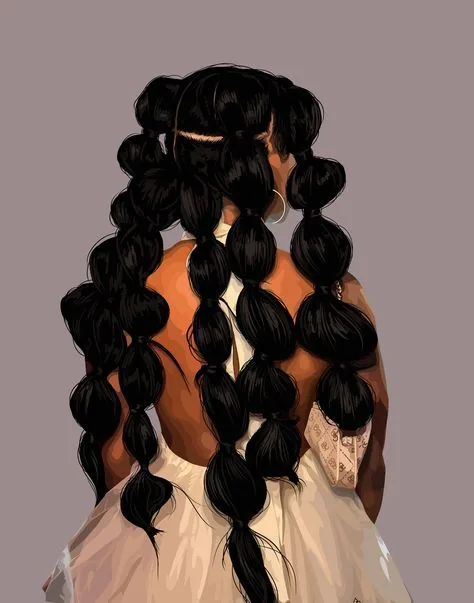
The bubble braid looks complicated and takes five minutes: a ponytail divided into sections by small elastics, with each section gently pulled out to form a bubble. On long thick hair it is a gift, because each elastic is another anchor point sharing the weight — instead of one elastic carrying everything, five or six share it, so the style stays high and secure all day. Keep the bubbles small and neat for work, or puff them out for a statement look; either way, the hair is contained, and the style photographs beautifully.
Time needed: five minutes, and it is easier than it looks. Best for: parties, festivals, and anyone who wants a ponytail with more personality. Watch out for: removing the elastics — never rip them out of thick hair, or you will snap strands; slide each one out gently, or cut them out with small scissors. Who should avoid it: anyone in a rush in the morning, because the elastics take a minute each to remove at night.
20. The Dutch Braid for Thick Long Hair
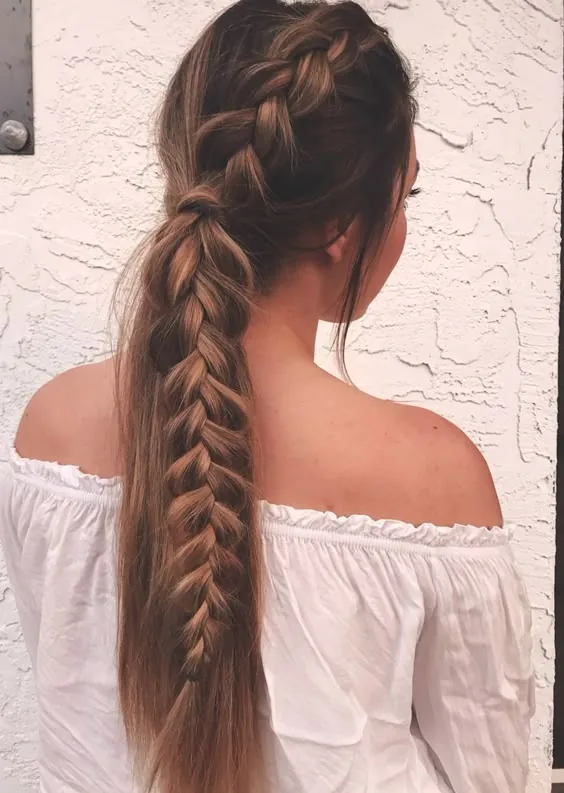
A Dutch braid — braided under rather than over, so it stands out from the head — is the best single braid for long thick hair. It handles the full weight of the hair in one structure, it keeps every layer contained from the hairline to the ends, and it sits flat enough for hats and headphones. Start at the crown, add small sections as you go, and braid all the way to the ends; on very thick hair, keep the sections generous, or the braid will take forever and your arms will ache before you finish.
Why it works for thick long hair: the braid’s structure carries the weight, so the style does not rely on a single elastic at all. Best for: workouts, windy days, and multi-day wear — a Dutch braid looks good on day two as well. How long it takes: five to seven minutes once practised; build it at home, not in a rush. Afterwards: take it out for soft, even waves, which is the best heatless wave method for thick hair.
21. The French Braid for Long Thick Hair
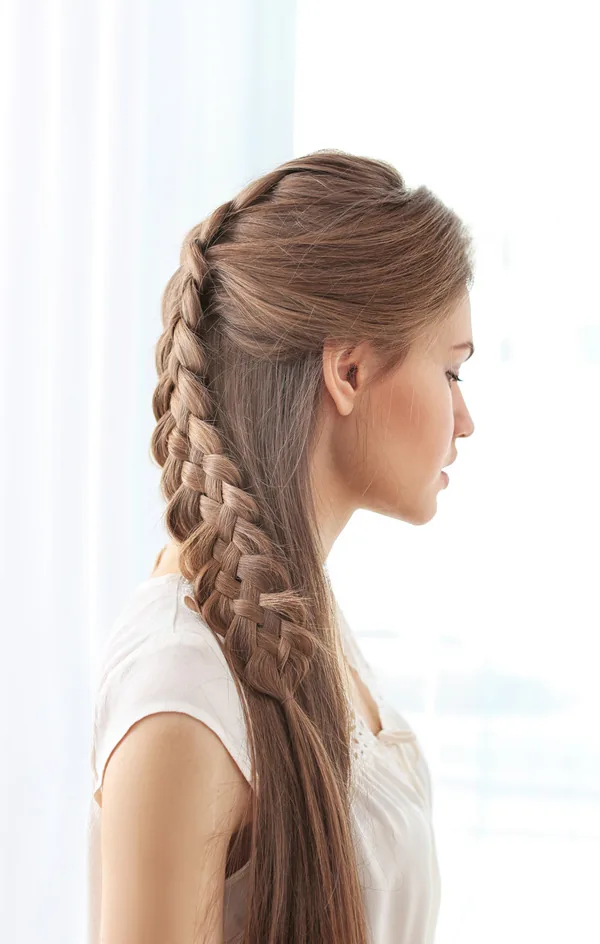
One French braid down the centre of the head is the most reliable long-hair style ever invented, and on thick hair it is even better: the braid distributes tension evenly across the whole scalp, so nothing aches, and it contains every strand from hairline to ends. Start at the crown, add small sections as you go, and braid all the way to the ends. For a neater finish, fold the tail up and pin it flat at the nape rather than leaving it hanging — a hanging braid on thick hair swings forward when you bend over, which defeats the purpose.
- Best for: all textures, every occasion, and anyone who needs a style that lasts all day without a re-do.
- How to do it: detangle first, add a little styling cream for grip, and keep the sections even — uneven sections are what make a braid loosen.
- Skip it if: your hair is too short to reach the nape in a braid — the half-up styles above are the equivalent.
- Maintenance: a French braid left in overnight gives soft waves with zero heat the next morning.
22. The Fishtail Braid for Thick Hair
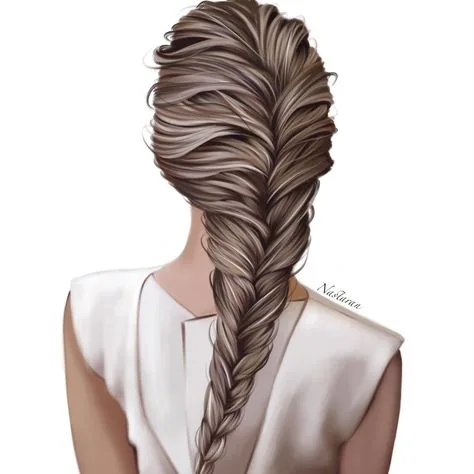
The fishtail braid looks intricate and is surprisingly simple: two sections, taking small pieces from the outside of each and crossing them over, repeated to the ends. On thick hair it is stunning, because the braid is wide and full, and it breaks up the solid mass of the hair into a beautiful herringbone pattern. It takes longer than a three-strand braid — ten minutes on very thick hair — so save it for days when you have time, and pancake it gently at the end to show off the pattern.
Why it works: the fishtail’s fine weave holds thick hair more securely than a loose three-strand braid, and it looks more polished. Best for: weddings, parties, and photos — it is the most photogenic braid in this guide. Styling tip: work on second-day hair, when the hair has grip; on freshly washed hair a fishtail slips apart. Common mistake: taking pieces that are too big, which makes the braid look like a regular braid — keep the pieces small, about half an inch.
23. Long Thick Hair in a Low Bun
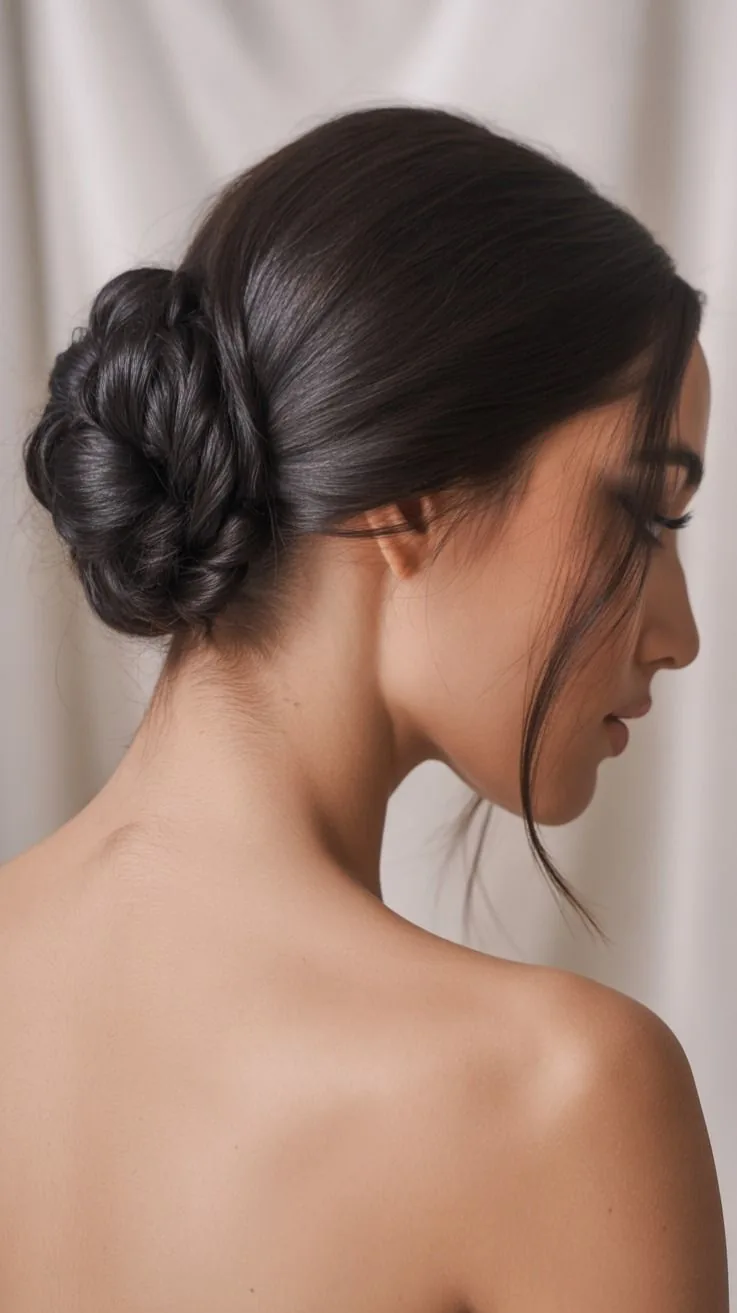
The low bun is the workhorse updo for long thick hair: gathered at the nape, twisted into a coil, wrapped around its base and pinned. The low position is the whole point — the weight hangs from the nape instead of pulling from the crown, so it stays comfortable for hours, and the bun sits flat enough for hats, headphones and high collars. On thick hair, braid the ponytail before coiling it, and the bun gains real staying power, because the braid’s structure stops the coil from unravelling.
Time needed: three to four minutes. Best for: work, formal events, and hot days — it is the most versatile bun in this guide. What to ask a stylist for: nothing — this is a home style — but if your bun always slides, ask for internal layers at your next cut, which make the hair easier to coil. Pins: use at least four long bobby pins, crossed in an X at the base, and the bun will not move.
24. The High Bun for Heavy Hair
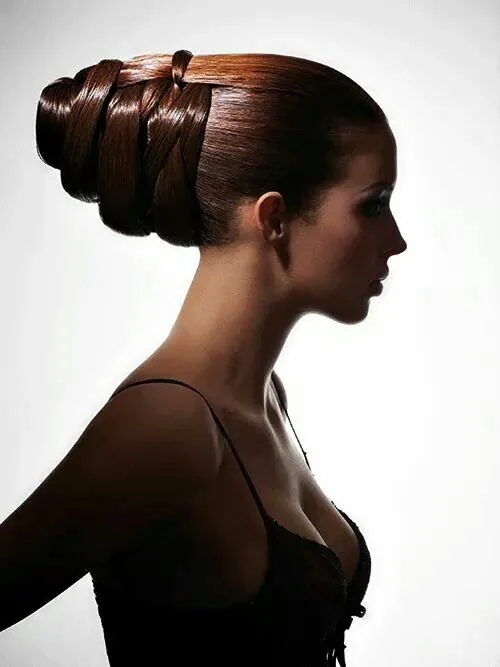
A high bun on long thick hair needs a different technique from a high bun on fine hair, because the weight of the coil will pull it down and apart. The trick is to build it on a braided base: gather the hair high, braid the ponytail, then coil the braid around its base and pin through the braid itself, not just around it. The braid’s structure locks the coil in place, and the pins have something solid to grip. A donut or bun maker can help, but only a large one — the small ones disappear inside thick hair.
Why it works: the braided coil distributes the weight around the base instead of hanging it from one point. Best for: formal events, dance, and anyone who wants the hair completely up and off the neck. Watch out for: a bun stacked too high on the crown, which creates a pressure point and a headache — sit it slightly back. Afterwards: take it down slowly and let the scalp breathe; a high bun worn tight all day is the fastest route to a tension headache.
25. The Messy Bun for Thick Long Hair
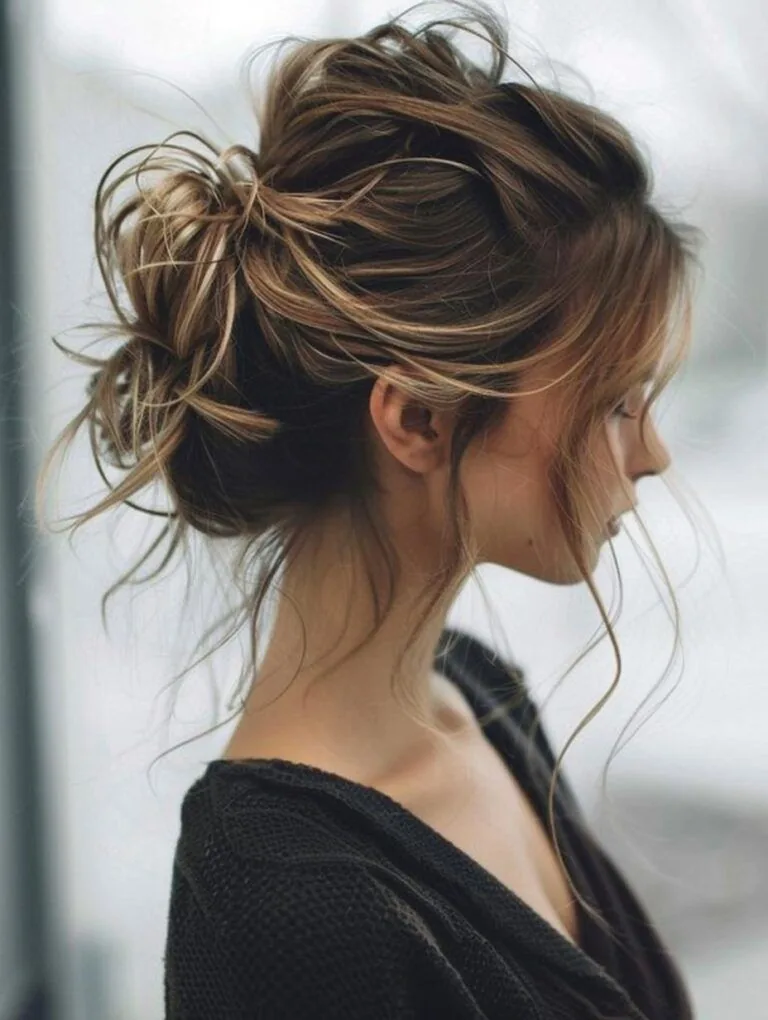
The messy bun is the top knot’s relaxed cousin: the hair is pulled through the elastic only halfway on the last loop so the ends fan out, then pinned loosely for a soft, undone finish. On thick hair it works best when the hair is not too clean — second-day hair, a little dry shampoo, or a spritz of texturising spray gives the pins something to hold. It takes thirty seconds, it forgives flyaways instead of fighting them, and it looks deliberately casual rather than falling apart.
- Best for: low-key days, errands, and the trip to and from work — not for workouts, where it will not survive.
- How to make it hold: pin in at least three places spread around the bun, not just one, and use a large claw clip as a backup anchor.
- Common mistake: pulling it too tight in the name of neatness — a messy bun should be loose, or it is just a bad top knot.
- Quick fix: if it starts to sag, twist the whole bun tighter and add two crossed pins at the base.
26. The Long Hair Claw Clip Twist
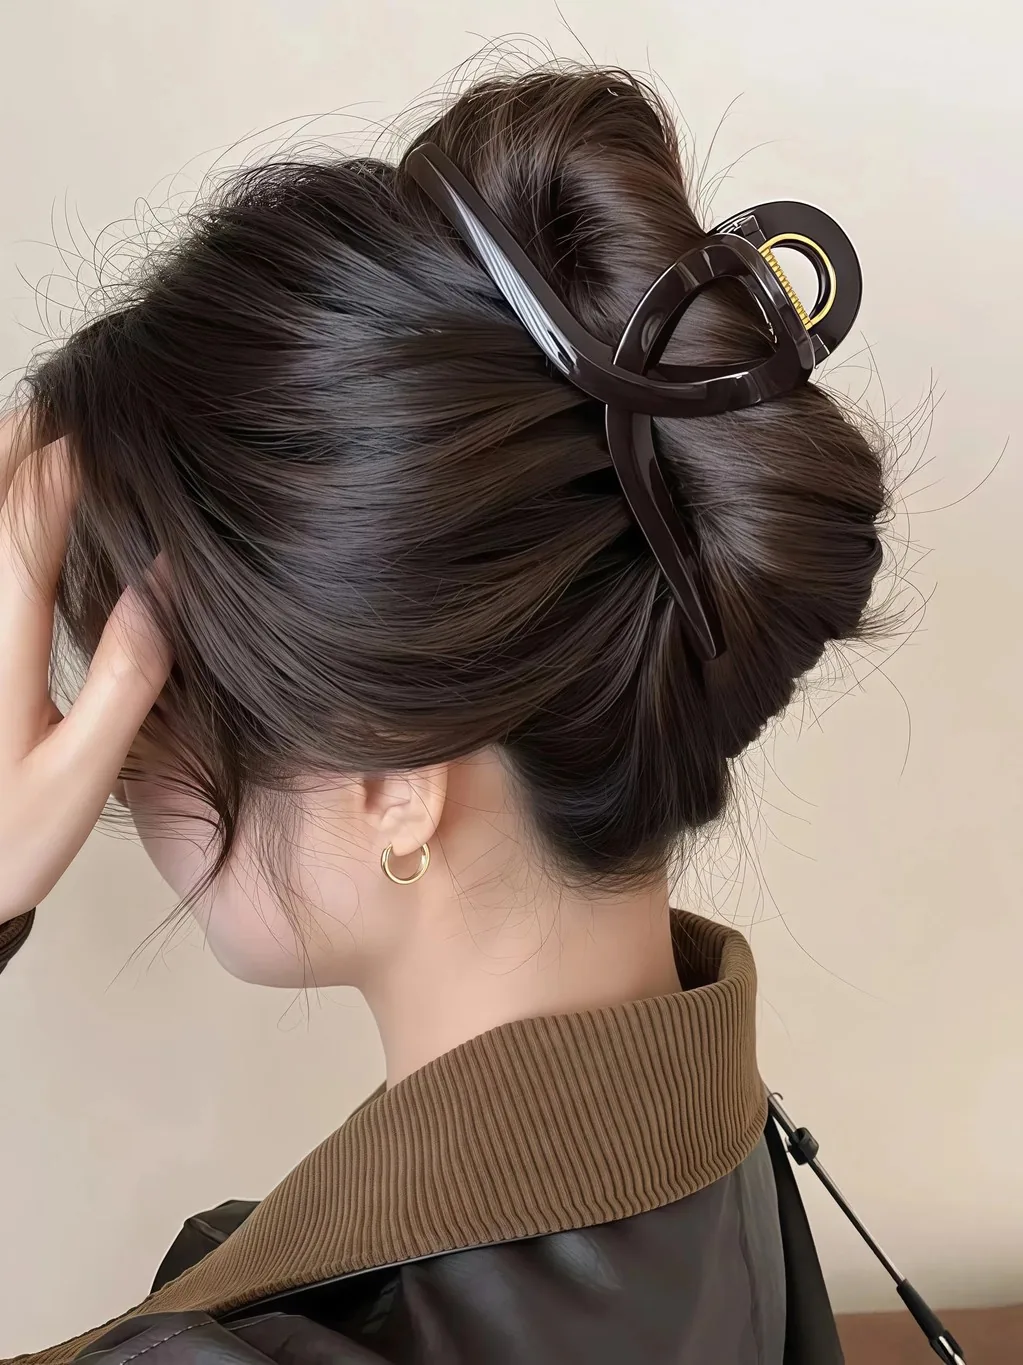
The claw clip twist is the fastest updo for long thick hair, and the only one that takes under a minute: gather the hair, twist it up the back of the head, fold the ends over, and clamp a large claw clip over the whole twist. The clip has to be large — the small ones made for fine hair will pop open on thick hair — and the best ones have strong springs and teeth that reach through the mass. Twist the hair before clipping, not after, and the clip will hold twice as long.
Why it works for thick long hair: the twist gathers the weight into one column, and the clip clamps the whole column at once, so no single strand is carrying the load. Best for: work-from-home days, errands, and anyone who wants the hair up without an elastic. Styling time: under a minute, and it looks better slightly undone. Who should avoid it: anyone with very heavy hair and a cheap clip — invest in a large, strong clip, or the twist will fall out by lunchtime.
27. Long Thick Hair With a Silk Scarf Wrap
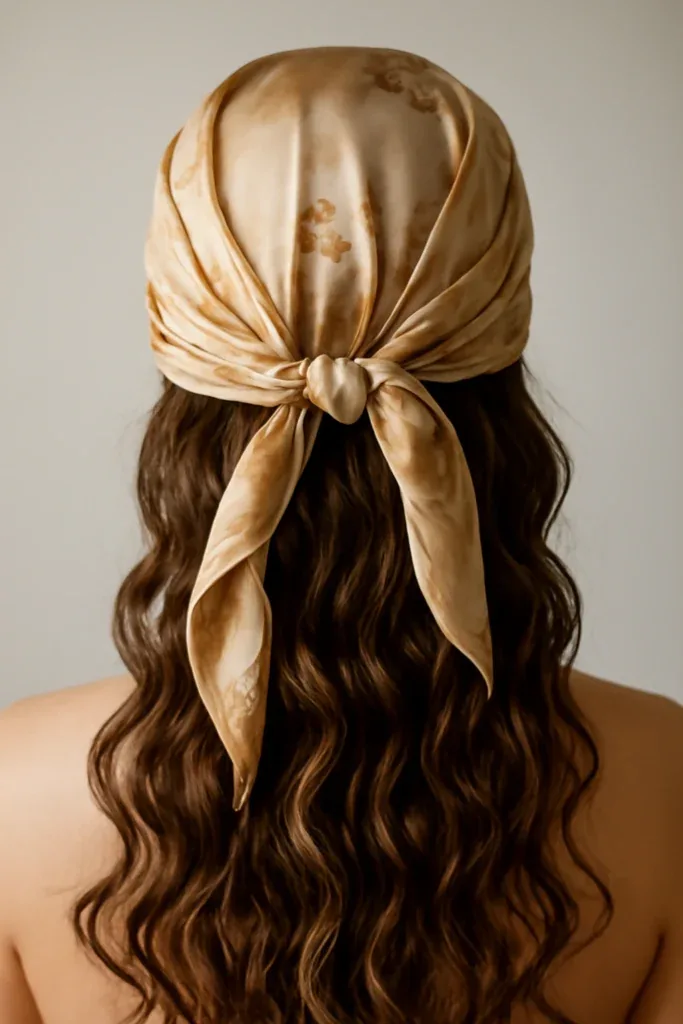
A silk scarf wrapped around a low bun or a ponytail does real work on long thick hair, not just decoration: the fabric grips the hair better than a bare elastic, it holds back the short layers and baby hairs that escape every style, and it protects the hair from friction against collars and bag straps. Tie it around the base of a low ponytail, or wrap it around a low bun and knot it underneath, and the scarf becomes a second anchor point sharing the weight.
Best for: travel, windy days, and anyone who wants a polished look with almost no effort. How to choose: a lightweight silk or satin scarf, not a heavy cotton one, which slips on thick hair — and a scarf long enough to wrap twice around the base. Styling tip: tie the knot at the side or underneath, so it does not bounce or catch. Bonus: a scarf also protects the part line from the sun, which matters more than it sounds on long hair.
28. Long Hair With a Headband Braid

A headband braid is a braid that runs along the hairline, from one temple to the other, like a headband made of your own hair — and on long thick hair it solves the oldest problem in the book, the face-framing pieces that escape every updo. Braid a section from the front hairline across the crown, pin it behind the ear, and let the rest of the hair fall free or gather it into a low ponytail. The braid holds the front back all day, and it looks far more polished than a plastic headband.
Why it works: the braid uses the hair’s own weight to stay in place, instead of a band that slides. Best for: work, weddings, and anyone whose fringe or layers always fall into their face. How long it takes: four to five minutes once practised. Variation: braid both sides and meet them at the back for a braided crown effect, or leave the rest of the hair down for a soft, romantic look.
29. The Half-Up Claw Clip for Thick Hair
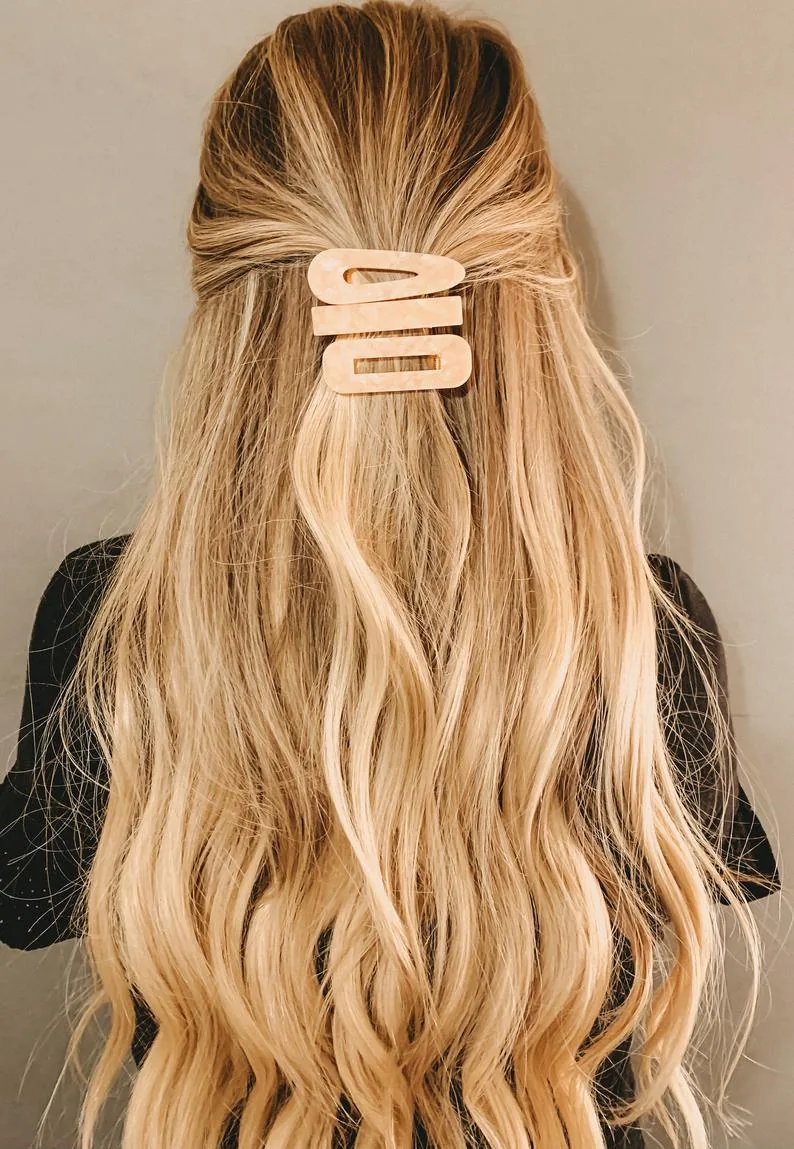
The half-up claw clip is the half-up half-down’s quicker cousin: take the top third of the hair, twist it once, and clamp a medium claw clip over it, letting the rest fall free. On thick hair, the clip needs to be medium-large and the top section needs to be smaller than you think — a third of the hair, not half — or the clip will slide under the weight. It is the best two-minute style in this guide, and it works on hair that is too thick for a half-up elastic to hold.
- Best for: every day, work, and anyone who wants the face clear without gathering all the hair up.
- Styling time: two minutes, and it looks better on second-day hair.
- Common mistake: taking too much hair in the top section — if the clip slides, take less hair next time.
- Upgrade: braid the top section before clipping it for a style that holds through a whole evening.
30. Long Thick Hair in a Loose Low Braid
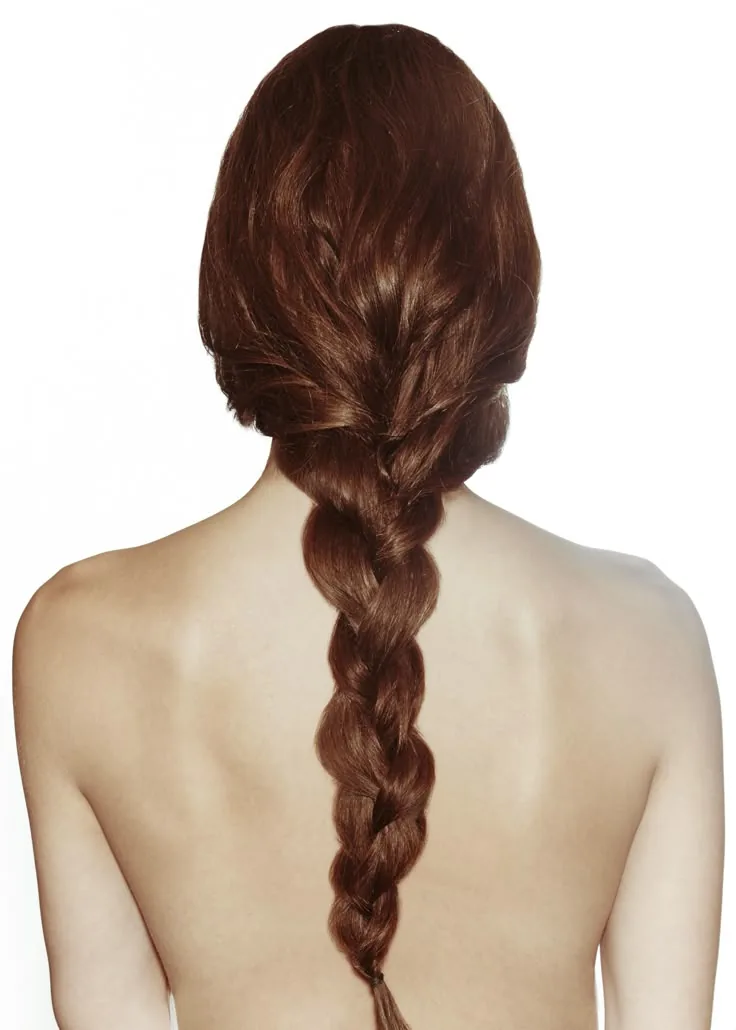
The loose low braid is the style you switch into when the day is done: a soft, low three-strand braid that keeps the hair contained and tangle-free without pulling on a tired scalp. After a day of tight styling, the scalp needs relief, and a loose braid gives it exactly that — no tension, no pins, no elastic pulling at one point — while still keeping the hair out of your face and off your neck. Braid it loosely, tie it off with a fabric-covered elastic, and let it be the bridge between the day and the night.
Why it works: a loose braid contains the hair without tension, so it is the kindest style for a sensitive scalp. Best for: evenings, the cool-down after a workout, sleeping — a loose braid overnight prevents tangles and gives soft waves by morning. Maintenance: brush the hair gently before braiding, from the ends upward, so tangles do not get locked into the braid. Drying-time tip: a loose braid dries faster than hair left down in a heavy mass, because air moves between the strands.
31. The Long Thick Hair Wavy Blowout
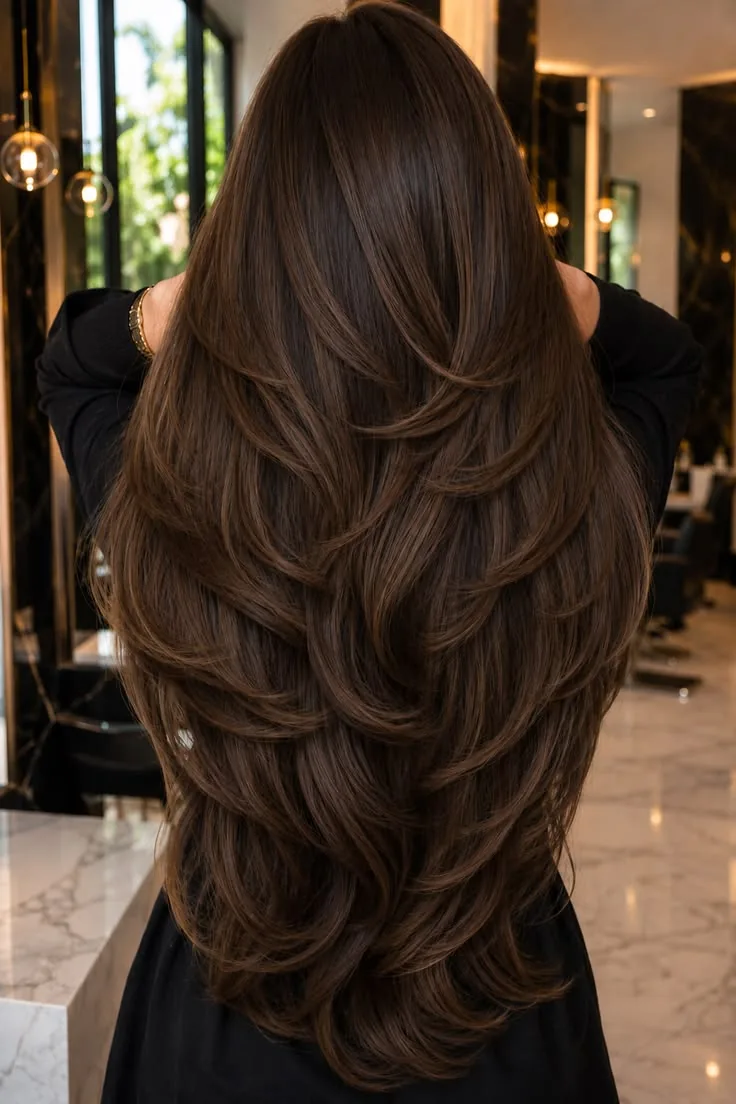
A wavy blowout on long thick hair is the salon look everyone asks for: smooth roots, soft waves through the lengths, and movement instead of a solid curtain. The key is sectioning — clip the hair into four sections and blow-dry each one with a large round brush, working from the roots down and flipping the ends under or out. On thick hair, a blowout takes 20 to 30 minutes, which is why it is a special-occasion style, not an everyday one, but the result lasts two or three days with dry shampoo at the roots.
Why it works: the round brush breaks up the mass into waves, so the hair looks lighter and moves. Best for: events, photos, and anyone who wants maximum polish. What to ask for at the salon: ‘a blowout with soft waves, not curls, and no extra volume at the roots — my hair has enough.’ Drying-time tip: rough-dry the hair to 80 percent with your fingers first, then use the round brush only for the last 20 percent — it halves the brush time.
32. Long Thick Hair With Soft Curls
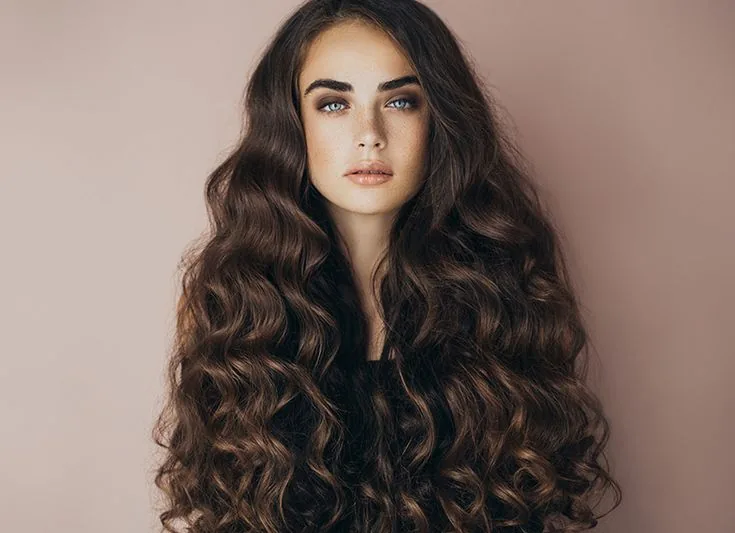
Soft curls on long thick hair are the most romantic style in this guide, and the easiest to get wrong: too much heat, too tight a curl, and the hair becomes a heavy mass of ringlets that drops within the hour. The fix is to curl large sections — two inches wide — with a large-barrel iron, curling away from the face, and to let each curl cool in your hand before you let it go. The cooled curl holds its shape, and the large sections keep the curls soft instead of tight.
- Best for: weddings, parties, and photos — soft curls photograph beautifully on thick hair.
- How long it lasts: a full day on second-day hair, less on freshly washed hair, which is too slippery to hold a curl.
- Common mistake: curling sections that are too small, which creates tight ringlets that tangle in thick hair.
- Maintenance: brush the curls out gently with a paddle brush after they cool, for soft waves instead of separate curls.
33. Long Thick Hair Straight and Sleek
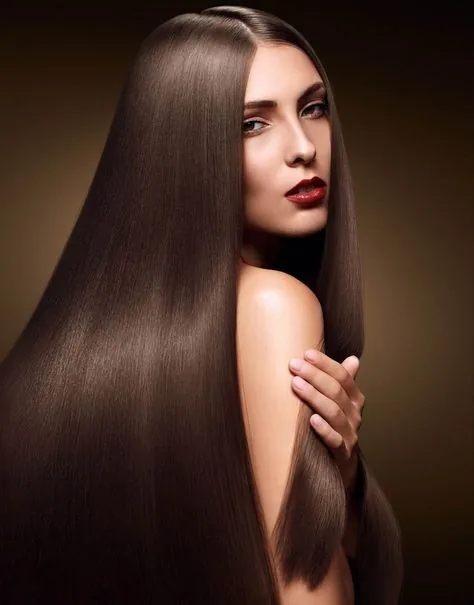
Straight and sleek is the simplest look for long thick hair and the hardest to maintain: every wave, kink and flyaway shows, and the weight of the hair pulls it straight anyway, so the style fights you in both directions. The trick is to work in sections — a flat iron on two-inch sections, from the roots down, with a heat protectant first — and to finish with a drop of smoothing oil on the ends only, never the roots. Done right, the hair looks like glass: smooth, shiny, and impossibly long.
Who it suits: straight thick hair, where the flat iron is enhancing what the hair already does. Who should avoid it: very wavy or curly thick hair, where straightening takes an hour and lasts until the first hint of humidity. Styling time: 20 to 30 minutes on thick hair — sectioning is not optional. Maintenance: a silk pillowcase at night keeps the sleek finish for a second day, and a little dry shampoo at the roots stops the top from going flat.
34. Long Thick Hair With Beach Waves
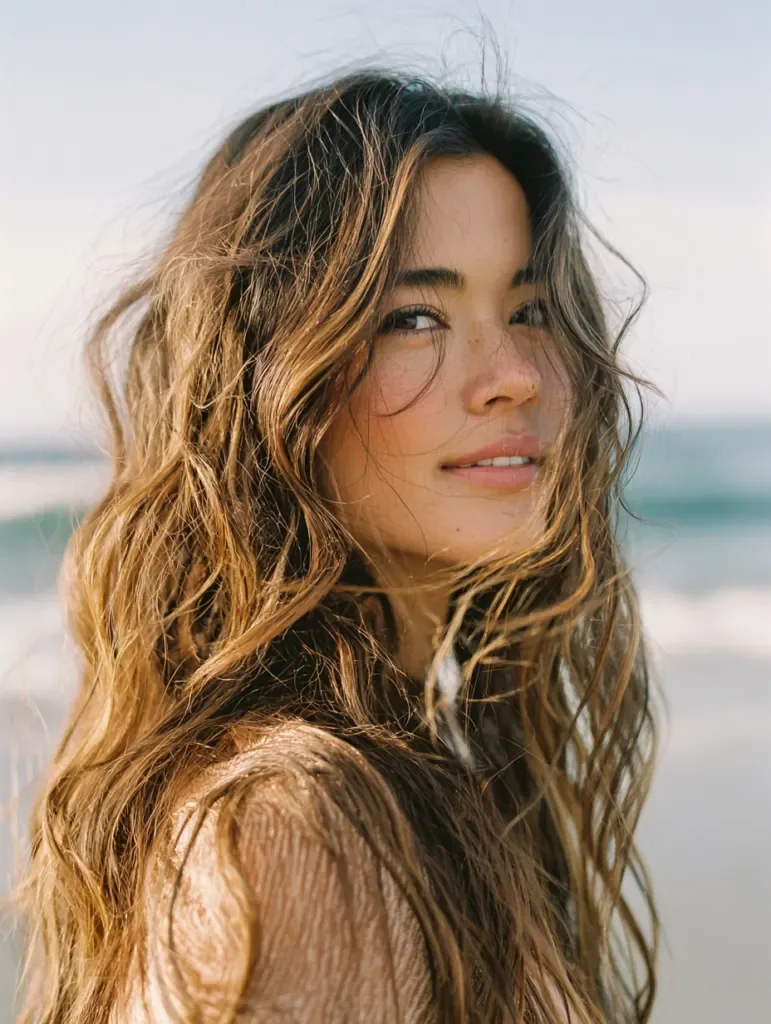
Beach waves are the most forgiving style for long thick hair: soft, undone waves that look better slightly messy, so they hide the frizz and flyaways that thick hair produces by midday. The easiest method is to braid damp hair into two loose braids, let it dry, and take it out — heatless waves with zero effort. For a faster version, use a large-barrel iron on large sections, curling alternate sections in opposite directions, and finish with a texturising spray instead of hairspray, which would weigh the hair down.
Why it works for thick long hair: the waves break up the solid mass, so the hair looks lighter and moves, and the texture gives the hair grip for updos later. Best for: summer, holidays, and every day — it is the lowest-effort polished look in this guide. Styling time: ten minutes with an iron, zero minutes with the braid method. Common mistake: using too much product — a texturising spray is enough, and heavy creams will flatten the waves.
35. Long Thick Hair With a Middle Part
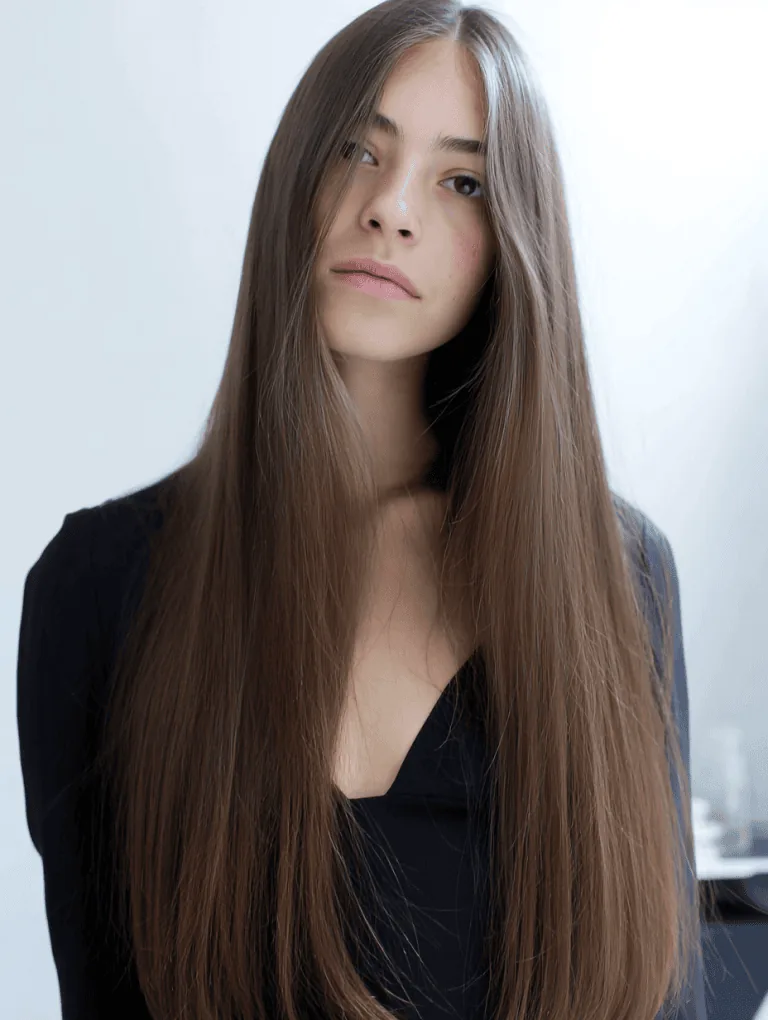
A middle part on long thick hair is the most symmetrical, polished look there is: the hair falls evenly on both sides, the face is framed equally, and the whole style looks deliberate. It works best on straight or gently wavy thick hair, where the weight of the hair keeps the part in place, and it needs the face-framing layers from section one — without them, a middle part on thick hair can look severe and flat. With them, it is the most editorial look in this guide.
How to style: part the hair while it is damp, blow-dry the roots forward, then let the lengths fall — the part will set as the hair dries. Who it suits: oval and round faces, where the symmetry balances the features. Who should avoid it: anyone with a strong cowlick at the crown, which will fight a middle part all day. Variation: a middle part with soft curls or beach waves is softer than a middle part worn straight, and it suits more face shapes.
36. Long Thick Hair With a Deep Side Part
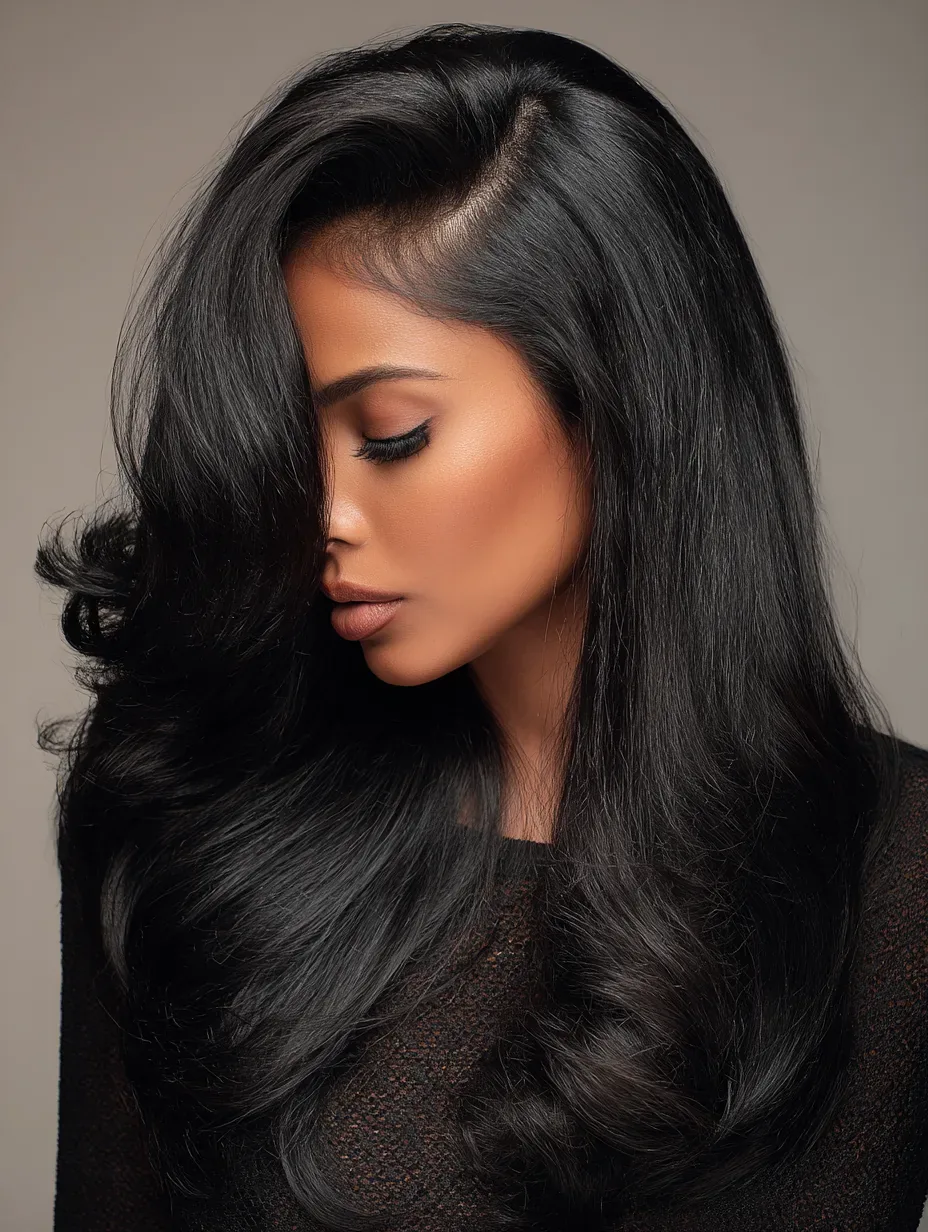
A deep side part is the middle part’s glamorous cousin: the hair is parted far to one side, so most of it sweeps across the forehead and falls in a heavy, dramatic curtain on the other side. On thick hair it is spectacular, because the weight of the hair keeps the sweep in place and the volume on the heavy side looks intentional and full. It is the best part for a formal event, and it instantly makes a simple blowout look like a salon style.
- Best for: formal events, photos, and anyone who wants instant glamour with no extra styling.
- How to style: part the hair while damp, blow-dry the roots in the direction of the part, and let the heavy side fall — a little texturising spray at the roots keeps it from going flat.
- Who it suits: almost everyone, but especially heart-shaped and square faces, where the sweep softens the forehead.
- Watch out: a deep side part on very thick hair can feel heavy on one side — balance it with a low bun or a braid on the heavy side if it aches.
37. Long Thick Hair in a Top Knot
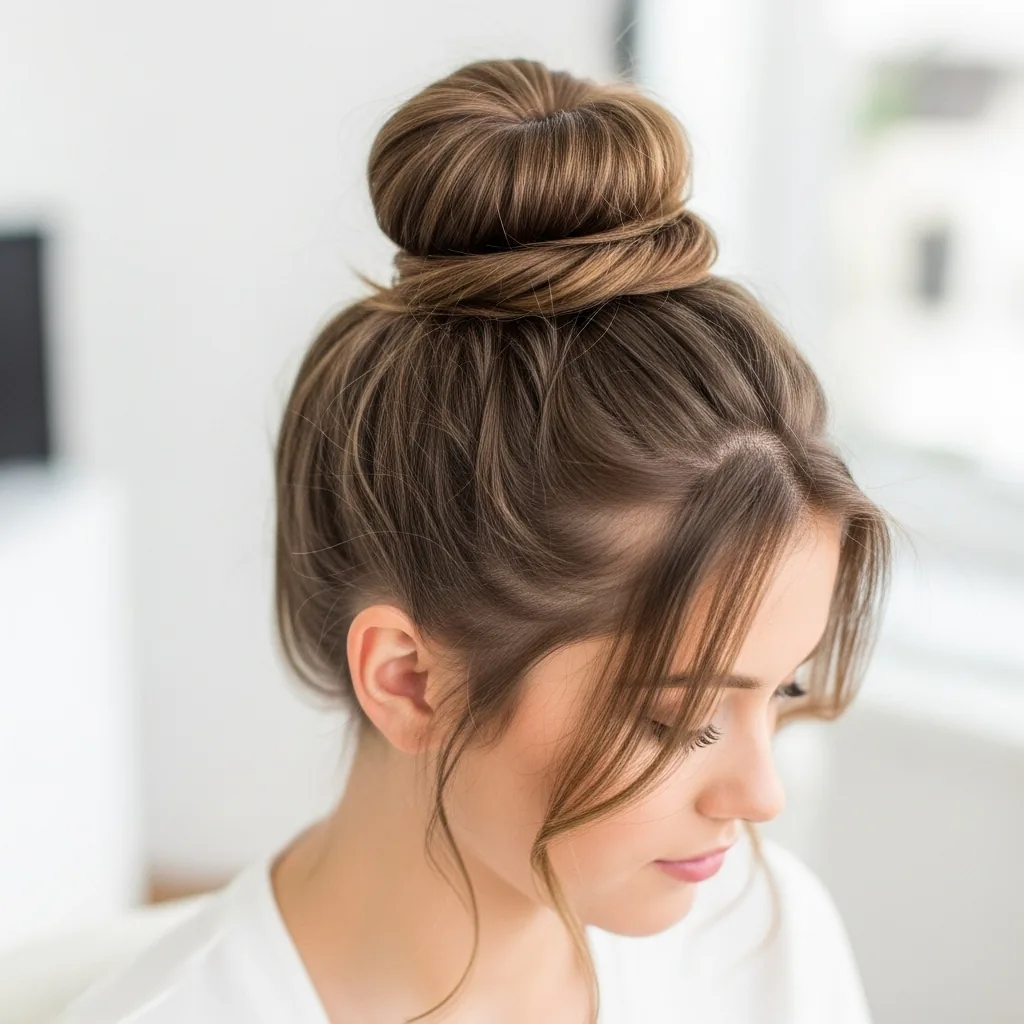
A top knot on long thick hair is a high bun worn as a statement: the hair is gathered high, twisted into a coil, wrapped around its base and pinned, sitting on top of the head like a crown. It keeps every strand off the neck, which matters on a hot day, and it looks polished with almost no effort. The technique is the same as the high bun in section 24 — braid the ponytail before coiling it, pin through the braid, and use at least three pins spread around the knot, not just one.
Why it works: the top knot uses the hair’s own weight to sit securely, and the braided coil stops it from unravelling. Best for: hot days, workouts, and anyone who wants the hair completely up. Watch out for: a knot stacked too high on the crown, which pushes headphone bands forward and creates a pressure point — sit it slightly back from the hairline. Afterwards: take it down slowly and let the scalp breathe; a top knot worn tight all day is the fastest route to a tension headache.
38. Long Thick Hair in Double Braids
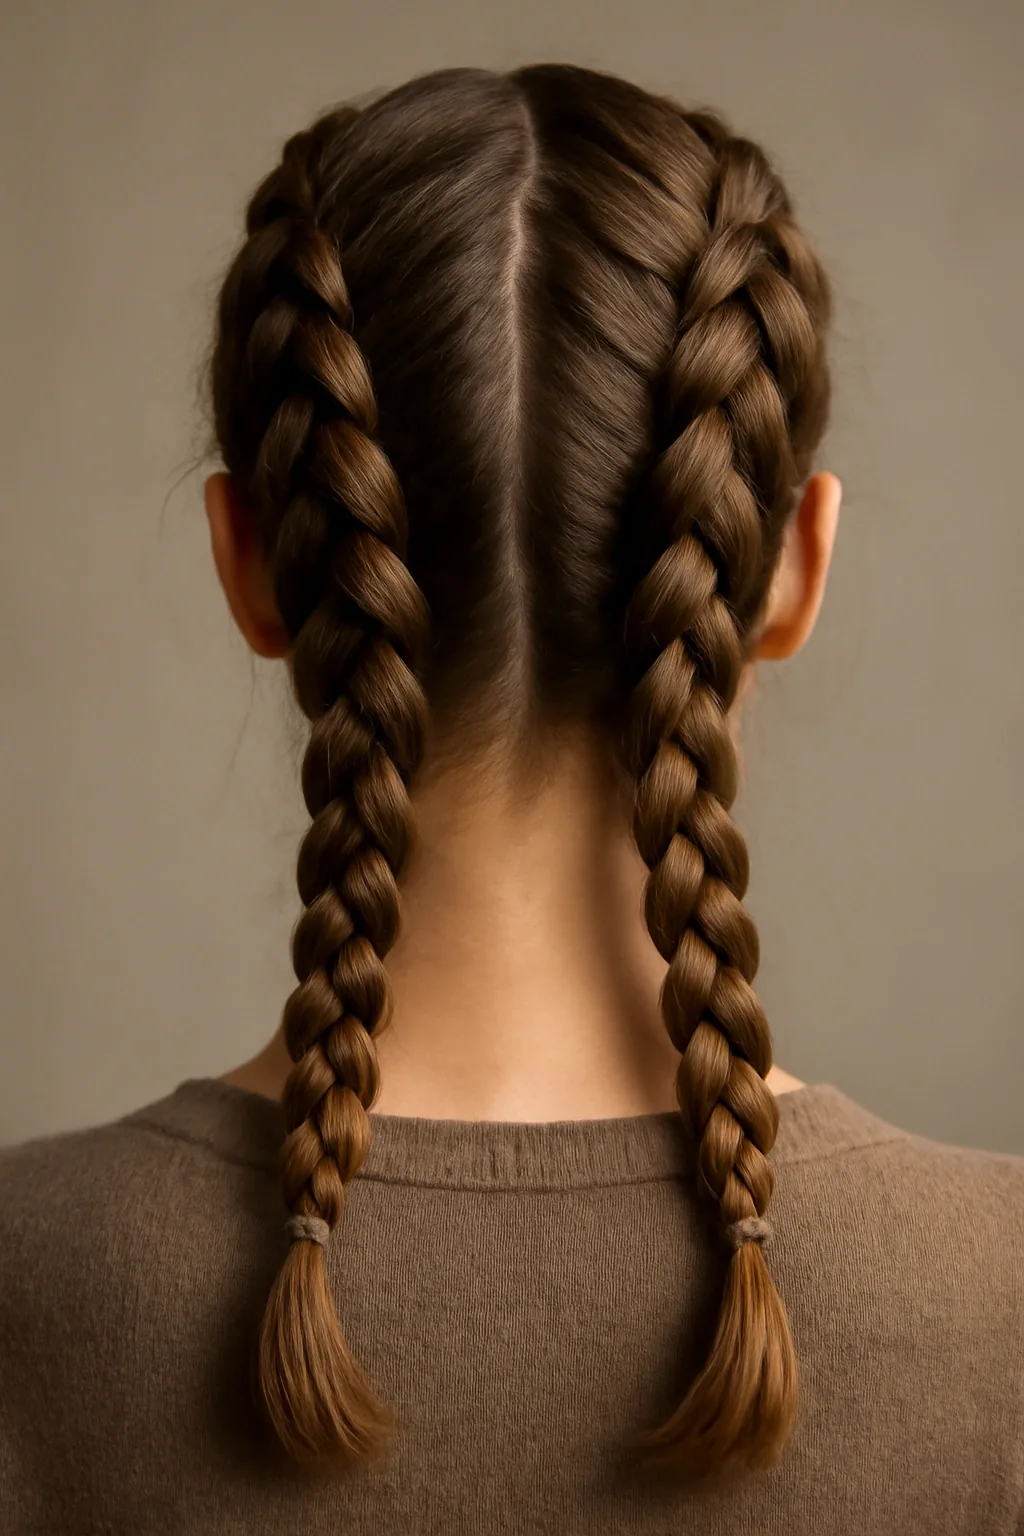
Double braids — two braids, one on each side — are the best style in this guide for very thick hair, because each braid carries half the weight. No single style handles heavy hair better: the weight is split, the tension is spread across the whole scalp, and the braids sit flat enough for hats and headphones. Part the hair down the middle, braid each side from the front hairline to the nape, then tie off the tails or fold them up into a low bun for the tidiest finish.
Time needed: seven to nine minutes once practised. Best for: workouts, travel, windy days, and multi-day wear. Pros: longest-lasting style in this guide, no pins needed, and the braids leave beautiful waves when you take them out. Cons: it takes practice to braid neatly on your own head, and it takes longer than any other style here — build it at home, not in a rush.
39. Long Thick Hair in a Side Braid
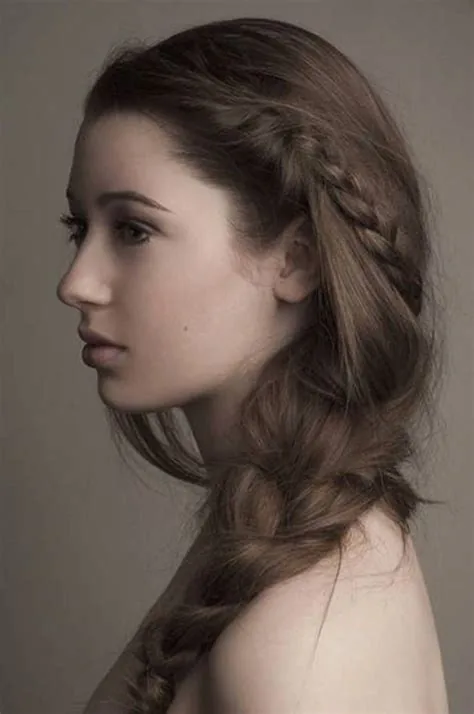
A side braid is the most romantic way to wear long thick hair down: the hair is gathered over one shoulder and braided loosely, so the braid sits in front where you can see it, and the weight rests on the shoulder instead of pulling at the scalp. It is the best braid for anyone who finds a centre braid uncomfortable, because the weight is distributed sideways, and it looks soft and effortless — the braid equivalent of a side part. Pull the braid apart gently at the end to make it look fuller, and leave a few face-framing pieces out for softness.
Why it works: the shoulder carries the weight, so there is no pulling and no headache. Best for: weddings, dates, photos, and anyone who wants a braid they can actually see. Styling tip: braid it loosely — a tight side braid looks severe, and a loose one looks romantic. Common mistake: starting the braid too high, which pulls the hairline; start it low, at the nape, and drape it over the shoulder.
40. Long Thick Hair in a Braided Crown
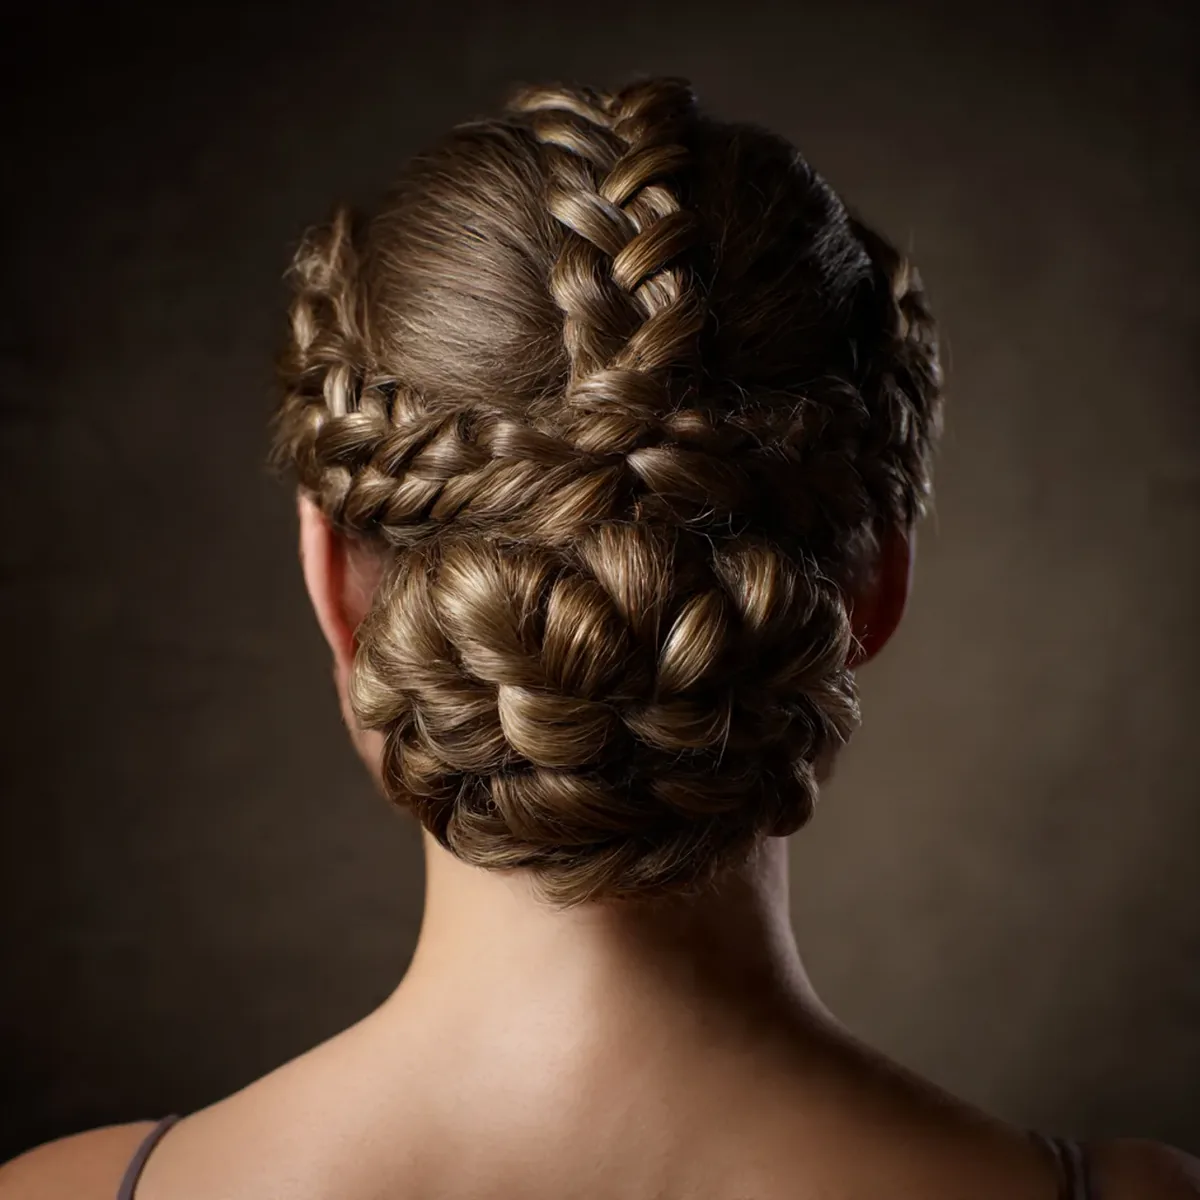
A braided crown is a braid that runs around the head like a crown, and on long thick hair it is the most regal style in this guide — the thickness makes the crown look full and substantial, where fine hair would need padding and pins to fill it out. Braid two sections, one from each temple, and pin them across the crown, or braid one long braid and wrap it around the head, pinning as you go. The rest of the hair can fall free, or be gathered into a low bun underneath.
- Best for: weddings, formal events, and photos — it is the most elegant braid in this guide.
- How long it takes: ten minutes once practised, and it holds all day without a re-do.
- What to ask for: if a stylist is building it, ask them to pin through the braid itself, not just around it, or the crown will slide.
- Variation: leave the ends of the braids loose and curl them softly for a romantic finish.
41. Long Thick Hair in a Sleek Low Chignon
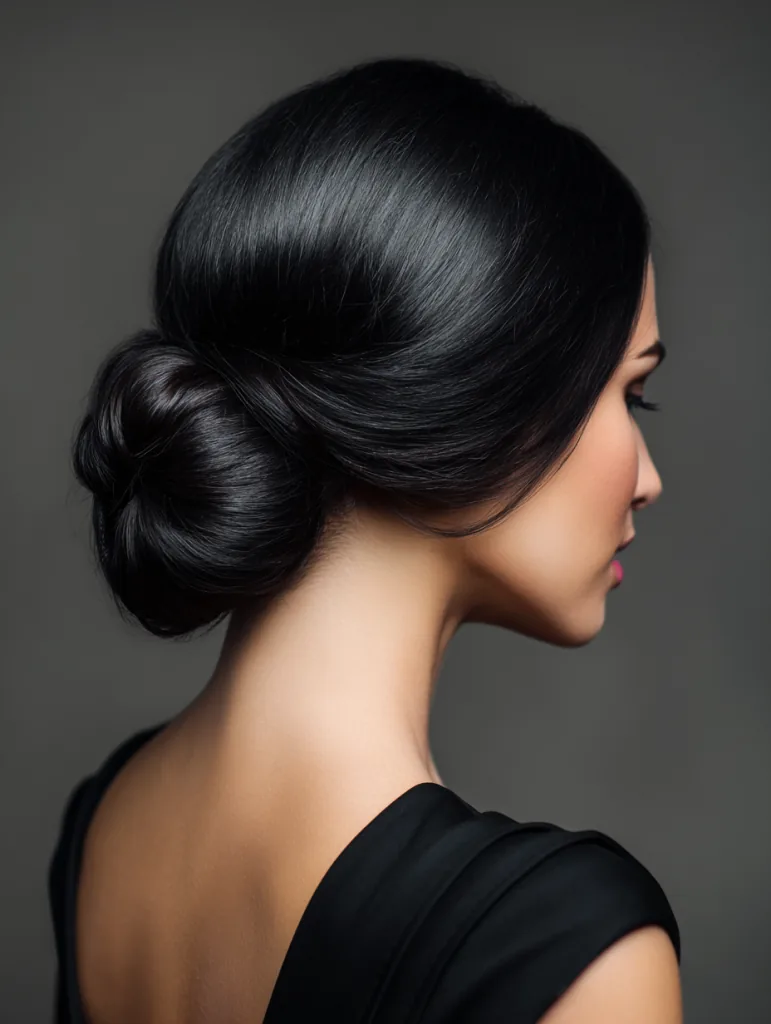
The sleek low chignon is the most polished updo for long thick hair: the hair is smoothed back, gathered low at the nape, twisted into a neat coil and pinned flat, with not a strand out of place. The thickness is what makes it work — a chignon on fine hair looks thin and needs padding, but on thick hair it is full, smooth and expensive-looking with no help at all. It is the best style in this guide for a wedding, a job interview, or any occasion where you need to look completely put together.
Why it works for thick long hair: the low position supports the weight, and the smooth finish shows off the hair’s natural shine. How to style: brush the hair back smoothly with a little styling cream, gather it low, twist it into a coil, and pin it flat with long bobby pins crossed in an X. Best for: formal events, work, and anyone who wants a timeless, elegant look. Maintenance: a drop of smoothing oil on the surface after pinning keeps flyaways down without weighing the style down.
What is the best haircut for long thick hair?
Long layers with internal or ghost layers, because they remove bulk and weight without losing length. A U-cut or V-cut shapes the ends so the weight is distributed, and face-framing layers keep the front light. Avoid blunt cuts with no layers, which leave all the weight in one solid block.
How do I make my long thick hair feel lighter?
Ask your stylist for internal layers, which remove weight from underneath without changing the outline, and wear styles that spread the weight — low buns, braids, and half-up styles — instead of high ponytails that hang everything from one point. Lightweight products on the mid-lengths and ends only also help, because heavy creams add weight.
Why does my long thick hair take so long to dry?
Because thick hair holds water deep inside the mass, so the outside feels dry while the inside is still damp. Dry it in sections, starting with the back, and use a microfibre towel first. If it takes more than 45 minutes to air-dry, ask for internal layers — removing bulk is the only thing that changes drying time permanently.
What is the best hairstyle for long thick hair for work?
A low bun, a braided ponytail, or a half-up twist, all anchored low at the nape where the weight is supported. They hold for eight hours without a re-do, they look polished, and they do not give you a headache the way a high ponytail on thick hair can.
How do I stop my thick hair ponytail from sliding down?
Build it in two stages — secure the top half first, then gather the bottom half up to meet it and secure both together with a second elastic — and use two elastics instead of one. Braiding the tail also helps, because the braid distributes the weight along its length instead of hanging it from one point.
Can I wear a claw clip with long thick hair?
Yes, but the clip has to be large, with strong springs and teeth that reach through the mass. Twist the hair before clipping, take a smaller top section than you think for a half-up clip, and use the clip as a backup anchor with two pins for all-day hold. Small clips made for fine hair will pop open on thick hair.
Should I thin my long thick hair?
Only at the ends, and only underneath. Thinning shears on the last two inches remove bulk where it is heaviest without creating frizz, but thinning the whole head creates a halo of short hairs and regrowth problems. Internal layers are usually a better choice than thinning, because they remove weight invisibly.
How often should I trim long thick hair?
Every 10 to 12 weeks. Thick hair hides split ends inside the mass, so by the time you notice them the damage has travelled up the strand. Regular trims keep the ends light, the layers working, and the hair looking healthy instead of heavy.
What is the best way to sleep with long thick hair?
In a loose low braid, on a silk or satin pillowcase. The braid keeps the hair contained and tangle-free overnight without pulling on the scalp, and the silk pillowcase reduces friction so you wake up with fewer tangles and less frizz. Never sleep with wet thick hair tied up tightly — it stays damp, tangles, and breaks.
How do I keep long thick hair from getting tangled?
Detangle before washing, from the ends upward, with a wide-tooth comb or a paddle brush; braid the hair loosely for sleep and for workouts; and use a leave-in conditioner on damp hair. Tangling happens when the lengths rub together freely, so any style that contains the ends — a braid, a low bun, a ponytail — prevents most of it.
Conclusion: Heavy Hair, Lightly Worn
Long thick hair is not a problem to solve — it is a resource to manage. The styles in this guide all do the same three things: they remove bulk where you feel it, they spread the weight so no single point carries it all, and they get the hair dry, because damp thick hair is heavy thick hair. Start with the cut — long layers, internal layers, a U-cut or a butterfly cut — because no styling trick can fix a cut that leaves all the weight in one block. Then keep three styles in rotation: one cut you love worn down, one braid that holds all day, and one updo that takes under five minutes. Rotate them, vary the anchor point, give your hair a free day when you can, and trim the ends every ten weeks. Your hair is long and thick because it is healthy and strong — wear it in a way that feels that good, and it will look that good too. Pick a style from this guide, try it tomorrow, and notice how much lighter the day feels when your hair is working with you instead of against you.

