
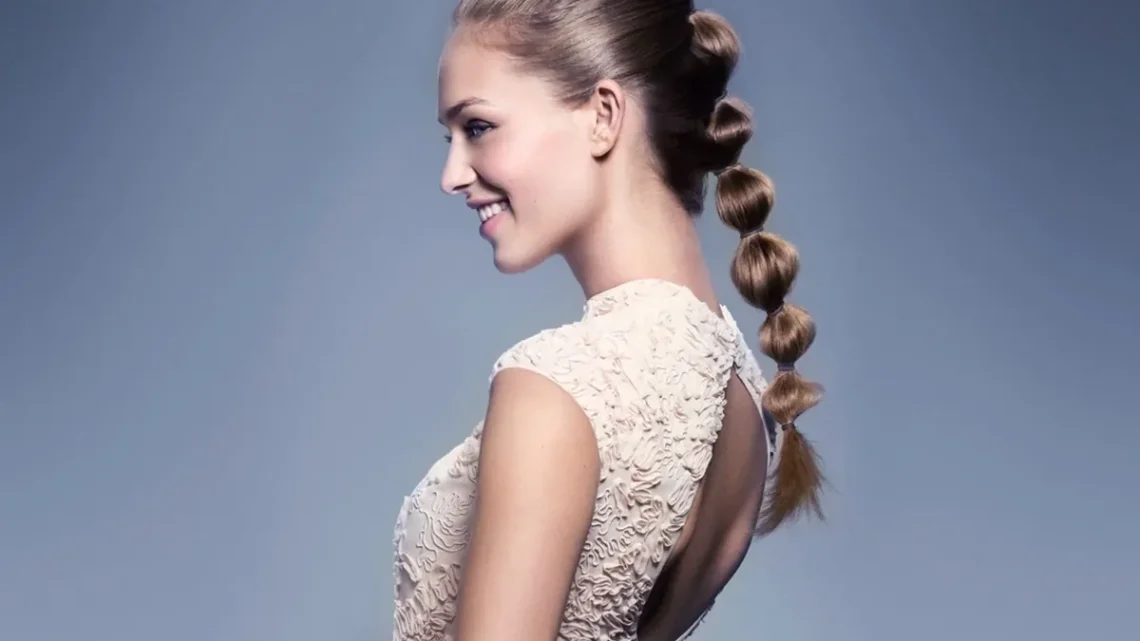
Bubble braids are the hairstyle that refuses to be ignored. Instead of weaving strands over and under each other, you gather the hair into a ponytail and tie elastics down its length, then puff out the sections between them into round, bouncy bubbles. The result is bold, playful and almost sculptural — a braid that looks like it took a stylist an hour but actually takes about ten minutes and zero braiding skill. No wonder it has taken over school hallways, gyms, festivals and red carpets alike.
Here are 41 bubble braid hairstyles, from the classic bubble ponytail and double bubble braids to bubble buns, bubble crowns, beaded and ribbon-wrapped versions, and looks for weddings, workouts, parties and everyday wear. Eight guides cover what a bubble braid actually is, the tools and elastics you need, the basic step-by-step, how to make your bubbles even and full, which styles suit each hair length, how to keep them secure all day, how to remove elastics without damage, and the mistakes that flatten the whole look. Every style notes who it suits, how to build it, and what to watch out for.
What a Bubble Braid Is (and How It Differs from a Regular Braid)
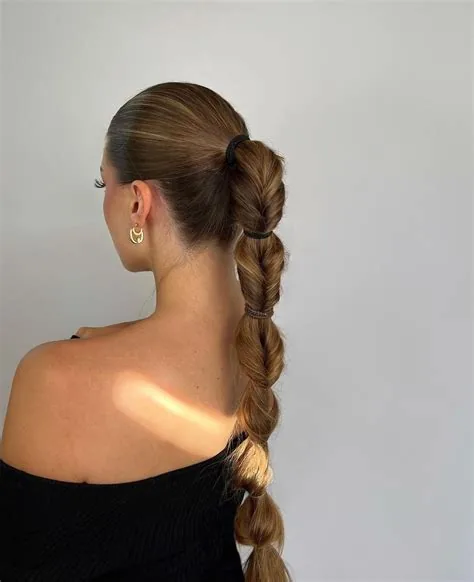
A bubble braid is not really a braid at all — it is a series of ponytail sections shaped into bubbles. You tie the hair into a ponytail, add elastics at even intervals down the length, and gently pull the hair between each pair of elastics outward until it puffs into a round bubble. There is no weaving, no crossing strands, and no finger gymnastics, which is why it is the most beginner-friendly braid in existence.
That is also what makes it different from a regular braid. A three-strand or French braid gets its shape from interlacing hair, so it lies flat and tight; a bubble braid gets its shape from volume, so it stands out and catches the light. It works on almost any hair type, from stick-straight to curly, and it holds up far better than a regular braid in wind or during a workout, because each elastic is its own anchor point. If you can tie a ponytail, you can do a bubble braid.
Tools and Elastics You Need for Bubble Braids
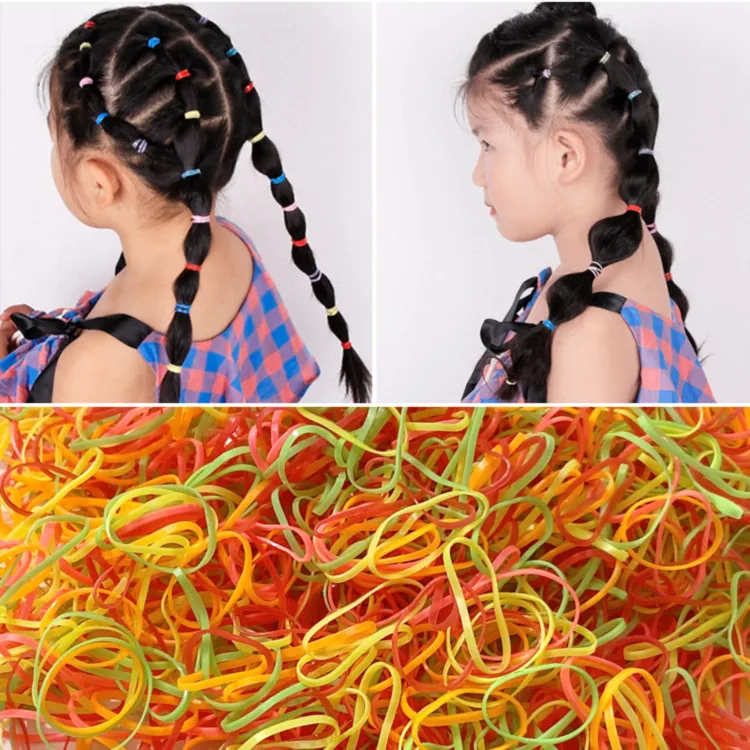
The good news is that bubble braids need almost nothing: a brush, a comb for parting, a handful of elastics, and optionally a little texturising spray or dry shampoo for grip. Small clear elastics disappear into the hair and suit sleek, polished looks, while thick fabric-covered elastics add colour and hold more hair — great for thick hair or statement styles. Buy more elastics than you think you need, because a full bubble braid on long hair can use eight or ten.
A few extras make the result noticeably better. A rat-tail comb helps you part cleanly and tease the bubbles for volume, a light-hold hairspray keeps flyaways in check without stiffening the bubbles, and a small amount of styling cream smooths the ponytail before you start. Ribbon, beads and scrunchies are optional decorations, not necessities. Skip heavy oils before styling — slippery hair slides out of elastics and the bubbles collapse.
The Basic Bubble Braid, Step by Step
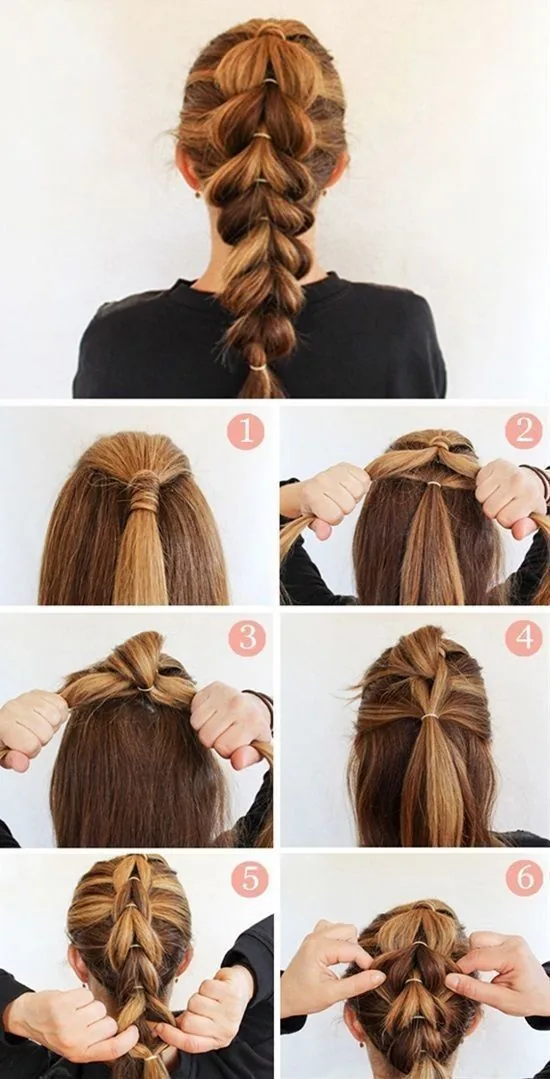
Start with brushed, slightly textured hair — day-old hair or hair with a little dry shampoo grips best. Gather all your hair into a ponytail at the height you want and secure it with a strong elastic. Then take a second elastic and tie it a few centimetres down the ponytail, leaving a gap of hair between the two elastics. Repeat down the length, spacing the elastics evenly, until you reach the ends.
Now comes the fun part: shaping the bubbles. Hold the ponytail just below an elastic with one hand and use the other to gently tug the hair between the two elastics outward, a little at a time, working around the whole bubble until it is round and full. Do the same for each section, checking in the mirror that the bubbles are roughly the same size. Finish with a light mist of hairspray, and tie the very end with a final elastic. Ten minutes, no braiding required.
How to Make Your Bubbles Even and Full
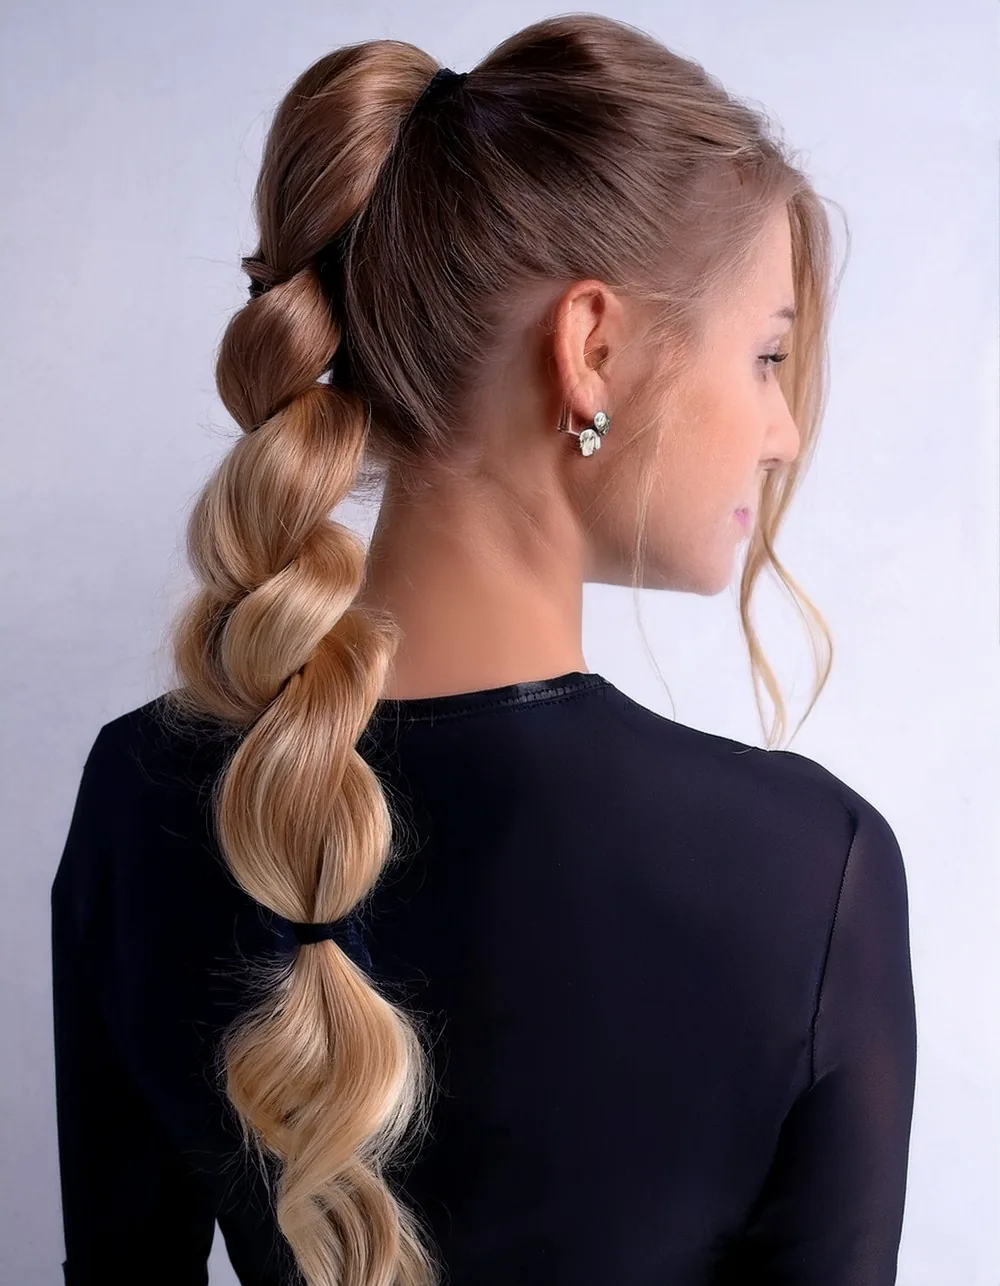
Even bubbles start with even spacing, so measure by eye before you tie anything: on most hair, gaps of about five to seven centimetres work well, shrinking slightly toward the ends where the hair gets thinner. If one gap is much bigger than the rest, that bubble will dwarf the others and the whole braid will look lopsided. Tie the elastics loosely enough to slide them a little before you commit, then tighten once the spacing looks right.
Fullness comes from the pull, not from the amount of hair. Tug the hair outward in small pinches all the way around each bubble instead of yanking one side, and tease the inside of each section very gently with a comb if the bubble still looks flat. A sprinkle of texturising powder at the roots of each bubble adds grip and volume. The most common error is pulling too hard at the top of the bubble and not enough at the sides — work around the circle, and check the shape from the side as well as the front.
Bubble Braids by Hair Length: Short, Medium and Long
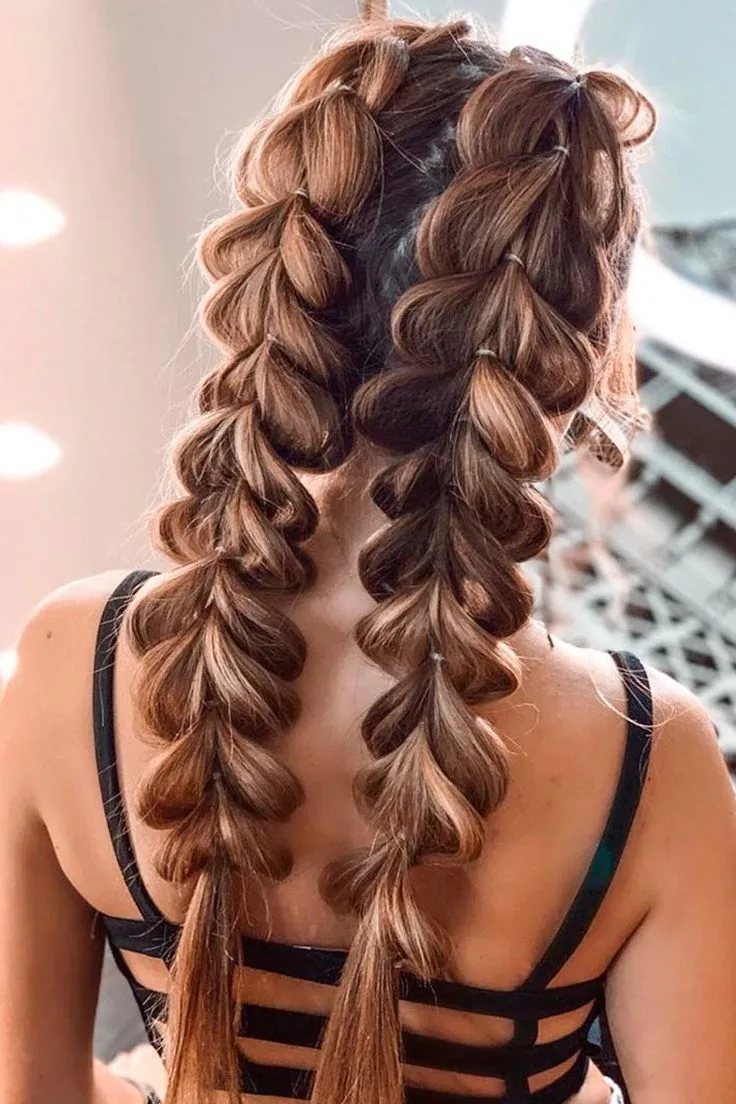
Long hair is the natural home of the bubble braid, because it gives you enough length for four or five generous bubbles — but medium hair works beautifully too, with three smaller bubbles and a slightly tighter spacing. Short hair is not excluded: a half-up bubble braid uses only the top section, so even shoulder-length hair can wear it, and a low bubble ponytail on a bob gives you one or two cute bubbles at the nape.
The trick is adjusting the spacing to the length you have. Long hair can take wide gaps and big, dramatic bubbles; medium hair needs gaps of about four centimetres so the bubbles do not swallow the whole length; short hair should keep the bubbles small and close together, or the style collapses into a single puff. Extensions are a genuine option if you want the long, dramatic version for one night — clip-ins at the back give you the length without the commitment.
Keeping Bubble Braids Secure All Day
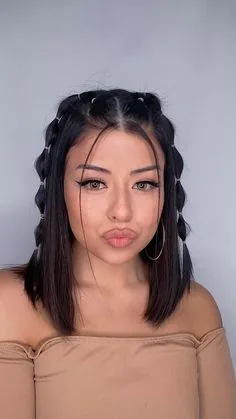
Bubble braids are naturally secure — every elastic is an anchor — but a few habits keep them perfect from morning to midnight. Start with hair that has some texture: freshly washed, silky hair is the enemy, so add dry shampoo or texturising spray before you begin. Use elastics that match your hair’s thickness, and double up the top elastic on thick hair, since it carries the most weight.
During the day, resist the urge to keep re-puffing the bubbles, because every tug loosens the elastics slightly. If a bubble starts to sag, tighten the elastic below it rather than pulling the hair again. For workouts or windy days, a light-hold hairspray over the whole braid and a couple of bobby pins hidden at the base will hold everything in place. And if one elastic does snap, the rest of the braid stays intact — which is another reason bubble braids beat regular braids for long days.
Removing Elastics Without Damage or Breakage
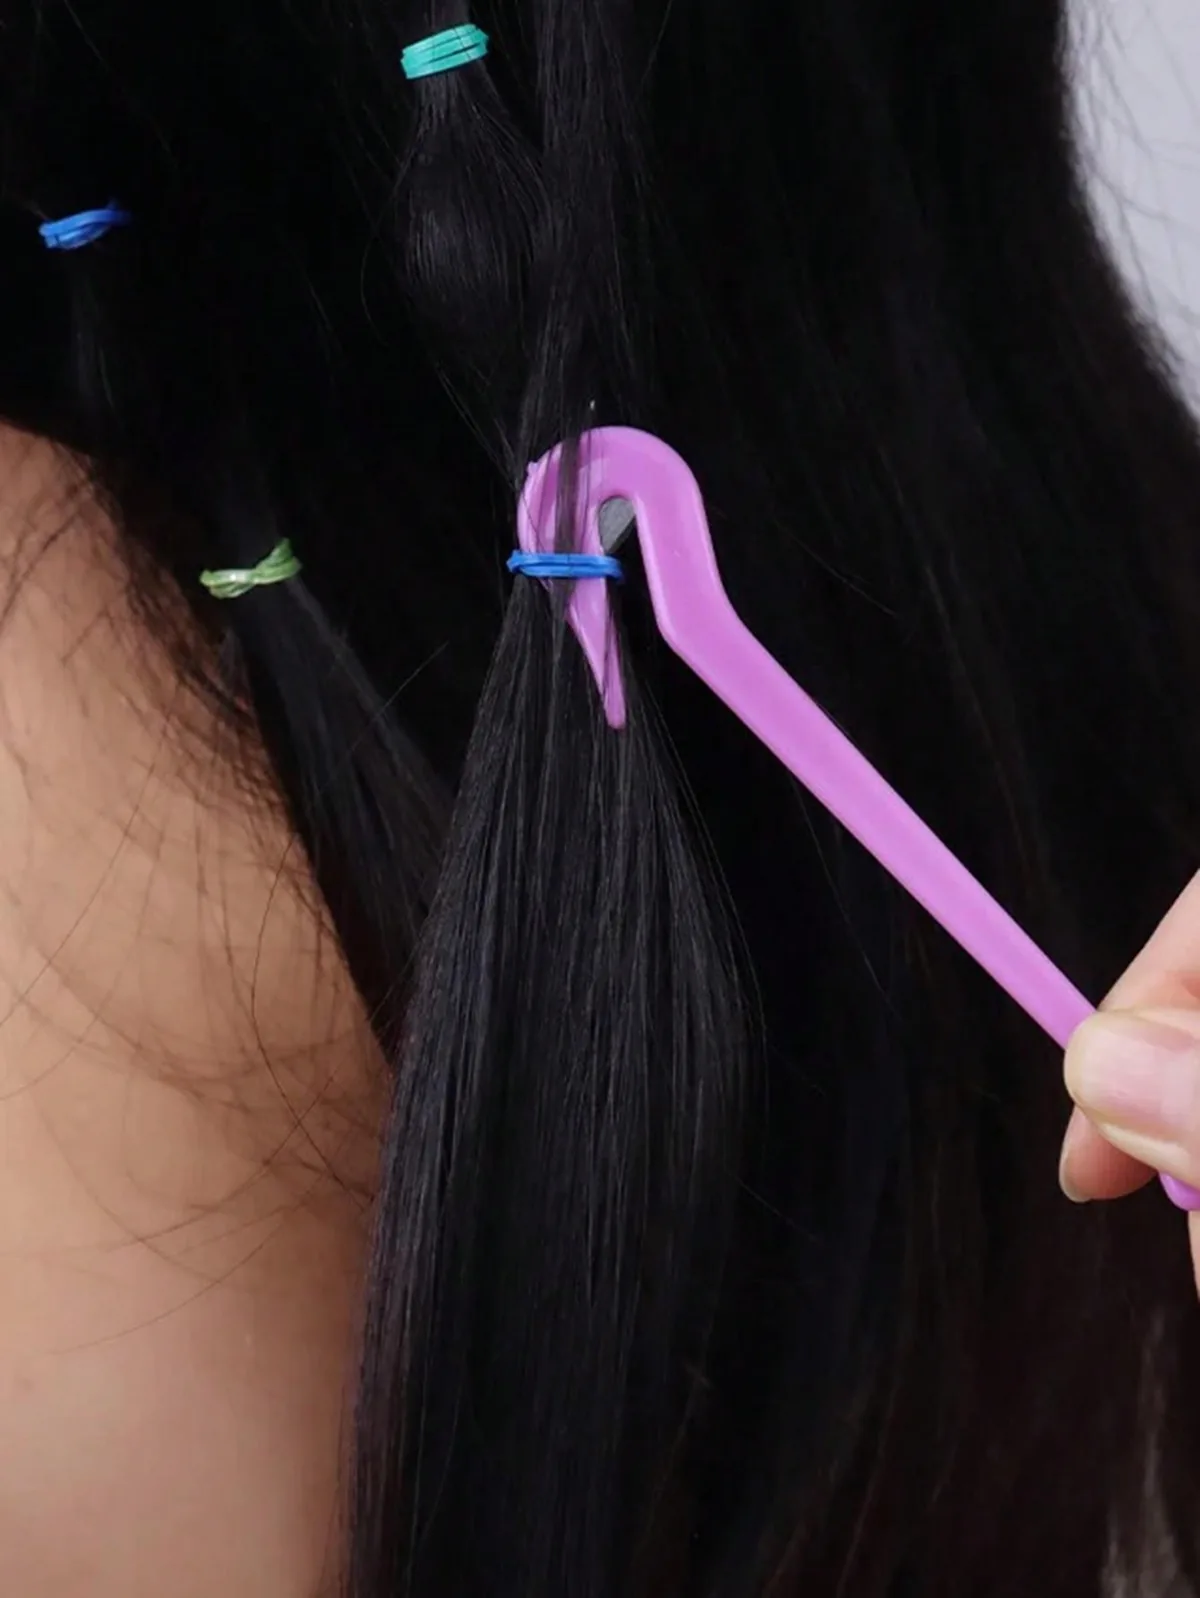
The fastest way to ruin a good hair day is ripping elastics out of a bubble braid. Small clear elastics in particular tangle into the hair, and yanking them breaks strands and leaves frizz. The safe method is simple: slide a pointed tail comb or a bobby pin under each elastic, stretch it gently away from the hair, and cut it with small scissors if it will not slide — cutting a cheap elastic is always better than tearing out hair.
Work from the bottom up, removing one elastic at a time and finger-combing each bubble loose as you go. Never brush a bubble braid out while the elastics are still in. Once everything is free, run a wide-tooth comb through the hair, then a brush, and finish with a little leave-in conditioner on the ends if the hair feels dry. Your hair will have a lovely loose wave from the bubbles — a bonus style for the next day.
Common Bubble Braid Mistakes (and How to Fix Them)
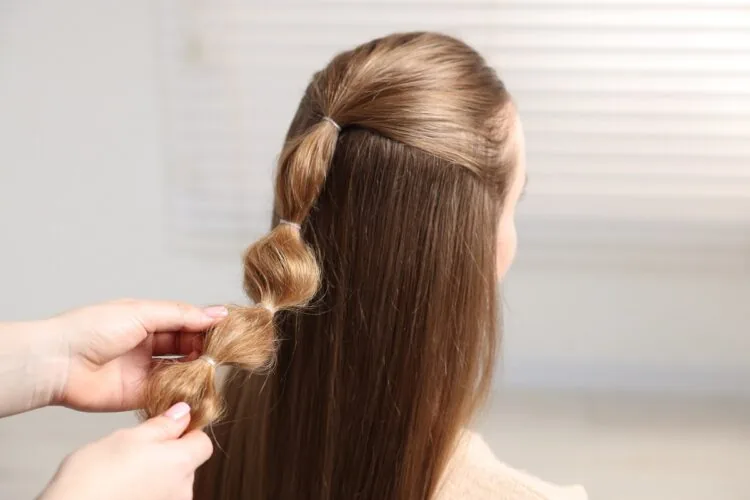
The number one mistake is uneven spacing: elastics tied at random intervals make the bubbles different sizes and the braid look accidental. Fix it by spacing the elastics before you tighten them, and by comparing each new gap to the one above it. The second mistake is pulling the bubbles too hard, which drags the elastics down and makes the whole braid sag — small, gentle tugs, all the way around, are the rule.
Other mistakes are easy to spot once you know them. Starting with slippery, freshly washed hair makes the elastics slide; using elastics that are too big lets the bubbles collapse; and skipping hairspray means flyaways take over by lunchtime. The opposite error is overdoing the products — too much gel or spray makes the bubbles stiff and crunchy instead of soft and bouncy. And never forget the ends: a bubble braid with a limp, untied tail looks unfinished, so finish with a neat elastic and a final puff.
1. The Classic Bubble Ponytail Everyone Starts With
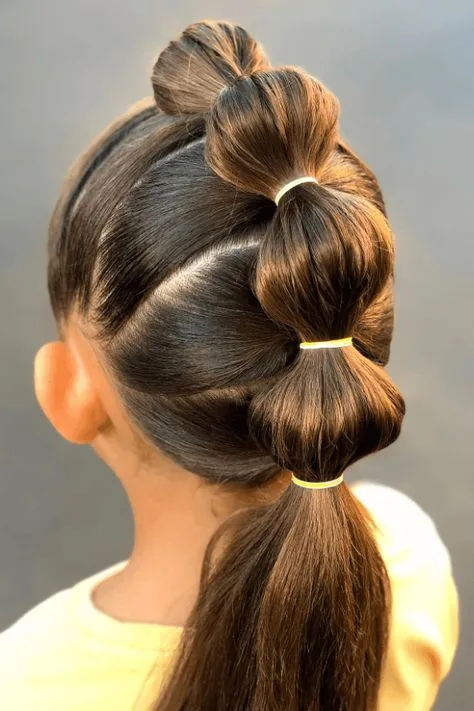
The classic bubble ponytail is where every bubble braid journey begins: one ponytail, elastics down its length, and bubbles puffed out to perfection. It is simple, bold and instantly recognisable, and it works on almost any hair length past the shoulders. The bubbles give a plain ponytail a sculptural, playful shape that photographs beautifully and turns heads without any braiding skill at all.
What it is: a single ponytail divided into puffed sections by elastics. Why it works: the bubbles add volume and shape exactly where a normal ponytail falls flat. Who it suits: anyone with medium to long hair, and anyone trying bubble braids for the first time. How to style it: tie a mid-height ponytail, space elastics five centimetres apart, and puff each bubble gently. What to ask for at the salon: nothing — this is the easiest bubble braid to do yourself.
2. High Bubble Ponytail: Bold, Lifted and Full of Energy
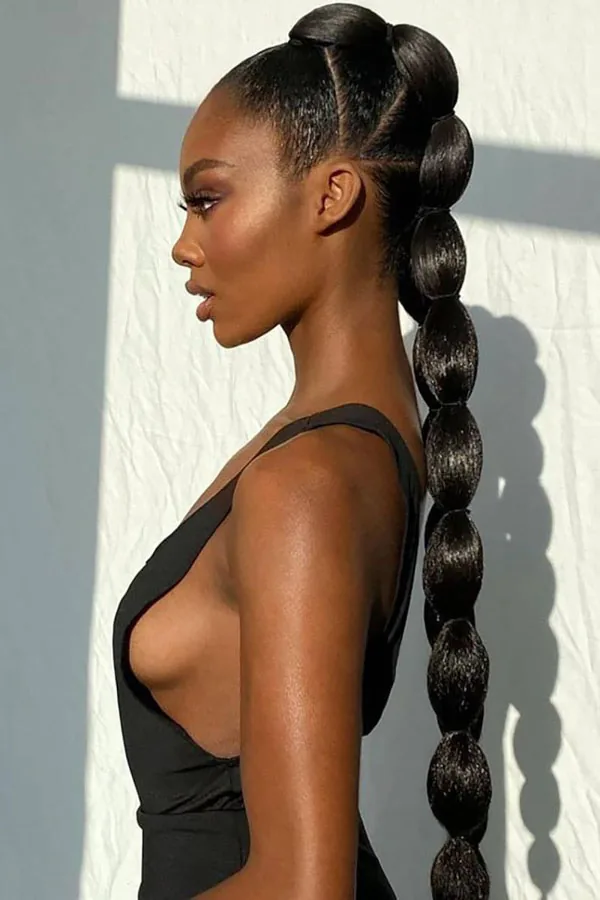
A high bubble ponytail takes the classic and turns the volume up: the ponytail sits at the crown, the bubbles stack down the back, and the whole style lifts the face and adds height. It is energetic, confident and a little dramatic — the hairstyle equivalent of walking in with your chin up. It suits parties, festivals, dance nights and any day you want your hair to make the statement before you do.
Best for: long hair, oval and heart-shaped faces, and high-energy occasions. How to style: gather the hair high, smooth the front with a brush, and make the bubbles slightly bigger toward the top for a graduated effect. Watch out for: a ponytail tied too tightly — it pulls at the hairline and gives you a headache, so keep the base firm but not painful.
3. Low Bubble Ponytail for a Soft, Polished Finish
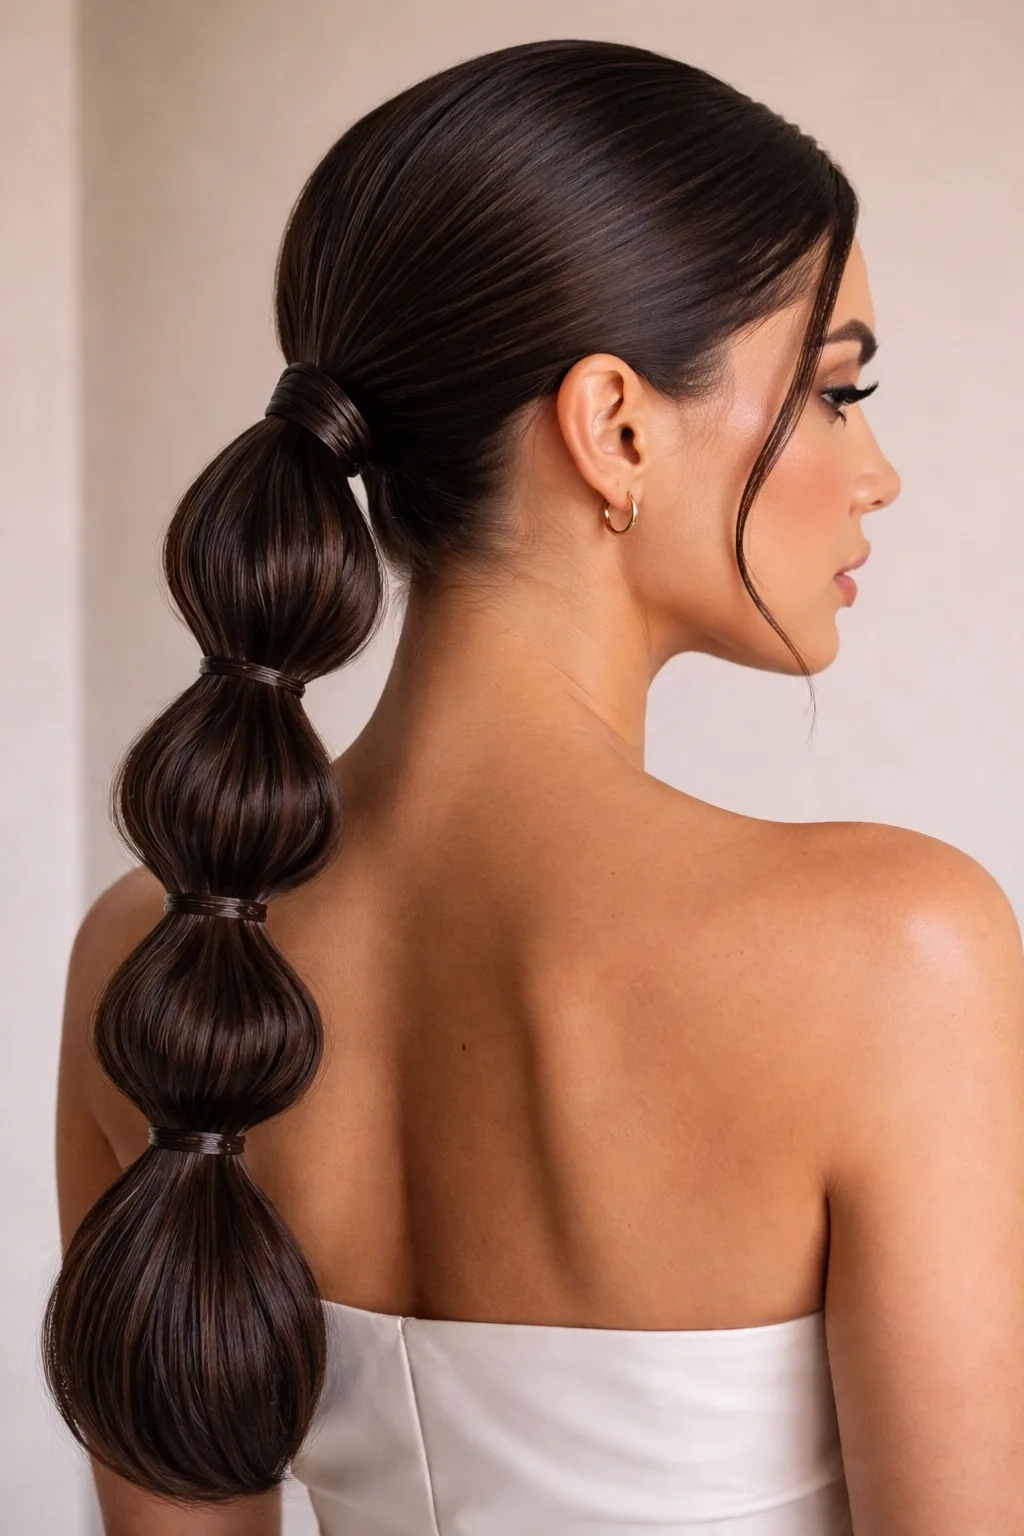
A low bubble ponytail is the grown-up version of the trend: the ponytail sits at the nape, the bubbles are neat and even, and the whole look reads polished rather than playful. It is the bubble braid you can wear to the office, a dinner, or a family event without feeling over the top, and it keeps every strand contained while still looking like a deliberate style choice.
Step 1: brush the hair smooth and gather it low at the nape. Step 2: secure with a strong elastic and hide it by wrapping a small strand of hair around the base. Step 3: tie elastics down the length at even intervals, keeping the gaps slightly smaller than a high ponytail for a neater look. Step 4: puff each bubble gently and evenly, then finish with a light-hold spray. The result is elegant, secure, and comfortable for hours.
4. Double Bubble Braids: Twice the Fun, Twice the Bubbles
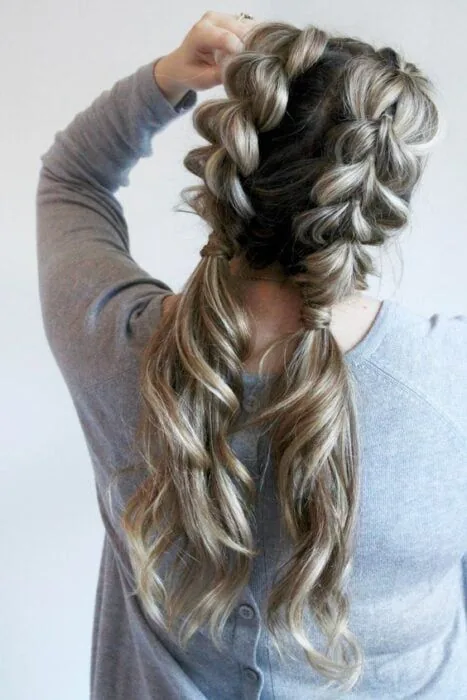
Double bubble braids — one on each side — are the most playful style in this guide, and the one that gets the most compliments. They frame the face, bounce when you move, and have a youthful, festival-ready energy that a single braid cannot match. They work on kids, teens and adults alike, and they are the best choice when you want a look that feels fun rather than formal.
Pros: symmetrical and eye-catching; holds up brilliantly during dancing or sport; suits almost every hair type. Cons: takes twice as long as a single braid, and matching the bubbles on both sides needs patience. Quick verdict: the most joyful bubble braid there is — part the hair cleanly down the middle, build both sides at the same time, and check the symmetry in the mirror before you leave.
5. Half-Up Bubble Braid for the Best of Both Worlds
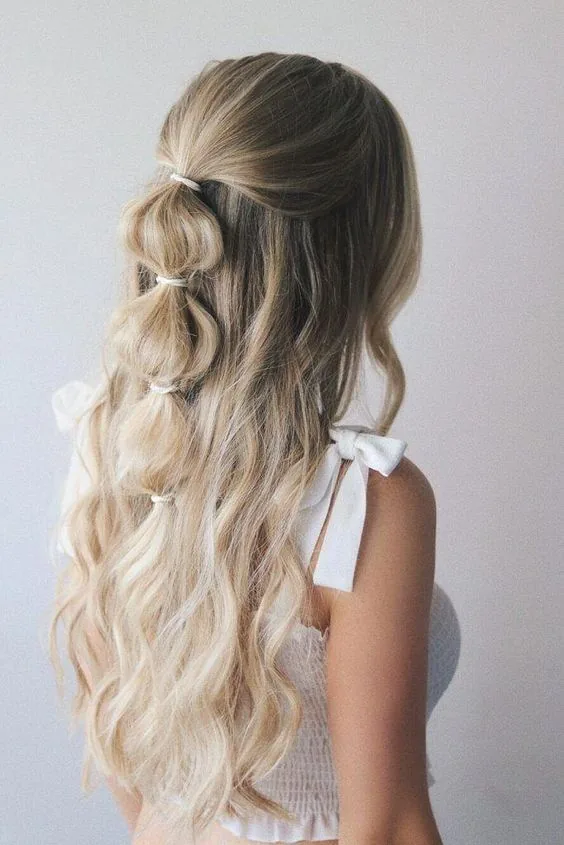
The half-up bubble braid is the clever compromise: the top section is gathered into bubbles while the rest of the hair flows free underneath. It keeps hair out of your face, shows off your length, and adds a playful detail that a plain half-up style lacks. It is also the best bubble braid for shorter hair, since it only needs the top half to be long enough to bubble.
Mistake 1: taking too much hair into the top section — it leaves the bottom looking thin, so keep the section to the crown only. Mistake 2: tying the elastics too far apart, which gives you one sad bubble instead of a chain. Time: about five minutes. Maintenance: re-puff the bubbles once midday and the style lasts until evening. This is the bubble braid to try first if your hair is shoulder-length or you are short on time.
6. Bubble Braid Crown: A Halo of Bubbles Around Your Head
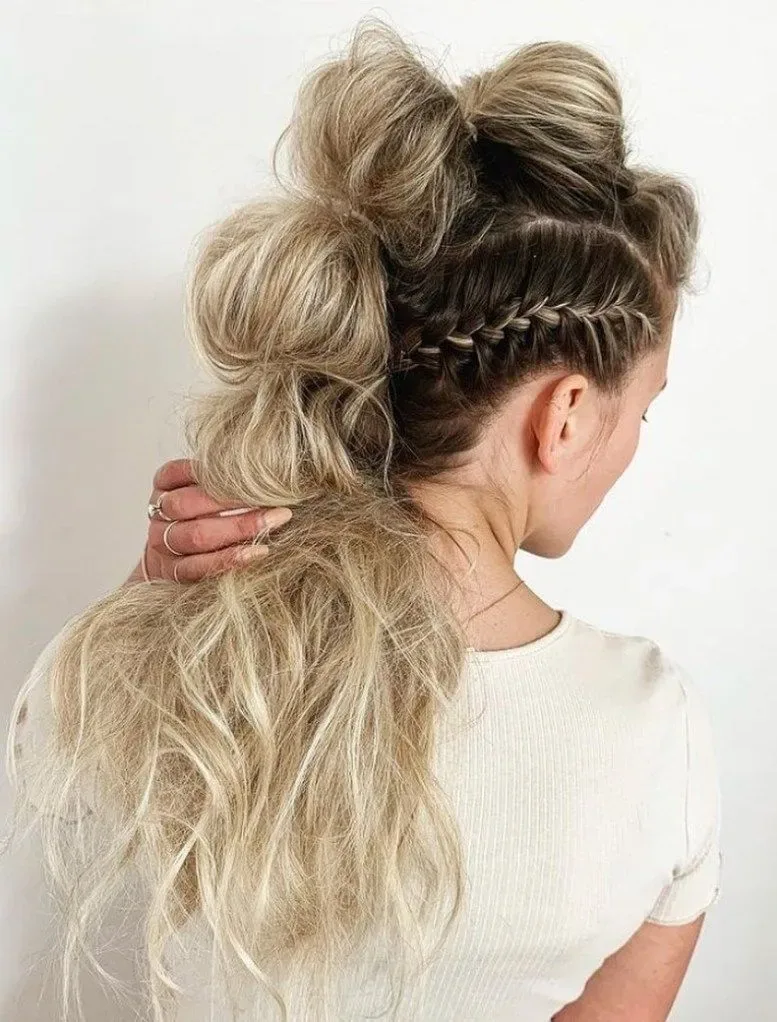
A bubble braid crown wraps the bubbles around the head like a halo, and it is one of the most romantic ways to wear the trend. The braid circles the head, the bubbles sit evenly around the crown, and the face is left completely open and framed. It is a favourite for weddings, festivals and photoshoots, where it looks intricate even though it is built from the same simple technique as a bubble ponytail.
What it is: a bubble braid that circles the head instead of hanging down. Why it works: the bubbles sit at the crown where the light catches them, so the style reads as a statement from every angle. Who it suits: medium to long hair, and anyone who wants an updo without a bun. How to style it: build a bubble braid on each side from the temples, cross them at the back, and pin the ends underneath. A few loose face-framing pieces soften the whole look.
7. Bubble Braid with Ribbon Woven Through the Bubbles
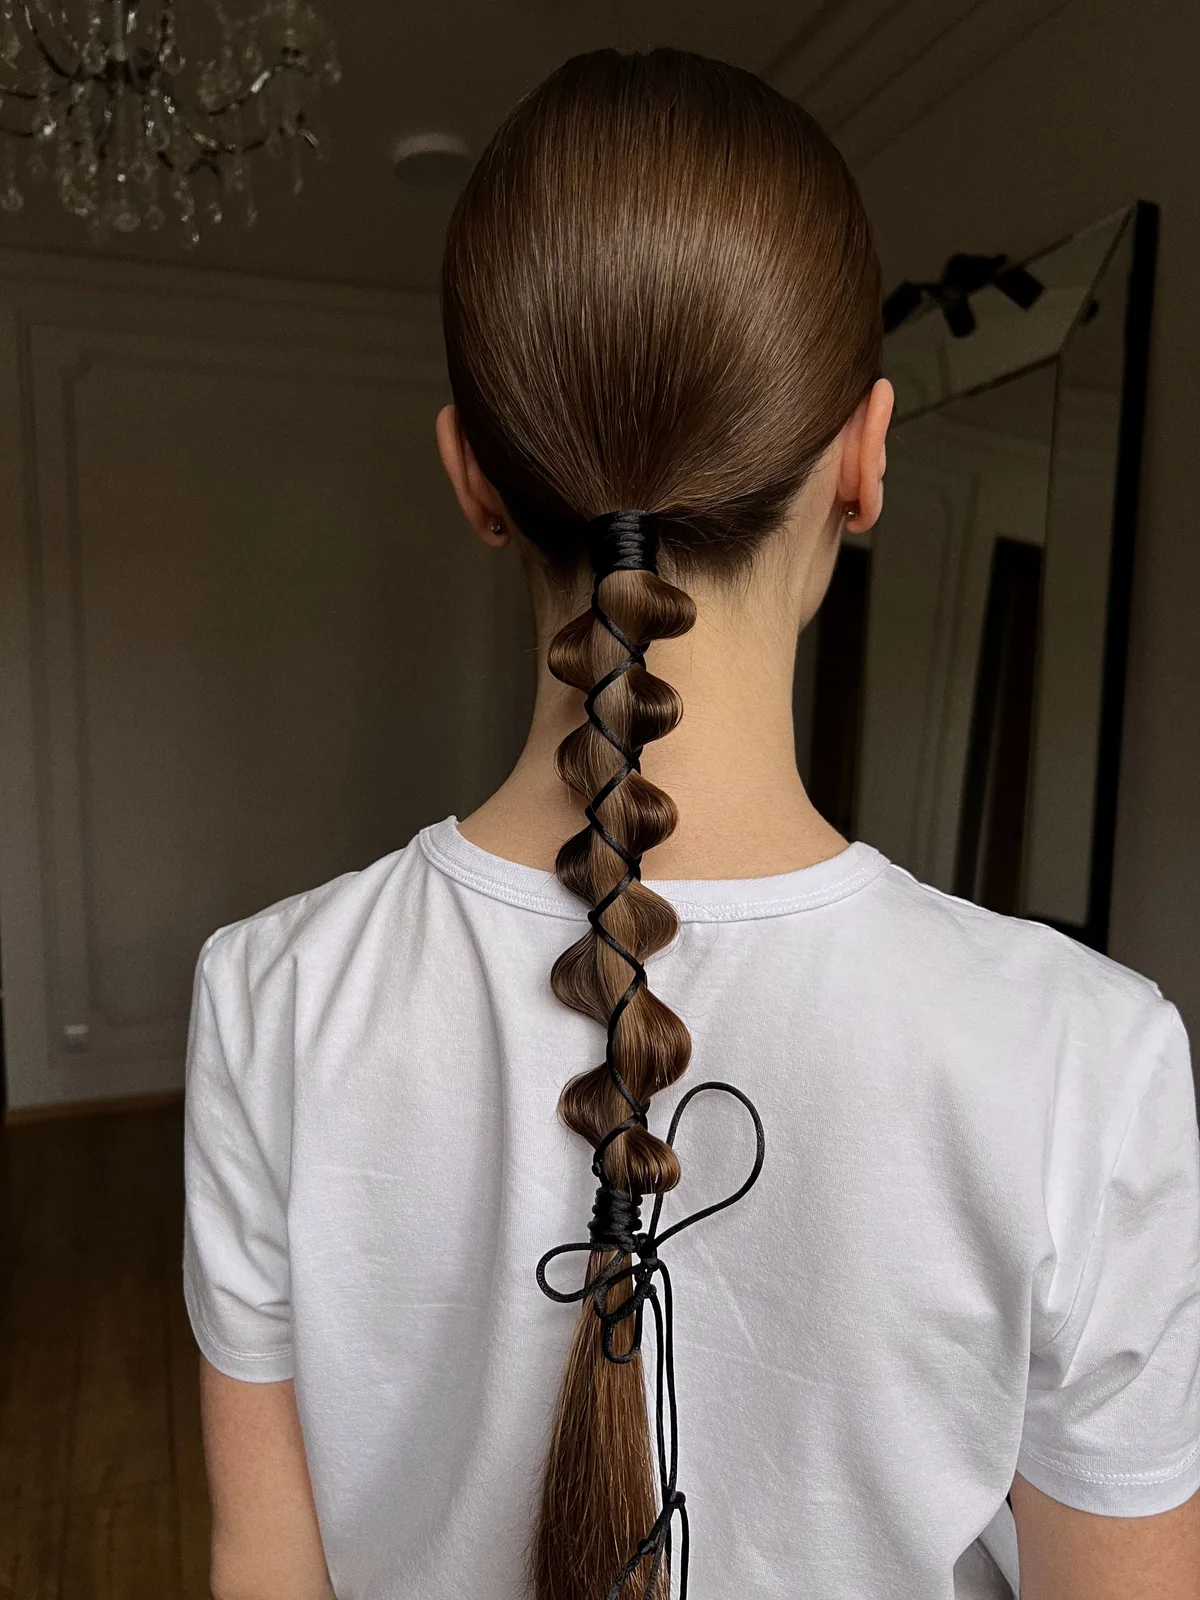
Ribbon turns a bubble braid from a hairstyle into an accessory: a satin ribbon threaded through the elastics or wrapped around each bubble adds colour, texture and a romantic finish. Choose a ribbon that matches your outfit for a coordinated look, or a contrasting colour for a bold pop — velvet ribbon in winter and satin in summer both look beautiful against the bubbles.
Best for: parties, weddings, school events and anyone who loves a feminine detail. How to style: build the bubble braid first, then thread the ribbon through the elastics and tie a bow at the end. Watch out for: ribbon that is too wide — it hides the bubbles instead of decorating them, so keep it narrow, about a centimetre wide.
8. Messy Bubble Braid for Effortless, Lived-In Texture
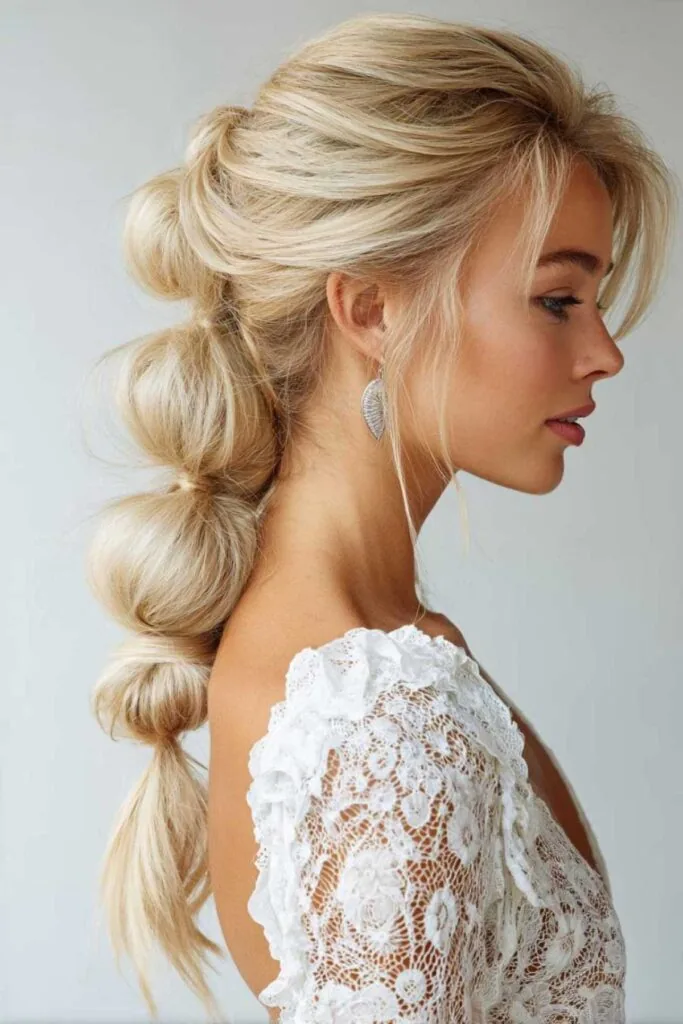
The messy bubble braid is the relaxed cousin of the classic: the bubbles are pulled out unevenly on purpose, a few strands escape around the face, and the whole style looks like you did it in five minutes and did not check the mirror — in the best way. It is the bubble braid for weekends, coffee runs and days when polished feels like too much effort.
Step 1: start with second-day hair or add texturising spray for grip. Step 2: tie a loose, low ponytail — do not smooth it perfectly. Step 3: space the elastics unevenly on purpose, with slightly different gaps. Step 4: pull the bubbles out generously and tug a few face-framing pieces loose. The imperfection is the point, so stop before it looks tidy — if it looks a little undone, you have done it right.
9. Sleek Bubble Braid: Sharp, Smooth and Red-Carpet Ready
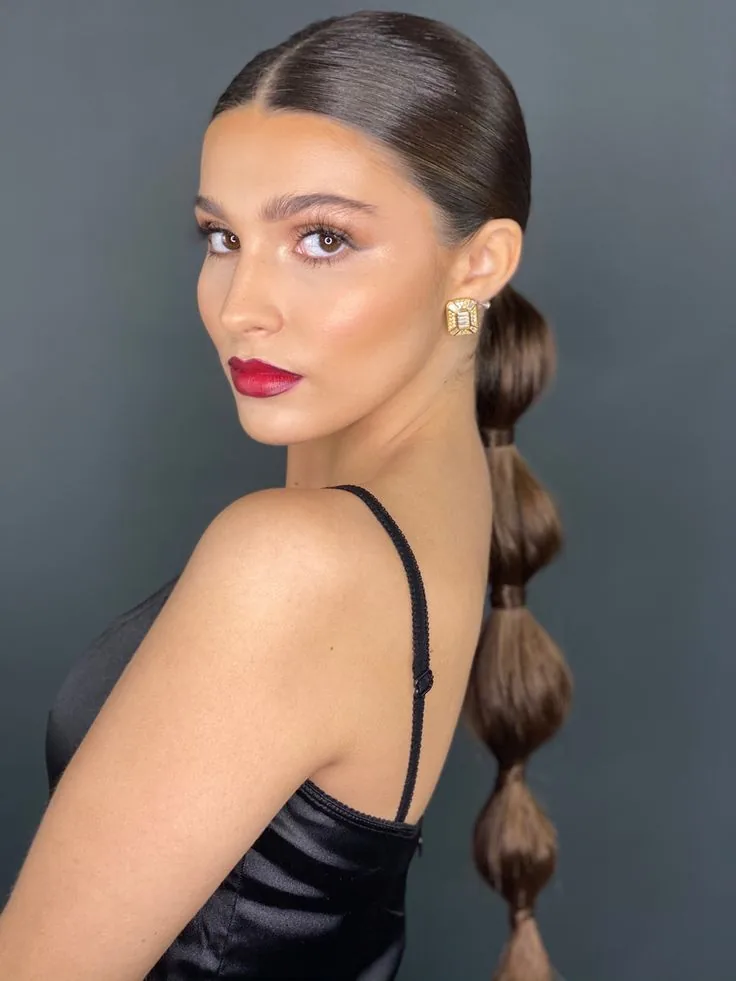
The sleek bubble braid is the polished, high-fashion version: the hair is smoothed flat at the front, every bubble is perfectly round and even, and the whole style looks like it came from a salon chair. It is the bubble braid for formal events, photoshoots and nights out, where the contrast between the smooth base and the sculptural bubbles does all the talking.
Pros: looks expensive and intentional; photographs beautifully; holds its shape for hours. Cons: needs the most prep — smoothing serum, a fine-tooth comb and hairspray — and it shows every flyaway. Quick verdict: worth the effort for a special occasion. Smooth the ponytail with serum before you start, keep the bubbles uniform, and finish with a shine spray for a glossy finish.
10. Bubble Braid for Long Hair: Five Big, Dramatic Bubbles
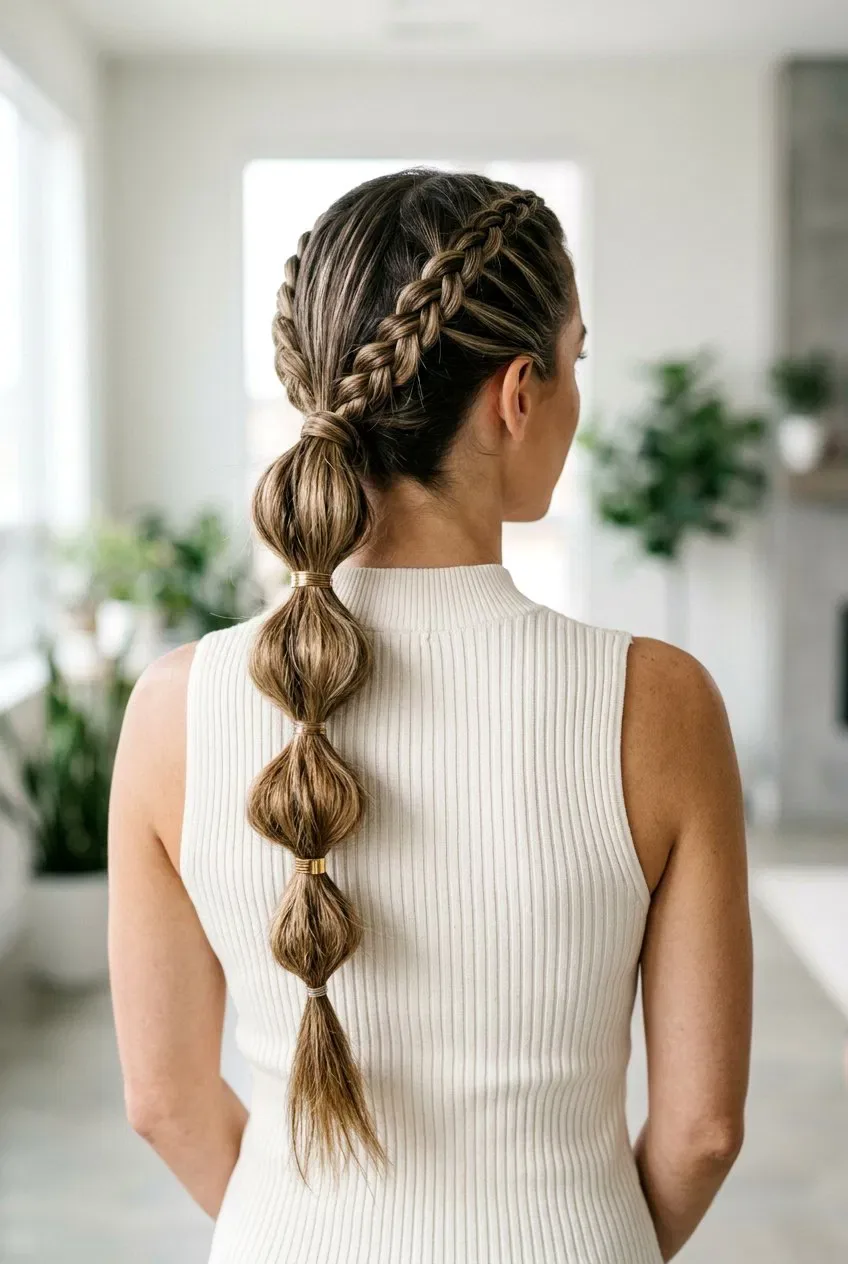
Long hair is where bubble braids show off most: with enough length for four or five big bubbles, the braid becomes a statement piece that runs down your back. The bubbles get slightly smaller toward the ends as the hair thins, which creates a natural graduated shape, and the style moves beautifully when you walk. It is the version you see on influencers and red carpets for a reason.
Time: ten to fifteen minutes, longer if you want perfectly matched bubbles. Maintenance: check the lowest bubble after a few hours — it carries the least hair and sags first, so tighten its elastic rather than re-puffing. Best elastic choice: small clear elastics that disappear into the hair, so the bubbles themselves are the focus. If your hair is very long, use a strong base elastic and double it, since the weight of the braid pulls downward all day.
11. Bubble Braid for Short Hair: Small Bubbles, Big Charm
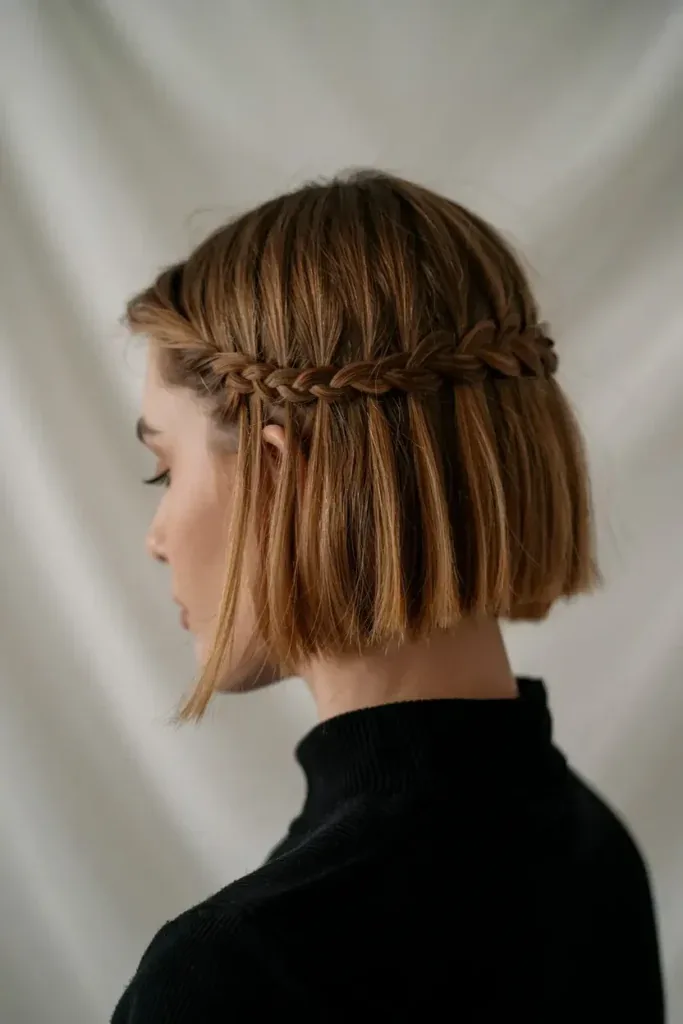
Short hair does not mean no bubble braids — it just means smaller, cuter ones. A low bubble ponytail on a bob gives you one or two neat bubbles at the nape, and a half-up bubble braid uses only the top section, so shoulder-length hair can wear it easily. The bubbles are smaller, but the charm is exactly the same, and the style is quicker to build than on long hair.
What it is: a bubble braid adapted to shoulder-length or bob-length hair. Why it works: small bubbles suit the proportions of shorter hair and look deliberate rather than forced. Who it suits: bobs, lobs and anyone growing their hair out. How to style it: keep the gaps tight, about three centimetres, and puff the bubbles gently — over-pulling on short hair makes the elastics slide out. A few bobby pins at the base add security.
12. Bubble Braid for Medium Hair: The Sweet Spot
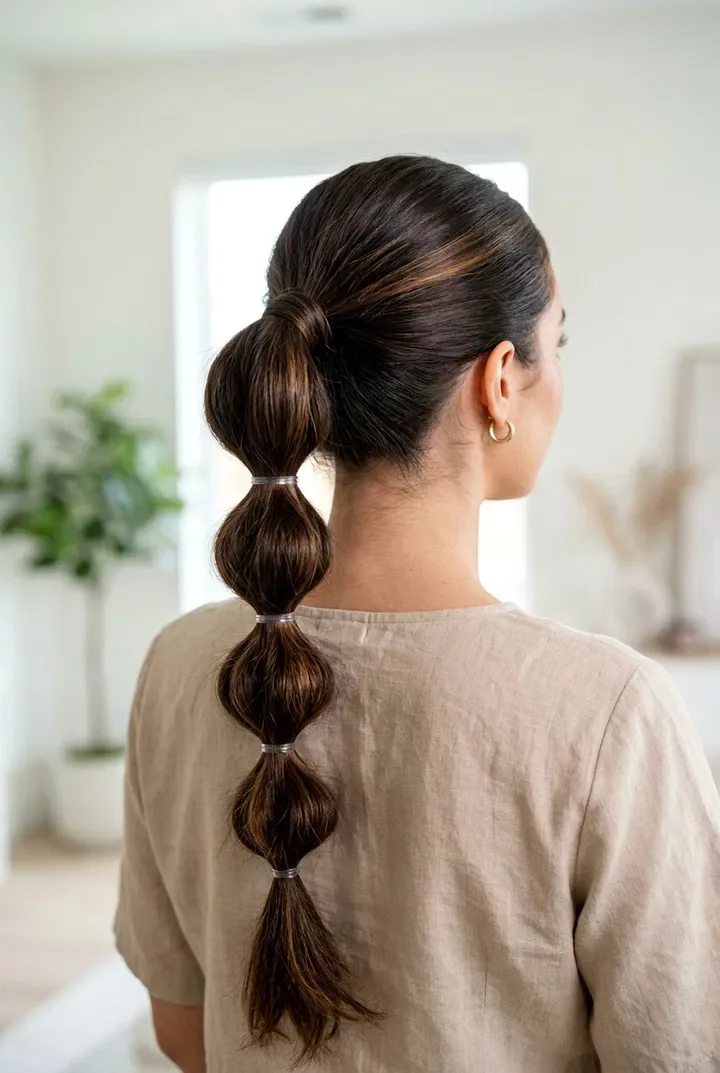
Medium hair is the sweet spot for bubble braids: long enough for three full bubbles, short enough to style in under ten minutes, and light enough that the braid never pulls or sags. The bubbles sit at a flattering scale — not too big, not too small — and the style holds its shape all day without the weight that long hair brings.
Best for: shoulder-length to collarbone-length hair, and anyone who wants a bubble braid without the upkeep of a long one. How to style: a mid-height ponytail, gaps of about four centimetres, and bubbles puffed to a medium fullness. Watch out for: making the gaps too wide — on medium hair, wide gaps leave you with only two bubbles and a long limp tail.
13. Bubble Braid for Curly Hair: Bouncy, Bold and Beautiful
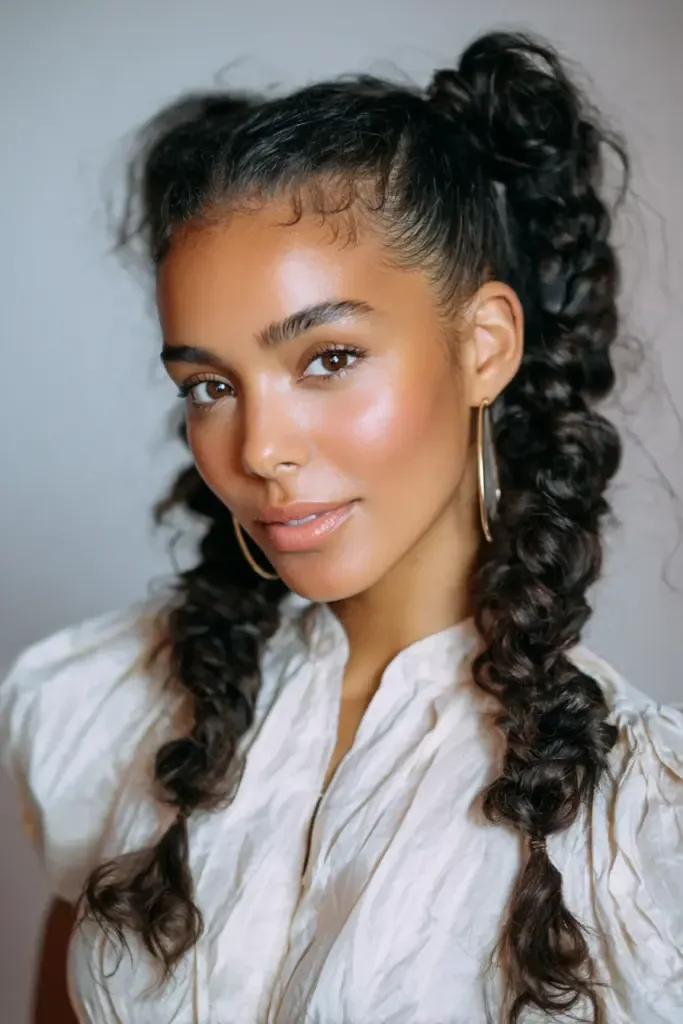
Curly hair makes bubble braids even better, because each bubble is naturally full, textured and bouncy. The curls fill out the sections on their own, so you need less pulling and teasing than straight hair does, and the finished braid has a gorgeous, cloud-like shape. It is one of the best protective styles for curly hair too, since the elastics keep the curls contained without tight braiding.
Step 1: work with stretched or blown-out curls for the easiest bubbles, or embrace the natural texture for a bigger look. Step 2: use fabric-covered elastics, which grip curly hair without snagging. Step 3: puff each bubble by lifting the curls outward gently — do not pull hard, or the curl pattern breaks into frizz. Step 4: finish with a light curl cream on the bubbles to define the texture. The result is bold, bouncy and full of personality.
14. Bubble Braid for Straight Hair: Clean Lines, Perfect Bubbles
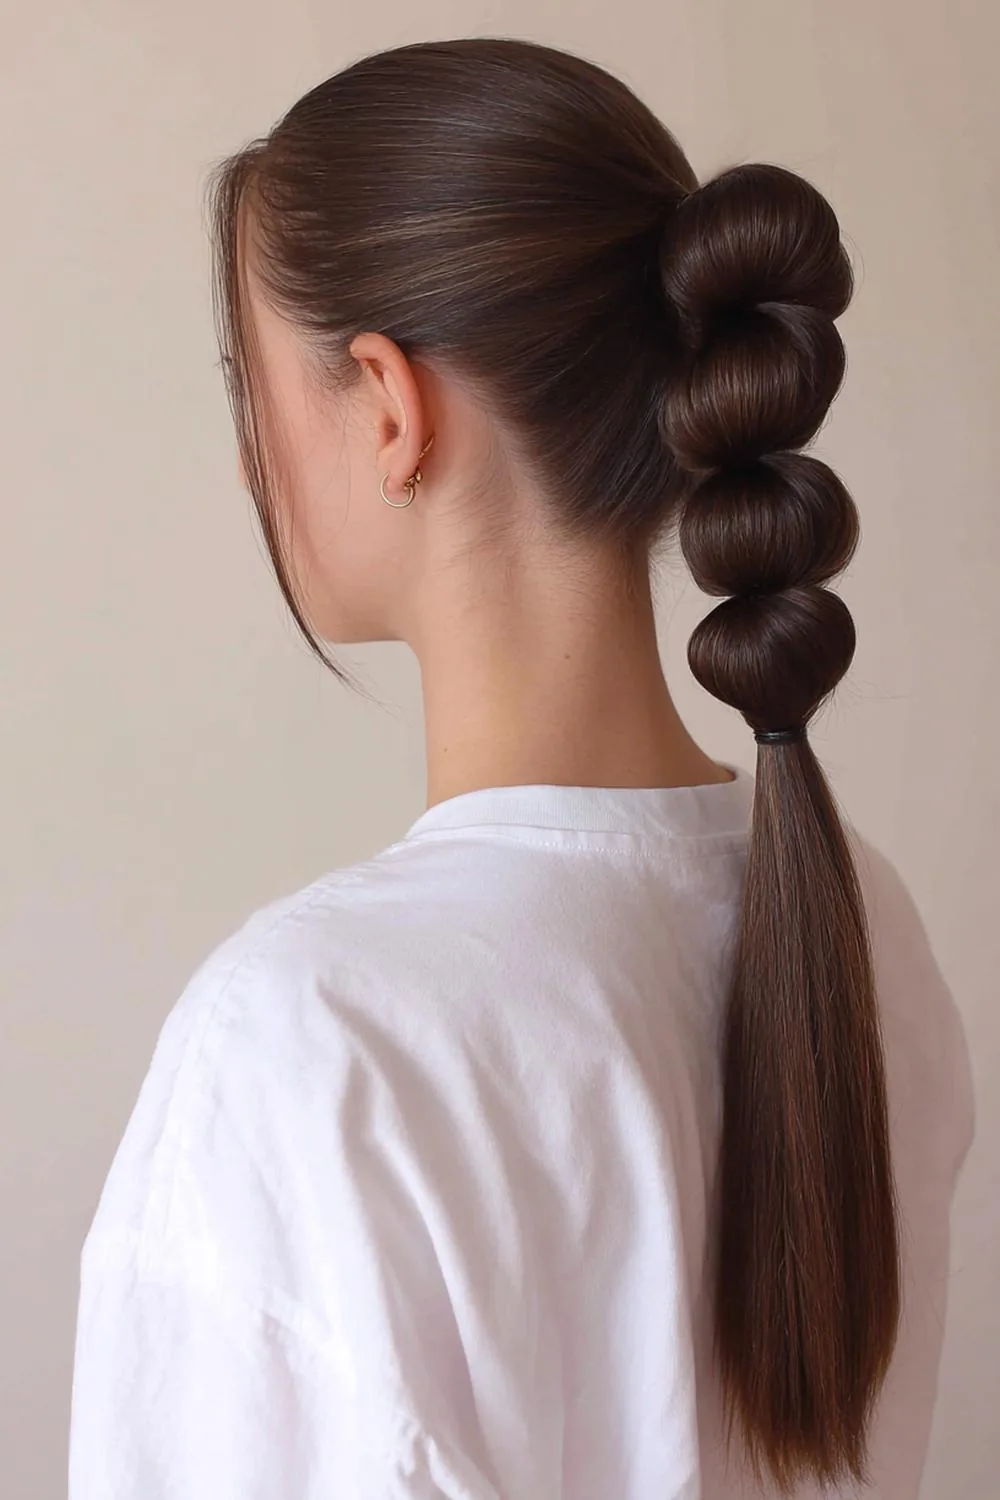
Straight hair gives the cleanest, most graphic bubble braid: the bubbles are smooth, round and perfectly defined, and the style looks almost architectural. The trade-off is grip — silky straight hair slides out of elastics more easily, so a little preparation is essential. With the right prep, though, straight hair produces the most polished bubbles of any hair type.
Pros: the most defined, photogenic bubbles; easy to make symmetrical. Cons: slippery hair needs texturising spray or dry shampoo first, and the bubbles can collapse without it. Quick verdict: prep is everything — add texture before you start, use small elastics, and check the bubbles from the side, where straight hair shows unevenness most clearly.
15. Bubble Braid with Curls at the Ends
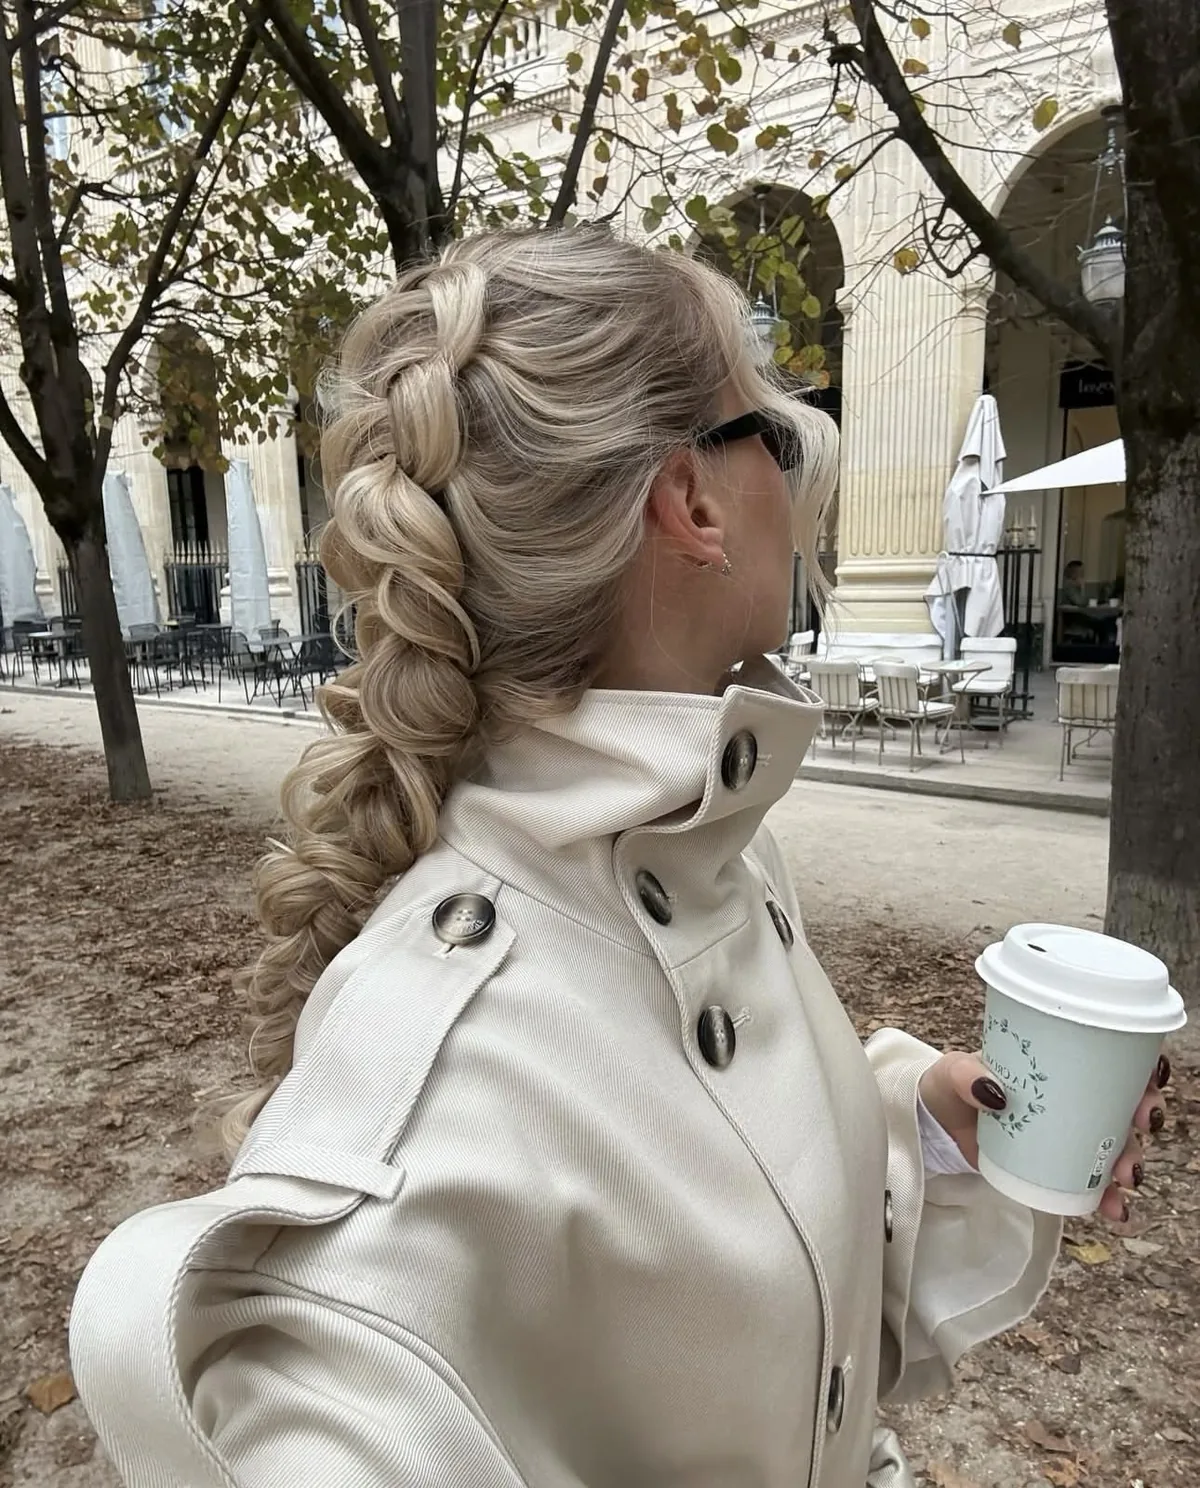
Curling the ends of a bubble braid adds a soft, romantic finish that stops the style from looking too graphic. The bubbles stay bold and round, but the tail ends in loose curls that soften the whole look — it is the perfect middle ground between a statement braid and a soft, feminine hairstyle. It works beautifully for dates, weddings and evenings out.
Mistake 1: curling the hair before building the bubbles — the curls get crushed when you tie the elastics, so curl the tail only, after the braid is built. Mistake 2: curling the bubbles themselves, which flattens them. Time: add five minutes to the basic braid for the curling step. Use a large-barrel iron on the last few centimetres only, and finish with a flexible-hold spray so the curls stay soft.
16. Bubble Braid Bun: Bubbles Twisted into an Updo
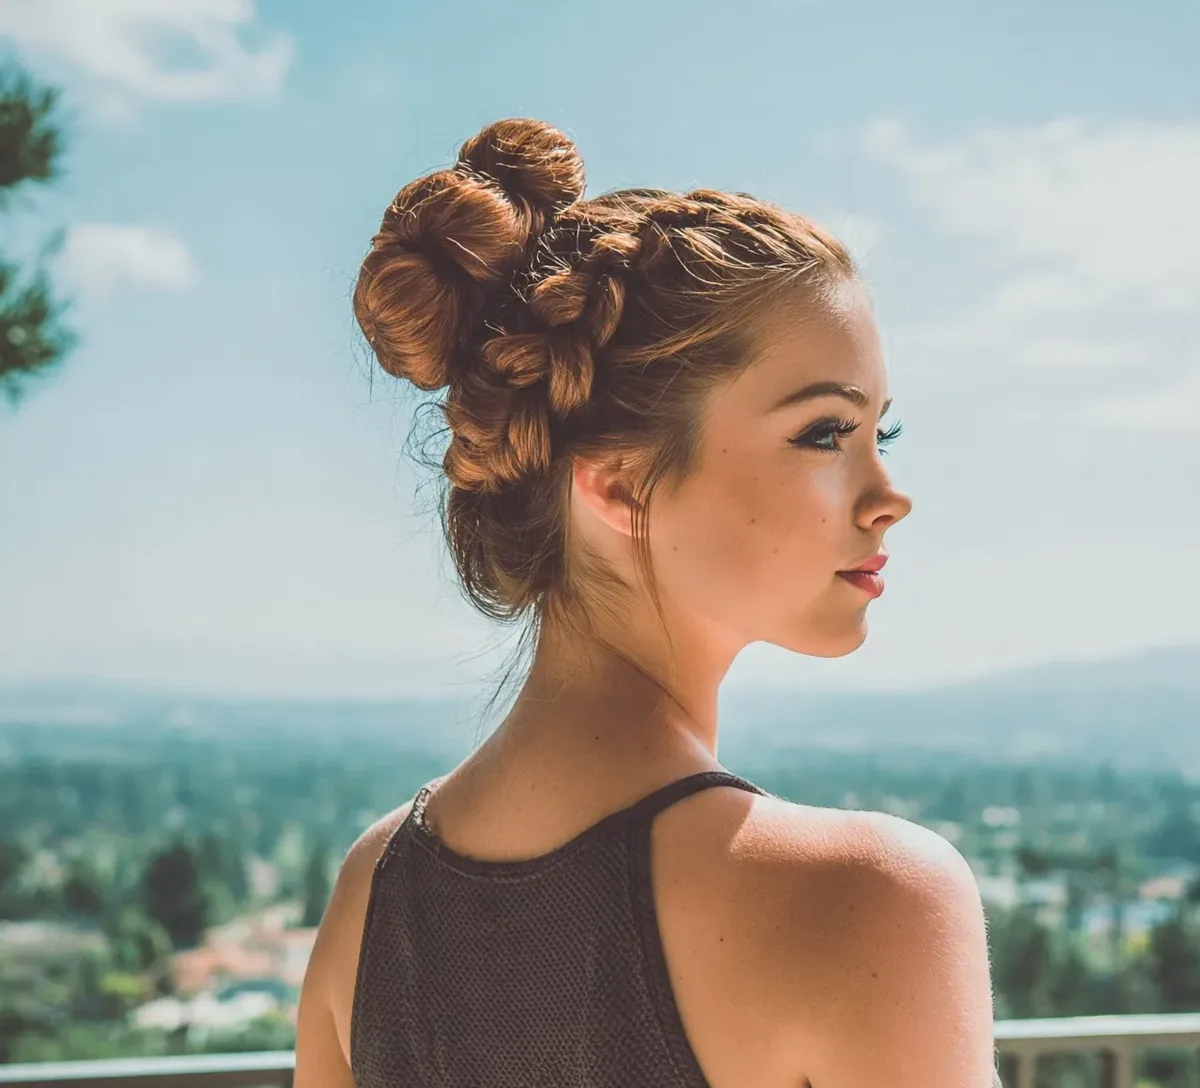
The bubble braid bun takes the bubbles off the ponytail and wraps them into an updo: build a bubble braid, then coil it into a bun and pin it in place. The bubbles peek out around the bun in a sculptural, textured shape that looks far more complicated than it is. It is a brilliant wedding-guest or party updo, and it holds for hours because the elastics and pins work together.
What it is: a bubble braid coiled and pinned into a bun. Why it works: the bubbles give the bun texture and volume that a plain twisted bun lacks. Who it suits: medium to long hair, and anyone who wants an updo with personality. How to style it: build a low bubble braid, coil it loosely, pin the bubbles in place with bobby pins, and pull a few face-framing pieces loose. A decorative pin at the side finishes it.
17. Bubble Braid with a Scrunchie at the Base
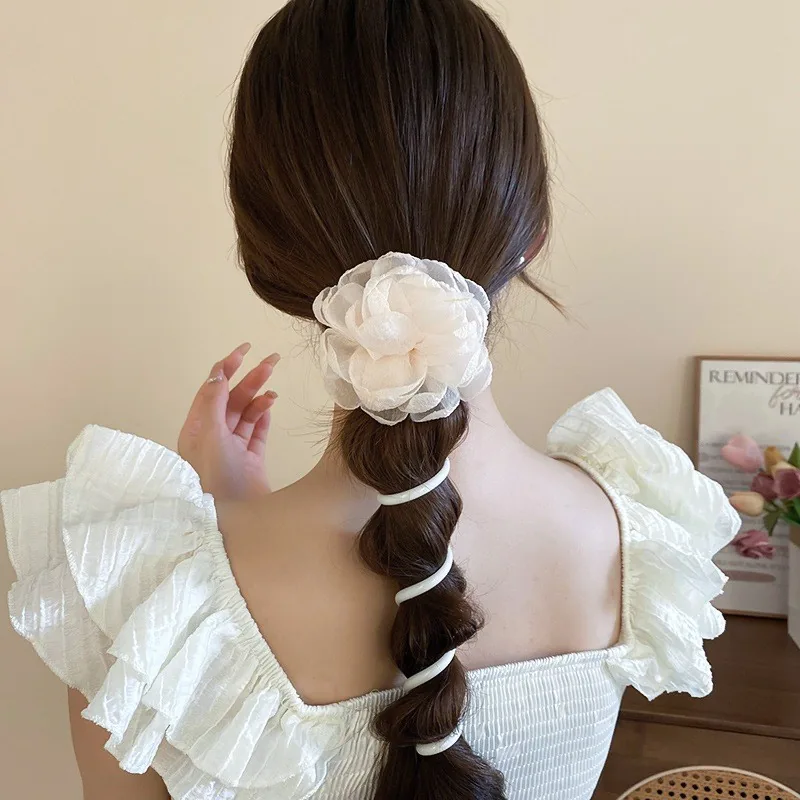
A scrunchie at the base of a bubble braid is the easiest upgrade in this guide: it hides the top elastic, adds a pop of colour or texture, and instantly makes the style feel styled rather than thrown together. Velvet scrunchies look luxe, satin ones look polished, and a patterned scrunchie turns the whole braid into a fashion statement.
Best for: everyday wear, school, and anyone who loves a quick accessory win. How to style: build the bubble braid as normal, then slide a scrunchie over the base elastic and arrange it so it sits neatly. Watch out for: a scrunchie that is too heavy — it drags the ponytail down, so choose a light one for all-day wear.
18. Bubble Braid for a Wedding: Romantic, Regal and Secure
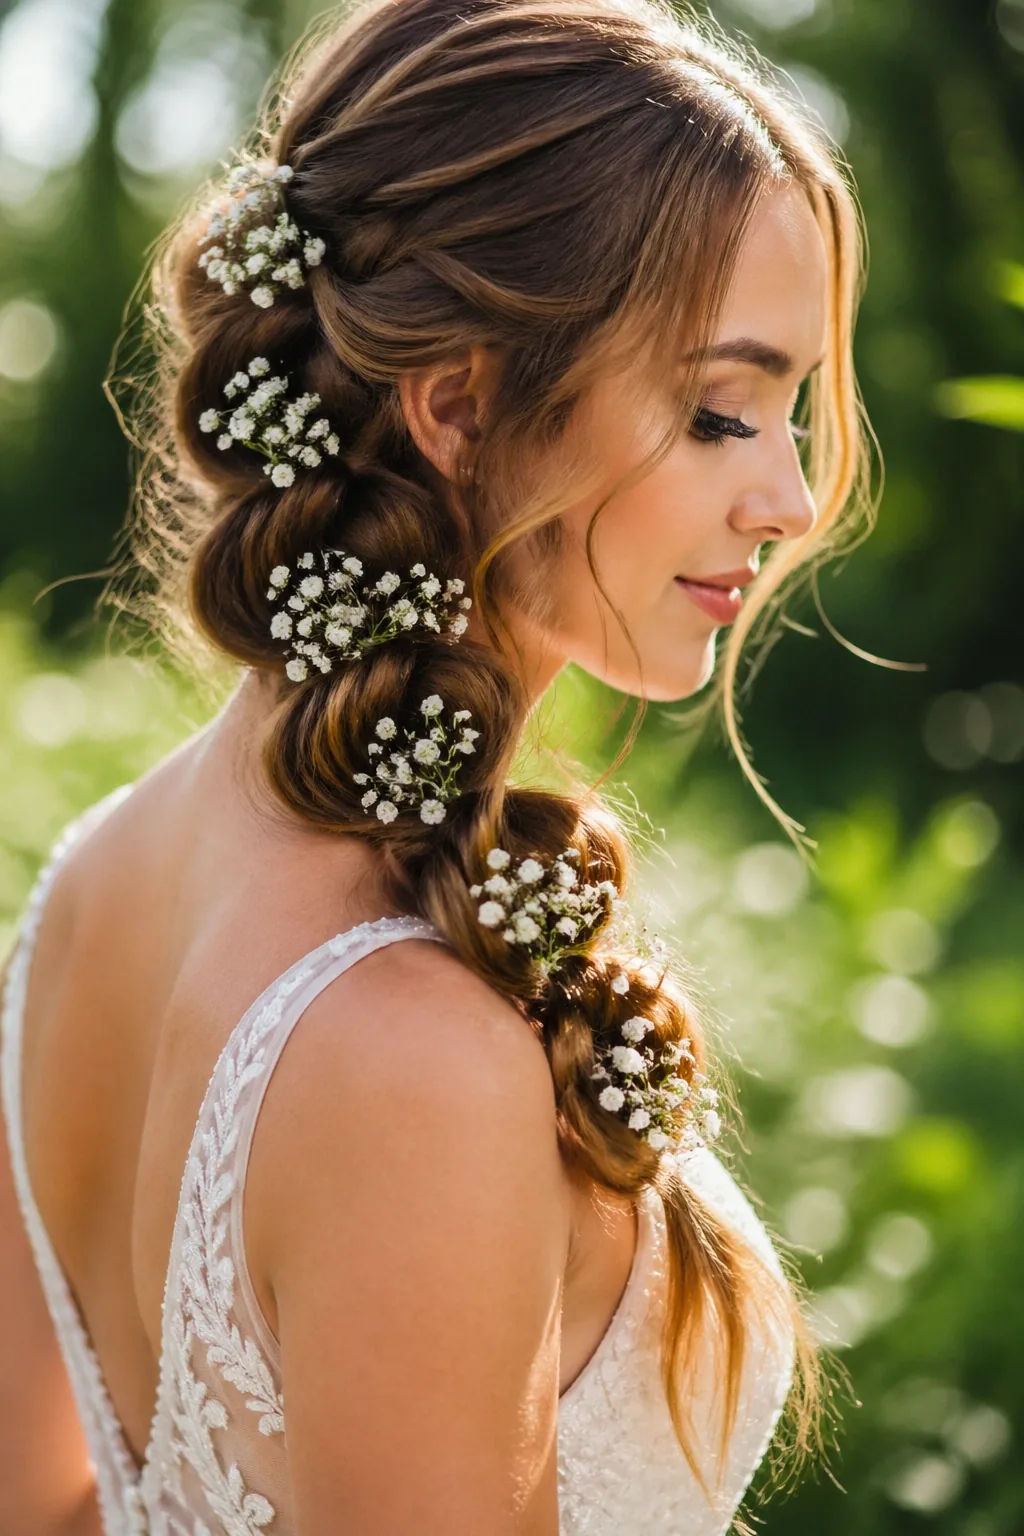
Bubble braids have quietly become a bridal favourite, because they are romantic, secure and photogenic from every angle. A low bubble braid with soft, full bubbles and a few loose tendrils looks regal without being stiff, and unlike a traditional braided updo it will not loosen during a long day of photos, dancing and hugging. Bridesmaids love it too, since the same technique works on every hair type in the party.
Step 1: start with softly curled hair for a romantic texture. Step 2: build a low bubble braid with generous, even bubbles. Step 3: weave in small flowers or a delicate hair vine between the bubbles. Step 4: finish with a flexible-hold spray and a light mist of shine spray. The style holds from the ceremony to the last dance, and it looks just as good in photos at midnight as it did at noon.
19. Bubble Braid for Prom: A Show-Stopper That Lasts All Night
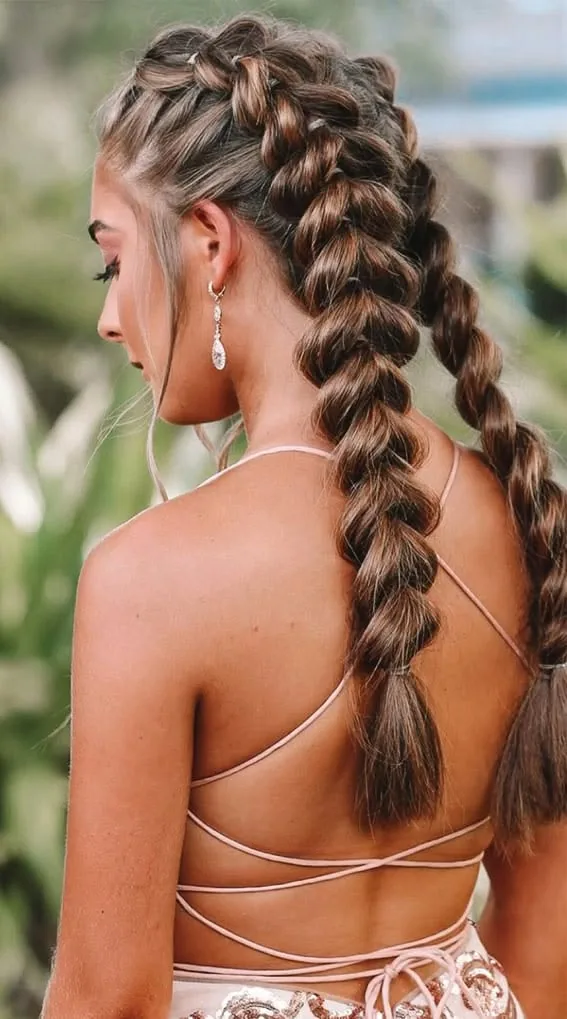
Prom is the night for a hairstyle with drama, and a bubble braid delivers it: a high bubble ponytail or a bubble braid crown paired with a gown looks bold, modern and unforgettable. It stands out in a room full of curls and updos, it photographs beautifully, and — crucially for a long night — it stays put through dancing, photos and an after-party.
Pros: unique and memorable; secure all night; suits statement earrings and an open back. Cons: the boldness is not for everyone — if your dress is already dramatic, a softer bubble style balances it better. Quick verdict: practice it once before the night, use strong elastics, and add a sparkly hair accessory at the base for a prom-ready finish.
20. Bubble Braid for School: Cute, Quick and Classroom-Proof
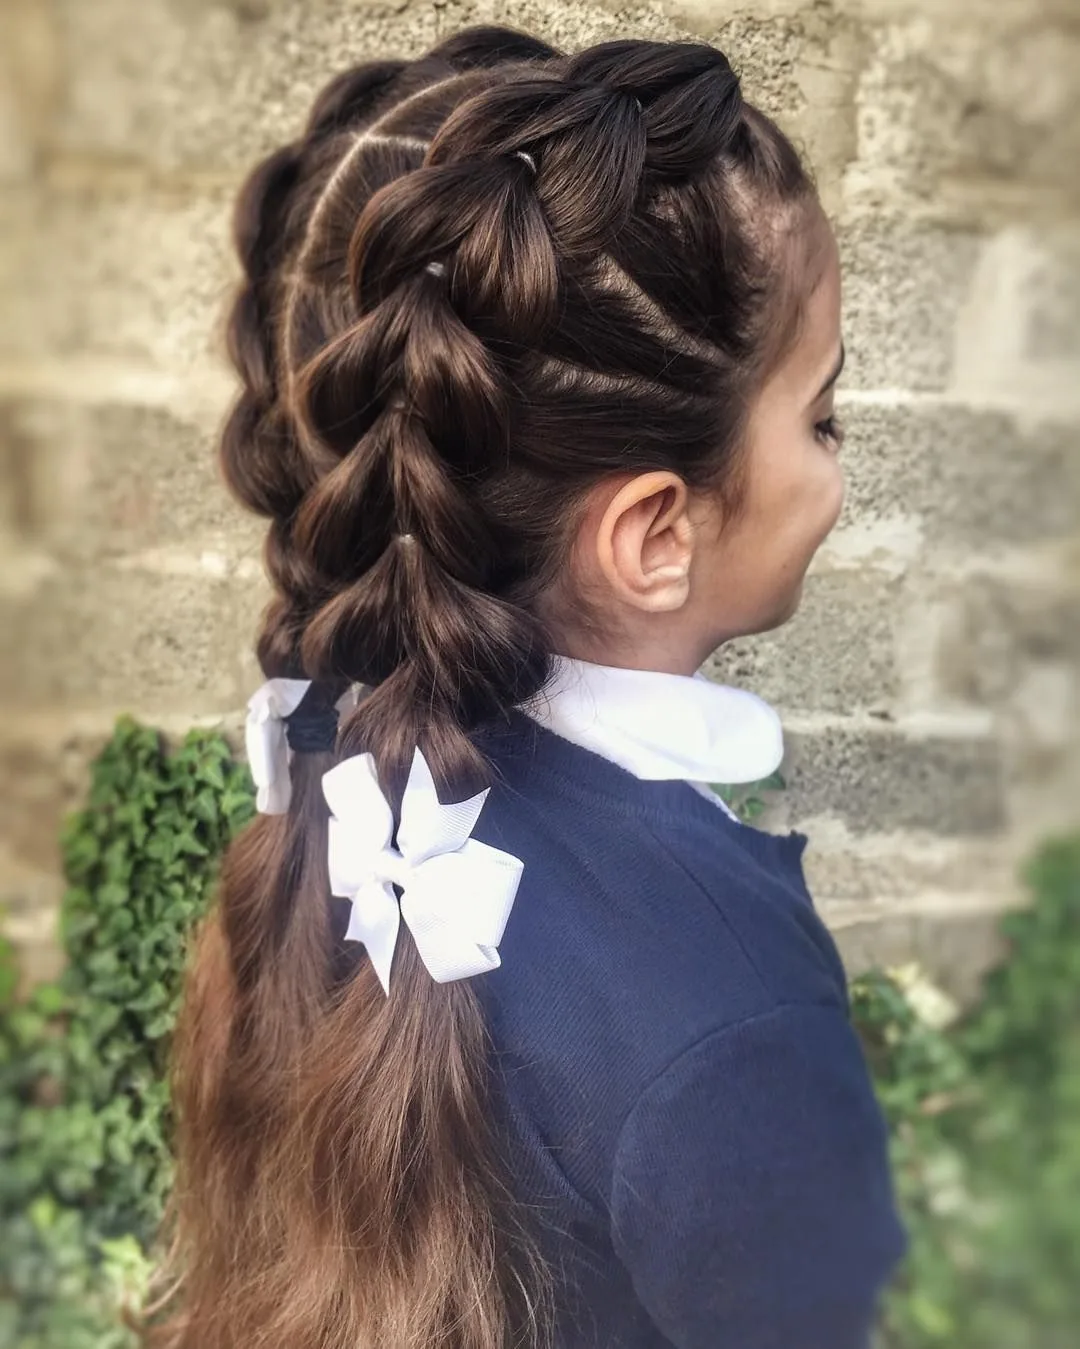
The bubble braid is the ideal school hairstyle: it takes five minutes in the morning, keeps hair completely out of the face all day, and survives lessons, lunch and PE without falling apart. Double bubble braids are the classic school version, but a single low bubble ponytail is just as practical and a little more grown-up for older students.
Time: five minutes, once you have practised it twice. Maintenance: none — the elastics hold all day, and the style still looks good by the last lesson. Best elastic choice: colourful elastics that match the school uniform or a favourite colour. One tip for parents: build the braid on slightly damp hair in the morning and it will hold its shape even better, with no products needed.
21. Bubble Braid for the Gym: The Workout Braid That Never Budges
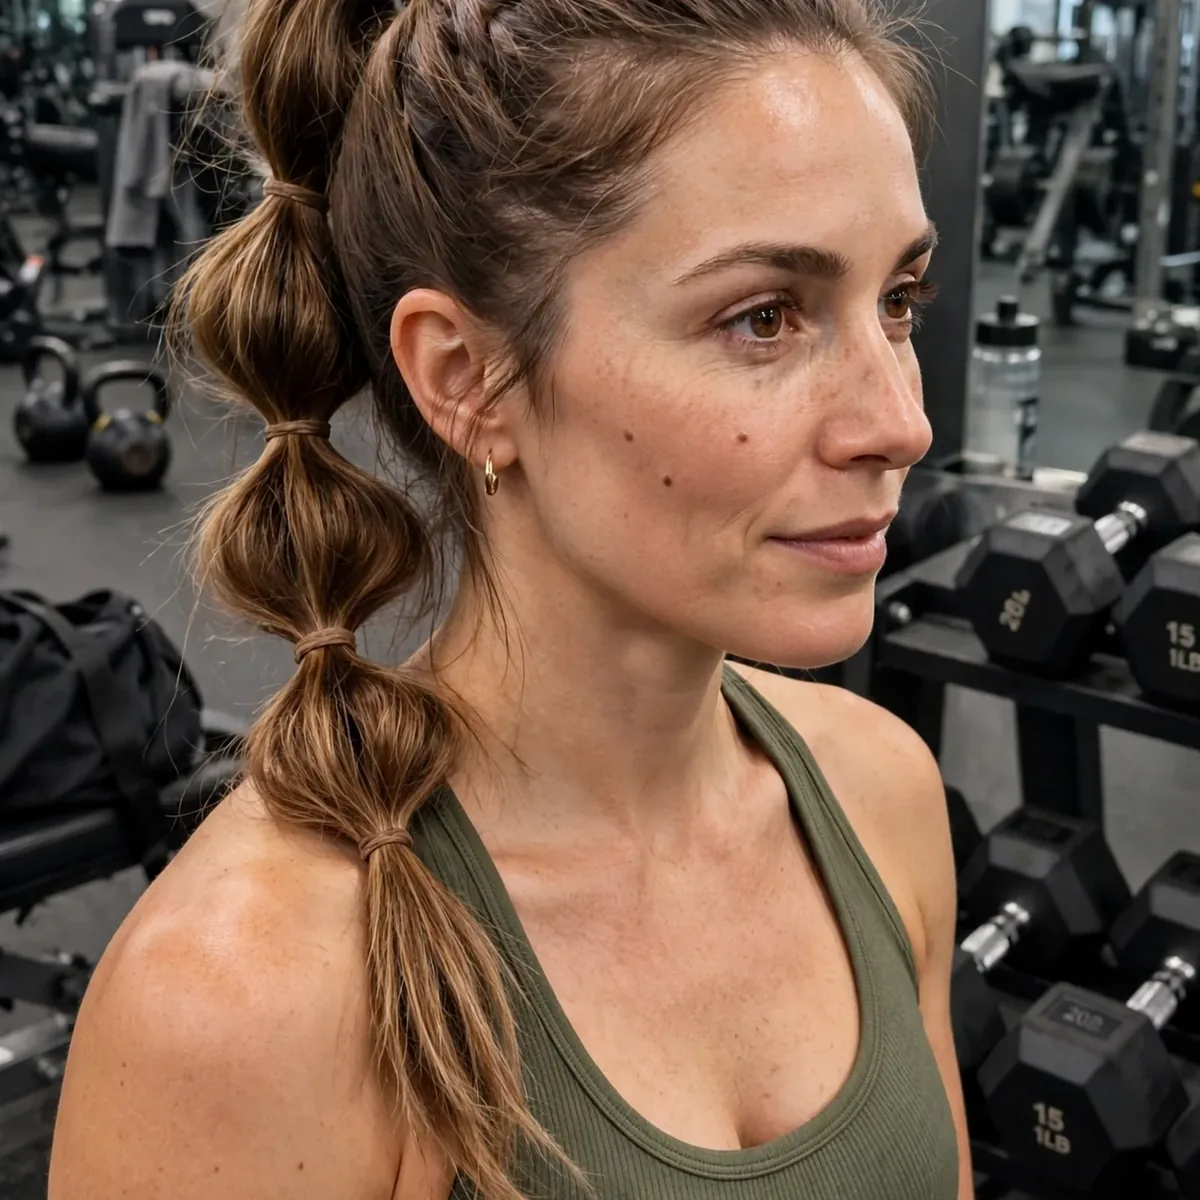
If you work out, you already know the problem: regular braids loosen, ponytails flop, and loose hair sticks to your neck. The bubble braid solves all of it. Every elastic is an anchor point, so the braid stays put through running, lifting and yoga, and the bubbles keep the hair contained and off your skin. It is the most practical workout hairstyle that still looks good in the gym mirror.
What it is: a high or low bubble braid built for movement. Why it works: multiple anchor points mean no single elastic carries all the weight. Who it suits: anyone who exercises, from runners to yogis. How to style it: tie the ponytail high for running, low for yoga, and use strong, thick elastics. After your workout, the braid comes out to reveal soft waves — a bonus second style.
22. Bubble Braid for Festivals: Colour, Glitter and Big Energy
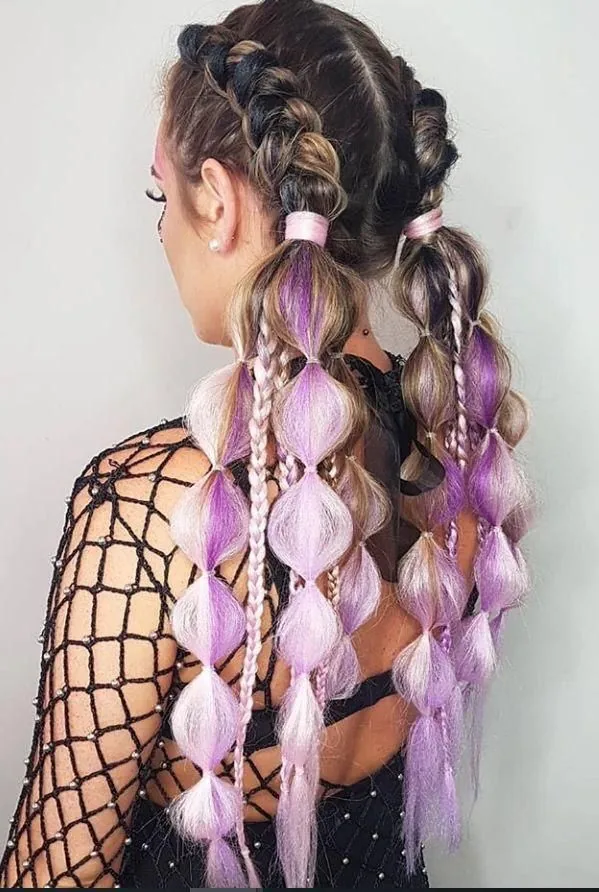
Festivals are where bubble braids go maximalist: bigger bubbles, brighter elastics, glitter, coloured hair extensions and beads, all in one look. The style is built to survive a full day of dancing in the sun, and the bubbles are the perfect canvas for decoration — each one can hold a different colour or accessory. It is the hairstyle equivalent of festival fashion: bold, fun and unapologetic.
Best for: music festivals, concerts, Pride and any outdoor celebration. How to style: build a high double bubble braid, add coloured elastics, thread in glitter strands, and finish with hair gems. Watch out for: the weight — heavy beads and extensions pull the braid down, so keep decorations light if you will be dancing for hours.
23. Bubble Braid with Colourful Elastics
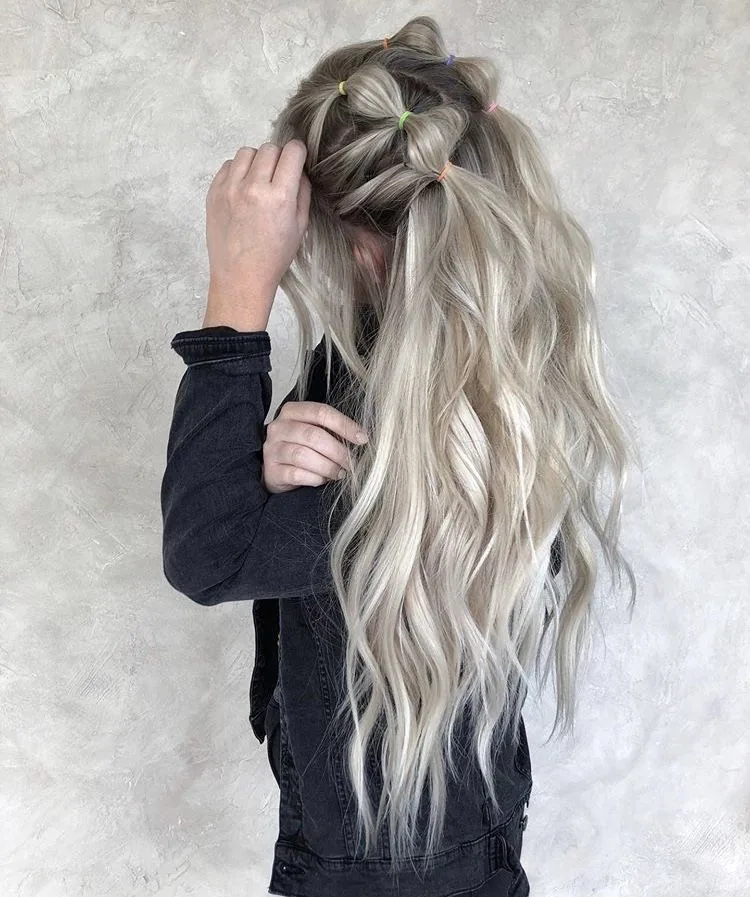
Colourful elastics are the simplest way to personalise a bubble braid: instead of hiding the elastics, you make them the feature. Rainbow elastics, pastels, neons or a single bold colour all change the mood of the braid completely, and they cost almost nothing. It is the easiest version to customise for a team, a party theme or a favourite colour.
Step 1: choose your elastic colours — one colour for a clean look, or alternating colours for a playful one. Step 2: build the bubble braid as normal, using the coloured elastics at each interval. Step 3: puff the bubbles gently so the elastics stay visible rather than buried. Step 4: match the elastics to your outfit or accessories for a coordinated finish. Children especially love this version, and it takes no extra time at all.
24. Bubble Braid with Beads on Every Bubble
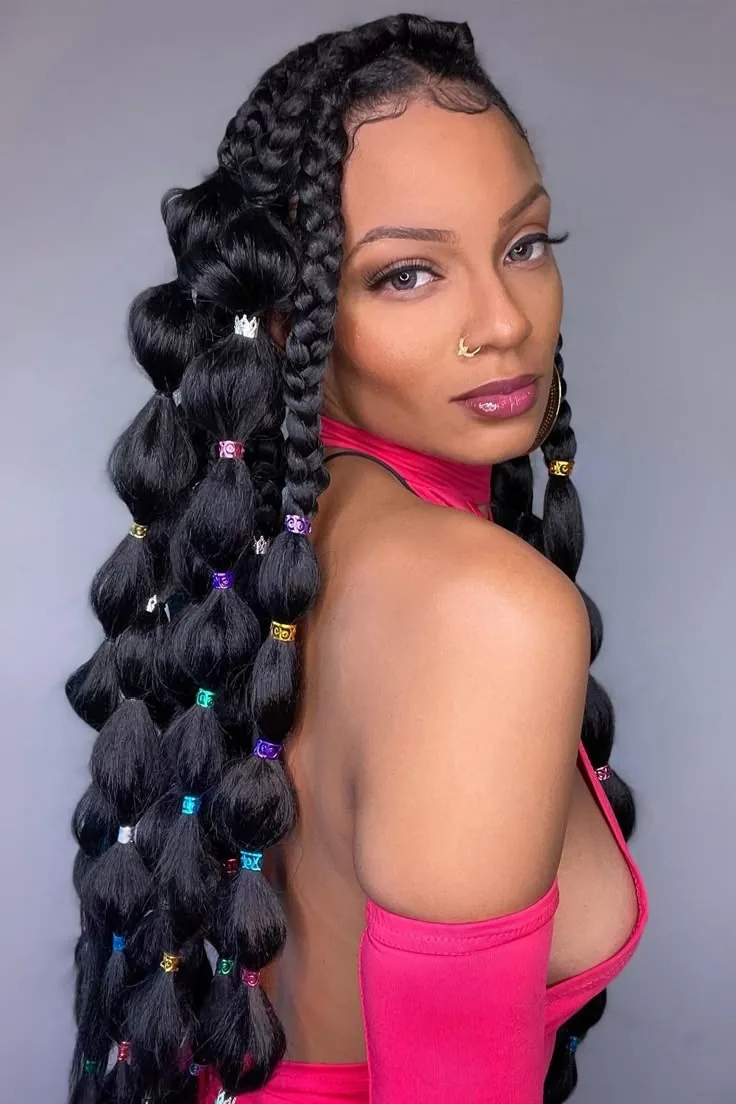
Beads turn a bubble braid into jewellery for your hair: small gold, wooden or colourful beads threaded onto the elastics or slipped over the bubbles catch the light and add a bohemian, handcrafted feel. The style has roots in braided traditions from many cultures, and it looks beautiful on every hair type, especially textured and curly hair where the beads sit naturally in the bubbles.
Pros: stunning and unique; the beads add weight that actually helps the braid hang beautifully. Cons: beads take extra time to thread, and heavy beads can pull on fine hair. Quick verdict: use lightweight beads, thread them onto the elastics before you tie them, and keep them small — a few beads per bubble is plenty, and the effect is gorgeous.
25. Bubble Braid with Fresh Flowers Woven In
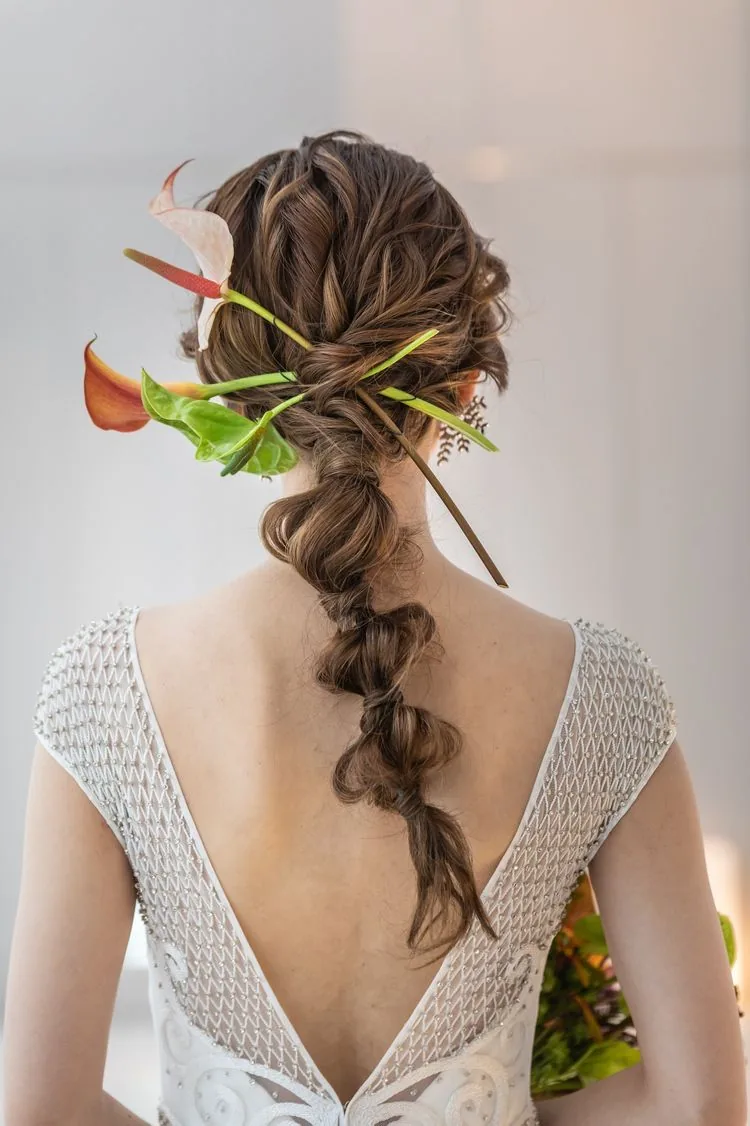
Fresh flowers woven into a bubble braid are pure romance: small blooms tucked between the bubbles turn a simple braid into something that looks straight out of a garden party or a wedding. Baby’s breath, tiny roses and daisies all work beautifully, and the bubbles hold the stems in place without any pins. It is a favourite for spring weddings, photoshoots and outdoor celebrations.
Mistake 1: using large flowers — they overwhelm the bubbles, so keep the blooms small and delicate. Mistake 2: adding the flowers before the bubbles are shaped, which crushes them. Time: ten minutes for the braid, plus five for the flowers. Use flowers with short stems, tuck them gently between the bubbles, and mist them lightly with water so they stay fresh for hours.
26. Bubble Braid with a Big Bow at the Top
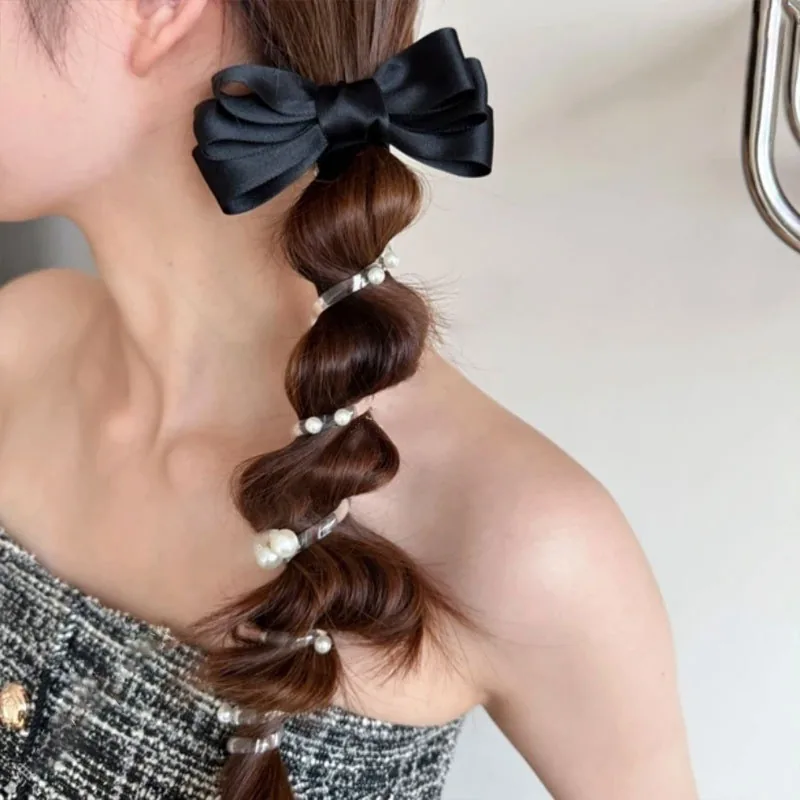
A big bow at the top of a bubble braid is the ultimate feminine finish: it frames the braid, adds a pop of colour, and turns an everyday style into something special. Velvet bows look luxurious in winter, satin bows look polished for parties, and a gingham bow gives the whole look a sweet, vintage feel. It is the detail that makes people ask where you got your hair done.
What it is: a bubble braid finished with a statement bow at the base. Why it works: the bow draws the eye to the top of the braid and balances the bubbles below. Who it suits: anyone who loves a feminine, polished detail. How to style it: build the braid first, then clip or tie the bow over the base elastic. Keep the bow in proportion — on a high ponytail it can be big, on a low braid it should be smaller.
27. Side Bubble Braid Swept Over One Shoulder
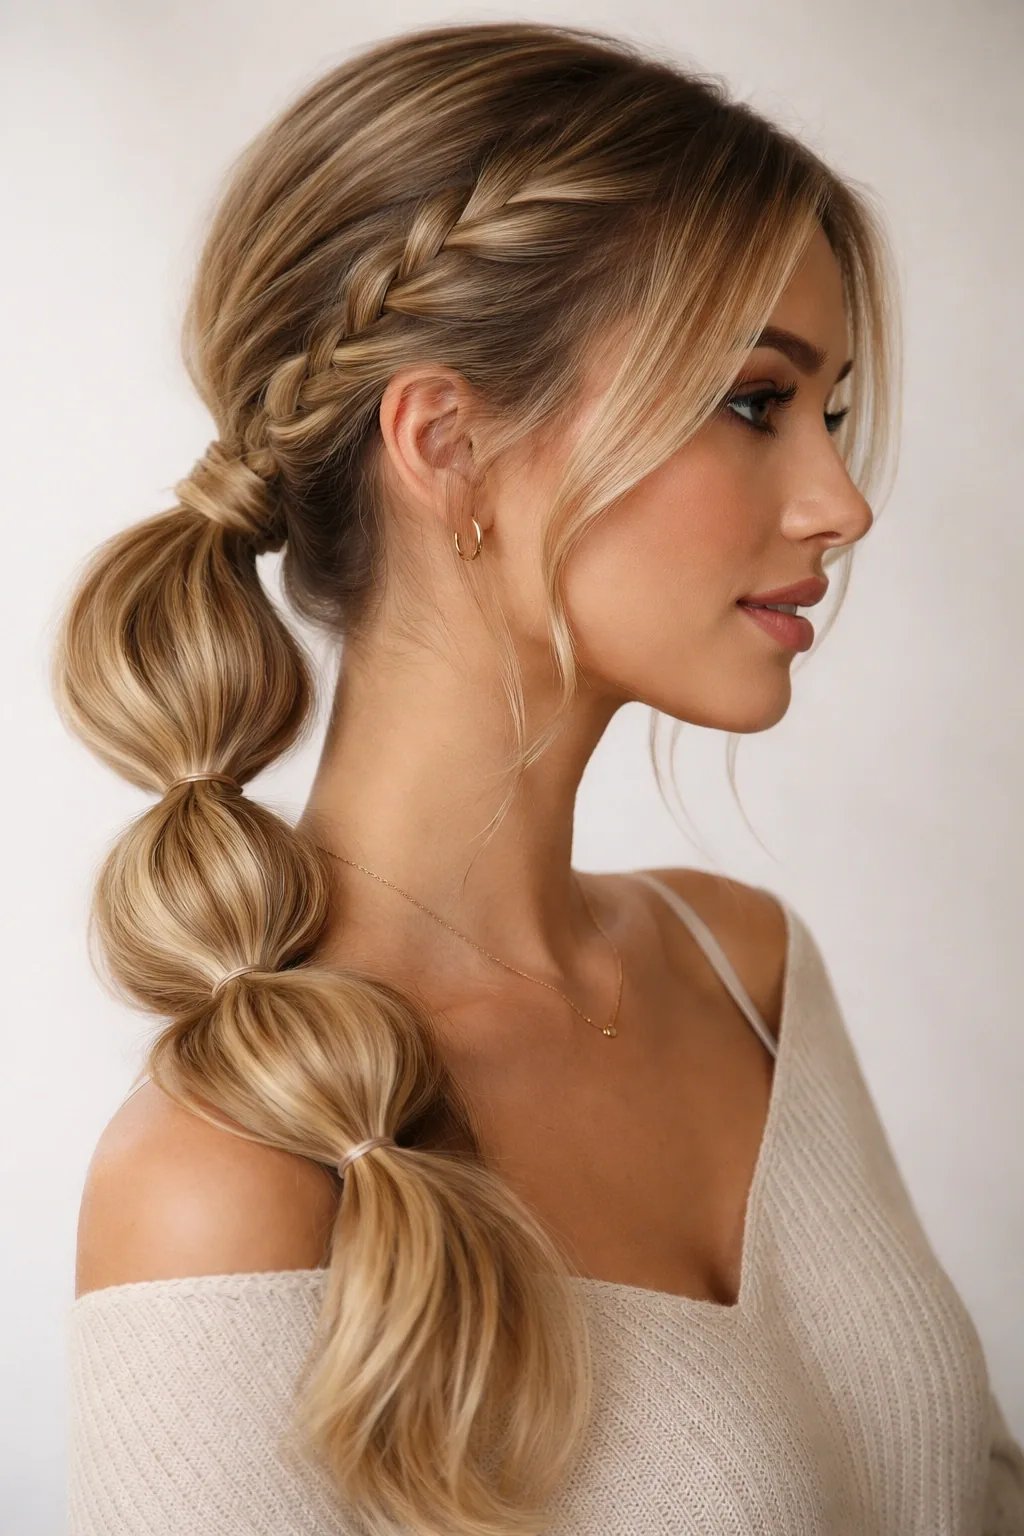
A side bubble braid sweeps all the drama over one shoulder, where the bubbles are visible from the front instead of hidden down your back. It is flattering, romantic and a little bit glamorous — the braid becomes part of your outfit rather than something behind you. It suits dates, dinners and photos, where you want the hairstyle to be seen.
Best for: long hair, one-shoulder outfits, and occasions where the braid should be visible. How to style: gather the hair to one side, tie the ponytail just behind the ear, and build the bubbles down over the shoulder. Watch out for: the braid sliding back to the centre — a bobby pin hidden at the base keeps it in place on the chosen side.
28. French Bubble Braid: A Braided Top That Melts into Bubbles
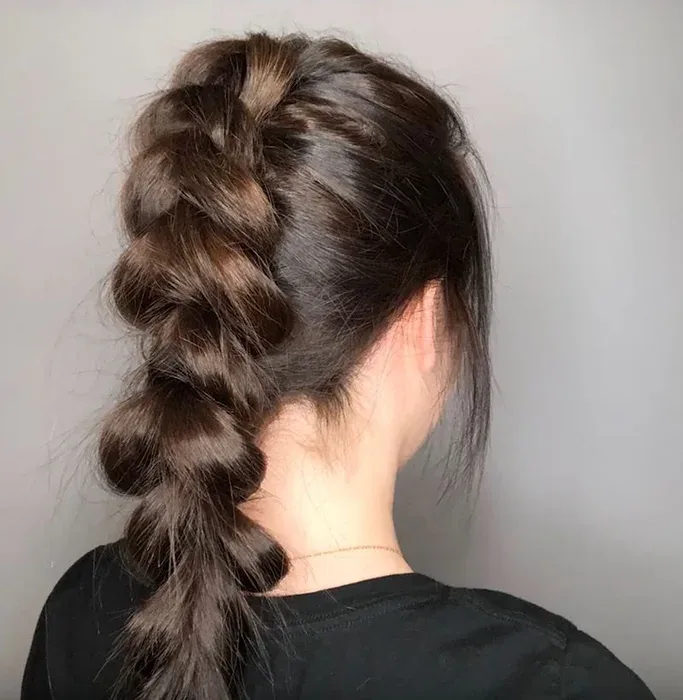
The French bubble braid is the best of both worlds: the top of the hair is French-braided for a flat, intricate start, and the braid then melts into bubbles for the length. It looks far more advanced than a plain bubble braid, but the French section only needs to run from the crown to the nape before you switch techniques. It is the version to try once you have mastered the basic bubble braid and want something fancier.
Step 1: French-braid the hair from the hairline to the nape, keeping the braid loose. Step 2: secure the braid with an elastic and continue as a bubble braid down the remaining length. Step 3: puff the bubbles gently and pancake the French section slightly for fullness. Step 4: pull a few face-framing pieces loose for softness. The combination looks intricate and impressive, and it holds even better than either technique alone.
29. Bubble Braid for Thick Hair: Taming the Volume
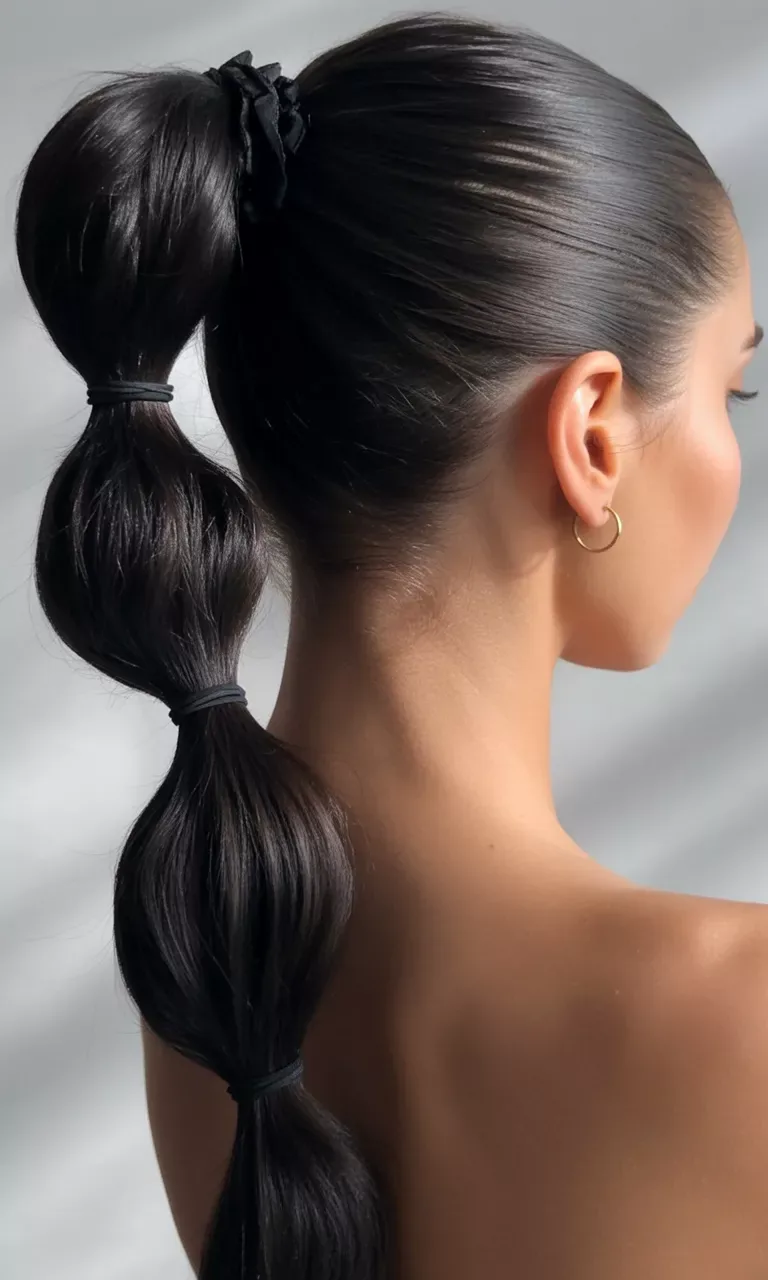
Thick hair makes the fullest, most dramatic bubble braids — the bubbles are naturally big and round, and the style looks lush from every angle. The challenge is weight: a thick bubble braid is heavy, and the top elastic carries all of it. The fix is simple — use two strong elastics at the base, space the bubbles a little further apart, and let the hair’s own volume do the work instead of pulling the bubbles out aggressively.
Pros: the fullest bubbles of any hair type; the style looks expensive and lush. Cons: heavy, and it can give you a headache if the base is too tight. Quick verdict: double up the base elastic, keep the base slightly loose, and take the braid down after a few hours if your head feels tired — thick hair deserves a break.
30. Bubble Braid for Fine Hair: Making Small Bubbles Look Full
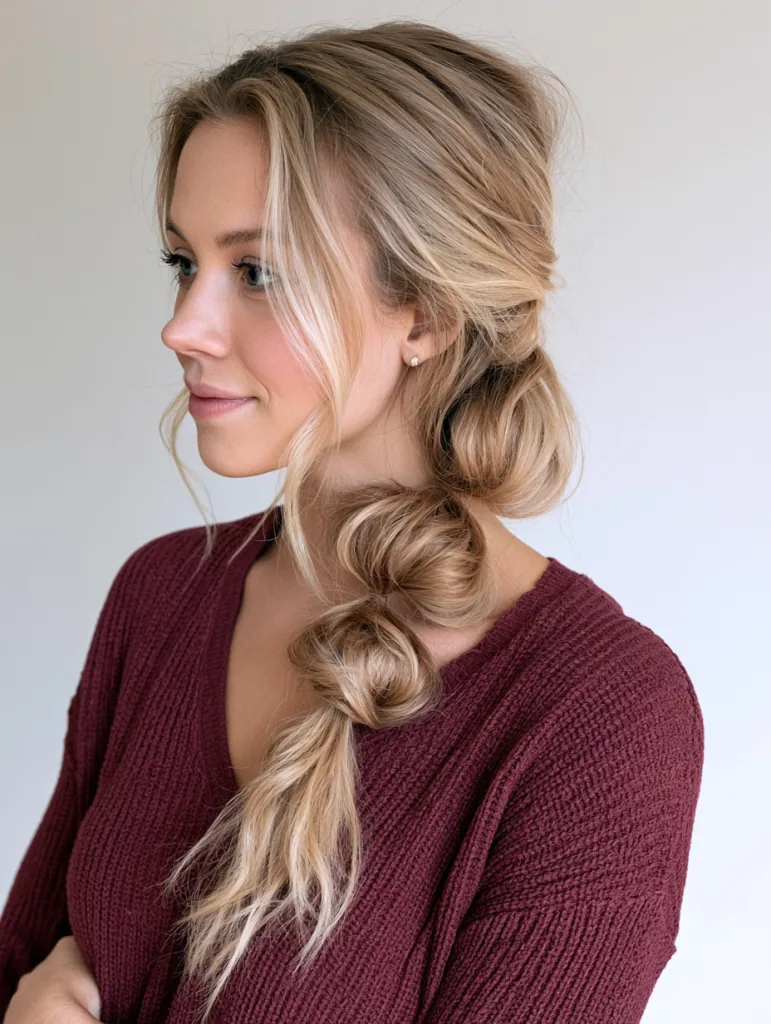
Fine hair can wear bubble braids beautifully, but it needs a little help: the bubbles will be smaller and softer, so texture is your best friend. Dry shampoo or texturising powder at the roots gives the hair grip and volume, and teasing each bubble very gently with a comb adds fullness without damage. The result is a delicate, pretty bubble braid that looks intentional rather than thin.
Mistake 1: using elastics that are too big — they swallow fine hair and the bubbles collapse, so use the smallest elastics you can find. Mistake 2: pulling the bubbles too hard, which drags the elastics down and flattens everything. Time: about eight minutes. Use clear mini elastics, keep the gaps small, and finish with a light texturising spray for hold.
31. Bubble Braid for Kids: Cute, Comfy and Tangle-Free
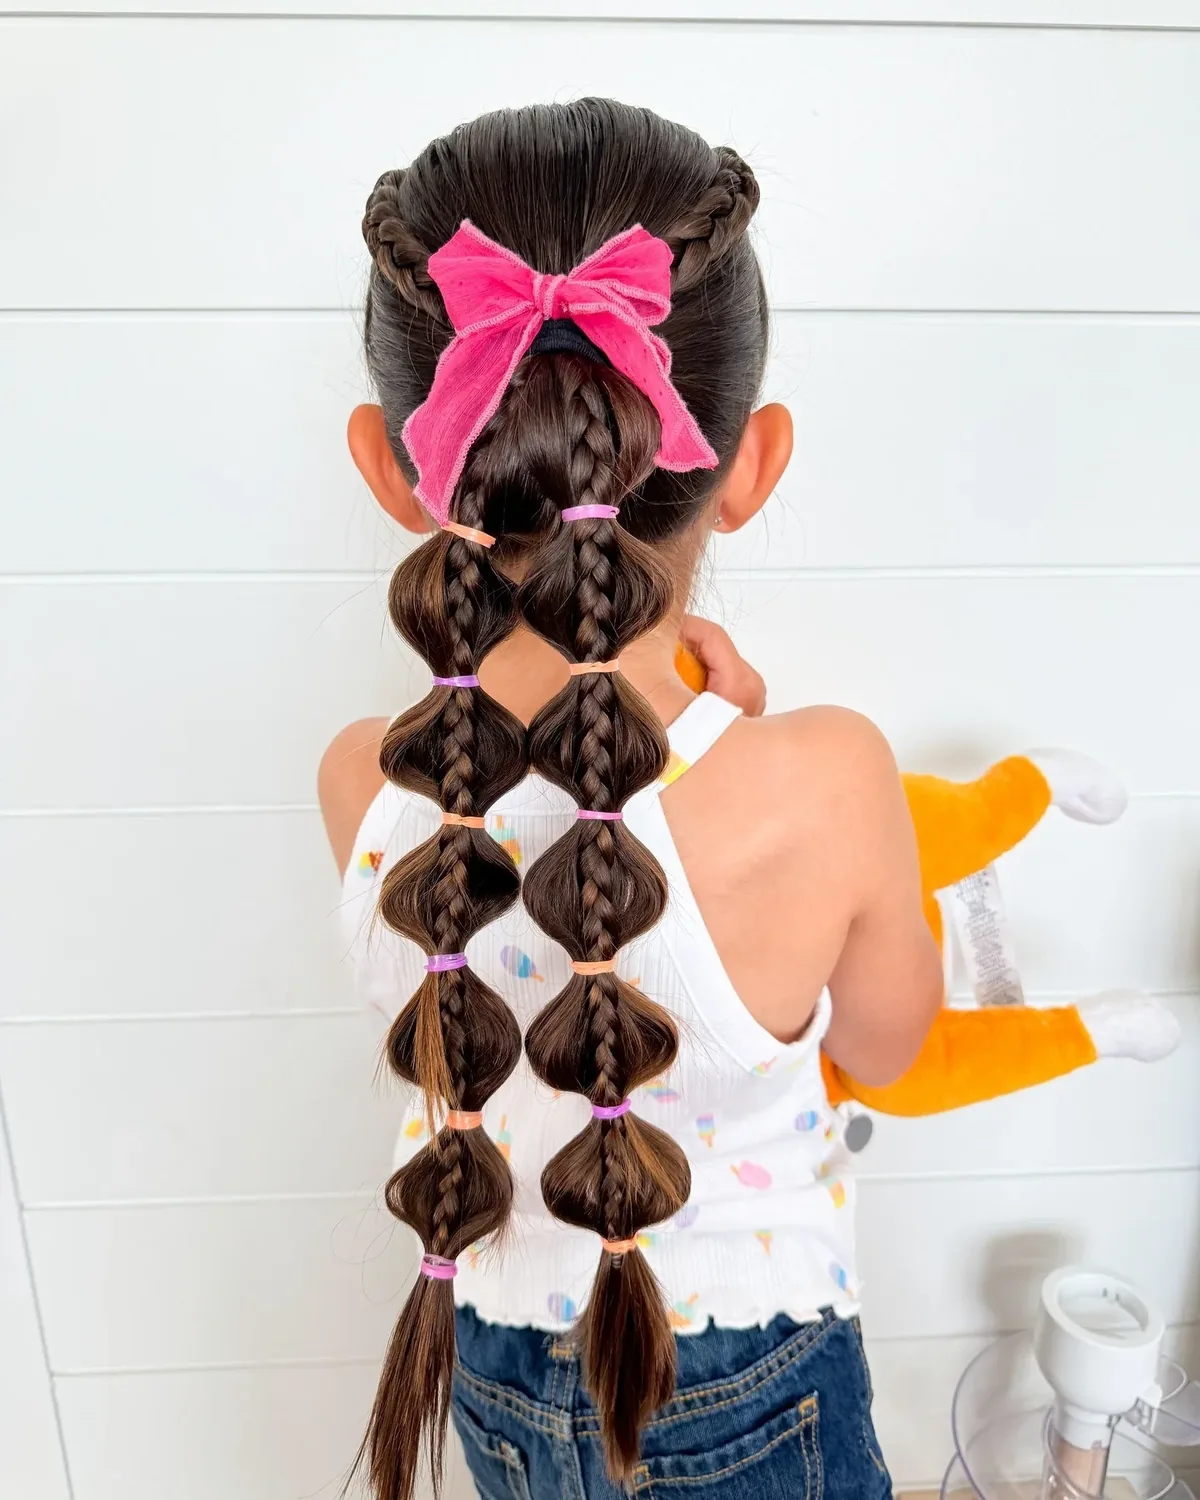
The bubble braid is the perfect kids’ hairstyle: it is quick, it does not hurt, it keeps hair out of the face all day, and children love the bouncy bubbles. Unlike tight braids that pull and take forever, a bubble braid is gentle on small heads, and the colourful elastics make it feel like a fun accessory rather than a chore. It survives school, playtime and naps without coming undone.
What it is: a gentle bubble braid built for children’s hair. Why it works: no pulling, no tight weaving, and the elastics do all the holding. Who it suits: any child with hair past the shoulders. How to style it: use soft fabric elastics, keep the bubbles small and the spacing tight, and let the child pick the elastic colours. Five minutes in the morning, and the style lasts until bedtime.
32. Bubble Braid for Teens: Trendy, Instagram-Ready and Easy
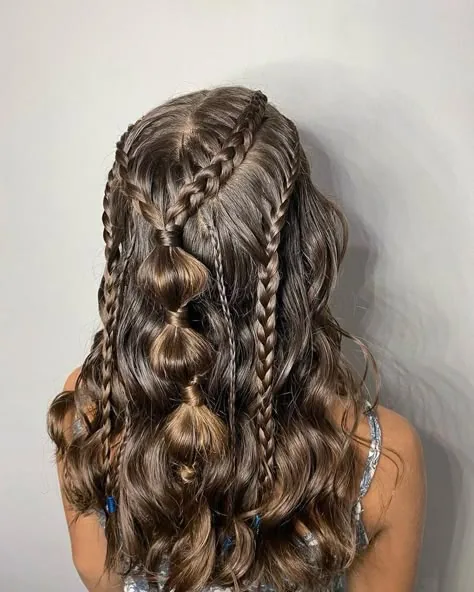
For teens, the bubble braid is the hairstyle that does it all: it is trendy, it photographs beautifully, and it is easy enough to do yourself before school. Double bubble braids, high bubble ponytails and bubble braids with colourful elastics are the most popular teen versions, and they pair perfectly with casual outfits, hoodies and festival looks.
Best for: school, parties, concerts and social media photos. How to style: a high bubble ponytail with slightly oversized bubbles, or double bubble braids with coloured elastics. Watch out for: over-pulling the bubbles to make them bigger — it loosens the elastics and the braid sags by lunchtime, so puff gently and let the shape build gradually.
33. Bubble Braid for Date Night: Flirty, Soft and Romantic
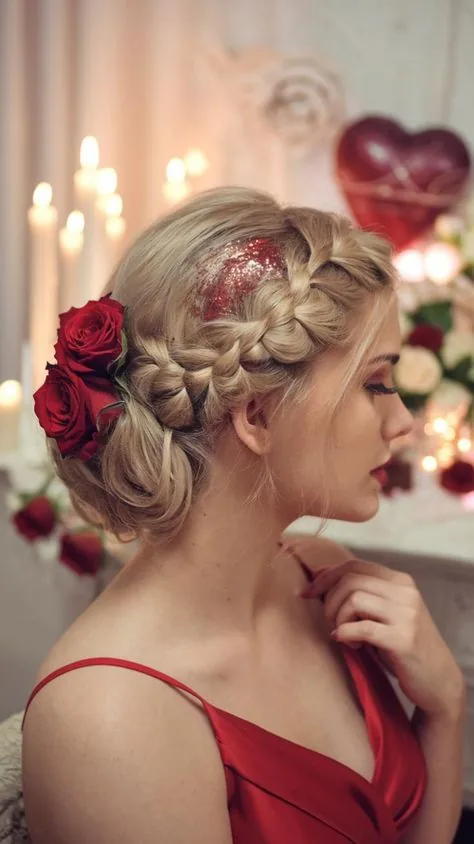
A bubble braid for date night should be soft, romantic and touchable — not stiff or severe. The trick is a low, loose bubble braid with gently puffed bubbles, a few face-framing tendrils, and a soft curl at the ends. It looks effortless and feminine, it frames the face beautifully in candlelight, and it stays in place through dinner, a walk and whatever the evening brings.
Step 1: curl the hair loosely before you start, for a soft texture. Step 2: build a low bubble braid with generous but gentle bubbles. Step 3: pull a few tendrils loose around the face and curl them lightly. Step 4: finish with a flexible-hold spray — never a stiff one, since the style should move. The result is romantic without trying too hard, which is exactly the point.
34. Bubble Braid for the Office: Polished Bubbles, Professional Finish

Yes, you can wear a bubble braid to the office — if you keep it polished. A low bubble ponytail with neat, even bubbles, smooth front sections and no bright accessories reads as a deliberate, professional style rather than a playful one. It keeps hair contained all day, survives a long commute, and still looks neat at five o’clock.
Pros: professional and contained; lasts all day; more interesting than a plain ponytail. Cons: a high, oversized bubble braid reads as playful, not professional — keep it low and neat. Quick verdict: low ponytail, small even bubbles, clear elastics, and a smooth finish. Save the colourful elastics and big bubbles for the weekend.
35. Bubble Braid with Bangs: Framing the Face Perfectly
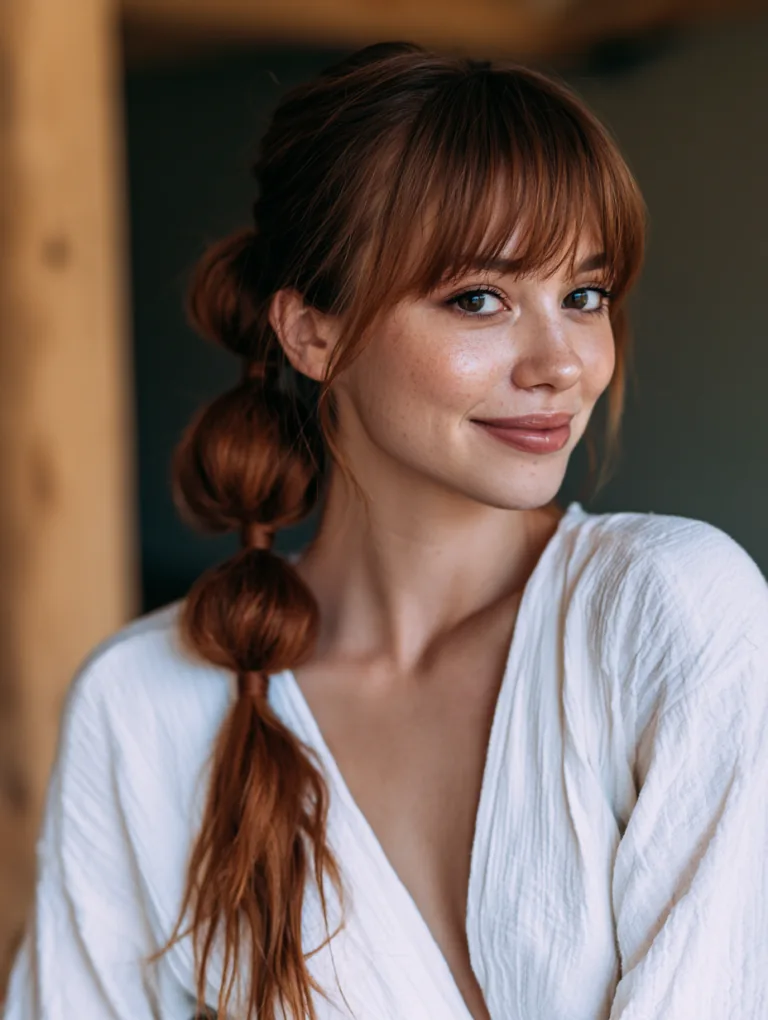
Bubble braids and bangs are a natural pair: the bangs frame the face while the bubbles add drama behind, so the whole look is balanced from the front and the back. Curtain bangs, wispy bangs and side-swept bangs all work beautifully with a bubble braid, and the bangs stop the style from looking severe when the hair is pulled back tightly.
Mistake 1: pulling the bangs into the ponytail — they belong loose, framing the face, so section them off before you gather the hair. Mistake 2: styling the bangs after the braid, when your arms are tired — style them first, while you have energy. Time: add two minutes to the basic braid for the bangs. Blow-dry the fringe with a round brush, then build the braid, and the combination looks polished and complete.
36. Bubble Braid Space Buns: Double Buns, Double Bubbles
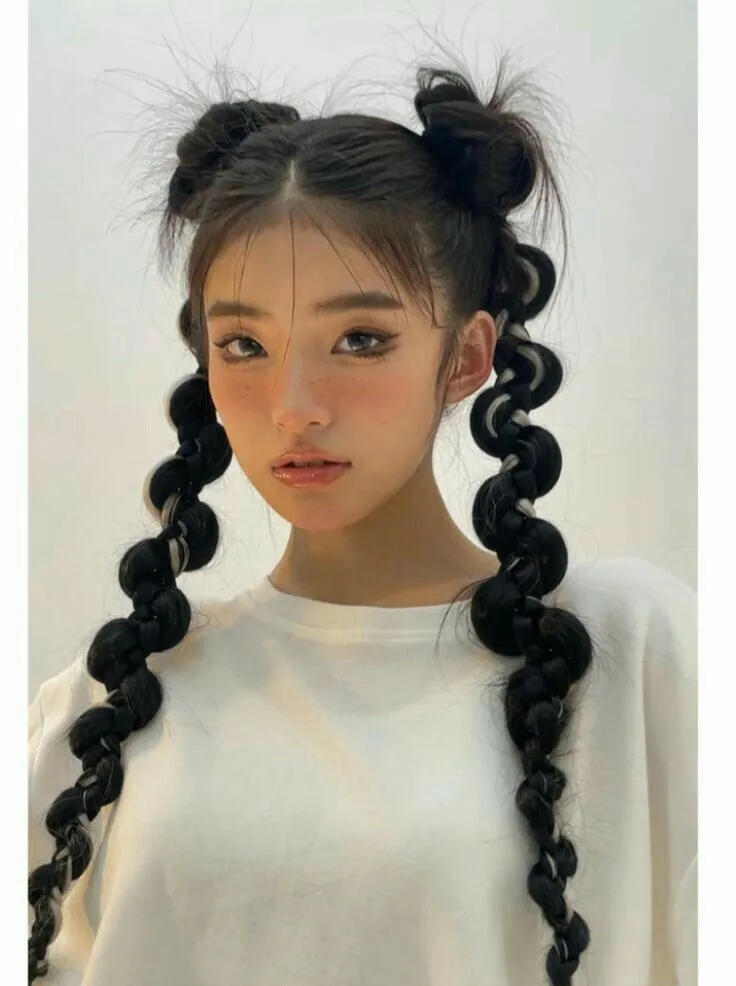
Bubble braid space buns combine two trends in one look: the hair is parted down the middle, each side is built into a bubble braid, and the braids are coiled into buns on top of the head. The bubbles peek out around each bun in a playful, festival-ready shape. It is bold, fun and unmistakably a statement — the hairstyle for concerts, festivals and days when subtle is not on the agenda.
What it is: double bubble braids coiled into two top buns. Why it works: the bubbles give the buns texture and size that plain twisted buns lack. Who it suits: medium to long hair, and anyone who loves a bold festival look. How to style it: build a bubble braid on each side, coil each one into a bun, pin securely, and pull a few bubbles out around the edges for fullness.
37. Bubble Braid with Loose Waves Underneath
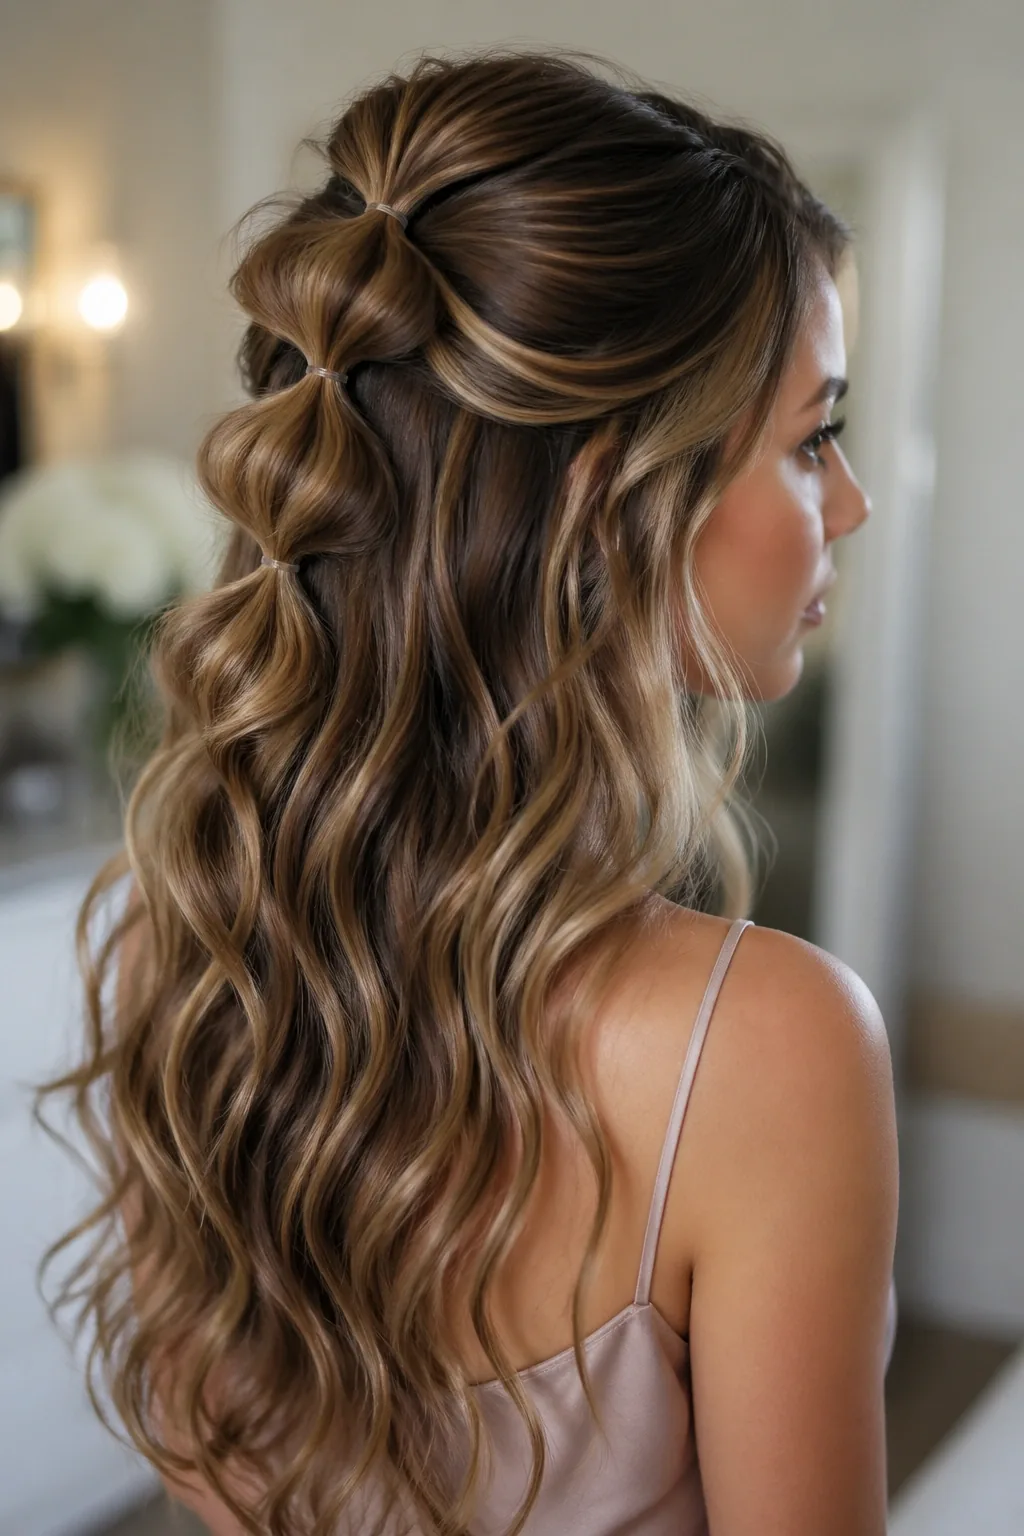
Pairing a bubble braid with loose waves is the best of both textures: the top half is structured and bubbly, the bottom half flows in soft waves, and the contrast makes both parts look better. The half-up bubble braid is the natural home for this combination, since the waves underneath get to shine while the bubbles add the playful detail on top.
Best for: weddings, dates and any occasion where you want structure and softness together. How to style: build the half-up bubble braid first, then curl the loose lengths in alternating directions with a large-barrel iron. Watch out for: curling the hair before the braid — the curls get crushed by the elastics, so always curl the loose hair last.
38. Bubble Braid for a Beach Day: Salt, Sun and Staying Power
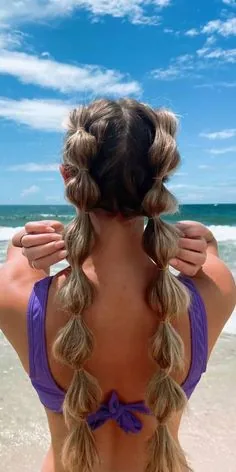
A bubble braid is the ultimate beach hairstyle: it keeps hair off your neck in the heat, survives wind and swimming far better than a regular braid, and looks even better with a little salt and sun in it. The bubbles hold their shape when wet, the elastics keep everything contained, and the style dries into soft waves when you take it out at the end of the day.
Step 1: apply a leave-in conditioner or sea-salt spray before you start, for texture and protection. Step 2: build a low or double bubble braid — low is best for swimming. Step 3: use strong elastics, since wet hair is heavier. Step 4: after swimming, rinse the braid with fresh water and let it dry in the sun. The style holds all day, and the waves you get when you take it out are a bonus.
39. Bubble Braid with Highlights: Light Catching Every Bubble
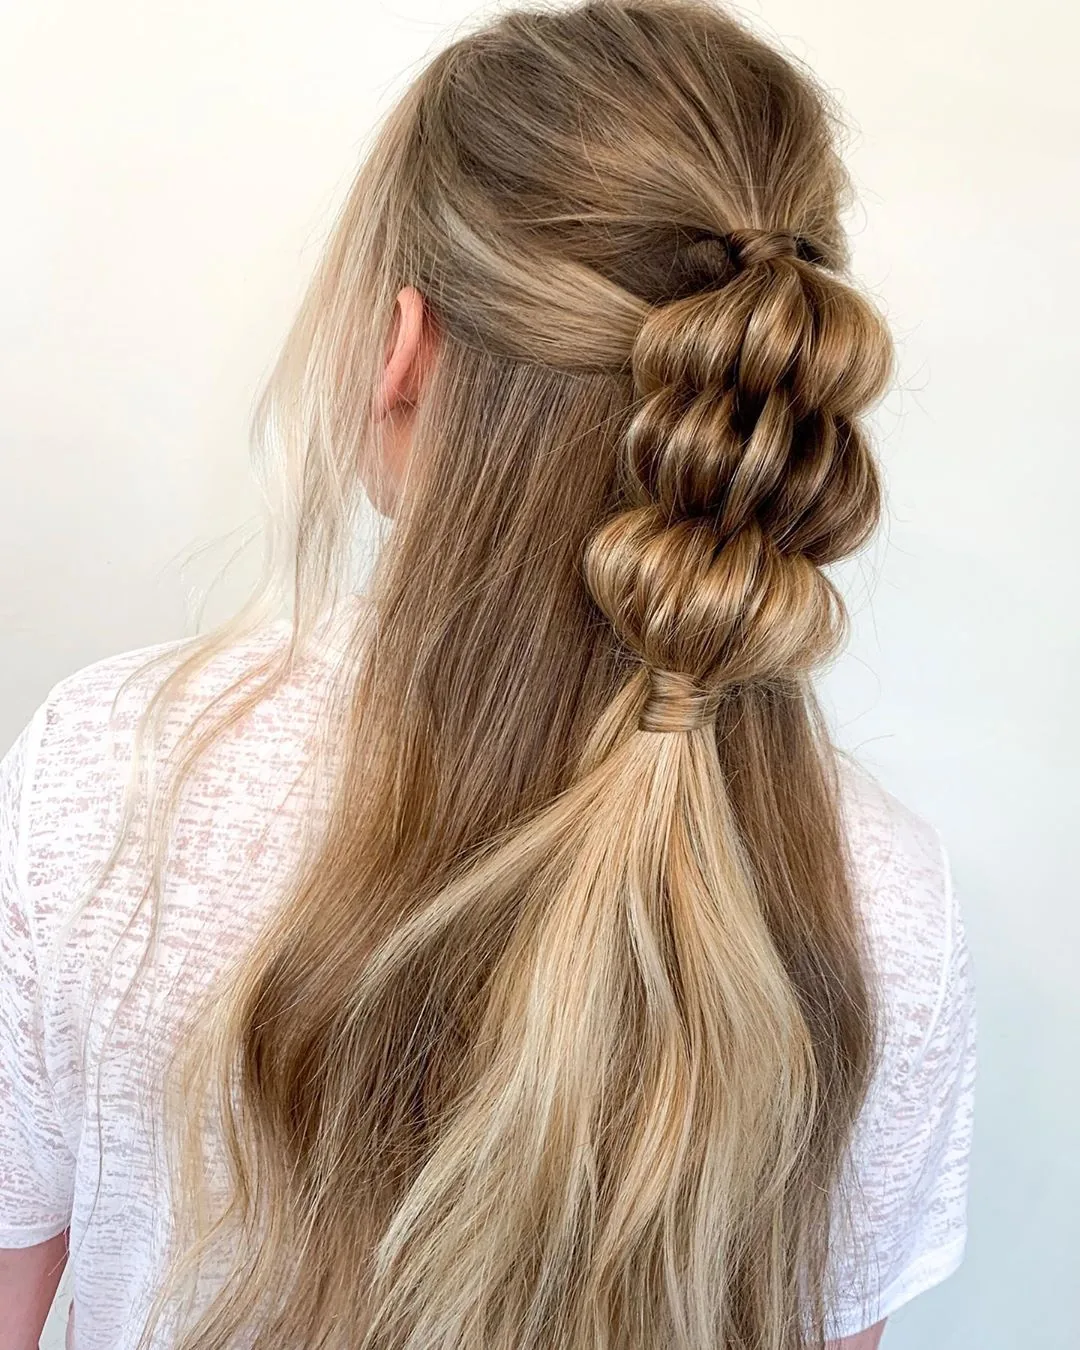
Highlights and bubble braids were made for each other: the bubbles are round, three-dimensional shapes, and every highlight catches the light differently on each one. Balayage, face-framing highlights and even a money piece all look more dimensional in a bubble braid than in straight hair, because the bubbles create shadows and shine that flat hair cannot.
Pros: makes highlights look richer and more dimensional; the bubbles show off colour beautifully. Cons: the effect is subtle on very dark hair without lighter pieces. Quick verdict: if you have highlights, try a bubble braid — it is the hairstyle that shows them off best. Ask your colourist for face-framing pieces if you want the maximum effect around the bubbles.
40. Bubble Braid for Parties: Glitter, Shine and All Eyes on You
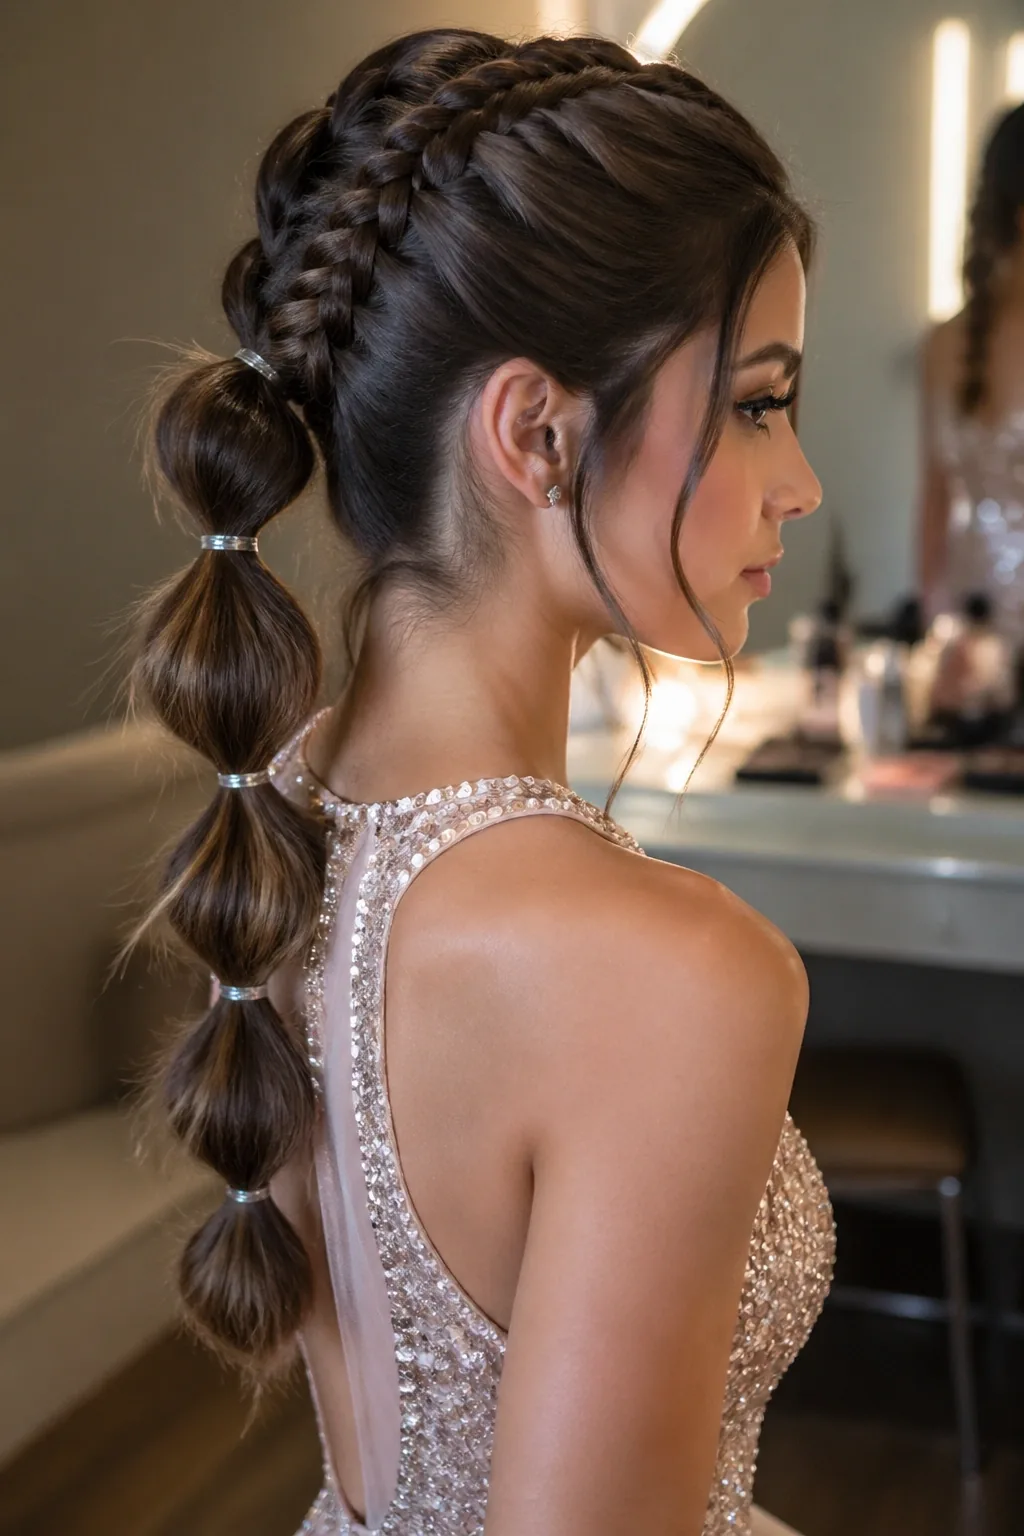
For a party, a bubble braid is the hairstyle that guarantees compliments: it is bold, it is different, and it looks like you spent an hour in a salon chair when it actually took ten minutes. Add glitter, hair gems or a sparkly accessory, make the bubbles big and dramatic, and pair it with statement earrings — the braid does the rest.
Mistake 1: adding glitter before the bubbles are shaped — it ends up everywhere except on the braid. Mistake 2: using a stiff-hold spray that makes the bubbles crunchy instead of bouncy. Time: fifteen minutes including decorations. Build the braid first, shape the bubbles, then add glitter or gems to the bubbles themselves, and finish with a flexible-hold spray so the style still moves when you dance.
41. Bubble Braid for Everyday: The Five-Minute Style You Will Actually Wear
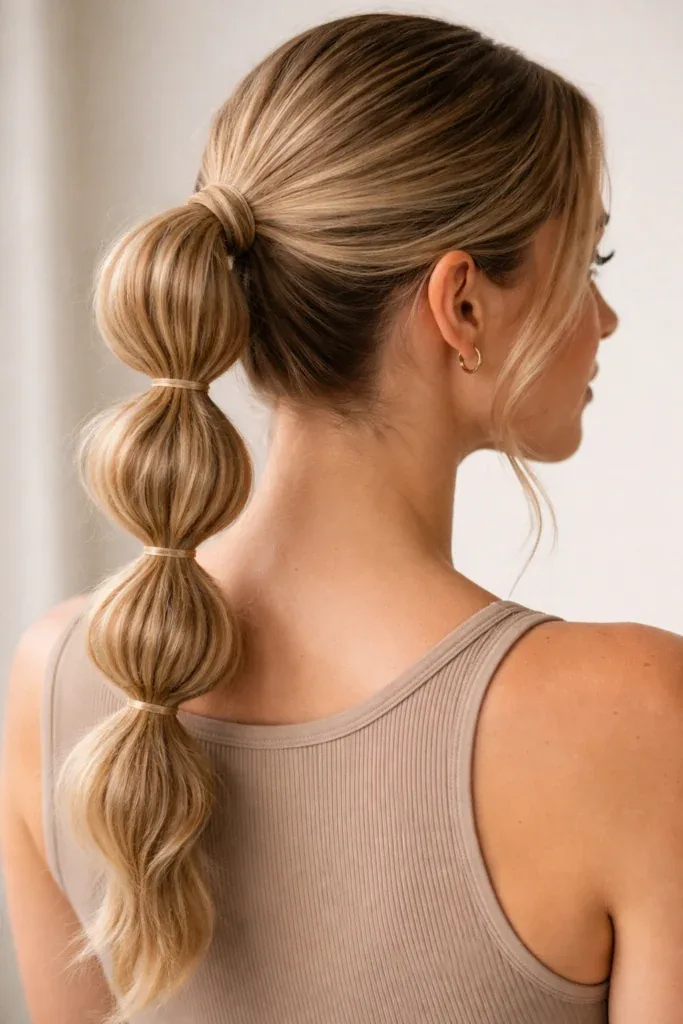
The everyday bubble braid is the one you will actually wear on a Tuesday: a low or mid-height bubble ponytail, three neat bubbles, no decorations, five minutes from start to finish. It keeps hair out of your face, looks like you made an effort, and survives the school run, the office and the gym in a single day. It is the bubble braid that earns its place in your regular rotation.
What it is: a simple three-bubble ponytail for daily wear. Why it works: it is fast, secure and flattering without any fuss. Who it suits: everyone — this is the most universal style in the guide. How to style it: brush, tie, space three elastics evenly, puff gently, and go. Once you have done it twice, you will not need a mirror — and that is when you know a hairstyle has truly become yours.
What is a bubble braid?
A bubble braid is a hairstyle made by tying a ponytail and adding elastics at intervals down its length, then puffing the hair between the elastics into round bubbles. It is not a real braid — there is no weaving involved — which is why it is the easiest braided look to do yourself.
How do you do a bubble braid step by step?
Tie your hair into a ponytail, add elastics at even intervals down the length, then gently pull the hair between each pair of elastics outward until it puffs into a round bubble. Work around each bubble so it is full on all sides, check the bubbles are roughly the same size, and finish with a light mist of hairspray.
Do bubble braids work on short hair?
Yes — a half-up bubble braid works on shoulder-length hair, and a low bubble ponytail on a bob gives you one or two cute bubbles. Keep the gaps small, about three centimetres, and puff the bubbles gently, since over-pulling makes the elastics slide out of short hair.
How long do bubble braids last?
A well-built bubble braid lasts all day and often into the next morning, because every elastic is its own anchor point. Start with textured hair, use elastics that match your hair thickness, and avoid re-puffing the bubbles during the day, which loosens the elastics.
Are bubble braids bad for your hair?
No, as long as you remove the elastics properly. Never rip them out — slide a tail comb underneath each elastic and cut it with small scissors if it will not slide. Using fabric-covered elastics instead of tight rubber bands also reduces breakage, and taking the braid down gently leaves soft waves rather than damage.
Can you do a bubble braid with curly hair?
Yes, and curly hair makes some of the best bubble braids, because the curls fill out each bubble naturally. Use fabric-covered elastics, puff the bubbles by lifting the curls outward gently rather than pulling hard, and finish with a little curl cream to define the texture.
What elastics are best for bubble braids?
Small clear elastics are best for sleek, polished looks because they disappear into the hair, while thick fabric-covered elastics hold more hair and suit thick or curly hair. Colourful elastics are a fun choice when you want the elastics to be part of the look. Always use elastics that match your hair’s thickness.
How do you make bubble braids look full?
Space the elastics evenly, tug the hair outward in small pinches all the way around each bubble instead of yanking one side, and tease the inside of each section very gently with a comb if it still looks flat. A sprinkle of texturising powder at the roots of each bubble adds grip and volume.
Can you sleep in a bubble braid?
Yes — a loose, low bubble braid is a comfortable way to sleep, and it protects the hair overnight while creating soft waves by morning. Keep the bubbles loose rather than tight, use fabric-covered elastics, and take the braid down gently in the morning for a bonus wavy style.
How do you remove a bubble braid without damage?
Work from the bottom up, removing one elastic at a time. Slide a pointed tail comb or bobby pin under each elastic and stretch it gently away from the hair, or cut it with small scissors if it will not slide. Never brush the braid out while the elastics are still in, and finger-comb each bubble loose as you go.
Conclusion: Big, Bold and Bubbly — Your Turn to Try It
Bubble braids work because they break the rules of braiding: no weaving, no skill, no hour in front of the mirror — just a ponytail, a handful of elastics, and ten minutes. Yet the result is bold, playful and sculptural, a hairstyle that turns heads at school, at the gym, at a festival and at a wedding. From the classic bubble ponytail to double bubble braids, bubble crowns, beaded and ribbon-wrapped versions, there is a bubble braid for every hair length, every hair type and every occasion in this guide.
Start with the classic bubble ponytail and get the spacing and the puffing right, then try the version that matches your day — the half-up bubble braid for short hair, the low bubble ponytail for the office, the double bubble braids for a festival, the low romantic bubble braid for a wedding. Use small elastics, space them evenly, puff gently all the way around, and never rip the elastics out at the end of the day. Give it one try, and the bubble braid will earn its place in your regular rotation — big, bold, bubbly, and entirely yours.

