

Hey you. So you love the dark romantic aesthetic, but your morning routine is more “coffee in a panic” than “candlelit poetry reading”? I hear you. That’s exactly why I’m obsessed with this look. It’s my go-to when I want to feel put-together and subtly edgy without spending an hour on my hair.
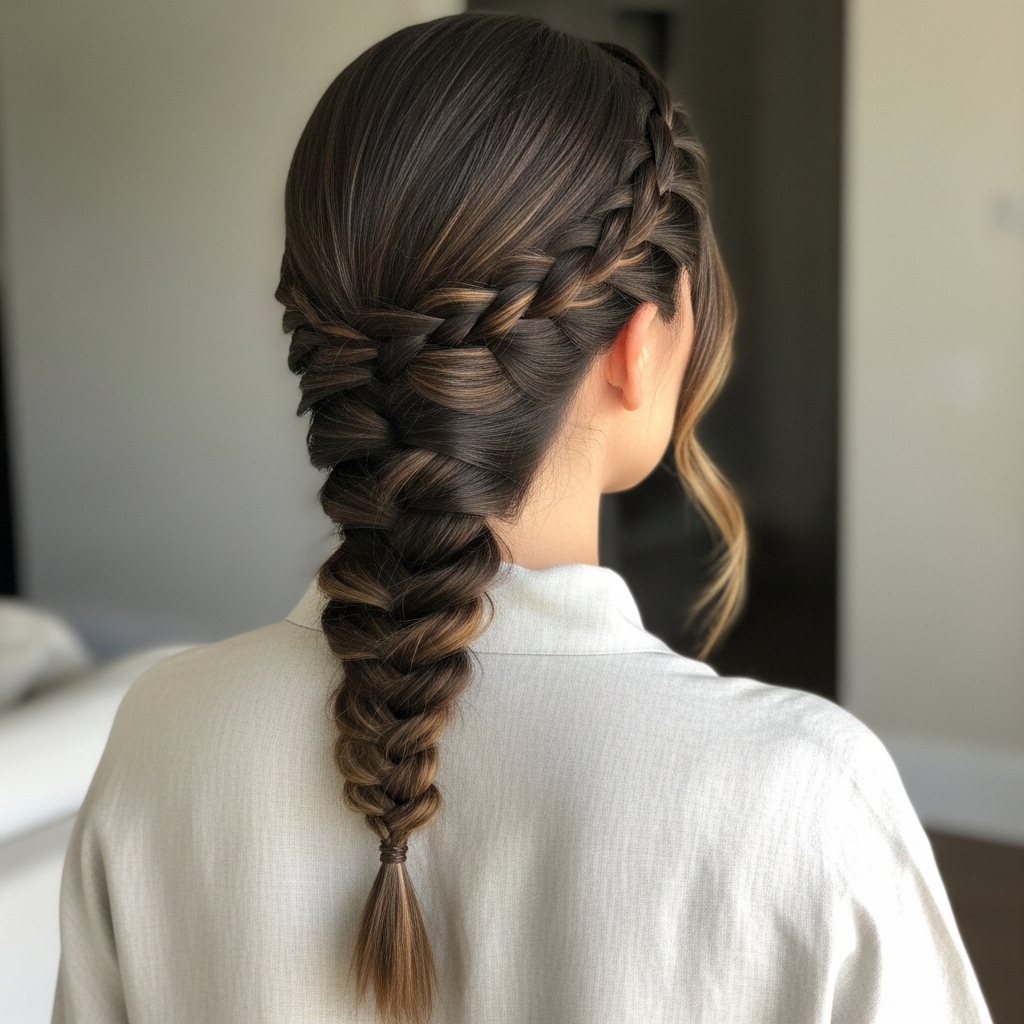
This romantic goth side braid is the perfect easy everyday style. It works on second-day hair, it’s comfortable, and it has that beautiful, undone vibe that feels intentional, not messy. Think less “costume” and more “cool-girl who just knows how to accessorize her vibe.”
Whether you’re into 2026 hairstyles that lean into the dark academia trend or you just want a break from your usual quiet luxury bob, this braid adds instant personality. It pairs just as well with a band tee as it does with a lace top. Let’s get into it—I promise it’s easier than it looks.
What Makes a Hairstyle “Romantic Goth”?
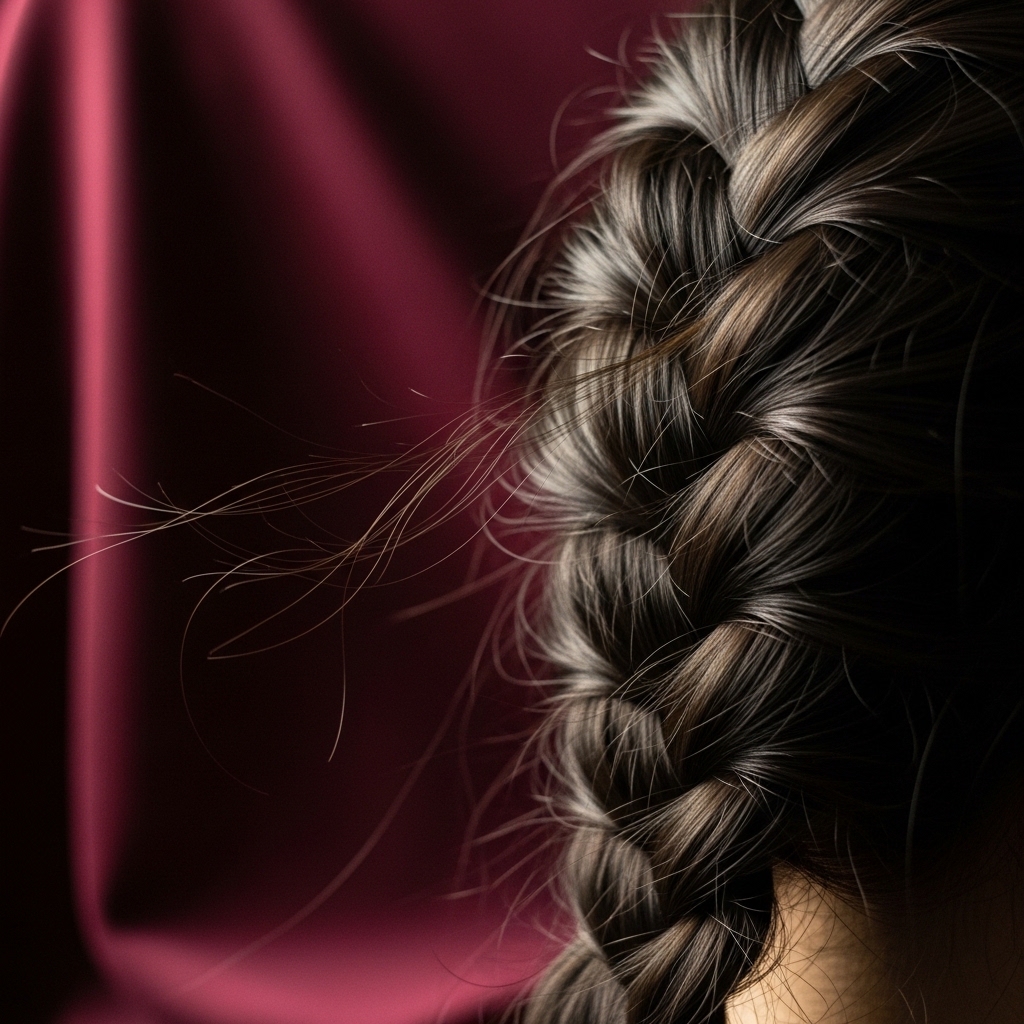
It’s all about the balance. Romantic goth hairstyles mix soft, flowing elements with a dark, moody edge. We’re not talking super tight, perfect braids here. The magic is in the texture and the slight imperfection.
Think soft tendrils, a bit of purposeful messiness, and accessories that feel vintage or mystical. It’s the hair equivalent of a velvet ribbon on a leather jacket. This style takes that feeling and makes it totally wearable for real life.
Why the Side Braid is an Everyday Winner
I reach for this braid constantly. First, it gets your hair out of your face in the most elegant way possible. No harsh ponytail bumps here. Second, it works with almost any hair texture and length, from a sharp asymmetrical lob to longer layers.
It also starts perfectly with that “lived-in” hair we all love. Day two or three hair has the natural grit and texture to make this braid look amazing from the start. It’s a true five-minute style that looks like you tried much harder.
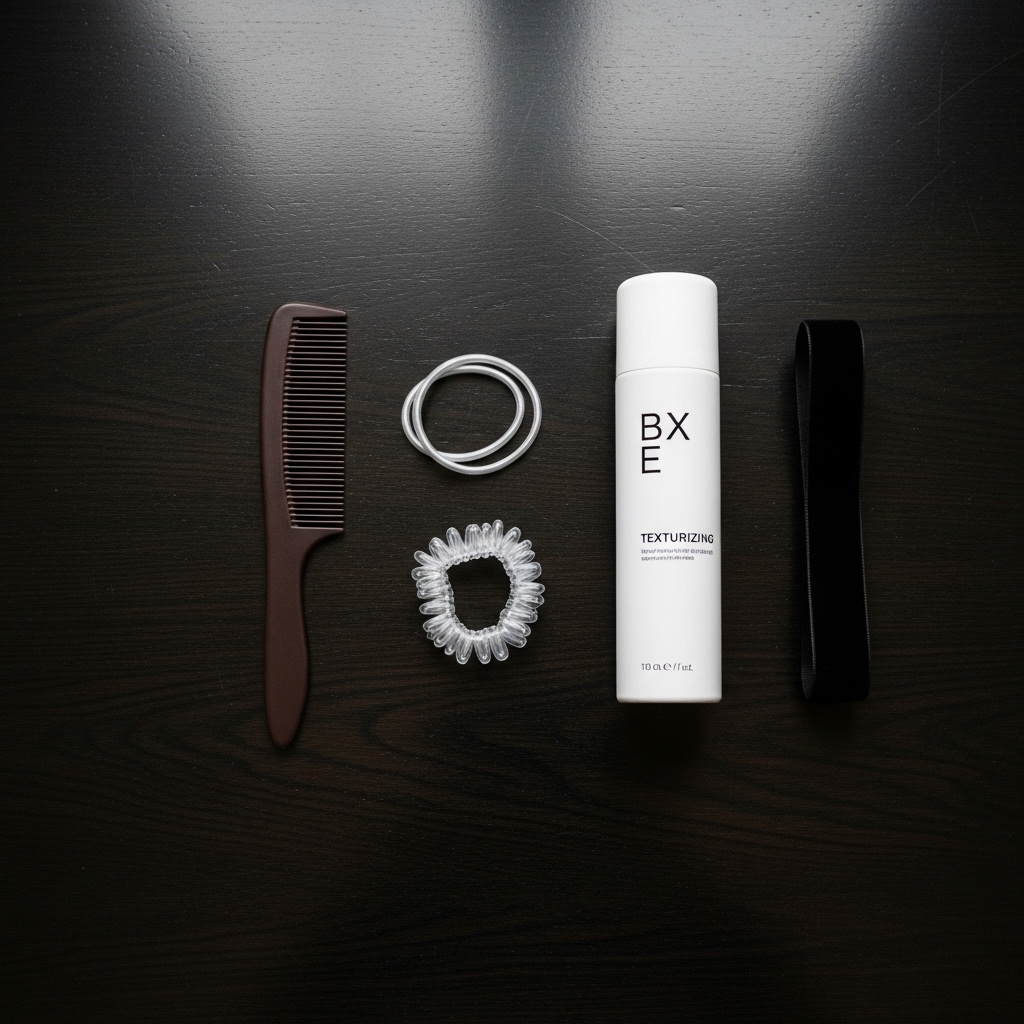
Gathering Your Simple Tools
You don’t need much! Here’s my kit for this look:
- A fine-tooth comb or brush for smoothing the crown.
- A couple of clear elastic bands (the kind that don’t snag).
- Light-hold texturizing spray or a dry shampoo for grip.
- Optional: A few bobby pins and your favorite hair accessory, like a dark silk scarf or a simple black clip.
That’s really it. Fancy products aren’t necessary. The goal is ease and that lived-in feel.
Start with the Right Hair Texture
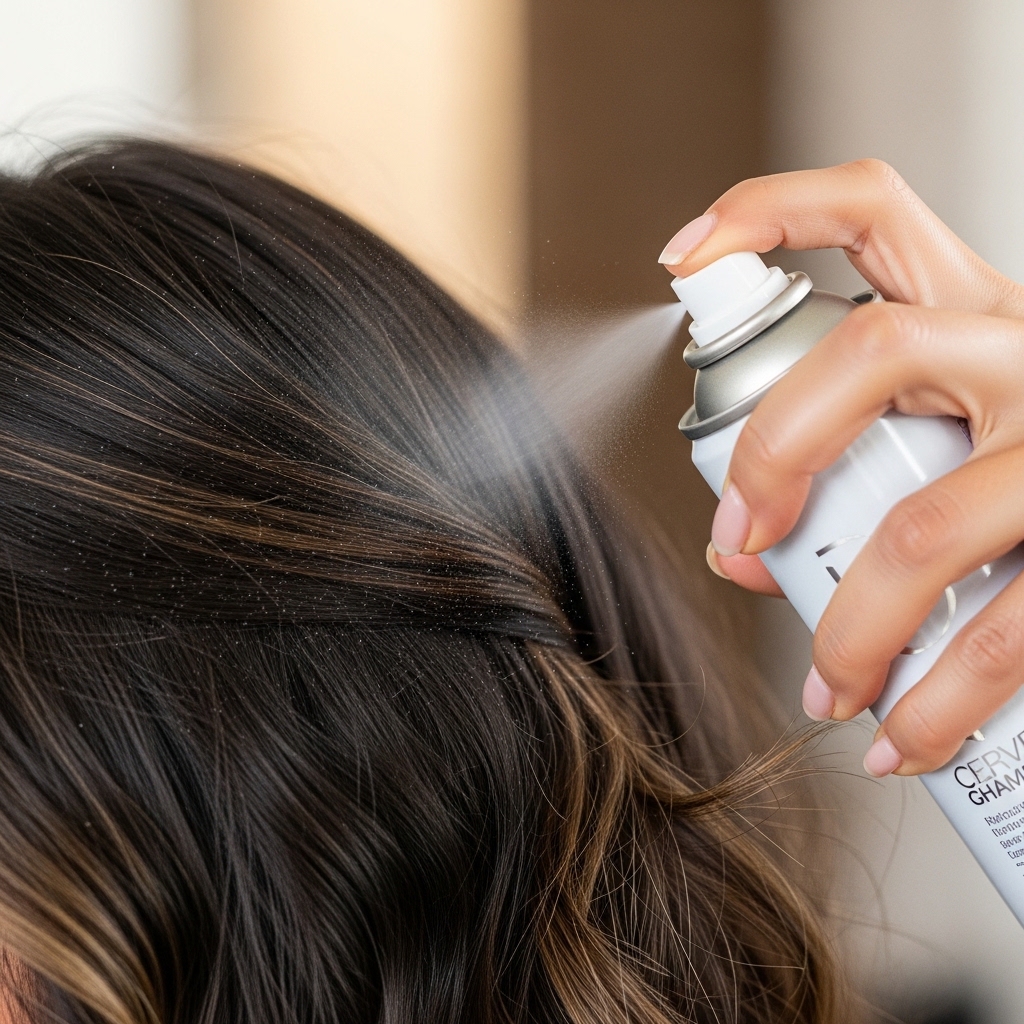
This style works best on hair that isn’t squeaky clean. If you just washed your hair, spray some texturizing spray at the roots and mid-lengths. Rub it in to create a little grit.
If you’re on day two or three, a quick blast of dry shampoo at the roots will add volume and the perfect amount of hold. We want the braid to have grip so it doesn’t slip apart, but we don’t want it to be stiff or crunchy.
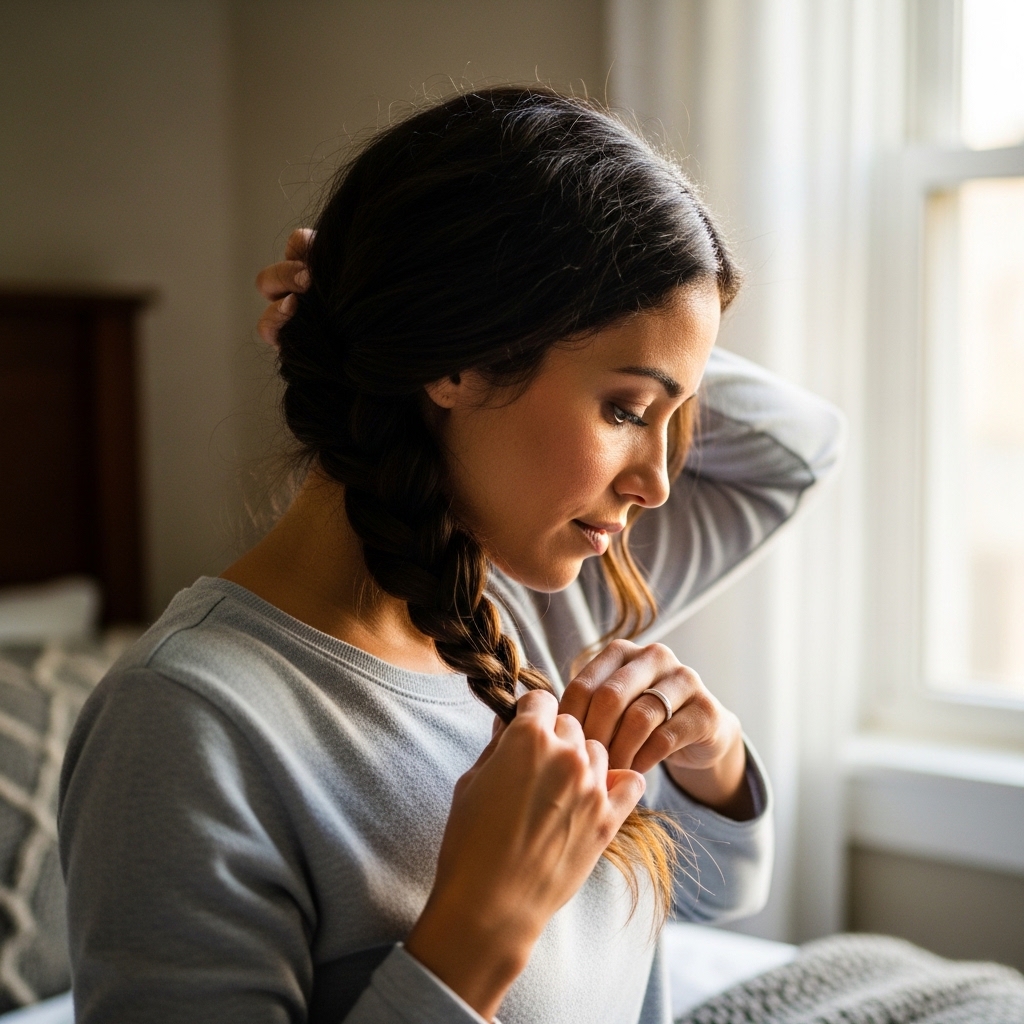
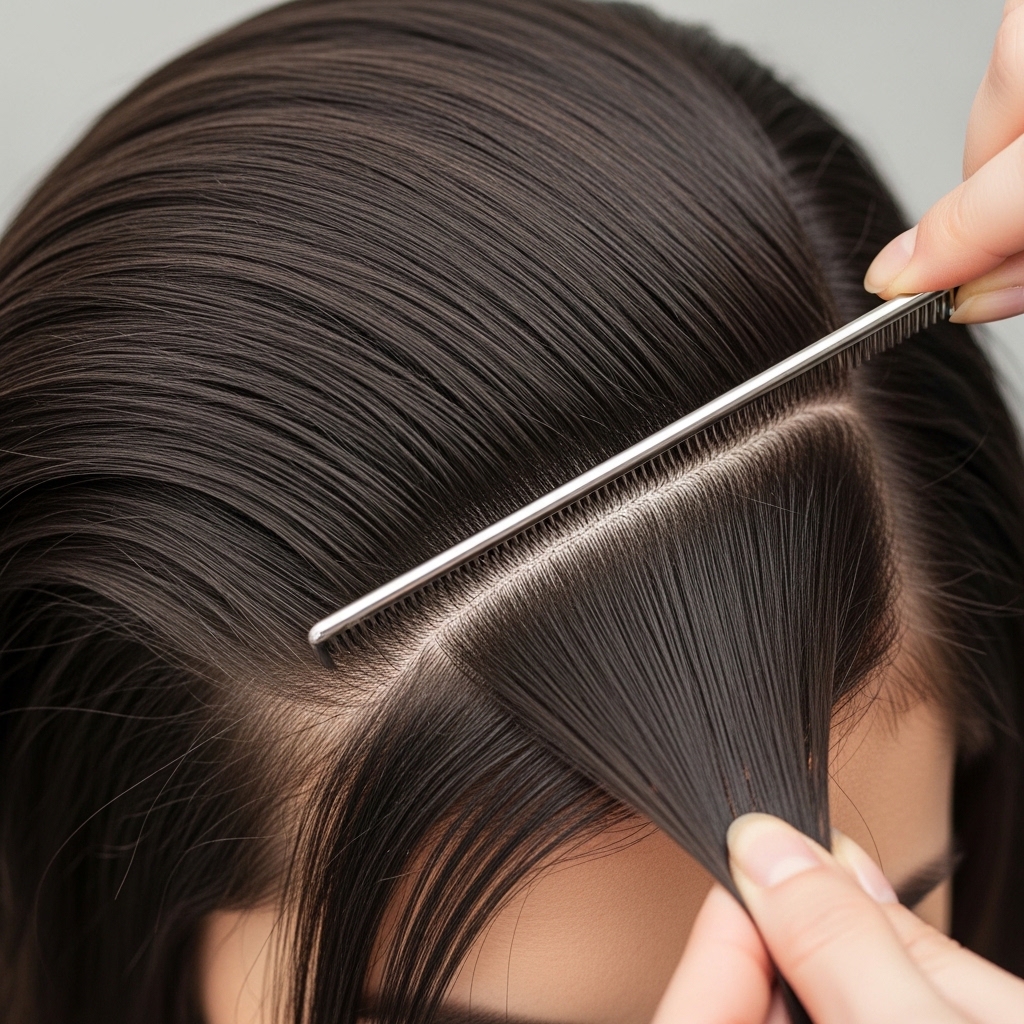
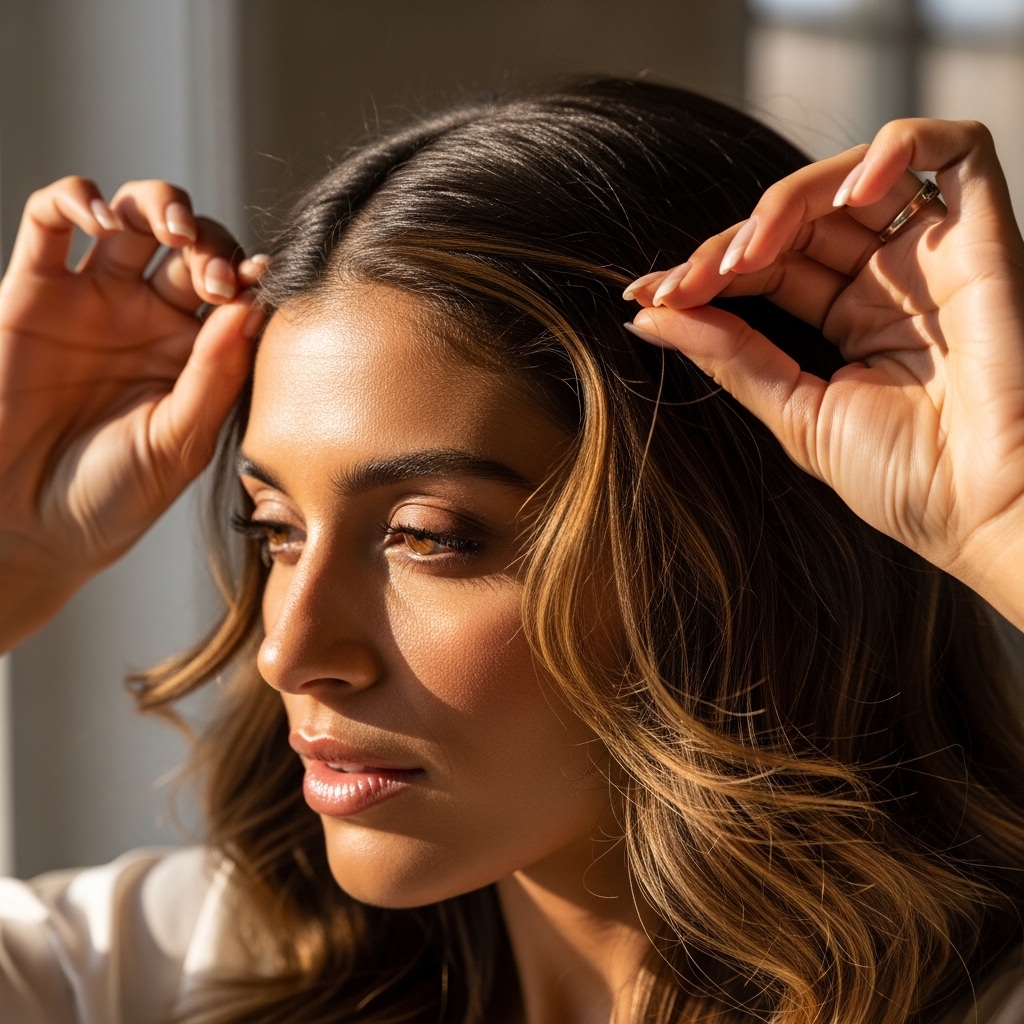
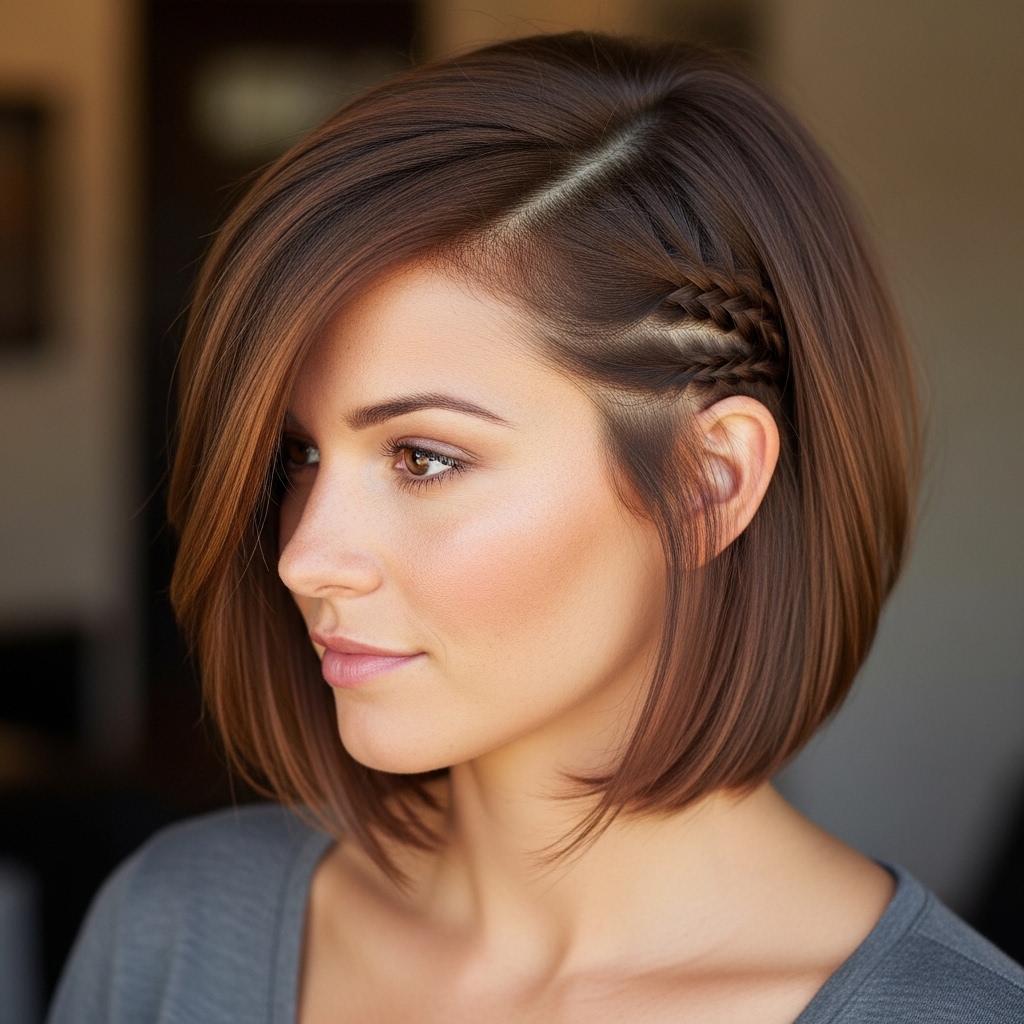
Step 1: Create a Deep Side Part
This isn’t a subtle side part. Go for drama. Use the end of your comb to create a clean, deep part on whichever side you prefer. I usually go with the side opposite my natural part for more volume.
Comb all your hair over to the heavier side. This immediately gives you that asymmetric, romantic feel. Don’t worry about making it perfectly sleek—a few baby hairs are welcome.
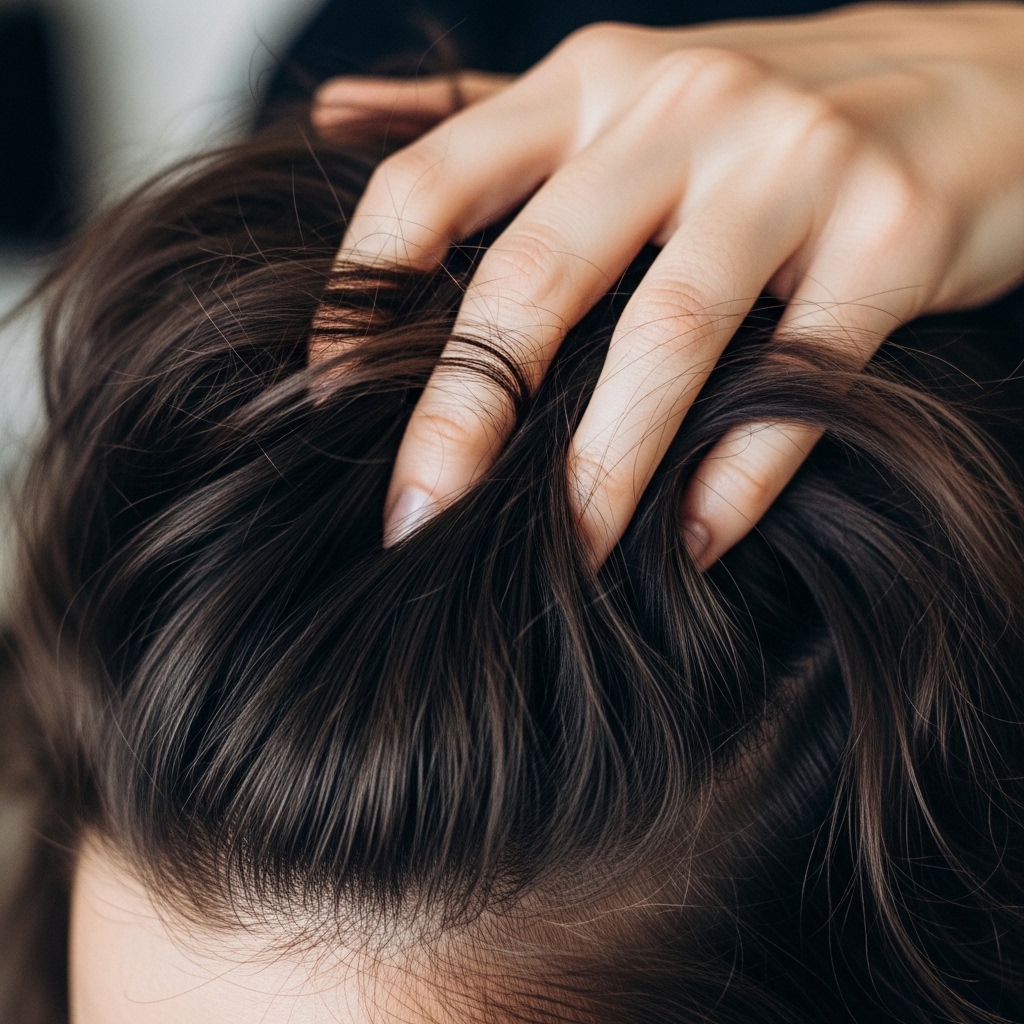
Step 2: Loosely Gather Your Hair
Gather all your hair on the heavier side, right by your ear. Don’t pull it too tight or too high. You want it to sit comfortably where a low ponytail would, but shifted over.
Hold it with your hand first. At this point, I like to gently back-comb or tease the crown area just a tiny bit for added volume and that “glitchy glam hair” undone effect.
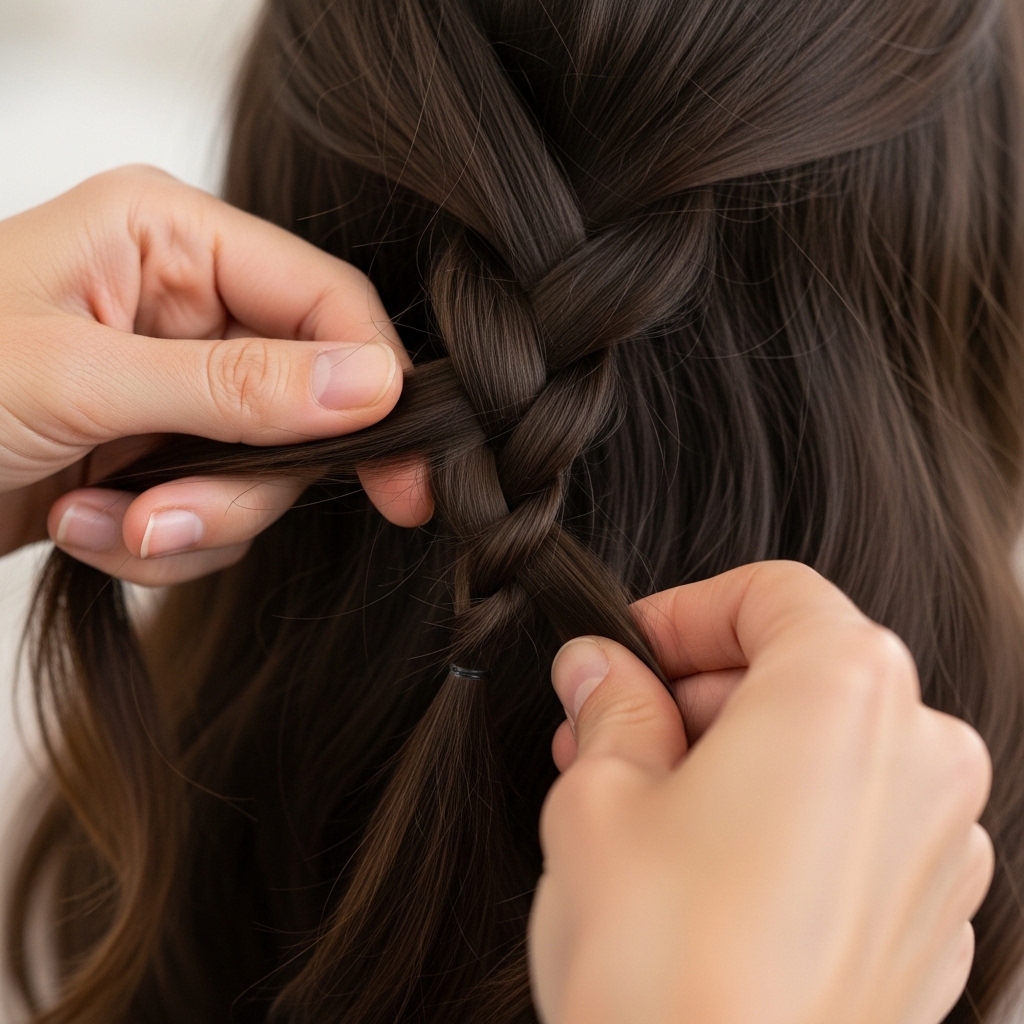
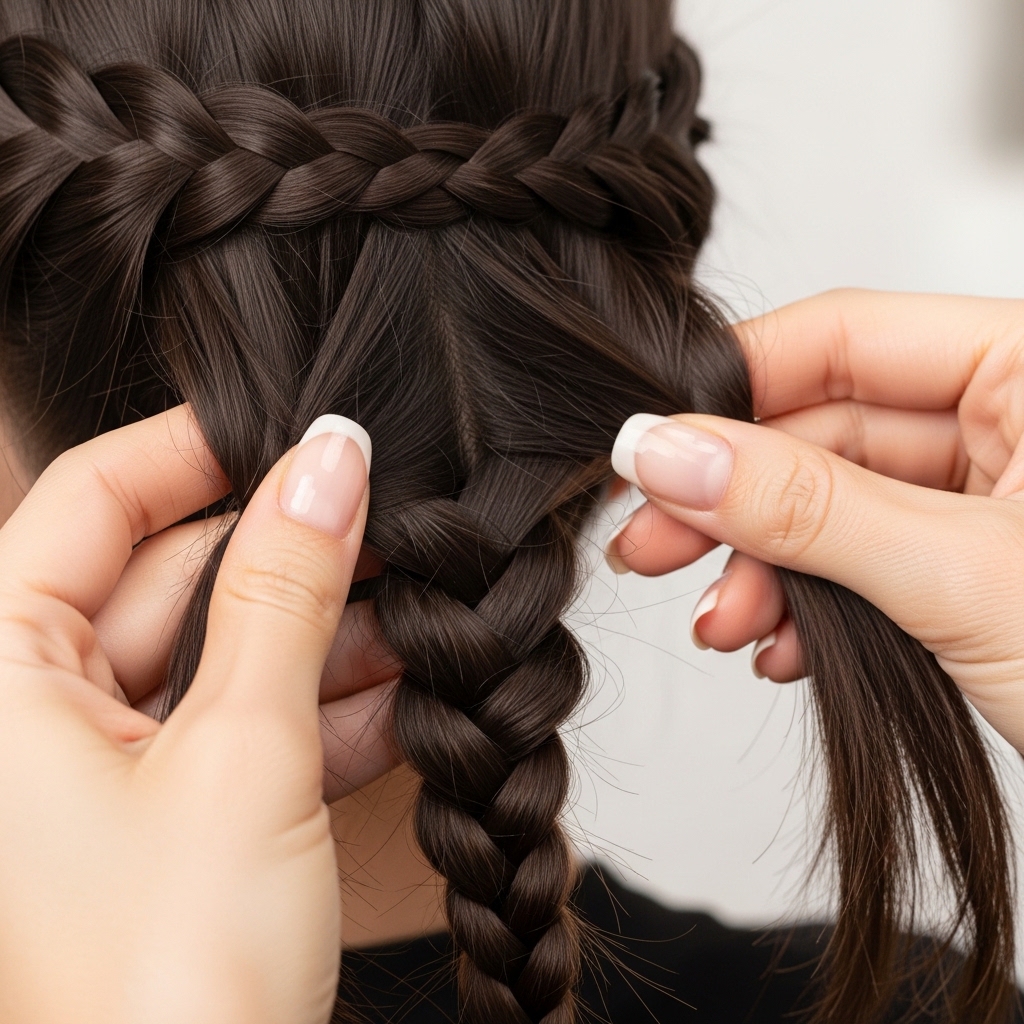
Step 3: Begin a Simple Three-Strand Braid
Now, start a basic three-strand braid. Divide your gathered hair into three equal sections. Cross the right section over the middle, then the left section over the new middle.
Keep your tension very light. This is key! You are not braiding tightly for a gym class. You want it soft and relaxed. Pull just enough to hold the sections together.
Step 4: Keep Braiding with Loose Tension
Continue braiding down the length of your hair. Remember, keep it loose. As you add more hair into the braid, don’t pull it snug against your head.
Let it fall naturally. This loose tension is what creates that romantic, soft look versus a severe, traditional braid. It should feel easy in your hands.

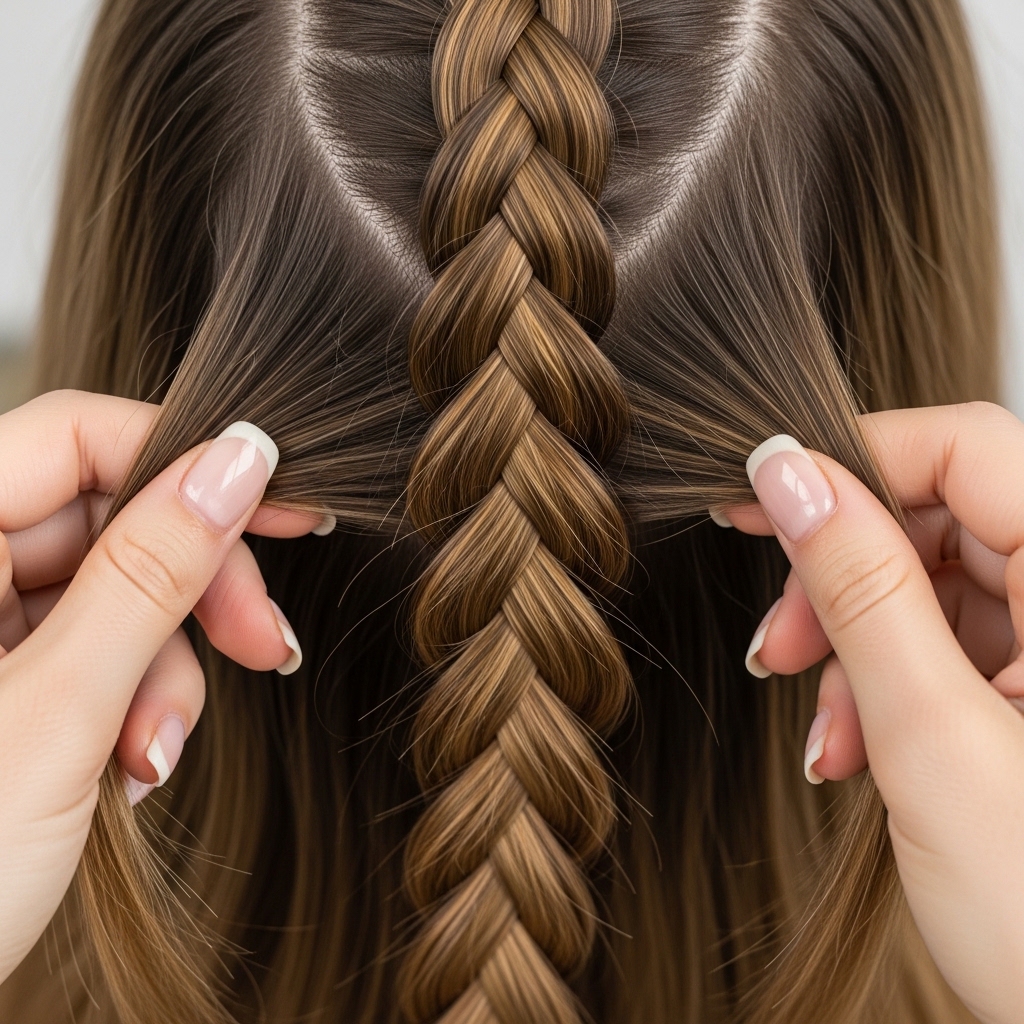
Step 5: Secure the End & Tug for Volume
Once you’ve braided as far as you can, secure the end with a clear elastic. Now, for the transformation! Gently tug on the outer loops of the braid.
Pinch each little “bump” of the braid and pull it outward to make the braid look fuller, wider, and more undone. This step makes it look intricate when it’s really not.
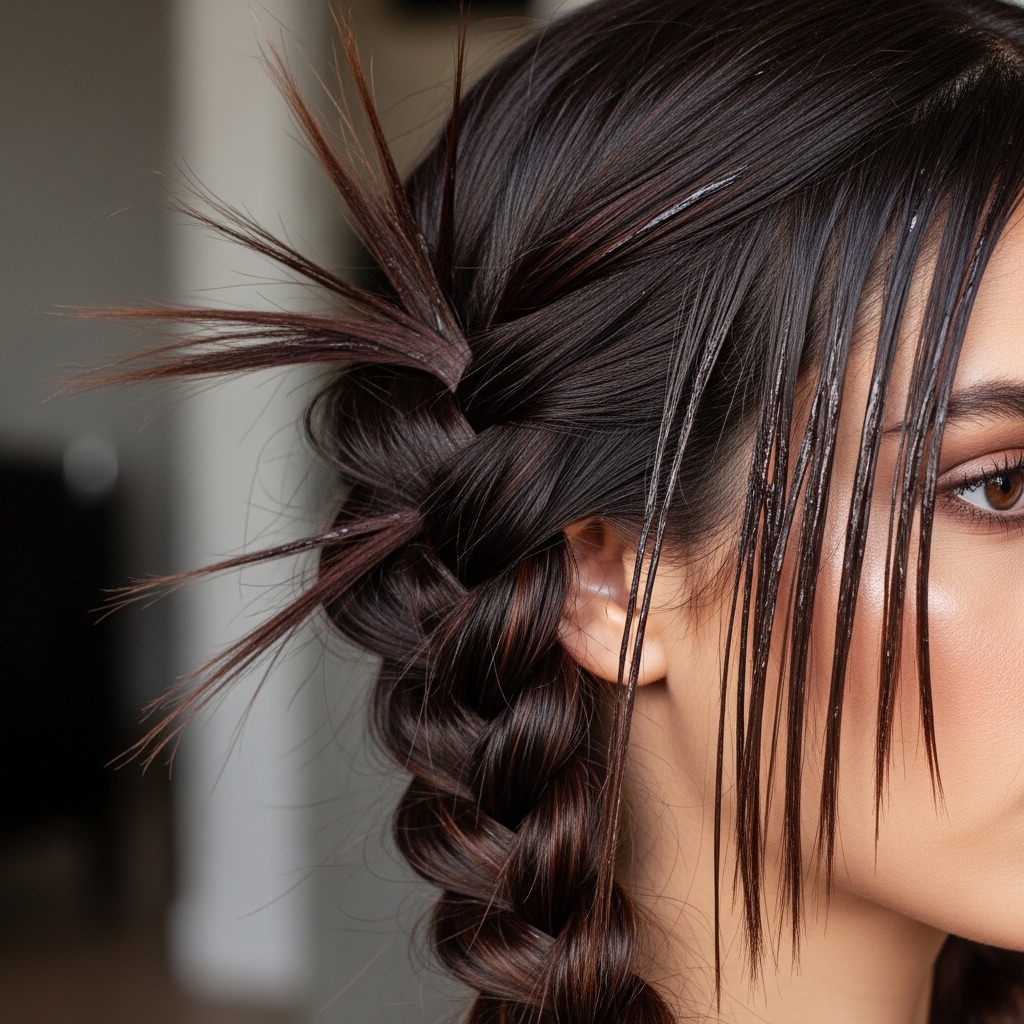
Step 6: Pull Out Face-Framing Pieces
This is non-negotiable for the romantic feel. Look at the front section of your hair, near your part. Pull out a few thin strands, maybe two or three on each side.
You can use the end of a comb or your fingers. These pieces will soften your entire face and add that effortless, vampire haircut allure. Curl them slightly with your fingers if they’re straight.
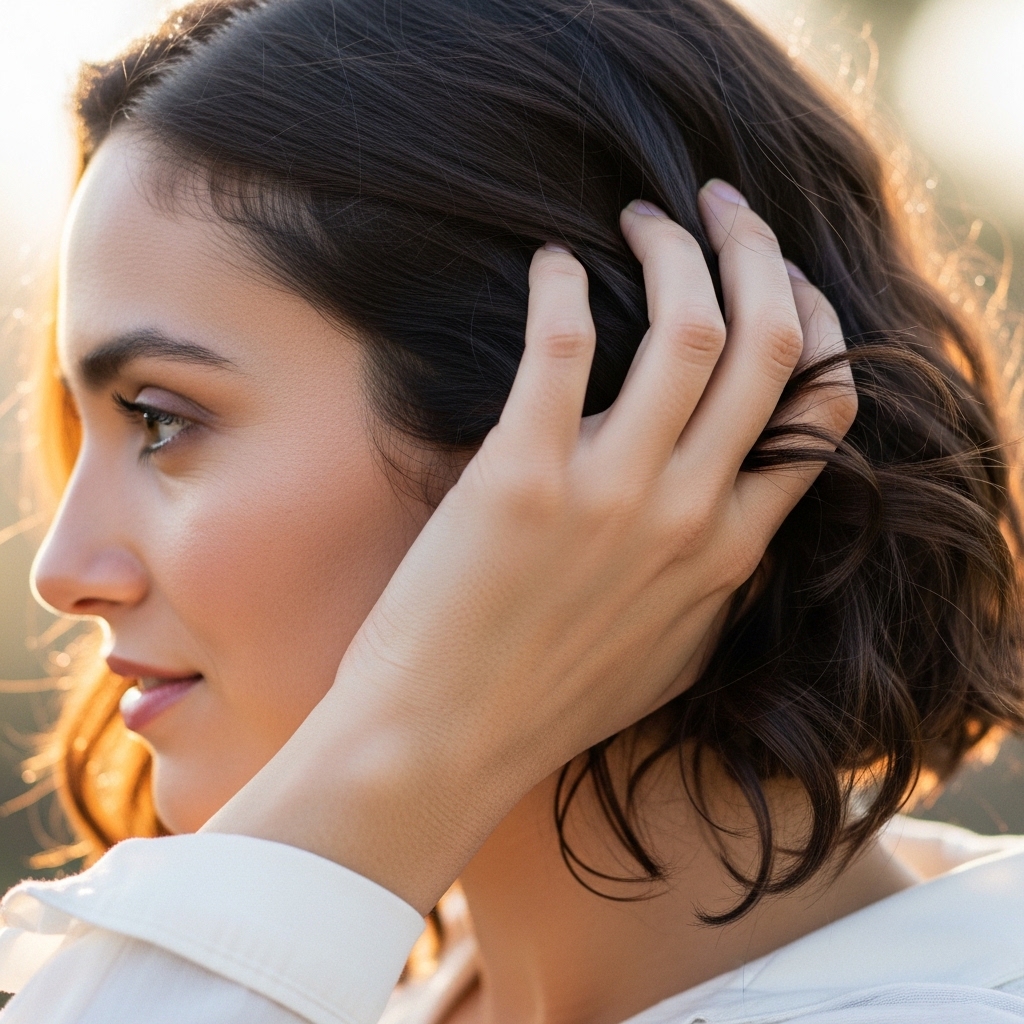
Step 7: Mess Up the Crown for Effortless Volume
Run your fingers gently through the hair at the crown of your head. Lightly tousle it. You want to break up any too-perfect smoothing from the initial combing.
This creates a bit of gentle height and that “I just woke up like this” texture. It prevents the style from looking too polished or severe, keeping it in everyday territory.
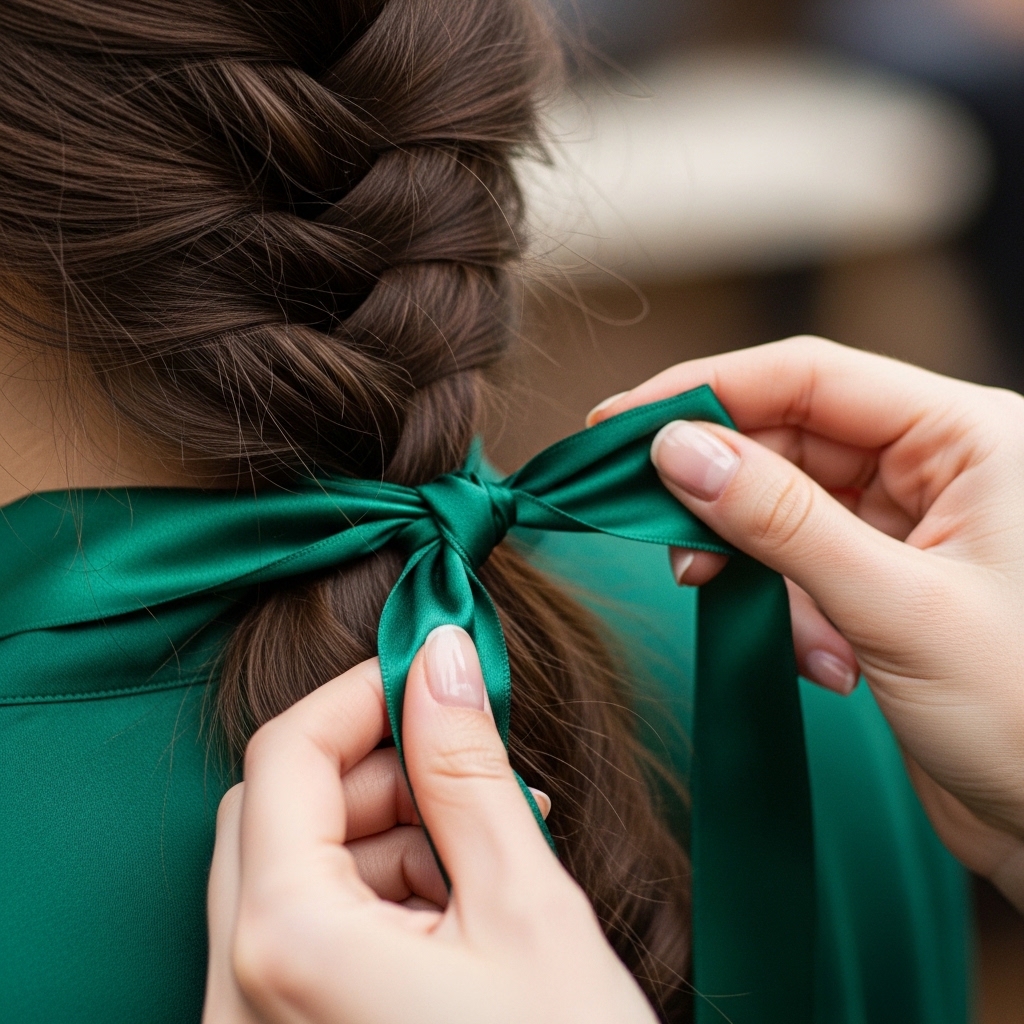
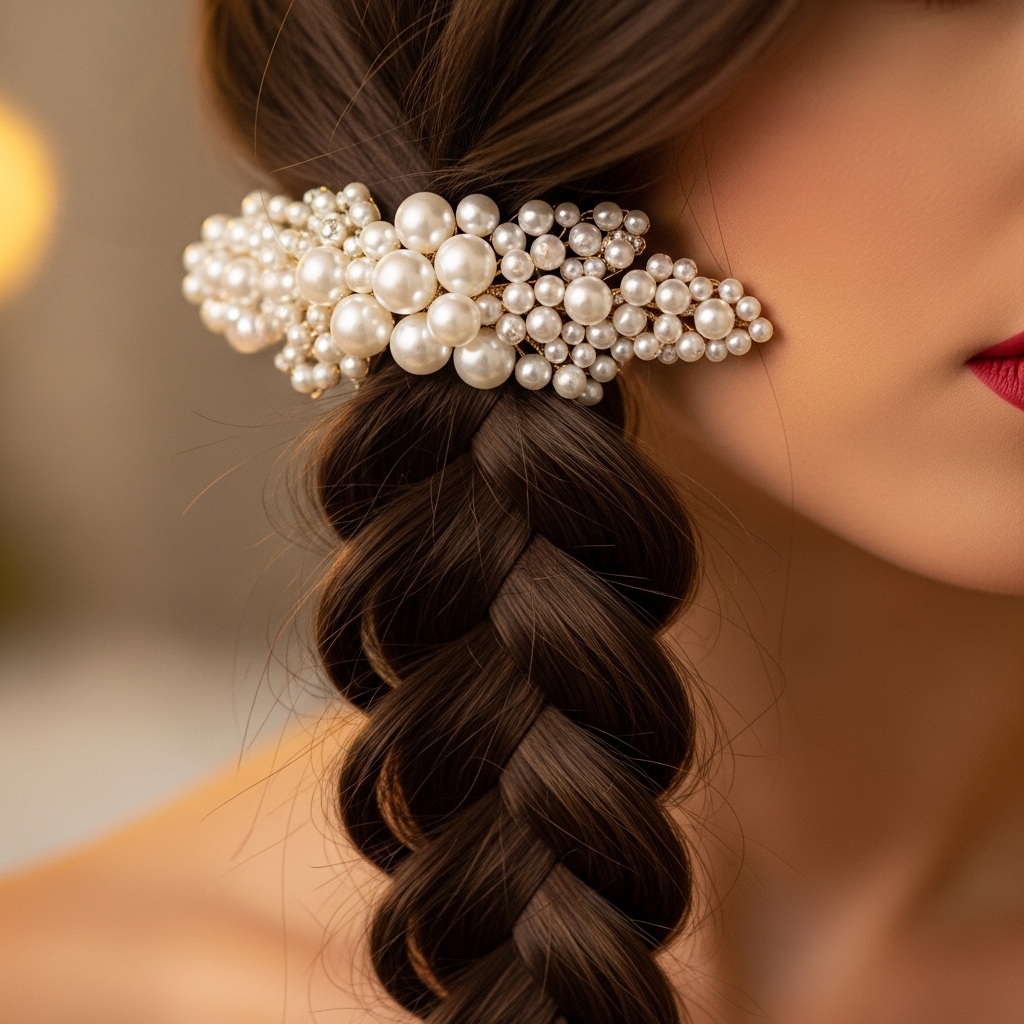
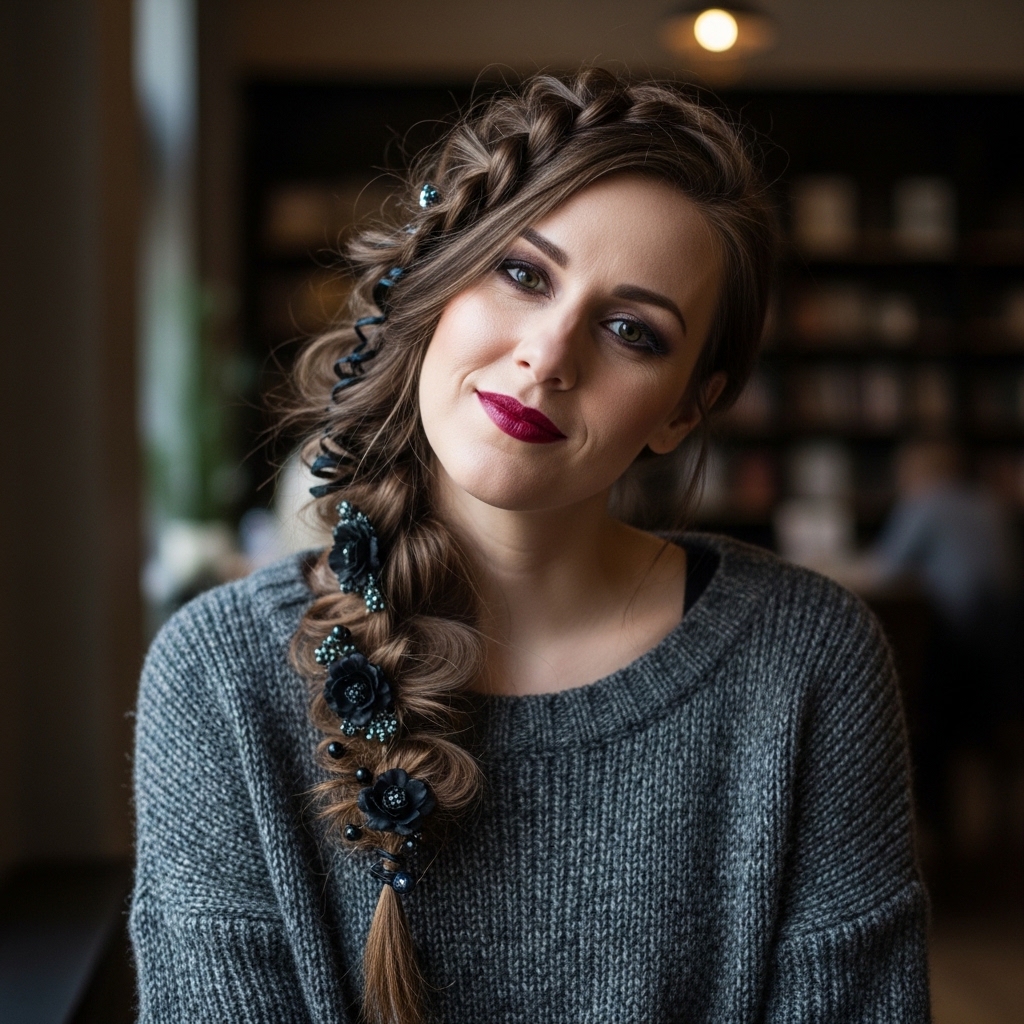
Optional: Add a Dark, Luxe Accessory
This is where you can personalize it. Take a dark silk scarf, a velvet ribbon, or a delicate chain accessory. You can tie it around the base of the braid where the elastic is.
Or, weave it into the braid itself as you go. This adds a touch of old money hair elegance or dark romantic detail that feels special but not over-the-top.
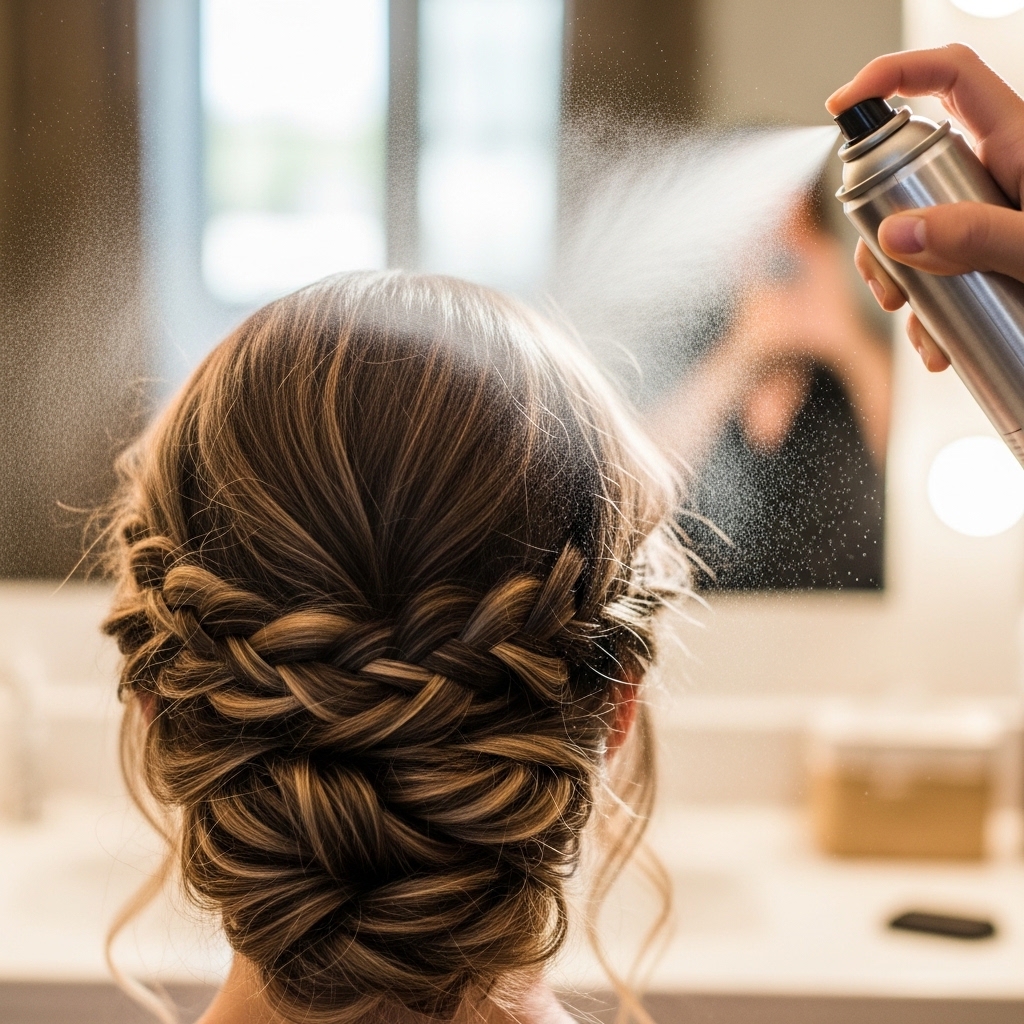
How to Make It Last All Day
A light mist of flexible-hold hairspray all over will lock in the texture without making it crispy. Focus on the front pieces and the crown.
If you have very silky hair, use a texturizing spray instead and crinkle the braid with your hands after spraying. Tuck a few bobby pins around the elastic at the nape if you feel any slipping.
Adapting This Braid for Shorter Hair
If you have a bob, lob, or asymmetrical lob, you can still do this! Start by twisting the hair at your temple back, incorporating more hair as you go, creating a small, soft braid along the side.
Secure it behind your ear with a bobby pin. It becomes more of an accent braid than a full one, but it gives the same romantic goth vibe. It pairs beautifully with a hime cut or blunt fringe.
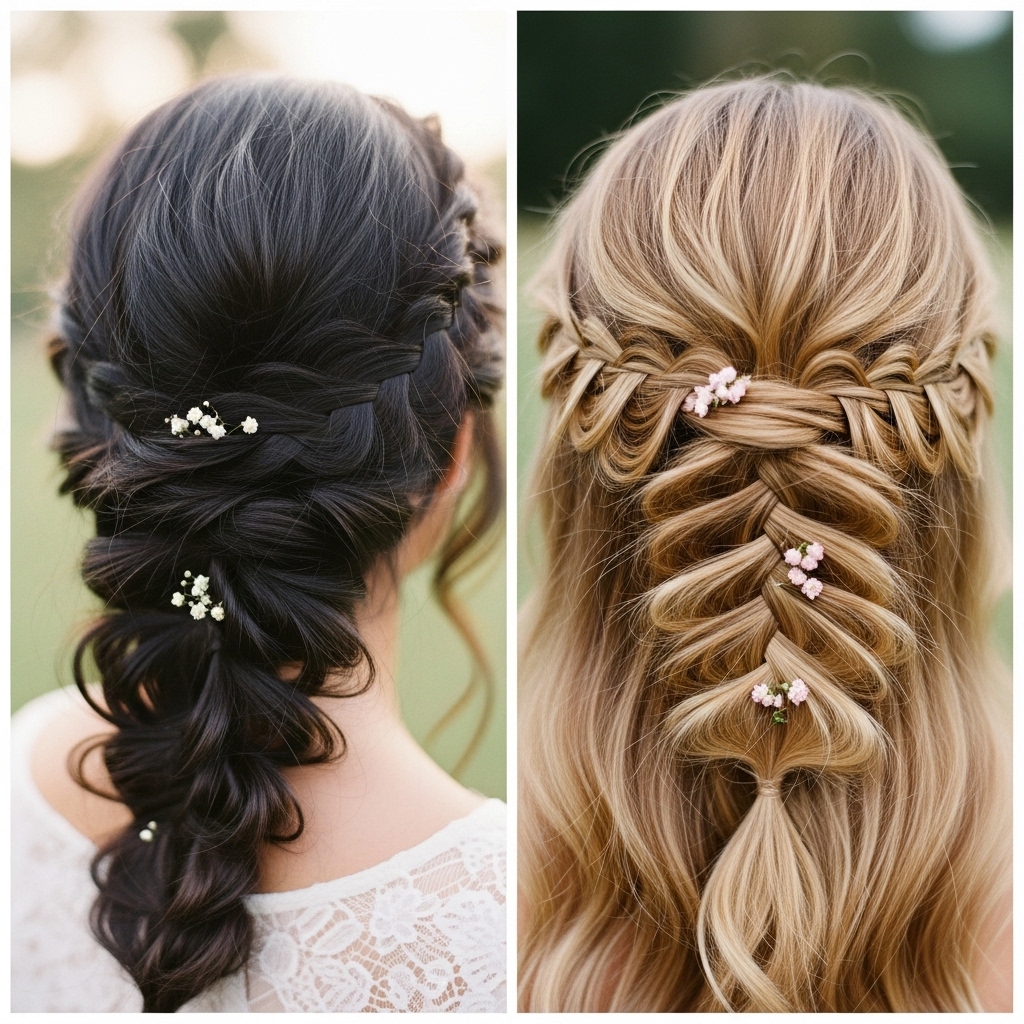
Pairing with Different Hair Colors
This braid looks stunning on every hair color. On dark brunettes and black hair, it feels classic and vampy. On blondes or redheads, it has a beautiful, ethereal fairy-tale quality.
If you have highlighted hair, the loose braid will show off the dimension in your color beautifully. It’s a great way to add interest to a solid quiet luxury bob color.
From Day to Night in Seconds
Wore this all day and now have dinner plans? The upgrade is simple. Add a more dramatic accessory—think a jeweled pin or a black satin bow.
Smooth the front pieces with a tiny bit of pomade for a sleeker feel, or curl them more deliberately. A swipe of bold lipstick instantly elevates the entire look from casual to cool-girl evening.
Common Mistakes & How to Fix Them
The biggest mistake is braiding too tight. If you do, just tug on the braid loops to loosen it. Another is making it too neat. Tousle it! Pull out more pieces.
If your braid feels too thin, try braiding with slightly damp, texturized hair. And if it slips, use a second clear elastic halfway down for extra security hidden inside the braid.
Why This Fits the “Quiet Luxury” Vibe
Quiet luxury is about impeccable quality and subtlety. This hairstyle fits because it looks expensive and intentional without being loud. It’s crafted, not careless.
It uses simple techniques to create a complex-looking result. It’s the hair version of a perfect cashmere sweater—understated, feels amazing, and always looks right.
Mixing Trends: Glitchy Glam & Romantic Goth
Glitchy glam hair is all about intentional imperfection and digital-age texture. You can blend it with this romantic goth braid by adding more piece-y, separated ends.
After braiding, use a tiny bit of wax or pomade on your fingertips to separate the very ends of the braid and those face-framing pieces, making them look more textured and “glitchy.”
Your New Go-To Style
I truly hope this becomes a staple in your rotation like it is in mine. It’s the perfect solution for a bad hair day, a busy morning, or just when you want to feel a little more “you.”
It proves that romantic goth hairstyles can be practical, fast, and totally wearable. It’s less about a subculture and more about a feeling—soft, strong, and a little mysterious.
More Easy Styles to Try
If you loved this, you might want to play with other accessible trends. A twisted, low vampire haircut bun is another favorite. Or, try accent braids with your current lob.
Exploring 2026 hairstyles early is all about adapting big moods into your real life. Look for styles that mix texture, asymmetry, and a touch of personal drama.
And that’s it, my friend. Your perfect, easy romantic goth side braid. It looks complicated to everyone else, but now you know the simple secret: keep it loose, keep it messy, and own that dark romantic vibe.
This is the kind of style that grows with you. Some days it’s just a braid. Other days, with the right lipstick and attitude, it’s a full moment. That’s the beauty of finding these easy, signature looks.
Did you try it? I want to see! Tag me on Instagram or save this post to Pinterest to keep this tutorial handy for your next rushed morning. What’s your favorite hair accessory to add to a style like this? Tell me in the comments below!

