
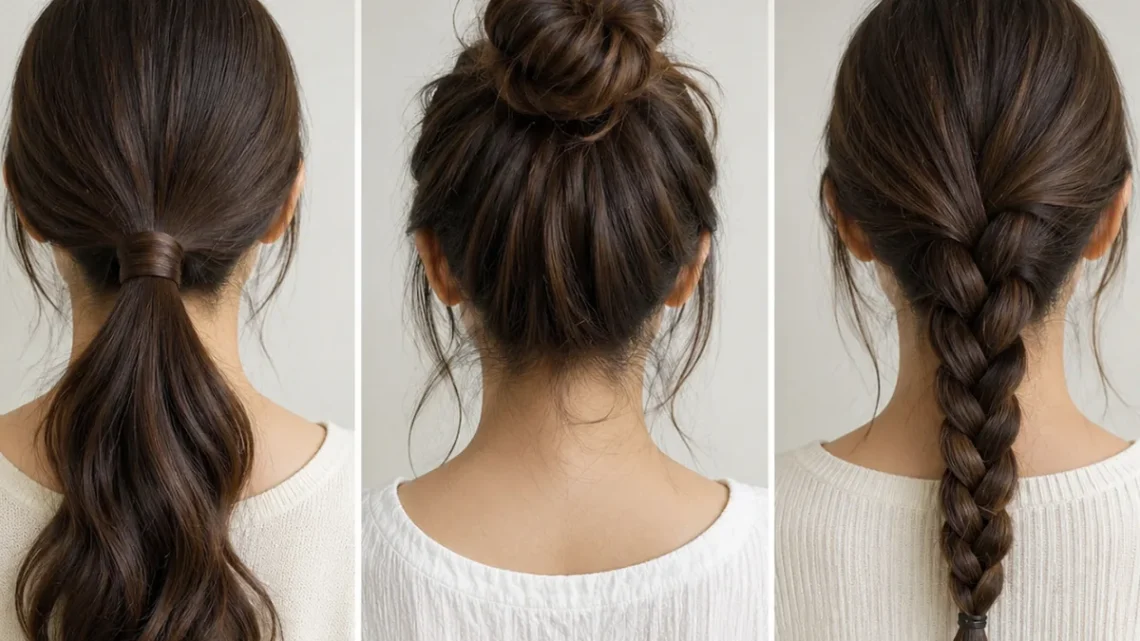
Some mornings give you forty-five minutes and a hot shower; most give you five. The alarm went off late, the kids need breakfast, the meeting starts in twenty minutes, and your hair is doing whatever it wants. That is the exact moment quick hairstyles for busy mornings earn their keep. The styles in this guide are not the ones that look good only in a salon chair — they are the ones that survive a real morning: a bus ride, a helmet, a gym bag, a coffee spill, and a full day of work after that.
This guide starts with eight practical explainers — the five-minute rule, no-heat styles, second-day hair savers, one-tool styles, night-before prep, styles by hair length, the two-minute toolkit, and the rushed-morning mistakes that cost you more time than they save — then walks through 36 quick hairstyles for busy mornings, from the five-minute low bun and the claw clip twist to overnight braid waves and the gym-to-office ponytail. Every style notes who it suits, how long it really takes, what can go wrong, and the one trick that makes it look finished instead of frantic.
The Five-Minute Rule: How to Look Done When You Have No Time
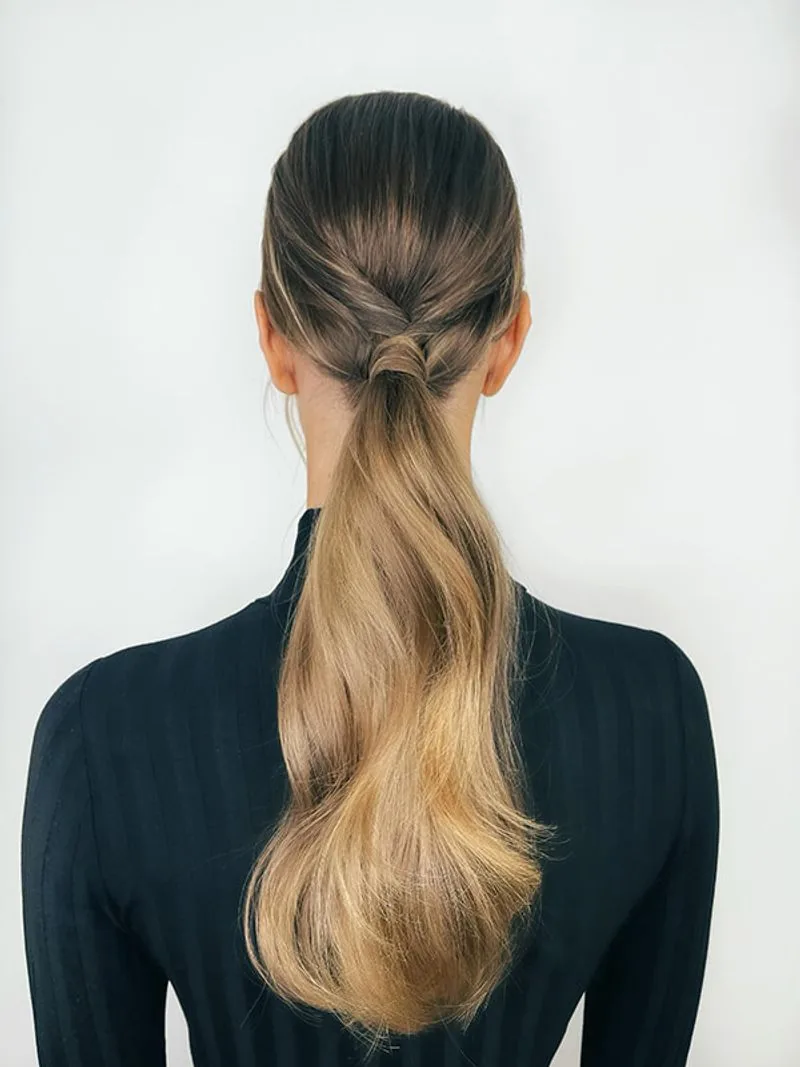
The five-minute rule is simple: if a style takes longer than five minutes on a normal morning, it is not a busy-morning style, no matter how pretty it looks in a tutorial. The trick is to stop chasing perfection and start chasing structure. One clean parting, one secure anchor point — a bun, a clip, a braid — and two loose pieces around the face will read as “done” from across a room, even if the back is not flawless. Nobody in your meeting is inspecting the back of your head.
Why it helps: a five-minute ceiling forces you to choose styles that forgive a shaky hand and a moving bus. Best for: anyone who regularly has less time than they planned, which is nearly everyone. How to use it: time yourself twice on a calm weekend, then trust that time on a rushed morning — a style you have timed feels faster than one you are guessing at. Common mistake: starting a new, complicated style on the morning you need it most; busy mornings are for styles you have already practised once.
No-Heat Styles: The Fastest Way Out the Door
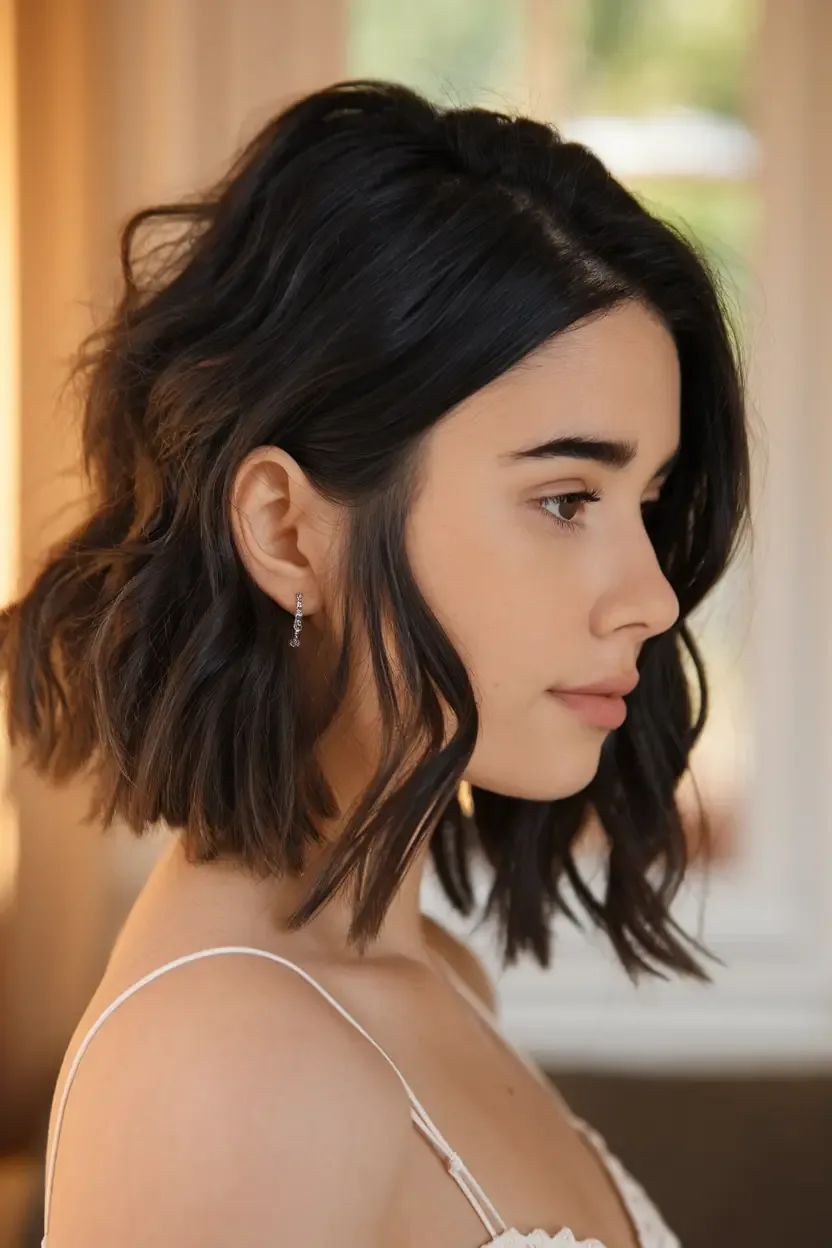
No-heat styles are the busy morning’s best friend, because they skip the slowest step of all: waiting for a tool to warm up and then working through your hair section by section. A twist, a braid, a clip or a bun uses your hair’s natural texture instead of fighting it, so you can build the style with your fingers in front of any mirror. They are also kinder to your hair over a whole week of rushed mornings, when daily heat would leave the ends dry and frizzy by Friday.
Who it suits: wavy and curly hair most of all, since the natural texture does half the styling, but straight hair works too with a little texture spray. Pros: faster, healthier, and no tool to forget in a hotel room. Cons: less polish than a blowout, and very straight, slippery hair may need an extra pin. Quick verdict: if you only learn one category from this guide, make it the no-heat styles — they are the ones you will actually use on a Tuesday.
Second-Day Hair Savers: When Washing Is Not an Option
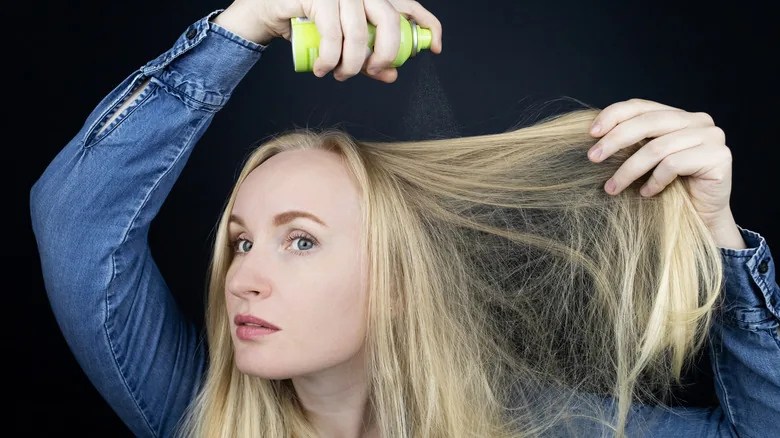
Second-day hair is not a problem to fix; it is a head start. Hair that was washed yesterday has grip, texture and a little natural oil at the roots, which means braids hold better, buns stay put with fewer pins, and twists do not slide out the way freshly washed hair does. A puff of dry shampoo at the roots, a quick massage with your fingertips, and thirty seconds of waiting is all the washing this hair needs — and most of the styles in this guide actually work better on it than on clean hair.
How to style: dry shampoo first, then style — never the other way round, or the powder sits on top of the finished style. Best for: updos, braids and twisted styles, which all grip better on day-two texture. What to avoid: loading the ends with heavy oil or serum, which drags second-day hair flat, and re-washing just the fringe, which creates a wet patch that never matches the rest. Cost and time: a can of dry shampoo costs a few dollars and saves ten minutes a morning.
One-Tool Styles: What You Can Do with Just a Brush or One Clip
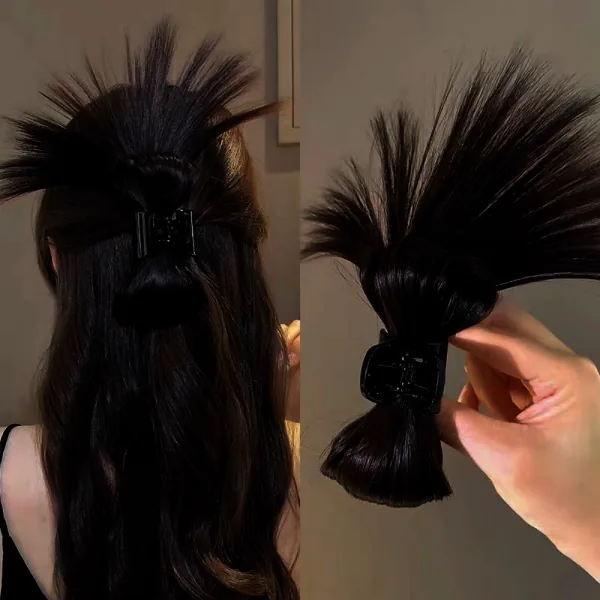
One-tool styles are built on a hard truth about rushed mornings: every extra tool you reach for is another minute gone and another thing to lose. A single claw clip, one elastic, or just a brush and your fingers can carry a whole style if you let them. The claw clip twist, the low ponytail with a wrapped base, and the headband tuck all need exactly one item, and they all look finished because the tool itself becomes part of the look. Keep that one tool by the mirror, not in a drawer.
Best for: anyone whose mornings involve a commute, a school run, or a bag that already weighs too much. How to choose: match the tool to your hair — a large claw clip for thick hair, a small one for fine hair, a snag-free elastic for hair that tangles. Common mistake: buying a clip that is too small for your hair and then fighting it for three minutes; a clip that fits goes in once and stays. Maintenance: none — that is the point.
Prep the Night Before: Wake Up with the Work Already Done
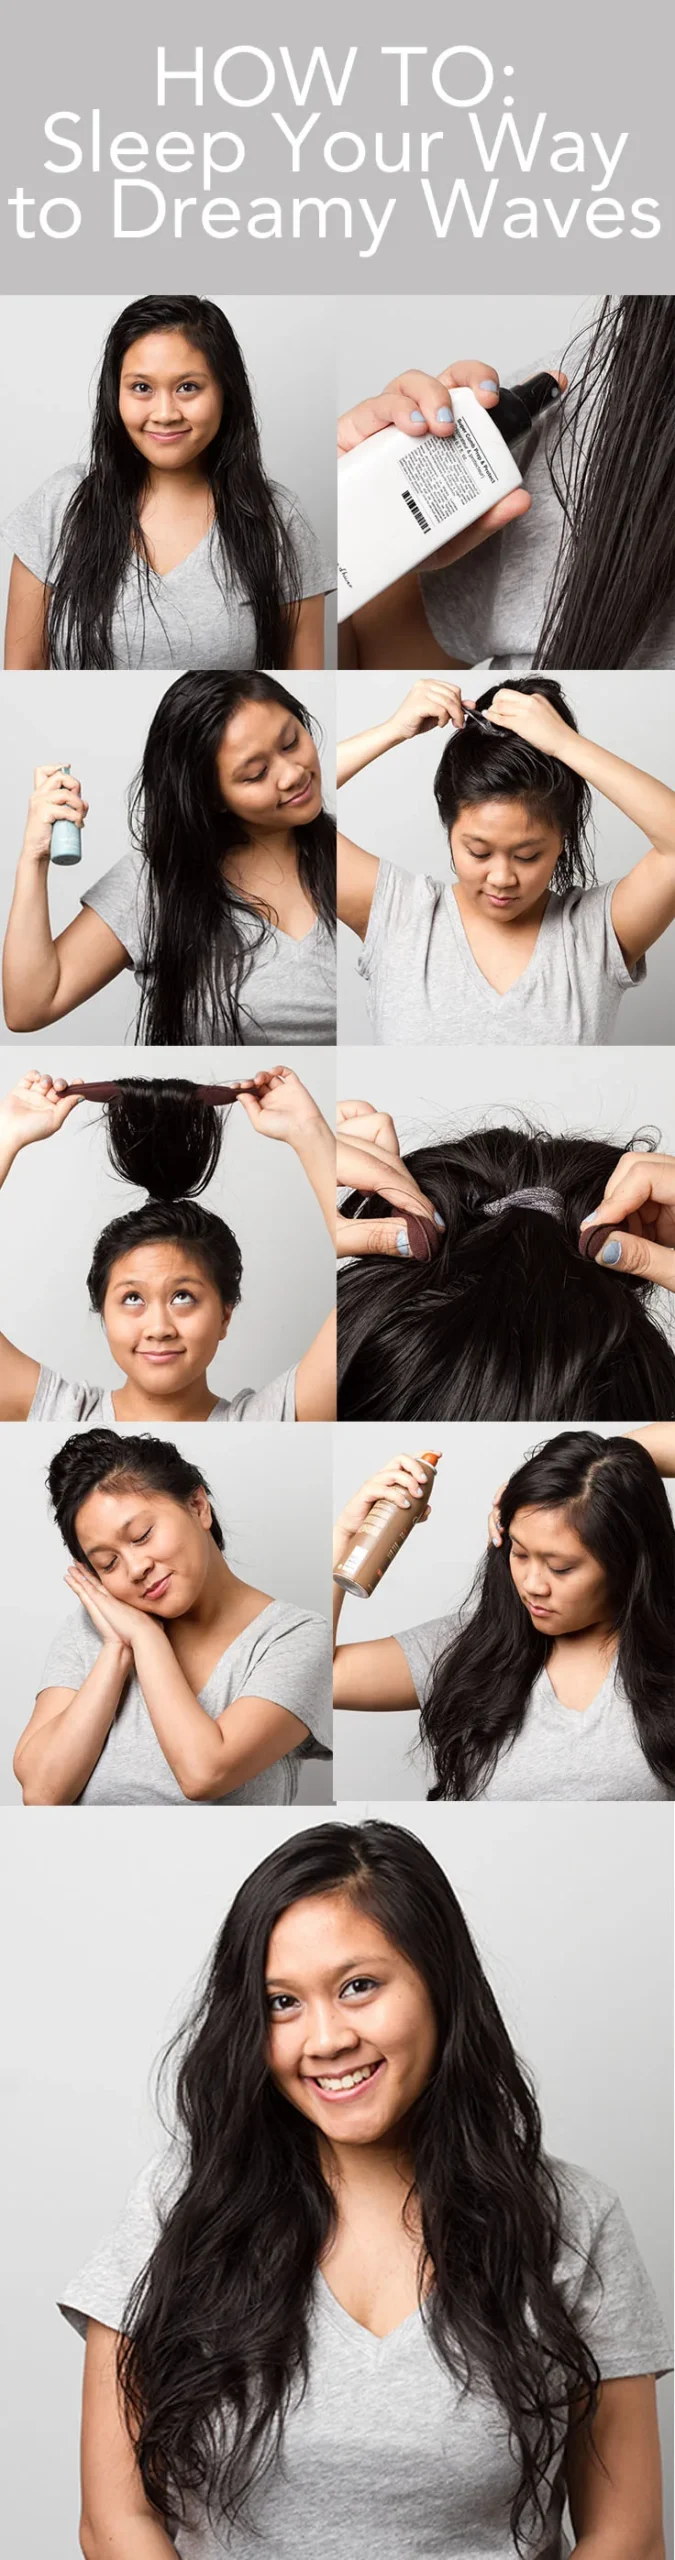
The fastest morning style is the one you did last night. A loose braid before bed gives you waves by morning; a high, loose bun gives you volume at the roots; a silk scarf or a satin pillowcase keeps the whole thing from turning into frizz overnight. None of this takes more than three minutes at night, when you actually have three minutes, and it turns a five-minute morning into a two-minute one. The night-before trick is the only real shortcut in this guide, because it moves the work to the part of the day when you are not in a hurry.
Who it suits: wavy and curly hair, which holds an overnight set beautifully, and anyone with a morning that starts before six. How to do it: braid damp hair loosely, tie it with a soft scrunchie, and sleep on a satin pillowcase or with a silk scarf. What to avoid: braiding soaking-wet hair, which stays damp until noon, and tying anything tightly, which leaves a dent you cannot brush out. Quick verdict: two minutes tonight buys you ten tomorrow — the best trade in this whole guide.
Quick Styles by Hair Length: Short, Medium and Long
Length decides which quick styles are actually quick. Short hair is fastest of all — a twist, a clip and a little texture spray, and you are done — but it has fewer updo options, so the styles lean on accessories and texture. Medium hair is the sweet spot: long enough for a bun, a braid and a ponytail, short enough to gather in one handful. Long hair has the most options and the slowest mornings, because gathering it takes longer and every style needs more pins to hold.
Best for: matching the style to what you actually have, instead of fighting your length. Short hair: twists, pins, headbands and the half-up. Medium hair: the claw clip twist, the low bun and the bubble ponytail. Long hair: braids, wrapped ponytails and the sock bun. Who should avoid what: very short hair should skip full buns, and very long hair should skip styles that need the hair to stay put with one pin.
The Two-Minute Toolkit: What to Keep by the Mirror
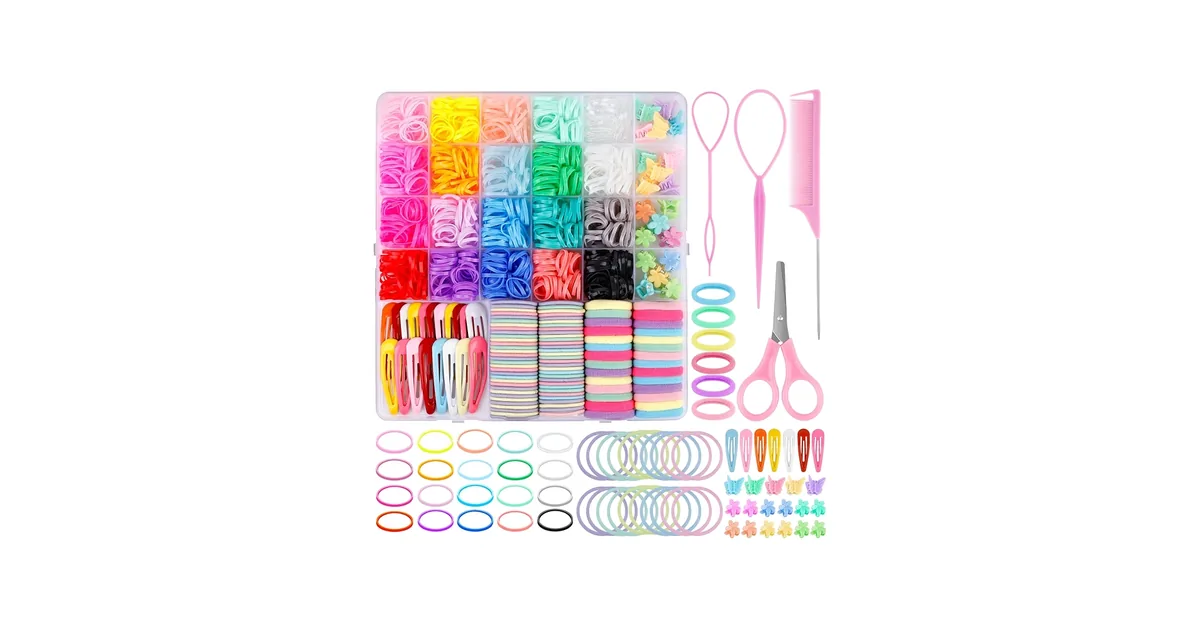
A busy-morning toolkit is not a drawer full of gadgets; it is five things in one spot by the mirror. Two snag-free elastics, one claw clip that fits your hair, four bobby pins, a small bottle of dry shampoo, and a travel-size texture spray. That is the whole kit, and it covers every style in this guide. The point is not owning the tools — it is knowing exactly where they are at 7:04 in the morning, when you are already late and cannot afford to search a drawer.
Why it helps: hunting for a missing elastic is the most common way a two-minute style becomes a ten-minute one. How to set it up: a small tray or a mug by the mirror, restocked every Sunday night. Cost and time: under ten dollars for the whole kit, and it lasts for months. Common mistake: buying cheap elastics with a metal join, which snag and snap hair — spend the extra dollar on snag-free ones and your hair will thank you by Friday.
Rushed-Morning Mistakes That Cost You More Time

Most busy mornings are not ruined by the hairstyle; they are ruined by the three minutes spent undoing the first attempt. The classic mistakes are all the same: starting with wet hair and a plan that needs dry hair, using a product that needs ten minutes to work in a two-minute window, and choosing a style you have never tried before on the day you need it most. Each one feels small, and each one costs you the morning. The fix is boring but reliable: pick the style before you pick up the brush, and never start a style you cannot finish in the time you actually have.
What to avoid: restyling from scratch instead of rescuing what is there — a clip or a twist usually saves a failing style faster than starting over. Who should avoid it: anyone tempted to flat-iron their whole head at 7:30; a slicked-back bun takes ninety seconds and looks more polished anyway. Quick verdict: on a truly rushed morning, the best style is the one you can do with your eyes half-closed. Save the new ideas for the weekend.
1. The Five-Minute Low Bun
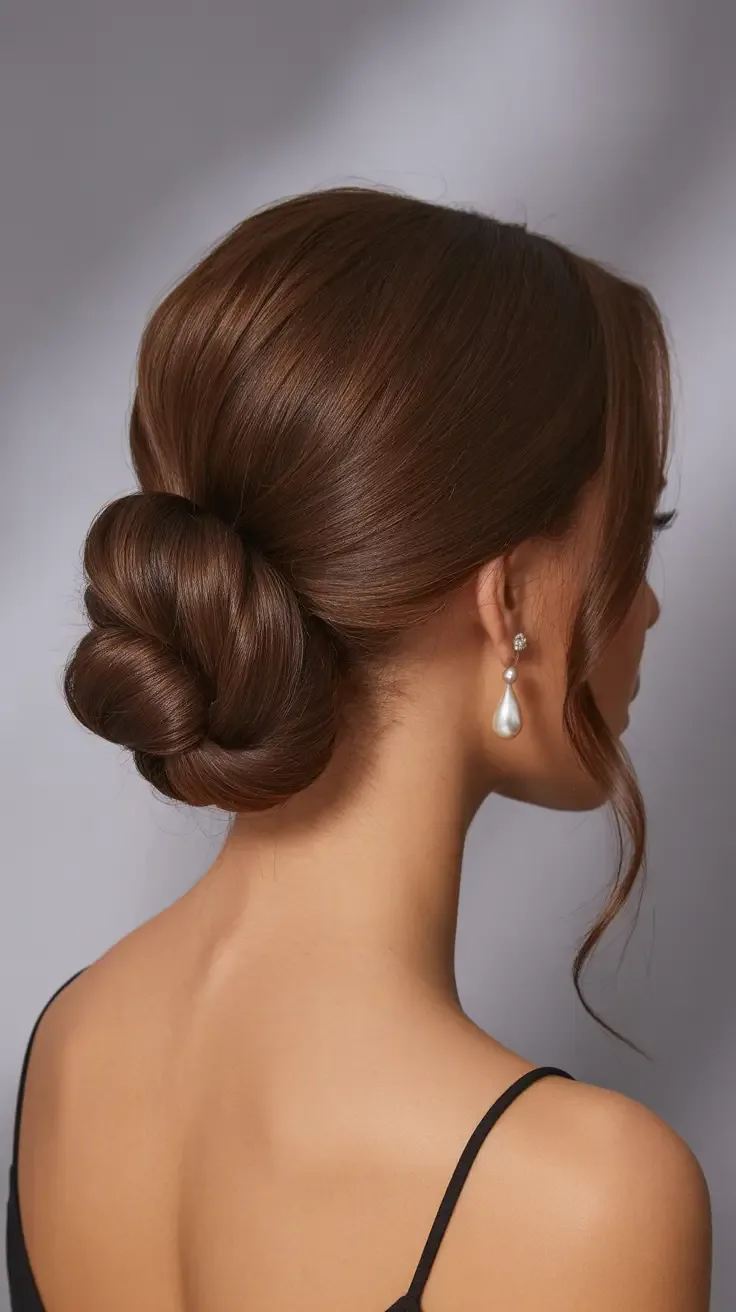
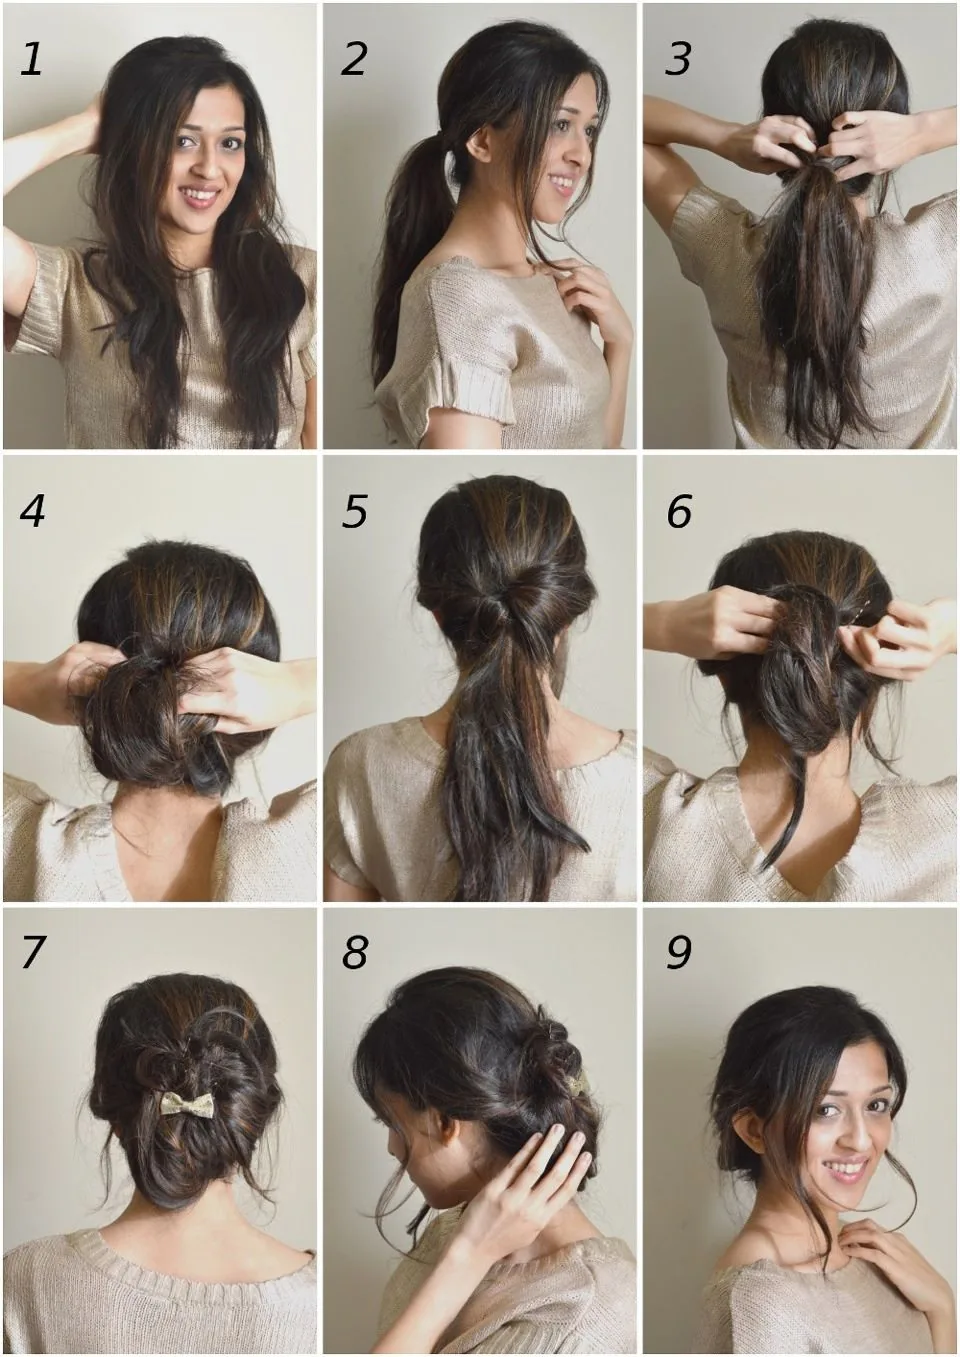
The five-minute low bun is the busy morning’s most reliable style: gather the hair low at the nape, twist it once, coil it into a bun, and pin it. It works on second-day hair, third-day hair, hair that would not behave for anything else, and it looks deliberate rather than desperate because a low bun reads as a choice. A few loose pieces pulled out around the face keep it soft, and the whole thing survives a commute, a helmet, and a long day at a desk.
Best for: medium to long hair, and anyone who needs to look polished with zero heat. How to style: brush the hair back, twist it into a rope, coil it flat against the head, and secure it with two pins in an X shape. What to ask your stylist: ask for a cut with enough length at the nape to gather, and layers that do not fall out of a low bun. Time: three to five minutes, and under two once you have done it a few times.
2. The Messy Top Knot
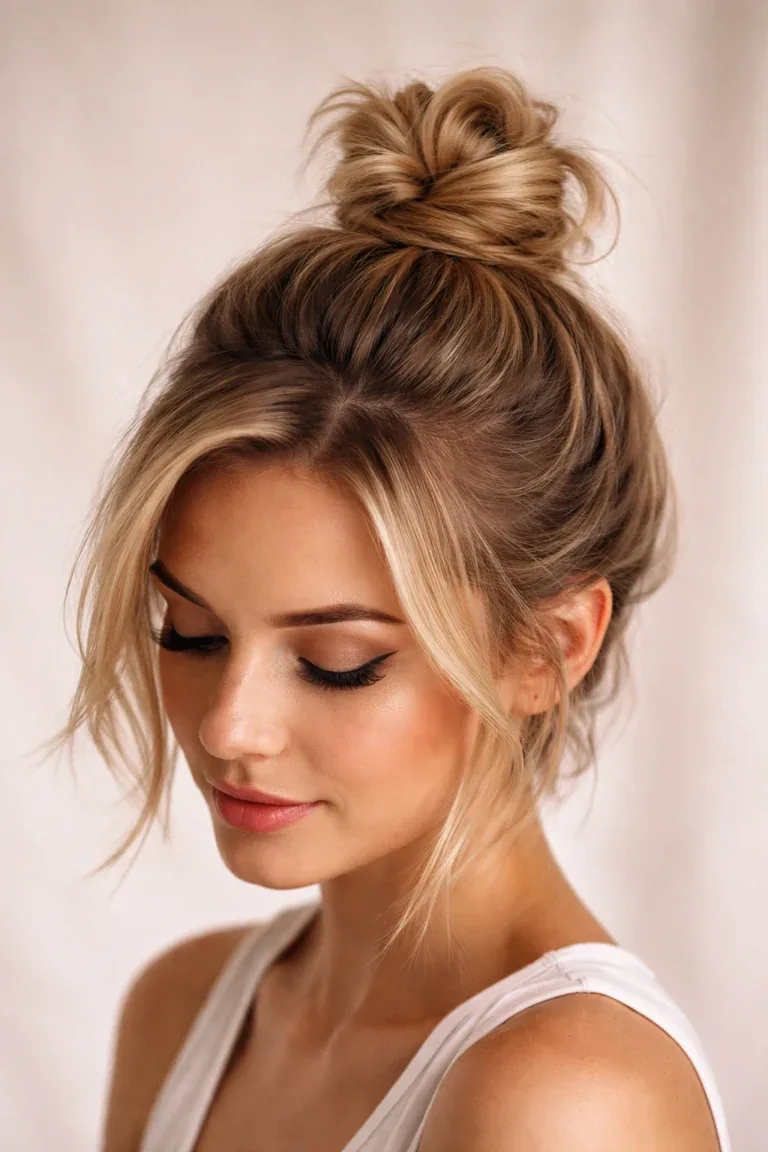
The messy top knot is the style that forgives everything: sleep creases, unwashed roots, a fringe that will not sit right. Gather the hair high, twist it loosely, wrap it around itself, and let the ends stick out wherever they like — the mess is the point. It keeps hair off your face and off your neck, which matters on a hot morning, and it looks intentional because the height and the looseness are a look in themselves, not an accident you are hiding.
Who it suits: medium to long hair, and anyone whose hair has enough texture to hold a loose knot. How to style: flip the head upside down, gather high, twist loosely, wrap and pin once. Common mistake: pulling it too tight, which turns a relaxed knot into a severe ballet bun and gives you a headache by ten. Quick verdict: the fastest genuinely good-looking style in this guide — two minutes, one elastic, one pin.
3. The Sleek Low Ponytail
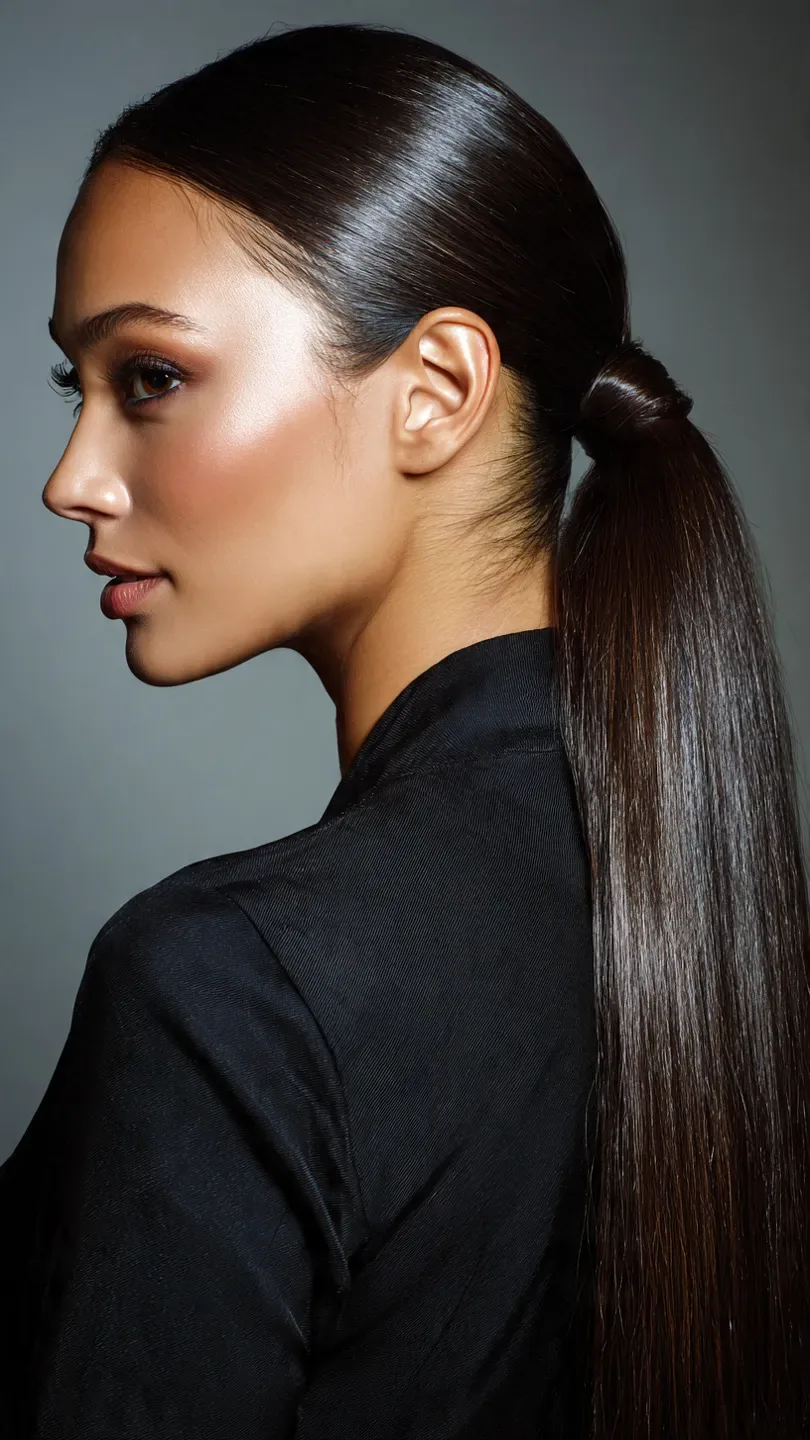
A sleek low ponytail is the office version of a busy morning: it takes three minutes, uses no heat, and looks like you spent twenty. The secret is the finish, not the ponytail itself — brush the hair smooth, secure it low, then take a thin strand from underneath and wrap it around the elastic so the band disappears. A drop of serum on the surface smooths flyaways, and the result is the kind of quiet polish that works in a boardroom and at a school gate.
Best for: straight and wavy hair, and professional mornings when a messy style would feel wrong. How to style: brush back with a little serum, secure low at the nape, wrap a strand around the base and pin it underneath. Pros: fast, polished, and it keeps every strand out of your face. Cons: very curly hair will need a brush-through first, and a centre part suits it better than a side part.
4. The High Ponytail with a Twist
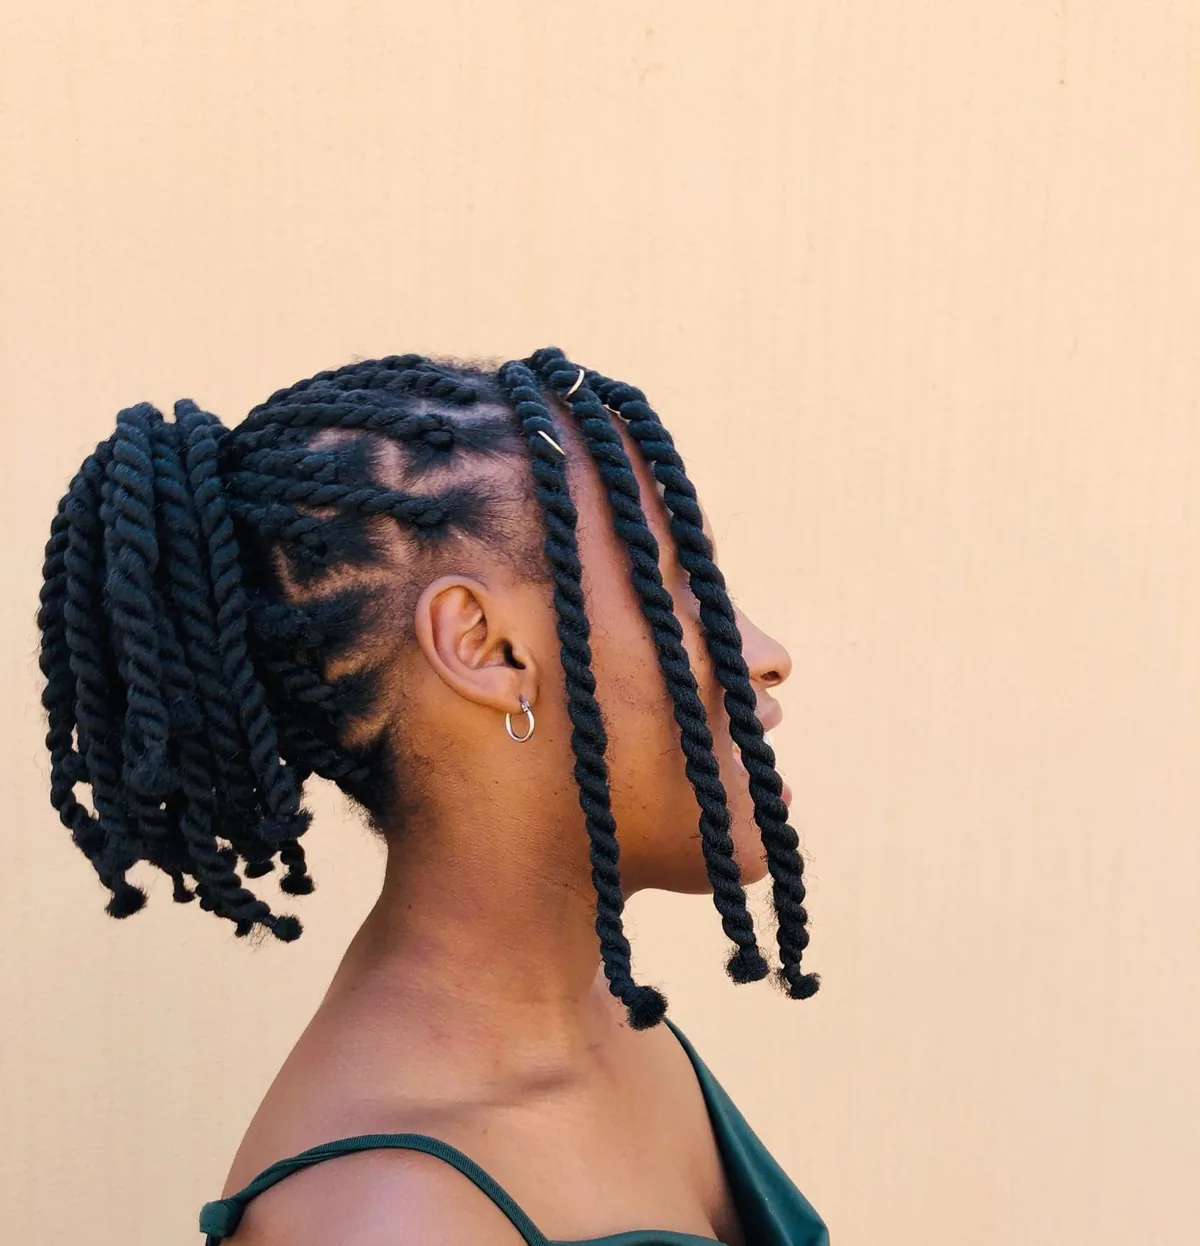
The high ponytail with a twist takes the plainest morning style and gives it one small upgrade: a twist. Gather the hair high, split off a section at the front, twist it back, and pin it into the ponytail base, so the front has shape instead of a flat sweep. The height lifts the face, the twist stops the style from looking like you just threw your hair up, and the whole thing still takes under four minutes, which is the point.
Who it suits: long and medium hair, and anyone who wants a ponytail that looks styled rather than rushed. How to style: secure the ponytail high, twist a front section back over the crown, and pin it at the base. What to avoid: pulling the ponytail so tight it hurts — a high ponytail should feel secure, not like a facelift. Maintenance: none; re-tighten once at lunch if it loosens.
5. The Half-Up Twist
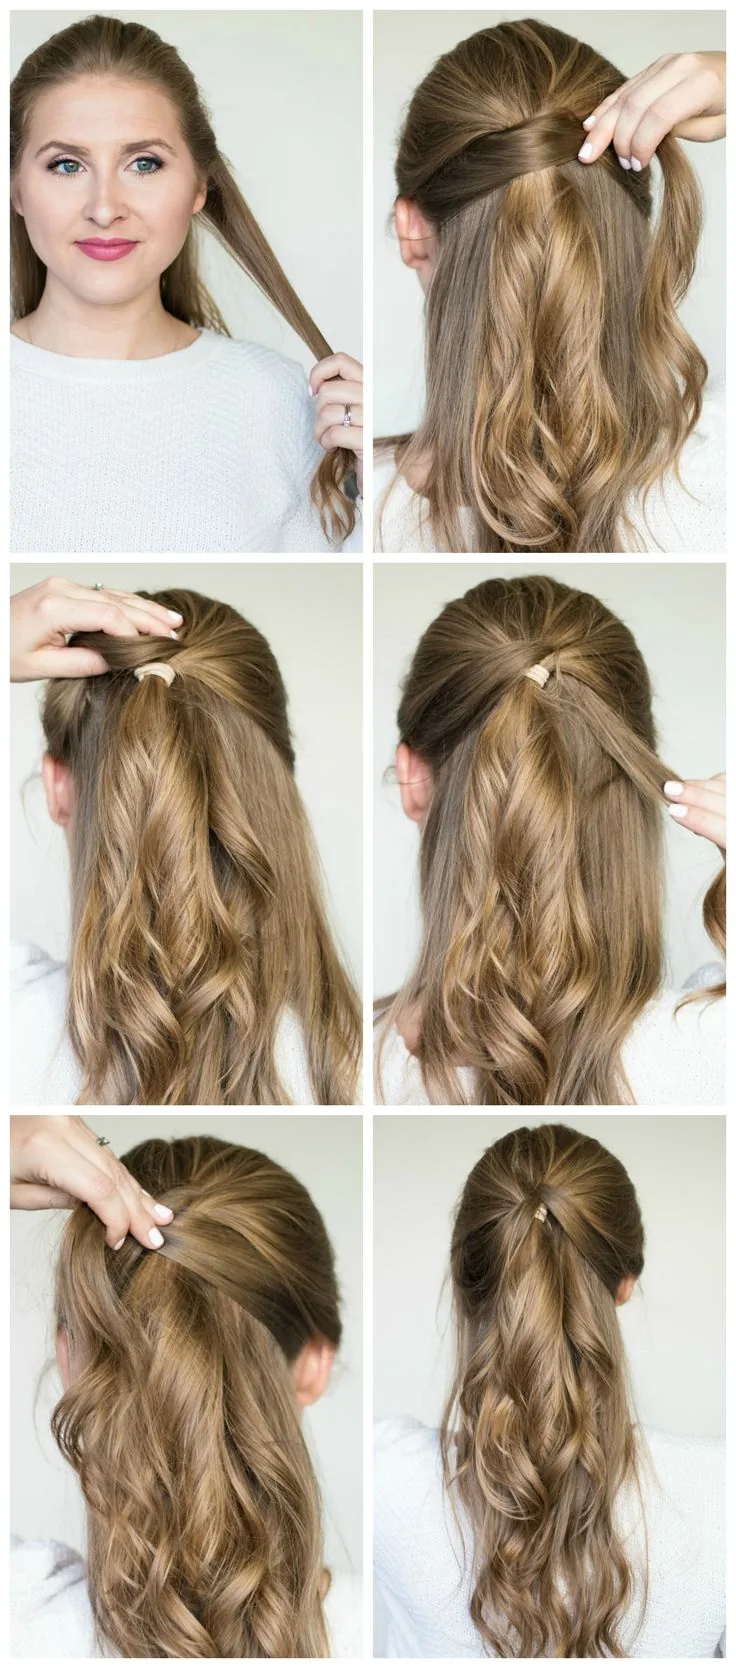
The half-up twist is the compromise style: hair down, face clear. Take a section from each side, twist them toward the back, and pin them together, and you have a style that keeps the front out of your eyes while the rest of your hair stays loose. It works on hair that is too short for a bun and too long to leave alone, and it is the quickest way to make open hair look like you did something to it on purpose.
Best for: short to medium hair, and mornings when you want your hair down but out of your face. How to style: twist each side section back, cross them at the back of the head, and pin with two bobby pins in an X. Cost and time: two minutes, two pins, no products needed. Common mistake: taking sections that are too thick, which pull loose by mid-morning — thinner twists hold longer.
6. The Claw Clip Twist
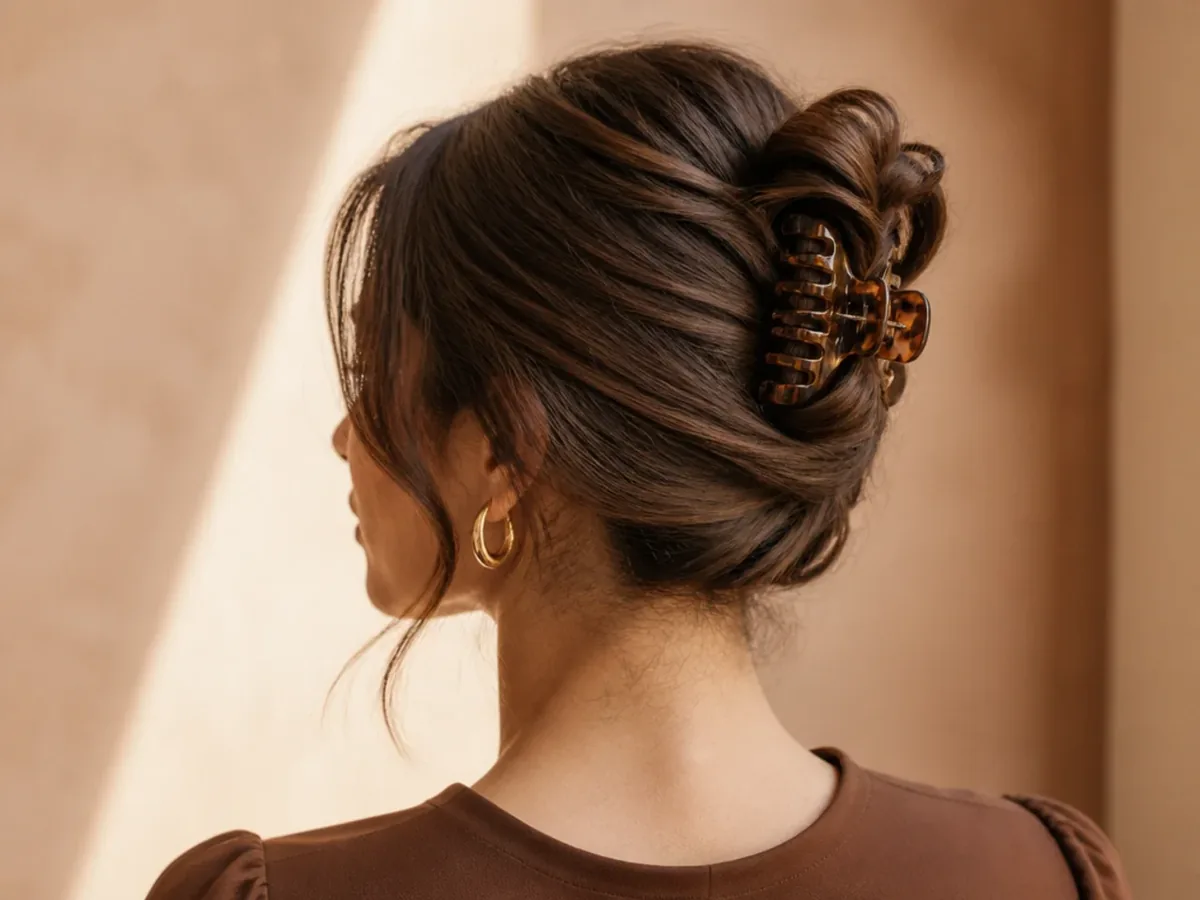
The claw clip twist is the single most useful busy-morning style ever invented, and it takes about forty seconds. Gather the hair, twist it up the back of the head, fold it over, and clamp the clip over the fold. The clip does all the holding, the twist does all the looking good, and the loose ends at the top give it the relaxed finish that makes it look like a style rather than a chore. It works on second-day hair, damp hair, and hair that refused every other idea this morning.
Who it suits: medium to long hair, especially thick hair that eats elastics for breakfast. How to style: twist up, fold over, clip once, and pull out two face-framing pieces. Who should avoid it: very fine, short hair, where a large clip overwhelms the style — use a mini clip instead. Quick verdict: if you buy one thing for busy mornings, buy a claw clip that actually fits your hair.
7. The Faux French Twist
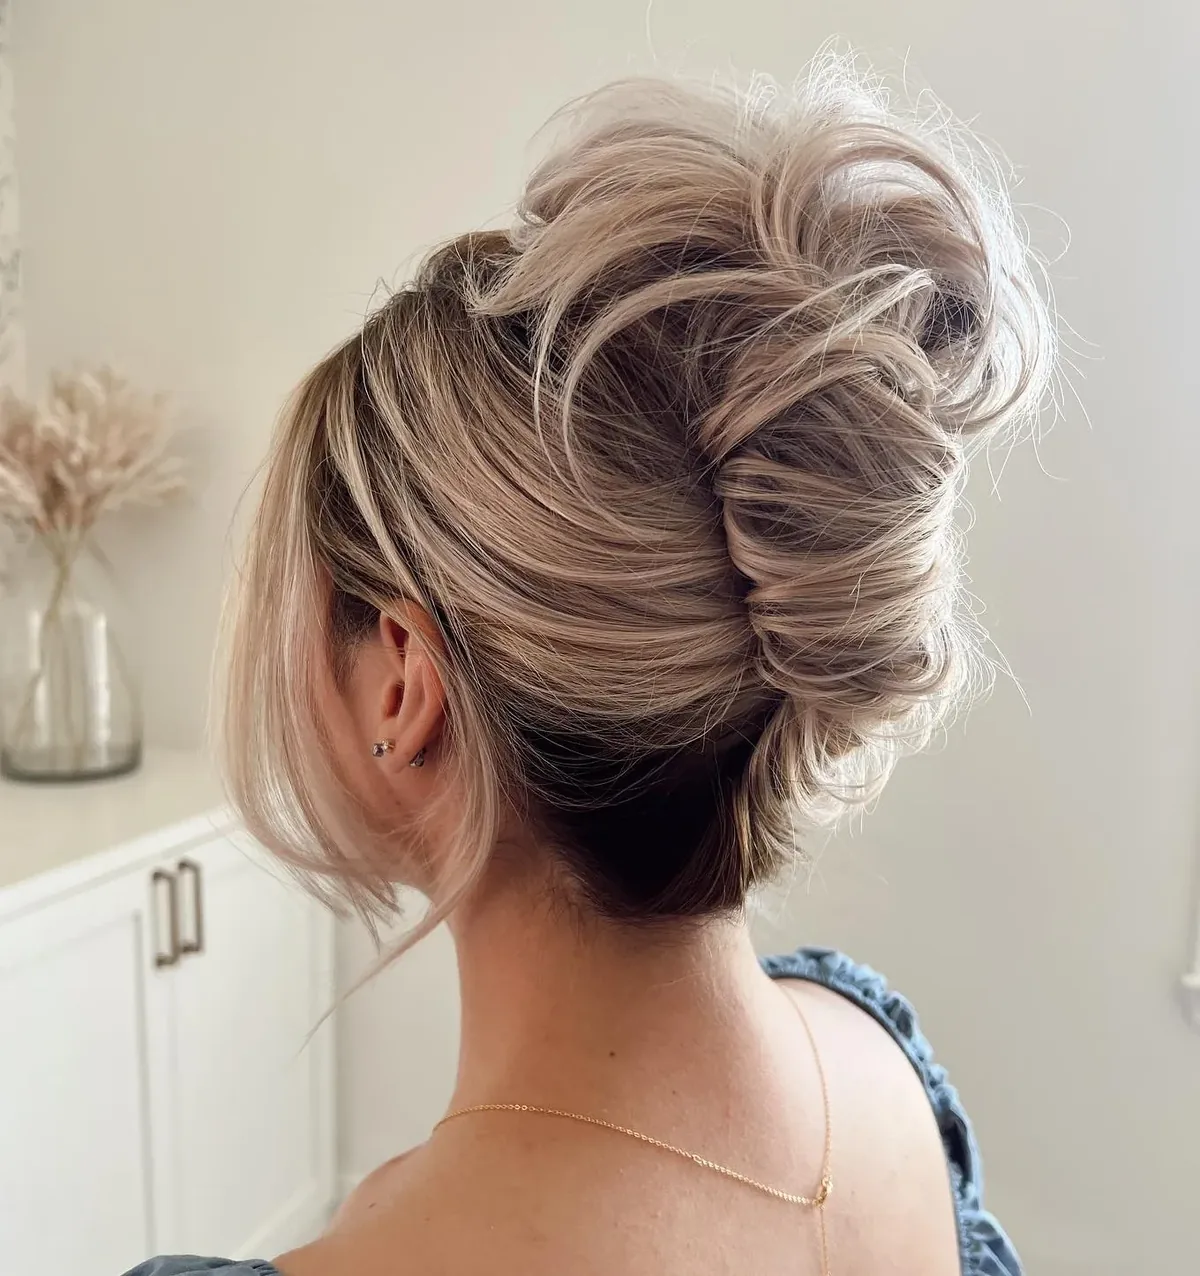
A real French twist takes practice, pins, and patience — none of which a busy morning offers. The faux version cheats beautifully: gather the hair low, twist it up the back of the head, tuck the ends in, and secure it with a large claw clip or three pins. From the front it reads as a classic French twist; from the back it reads as a neat, rolled updo; and nobody can tell the difference at normal conversation distance, which is the only distance that counts.
Best for: medium to long hair, and mornings that need to look formal without a formal amount of time. How to style: twist the hair up, tuck the ends under the roll, and pin at the top, middle and bottom. Pros: elegant, secure, and no heat. Cons: it needs three pins minimum, and very layered hair may need a little texture spray to stop pieces escaping.
8. The Bubble Ponytail
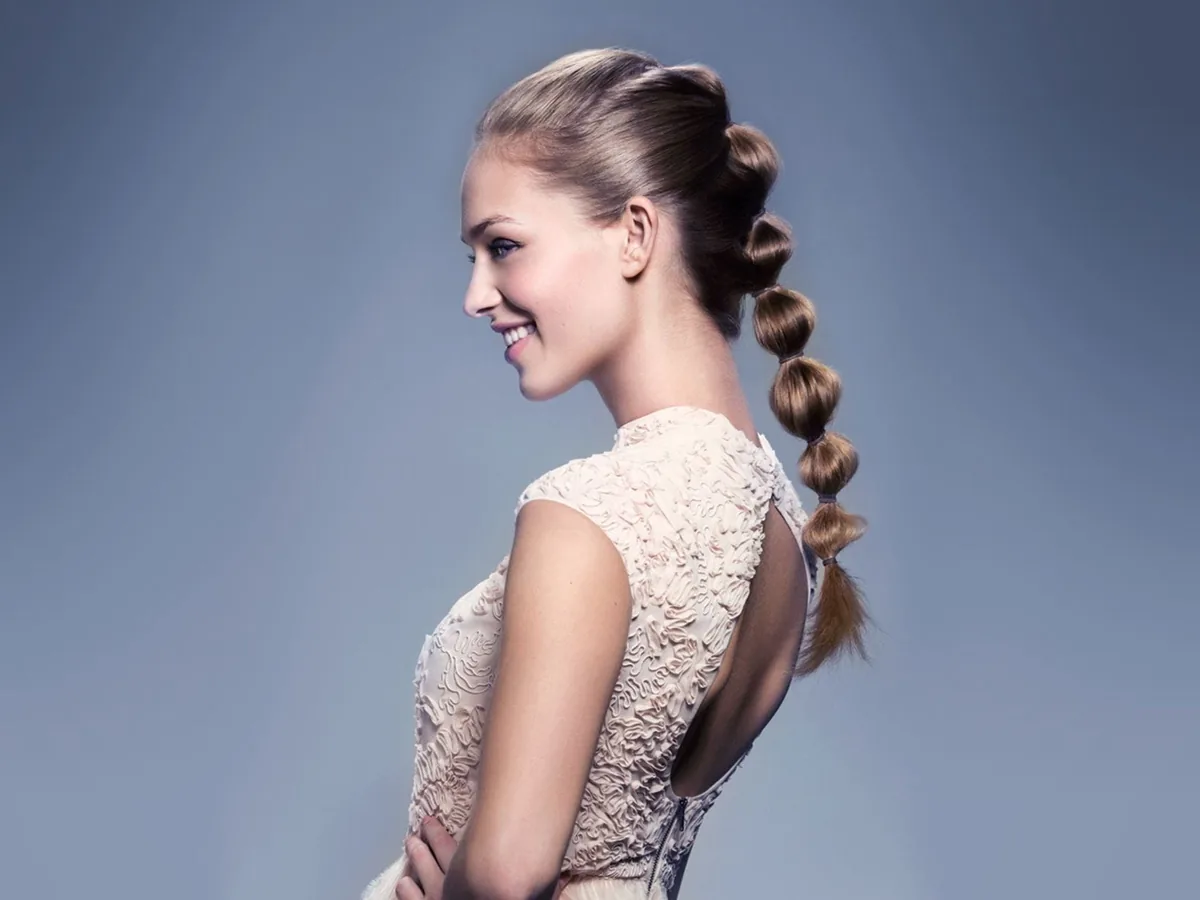
The bubble ponytail turns a plain ponytail into a style with five minutes and four extra elastics. Secure a high or low ponytail, then add elastics down its length, gently pulling each section outward to make a bubble. It looks playful and deliberate, it holds all day because each bubble is its own anchor, and it works brilliantly on long hair that would otherwise just hang there. It is also one of the few quick styles that actually looks better by lunchtime, once the bubbles have softened.
Who it suits: long hair, and anyone who wants a ponytail with personality. How to style: space the elastics evenly, puff each section gently with your fingers, and keep the bubbles smaller near the top. Common mistake: pulling the bubbles too hard, which makes them collapse — a gentle tug is enough. Time: four to five minutes for a full-length version, two for a short one with two bubbles.
9. The Two-Minute Side Braid
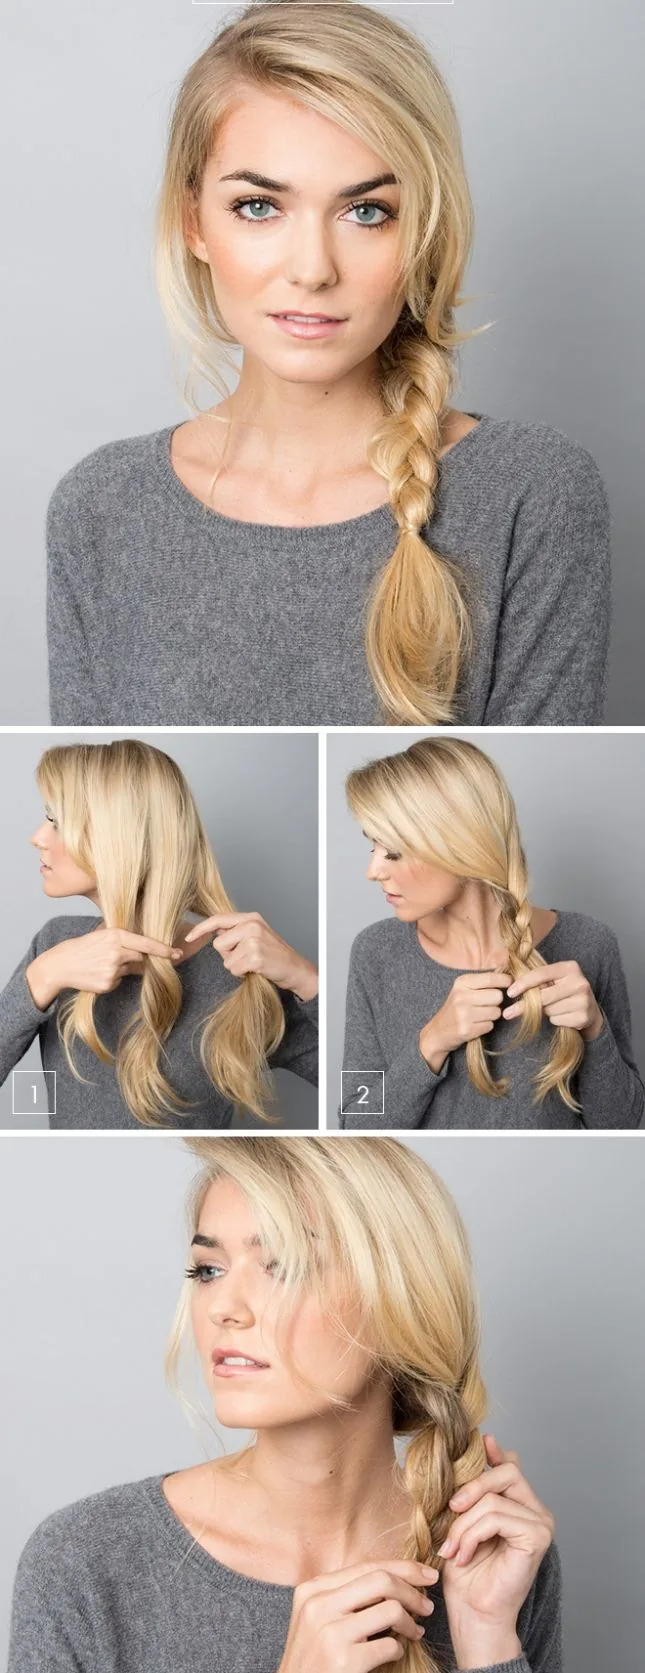
The two-minute side braid is the style for hair that will not cooperate with anything else. Sweep all the hair over one shoulder, braid it loosely, tie the end, and pull the braid gently wider so it looks full instead of thin. It keeps hair off your back and out of your way, it hides unwashed roots behind the sweep, and it works on hair that is too short for a bun and too tangled for a ponytail. A side braid also photographs well, which matters on the mornings you end up in a group photo you did not plan for.
Best for: medium to long hair, and second-day hair that already has grip. How to style: sweep, braid loosely, tie, and pancake the braid by tugging the edges outward. What to ask your stylist: ask for layers that blend into a braid rather than sticking out of it. Quick verdict: the most forgiving braid in this guide — a loose side braid looks good even when it is uneven.
10. The Braided Ponytail
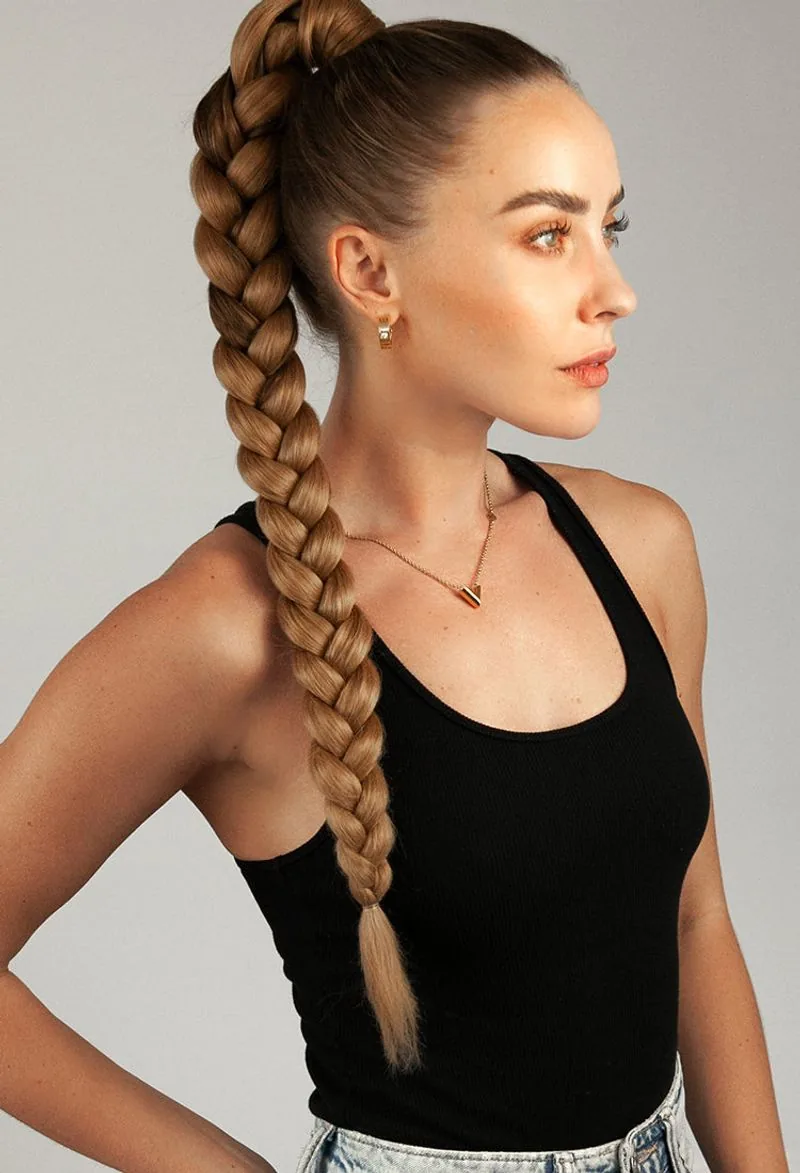
The braided ponytail is two styles in one: the lift of a high ponytail and the texture of a braid, with no extra time. Secure a ponytail first, then braid the tail itself and tie the end. The ponytail base keeps the braid from pulling, the braid keeps the ponytail from swinging into your face, and the whole thing survives a workout, a commute and a windy walk to the office. It is the style to choose when you need your hair completely out of the way but still want it to look like you tried.
Who it suits: long hair, and active mornings that end at the gym or on a bike. How to style: ponytail first, then a simple three-strand braid down the tail. Maintenance: none — it holds all day and usually looks fine the next morning too. Cost and time: three minutes, two elastics, and no products at all.
11. The Faux Fishtail
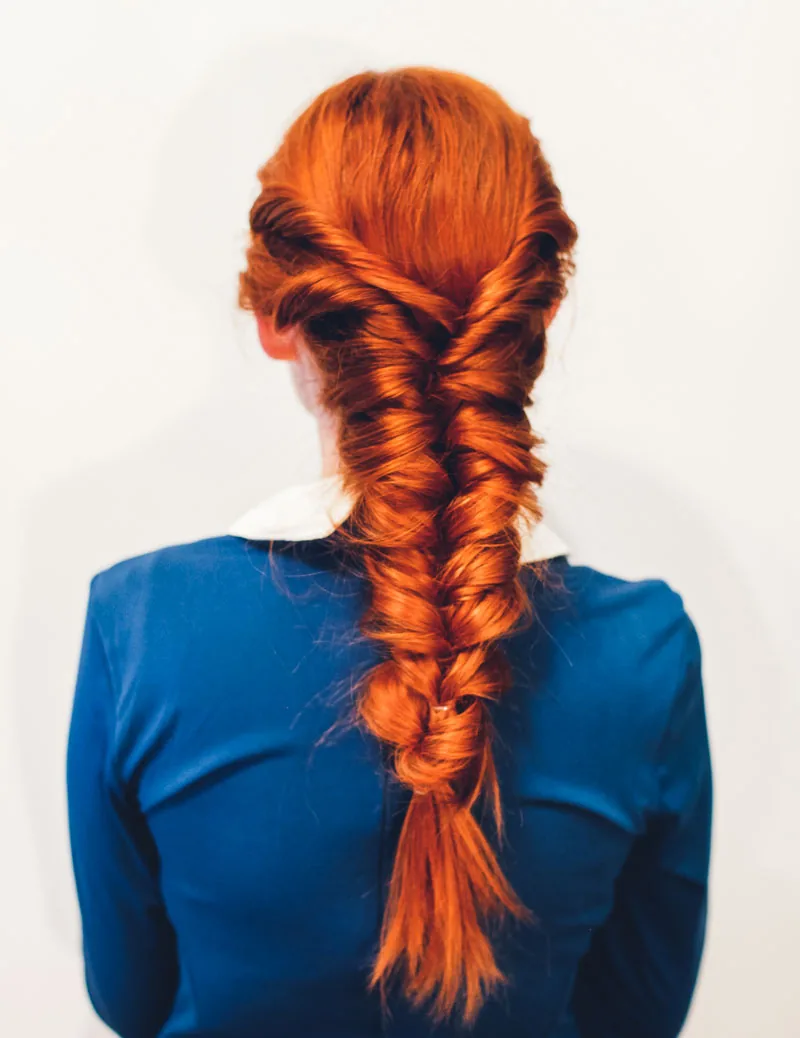
A real fishtail braid is beautiful and slow, which is why busy mornings need the faux version. Braid the hair in a simple three-strand braid, then pull small pieces out along the edges and cross them over, which mimics the woven look of a fishtail without the fiddly small sections. The result reads as a fishtail from a normal distance, it takes a third of the time, and it is far more forgiving — a faux fishtail that is a little loose just looks relaxed, while a real one that is a little loose looks unfinished.
Best for: medium to long hair, and anyone who loves the fishtail look but has never mastered the real thing. How to style: braid loosely, then tug small edge pieces across the braid to fake the weave. Pros: fast, forgiving, and it looks more intricate than it is. Cons: it does not hold as tightly as a real fishtail, so add an extra elastic at the end.
12. The Rope Braid
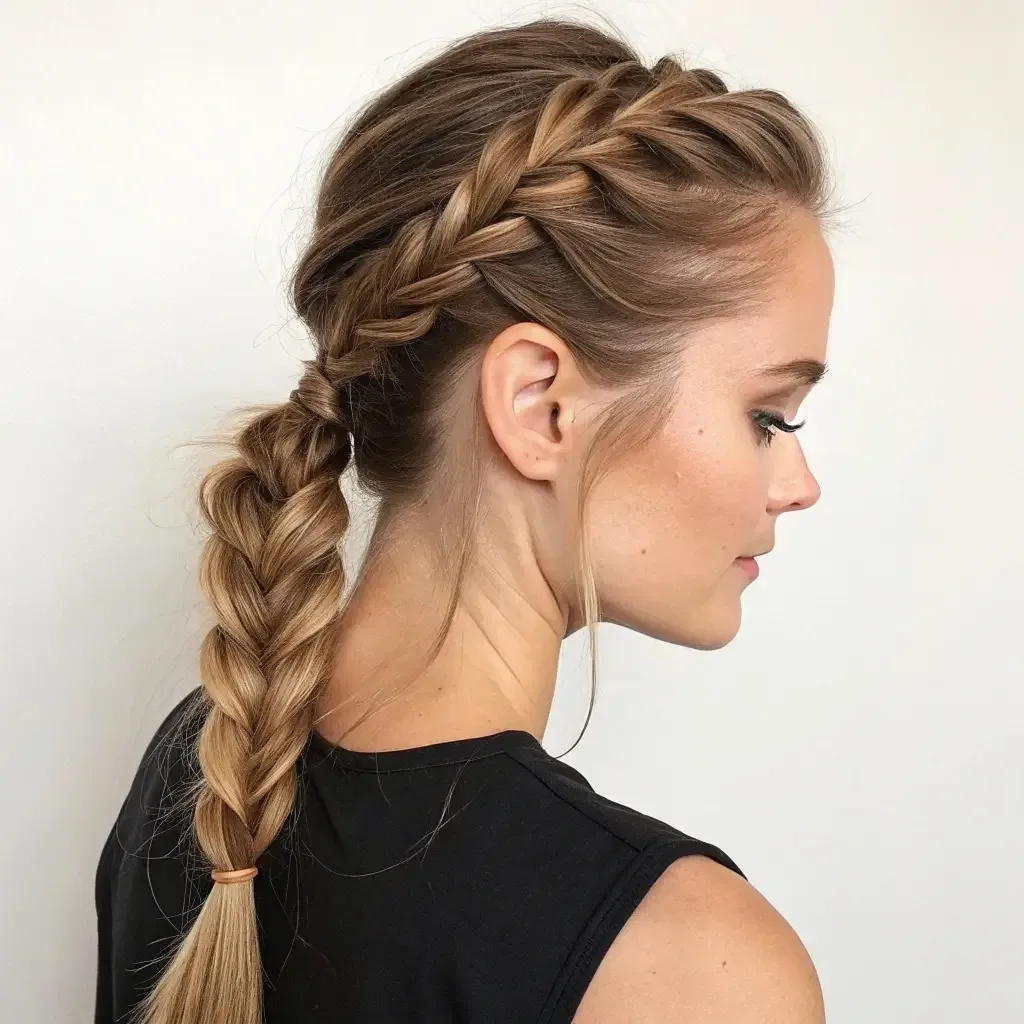
The rope braid is the fastest real braid there is: split the hair into two sections, twist each one the same way, then twist the two twists around each other in the opposite direction. Two twists, one wrap, and you have a braid that looks far more complicated than it is. It holds beautifully because the opposing twists lock each other in place, which makes it one of the most secure quick styles in this guide — a rope braid done at seven in the morning is usually still intact at seven in the evening.
Who it suits: medium to long hair, especially thick hair that slips out of normal braids. How to style: twist each section clockwise, then wrap them anticlockwise and tie. Common mistake: twisting both sections the same way when you wrap them, which makes the braid unravel — the wrap must go the opposite way. Time: two to three minutes once you have done it twice.
13. The Dutch Braid Headband
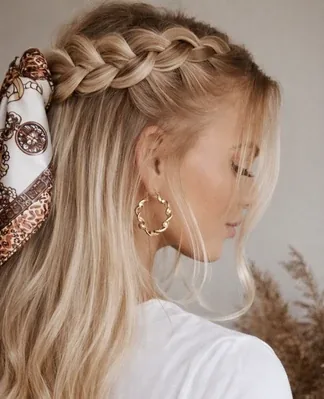
The Dutch braid headband uses a braid as a headband: braid a section of hair along the hairline, from one ear across to the other, and pin the end behind the opposite ear. It keeps the front of your hair out of your face all day, it works on hair that is too short for a full updo, and it looks like a deliberate style rather than a rescue job. The rest of the hair can stay down, go into a ponytail, or do whatever it likes — the braid at the front does the work of looking finished.
Best for: short to medium hair, and anyone whose fringe or front layers keep falling into their eyes. How to style: start behind one ear, Dutch-braid along the hairline, and pin the tail behind the other ear. What to avoid: braiding too tightly, which pulls and gives you a headache — a Dutch braid headband should feel comfortable, not clamped. Quick verdict: four minutes, one braid, and the whole front of your hair is handled for the day.
14. The Twisted Crown
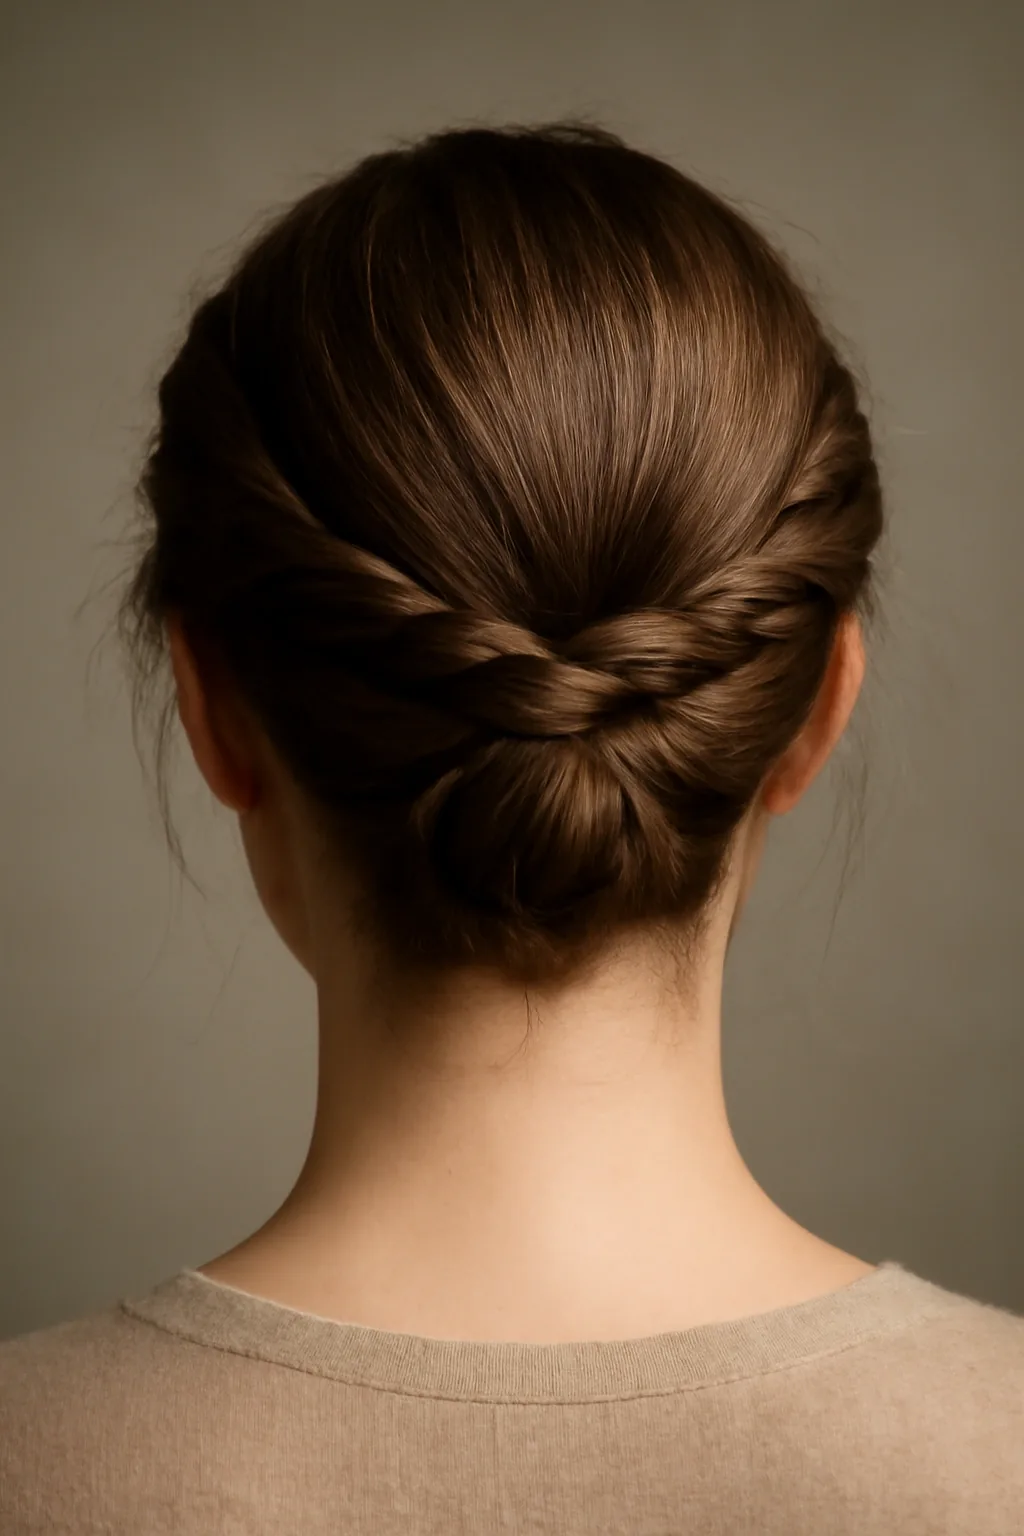
The twisted crown is a headband made of your own hair: take a section from each side, twist them toward the back, cross them, and pin. It has the same effect as the Dutch braid headband — front hair secured, face clear — but it needs no braiding skill at all, just two twists and two pins. It suits hair that is too layered or too slippery to braid neatly, and it is the style to reach for when you want the braided look without the braiding.
Who it suits: medium hair, and anyone who cannot braid but can twist. How to style: twist each side section back, cross them at the crown, and pin in an X. Pros: faster than a braid, easier to fix if it loosens, and it flatters every face shape. Cons: it holds less firmly than a braid, so it suits desk days better than gym days.
15. The Pinned-Back Front Twist
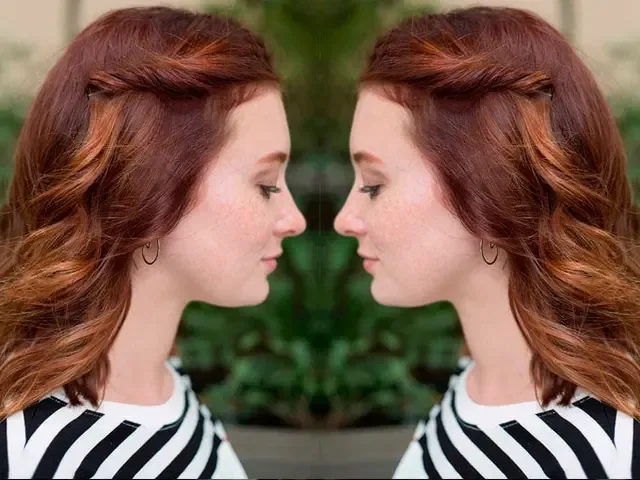
The pinned-back front twist is the smallest style in this guide and one of the most useful: twist the front section of hair back from your face, pin it, and walk out. It takes thirty seconds, it fixes a fringe that is growing out, it keeps hair out of your eyes while you work, and it makes the rest of your hair look intentional by contrast. It is less a hairstyle than a finishing move, and it is the one to use when you have done nothing else and need to look like you did something.
Best for: any length, and growing-out bangs that will not sit still. How to style: twist a two-inch section back from the hairline and pin it flat with a bobby pin. Cost and time: thirty seconds and one pin. Common mistake: twisting too much hair, which pulls the style loose — a small section holds longer than a big one.
16. The Sock Bun Without Heat
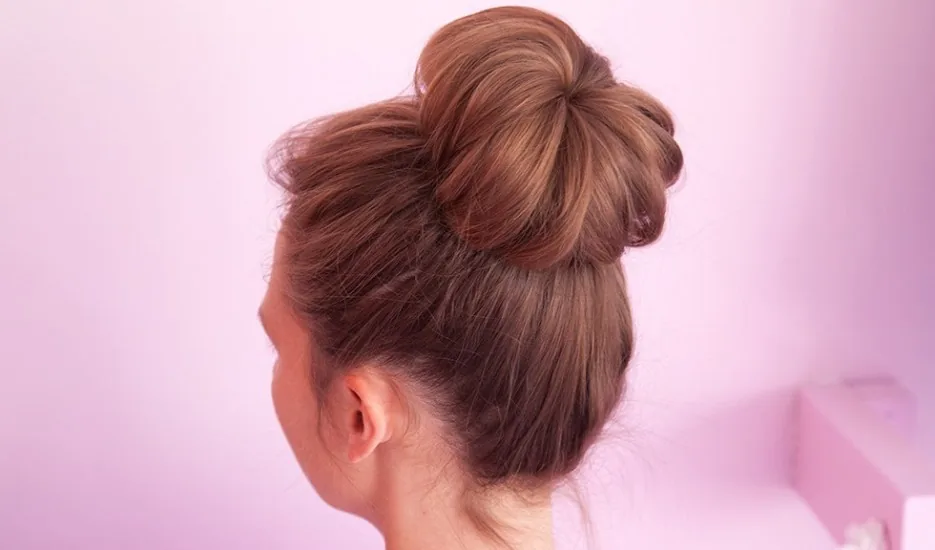
The sock bun sounds like a joke until you try it on a morning when nothing else works. Roll a sock into a donut, pull your ponytail through it, and roll the hair down around the donut until you reach the base. The result is a perfectly round, smooth bun that looks like it took a stylist, and it holds all day because the sock gives the hair something to grip. Keep a sock donut in your toolkit and this becomes a three-minute style, not a project.
Who it suits: medium to long hair, and anyone who wants a neat bun without pins everywhere. How to style: ponytail through the donut, spread the hair over it, roll down, and tuck the ends under. What to ask your stylist: ask for layers that are long enough to wrap a donut without pieces sticking out. Maintenance: none — and the bun usually survives a whole day intact.
17. The Donut Bun
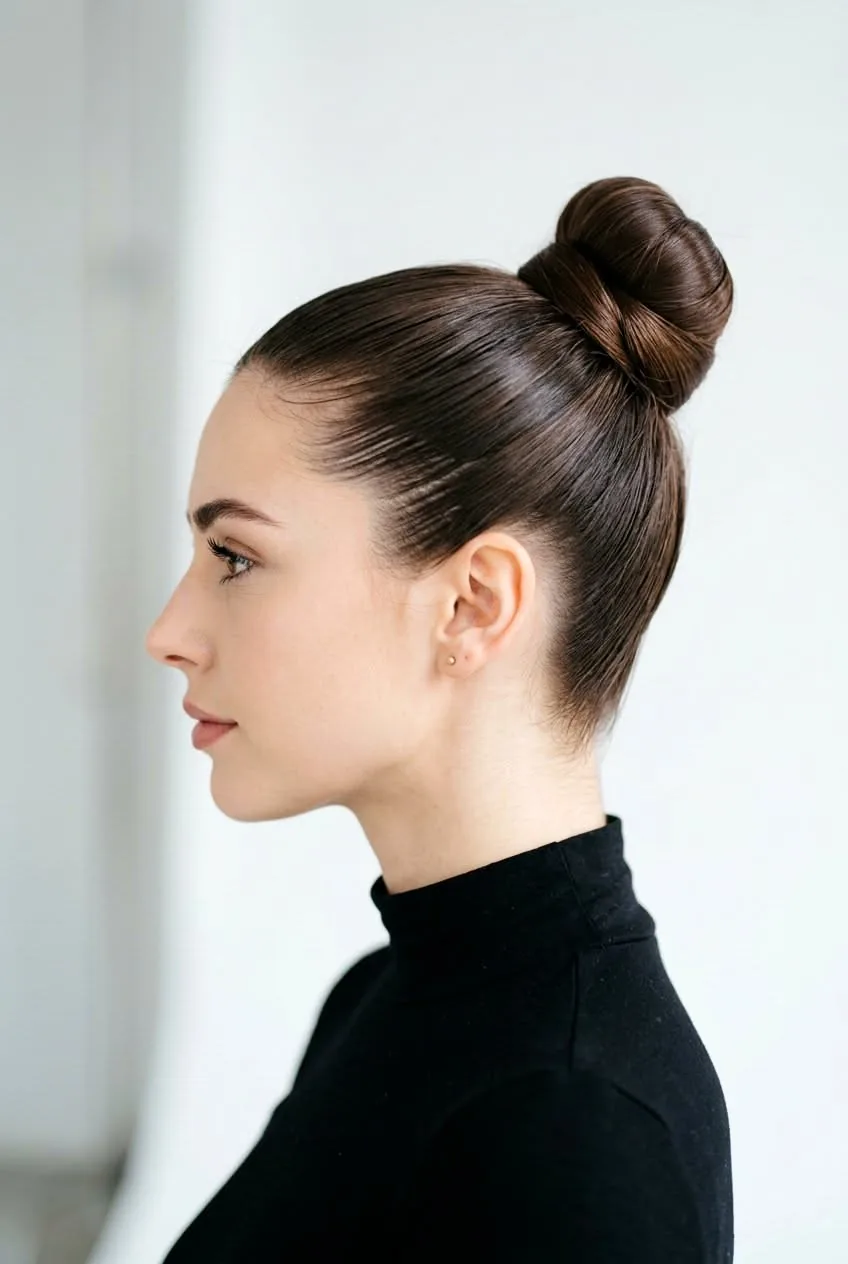
The donut bun is the sock bun’s shop-bought cousin: a foam donut does the same job with a cleaner finish and no sock in your hair drawer. Pull the ponytail through the donut, spread the hair evenly over it, and secure the ends underneath with pins. The bun comes out smooth, round and symmetrical every time, which is why it is the go-to for interviews, weddings and any morning when a messy bun would send the wrong message. It looks like effort, and it takes about three minutes.
Best for: medium to long hair, and formal mornings that need a neat finish. How to style: spread the hair evenly over the donut so no foam shows, then pin the ends underneath. Pros: perfectly neat, very secure, and it makes thin hair look thick. Cons: it needs the donut, so keep one in your bag if you travel.
18. The Quick Space Buns
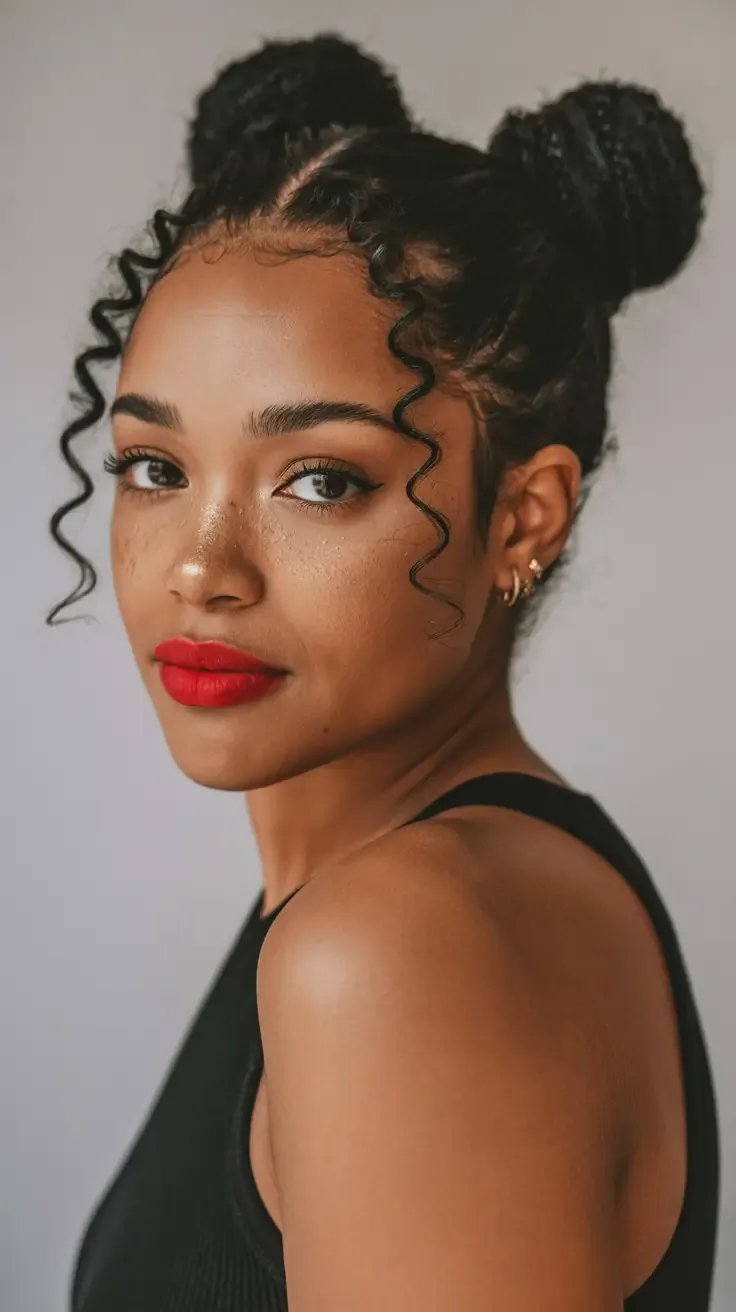
Space buns are two small buns, one on each side, and they are far more wearable than they sound when you keep them low and loose. Part the hair down the middle, twist each side into a small bun, and pin. They keep all your hair off your neck, they survive a workout, and they suit a casual morning, a festival, or a day when you simply want your hair completely out of the way. Kept low and soft, they read as playful rather than costume.
Who it suits: medium to long hair, and younger women or casual days. How to style: middle part, twist each side up, pin, and pull out a few face-framing pieces. Who should avoid it: very formal settings, where a single low bun is the safer choice. Time: four minutes for both buns, and they hold all day.
19. The Low Chignon with a Scarf
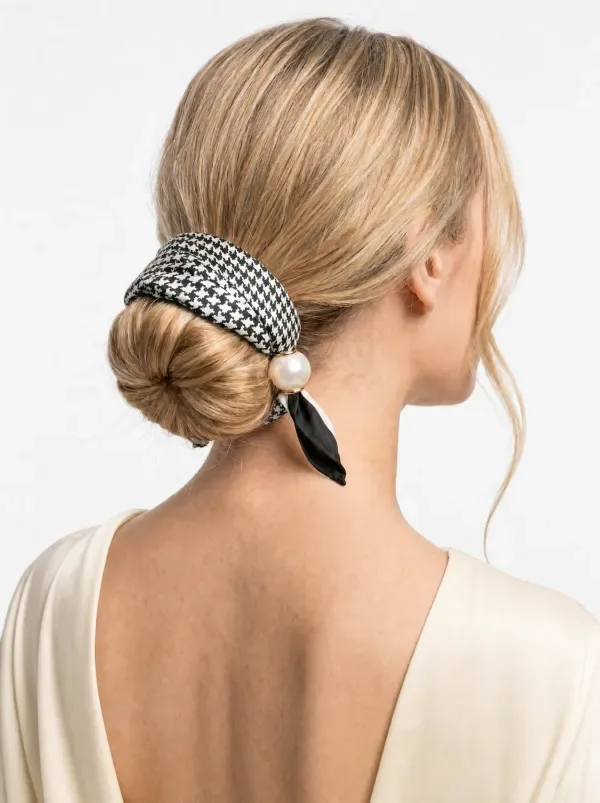
A low chignon with a scarf is a plain low bun wearing a silk scarf, and the scarf does an unreasonable amount of work. Tie the scarf around the base of the bun, knot it at the top, and let the ends hang — suddenly a three-minute bun looks like a styled updo with an accessory, and the scarf also hides any pins, elastics or uneven bits you would rather not show. It is the fastest way to make a basic bun look like you planned it.
Best for: medium to long hair, and mornings when a plain bun feels too plain. How to style: bun first, then wrap the scarf around the base and knot it. Cost and time: one scarf you already own, thirty extra seconds. Common mistake: a scarf that is too big or too slippery — a small silk square stays put, a long one slides off by nine.
20. The Scarf-Wrapped Ponytail
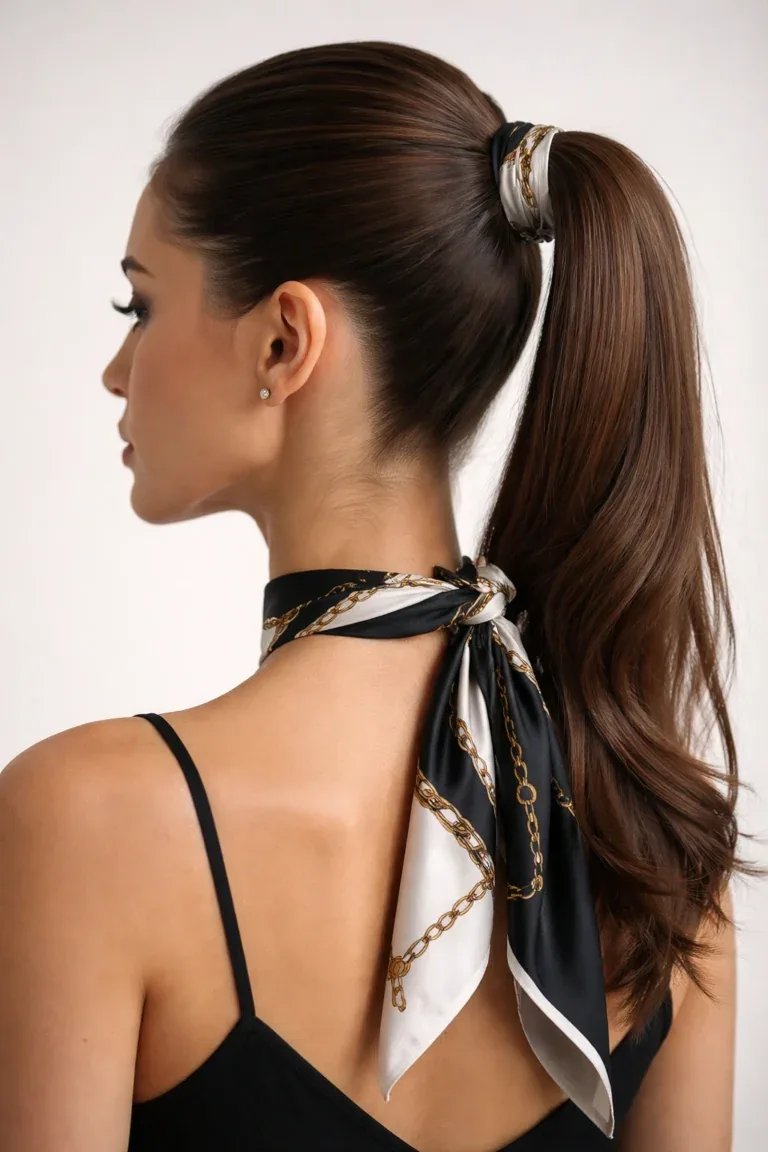
The scarf-wrapped ponytail is the same trick applied to a ponytail: wrap a scarf around the base instead of a strand of hair, and the whole style changes. The scarf covers the elastic, adds colour and texture, and makes a basic ponytail look like an outfit choice rather than a default. It is especially good on second-day hair, because the scarf hides the roots and the ponytail hides the rest, and it takes about four minutes from start to finish.
Who it suits: long hair, and anyone who owns one silk scarf and wants it to earn its keep. How to style: secure the ponytail, wrap the scarf around the base twice, and tie it in a small bow or knot. Pros: fast, pretty, and it hides a multitude of morning sins. Cons: the scarf can loosen during a workout, so save this one for desk days.
21. The Headband Tuck
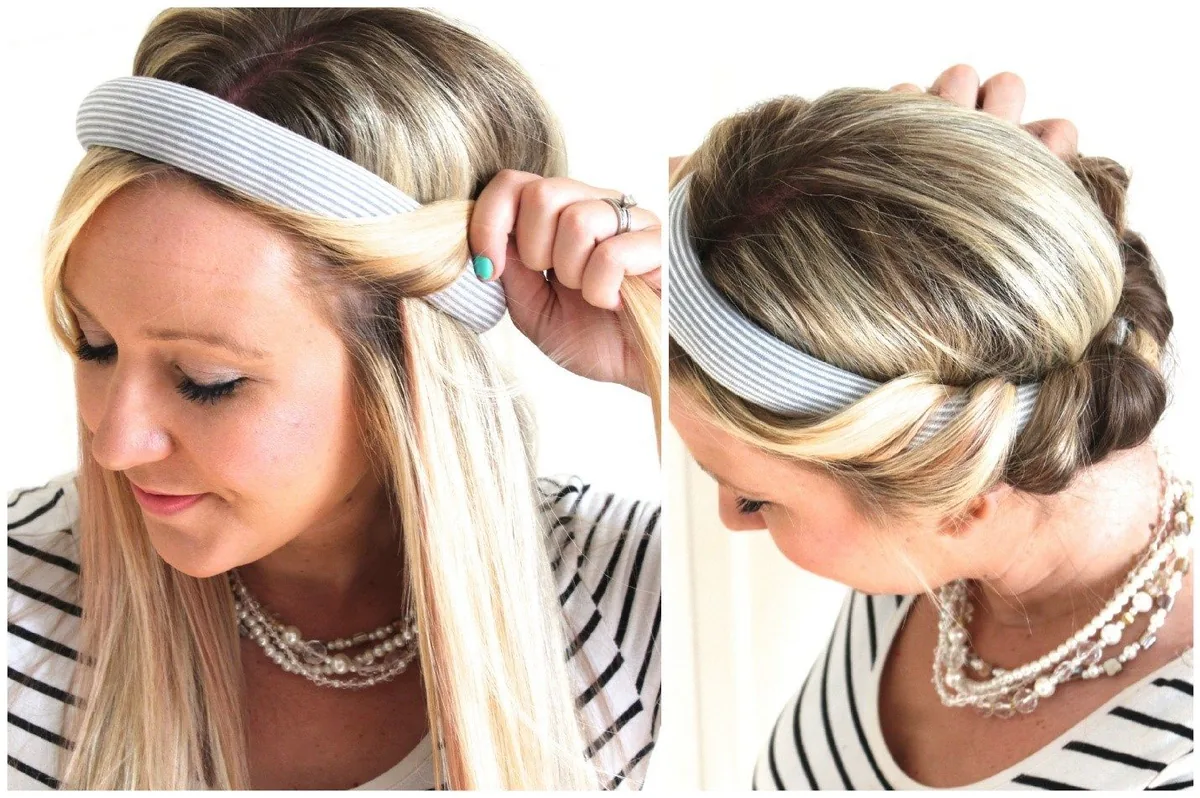
The headband tuck is a vintage trick that works perfectly on a rushed morning: put on a stretchy headband, then tuck sections of hair up and into the band all the way around. The hair rolls itself into a soft, low updo, the headband holds it all in place, and the result looks like a deliberate vintage roll rather than a five-minute fix. It is one of the few quick styles that genuinely suits very short hair too, because even short lengths can be tucked.
Best for: short to medium hair, and anyone who owns a stretchy headband. How to style: band on, then tuck sections up into it, working from front to back. What to avoid: a headband that is too tight, which slips back and gives you a headache — it should sit comfortably, not grip. Quick verdict: three minutes, no pins, no heat, and it looks far harder than it is.
22. The Bandana Wrap
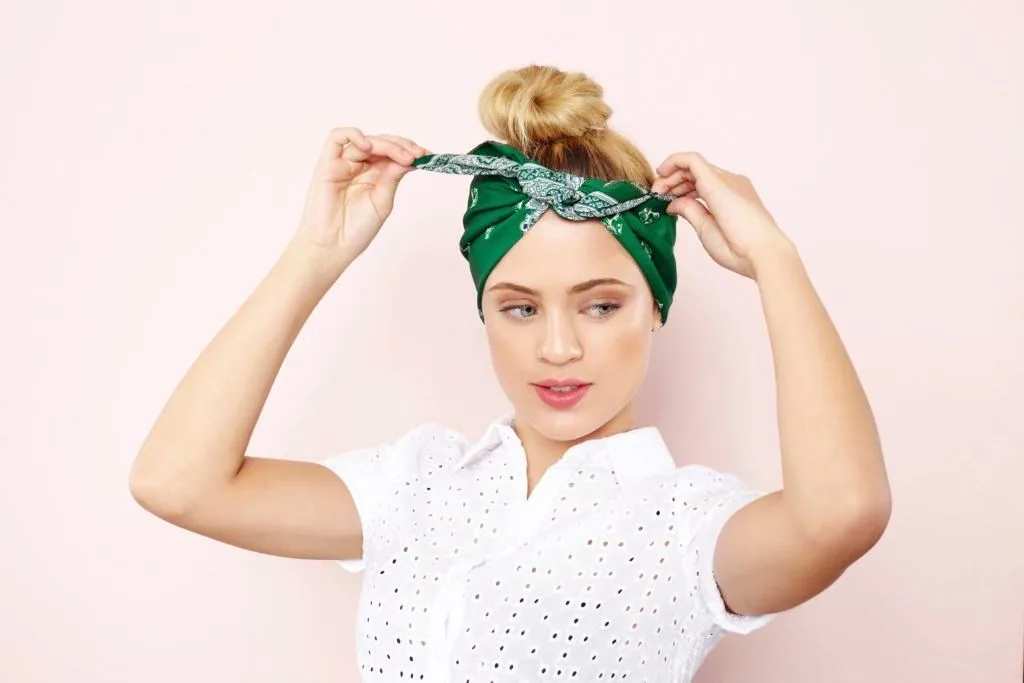
The bandana wrap is the honest solution to a morning when your hair is not going to cooperate with anything: cover the top, let the rest hang loose, and call it a style. Fold a bandana into a triangle, tie it at the nape or on top, and leave the ends of your hair out — the bandana becomes the accessory, the loose hair becomes the style, and the unwashed roots become nobody’s business. It is also the best bad-hair-day rescue in this guide, because it does not pretend your hair is fine; it just makes the whole thing look deliberate.
Who it suits: any length, and anyone having a genuinely bad hair day. How to style: fold, place, tie at the nape, and arrange the loose hair around it. Pros: thirty seconds, zero skill, and it covers roots completely. Cons: it is casual, so save it for casual days — it is not an interview look.
23. The Wet-Look Slick-Back
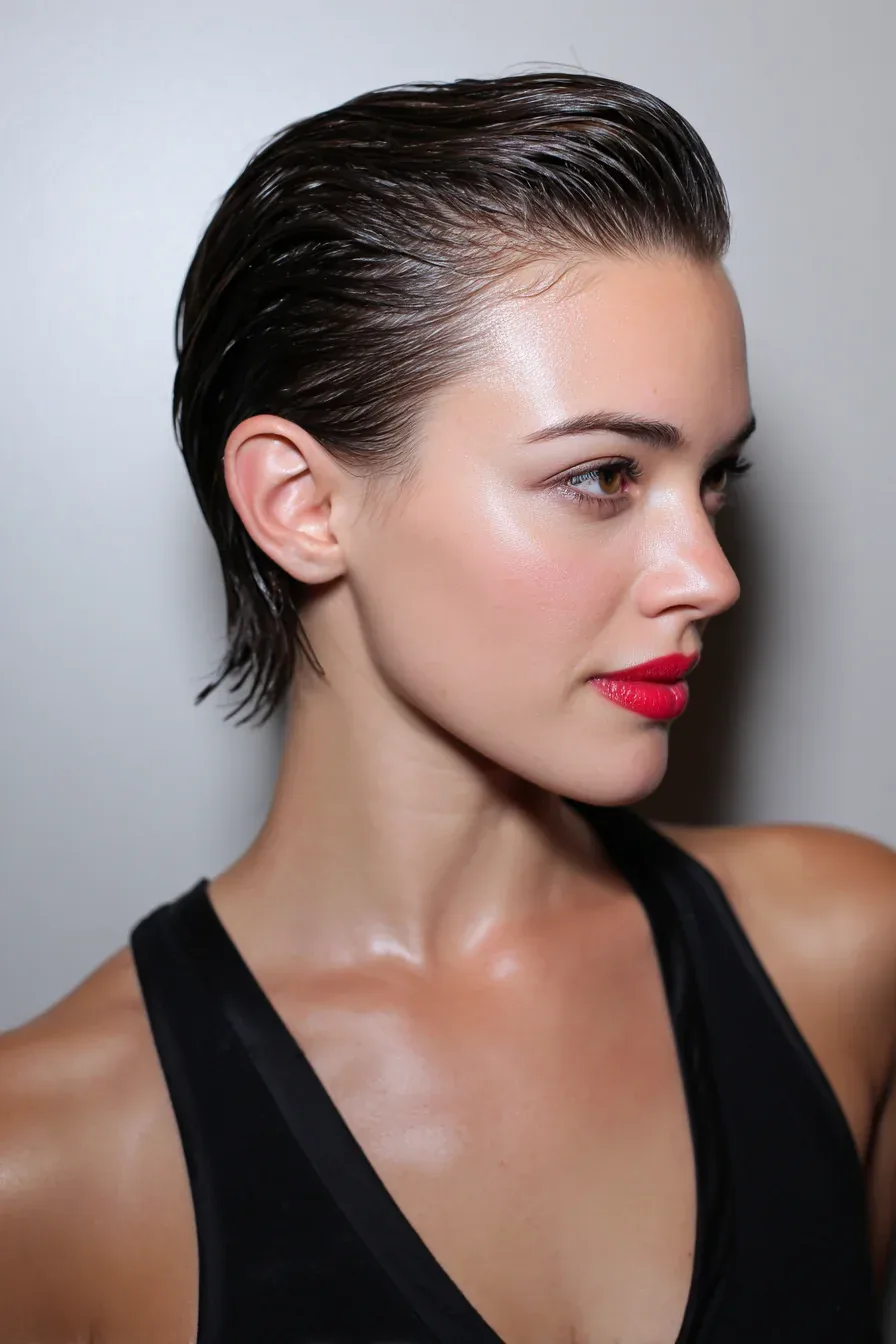
The wet-look slick-back is the style that turns damp hair from a problem into the plan. Comb gel or a little leave-in cream through damp hair, brush it all straight back, and let it dry that way. The gel holds the shape, the dampness gives the shine, and the result is a sleek, editorial finish that takes about ninety seconds and looks like you spent twenty minutes with a flat iron. It is the fastest way to look polished on a morning when your hair is still wet and you have no time to dry it.
Best for: straight and wavy hair, and mornings when you have washed your hair but have no time to dry it. How to style: gel through damp hair, brush back, and do not touch it while it dries. Common mistake: using too much gel, which turns sleek into crunchy — a coin-sized amount is enough. Maintenance: none; it sets as it dries and stays put.
24. The Overnight Braid Waves
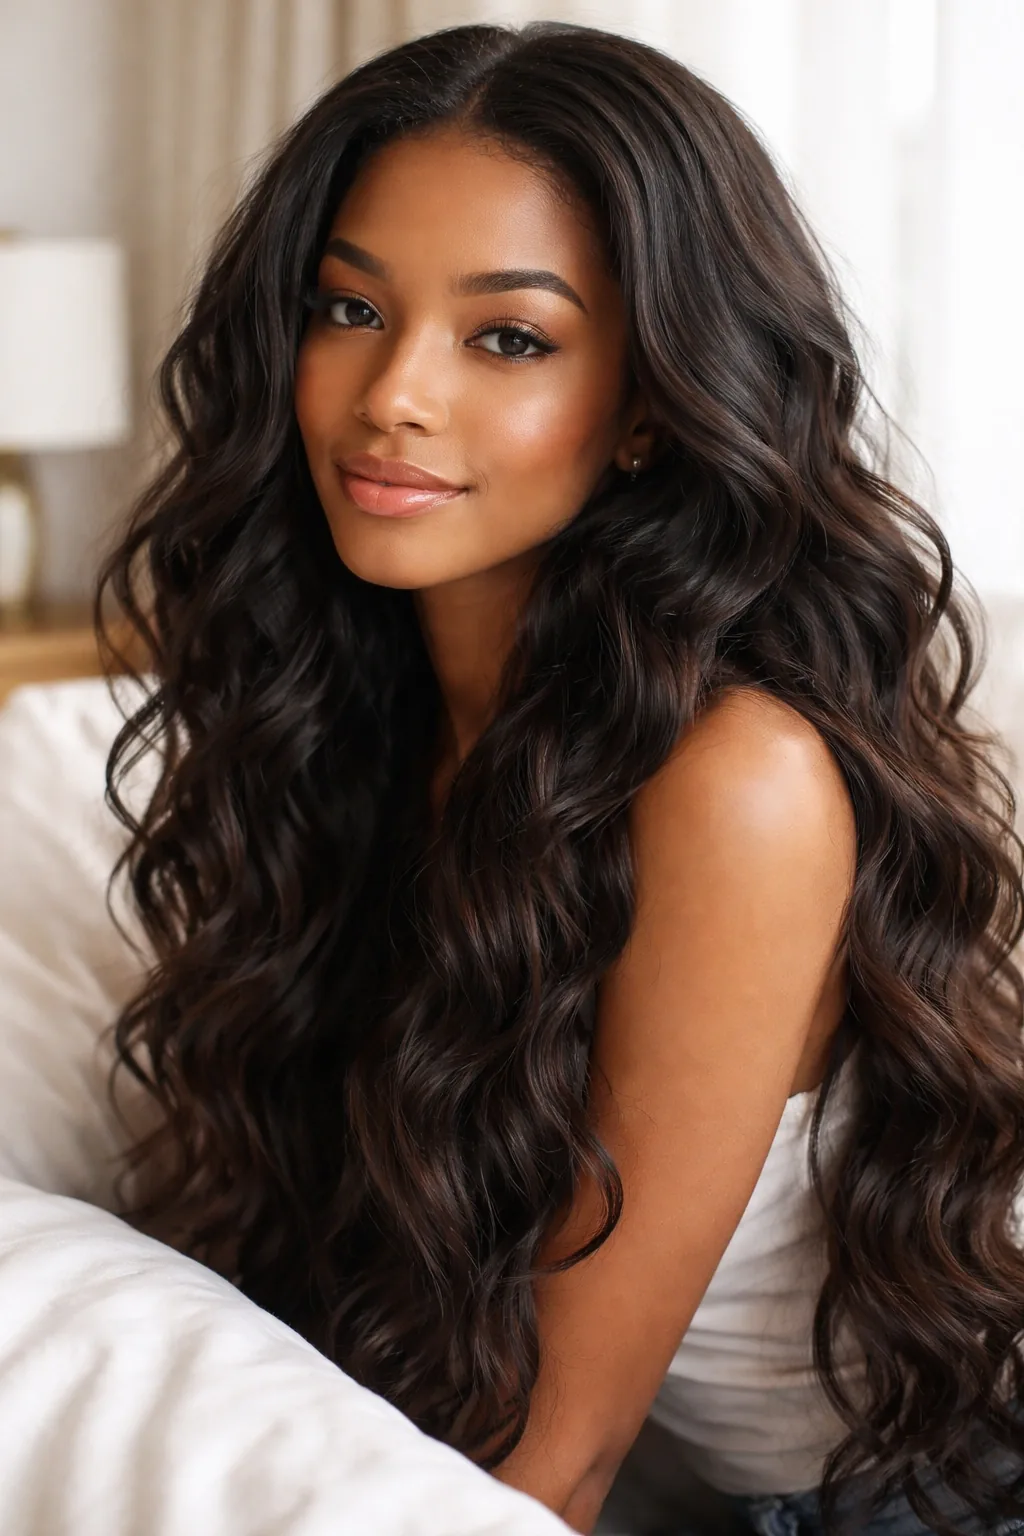
Overnight braid waves are the night-before trick at its best: braid damp hair loosely before bed, sleep on it, and undo it in the morning to find soft, even waves that would take twenty minutes with a curling iron. The waves last all day because they were set for eight hours, not eight minutes, and they look natural because they are — no heat, no product, no effort in the morning at all. Undo the braid, shake the hair out, add a little texture spray, and you are done in under a minute.
Who it suits: medium to long hair, especially wavy hair that holds a set. How to do it: one loose braid for soft waves, two braids for tighter ones, tied with a soft scrunchie. What to avoid: braiding soaking-wet hair, which stays damp and goes flat — damp, not wet, is the rule. Time: three minutes at night, under a minute in the morning.
25. The Textured Bedhead Waves

Textured bedhead waves are the style for women who wake up with hair that already has a wave in it and just need to make it look intentional. Scrunch a little texture spray or mousse through the lengths, shake the hair out at the roots, and let the natural wave do the rest. The trick is to stop trying to smooth it: bedhead texture looks good precisely because it is uneven, and the more you brush it, the worse it gets. Three minutes of scrunching beats twenty minutes of heat styling on this hair.
Who it suits: naturally wavy hair, and anyone whose hair wakes up with texture already in it. How to style: texture spray, scrunch upward, shake at the roots, and do not brush. Common mistake: brushing wavy hair dry, which turns waves into frizz — fingers only, once the spray is in. Quick verdict: the lowest-effort style in this guide, because your hair did most of the work while you slept.
26. The Pineapple Puff for Curly Hair
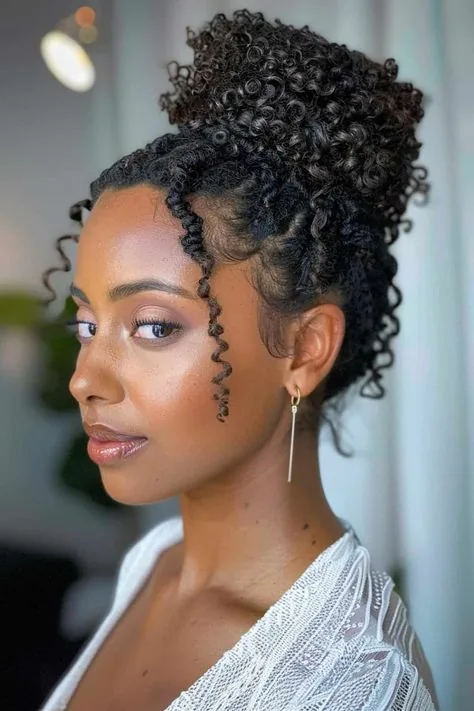
The pineapple puff is curly hair’s five-second style: gather all the curls high on top of the head, secure them loosely with a scrunchie, and let them fall forward like a pineapple top. It keeps curls off the face and off the neck, it protects the curl pattern instead of crushing it, and it looks joyful rather than rushed. It is also the style curly-haired women use to protect their curls overnight, so it doubles as a sleep style and a morning style with no change at all.
Best for: curly and coily hair of any length that can gather on top. How to style: gather high, secure loosely with a satin scrunchie, and fluff the curls into shape. What to avoid: a tight elastic, which dents the curls and breaks them — loose is the whole point. Maintenance: none; refresh the front curls with a little water if they need it.
27. The Wash-and-Go Curl Refresh
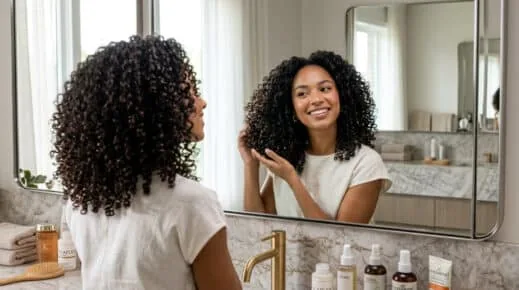
The wash-and-go curl refresh is for curly hair on the morning after wash day, when the curls are a little flat but not worth re-washing. Mist the hair lightly with water, smooth a pea-sized amount of curl cream over the frizziest curls, scrunch upward, and let it dry while you get dressed. The water reactivates yesterday’s product, the cream redefines the curls that went flat overnight, and the whole refresh takes three minutes — a full wash and style would take forty.
Who it suits: curly and wavy hair that was washed yesterday and just needs waking up. How to style: water mist first, cream second, scrunch third, and then do not touch it. Pros: fast, no heat, and it extends wash day by a full day. Cons: it only works if yesterday’s product is still in the hair — if the curls are completely product-free, a full wash is faster than a refresh.
28. The Two-Minute Side Sweep
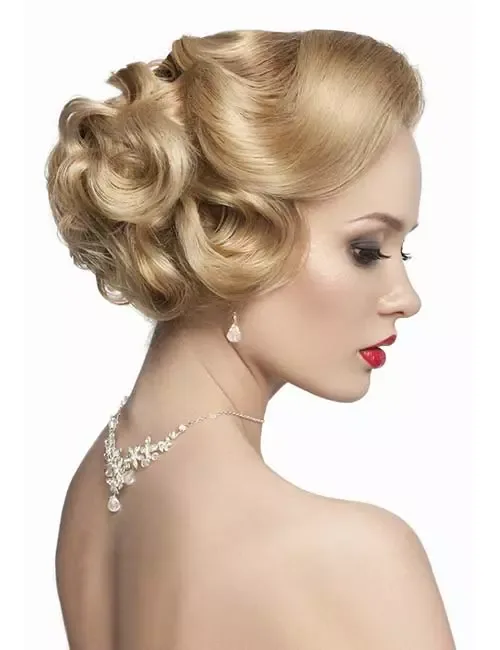
The two-minute side sweep is the style for open hair on a morning when you have no time for open hair. Part the hair deeply on one side, sweep the heavy side across the forehead, and pin it behind the opposite ear — or just tuck it and let it fall. The deep part gives instant volume at the crown, the sweep gives the face a frame, and the whole thing takes two minutes with a brush and one pin. It is the quickest way to make loose hair look like a style instead of a default.
Best for: medium to long hair, and anyone who wants their hair down but out of their face. How to style: deep side part, sweep across, pin or tuck behind the ear. Cost and time: two minutes, one pin, no products. Common mistake: parting the hair while it is soaking wet — the part sets better on damp or dry hair, so sweep it after you have towel-dried.
29. The Curtain Bangs Quick Fix
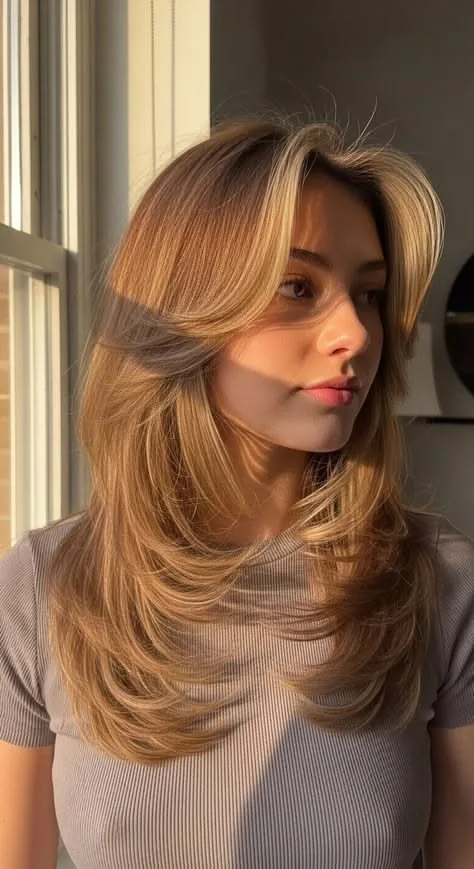
Curtain bangs are wonderful until the morning they wake up bent the wrong way, and the quick fix takes ninety seconds: dampen the bangs lightly, blow-dry them forward with a round brush for ten seconds, then split them in the middle and flick each side outward. The heat resets the bend, the split gives the curtain shape, and the bangs frame the face again instead of sticking to the forehead. It is a tiny fix, but bangs set the tone for the whole face, so ninety seconds here is worth more than ninety seconds anywhere else.
Who it suits: anyone with curtain bangs or a grown-out fringe. How to style: dampen, blow-dry forward, split and flick outward. What to ask your stylist: ask for bangs cut long enough to tuck behind the ear on a bad morning — that is your escape route. Time: ninety seconds with a dryer, three minutes without one.
30. The Braided Bangs Pin-Back
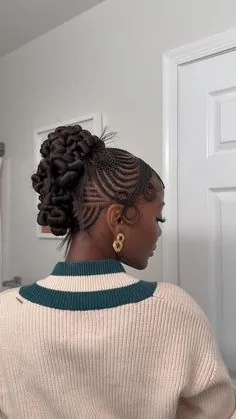
The braided bangs pin-back is the rescue for bangs that will not behave and a fringe that is growing out. Braid the front section of hair — just the bangs and the hair beside them — back along the hairline, and pin it flat. The braid holds the bangs out of your face all day, it looks like a deliberate detail rather than a cover-up, and it takes about two minutes, which is less time than you would spend fighting the bangs with a straightener.
Best for: growing-out bangs, and anyone whose fringe falls into their eyes by nine. How to style: braid the front section back, pin it flat, and blend the tail into the rest of the hair. Pros: secure, pretty, and it buys you another month of growing out a fringe. Cons: it needs a little length — very short bangs cannot be braided yet.
31. The Half-Up Bubble Braid
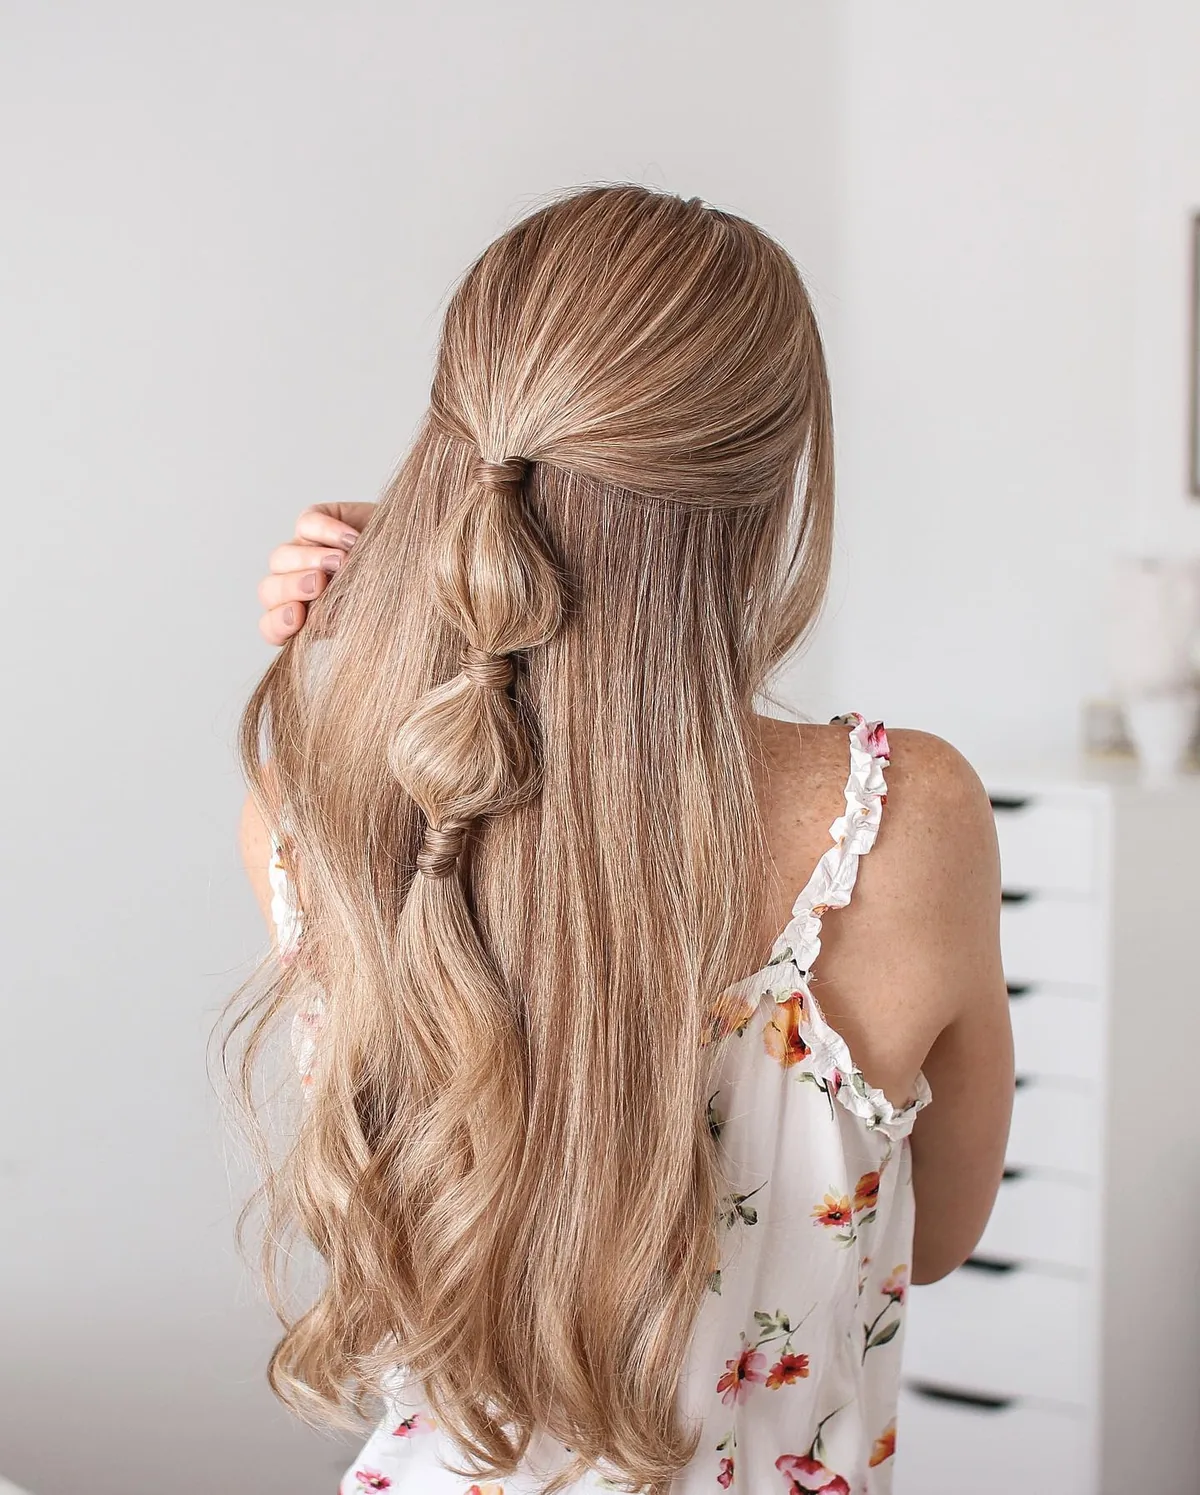
The half-up bubble braid is the half-up twist’s playful cousin: gather the top half of the hair, secure it, then add two more elastics down the gathered section and puff each one into a bubble. The top has structure and fun, the bottom stays loose, and the whole style takes three minutes. It suits hair that is too short for a full bubble ponytail but long enough for a half-up, and it is one of the few quick styles that actually looks better on second-day hair, when the texture holds the bubbles in place.
Who it suits: medium hair, and anyone who wants a half-up with more personality than a twist. How to style: half-up ponytail, two more elastics, puff each section gently. Common mistake: making the bubbles too big, which pulls the style loose — small, even bubbles hold longer. Quick verdict: three minutes, three elastics, and a half-up that looks like you planned it.
32. The Topsy Tail Ponytail
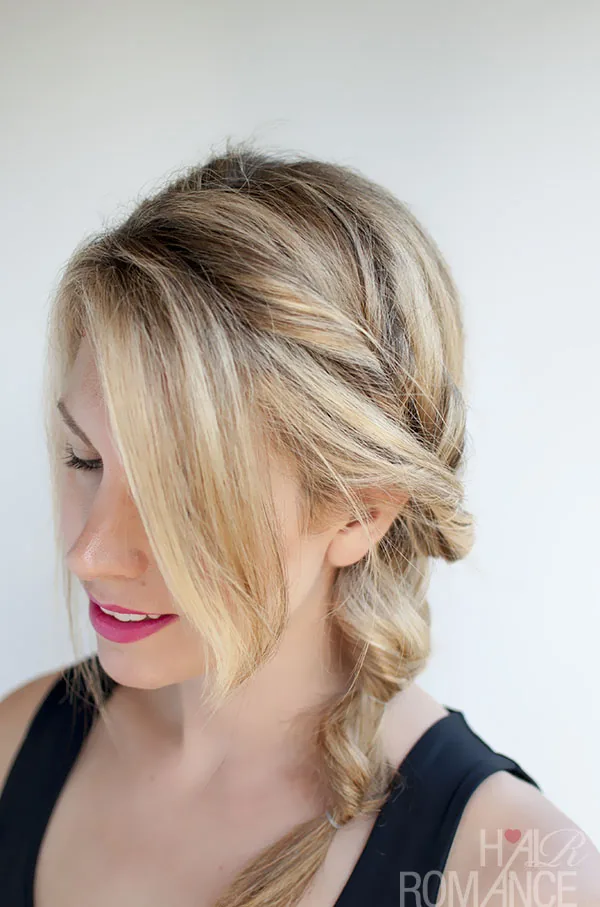
The topsy tail is a nineties trick that deserves its comeback, because it takes thirty seconds and looks like a twist. Secure a low ponytail, make a small gap above the elastic, and flip the ponytail up and through the gap. The flip creates a twisted, knotted effect at the base that looks far more complicated than it is, and it holds the ponytail more securely than a plain elastic because the twist itself acts as an anchor. It is the fastest upgrade to a ponytail in this guide.
Best for: medium to long hair, and anyone who wants a ponytail with a detail. How to style: low ponytail, gap above the elastic, flip the tail through. Cost and time: thirty seconds and one elastic. What to avoid: flipping a very thick ponytail through a small gap, which tangles — make the gap generous and the flip gentle.
33. The Knotted Ponytail
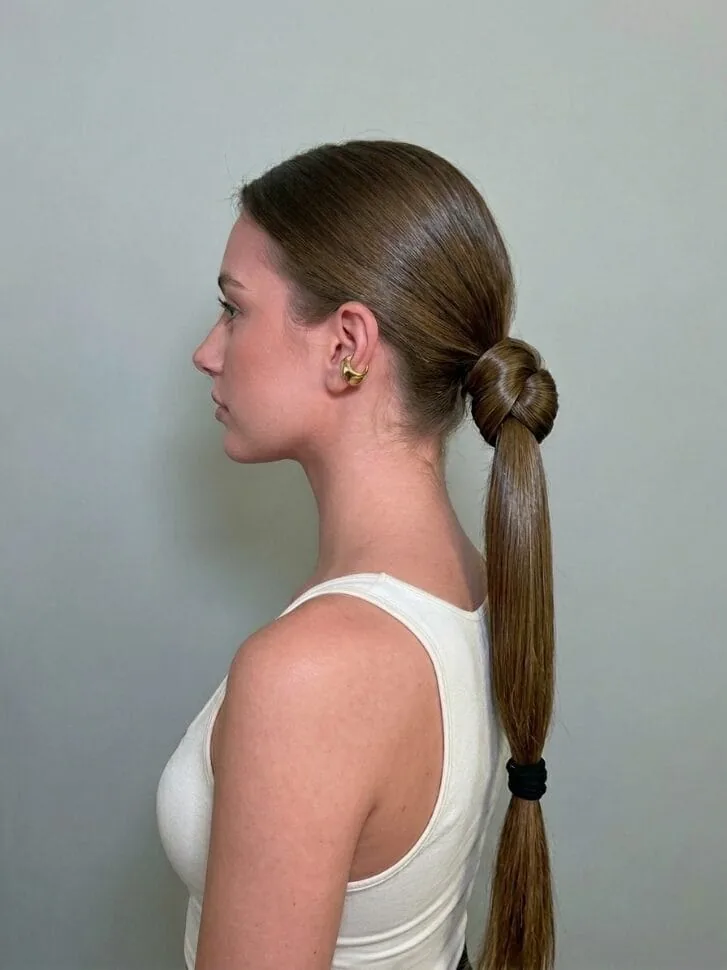
The knotted ponytail is exactly what it sounds like: split a low ponytail into two sections, tie them in a knot, tie them again, and pin the ends underneath. The knots create a textured, wrapped base that looks like an intricate updo, and the style holds itself together because the knots lock each other in place. It takes about three minutes, it needs no elastic at all if the knots are tight enough, and it is the style to choose when you want a ponytail that looks like a completely different thing.
Who it suits: long hair, which has enough length to knot twice. How to style: split, knot, knot again, and pin the ends under the base. Pros: secure, unusual, and it needs no elastic. Cons: it does not work on short hair, and the knots can be tricky to undo — work them loose gently at night.
34. The Quick French Roll
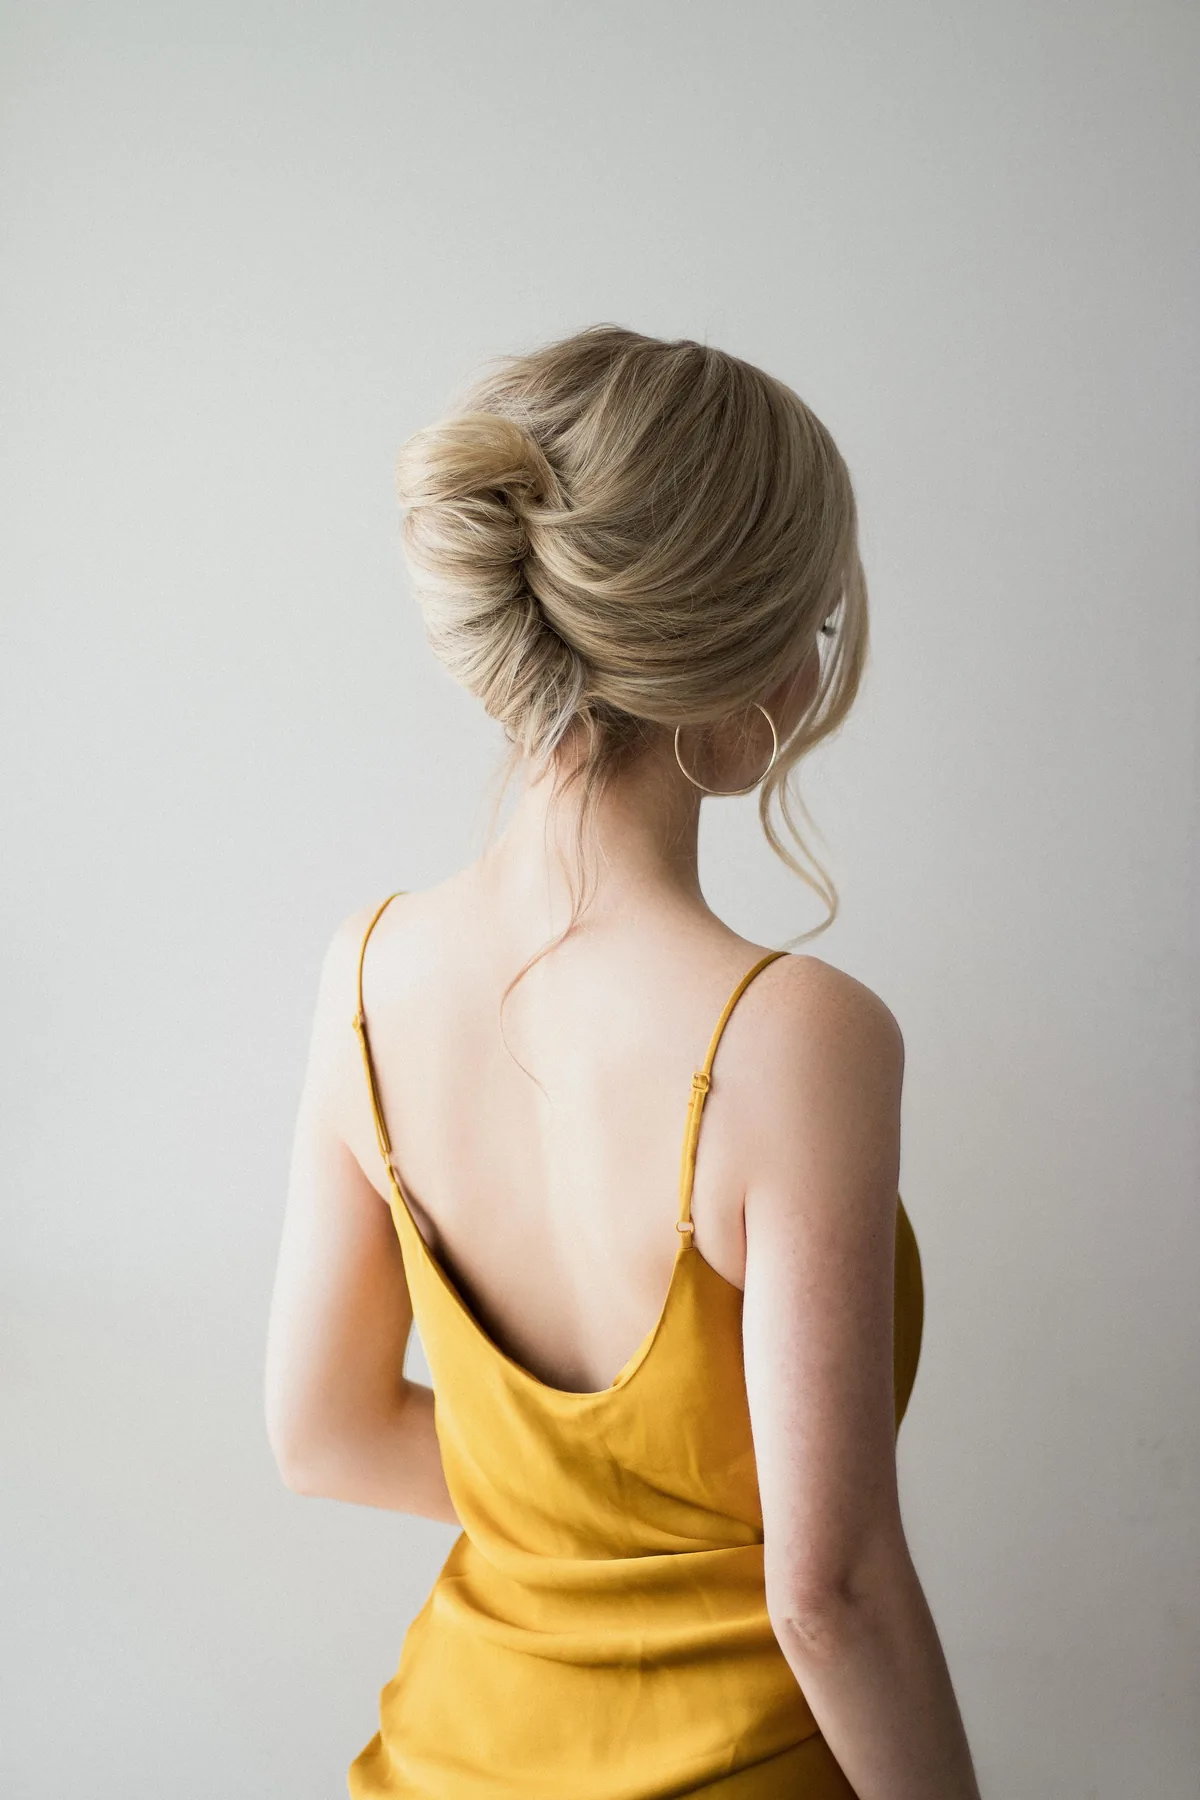
The quick French roll is the faux French twist’s neater sibling: gather the hair to one side, roll it upward against the head, and pin it in a vertical roll. The roll sits at the back of the head like a classic chignon, it reads as formal and finished, and it takes about four minutes with three pins. It is the style for the morning when you have a presentation, an interview or a wedding guest list, and you need your hair to look like you prepared — even though you did it in the time it took the kettle to boil.
Best for: medium to long hair, and formal mornings that need a polished updo. How to style: gather to one side, roll up against the head, and pin top, middle and bottom. What to ask your stylist: ask for a cut with enough length to roll without pieces falling out. Maintenance: none — a well-pinned roll holds all day.
35. The Gym-to-Office Ponytail
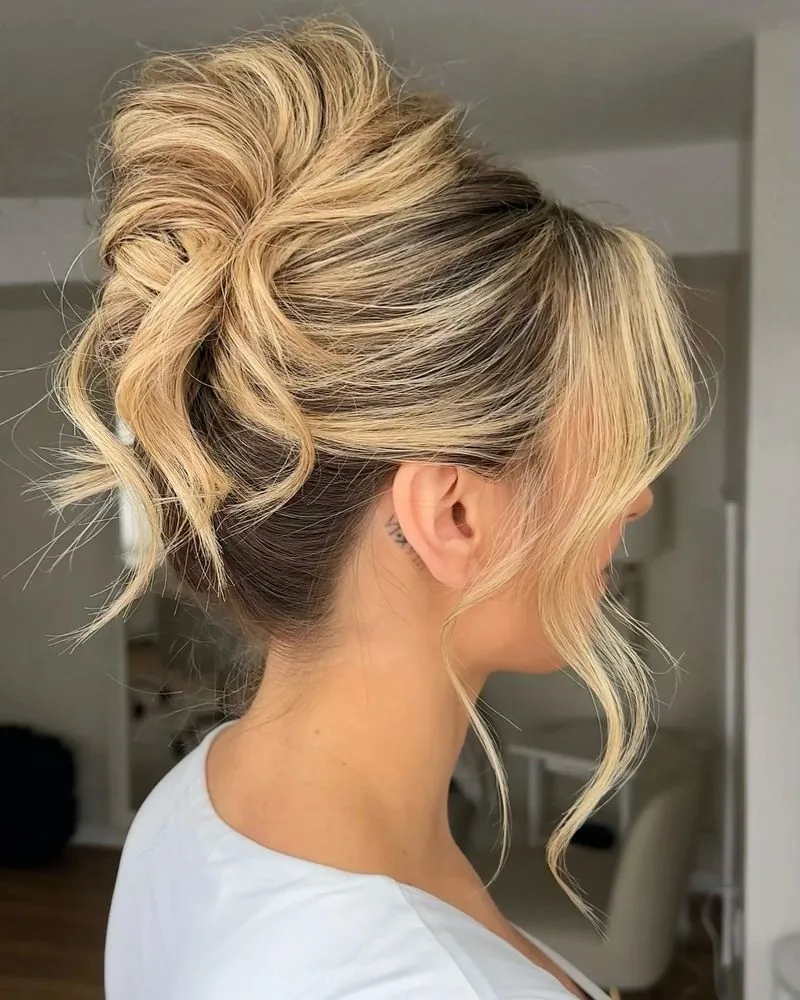
The gym-to-office ponytail is built for the morning that starts with a workout and ends at a desk: a high, tight ponytail that survives the gym, then a thirty-second upgrade at the office — wrap a strand around the base, smooth the flyaways with a little water or serum, and it becomes an office ponytail. The point is that you do not restyle from scratch; you build one style that does two jobs, and the upgrade takes less time than finding a meeting room.
Who it suits: long hair, and anyone whose morning includes exercise before work. How to style: high ponytail for the gym, then wrap a strand around the base and smooth the surface for the office. Pros: one style, two settings, and no restyling. Cons: it needs a strong elastic — a weak one will not survive the workout half of the morning.
36. The Five-Minute Updo for Fine Hair
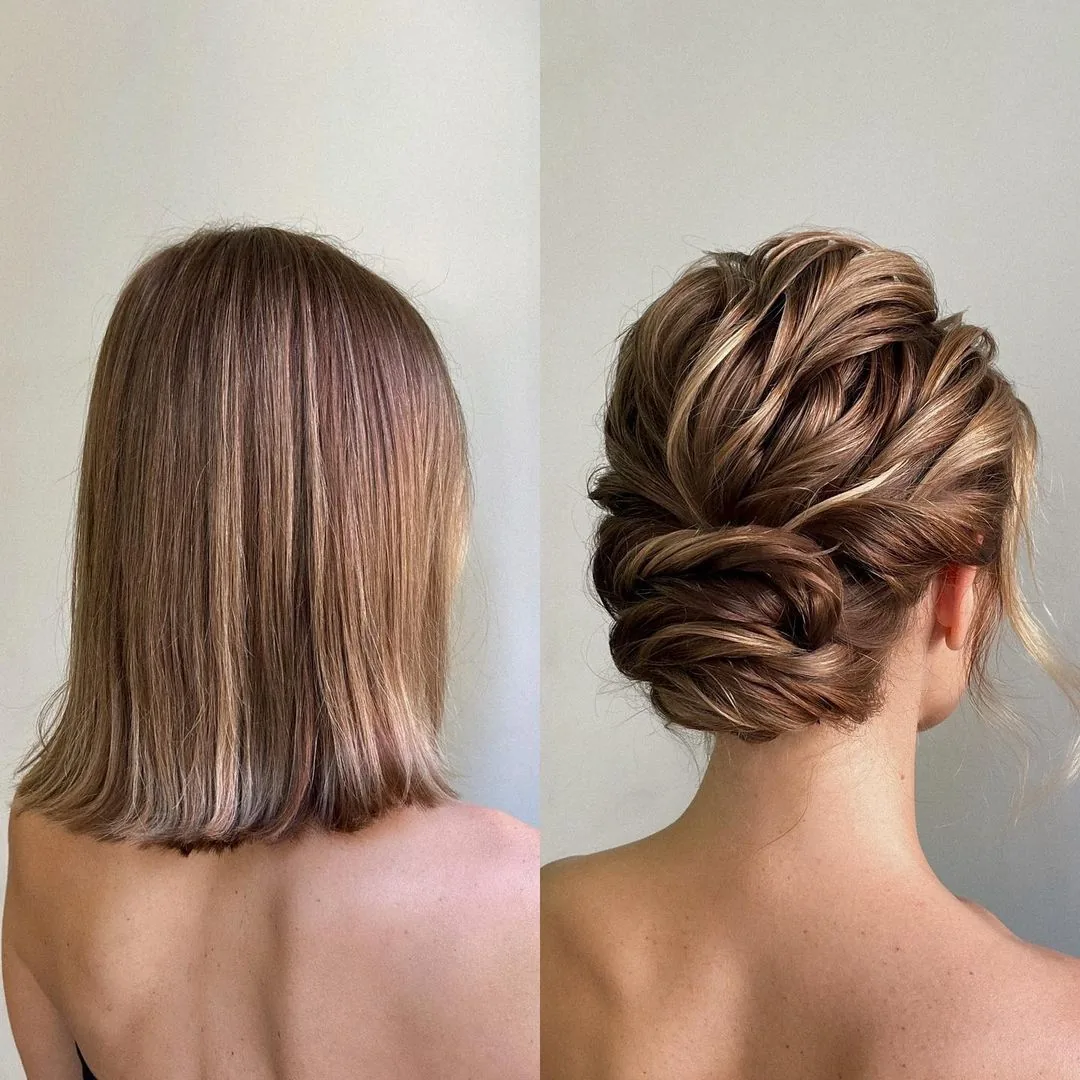
Fine hair and updos have a difficult relationship: the hair slips out of pins, the bun looks small, and the whole thing falls flat by ten. The five-minute updo for fine hair fixes all three by working with the hair instead of against it — tease the crown lightly for grip, twist the hair loosely rather than tightly, and pin the bun with pins that cross in an X, which holds fine hair far better than parallel pins. A little dry shampoo at the roots before you start gives the hair the texture it needs to hold, and the result is a bun that looks full instead of thin.
Best for: fine and thin hair that slips out of normal updos. How to style: dry shampoo at the roots, light teasing at the crown, loose twist, and crossed pins. Who should avoid it: nobody — but very thick hair does not need the teasing step. Quick verdict: the only updo in this guide built specifically for fine hair, and the crossed-pin trick alone is worth learning.
What is the fastest hairstyle for a busy morning?
The claw clip twist is the fastest genuinely good-looking style, at about forty seconds: twist the hair up, fold it over, and clip it. The messy top knot is nearly as fast at two minutes. Both need one tool, no heat, and no mirror precision, which is why they beat every other option when you are truly late.
How can I make my hair look done in under five minutes?
Pick one clean anchor — a low bun, a twist, a braid or a clip — and add two loose pieces around the face. That combination reads as finished from any normal distance. Finish with a drop of serum on flyaways and a quick check of the front, not the back, because the front is what everyone actually sees.
What are the best quick hairstyles for busy mornings on second-day hair?
Second-day hair is ideal for quick styles, because the natural texture gives braids and buns grip. The low bun, the side braid, the claw clip twist and the bubble ponytail all hold better on day-two hair than on freshly washed hair. Add dry shampoo at the roots first, wait thirty seconds, then style.
Can I do a quick hairstyle without heat?
Yes — most of the styles in this guide use no heat at all. Twists, braids, buns, clips and overnight waves all work with your hair’s natural texture. No-heat styles are also faster, because you skip the warm-up time and the section-by-section work, and they are kinder to your hair over a whole week of rushed mornings.
What is the easiest quick hairstyle for short hair?
The pinned-back front twist takes thirty seconds and works on almost any short cut, and the headband tuck works even on very short hair. A half-up twist also suits short hair well, because it only needs the top half. Skip full buns on short hair — they need length you do not have, and a clip or a twist does the same job faster.
How do I keep a quick morning hairstyle from falling apart?
Use the right anchor for your hair: crossed bobby pins in an X hold fine hair, a claw clip that fits holds thick hair, and a snag-free elastic holds a ponytail. Style second-day hair when you can, because it grips better, and avoid touching the style once it is in — every adjustment loosens it a little. A light mist of hairspray helps, but only after the style is finished.
What should I do the night before to save time in the morning?
Braid damp hair loosely for waves by morning, or put it in a high, loose bun for volume at the roots. Sleep on a satin pillowcase or with a silk scarf to stop frizz. Lay out your toolkit — elastics, clip, pins, dry shampoo — by the mirror. Two minutes tonight saves ten tomorrow, which is the best trade in this guide.
Are claw clips good for quick morning hairstyles?
Yes, a claw clip is the single most useful busy-morning tool, as long as it fits your hair. A large clip holds thick hair, a small one suits fine hair, and a clip that is too small will fight you for three minutes. The claw clip twist takes forty seconds, holds all day, and the clip itself becomes part of the look.
What quick hairstyle works best for curly hair in the morning?
The pineapple puff takes five seconds and protects the curl pattern, and the wash-and-go refresh — a water mist, a little curl cream, a scrunch — revives yesterday’s curls in three minutes. Avoid brushing curly hair dry in the morning, which breaks the curls into frizz; fingers and water are the only tools a curly morning needs.
How do I look polished when I only have two minutes?
Choose the sleek low ponytail or the wet-look slick-back: both take about ninety seconds, both read as polished, and both hide unwashed roots completely. Smooth the surface with a little serum or water, secure the style low, and check the front in the mirror. Polished is a finish, not a length of time — and a smooth surface does more for it than any complicated style.
Conclusion: Five Minutes Is Enough When the Style Does the Work
Quick hairstyles for busy mornings are not about lowering your standards — they are about choosing styles that meet the morning you actually have. A claw clip twist, a low bun, a side braid or an overnight wave each takes minutes, needs one tool or none, and looks finished because the style itself does the work. Pick two or three favourites from this guide, practise them once on a calm weekend, and keep the toolkit by the mirror. On the mornings when everything runs late, you will not need twenty minutes and a hot tool — you will need five minutes, one clip, and a style you already trust.

