

Okay, let’s be real. You saw that stunning hime cut on your feed and immediately felt that “I need this” vibe. It’s that perfect mix of edgy and elegant, right? But then you wondered, “Can I even make that work on my straight hair at home?”
I totally get it. As someone who has hacked at my own hair more times than I’d like to admit, I’m here to tell you: yes, you absolutely can. You don’t need a salon trip every other day.
This guide is your best friend’s cheat sheet. We’re breaking down the hime cut—those sharp, jaw-length front pieces and long back hair—into totally doable steps. Think of it as your ticket to one of the coolest 2026 hairstyles without the panic.
Grab your tools, and let’s turn your bathroom into a zen styling studio. It’s easier than you think, promise.
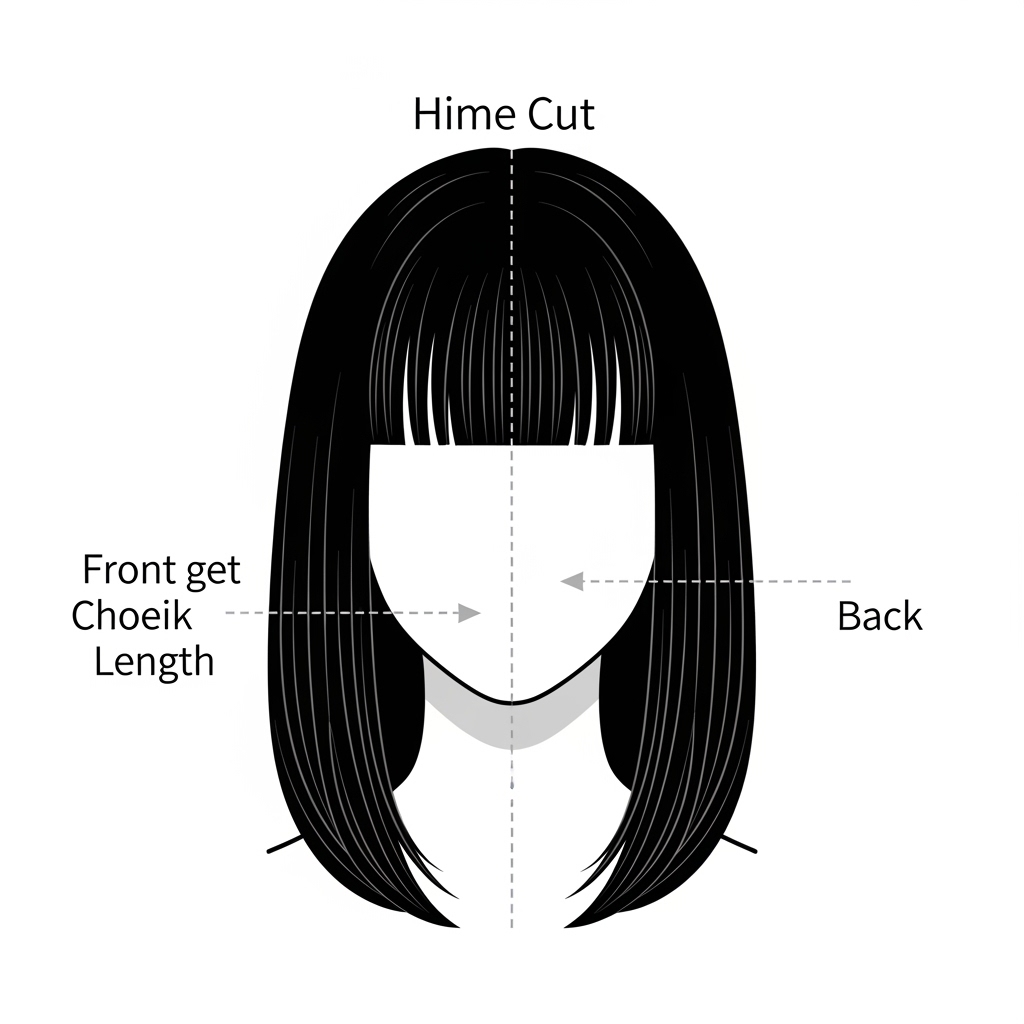
What Exactly Is The Hime Cut?
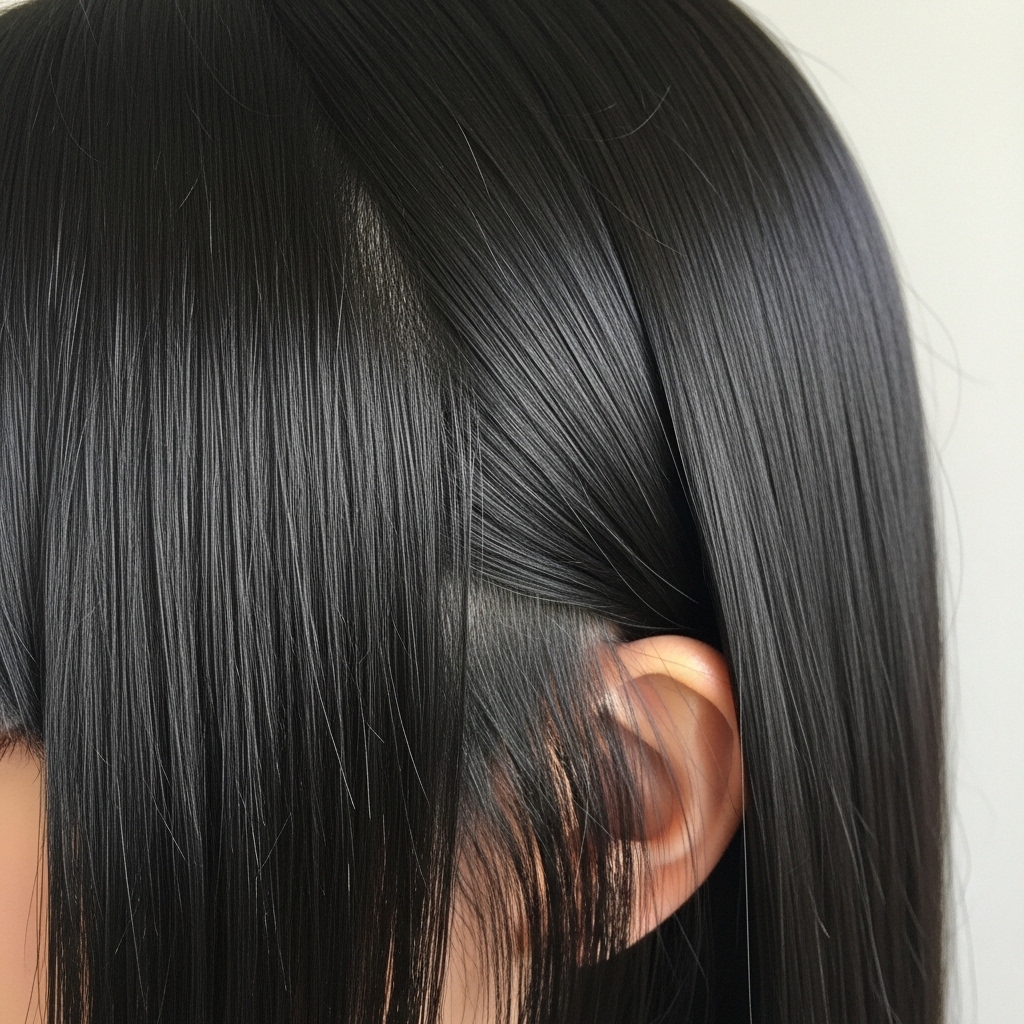
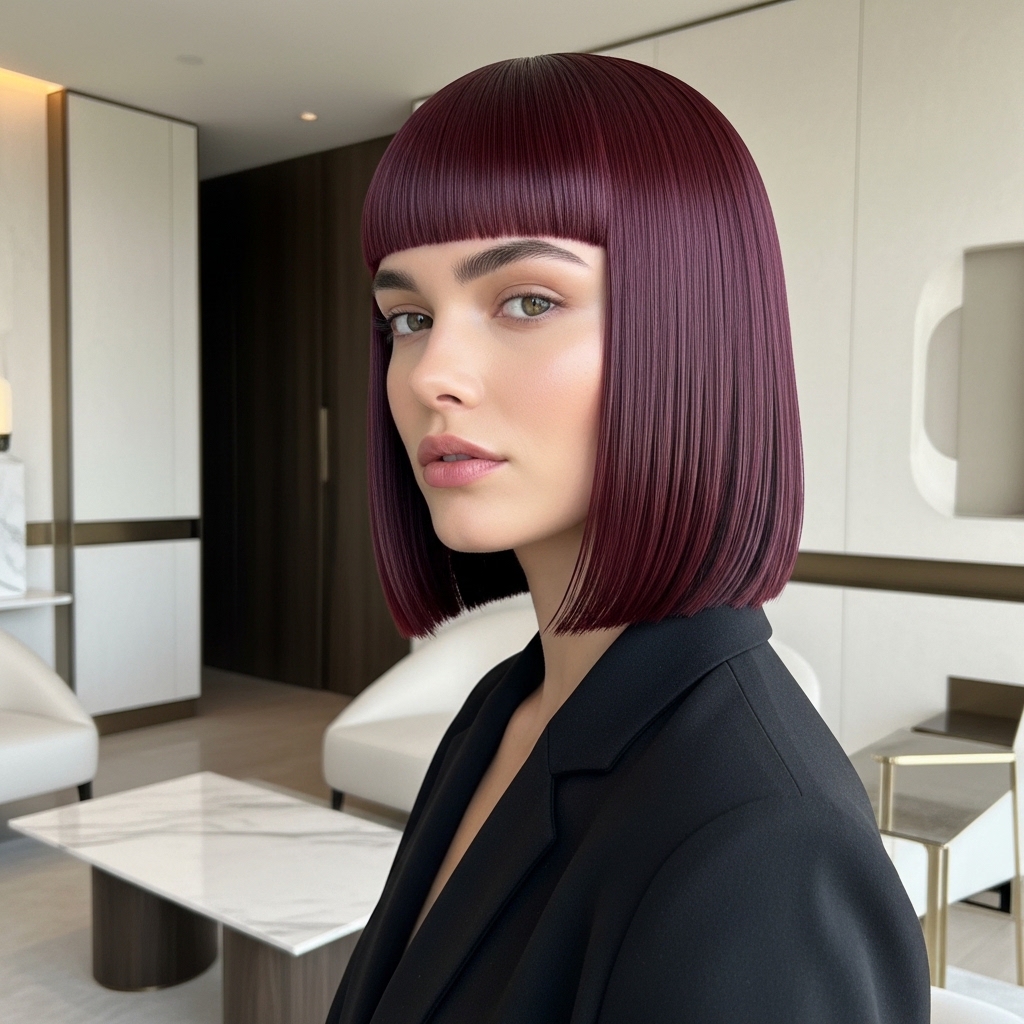
The hime cut, or “princess cut,” is a traditional Japanese style that’s taken over modern feeds. It’s defined by two super distinct sections: blunt, straight-across bangs and face-framing strands that cut off sharply at the jaw or chin, while the rest of your hair flows long in the back.
It creates a dramatic, geometric shape that’s hard to miss. Today, it’s been remixed into so many vibes—from old money hair with a polished finish to romantic goth hairstyles with a dark, poetic feel. It’s all about that striking contrast.
Why The Hime Cut Works So Well On Straight Hair
If you have naturally straight hair, you’re already halfway to a perfect hime. This style relies on clean, sharp lines and a smooth texture to really make its statement. Your straight hair is the ideal canvas to show off those geometric angles.
It means less daily heat styling to fight your natural texture. A little smoothing and you’re good to go. It’s a low-fuss way to achieve a high-impact look, fitting right into that quiet luxury bob aesthetic if you keep the front pieces a bit longer.
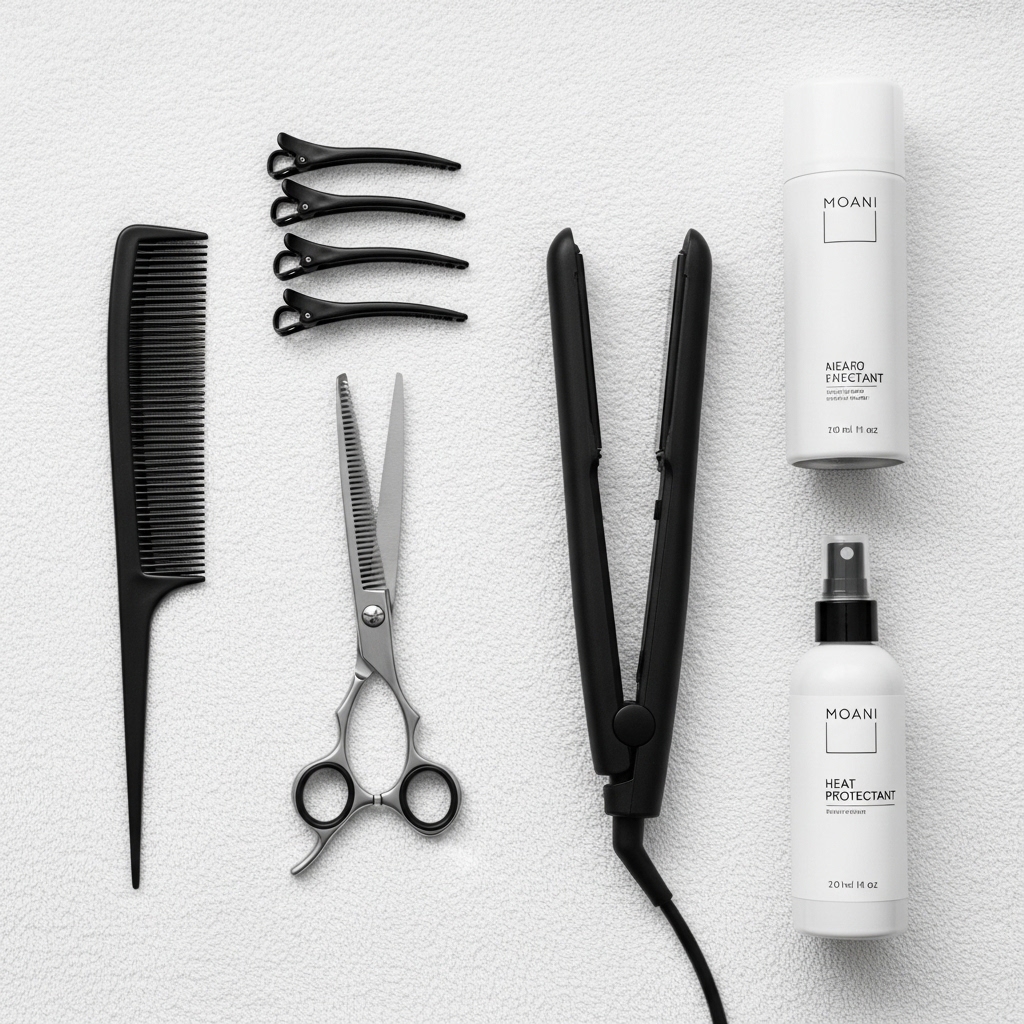
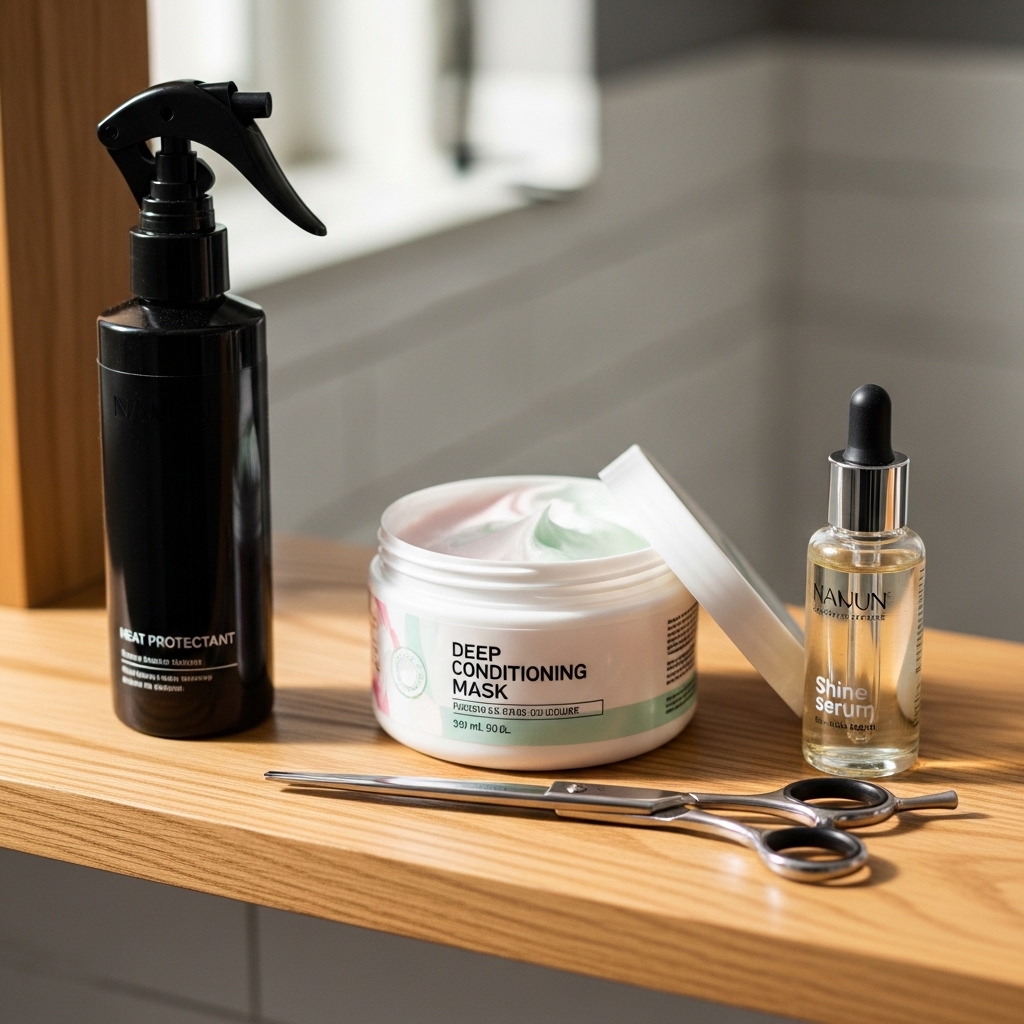
Tools You Absolutely Need Before You Start
Don’t worry, you don’t need a pro kit. Just gather these basics: a fine-tooth comb, hair clips to section your hair, sharp hairdressing scissors (please, not the kitchen ones!), a flat iron, and a heat protectant spray.
A good, strong-hold hairspray is also a must for keeping those lines sharp all day. Having everything laid out before you start is the key to a stress-free styling session. Trust me, running around with wet, sectioned hair is no fun.
Step 1: Start With Super Clean, Blow-Dried Hair
Always begin with freshly washed hair. This gives you the cleanest, most even base to work with. Towel-dry gently and use a blow dryer on a medium setting to get your hair completely smooth and dry before you even touch the flat iron.
I like to blow-dry my hair straight down, using a round brush to smooth out any bumps. This step eliminates any surprise waves or kinks that could mess with your crisp lines later. It’s the foundation for everything.

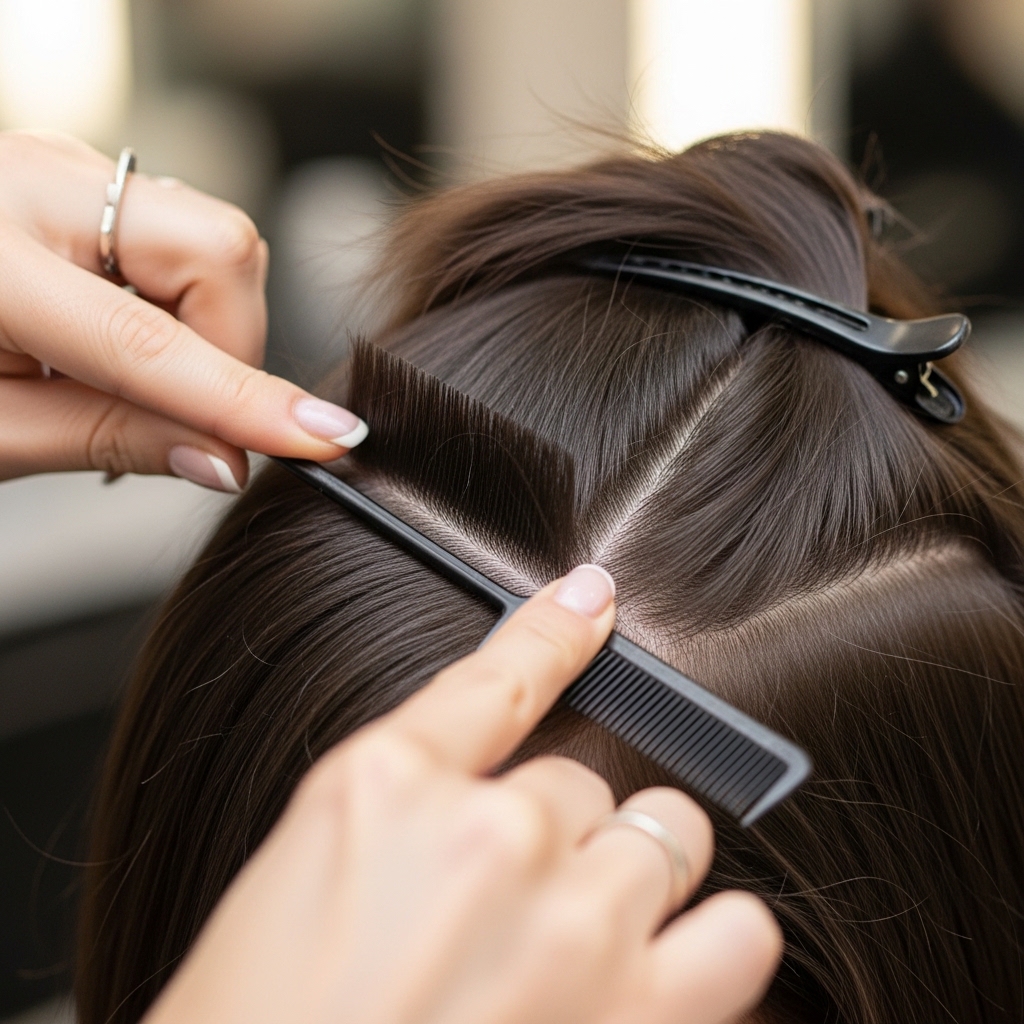
Step 2: Sectioning Is Your Secret Weapon
This is the most important step. Use the end of your comb to draw a triangle from the top of your head down to each temple. Clip this front section forward. This is your “hime” section—the part you’ll cut and style separately.
Then, clip the rest of your hair back so it’s completely out of the way. Clean sections are what separate a DIY success from a hack job. Take your time here.
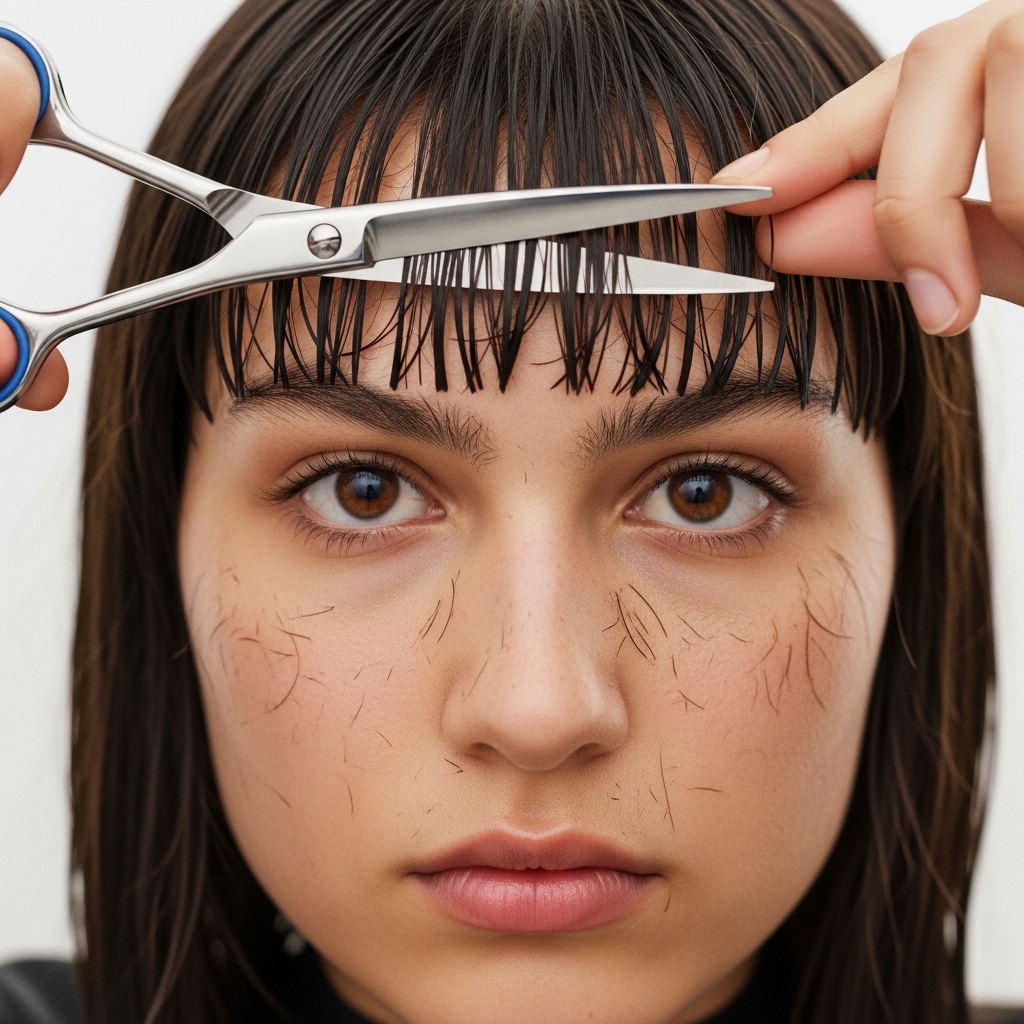
Step 3: Trimming The Front Bangs (Go Slow!)
Unclip just the very front part of your triangle for the bangs. Comb them straight down. Remember, you can always cut more, but you can’t add it back. Start by trimming just a tiny bit, right at or below your eyebrows.
Cut straight across, holding the scissors horizontally. I recommend cutting them a tiny bit longer than you think at first. You can always go shorter after you style the side pieces.
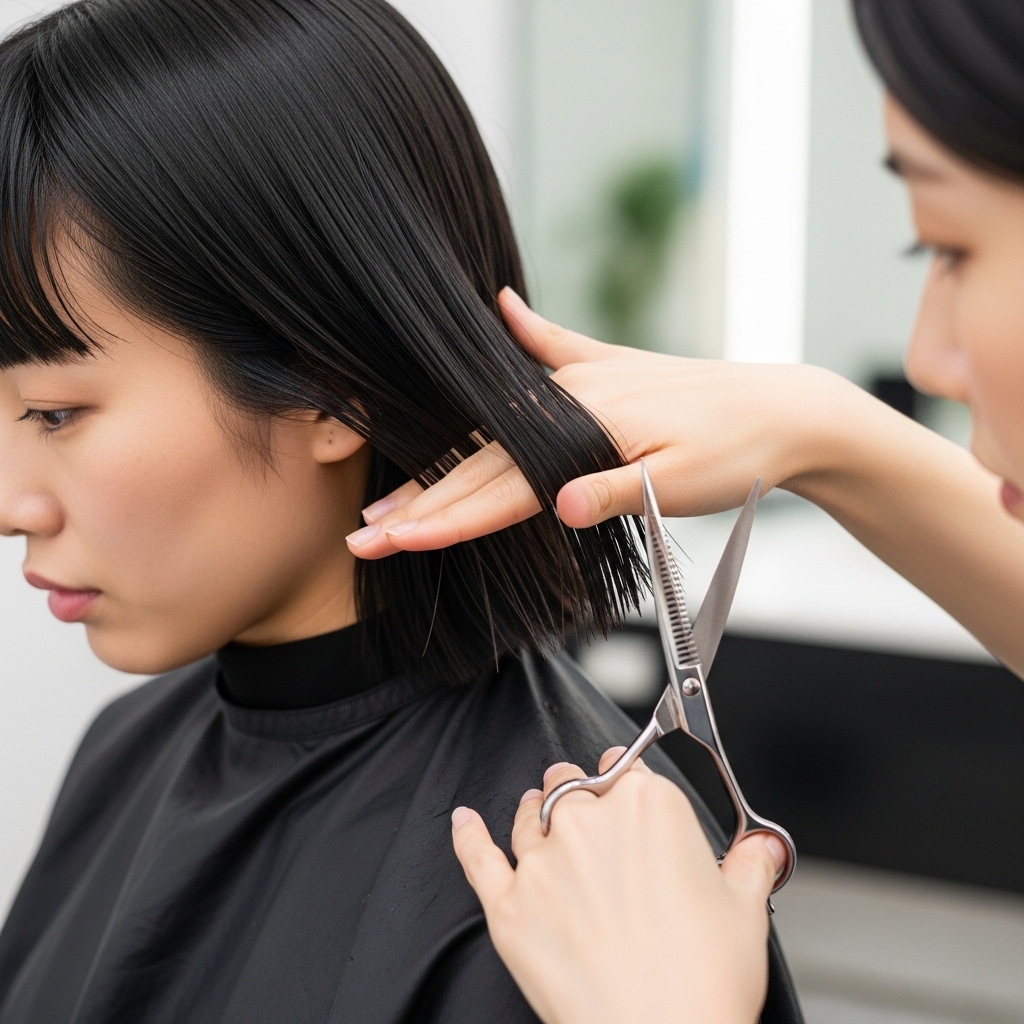
Step 4: Cutting The Signature Side Pieces
Now, unclip the rest of the triangle section on one side. Comb this hair forward over your shoulder. Decide where you want it to hit—jaw or chin are classic. Point-cut vertically into the ends to soften the line just a touch.
Match the other side by bringing that same section forward and cutting to the same length. Always cut this hair dry, so you see the exact final length immediately.
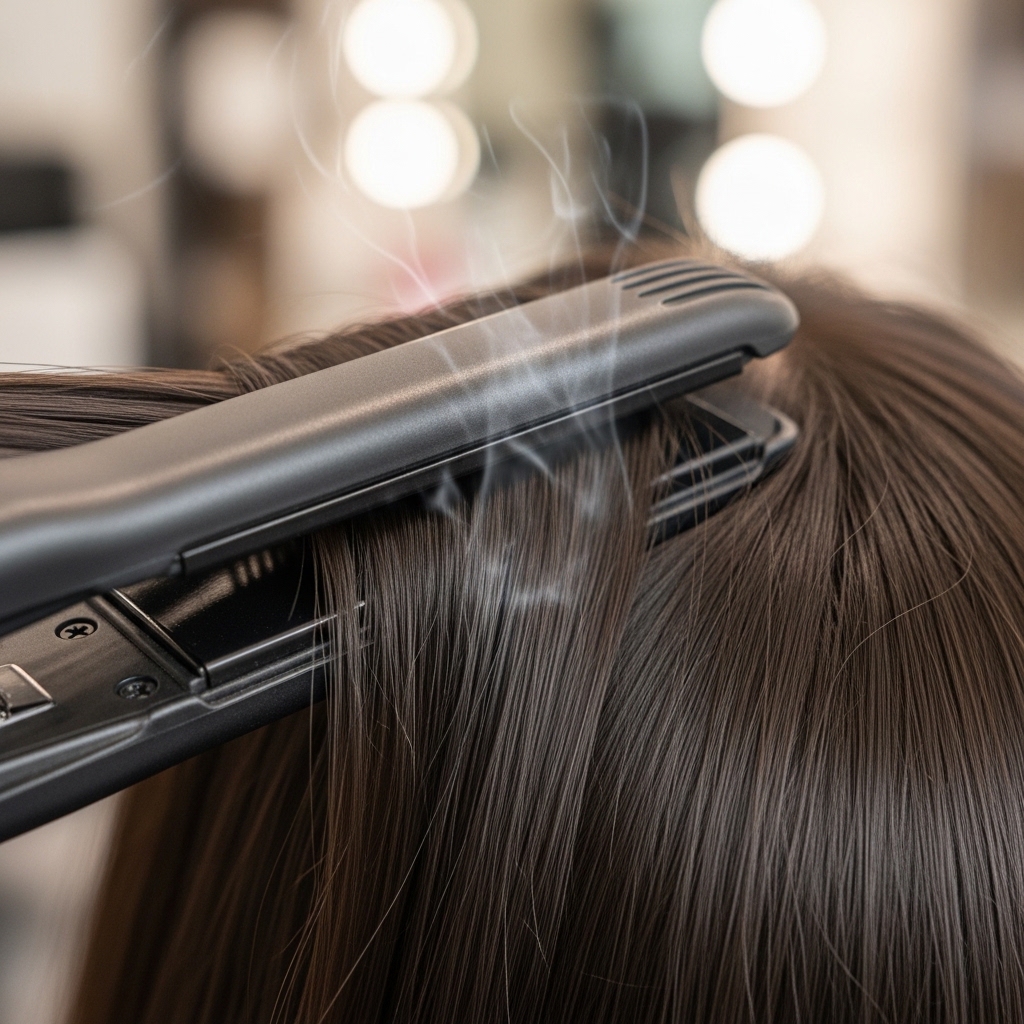
Step 5: The Flat Iron Method For Razor-Sharp Lines
Once your pieces are cut, it’s time to polish. Spray a light heat protectant on the front sections. Using your flat iron, clamp down on a small section of bangs and glide slowly down to seal the cuticle and create a perfect, sharp edge.
Do the same for each side piece, pulling the hair straight down and forward. This step erases any little frayed ends and gives you that salon-smooth finish.
Creating The “Blunt Bangs” Look
For the classic hime vibe, your bangs should be a solid, heavy curtain. After flat-ironing, use a tiny dab of smoothing serum just on the ends to fight flyaways. Then, use a small, dense makeup brush to apply a light dusting of translucent powder right at your roots.
This soaks up any oil and helps the bangs stay piece-y and separate, instead of clumping together. It’s a pro trick that makes all the difference.

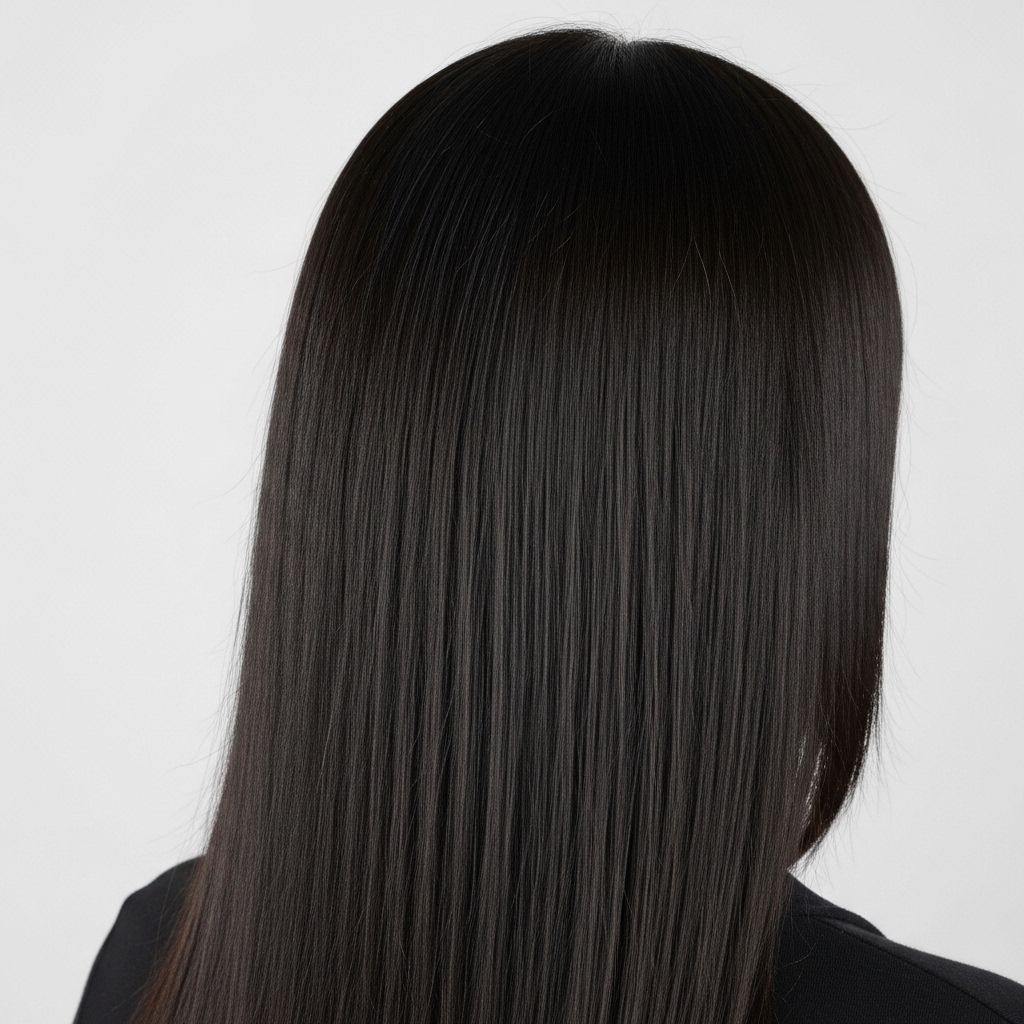
Styling The Long Back Section
Unclip the long back section of your hair. Give it a quick pass with the flat iron if needed, just to ensure it’s smooth and matches the sleek front. You can wear it straight down for maximum drama.
For a softer look, you can create loose waves in just the back section. This adds a romantic goth contrast to the sharp front. The key is to keep the front geometric and the back fluid.
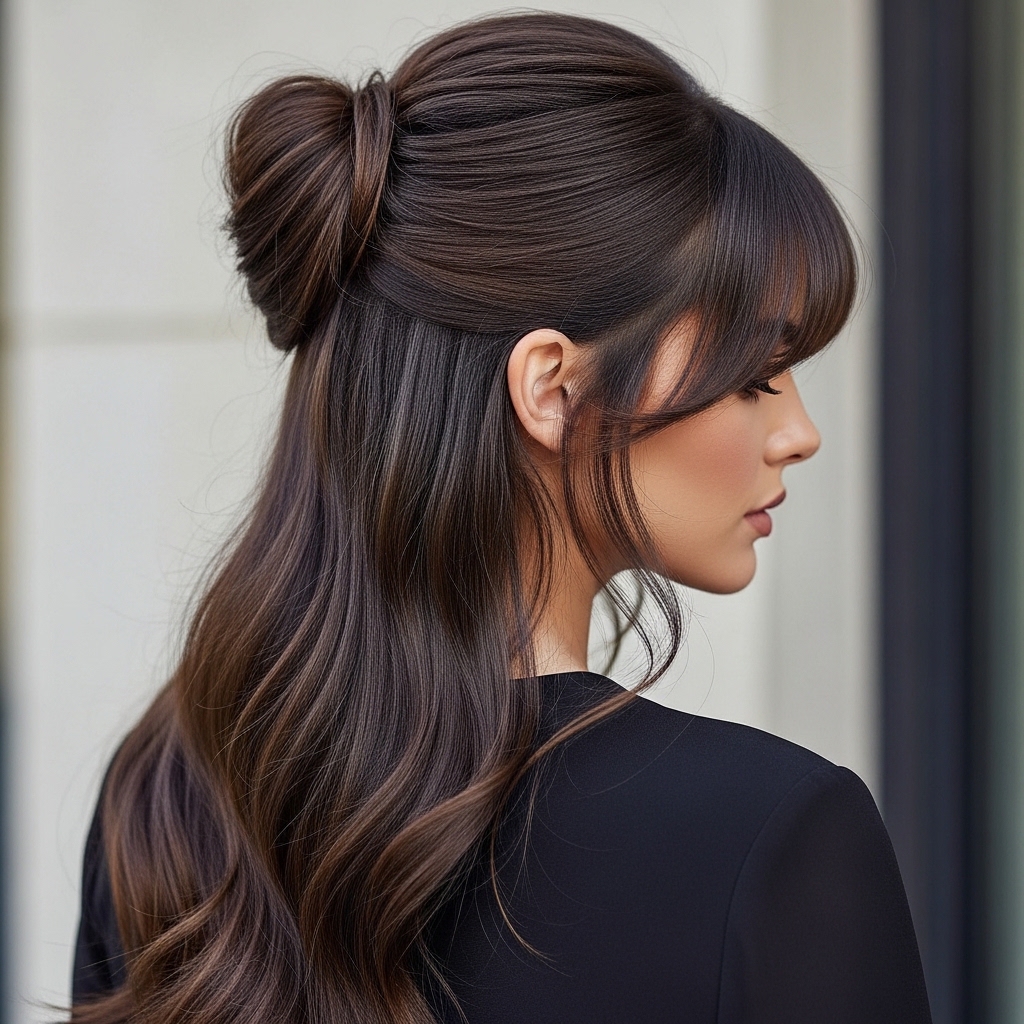
The Half-Up, Half-Down Hime Style
This is a gorgeous way to show off the cut. Gather just the long back hair into a low, loose ponytail or bun at your nape, leaving all the front hime pieces and bangs completely free.
It highlights the beautiful disconnect between the sections and feels very elegant. It’s a perfect style for when you want to feel put-together but still show off your edgy cut.
Adding “Glitchy Glam” Texture
Love the glitchy glam hair trend? You can add it here. After straightening, take just the very ends of your hime side pieces and bangs. Pinch them between the plates of your flat iron and give a slight, uneven twist to create a bent, piece-y end.
It adds a cool, deconstructed texture that feels modern and edgy, like a digital glitch. Keep it subtle for maximum effect.
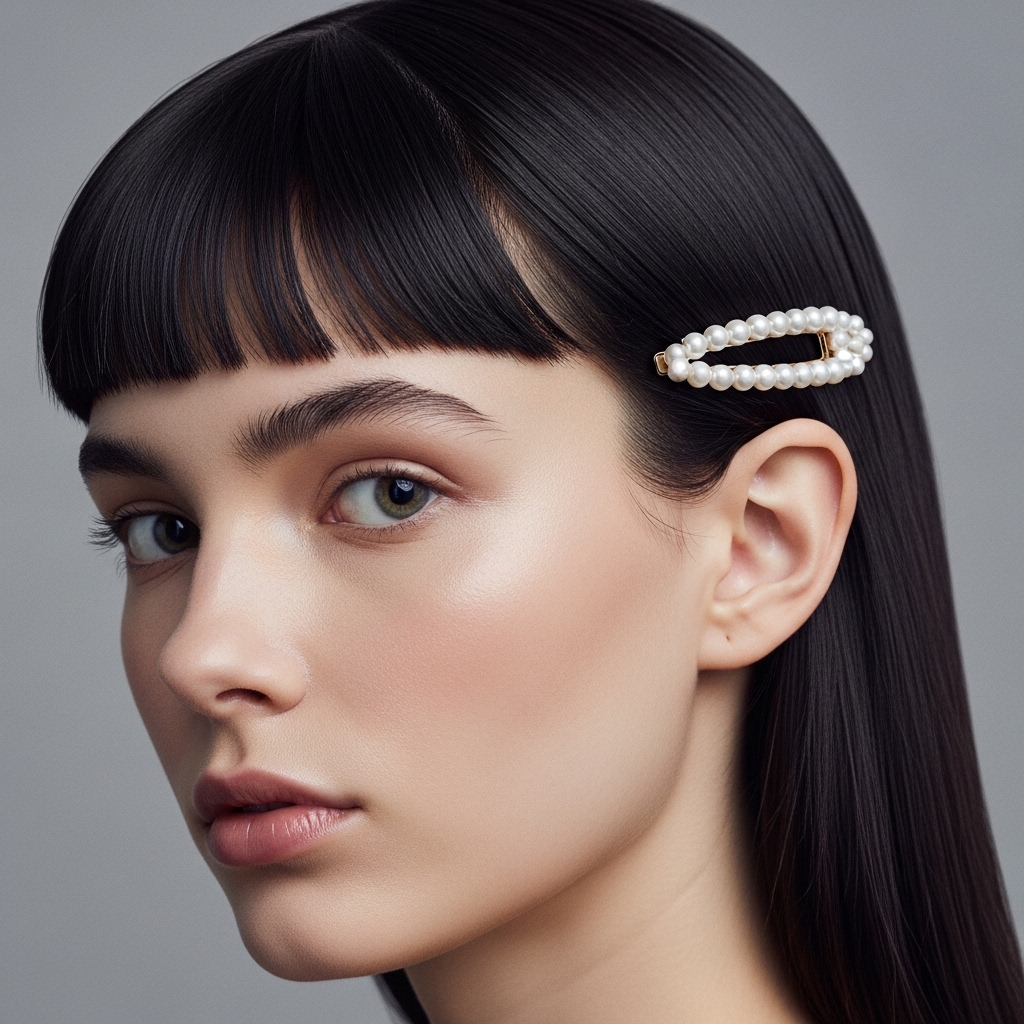
Accessorizing Your Hime Cut
A simple barrette or pin placed just behind the side piece, where the short hair meets the long, is stunning. It adds a touch of old money hair elegance. Think pearl clips or simple gold.
You can also use a thin headband over the bangs. Push it back just enough so it sits right where your bangs end, adding a vintage touch without hiding the cut.
Night-Out Version: The Sleek Vampire Vibe
For a true vampire haircut feel, amp up the drama. Make every line razor-straight and severe. Use a strong-hold gel on your bangs while blow-drying for an extra-flat, graphic look.
Pair it with deep, middle-parted styling and a dark lip. This look is all about high contrast and a fearless, sharp silhouette. It’s powerful and unforgettable.

Day-To-Day Casual Styling
For everyday, the goal is effortless. A quick pass with the flat iron on the front pieces only, then let the back air-dry if it wants to. Use a light-hold texturizing spray on the long back section to add a tiny bit of separation.
The cut does the work. You just have to keep the front pieces smooth and defined, and you’ll look styled even on a quick errand run.

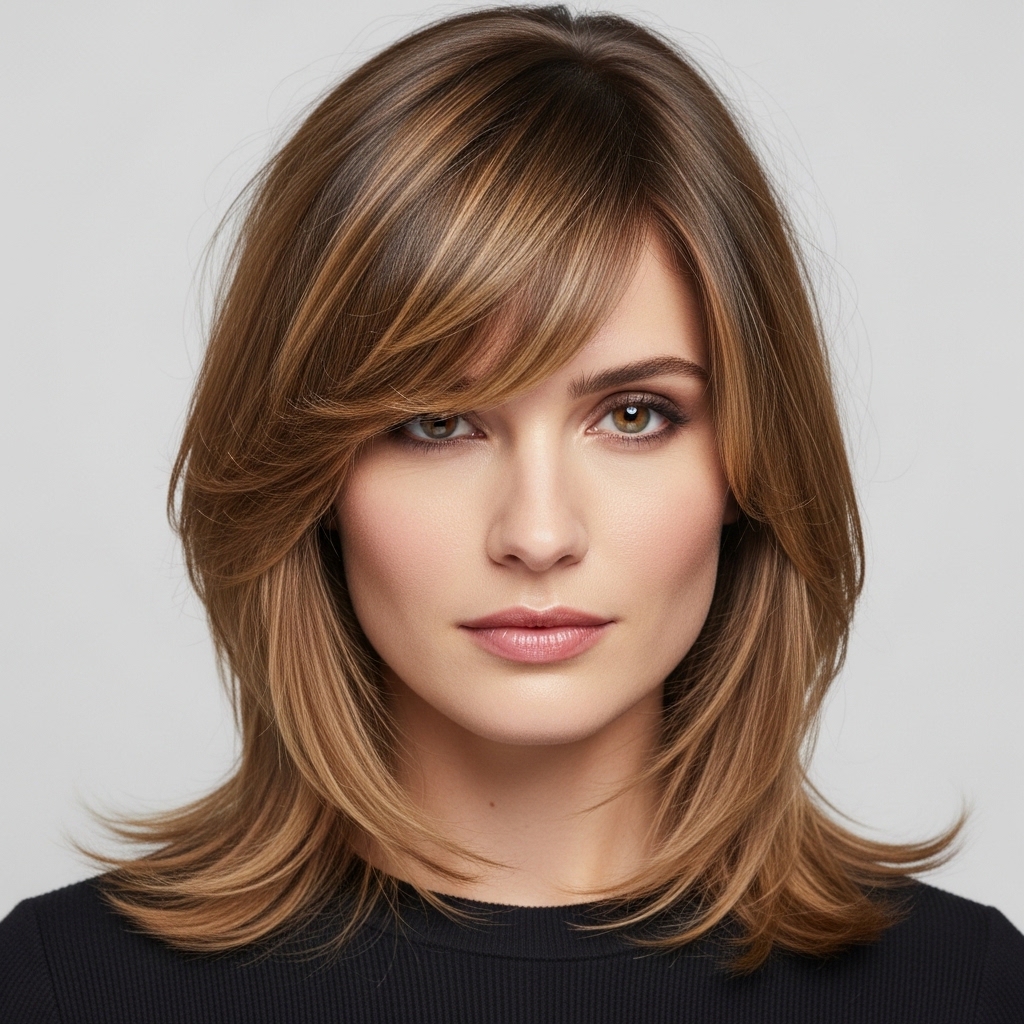
What To Do With Growing-Out Bangs
As your bangs grow, blend them into your side pieces. Start sweeping them slightly to the side and use a small clip to train them. You can integrate them into a soft, asymmetrical lob look as they get longer.
This phase is actually really fun—it’s like getting a new cut every few weeks. Use cute pins or tuck them behind your ears with some strong-hold spray.
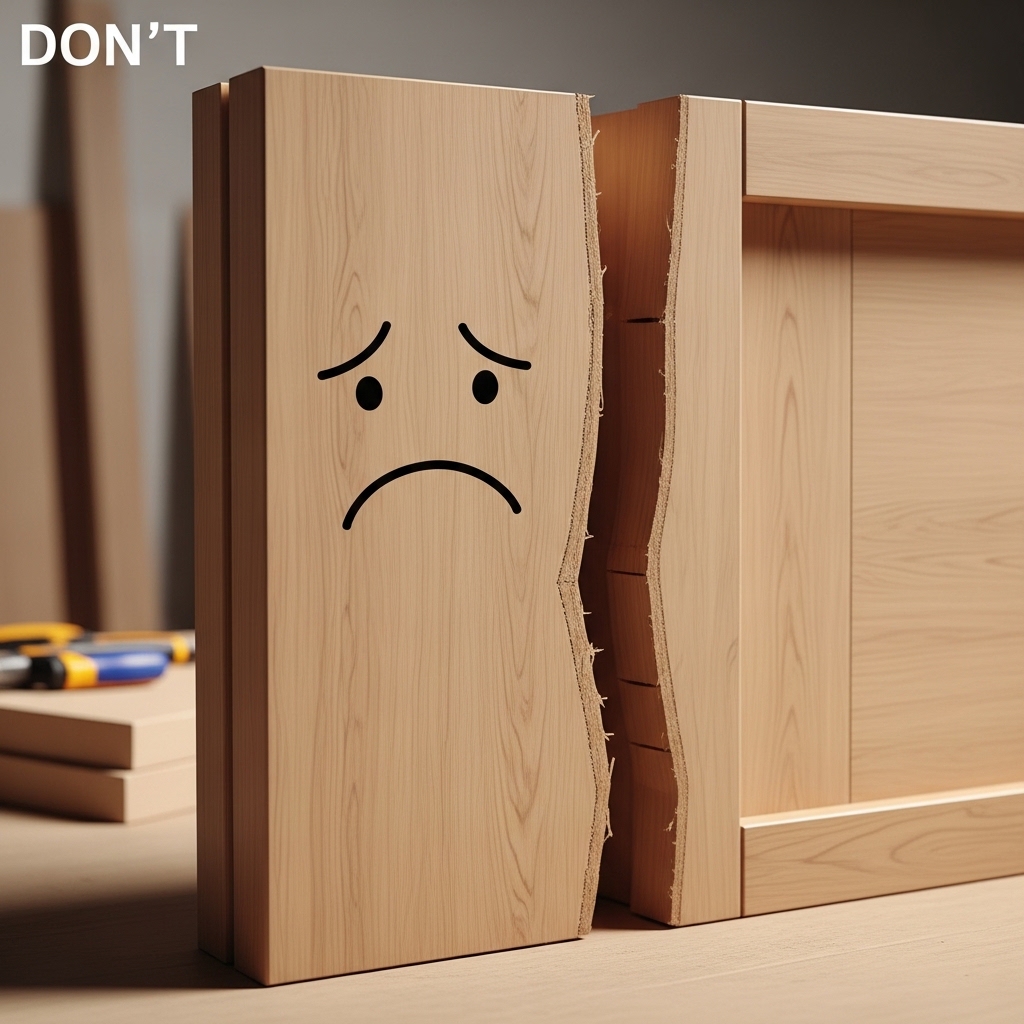
Common Hime Cut Mistakes To Avoid
- Cutting hair wet: Straight hair shrinks as it dries. Always cut dry for accuracy.
- Making the triangle too wide: Your side pieces will be too thick. Start with a modest triangle.
- Using dull scissors: This will give you frayed, split ends instantly. Invest in one good pair.
- Forgetting to style the back: The contrast is key. Don’t leave the back section messy.
Haircare For Maintaining Your Style
Healthy hair holds a shape better. Use a hydrating mask once a week to keep your straight hair shiny and strong. Trim your bangs and face-framing pieces every 3-4 weeks to keep them sharp.
Always, always use a heat protectant. Your flat iron is your best friend for this style, but you need to protect your hair from damage to keep those ends looking clean, not fried.
Is The Hime Cut A “Quiet Luxury” Style?
Absolutely, when done with precision. The quiet luxury bob is all about impeccable cut and health over obvious styling. The hime cut fits right in if you focus on flawless lines, rich color, and a glossy finish.
It’s a statement that doesn’t need to shout. It’s the confidence in a sharp, unusual shape that feels both luxurious and personal. It whispers that you know exactly what you’re doing.
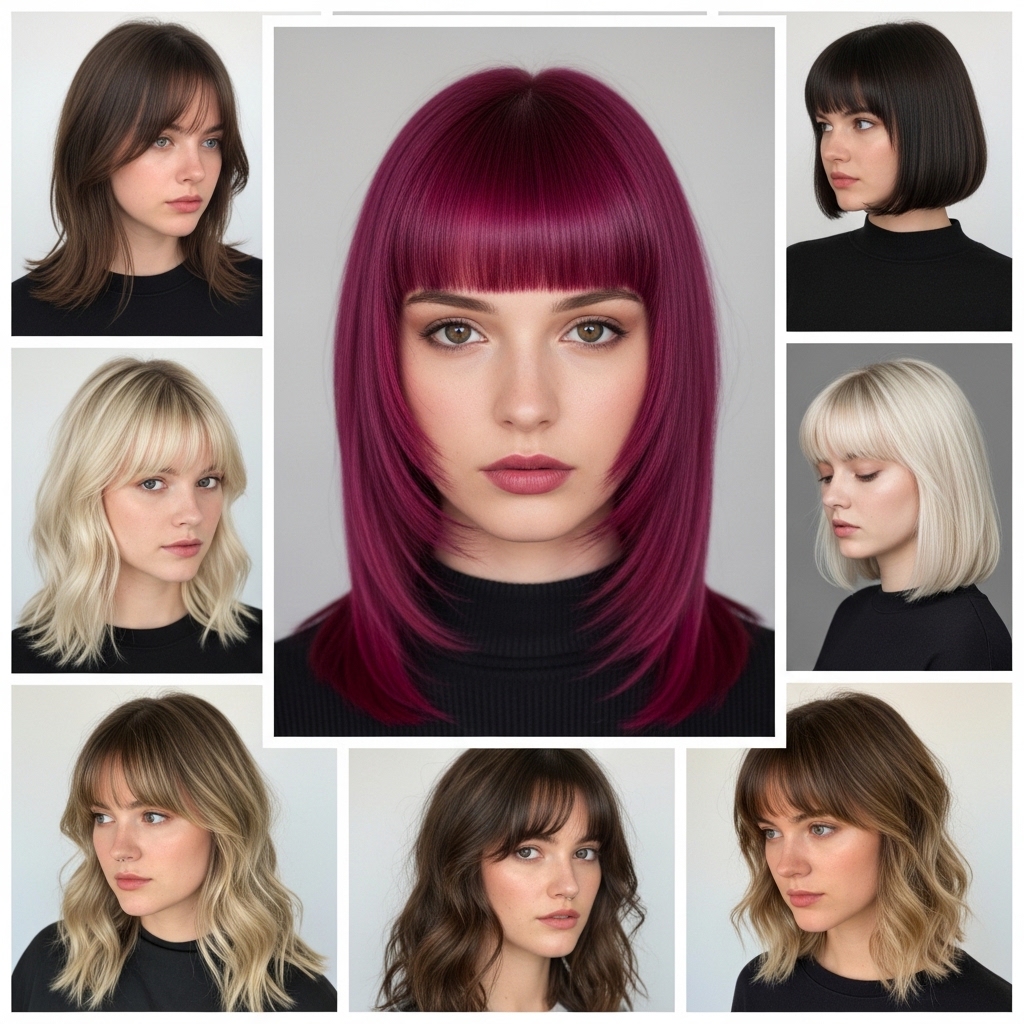
Hime Cut Variations To Try Later
Once you’ve mastered the classic, play with variations. Try a vampire haircut with more layers in the back. Or an asymmetrical lob by cutting the back shorter. Add curtain bangs instead of blunt ones.
You can even dip-dye the front pieces for a pop of color. This cut is a fantastic base for so many of the trending 2026 hairstyles we’re starting to see.
My Final Pep Talk For You
If you’re feeling nervous, just breathe. Hair grows back, but the confidence from trying something bold lasts way longer. The hime cut is a celebration of straight hair, not a fight against it.
You have everything you need to rock this look. It’s about attitude as much as it is about technique. Own those sharp lines and that dramatic silhouette.
And just like that, you’ve got the know-how to create one of the most head-turning cuts right at home. It’s more than just a hairstyle—it’s a way to express a little boldness in your daily routine. Every time you style those sharp lines, it’s a reminder that you can master cool, beautiful things.
Remember, the best part about hair is that it’s always changing, always growing. So have fun with it. Play with the styling, try the half-up look for a date night, or rock the sleek vampire vibe when you need an extra boost of power.
Save this post to Pinterest to keep this guide handy for your next styling session! And I’d love to hear—are you thinking of trying the hime cut? Or do you have another dream cut you’re curious about? Let me know in the comments below!

