
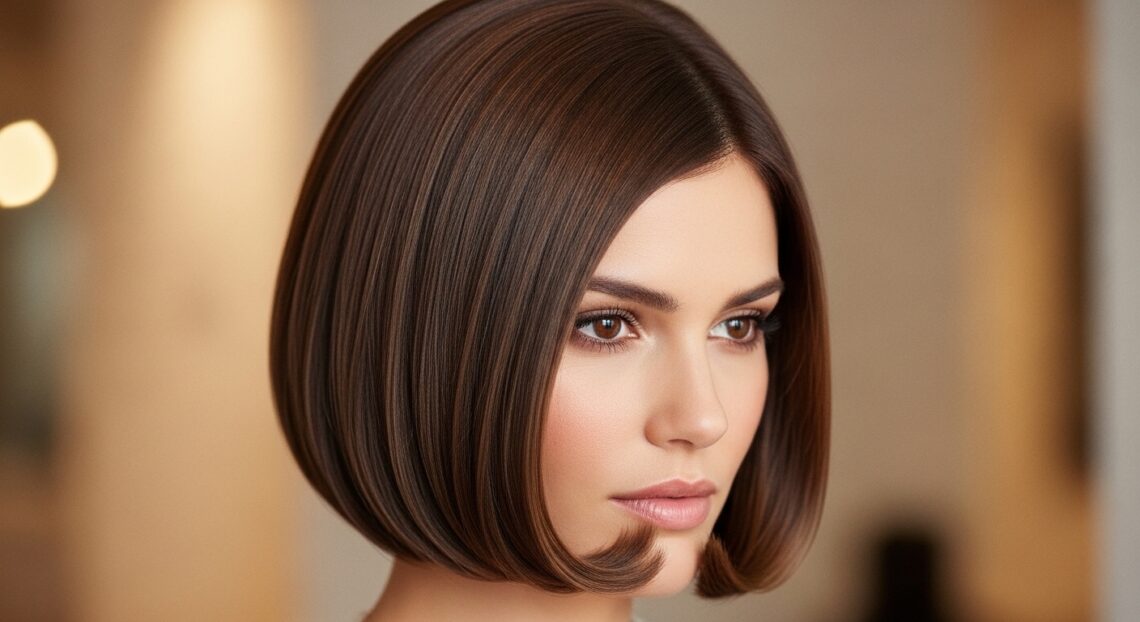
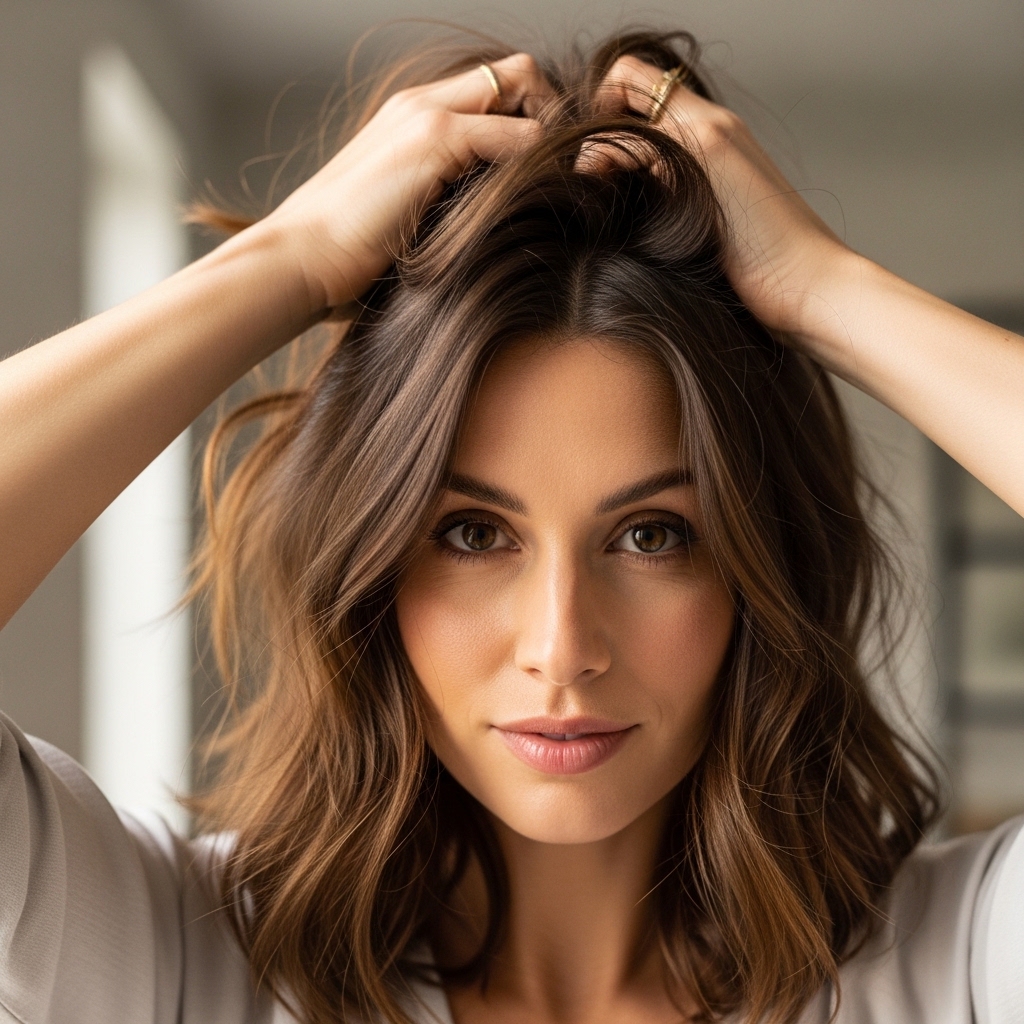
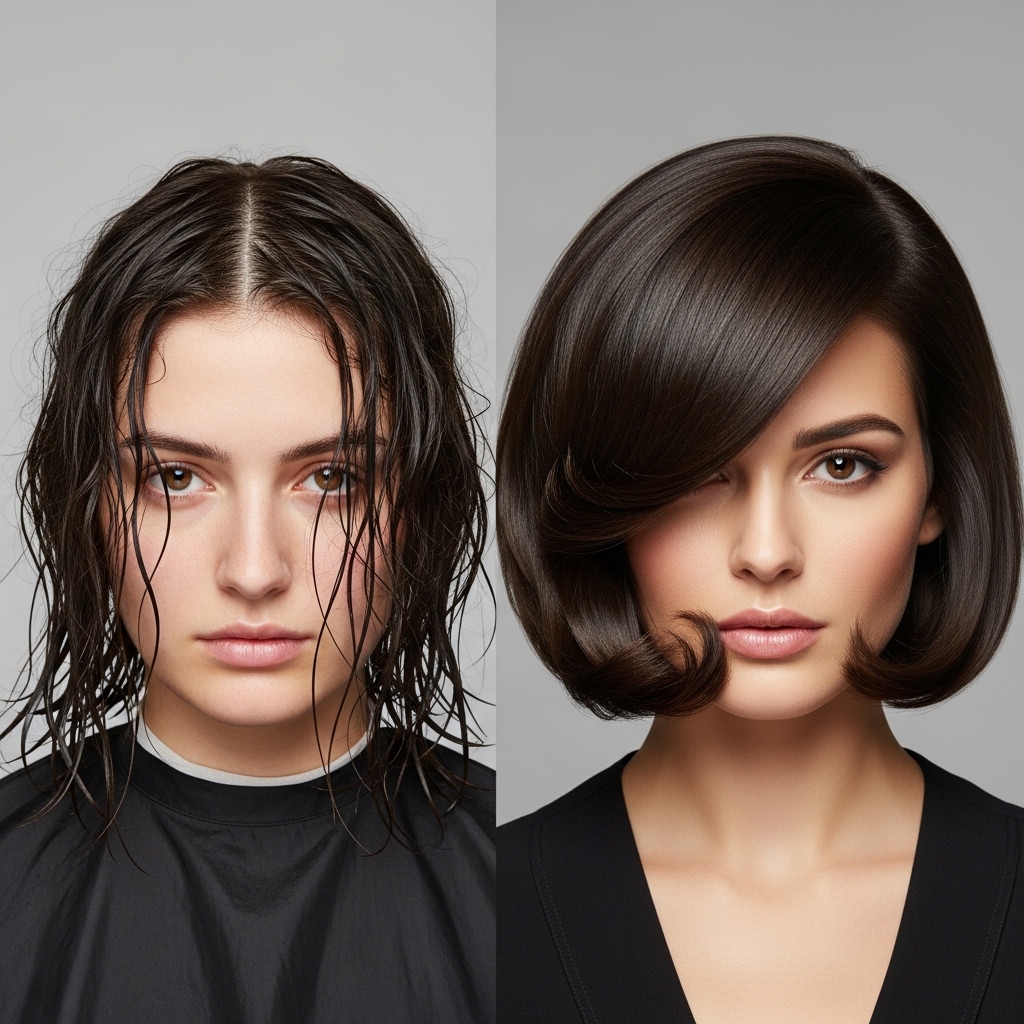
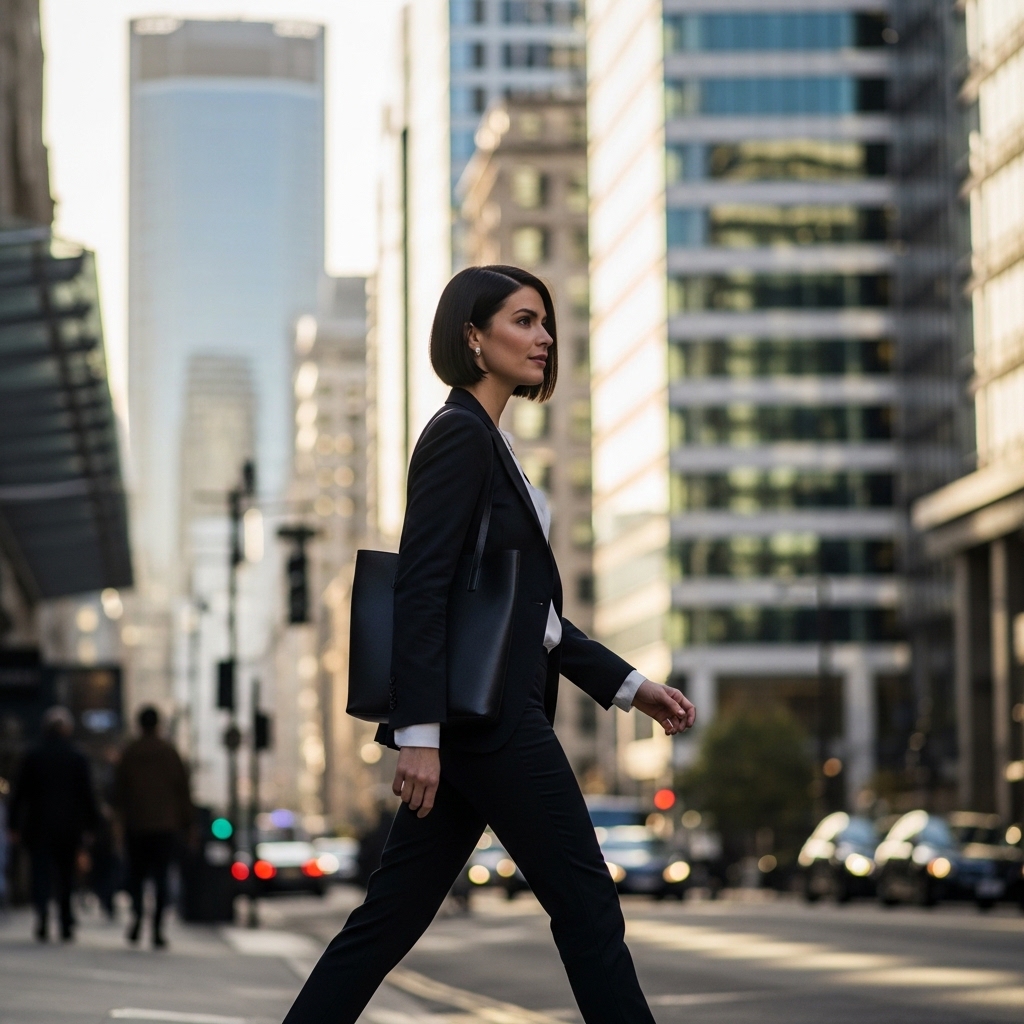
Okay, let’s talk about a hairstyle that’s absolutely everywhere right now, and for good reason. The sculpted bob with a deep part is that perfect mix of chic and effortless. It feels like the ultimate quiet luxury bob, but it’s surprisingly easy to make your own.
Whether you’re into that clean, old money hair vibe or you want to edge it toward something like a vampire haircut, this cut is your blank canvas. I’ve been playing with this style for weeks, and I’m breaking down exactly how to get it, style it, and make it last all day.
This is one of those 2026 hairstyles you can start wearing today. It’s all about precision and a little bit of attitude. Grab your favorite products, and let’s get into it.
What Exactly Is a Sculpted Bob?
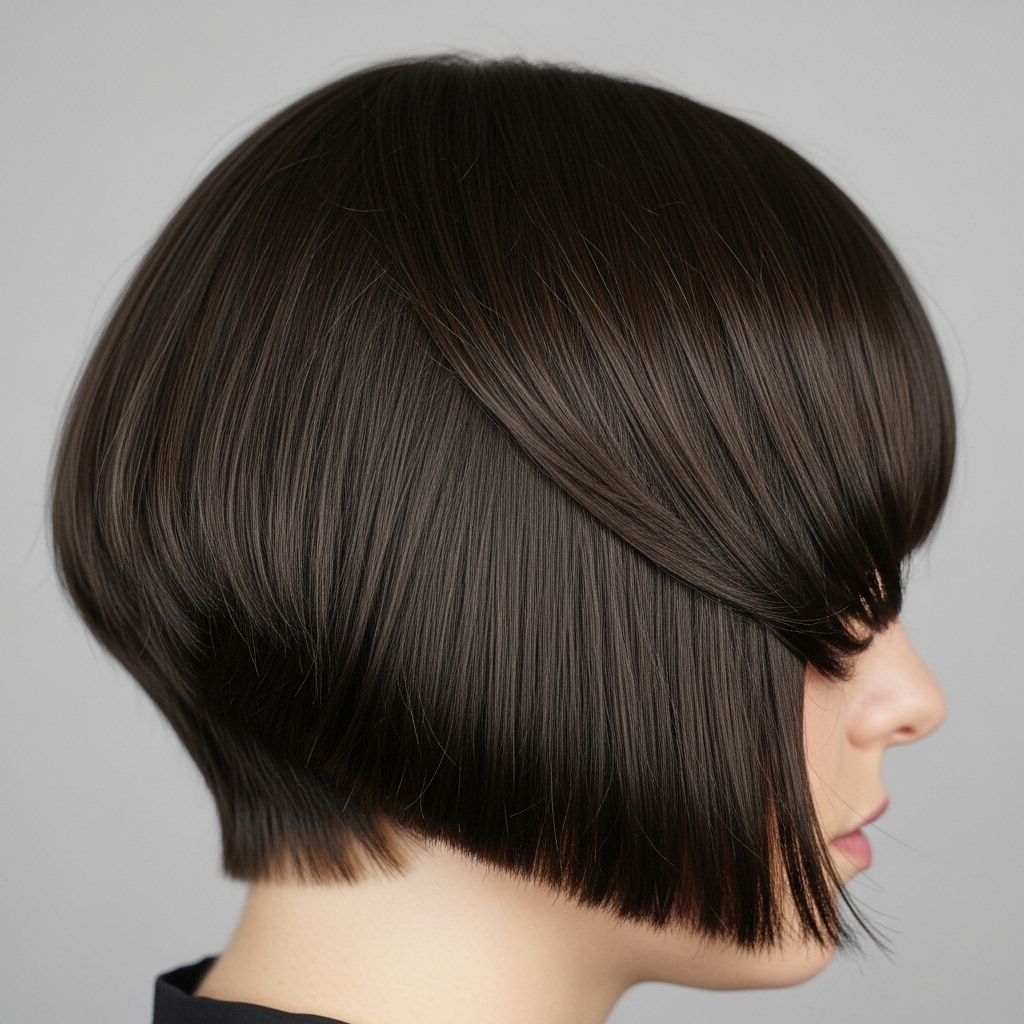
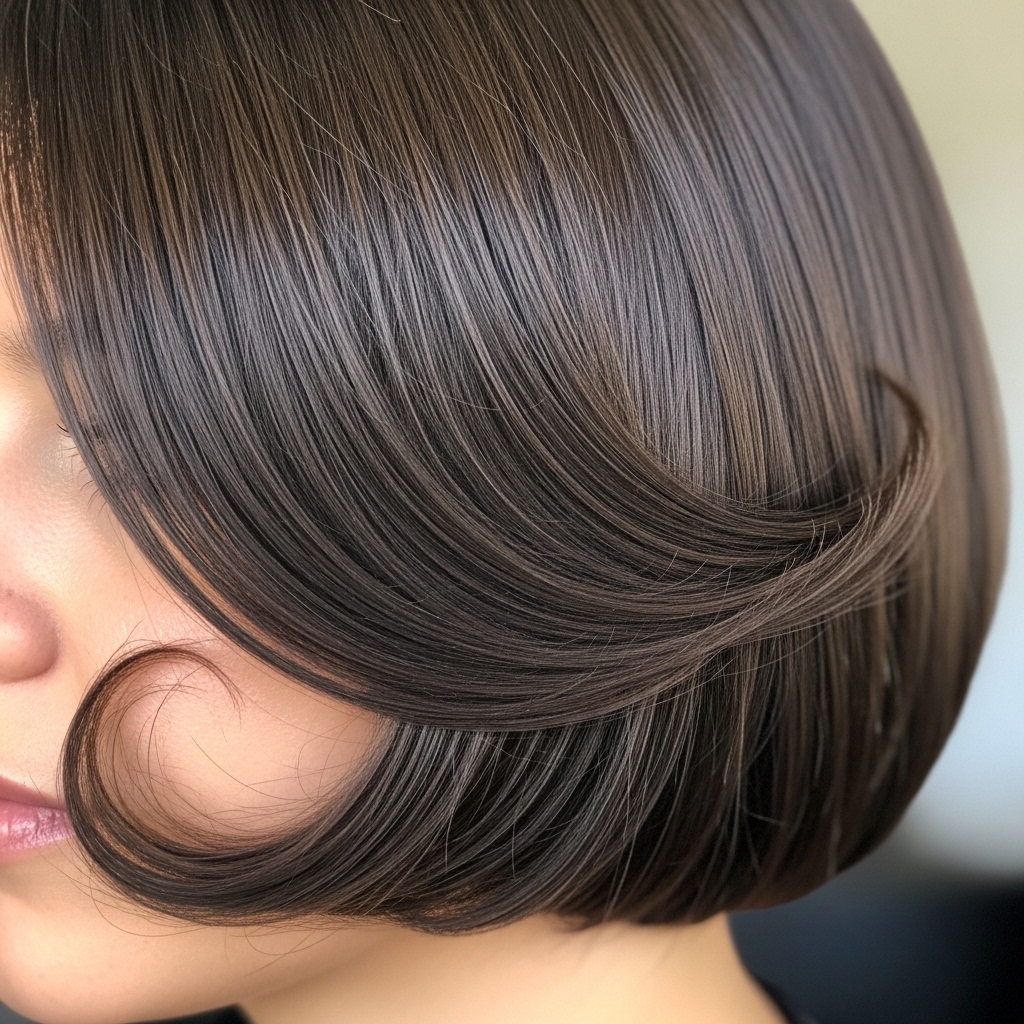
A sculpted bob isn’t just a blunt cut. It’s all about intentional shape and movement. The hair is cut to frame the face with clean, sometimes angular lines, while the deep part adds instant drama and sophistication.
Think of it as architecture for your hair. It has structure, but it’s not stiff. This is the look that bridges the gap between a classic chin-length bob and more trending shapes like the asymmetrical lob or even the boldness of a hime cut.
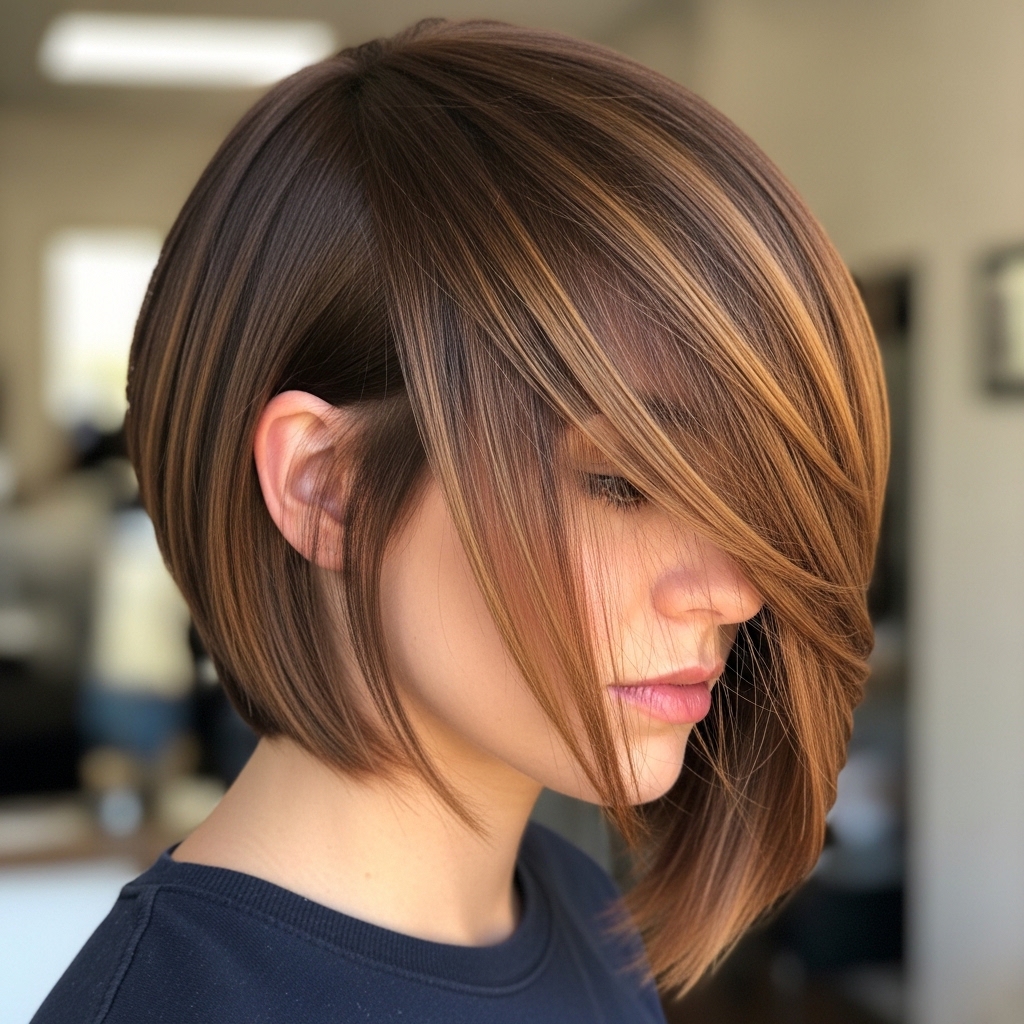
Why the Deep Part Makes All the Difference
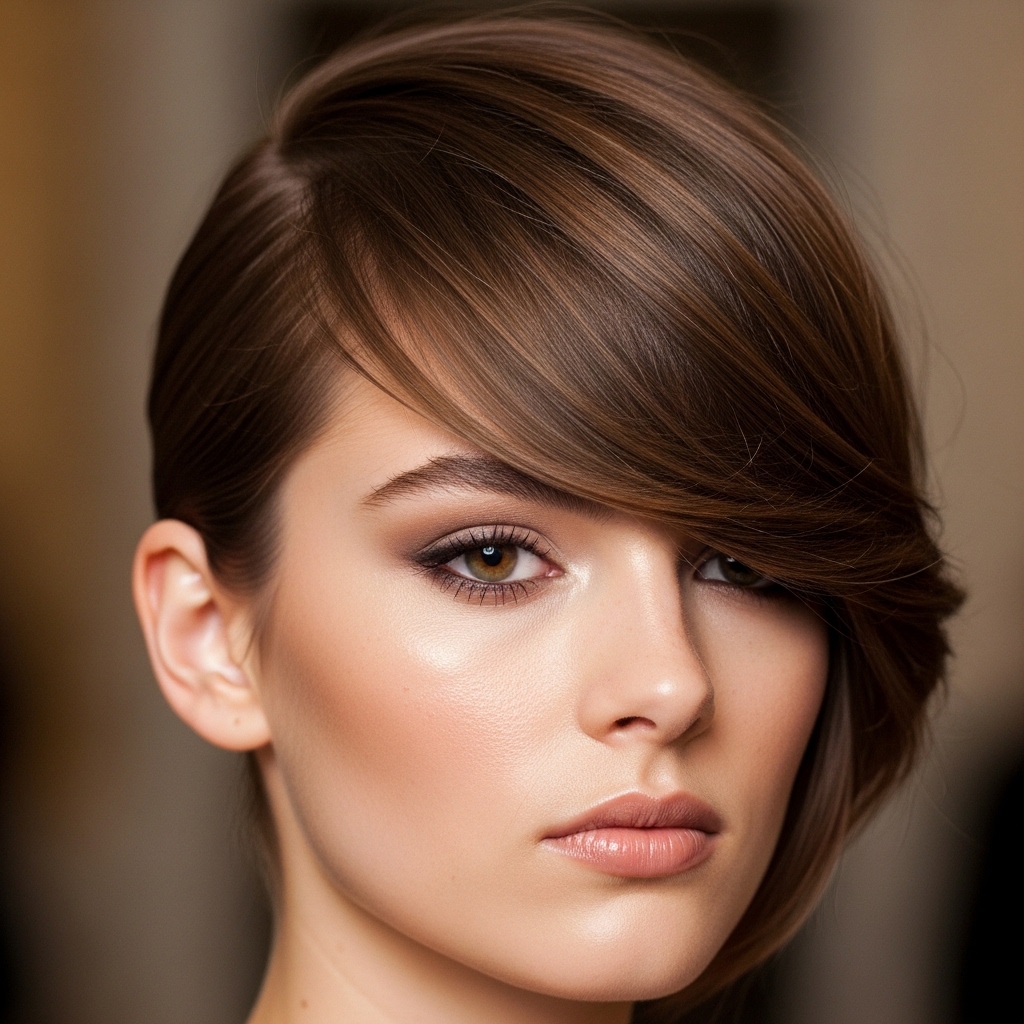
Forget the center part for a second. A deep side part completely changes the energy of this bob. It creates volume at the crown and allows one side to sweep dramatically across the forehead, while the other tucks neatly behind the ear.
This asymmetry is what gives it that modern, cool-girl feel. It’s a simple switch that elevates the entire style, making it feel more personalized and less like a standard haircut.
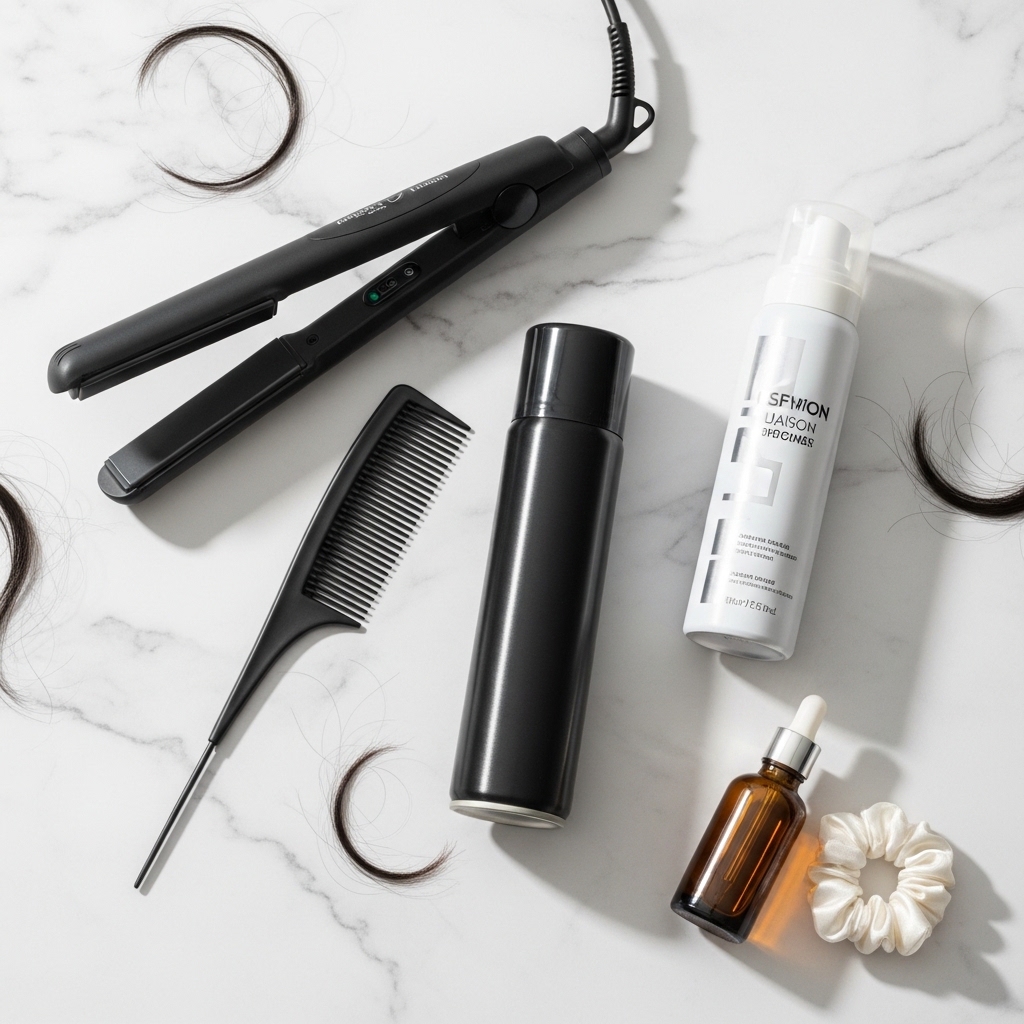
Tools You’ll Need to Get the Look
You don’t need a salon full of tools, but a few key items are non-negotiable. First, a good flat iron with rounded edges for smoothing and curling. A medium-hold hairspray is a must. Don’t forget a tail comb for that perfect, precise part.
For products, a lightweight mousse or volumizing spray at the roots will be your best friend. A small amount of smoothing serum or cream will polish the ends without weighing them down.
- Flat iron with rounded edges
- Tail comb (for the part!)
- Medium-hold hairspray
- Volumizing mousse or spray
- Smoothing serum
Step 1: Start with Day-Old Hair
Trust me on this. Freshly washed hair can be too slippery and soft to hold this style well. Day-two or even day-three hair has just enough natural texture and grip to make styling easier and help it last longer.
If you must wash, use a volumizing shampoo and conditioner, and avoid heavy creams in the shower. Towel-dry gently and let it air dry about 80% of the way before you start heat styling.
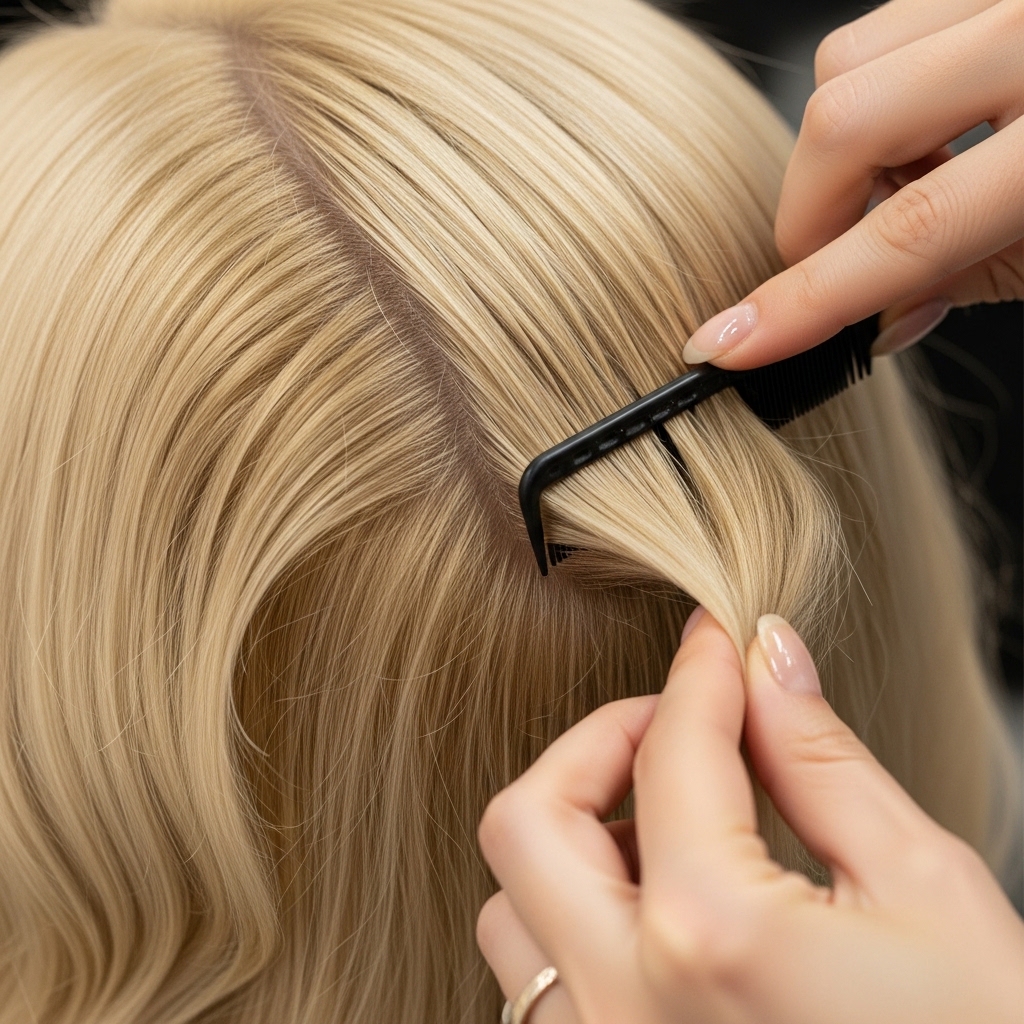
Step 2: Create That Perfect Deep Part
This is where the tail comb comes in. Start at the corner of your eyebrow (or even further over) and drag the comb’s point straight back to the crown of your head. Don’t be shy—go deep.
Once the line is established, use the comb to gently lift the hair on the heavier side at the root. This little lift is the secret to avoiding a flat look and building that signature volume.
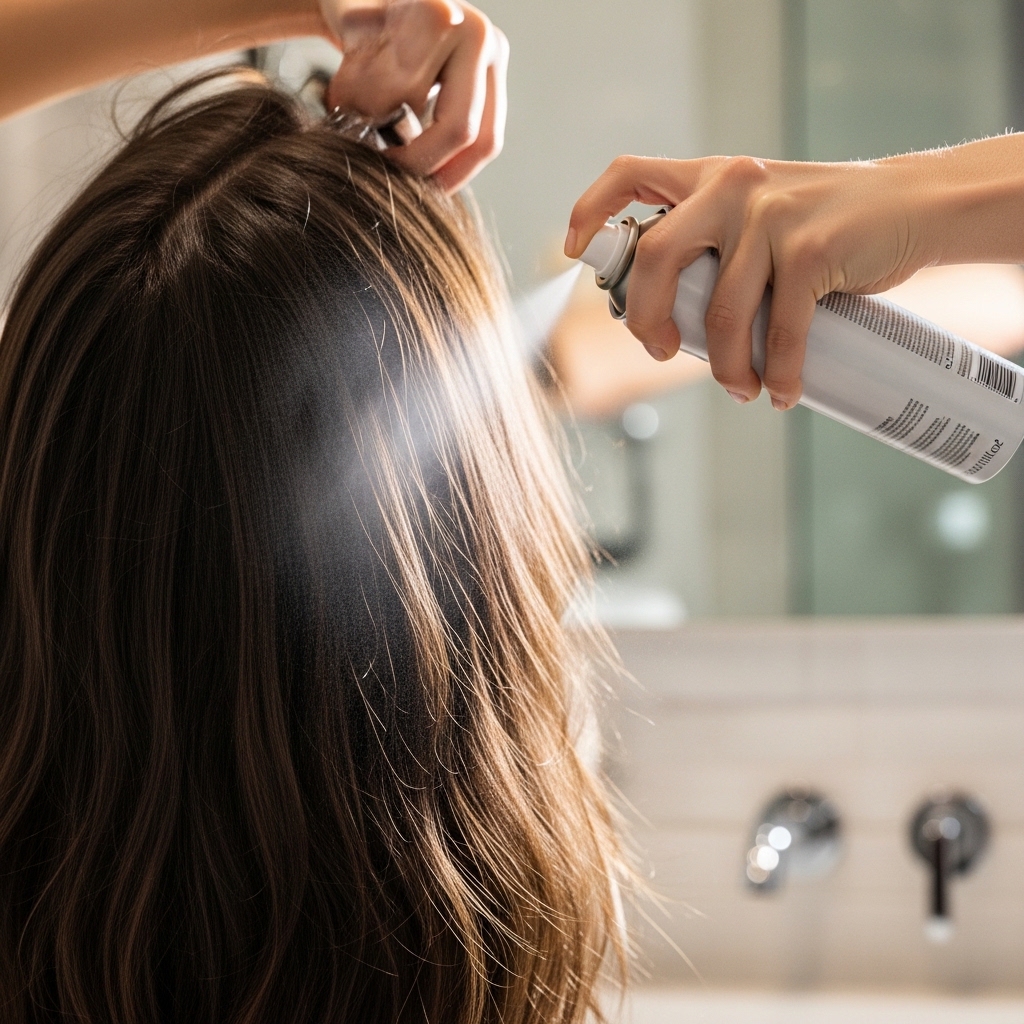
Step 3: Apply Your Base Products
Flip your head over and spray a volumizing spray or work a pearl-sized amount of mousse directly at the roots on both sides. This gives your hair something to hold onto.
Then, on your palms, rub a dime-sized amount of smoothing serum. Gently run your hands over the mid-lengths and ends of your hair. This will protect from heat and fight any frizz, ensuring a polished finish.
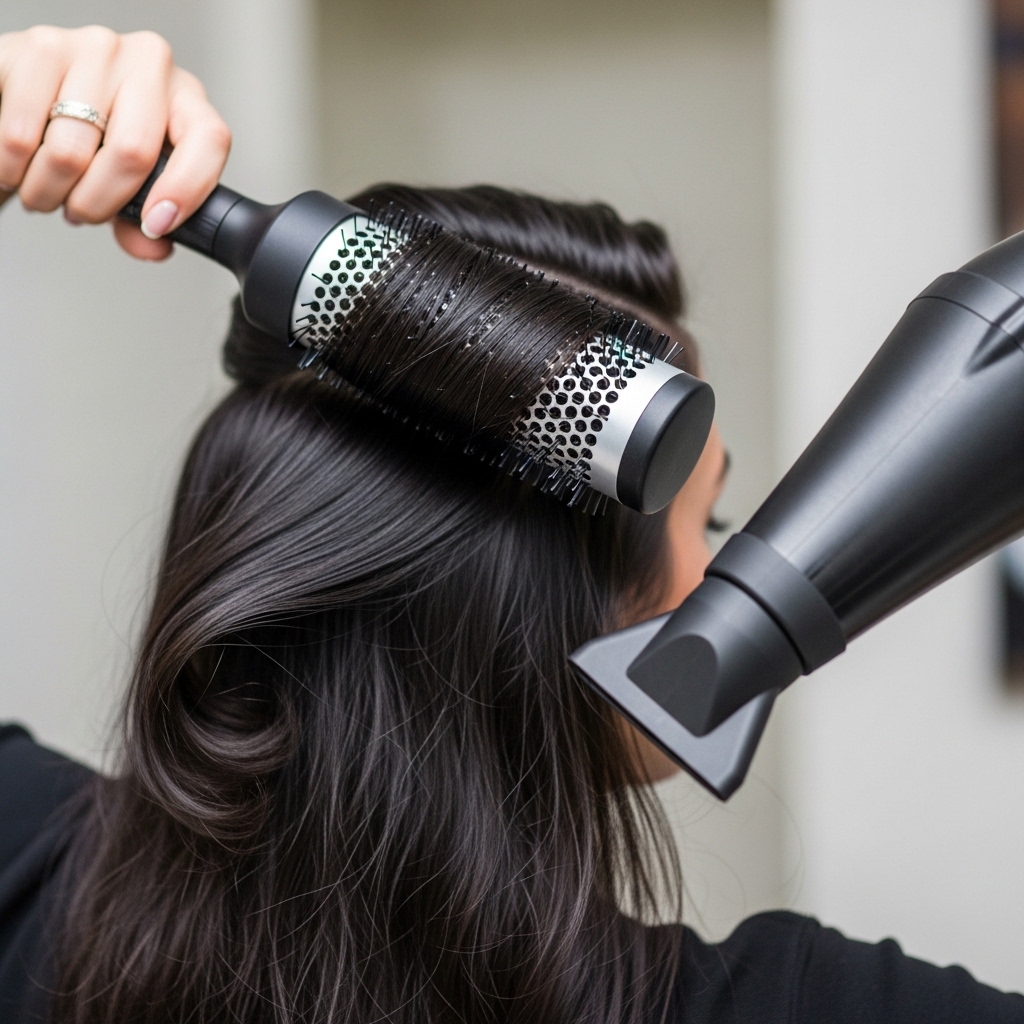
Step 4: Blow-Dry for Direction
Using a round brush, blow-dry your hair following the direction of your deep part. On the heavier side, brush the hair forward and slightly down over your forehead, then direct it back.
On the shorter side, brush everything back and away from your face. The goal here isn’t perfect smoothness, but to set the hair in the right direction and lock in that root volume.
Step 5: Flat Iron for Smoothness & Shape
Take small, vertical sections of hair. Clamp your flat iron near the root and, as you glide down, turn the wrist slightly inward or outward to create a very soft bend, not a curl.
This technique adds body and stops the hair from looking too flat or triangular. Pay extra attention to the front sections—these frame your face and define the sculpted look.

Step 6: Sculpt the Front Sections
The hair that falls around your face is the star. On the heavier side, take that front section and curve it under, toward your chin. On the shorter side, curve it under and back toward your ear.
You can even try a slight outward flick at the end on the shorter side for a playful touch. This contrast is what makes the sculpted bob so dynamic and face-framing.
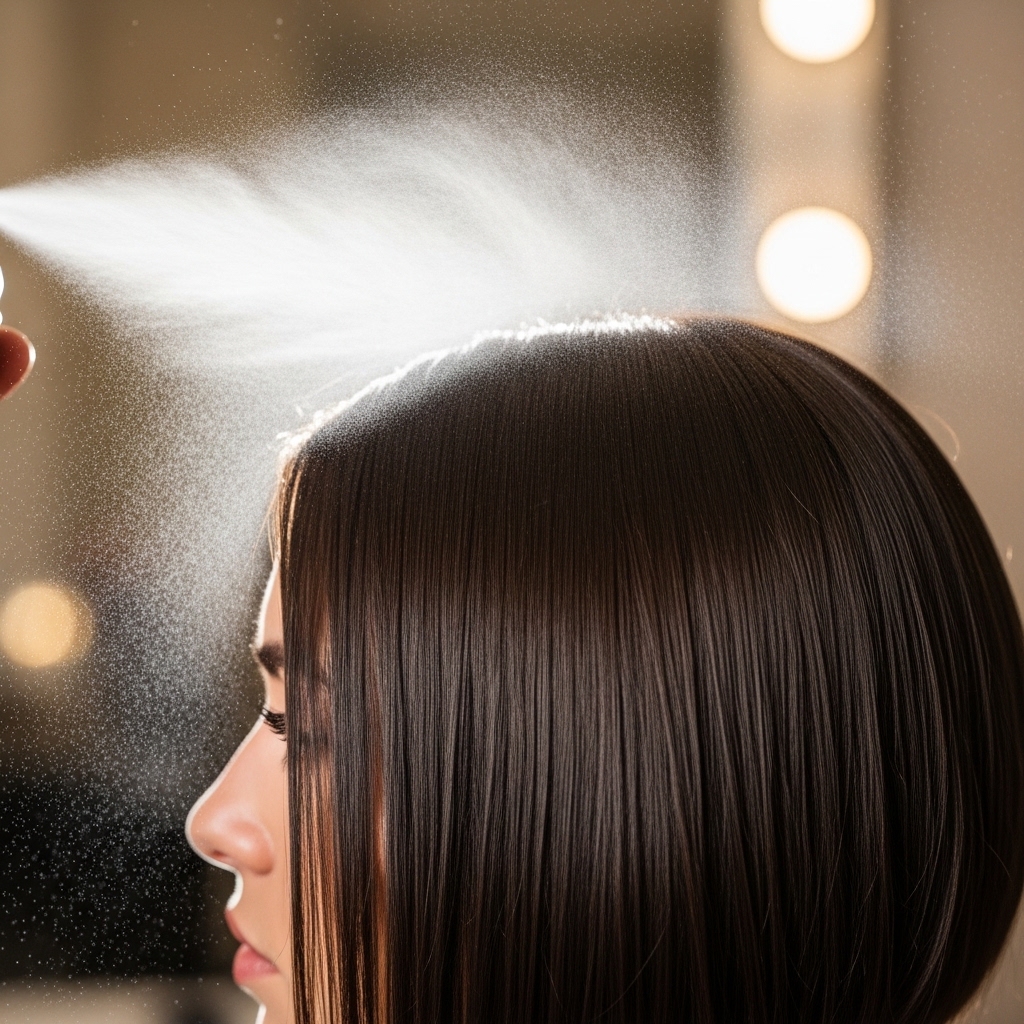
Step 7: Lock It All In Place
Hold a can of hairspray about 10 inches away from your head. Give a light, all-over mist. Then, lift the top layers and spray a bit more directly at the roots on the crown for lasting lift.
Finally, use the cool shot button on your blow dryer for 10 seconds all over. This cools the hair’s cuticle, setting the style and increasing its longevity.
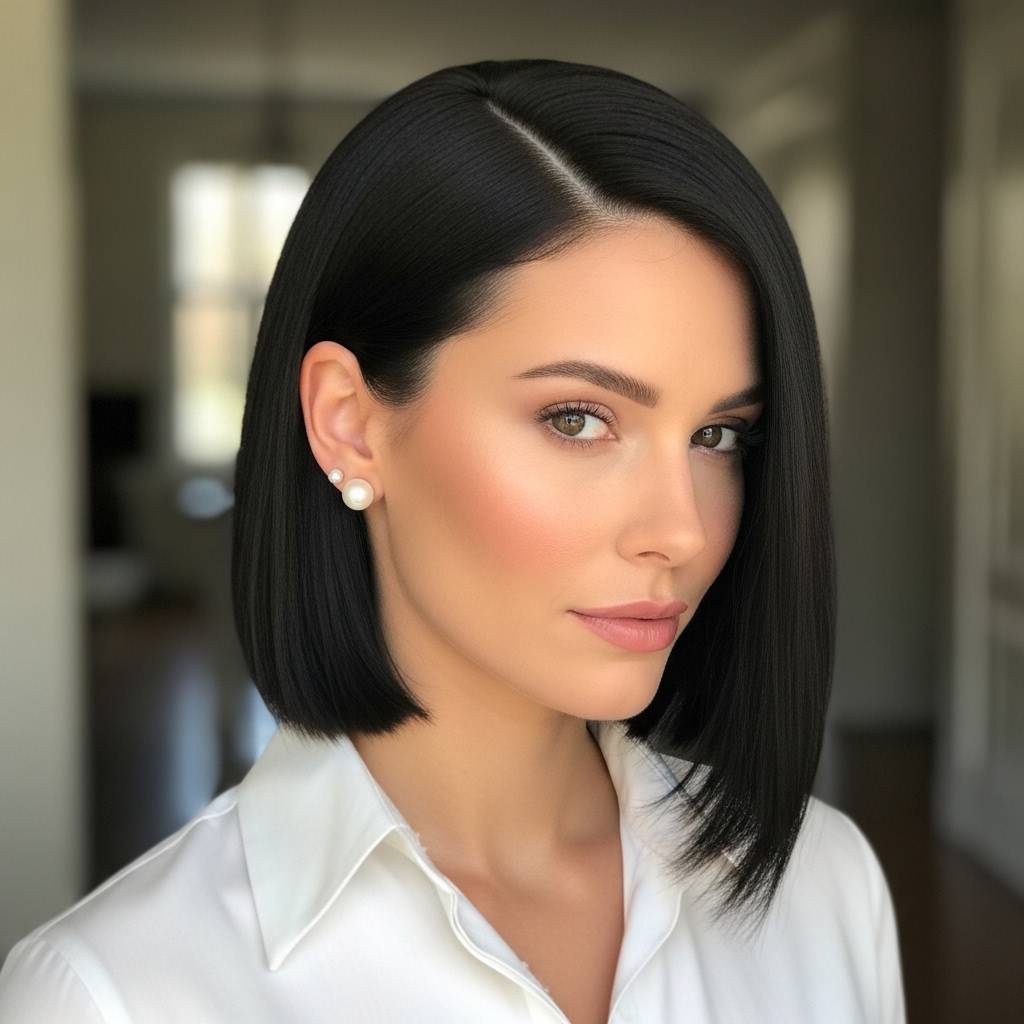
How to Get That “Old Money” Vibe
For that classic, old money hair feel, focus on extreme polish. Ensure every strand is sleek and smooth. The deep part should be razor-straight, and the ends should be perfectly blunt and tucked under.
Keep the color natural-looking—think rich brunettes or soft blondes. The vibe is “effortlessly perfect,” like you were born with this incredibly chic, low-maintenance hair.
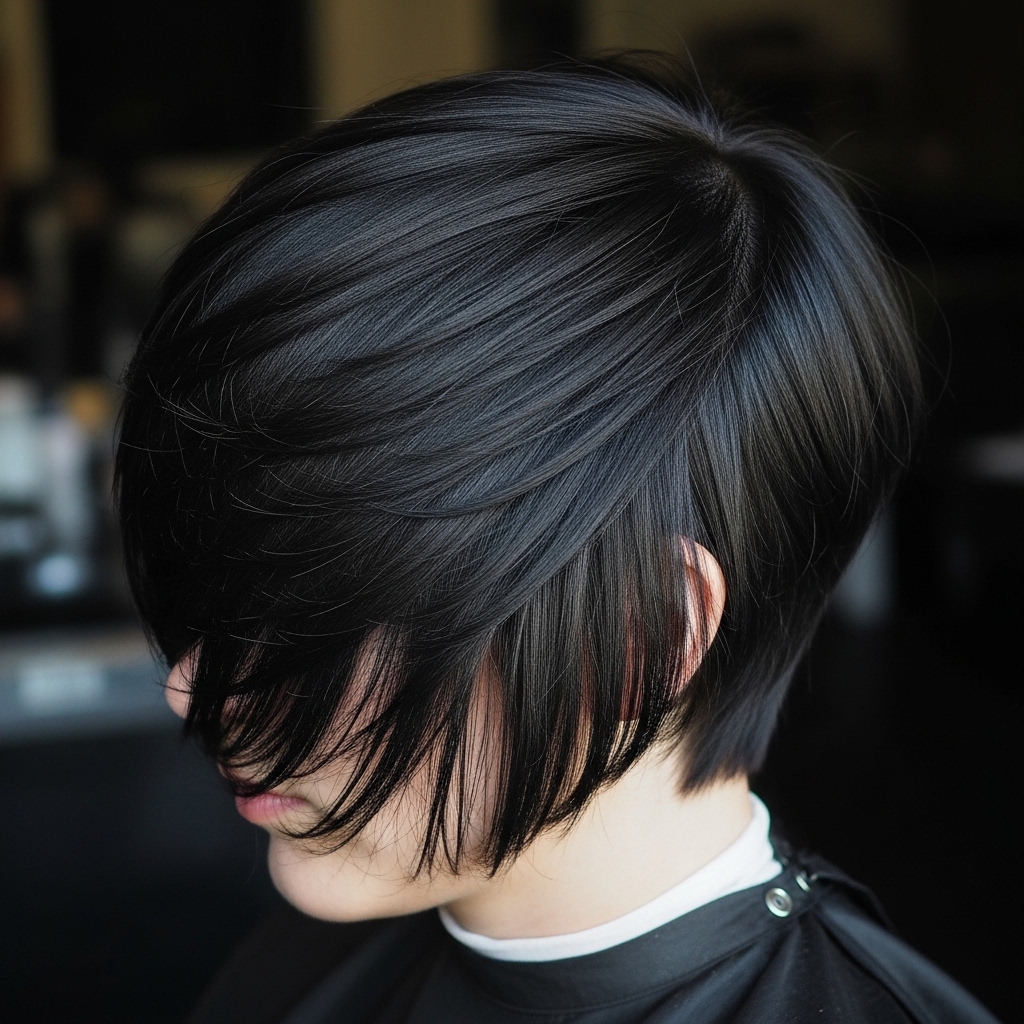
How to Add a “Romantic Goth” Twist
Love romantic goth hairstyles? This cut is perfect for it. Keep the sculpted shape but play with texture. After styling, gently tease the roots at the crown for a bit more height and drama.
You can also use a wax or pomade to piece out the very ends, creating a slightly undone, lived-in texture. Pair it with deep, rich hair color for the full effect.
Experimenting with “Glitchy Glam” Texture
Glitchy glam hair is all about intentional imperfection. To get this vibe, after straightening, go back in with your flat iron and randomly kink or bend a few small, face-framing pieces in opposite directions.
The rest of the hair stays smooth, but these few “glitched” pieces add an unexpected, artistic edge. It’s a super cool way to personalize the classic sculpted bob.

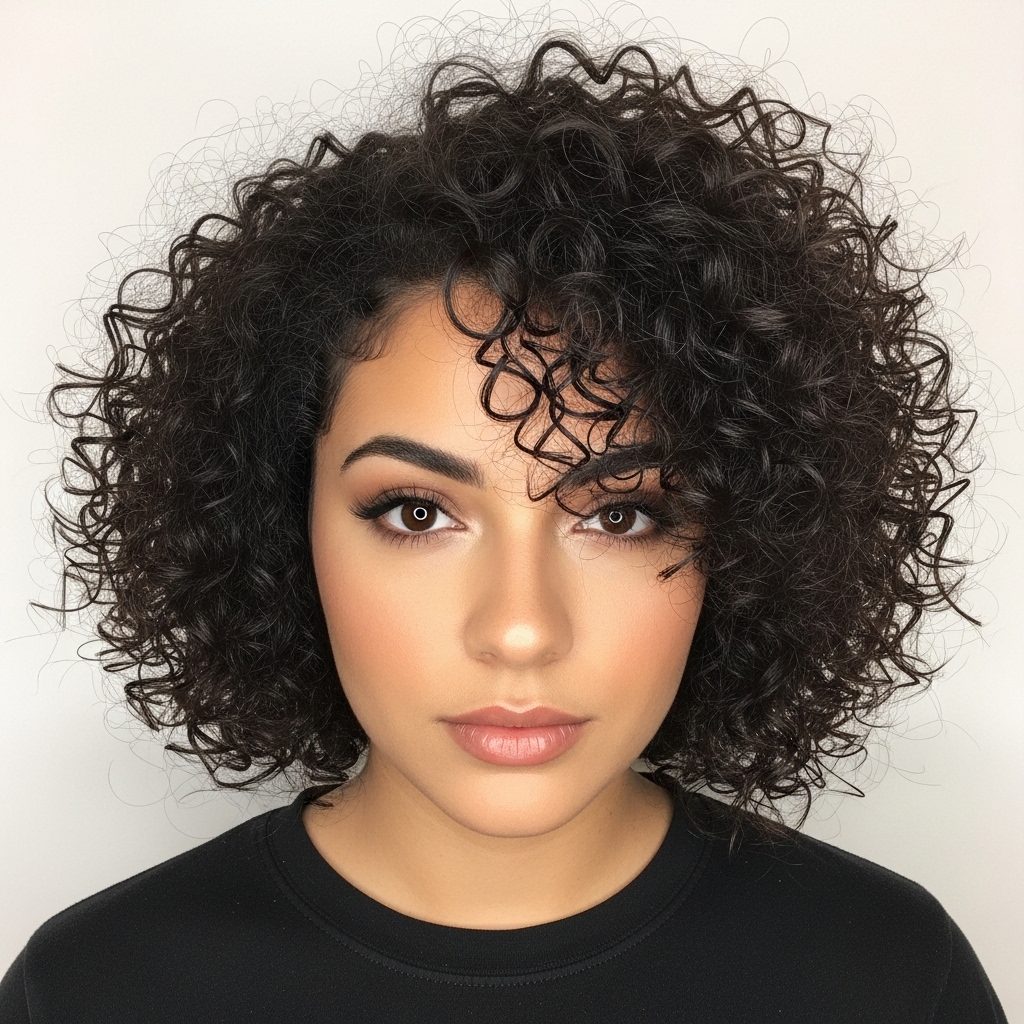
What If You Have Curly or Wavy Hair?
This style works beautifully on textured hair! The key is to enhance your natural pattern. Use a diffuser to dry your curls or waves, scrunching them up toward your scalp to maintain volume.
Use the tail comb to create your deep part while your hair is wet. Then, define your curls with a gel or cream. The deep part will give a gorgeous, dramatic frame to your curl pattern.
Making Your Bob Look Asymmetrical
If you love the look of an asymmetrical lob, talk to your stylist about cutting the back slightly longer than the front, or having one side noticeably shorter. The deep part will exaggerate this asymmetry beautifully.
When styling, emphasize the difference. Smooth the longer side dramatically and tuck the shorter side firmly behind the ear. It’s a bold, fashion-forward take.
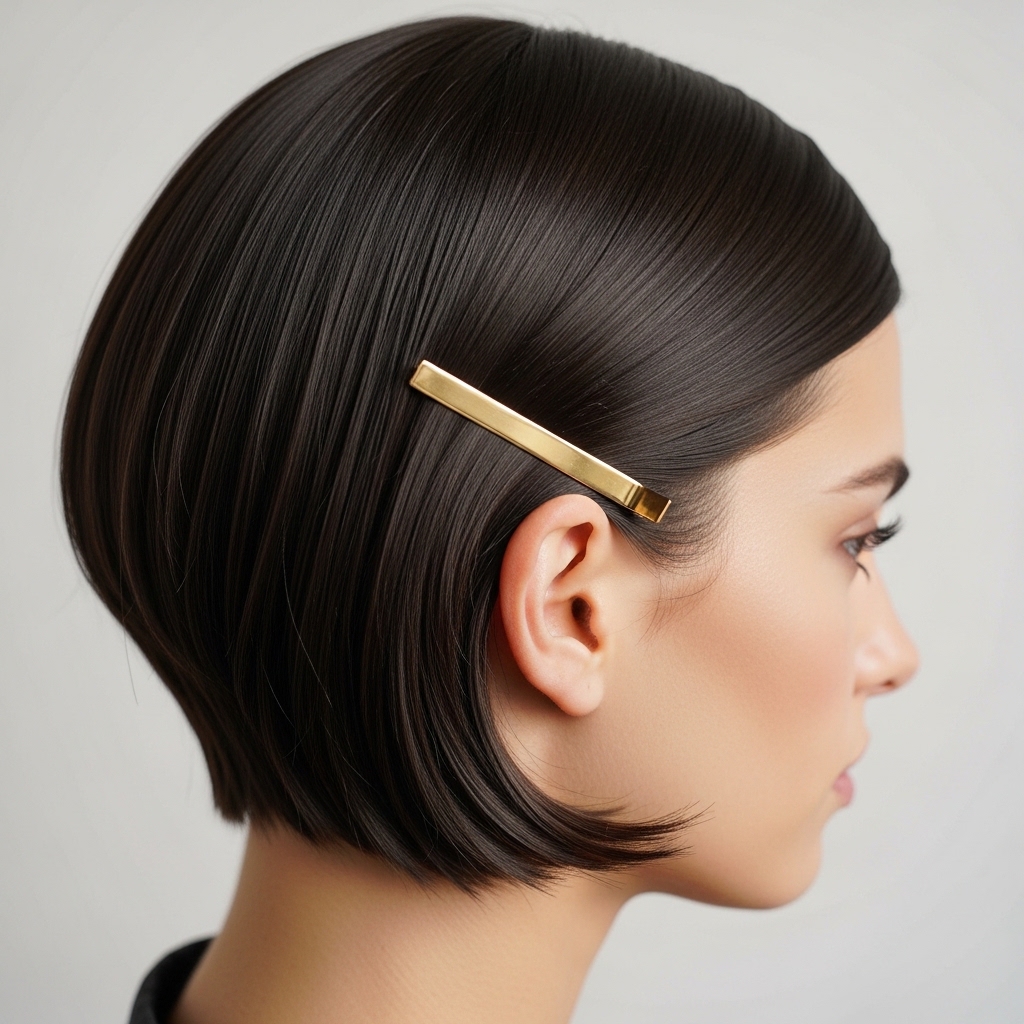
Accessorizing Your Sculpted Bob
Accessories can take this style to the next level. A simple, elegant barrette clipping back the shorter side is incredibly chic. Thin headbands worn just behind the hairline also look amazing.
For evening, don’t be afraid of sparkly pins or a sleek silk scarf tied as a headband. The clean lines of the bob make it the perfect canvas for fun accessories.
- Minimal barrettes or clips
- Thin, fabric headbands
- Delicate sparkly pins
- Silk scarves
Quick Morning Refresh Routine
No time for a full re-style? Flip your head over and fluff the roots with your fingers. Redo your deep part with the tail comb. Use a dry shampoo at the roots for volume and texture.
If any pieces are bent weirdly, quickly hit them with the flat iron on a low setting. A light spray of texturizing spray can revive the shape and hold in seconds.

Common Styling Mistakes to Avoid
Using too much product is the biggest mistake. It weighs down the fine hair and makes the bob look greasy and flat. Start with less—you can always add more.
Also, avoid curling the entire head. This style is about smoothness with strategic bends. Tight curls all over will lose the sculpted, architectural feel and make the shape look bulky.
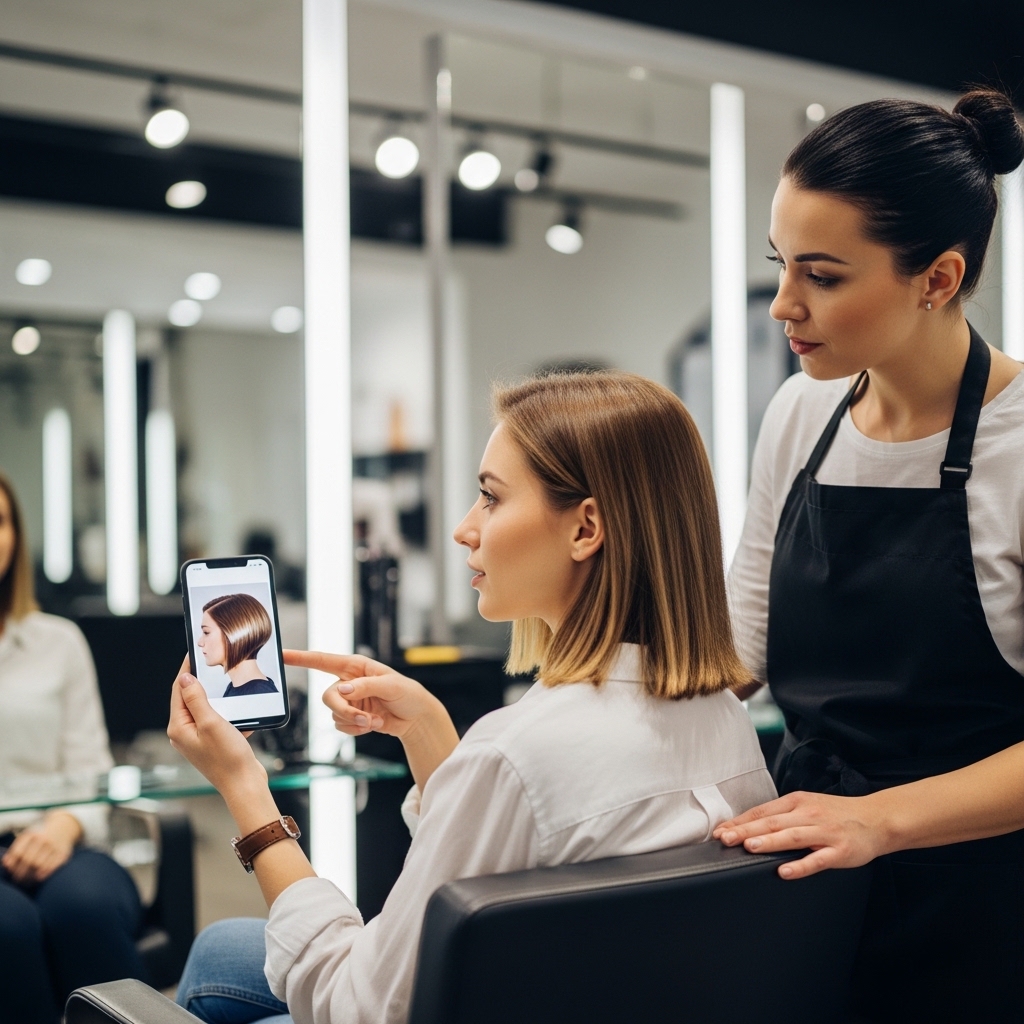
How to Talk to Your Stylist
Bring pictures! Say you want a “chin-length bob with a deep side part and stacked, sculpted layers in the back for movement.” Mention you want it to be face-framing.
Specifically ask for a cut that looks good with a deep part. A good stylist will cut it dry or while you’re sitting upright to see how the hair falls with gravity and the part.
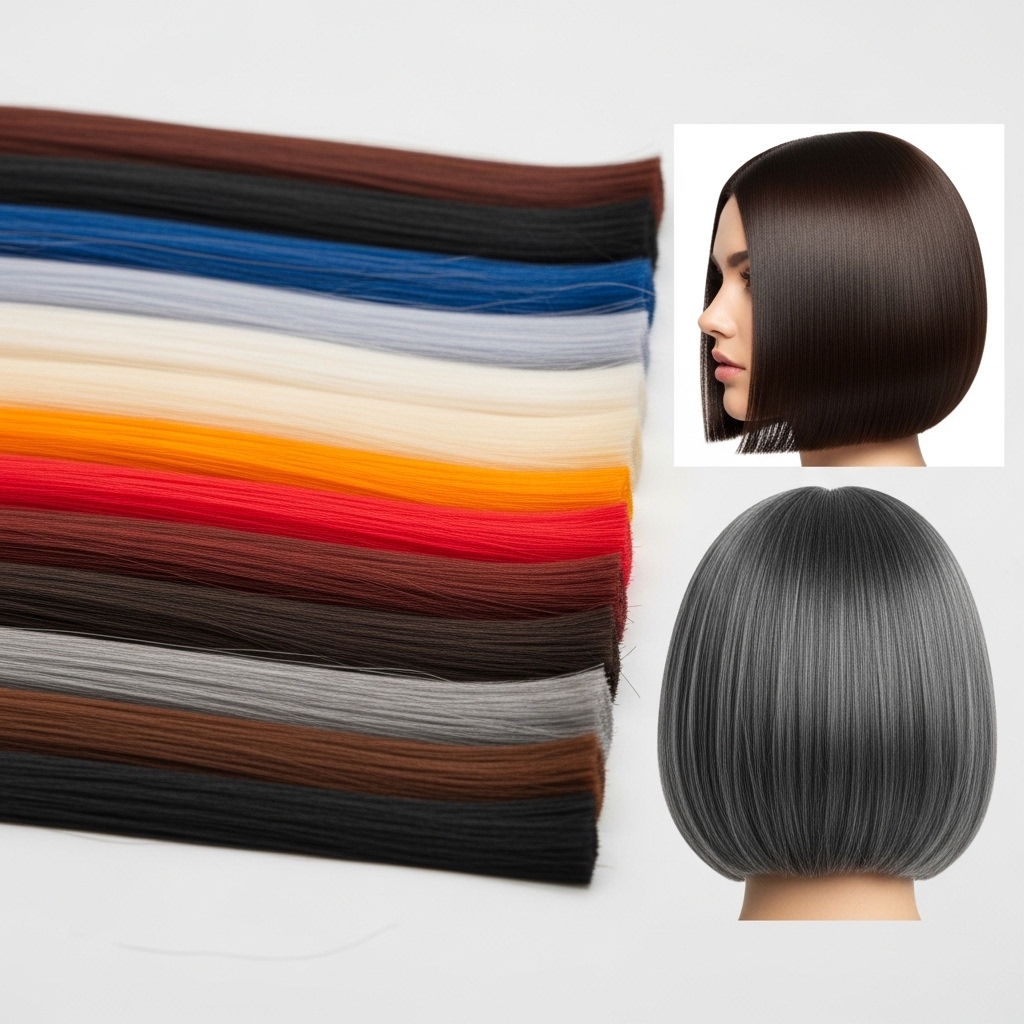
Best Hair Colors for This Cut
Solid, rich colors make the sharp lines pop. Think espresso brown, cool black, or beige blonde. For more dimension, ask for subtle balayage or face-framing highlights.
Trendy colors like cherry red or platinum also look incredible, as the solid shape shows off the color beautifully. It’s a great cut for both natural and fashion colors.
From Day to Night in 5 Minutes
To elevate your bob for evening, add shine. A drop of shine serum smoothed over the surface does wonders. Amp up the volume at the crown by teasing it lightly.
Swap your simple clip for something sparkly. Deepen your side part and smooth any flyaways with a strong-hold spray. It’s a quick, impactful transformation.

Why This Style Feels So Modern
It hits all the right notes for current trends: it’s polished but not stiff, has a cool-girl asymmetry, and works with multiple aesthetics, from quiet luxury to romantic goth.
It’s a style that shows you understand fashion and wear it with confidence. It feels intentional, which is exactly what the best 2026 hairstyles are all about—personal expression through precision.
Your Final Checklist Before Leaving the House
- Is my deep part clean and sharp?
- Do I have volume at the crown?
- Are the ends smooth and not frizzy?
- Are the front sections framing my face nicely?
- Have I checked the back for any weird bends?
A quick mirror check from all angles ensures your sculpted bob is perfect. Now go rock it!
And that’s it! The sculpted bob with a deep part might look like it requires a professional touch every morning, but as you can see, it’s totally achievable at home. It’s become my go-to style because it makes me feel put-together in minutes, whether I’m running errands or meeting friends.
The best part is how versatile it is. You can wear it super sleek one day and add a little glitchy glam texture the next. It grows out beautifully, too, often morphing into a great asymmetrical lob. It’s a cut that really works with you.
I hope this guide gives you the confidence to try it. Have fun with it, make it your own, and enjoy all the compliments that are definitely coming your way.
Save this post to Pinterest to keep this guide handy for your next styling session! And I’d love to know—are you thinking of trying this cut? Or do you already rock a deep-part bob? Tell me your thoughts or styling tips in the comments below!

