
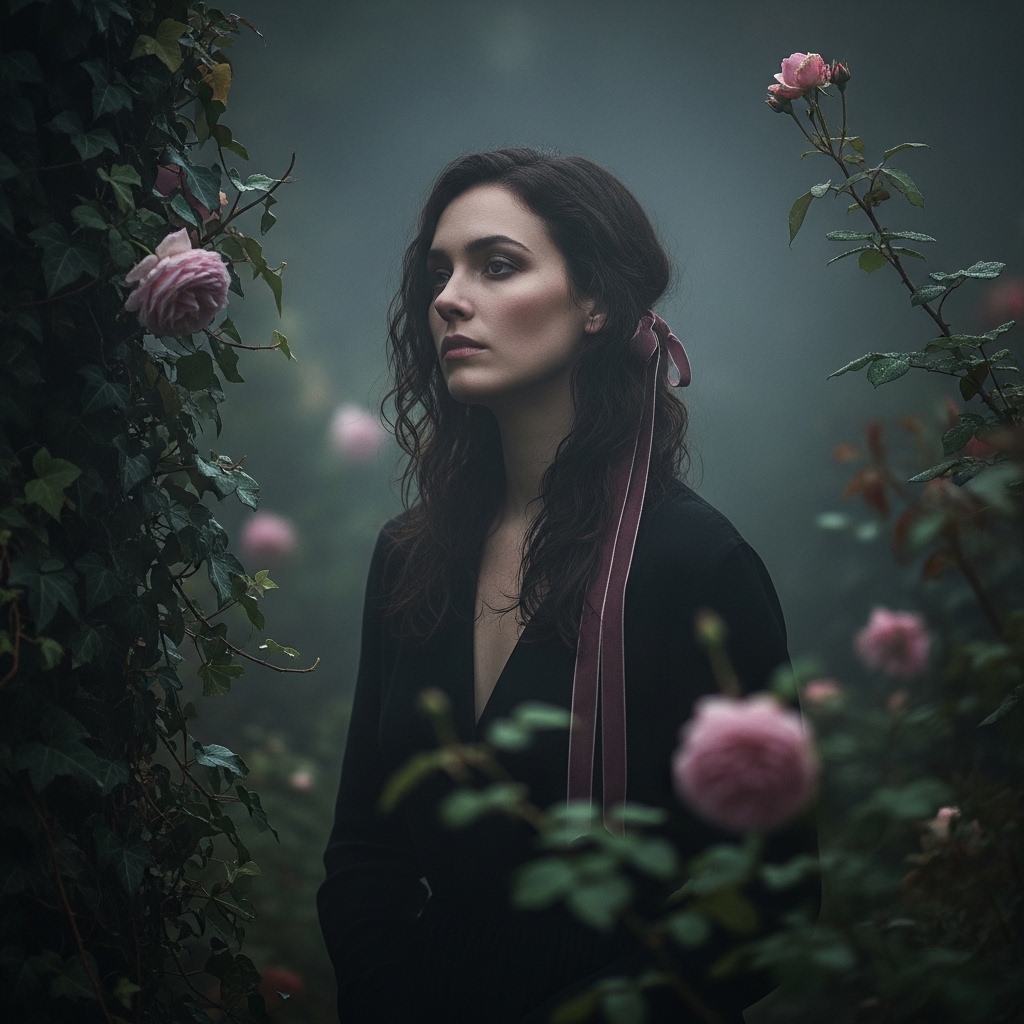
Hey you. So, you’re scrolling, feeling that itch for a change. Maybe you saw a stunning look on your feed—something darkly romantic, a little poetic, a little mysterious. That’s the romantic goth vibe calling, and I get it. It’s not about being scary; it’s about soft, ethereal beauty with an edge.
But let’s be real: some of those intricate hairstyles look impossible to do on yourself. That’s why I’m obsessed with this side braid. It captures that entire romantic goth feeling—flowy, a bit undone, deeply pretty—but it’s seriously one of the easiest things you’ll ever do with your hair.
This tutorial is for anyone who wants to tap into that aesthetic without a two-hour styling session. Whether your hair is long or a chic asymmetrical lob, this braid works. It’s perfect for a date night, a moody photoshoot, or just feeling like the main character on a Tuesday. Let’s get into it.
What Is Romantic Goth Hair, Really?
Before we braid, let’s set the scene. Romantic goth isn’t the spiky, harsh aesthetic of the past. Think of it as the “quiet luxury” version of alternative style. It’s soft, flowing, and deeply feminine, with a touch of melancholy elegance.
It draws inspiration from vintage romance and modern edge. We’re talking soft waves, delicate braids, and hair accessories like velvet ribbons or dried flowers. The color palette tends to be darker, but the feeling is warm and inviting, not cold.
Why This Side Braid Is a Total Game-Changer
This hairstyle is a secret weapon. It looks like you put in way more effort than you did. The side-swept nature of it is instantly flattering, creating a beautiful frame for your face and a touch of old-world drama.
It’s also incredibly versatile. Wear it with a sleek vampire haircut for a sharp look, or with loose, glitchy glam waves for something more undone. It works on second-day hair perfectly and holds up all night long. Honestly, it’s a staple.
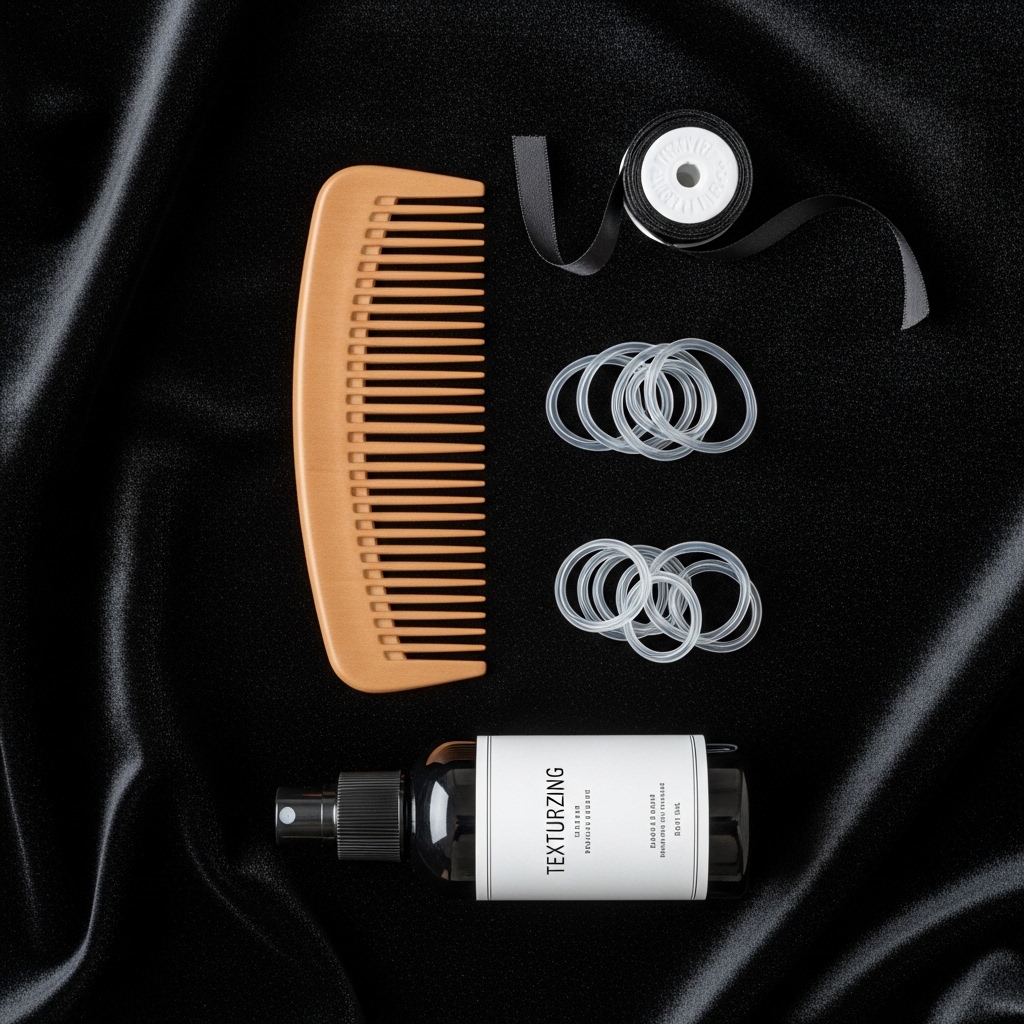
What You’ll Need to Get Started
Gathering your tools takes two minutes. You don’t need anything fancy. Here’s my go-to kit for this look:
- A fine-tooth comb for parting
- A couple of clear elastic bands (they disappear)
- Light-hold hairspray or texturizing spray
- Optional: A few bobby pins and a cute hair clip or ribbon
That’s it! The focus is on the technique, not the products. A little texture spray goes a long way to giving your hair that lived-in, romantic feel.
Step 1: Prep Your Hair Texture
Start with hair that’s not freshly washed. Day-old hair has more grip. If your hair is very silky, spray a light texturizing spray all over. I like to create a bit of wave first, even if it’s just from a loose overnight braid.
This gives the final style more body and that “glitchy glam” piece-y texture. The braid will hold better and look fuller. Don’t worry about perfection; we want movement and softness.

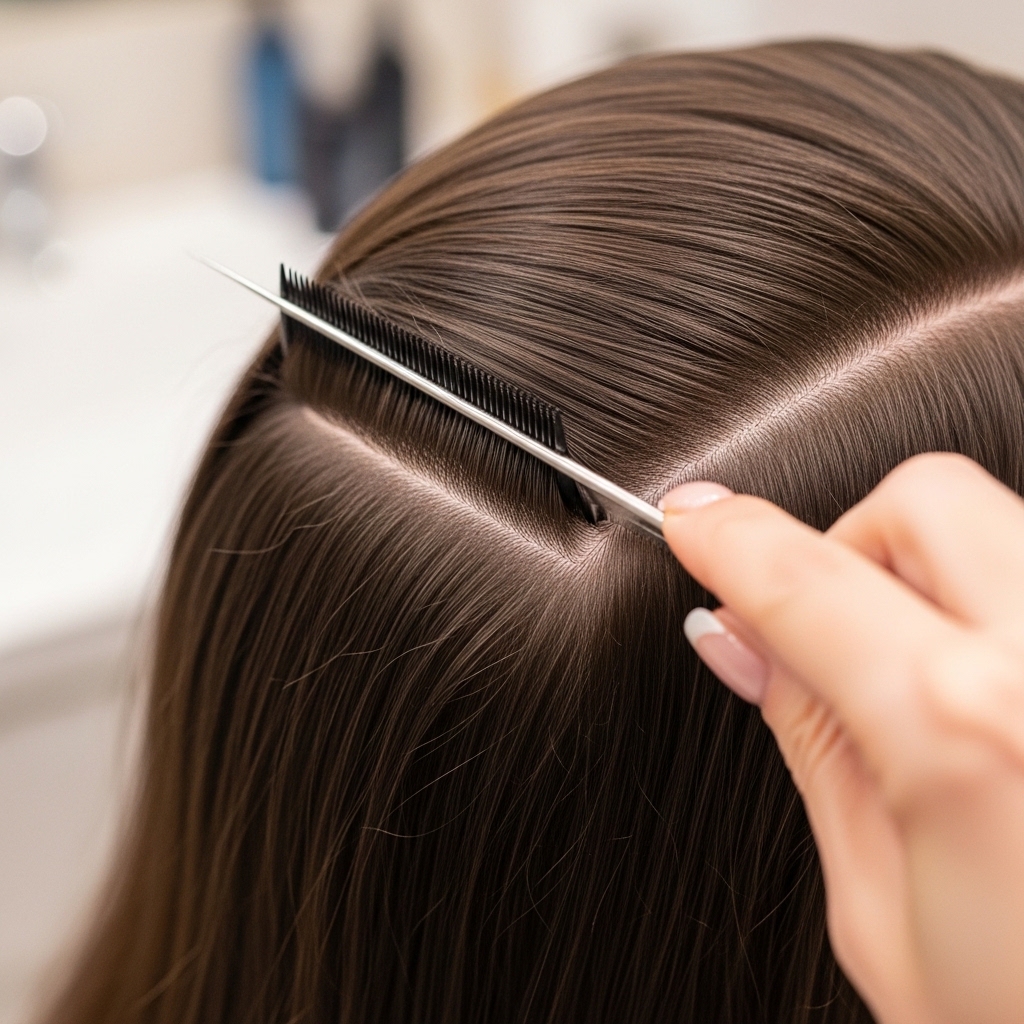
Step 2: Create Your Deep Side Part
This is key for the drama. Using the fine end of your comb, create a deep side part. It doesn’t have to be perfectly straight—a slightly zig-zag part can look more natural and give volume at the roots.
Which side? Go with your natural part, or choose the side you usually tuck your hair behind. This will make the braid feel more intuitive and comfortable to wear throughout the day.
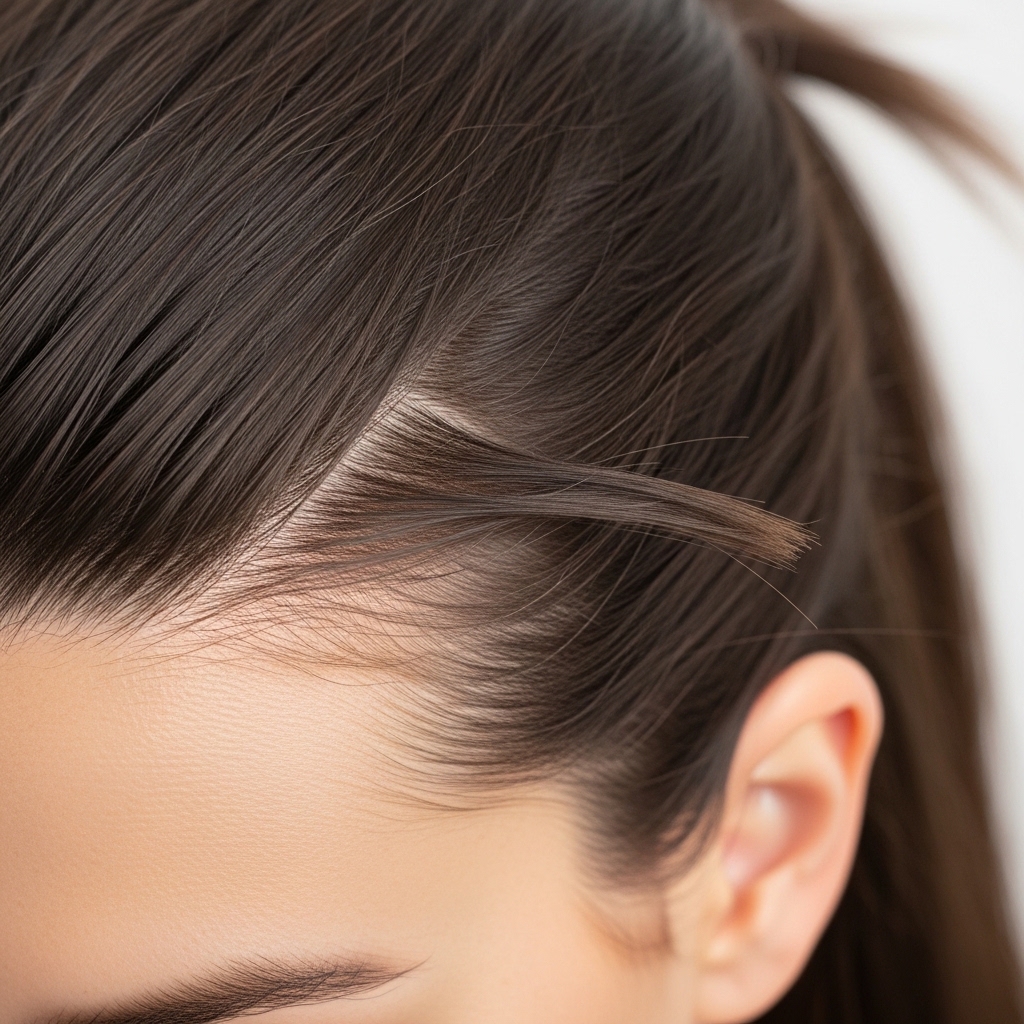
Step 3: Section Your Hair for the Braid
From the side with more hair, take a section from your hairline back to about your ear. This will be the front piece of your braid. Clip or loosely hold the rest of your hair out of the way for now.
This section doesn’t need to be thick. We’re going for a delicate, face-framing braid, not a heavy cornrow. You can always add more hair in as we go.
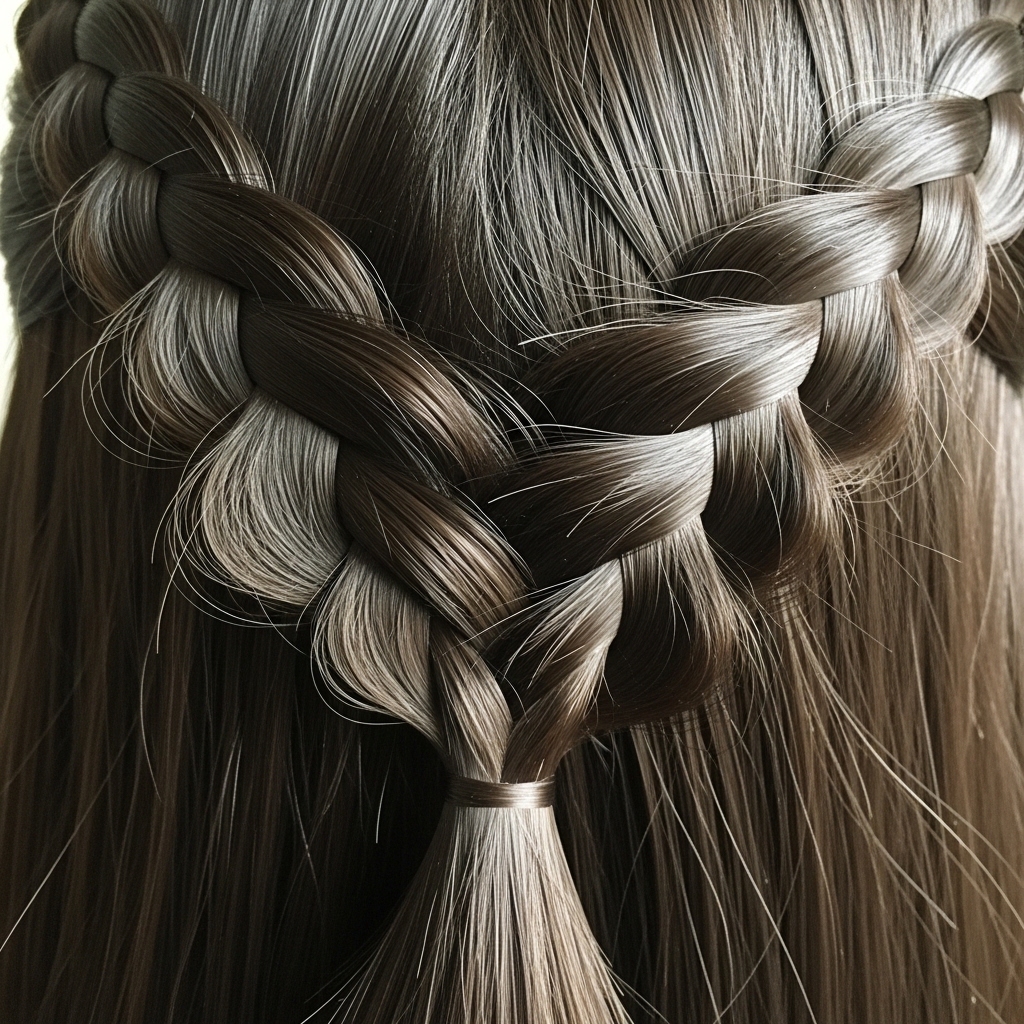
Step 4: Begin a Simple Three-Strand Braid
Divide your small section into three even strands. Start a basic three-strand braid right at your temple. Keep it snug but not tight. We don’t want a perfectly neat braid; a little looseness is romantic.
Braid this small section for about two or three crosses. This establishes the braid’s starting point and direction, which will be angling back and down toward your opposite shoulder.
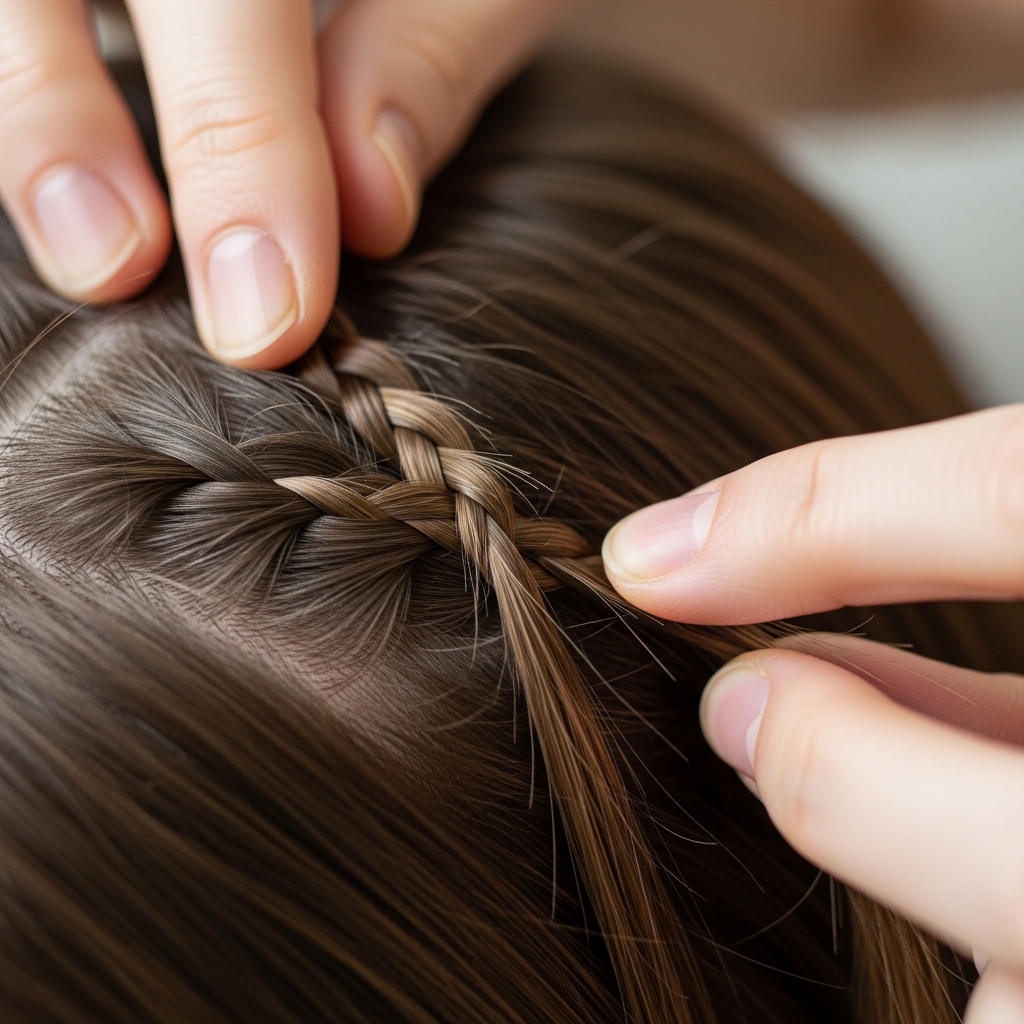
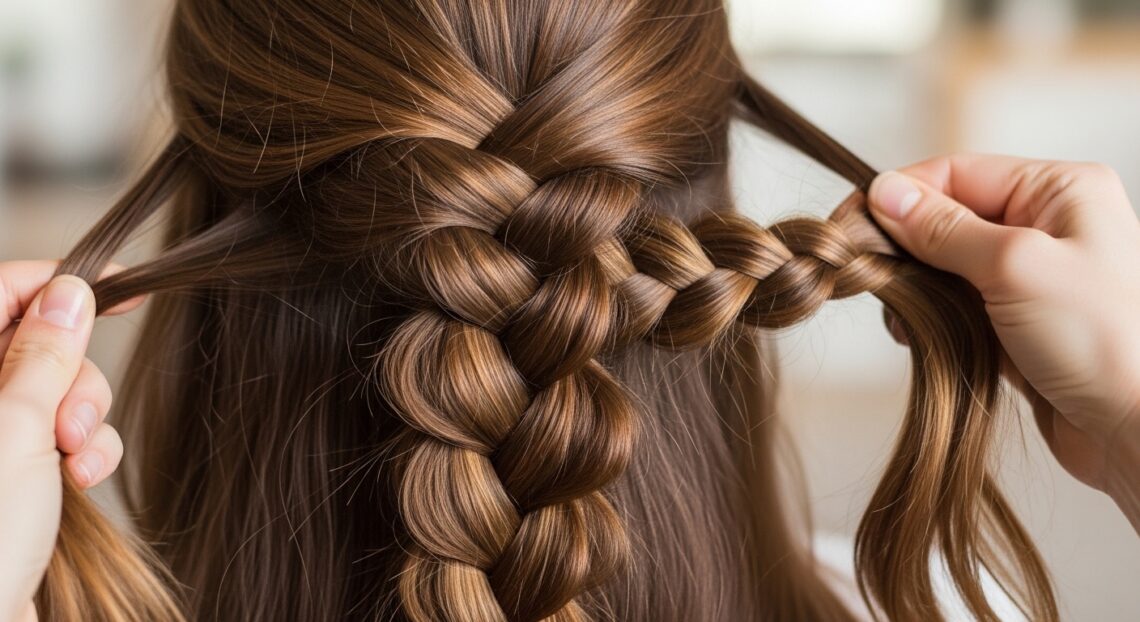
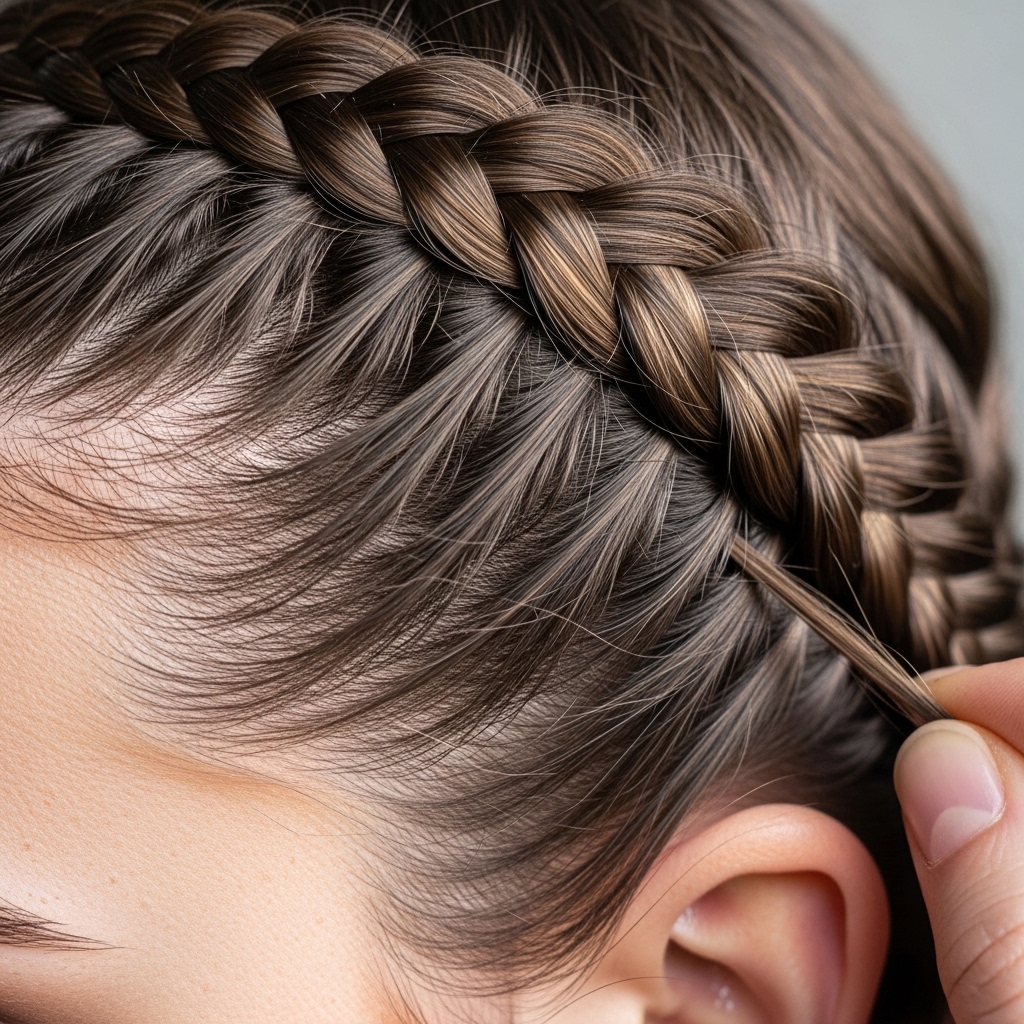
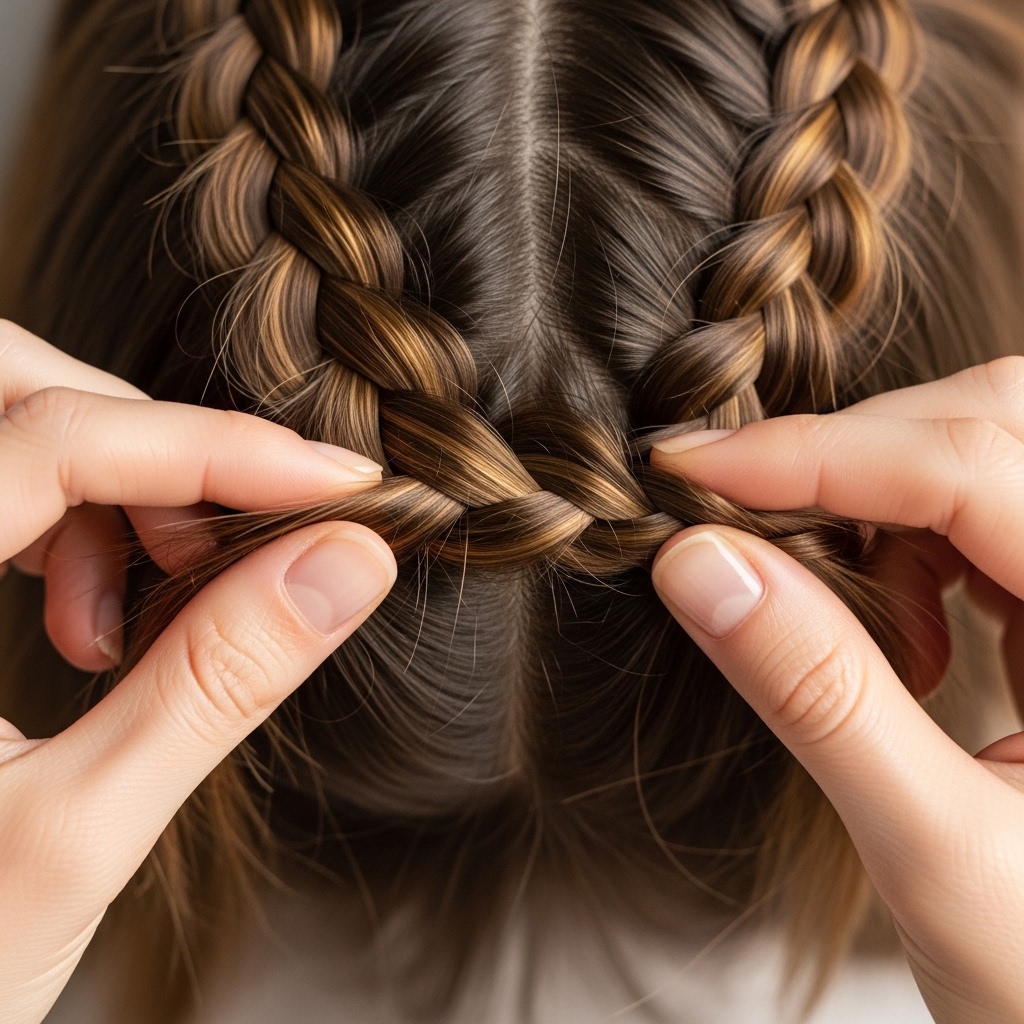
Step 5: The French Braid Add-In Technique
Now, as you continue braiding, start adding in more hair. With each new stitch, grab a small, thin piece of hair from the top section (the loose hair behind your part) and add it to the strand currently on top.
This is just like a French braid, but we’re only adding hair from the top side. This pulls the style across your head beautifully and secures all that front hair.
Step 6: Braid Along Your Hairline
Continue this method, braiding and adding hair only from the top, as you work along your hairline from the front of your head toward the back, just above your ear. The braid should curve gently with the shape of your head.
Keep the added sections small and consistent. The goal is a braid that seems to emerge from your hairline and trail back, not a thick, chunky rope.
Step 7: When to Stop Adding Hair
Once you reach the point just behind your ear, stop adding new hair. You’ve now incorporated all the hair from that front top section. The rest of your hair (from the bottom and back) should still be loose.
Secure this point temporarily with a clip if you need to. You should now have a small French braid that transitions into a regular three-strand braid.
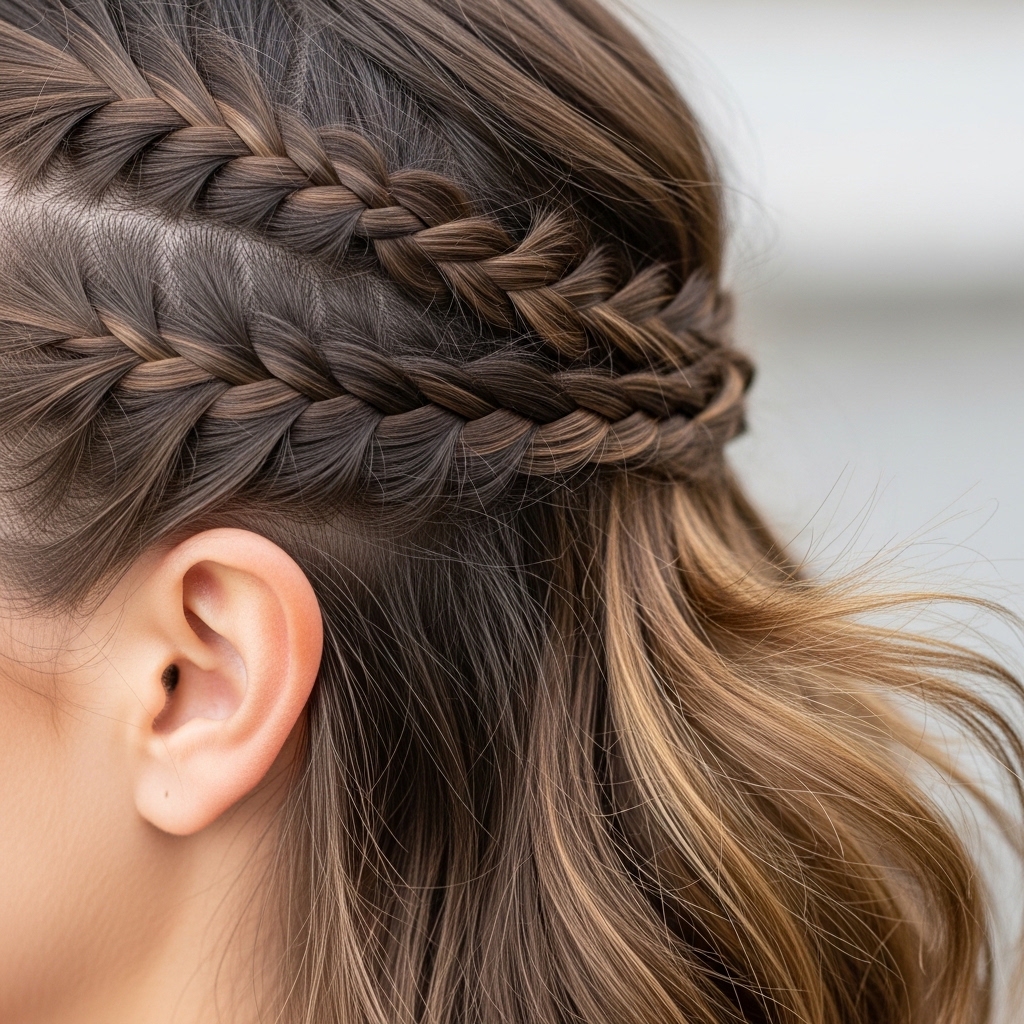
Step 8: Combine Braid with Loose Hair
This is the magic step. Unclip the rest of your hair. Now, combine the tail of your small braid with all of your loose hair. Gather it all together, as if you’re making a low side ponytail on the opposite side of your head from where you started.
Your small braid will now run along the side of your head, connecting into this big, gathered section. It looks intricate but took seconds.
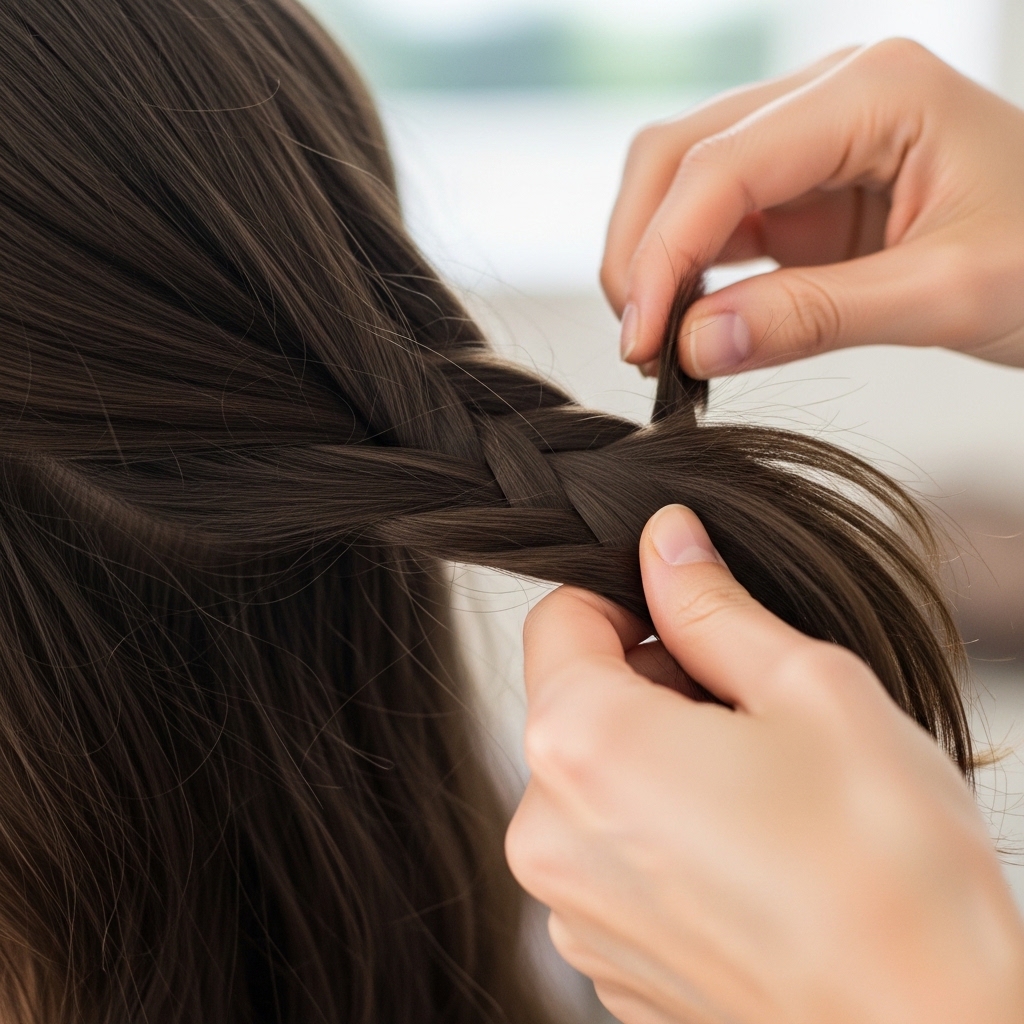
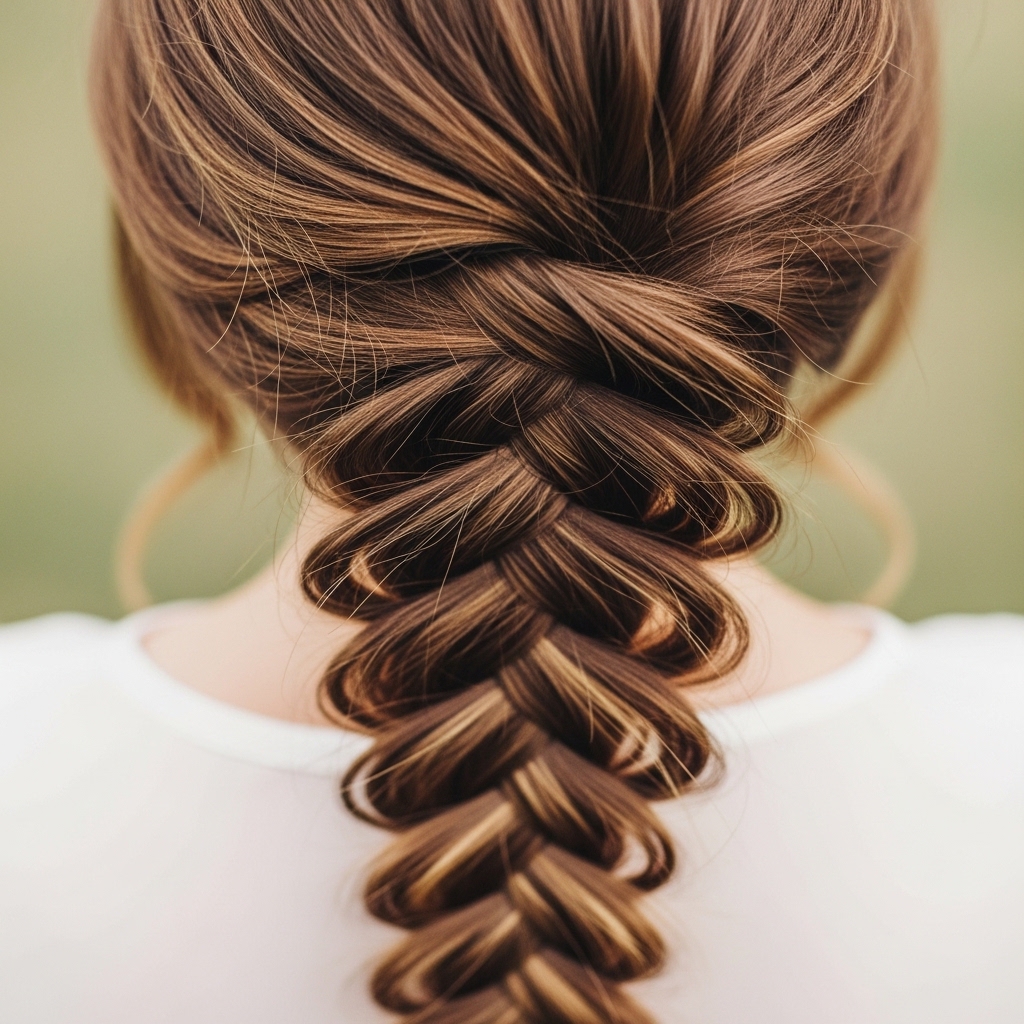
Step 9: Continue Braiding Everything Together
With everything combined—the small braid and all your loose hair—simply continue braiding in a basic three-strand pattern all the way to the ends. Make this part of the braid loose and slightly messy.
Don’t pull too tight. Let pieces fall out. This contrast between the neat start and the messy, thick tail is what makes it feel effortless and romantic.
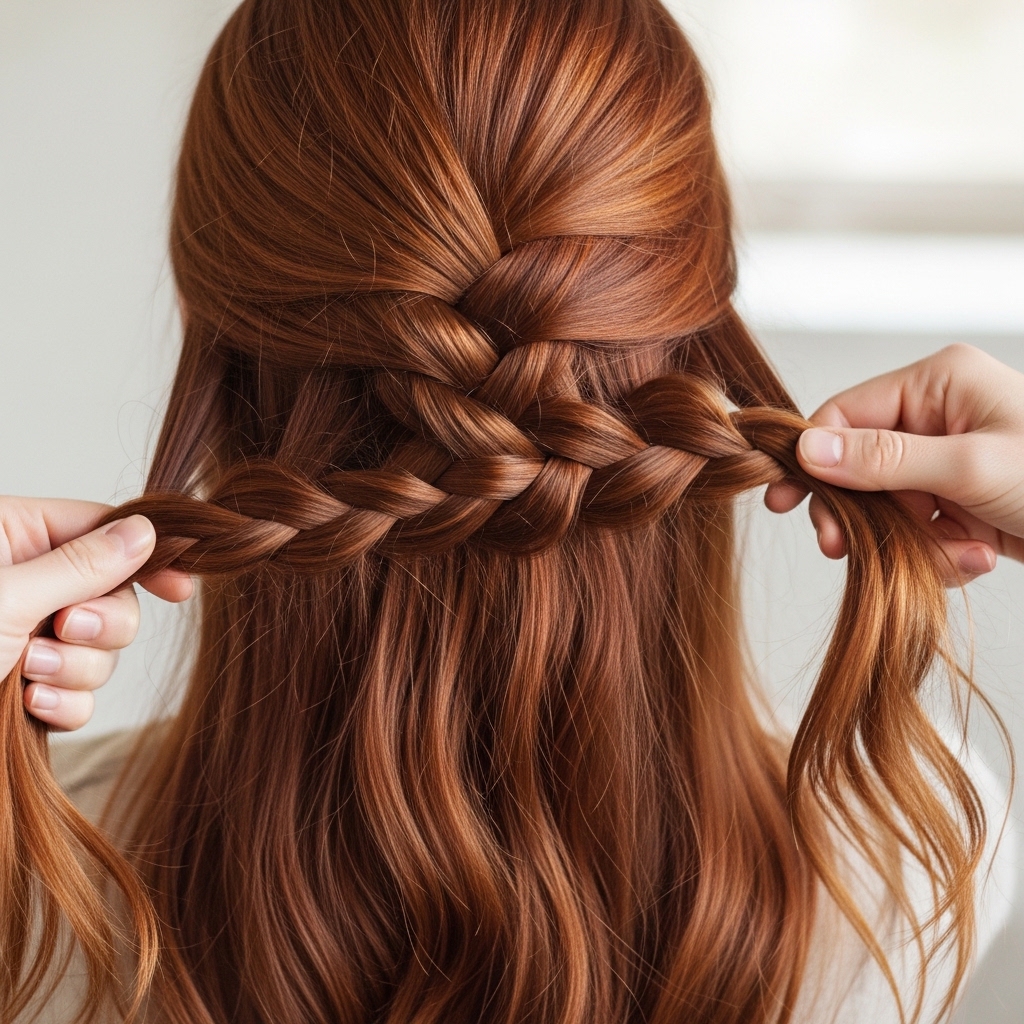
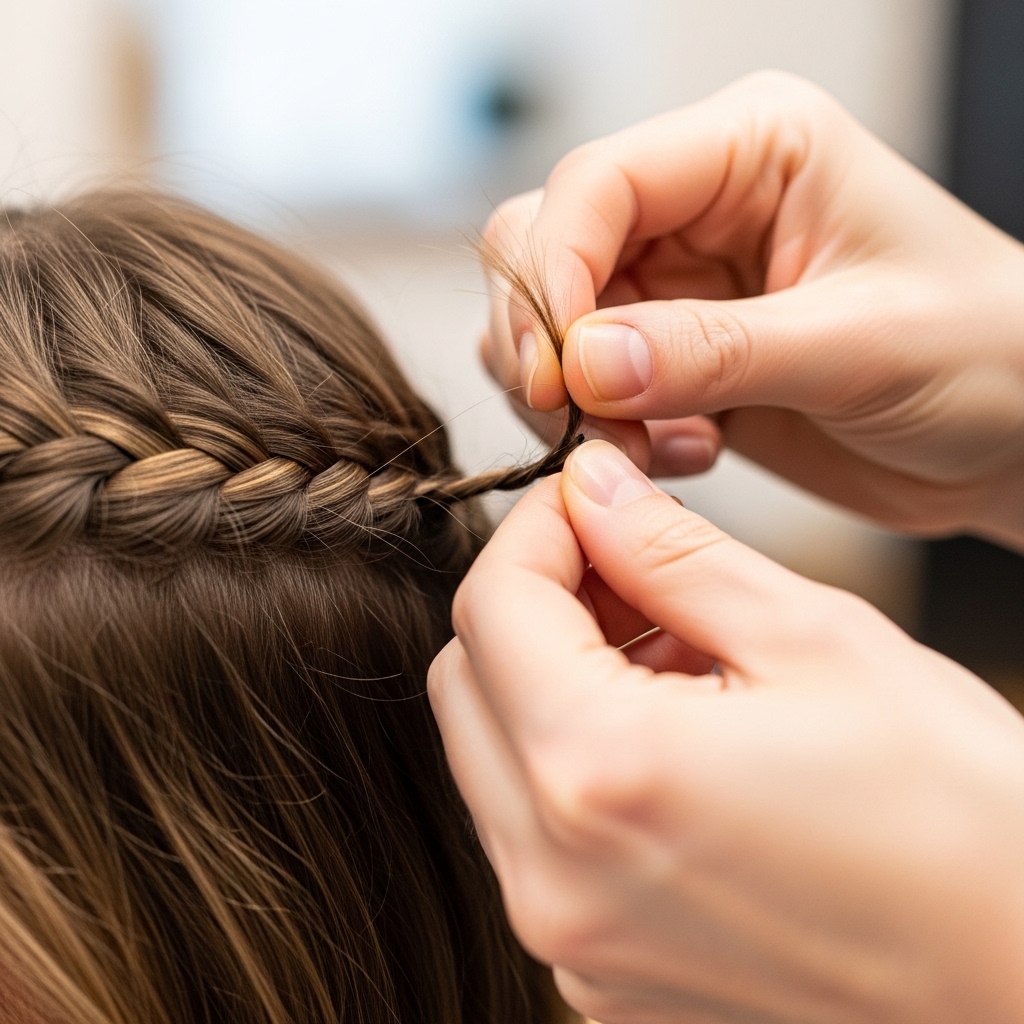
Step 10: Secure the End & Adjust Tightness
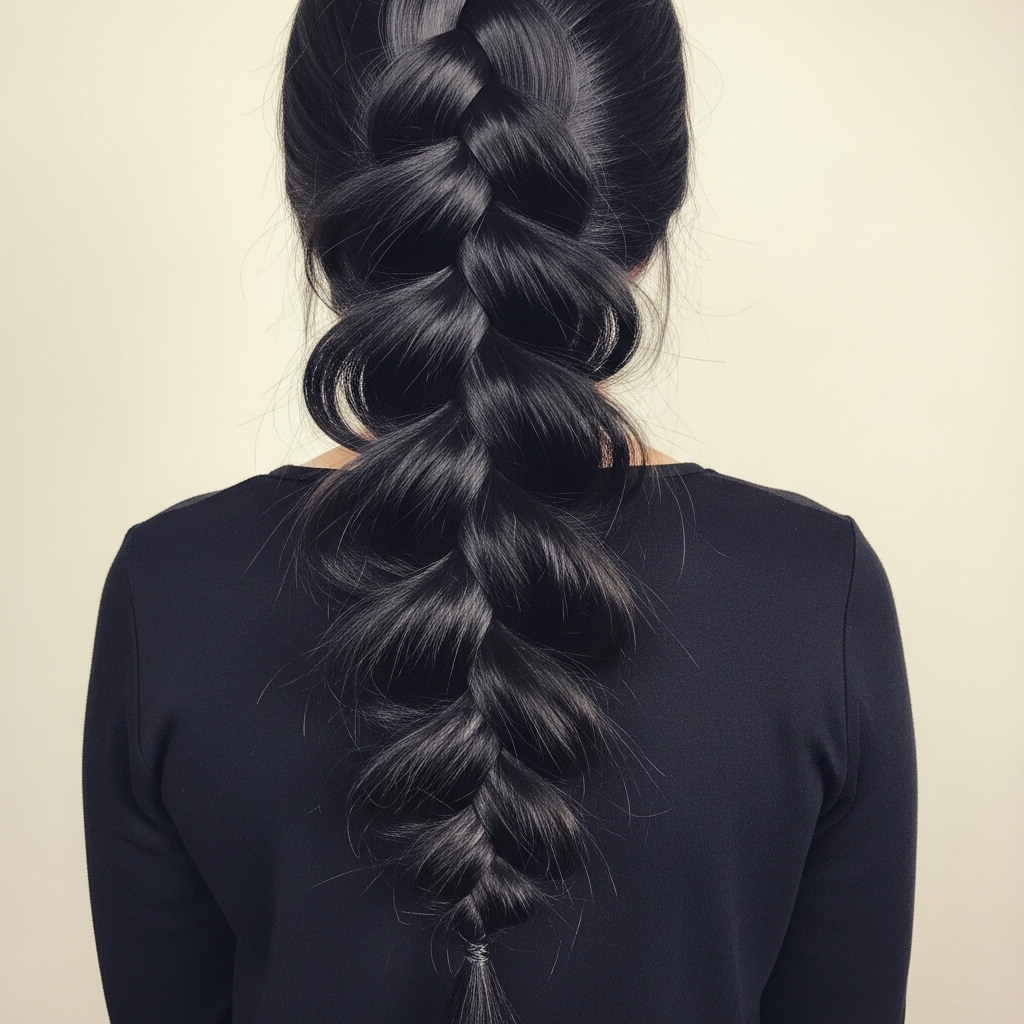
Secure the very end of the braid with a clear elastic. Now, go back and gently tug on the outer loops of the braid, both the small French braid section and the large tail, to loosen it up and create volume.
This “pancaking” step is non-negotiable. It transforms a tight, schoolgirl braid into a soft, dreamy one. Pull evenly for a balanced, voluminous look.
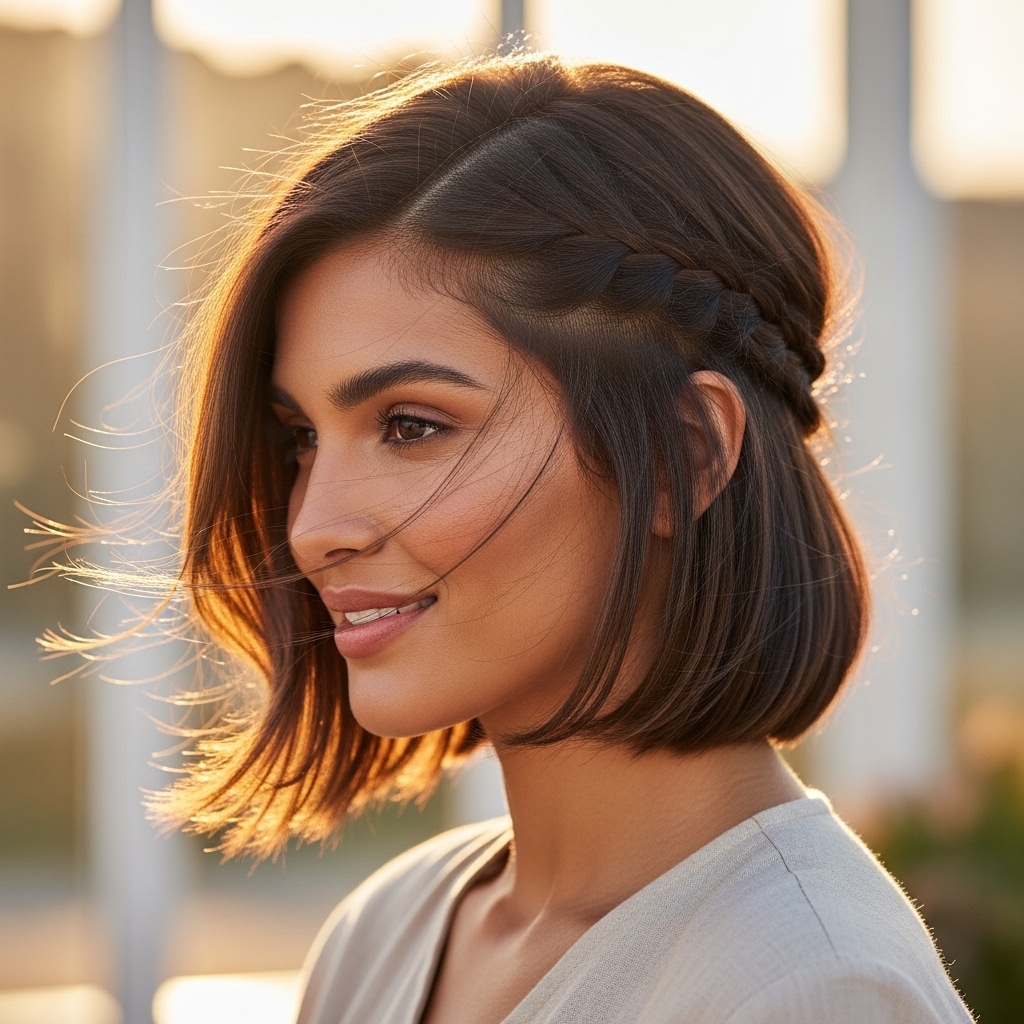
How to Style With Short Hair (Lobs & Bobs)
Got a chic asymmetrical lob or a quiet luxury bob? You can still do this! Follow the same steps, but your French braid along the hairline will be shorter. When you combine the braid tail with your loose hair, you’ll have less length.
Simply braid as far as you can and secure. The result is an adorable, wispy side braid that’s perfect for shorter 2026 hairstyles. It adds instant detail and texture.
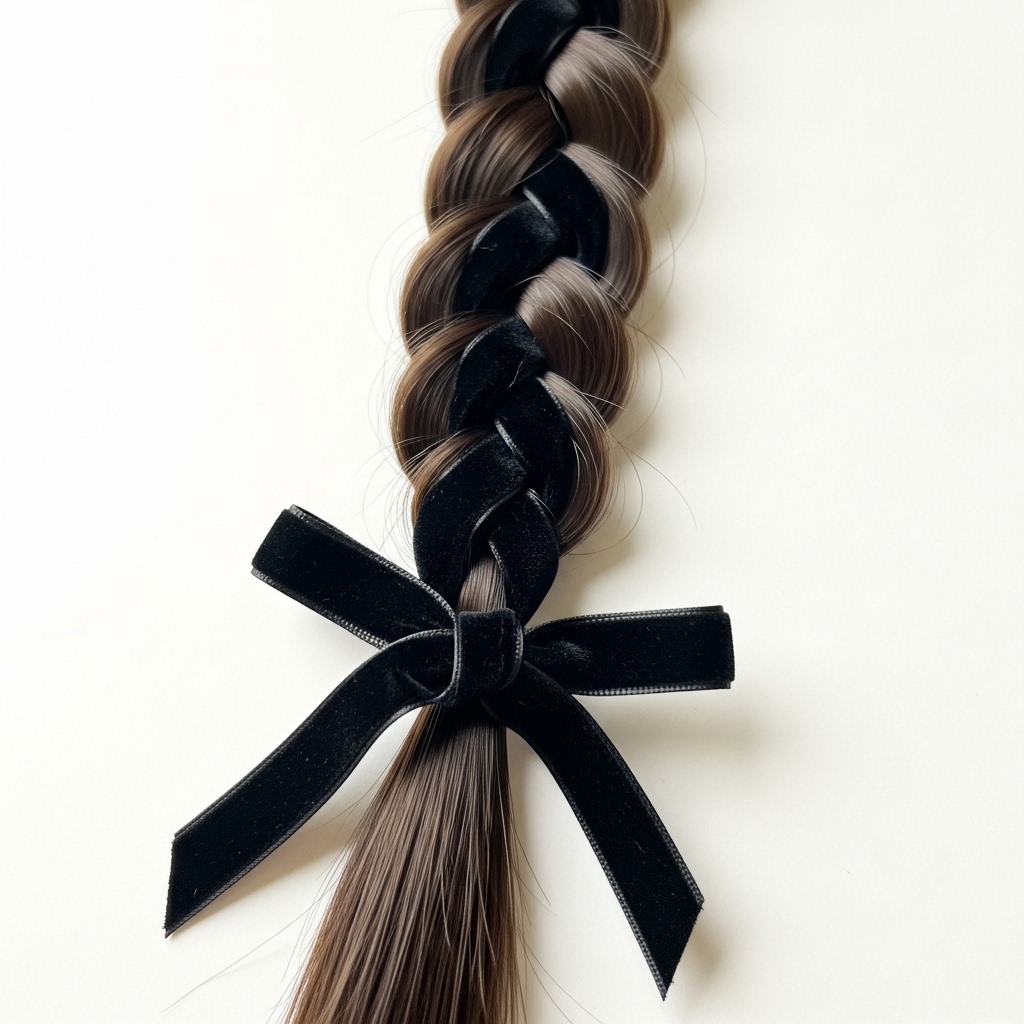
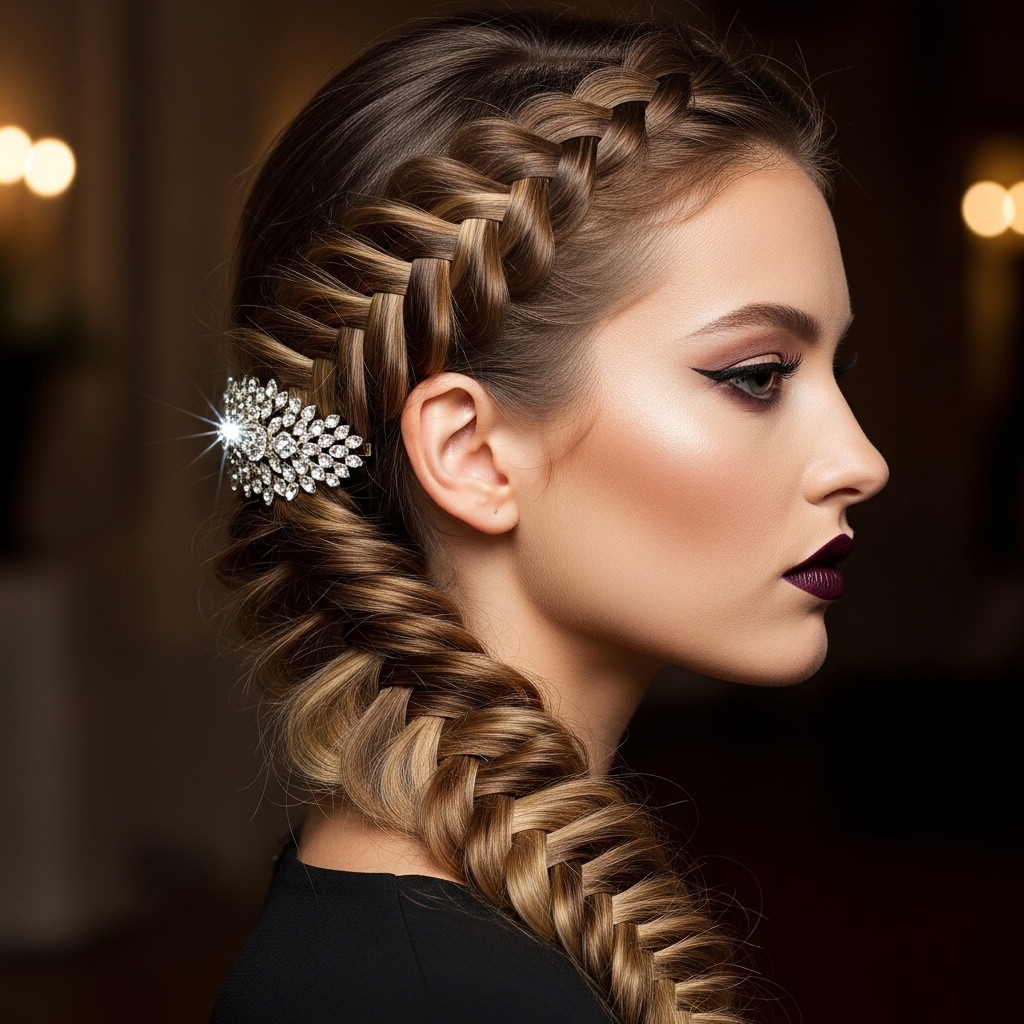
Adding Romantic Goth Hair Accessories
This is where you personalize it. Weave a thin black or burgundy velvet ribbon into the braid as you go, or tie it around the base elastic. A few strategically placed pearl-ended pins or a dried baby’s breath sprig tucked in adds major fairy-tale energy.
Less is more. Choose one statement piece, like a beautiful ornate clip at the base of the braid, or keep it subtle with a woven ribbon.
Creating the “Undone” Finish
To avoid a too-perfect look, pull out a few face-framing wisps after you’re done. Use your fingers to gently loosen the hair around your temples and the top of the braid for a softer hairline.
This “undone” finish is what makes it feel modern and romantic, not costumey. It should look like you just came from a walk in a mysterious forest.

Setting It All Day (Or Night)
For hold without stiffness, mist a light-hold hairspray on your hands first, then lightly run them over the surface of the braid and any flyaways. This controls without making it crunchy.
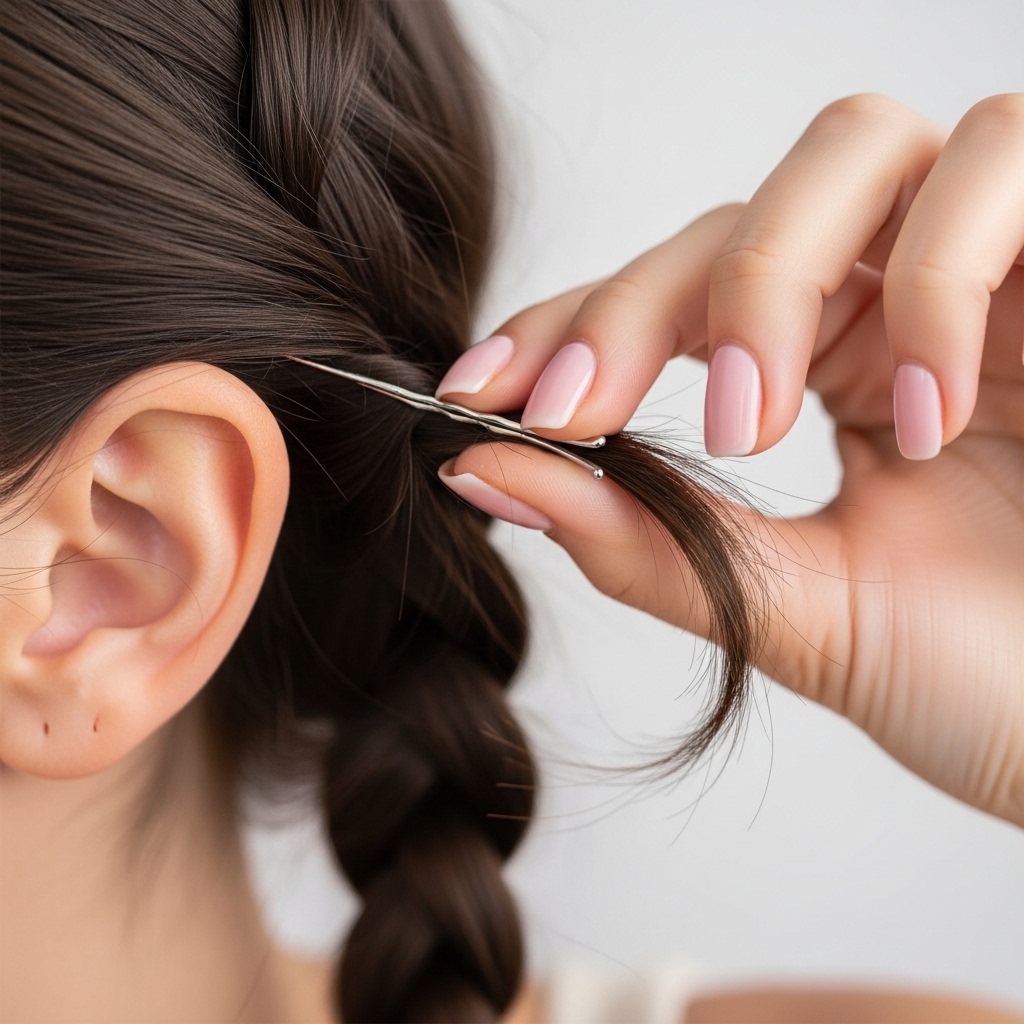
If you’re wearing this for a big event, a single bobby pin crossed over the elastic at the nape of your neck will lock it in place invisibly. It’s not going anywhere.

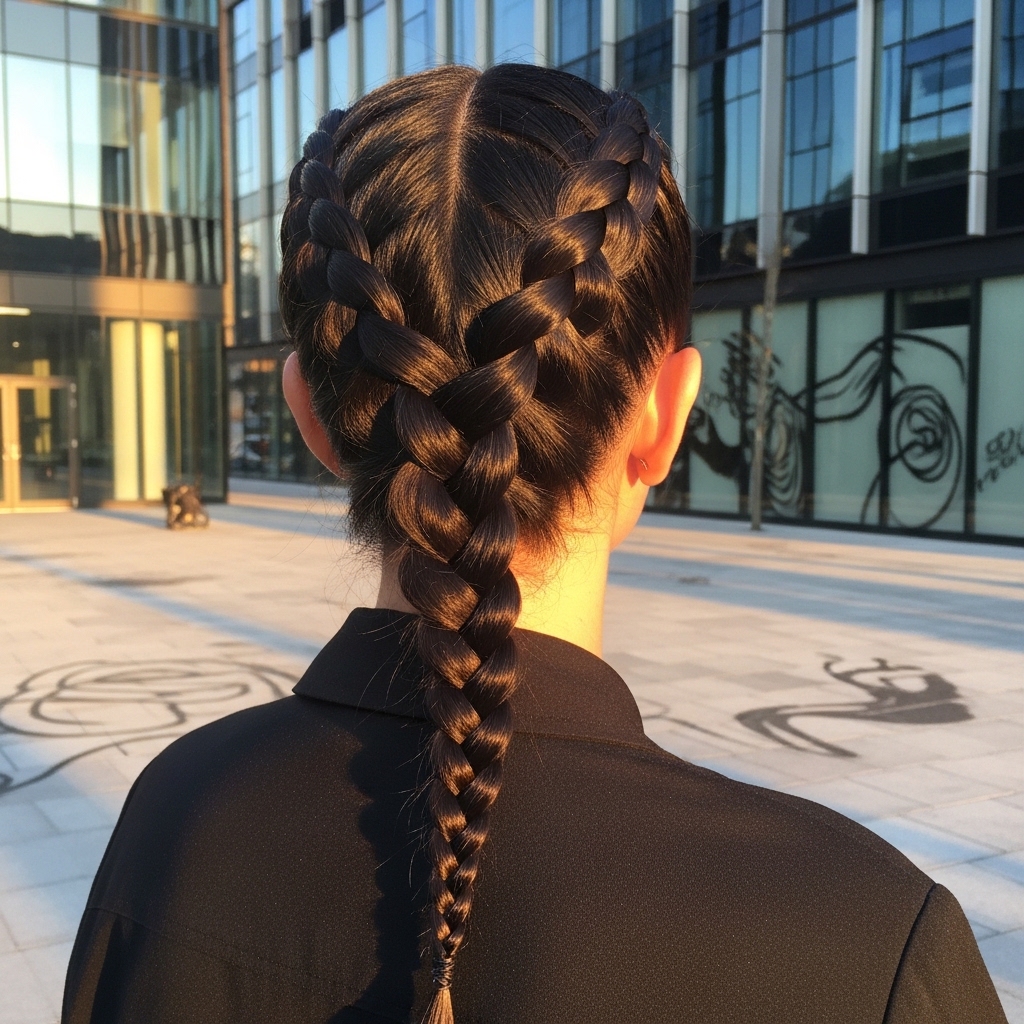
Adapting for Super Thick Hair
If you have a lot of hair, break the initial “add-in” section into smaller subsections. Make your first braid slightly thicker to anchor all that volume. When you pancake the braid at the end, you’ll have amazing, dramatic texture.
You might need two elastics down the length of the tail for security. The result is a stunning, heavy braid with incredible presence.
Adapting for Fine or Silky Hair
Texture is your best friend. Use that texturizing spray generously at the roots and lengths. Backcomb the crown area slightly before starting for hidden volume. When braiding, keep it a bit tighter, as silky hair likes to slip.
The pancaking step will still give you the illusion of thicker hair. A dry shampoo at the roots can also add the necessary grit for hold.
Day-to-Night Transformation in Seconds
Wore this to work? Transform it for dinner in under a minute. Pull out a few more pieces for a messier vibe. Swap the clear elastic for a decorative clip or wrap a chain necklace around the base.
Add a bold lip color or some shimmer on the eyes. Suddenly, your practical daytime braid is a full romantic goth evening look. It’s the ultimate versatile style.
Pairing With Other Romantic Goth Looks
This braid pairs perfectly with other trending styles. Imagine it with curtain bangs or a hime cut—the blunt front pieces would look incredible. It also softens the sharpness of a vampire haircut or adds romance to an otherwise sleek old money hair look.
It’s the perfect complement to lace, velvet, or high-neck silhouettes. It adds that touch of poetic softness to any outfit.

Common Mistakes & How to Fix Them
The braid is too tight. Fix it by gently pulling on the outer loops to loosen. The braid looks messy in a bad way. You might have added uneven sections. Smooth the top section with your hand as you go.
It won’t stay behind my ear. Use a single, hidden bobby pin to anchor the braid to your hair just behind your ear. The end is too thin. Pancake more aggressively to widen the braid and hide the thin tail.
Why This Braid Feels So “Now”
This style hits all the right notes for current trends. It has the elegance of quiet luxury hair, the edge of romantic goth, and the effortless vibe of glitchy glam. It’s detailed without being fussy, which is exactly what 2026 hairstyles are leaning into.
It allows for personal expression, works on multiple hair lengths and textures, and looks amazing in photos. It’s a timeless technique with a very modern, moody twist.
Your Final Look & Confidence Boost
When you look in the mirror, you should see someone soft, strong, and beautifully mysterious. This hairstyle isn’t just about hair; it’s about embracing a certain feeling—a bit dramatic, deeply romantic, and totally confident.
That’s the real magic of finding a hairstyle that clicks with your desired vibe. It’s an instant mood booster and a form of self-expression. You did that.
And that’s it, friend. My go-to braid for when I want to feel put-together but still like myself—just a more poetic, romantic version. It proves that you don’t need complicated techniques to create something that looks special and feels authentic.
The best part? Once you do it two or three times, it becomes muscle memory. You’ll be able to whip it up in five minutes flat, which is my kind of beauty hack. It’s a small way to add a little daily magic to your routine.
I’d love to see your take on it! Did you add a ribbon? Try it on your lob? Save this post to Pinterest so you can find it whenever the mood strikes. And tell me in the comments—what’s your favorite hair accessory to add to a braid?
Hailey & Team xx

