
Okay, let’s be real. Some mornings, you just need your hair to look expensive and pulled-together with zero effort. You’re not trying to chase every 2026 hairstyles trend. You want that “old money hair” vibe—polished, healthy, and quietly confident.
That’s why I live for a solid sleek straight hair routine. It’s the ultimate quiet luxury signature. It works for the office, school runs, and everything in between.
This isn’t about complicated steps. It’s about smart, practical choices that give you maximum impact for minimal time. Think of it as your cheat code for looking like you have it all together, even on the most chaotic days.
Let’s get into the simple steps that make it happen.
1. The Mindset: Sleek Hair as a Signature
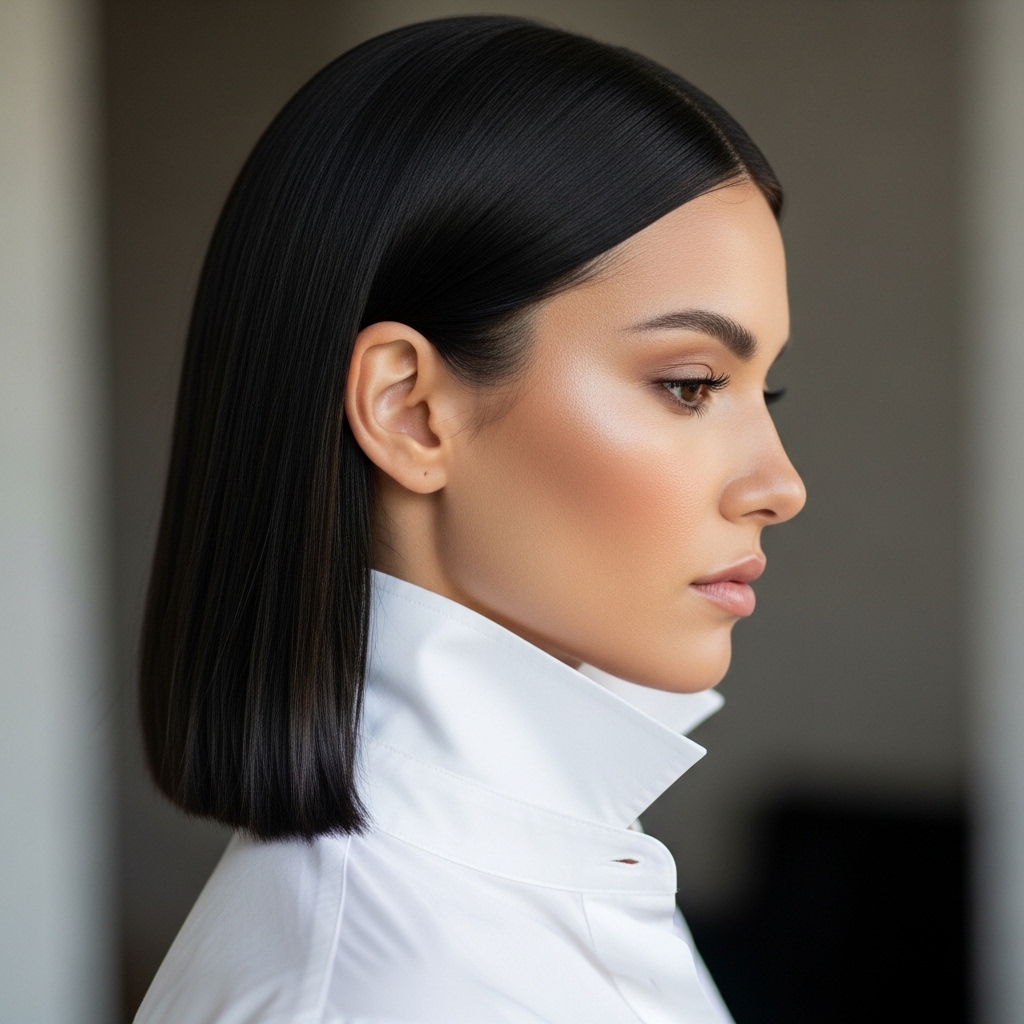
Before we touch a single product, let’s talk mindset. A sleek, straight style is less about being trendy and more about having a reliable, elegant uniform. It’s your foundation.
While romantic goth hairstyles or a dramatic vampire haircut have their moment, this look is timeless. It says you value precision and health. It pairs with everything from athleisure to a blazer.
Think of it as your canvas. Once you master this base, you can always add flair—like a deep side part or a tucked-behind-the-ear moment—in seconds.
2. The Wash Day Foundation
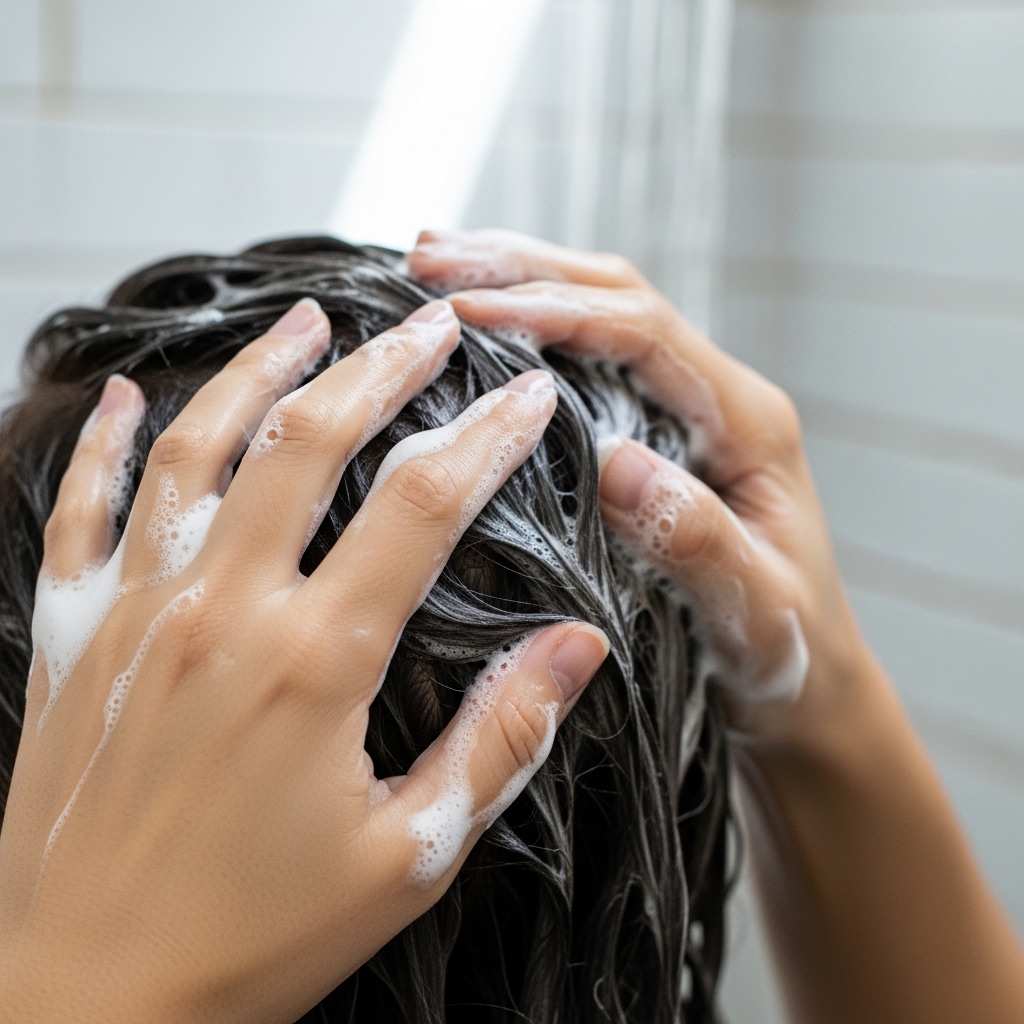
Everything starts in the shower. For sleek hair, you need a clean, smooth base. This means choosing the right shampoo and conditioner for your hair type.
If your hair is fine, look for volumizing formulas that won’t weigh it down. For thicker or frizz-prone hair, smoothing or moisturizing lines are your best friend. The goal is to cleanse without stripping.
Take that extra minute to really massage your scalp. This stimulates blood flow and ensures your hair is truly clean from roots to ends, which is key for longevity.
3. The Crucial Cold Rinse
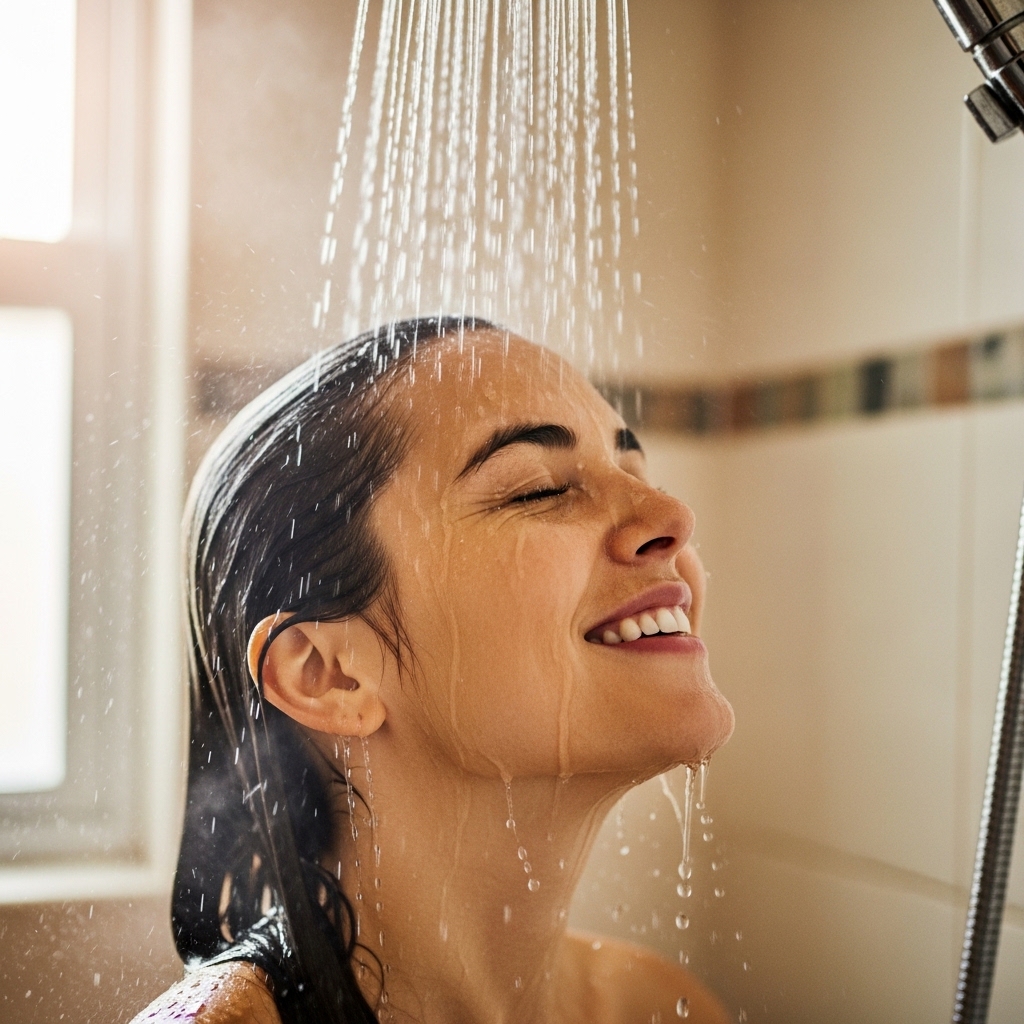
This is the easiest pro-tip you’ll ever get. After you’ve rinsed out your conditioner, switch the water to cool or cold for a final 10-15 second rinse.
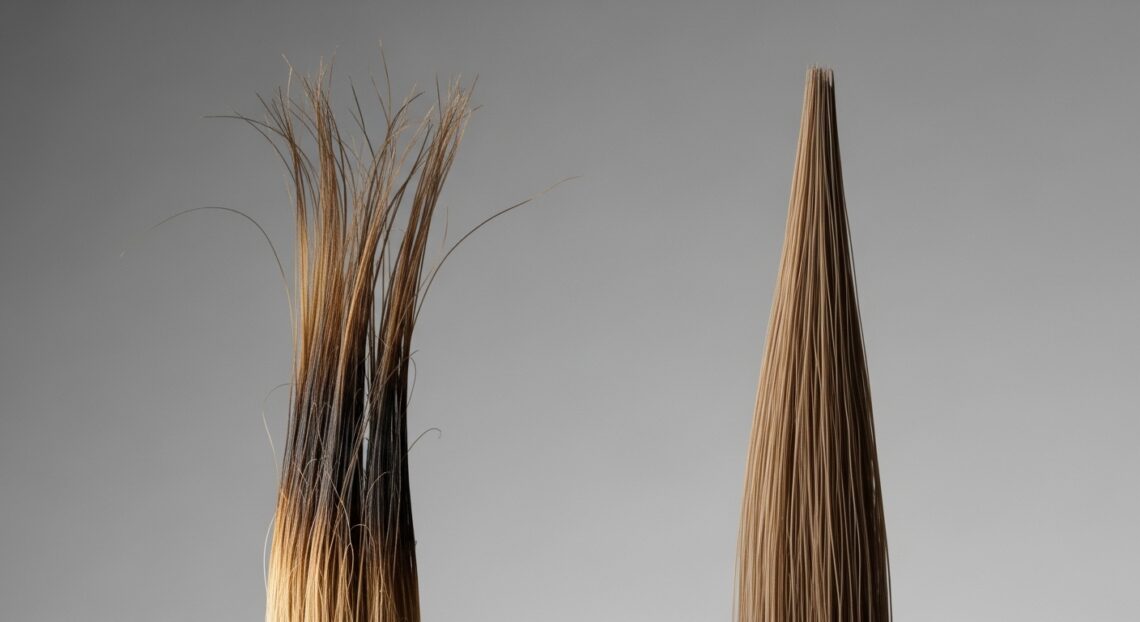
Why? The cold water helps to flatten the hair’s cuticle—the outer layer. A flattened cuticle reflects more light, which means instant, incredible shine.
It also helps seal in the moisture from your conditioner and can reduce frizz before you even start styling. It’s a tiny step with a huge payoff for that glossy look.
4. The Towel Technique Matters
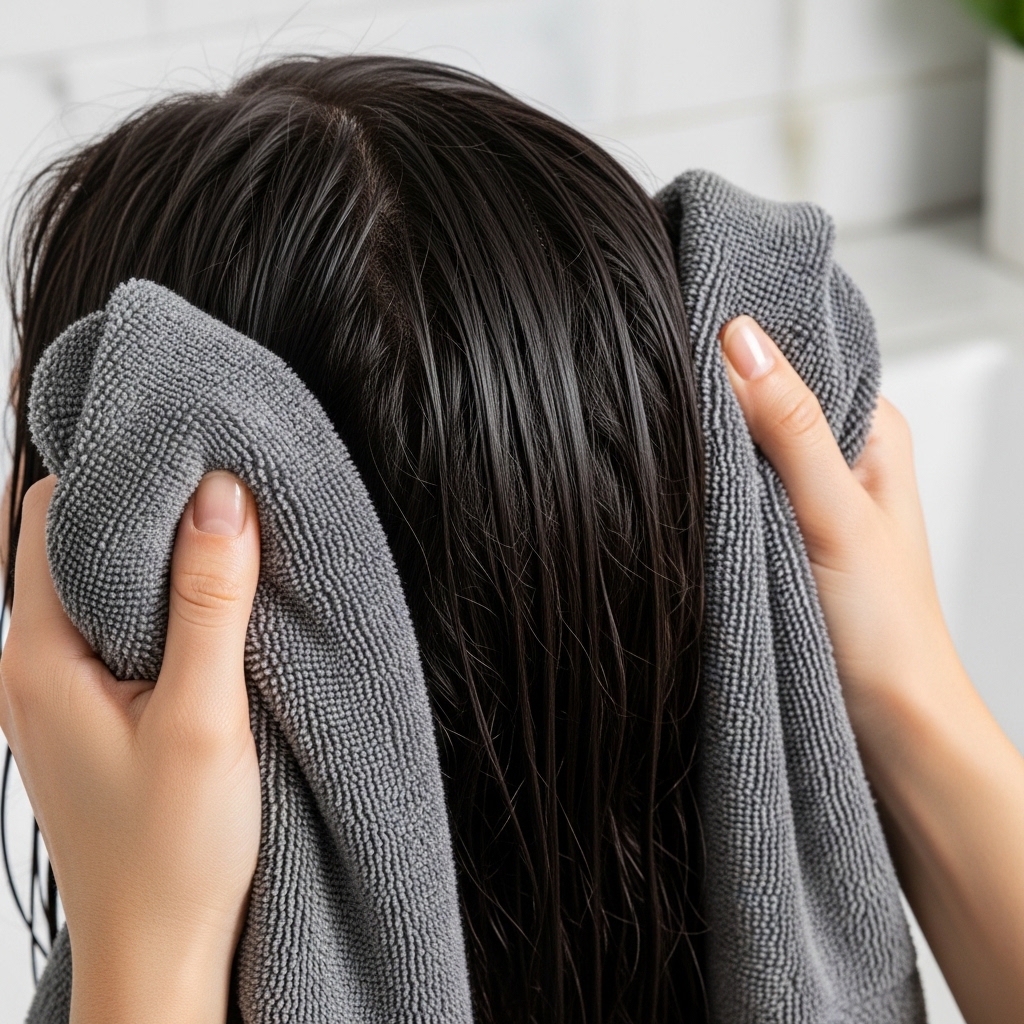
Never, ever rub your hair dry with a regular bath towel. The rough texture creates friction, which leads to frizz, breakage, and a rough cuticle. You’re undoing all that cold rinse work!
Instead, use a soft microfiber towel or an old cotton t-shirt. Gently squeeze the water out from your ends up to your roots.
Then, wrap it up and let it sit while you do your skincare or get dressed. The goal is to get your hair from sopping wet to just damp before you apply any heat.
5. The Heat Protectant Non-Negotiable
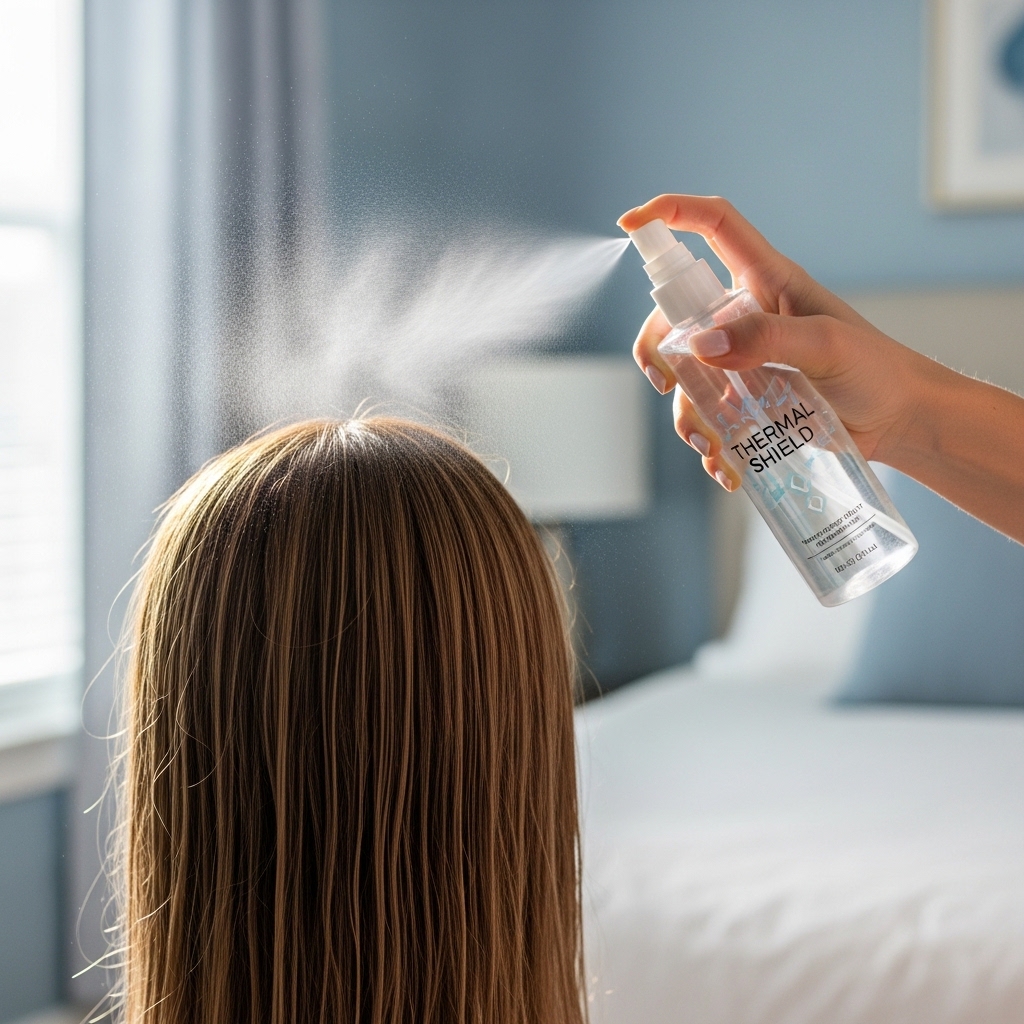
If you skip this, we can’t be friends. Applying a heat protectant is the single most important thing you can do for your hair’s health when using hot tools.
Spray it evenly on your damp hair, focusing on the mid-lengths and ends where hair is most fragile. It creates a protective barrier between your hair and the heat of your tools.
This isn’t just about preventing damage today. It’s about keeping your hair strong and shiny for the long run, so you can keep rocking this look for years.
6. The Blow-Dry Primer
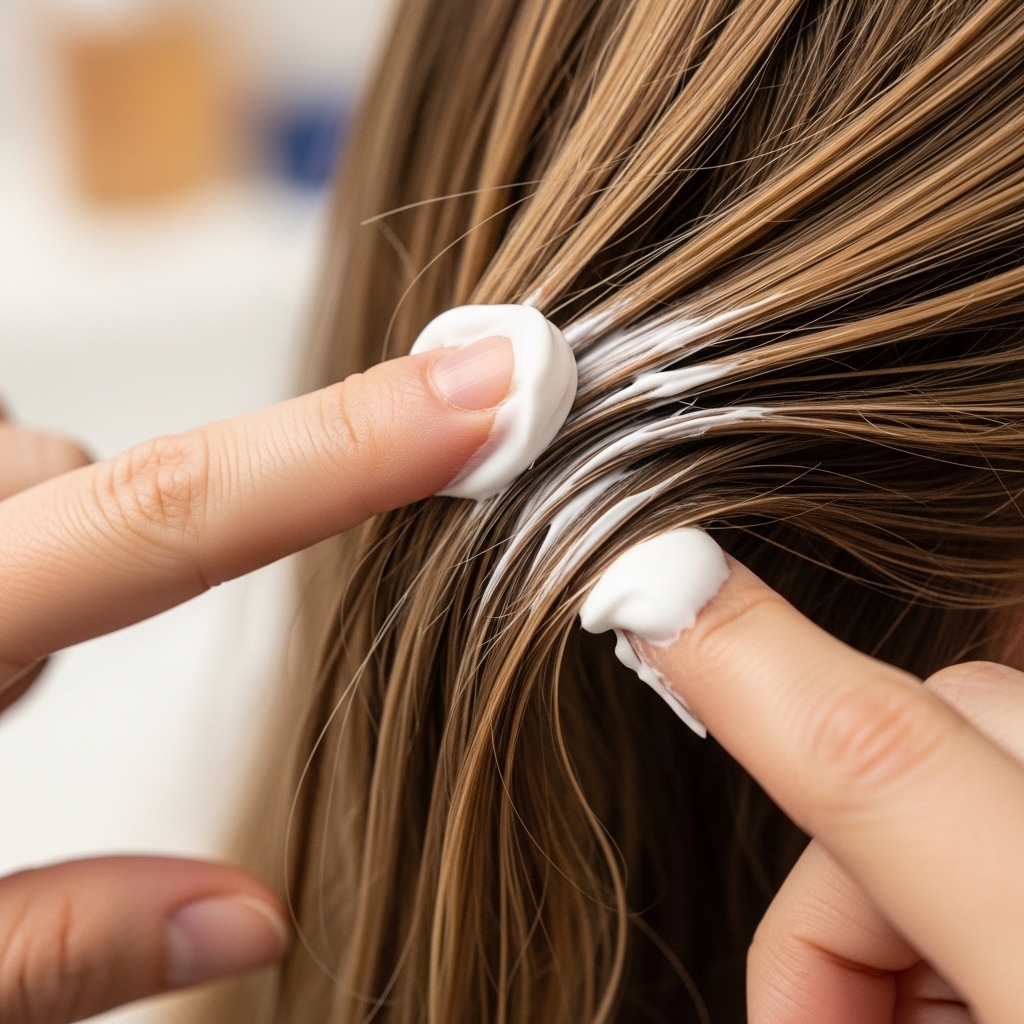
For the busiest days, a good blow-dry cream or primer is your secret weapon. Apply a pea-to-nickel-sized amount (depending on your hair thickness) to your damp hair after your heat protectant.
These products are designed to smooth the hair, fight frizz, and cut down on blow-dry time. They provide a silky texture that makes the flat iron’s job much easier later.
Distribute it evenly with a wide-tooth comb. You’ll feel the difference immediately—your hair will be more manageable and tangle-free.
7. Rough Drying the Right Way
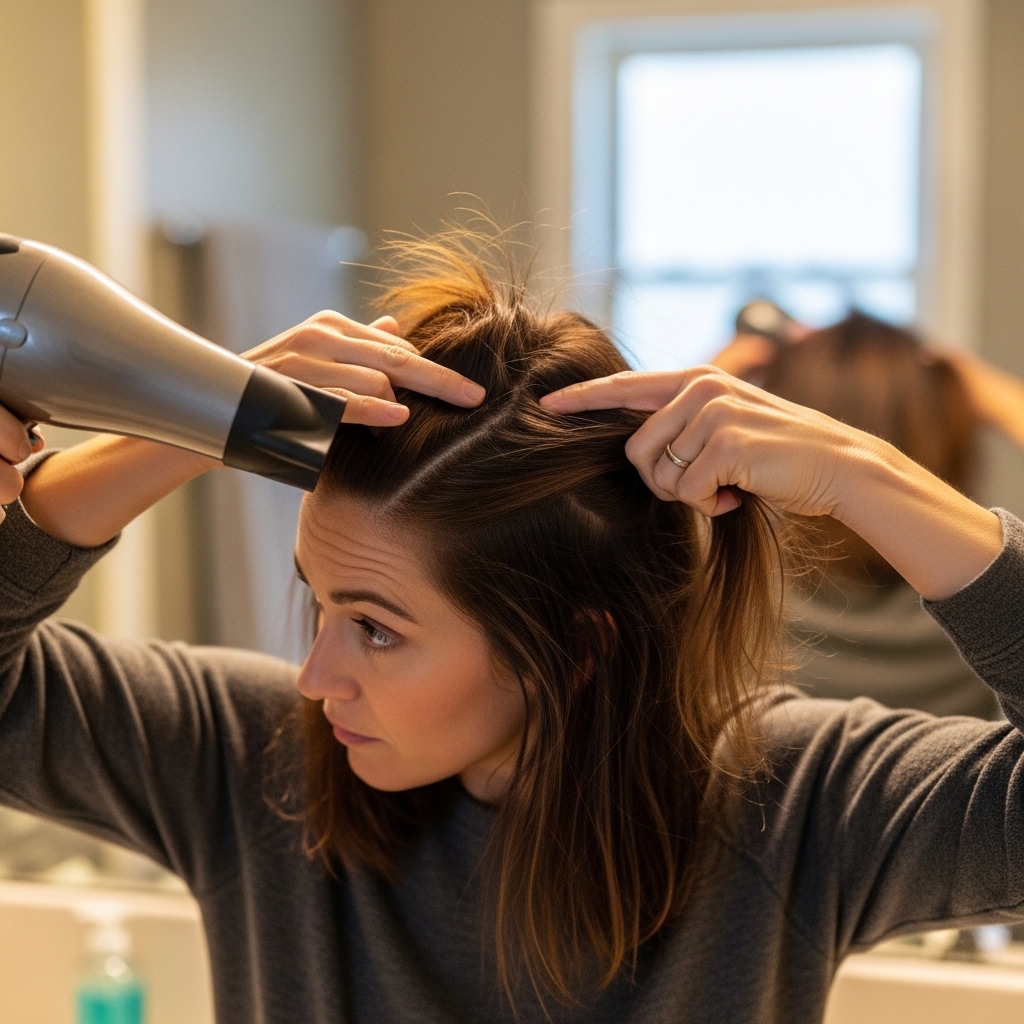
You don’t need a perfect blow-out. For this routine, we just need to get your hair about 90-95% dry. Use your dryer on a medium heat and medium speed setting.
Flip your head upside down and dry the roots for volume. Then, use your fingers or a wide-tooth comb to gently pull your hair straight as you dry the lengths.
The goal is to eliminate the dripping wetness. Your hair should feel just slightly damp to the touch, with no cold, wet spots, before you move to the iron.
8. Sectioning for Speed & Perfection
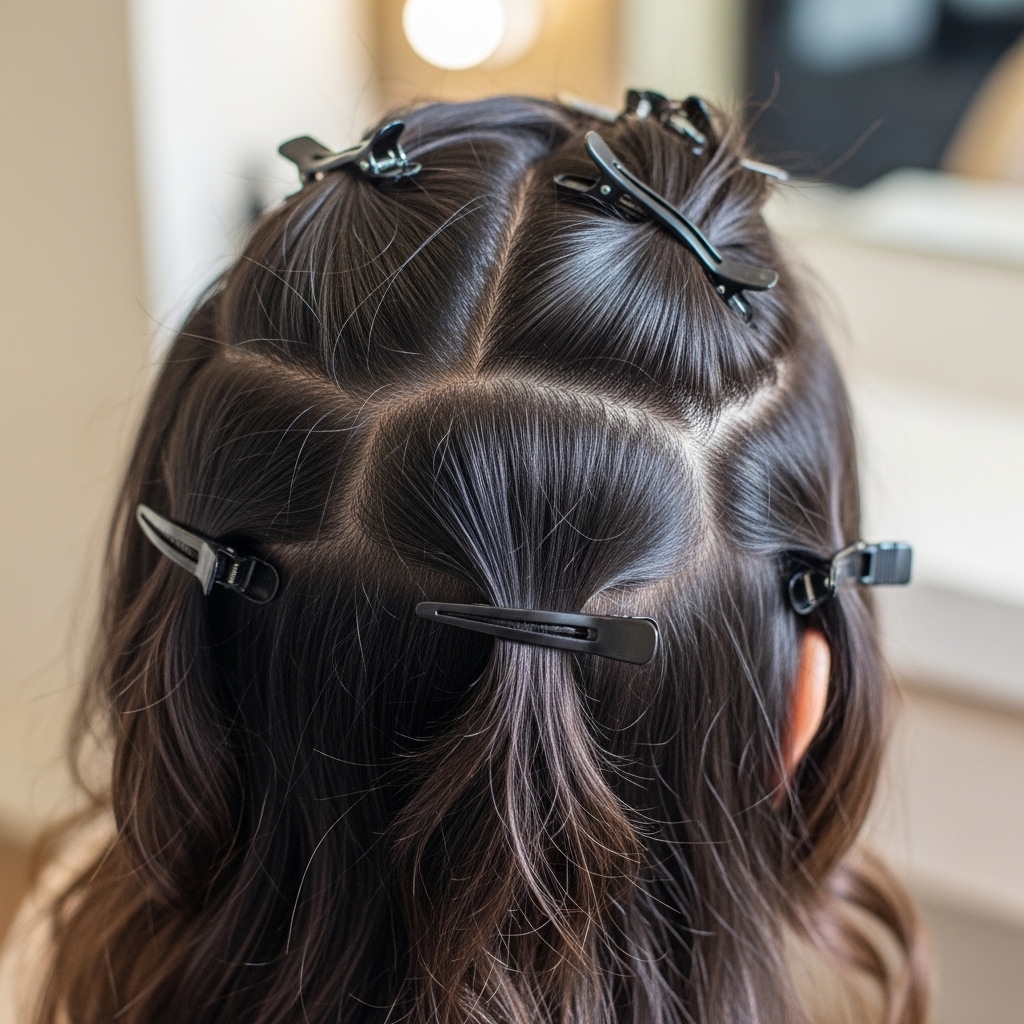
This is what separates a haphazard job from a salon-smooth finish. Before you turn on your flat iron, section your hair.
I keep it simple: clip up the top half of your hair. Start with the bottom back section, then do the sides, then finally release the top. Working in smaller, manageable sections ensures every strand gets heat.
It actually makes the process faster because you’re not fighting with unclipped hair getting in the way. It’s the ultimate time-saver for a flawless result.
9. The Flat Iron Temperature Guide

More heat is not always better. Using too high a temperature can fry your hair, even with a protectant. Here’s a quick guide:
- Fine or color-treated hair: 300-330°F
- Medium or normal hair: 330-365°F
- Thick or coarse hair: 365-385°F
Start at the lower end. You can always do a second pass on a slightly higher setting if needed, but you can’t undo heat damage. The goal is healthy shine, not just straightness.
10. The Slow & Steady Pass
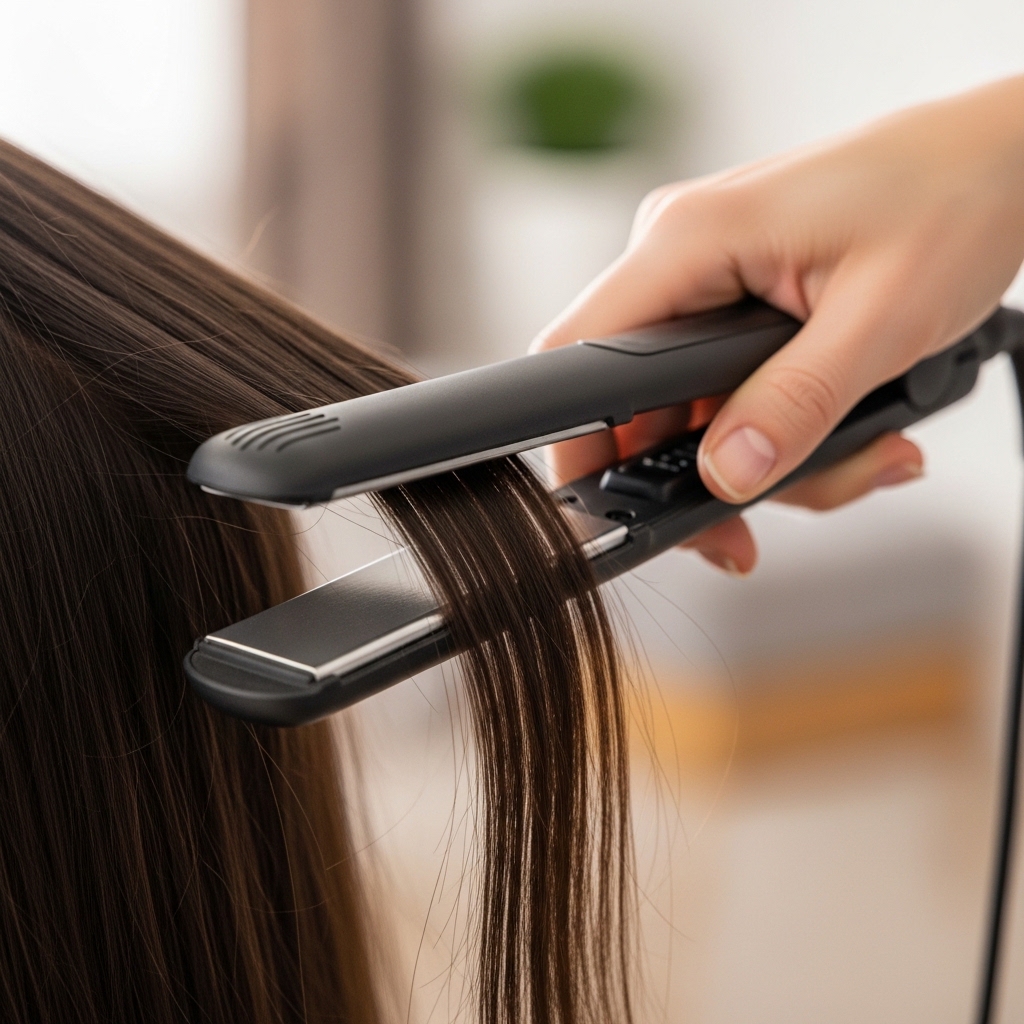
Resist the urge to clamp and zip down your hair quickly. For that glass-like finish, you need slow, steady, and complete passes.
Take a section about 1-2 inches wide. Clamp the iron as close to the roots as you can without touching your scalp. Then, glide it down the section in one smooth, continuous motion.
Aim for about 2-3 seconds per inch of hair. This gives the heat enough time to actually smooth the hair shaft, rather than just superficially warming it.
11. The “Cool Shot” Seal
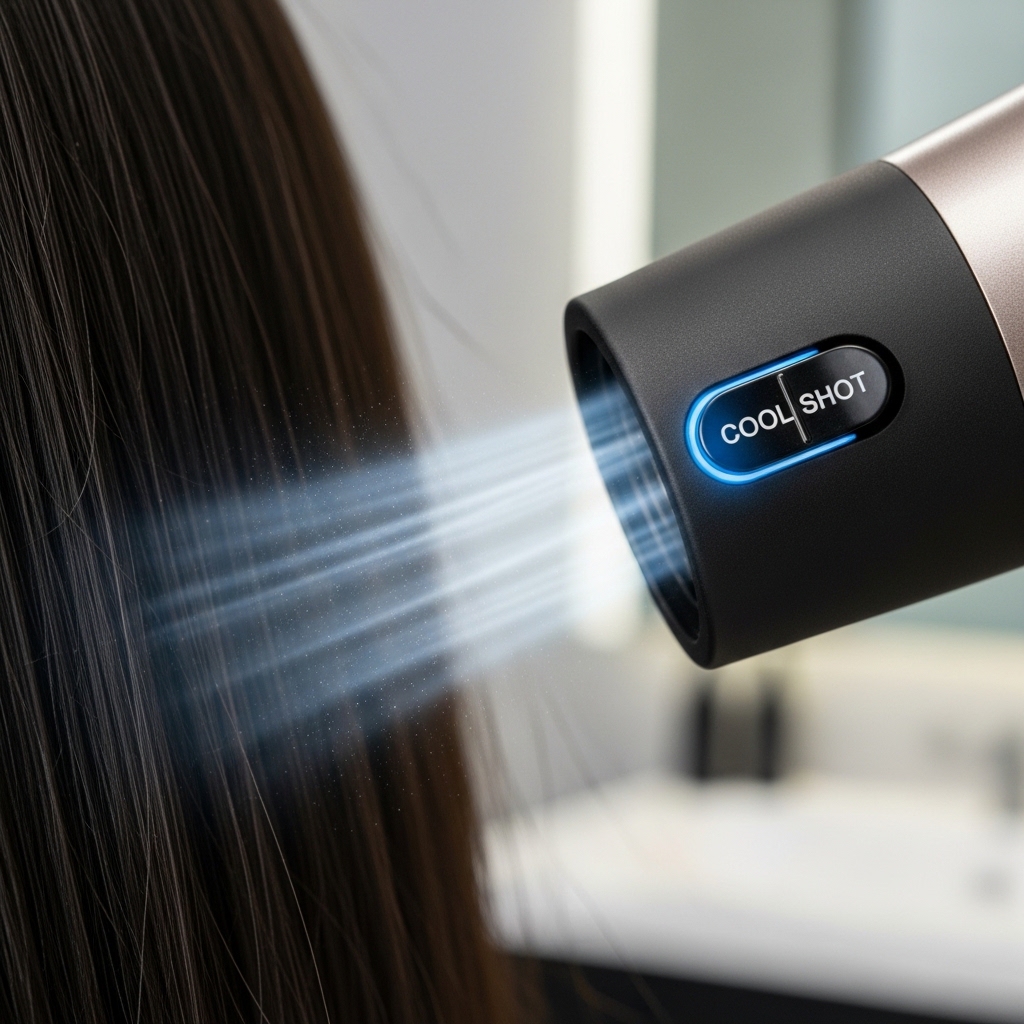
Most hair dryers and some flat irons have a “cool shot” button. This isn’t a gimmick—it’s a styling tool. After you’ve straightened a section, hit it with a blast of cool air.
The cool air helps to “set” the hair in its new, straight form. It locks in the style by closing the cuticle again, just like the cold rinse did, boosting shine and reducing the chance of frizz from humidity.
It makes your hard work last so much longer. It’s the final seal on your sleek style.
12. The Root Lift Trick

Sleek doesn’t have to mean flat. A little volume at the roots makes the style modern and prevents it from looking dated or heavy.
Once a section is straightened, take the very tips of your flat iron and clamp it right at the root. Gently twist the iron away from your face, just a quarter turn, and hold for a second.
This gives a subtle, lived-in lift. It’s the detail that makes a quiet luxury bob or an asymmetrical lob look expensive and intentional, not just flat-ironed.
13. Taming the Baby Hairs & Flyaways
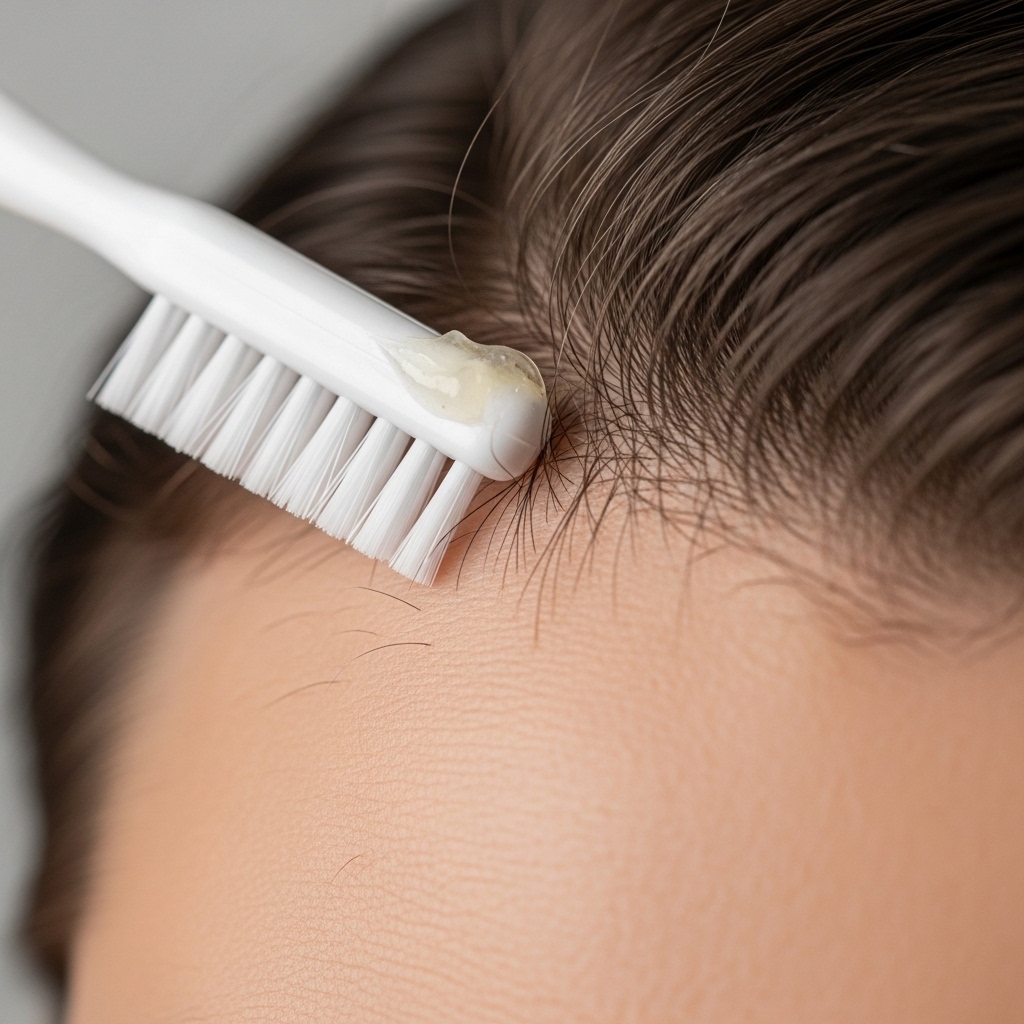
Even with the best routine, those tiny hairs around your face can rebel. For a truly polished finish, you need to address them.
Spray a tiny bit of hairspray on a clean toothbrush or a spoolie. Gently brush those baby hairs and flyaways into place, following your hairline.
You can also use a very, very small amount of clear brow gel or a dab of smoothing serum on your fingertips. This is the final touch that screams “I paid attention.”
14. The Shine Serum Finish
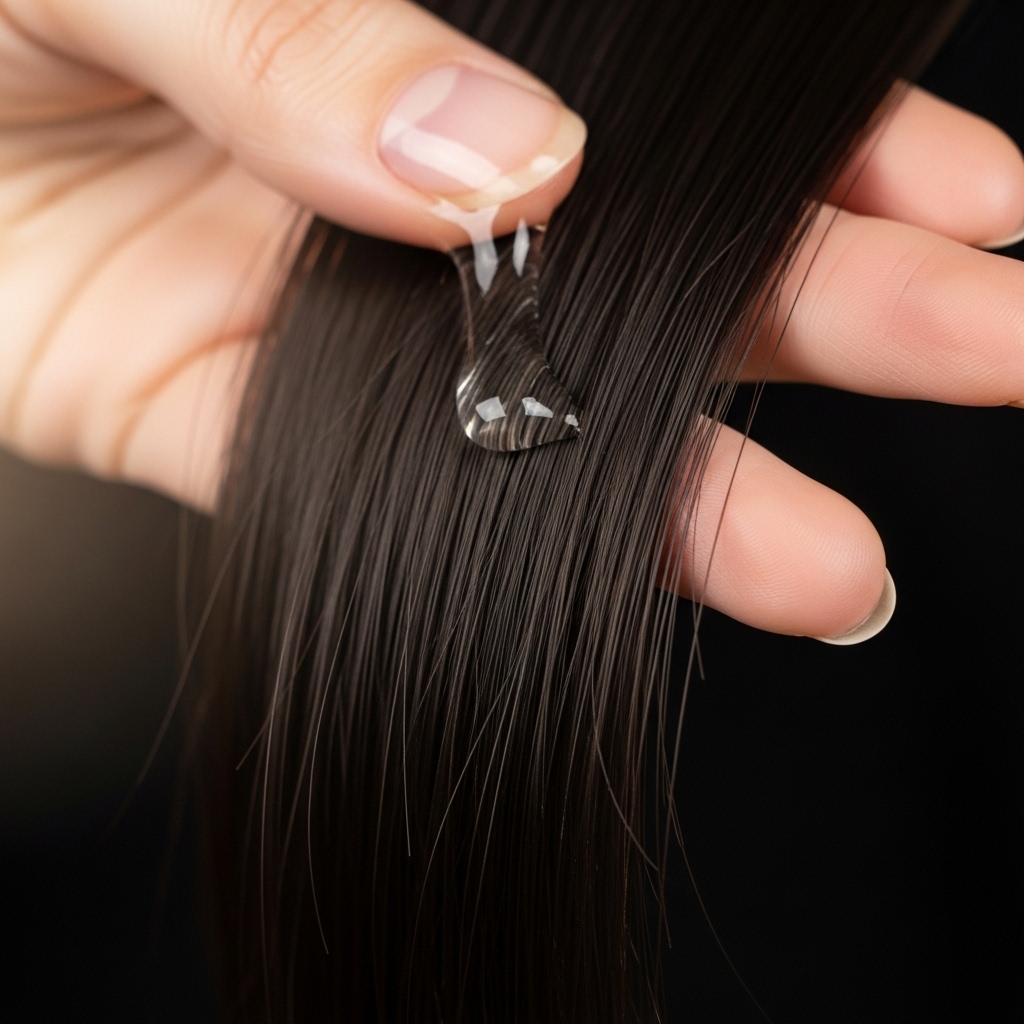
After all the heat styling is done, it’s time for the magic potion: shine serum. This is what gives you that “glass hair” effect.
Put one small drop on your palms, rub them together, and then lightly gloss over the surface of your hair. Focus on the mid-lengths and ends. Avoid the roots!
This step adds a final layer of protection, fights humidity, and makes your hair look incredibly healthy and expensive. It’s the quiet luxury signature.
15. The Overnight Preservation Plan
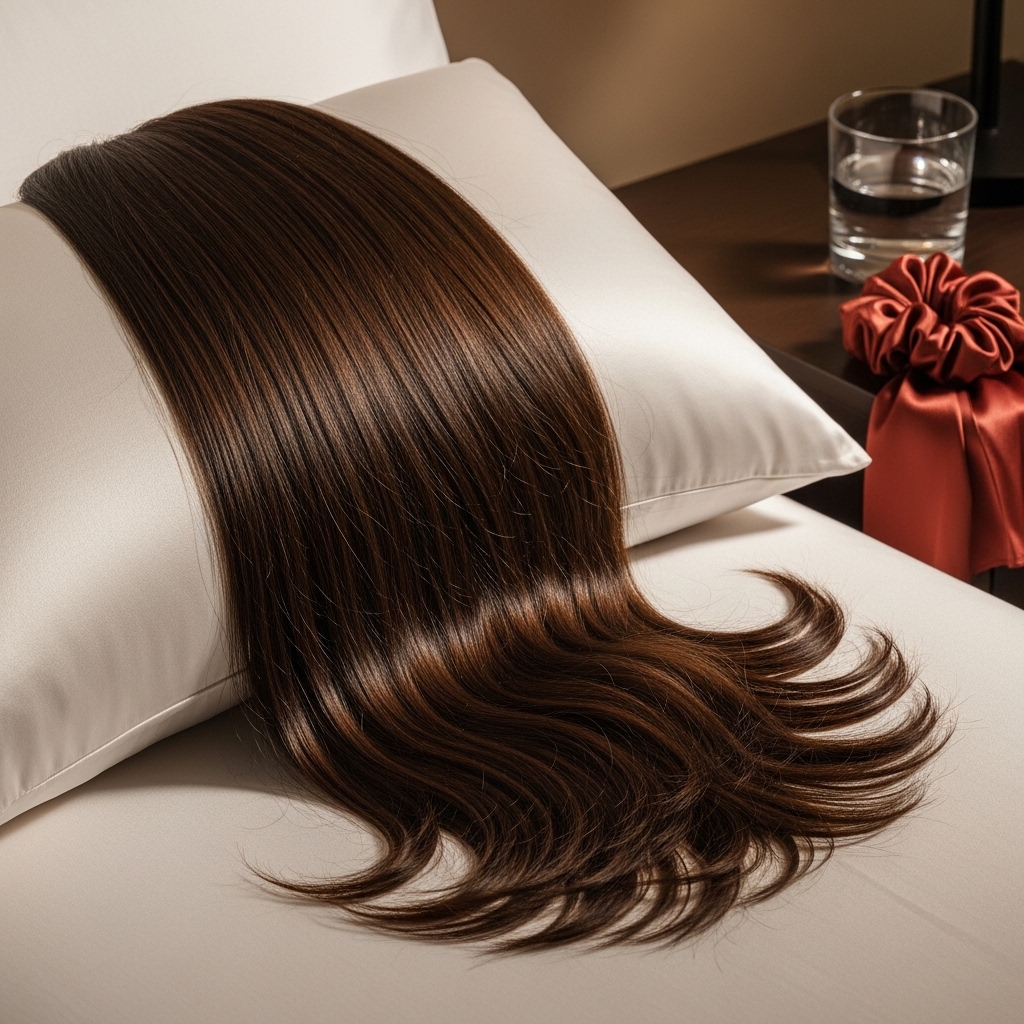
You did all this work—let’s make it last! Sleeping on a cotton pillowcase creates friction that causes frizz and breaks your hair.
Switch to a silk or satin pillowcase. The smooth surface allows your hair to glide as you sleep, preserving your style and reducing bedhead dramatically.
You can also loosely pull your hair into a low, loose ponytail at the very top of your head with a silk scrunchie. This keeps it from getting tangled or crushed.
16. The Next-Day Refresh Routine
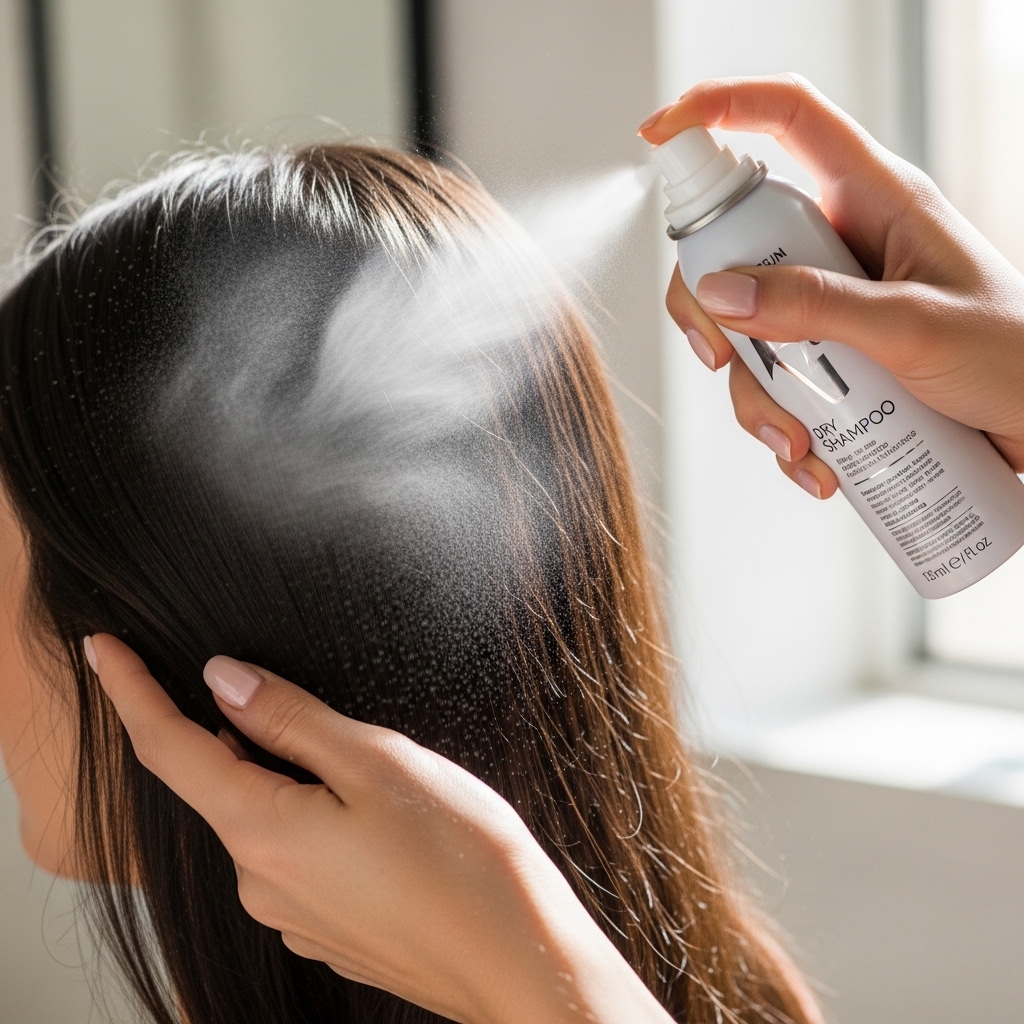
On day two, your hair might still be straight, but the roots can get a little flat or oily. Enter your refresh toolkit.
A light spray of dry shampoo at the roots will absorb oil and add volume. Then, use a light-hold smoothing spray or a tiny bit of serum on just the ends to combat any new flyaways.
If you have a few kinks, you can quickly run your flat iron over just those sections on a low setting. No need to re-do the whole head!
17. When to Skip a Wash

Here’s a secret: this sleek style often looks even better on day two or three. The natural oils from your scalp have had a chance to distribute slightly, adding a soft, natural luster.
Don’t feel pressured to wash every day. Over-washing can strip your hair and make it harder to style. Trust your refresh routine.
Your hair has more grip and body on non-wash days, which can actually help styles like a polished ponytail or a chic half-up look hold even better.
18. Adapting for Different Cuts
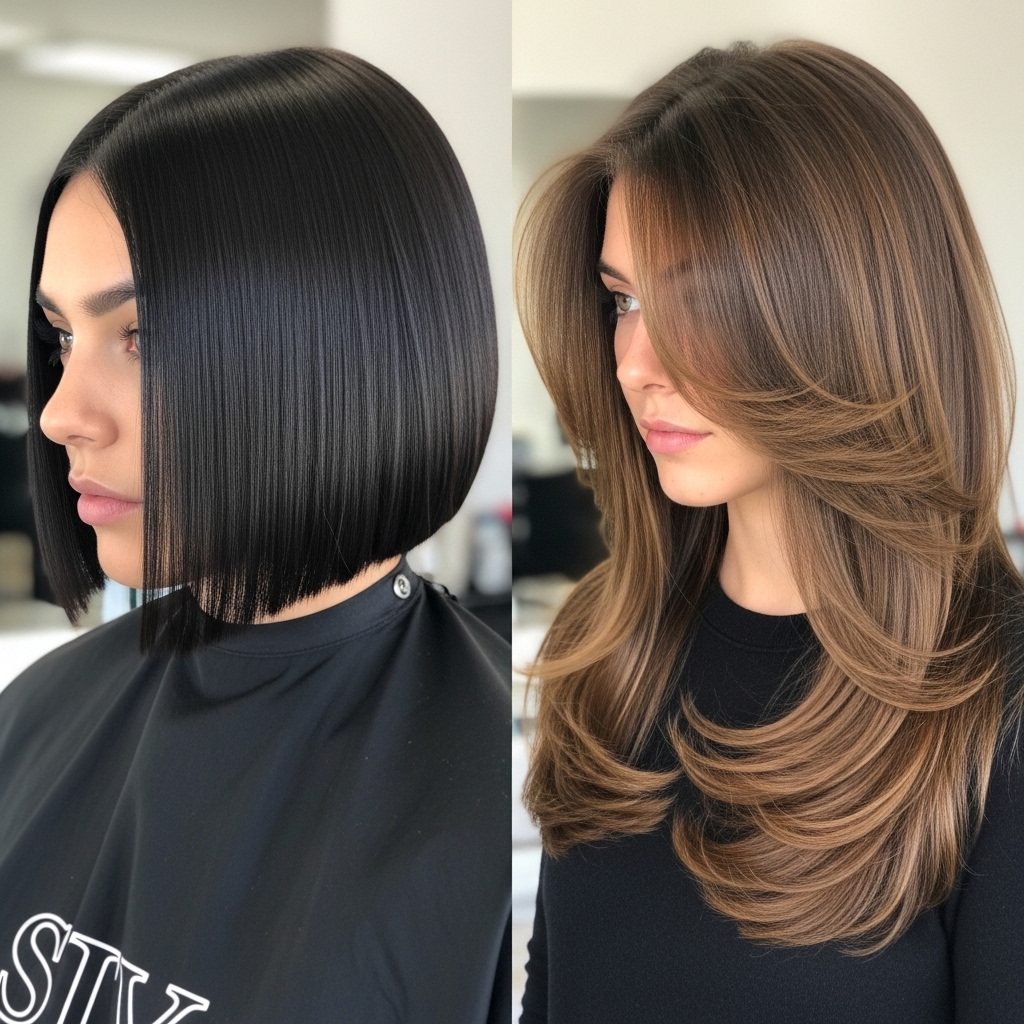
This routine works for any length, but here are tweaks for popular cuts. For a sharp hime cut or blunt bob, be extra precise with your sections and ends.
For an asymmetrical lob, style the longer side first to use it as a guide. For longer, layered hair, pay extra attention to smoothing the ends of each layer to prevent a frayed look.
The principles are the same: protect, section, smooth slowly, and seal. The cut just changes where you focus your attention.
19. Avoiding Common Mistakes

Let’s quickly go over what to avoid so your hair stays healthy. First, using dirty hot tools. Wipe your flat iron plates with rubbing alcohol weekly to remove product buildup.
Second, going over the same section too many times. One or two slow passes is enough. More than that invites heat damage.
Third, forgetting to trim your ends. Split ends will never look sleek, no matter how much serum you use. Get a trim every 8-12 weeks.
20. Your Quick-Start Product List
You don’t need a cabinet full of products. Here’s the streamlined kit to build over time:
- Shampoo & Conditioner: For your hair type (smoothing or volumizing).
- Heat Protectant Spray: Non-negotiable.
- Blow-Dry Primer/Cream: For faster drying and smoothing.
- Quality Flat Iron: With adjustable temp and ceramic/tourmaline plates.
- Shine Serum: A lightweight, silicone-based formula.
- Dry Shampoo: For refreshing between washes.
Start with the protectant and iron. Those are the game-changers.
And there you have it—the no-stress, maximum-impact routine for that perfect sleek hair, even when you’re running on coffee and a to-do list a mile long.
Remember, the goal isn’t perfection. It’s looking and feeling put-together with a style that works for you. Once this becomes your go-to, you’ll save so much time and brain space in the morning.
That’s the real quiet luxury: simplicity that makes you feel confident.
Save this post to Pinterest to keep this routine handy for your next busy week! And tell me in the comments—what’s your one can’t-live-without hair product for busy days?

