
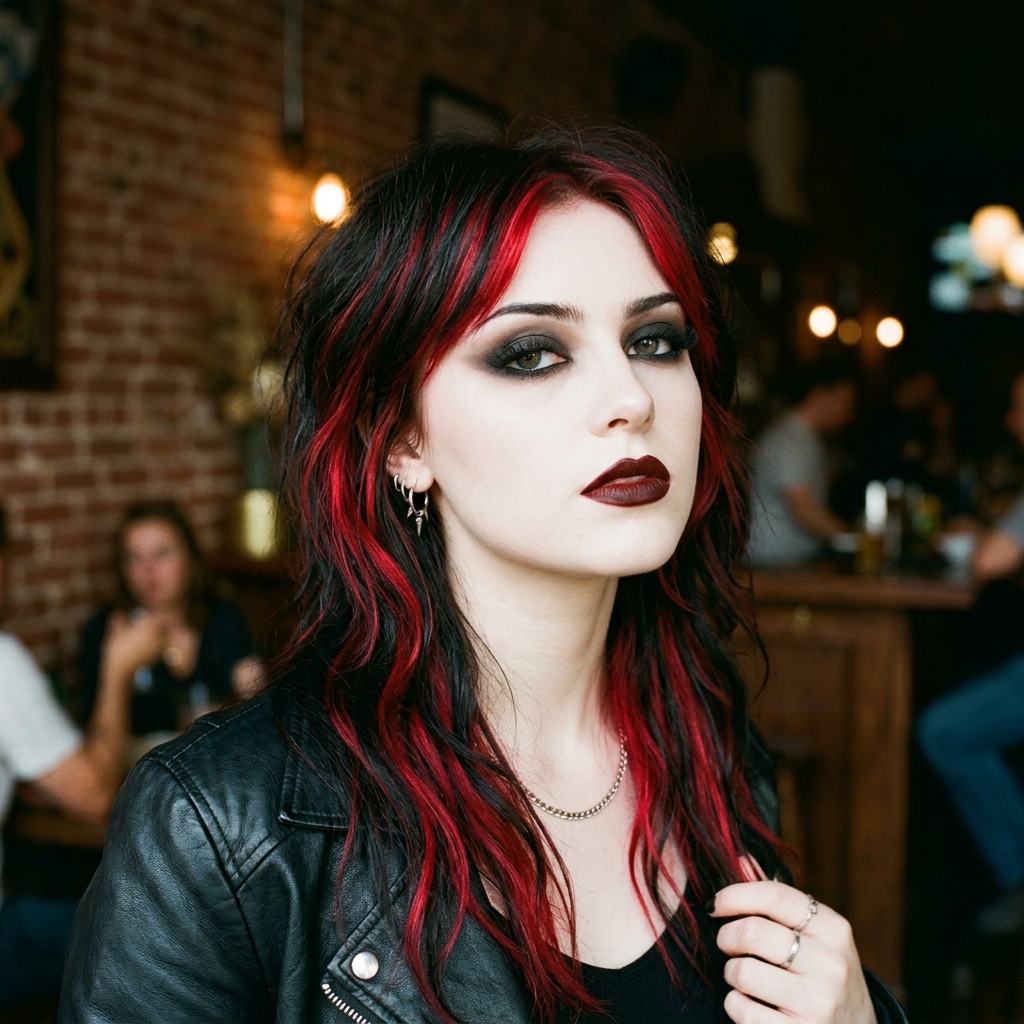
Okay, let’s talk about drama. Not the stressful kind, but the kind you wear in your hair. If you’ve been scrolling and feeling like your look needs a little more… bite, you’re in the right place. The vampire haircut is having a major moment, and it’s the perfect blend of edgy and elegant.
Think of it as the love child of romantic goth hairstyles and that cool quiet luxury bob vibe. It’s less about looking scary and more about looking powerfully, intriguingly you. It’s a statement, for sure.
And the best part? You don’t need a salon appointment to try the core idea. Today, I’m breaking down exactly how to get the look, focusing on adding those stunning red accents for a pop of drama. It’s easier than you think, and I promise it’s a game-changer for your style confidence.
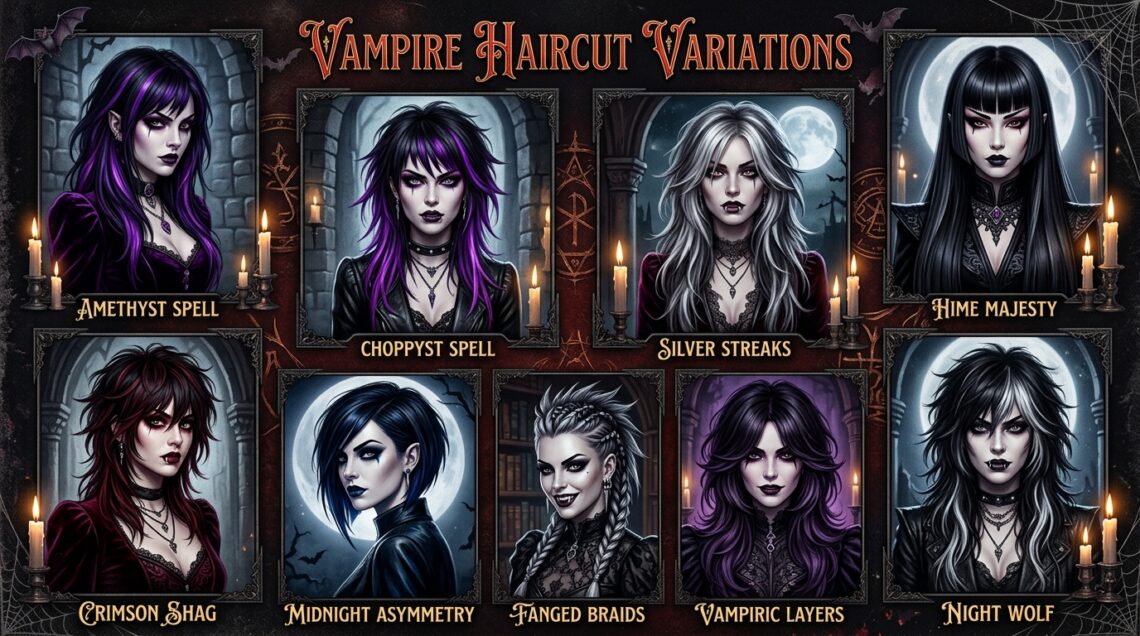
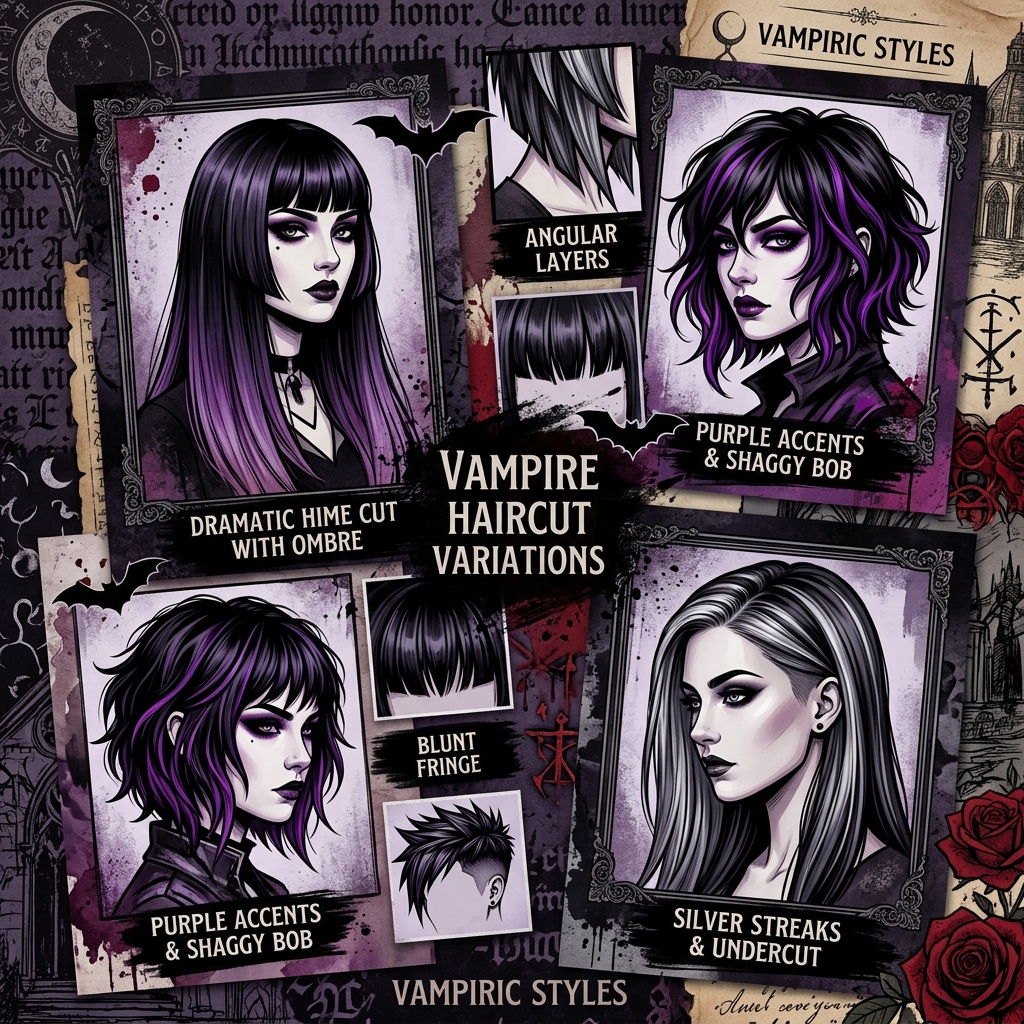
What Exactly Is a Vampire Haircut?
It’s not just one specific cut. The vampire haircut is more of a vibe. It pulls from several iconic styles to create something sharp, a little undone, and full of personality. We’re talking sharp, often asymmetrical lob lengths, heavy fringe, and dramatic layers.
It often mixes elements of the graphic hime cut with the texture of a shag. The goal is hair that looks effortlessly cool, like it has a story. It’s a perfect entry into 2026 hairstyles that are trending right now, blending dark romance with modern edge.
Why Add Red Accents?
Red is the ultimate color for this look. It mimics the idea of wine, blood, or dark roses—all very vampire-core. Against dark brown or black hair, red accents create an unbelievable contrast that’s pure glitchy glam hair.
These accents can be subtle or bold. They add dimension, movement, and that crucial element of surprise. It’s the detail that takes a great cut and makes it unforgettable. It’s your secret weapon for standing out.
Tools You’ll Need to Get Started
Gathering your tools first makes everything smoother. You don’t need a professional kit, just the right basics. Here’s what to grab before we begin.
- Sharp hairdressing scissors (never use paper scissors!)
- Fine-tooth comb and hair clips for sectioning
- Your chosen red hair color (more on that next)
- Application brush, bowl, and gloves
- A good clarifying shampoo and deep conditioner

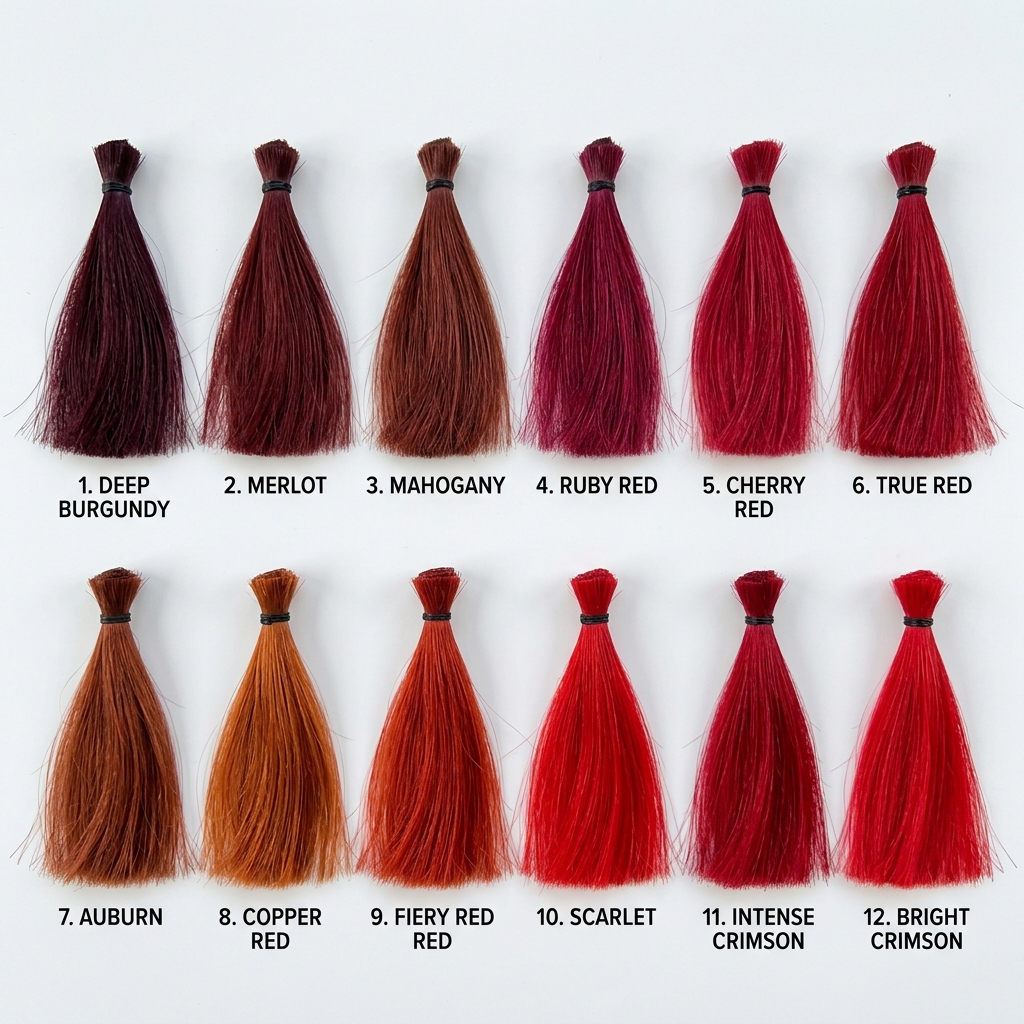
Choosing Your Shade of Red
This is the fun part. Your red should complement your base color and your personal style. For a more old money hair twist, go for a deep, burgundy wine shade that looks rich in certain lights.
For high drama, try a vibrant crimson or cherry red. If your base is a lighter brown, a coppery red is stunning. I recommend a semi-permanent color for accents—it’s less commitment and easier to refresh.
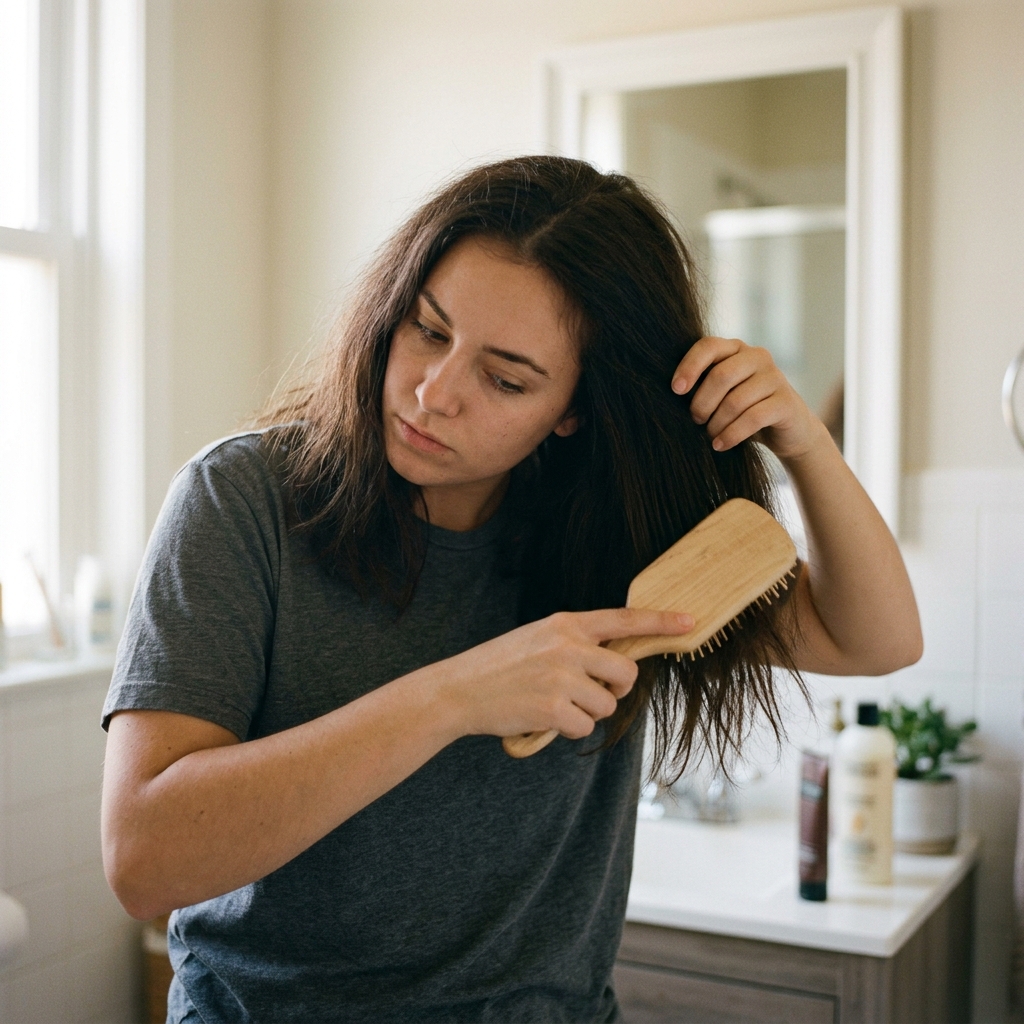
Prepping Your Hair Properly
Always start with clean, dry, but not freshly washed hair. Hair that’s a day or two old has natural oils that protect your scalp during coloring. Do a clarifying wash a day before to remove any product buildup.
This ensures the color takes evenly. Brush out all tangles. Put on an old shirt you don’t mind staining and lay out your tools. Good prep prevents mistakes and makes the whole process feel more professional.
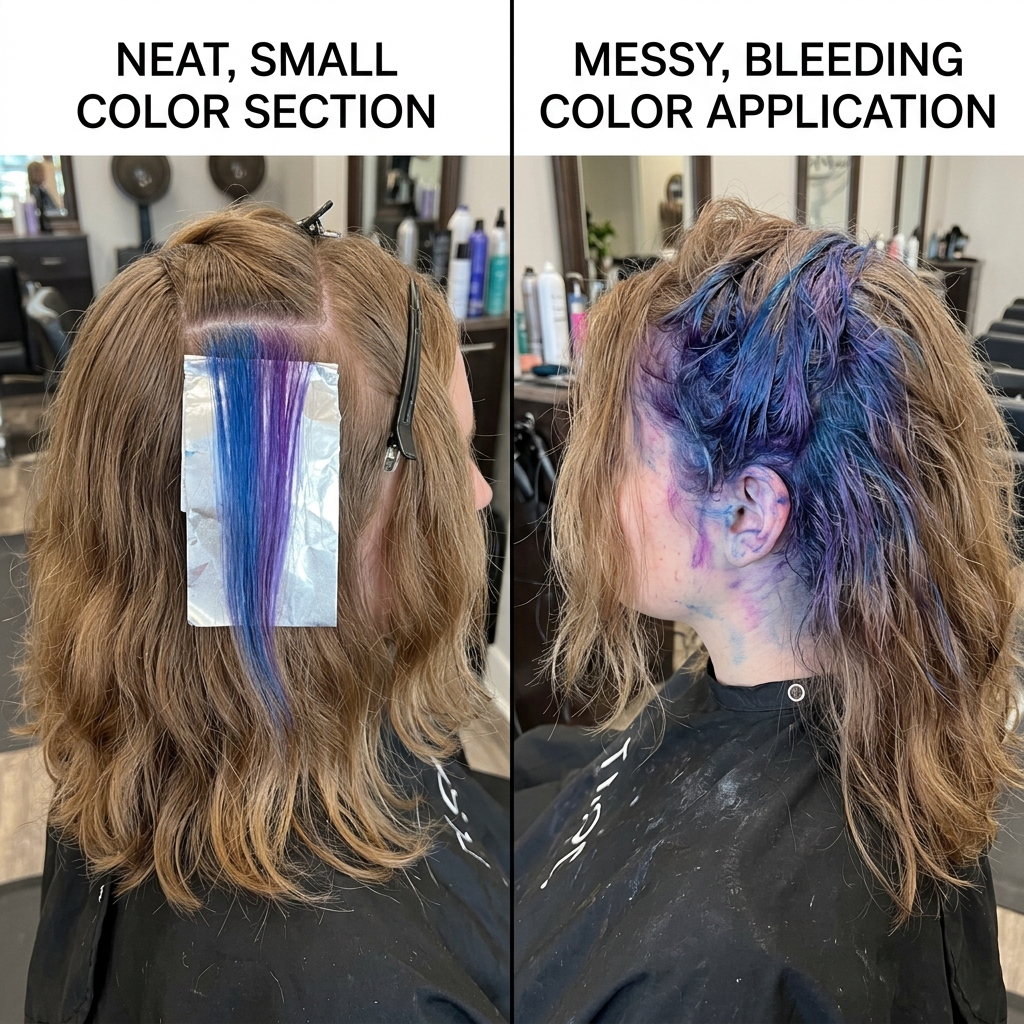
Mapping Out Your Accent Placement
Don’t just start applying color! Placement is key for that intentional, cool-girl look. Look in the mirror and decide where you want the focus. The most popular spots are the money piece around the face or thin horizontal slices underneath the top layer.
Use your comb to separate the sections you plan to color and clip the rest away. Sketching a light guide with a tail comb can help. This planning step is what separates a pro look from a DIY mess.
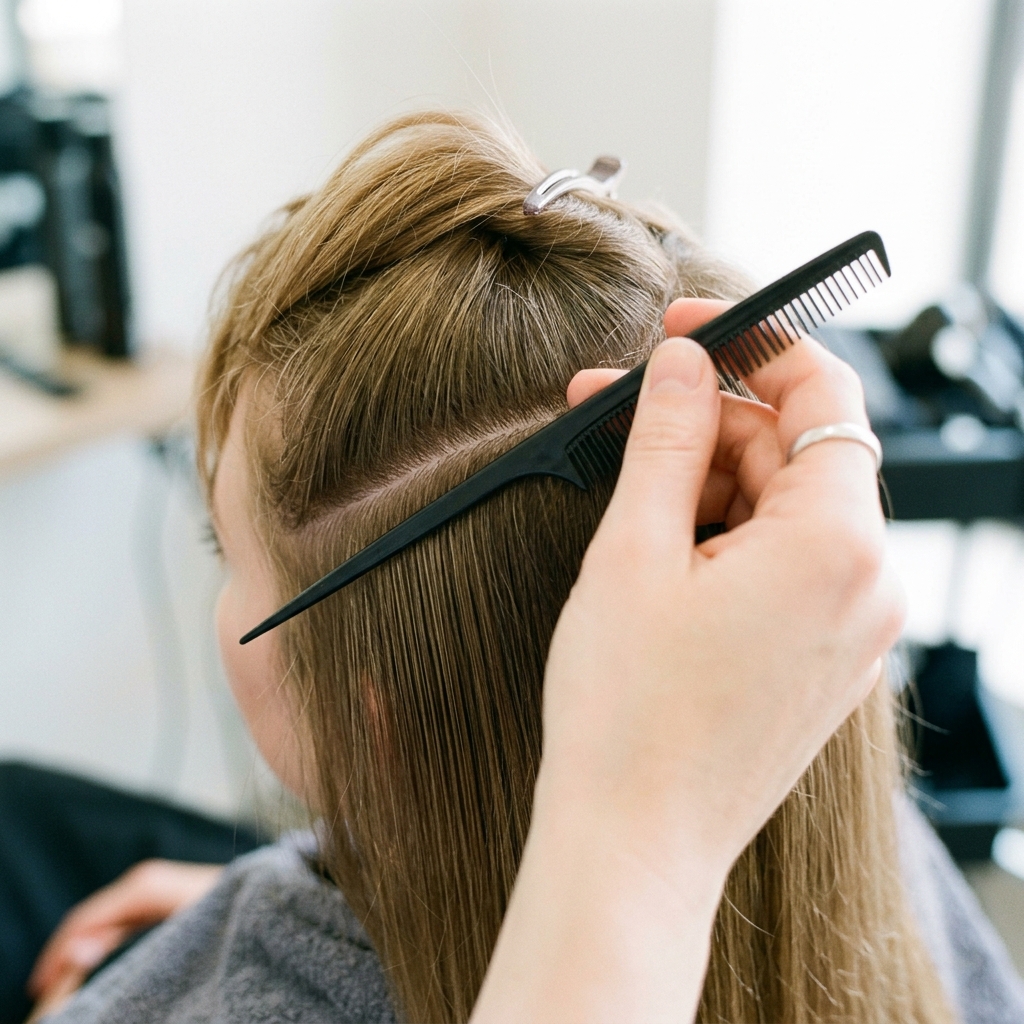
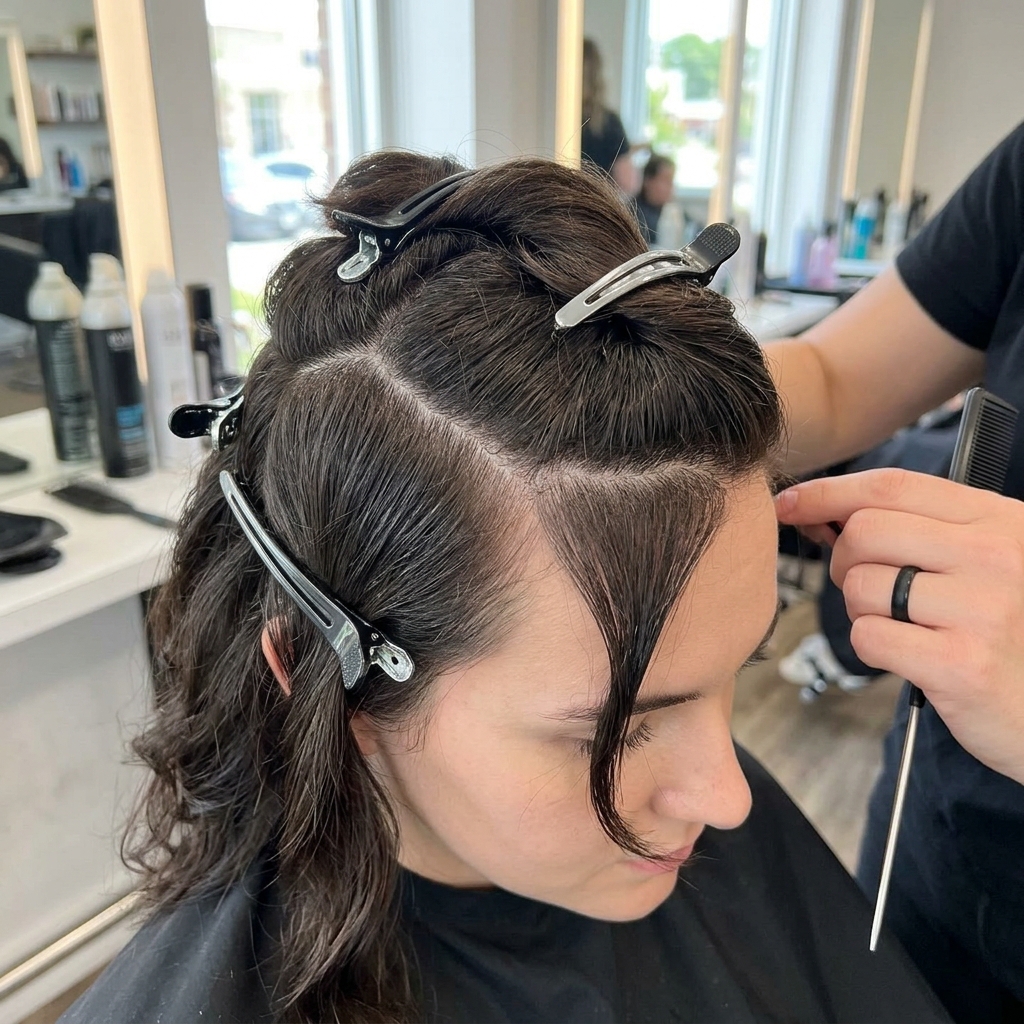
Sectioning Like a Pro
Clean sections are everything. Use the end of your comb to create sharp, clean parts. Clip the bulk of your hair up and out of the way. Work in small, manageable sections.
For face-framing pieces, take triangular sections from the front. For underlayers, create a horizontal part from ear to ear and clip the top hair up. This keeps you organized and ensures you only color what you intend to.
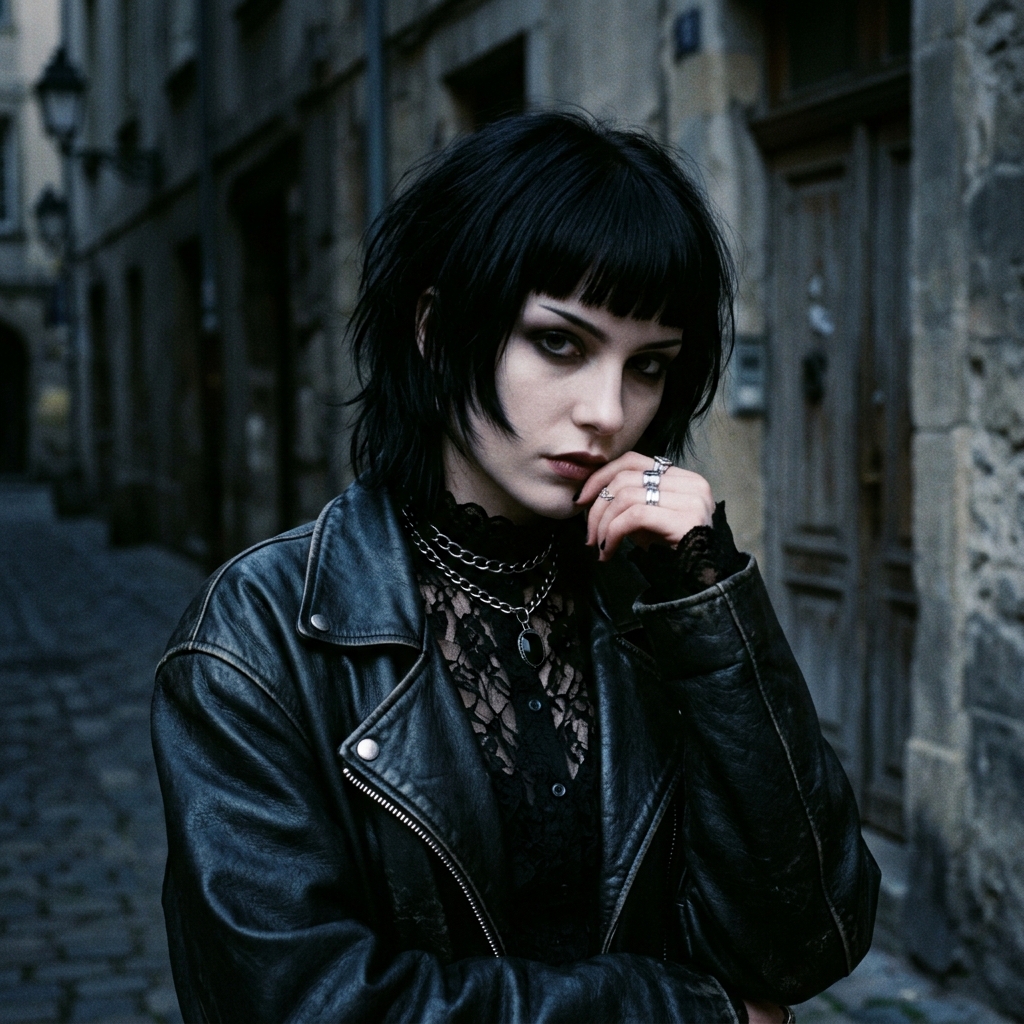
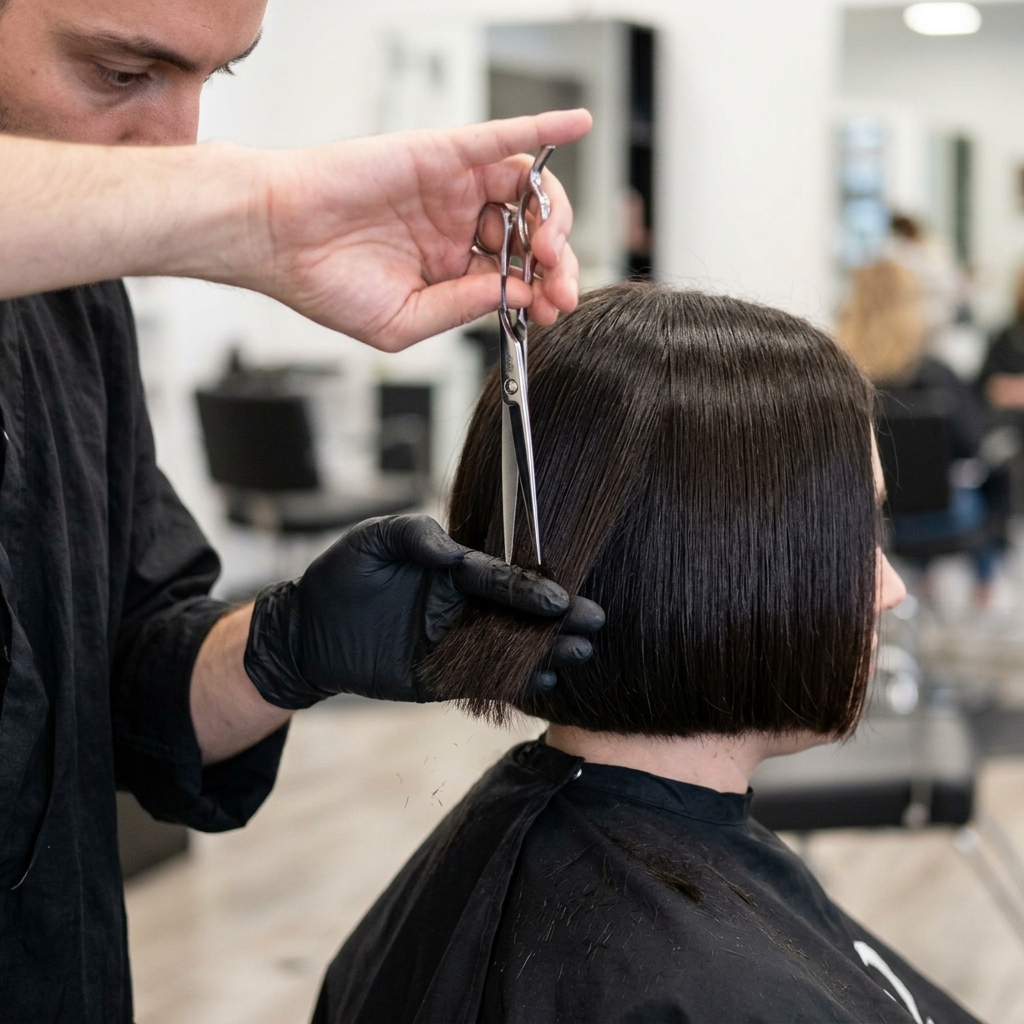
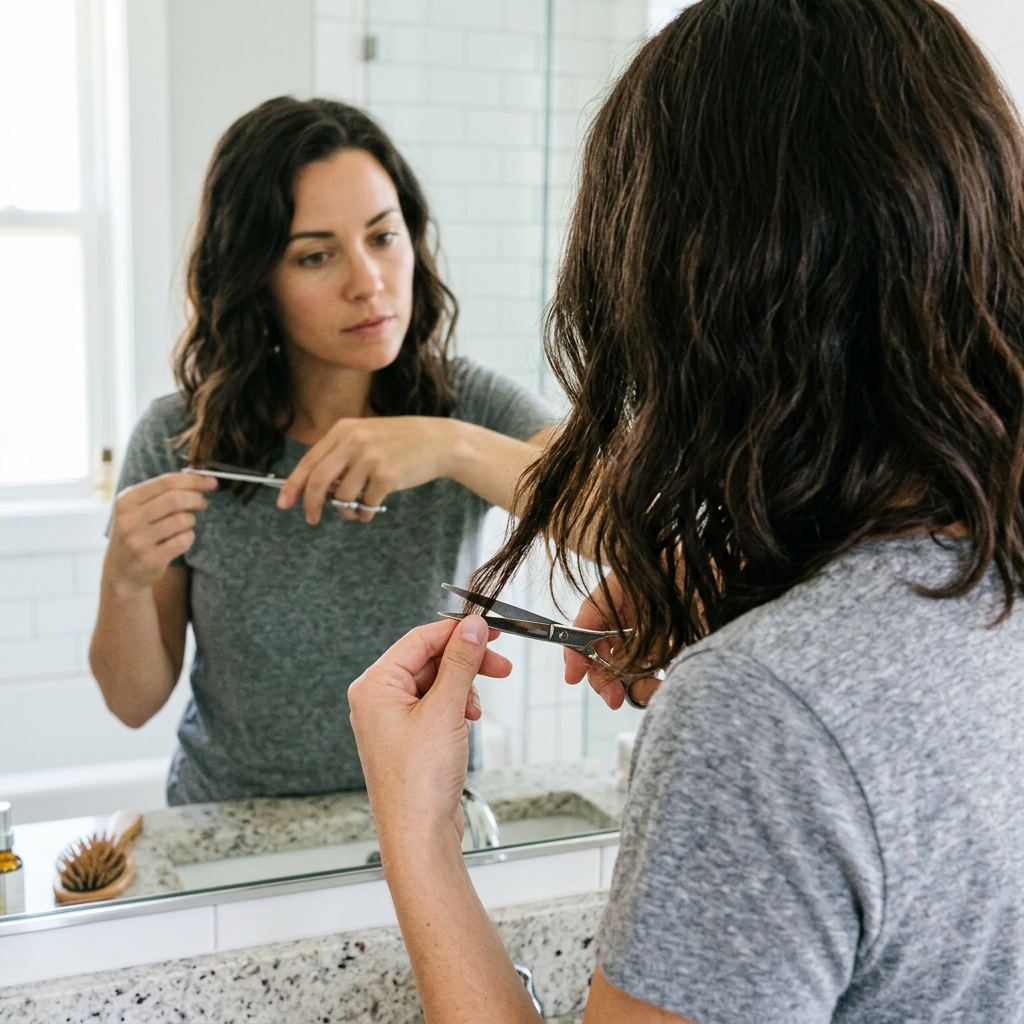
The Cutting Technique: Creating the Shape
If you’re trimming or shaping your base cut, start here. For a blunt asymmetrical lob, cut your hair dry. Focus on creating a strong, clean line that’s shorter in the back or on one side.
Point-cut into the ends to soften them and avoid a harsh line. Remember, you can always cut more, but you can’t add hair back. Go slow, check your work in the mirror constantly, and keep the shape slightly jagged for that lived-in feel.
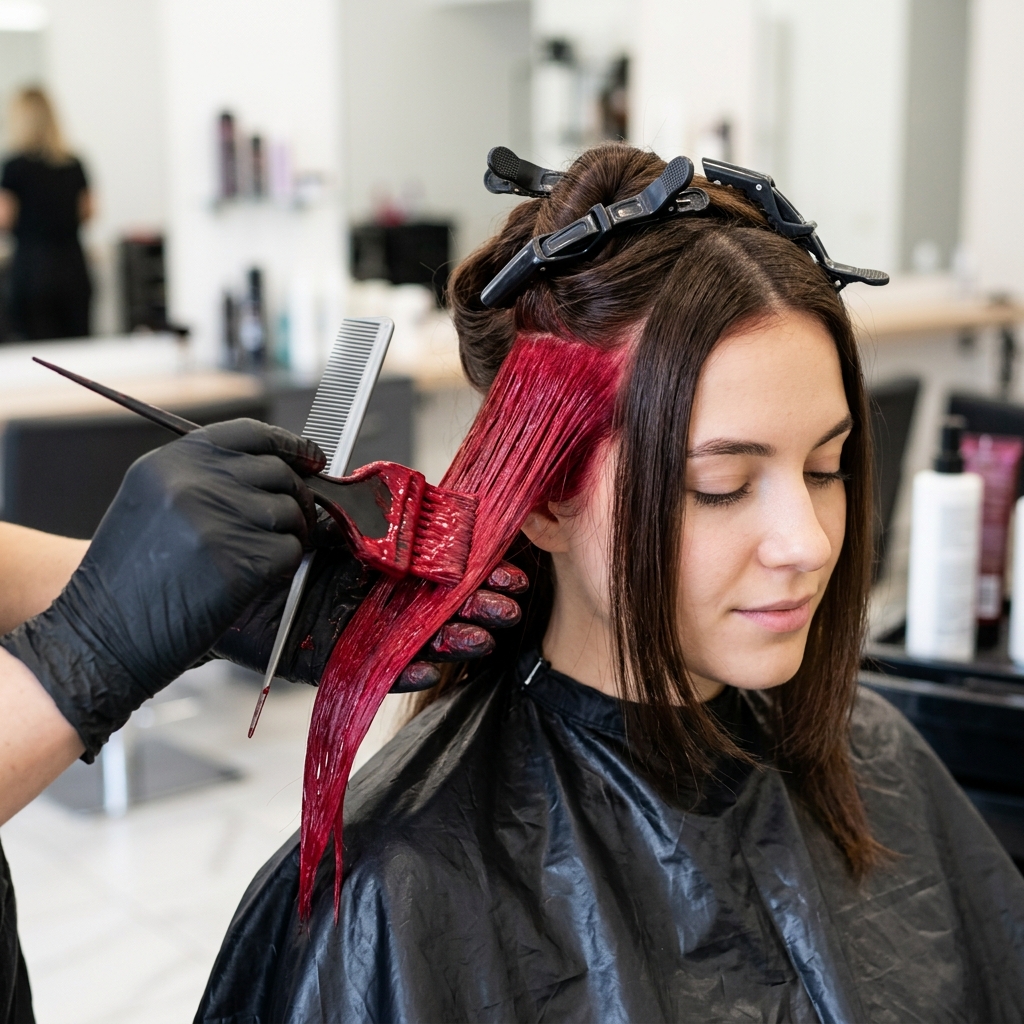
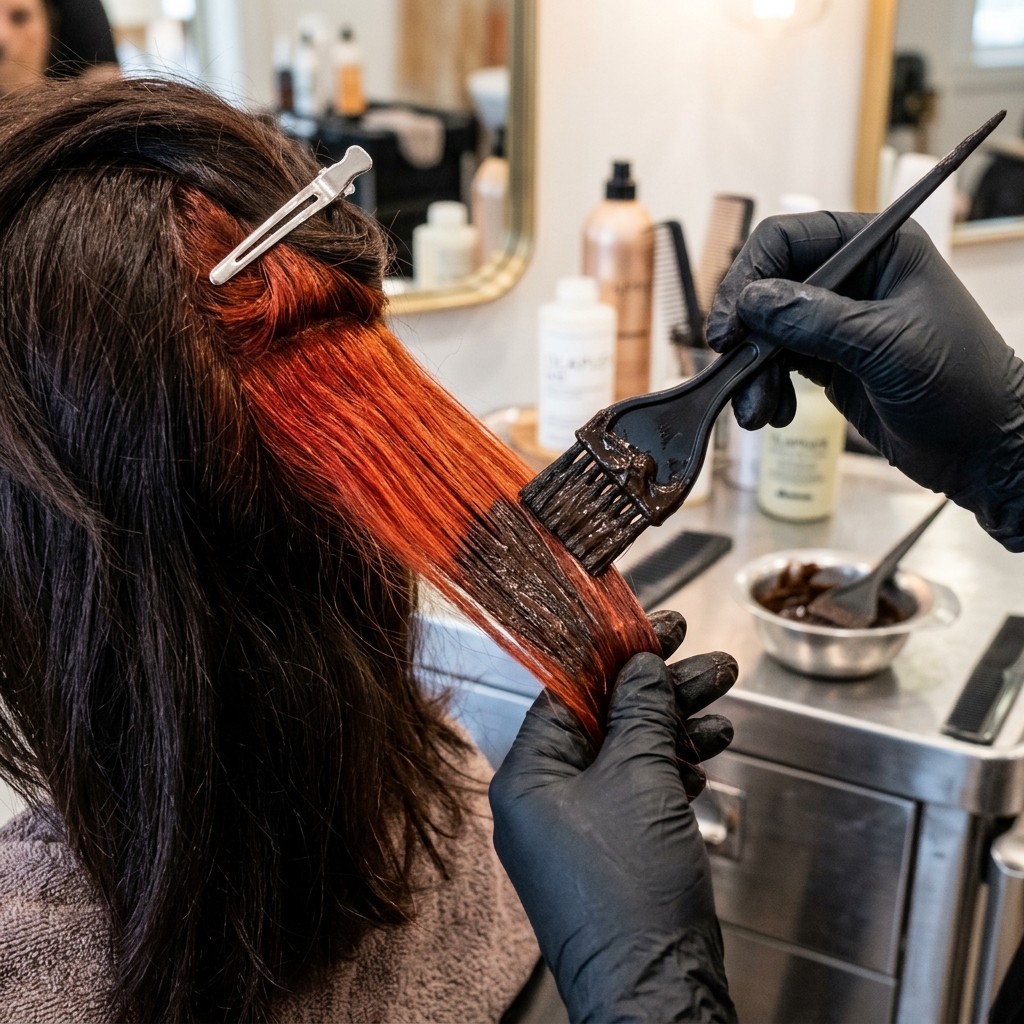
Applying the Red Color to Face-Framing Pieces
This is the most popular method. Isolate your chosen front sections. Mix your color according to the package instructions. Using your brush, apply the dye from root to tip, saturating the hair completely.
Make sure every strand is covered. Once applied, you can gently fold the section in foil or plastic wrap to prevent it from touching the rest of your hair. This gives you a bold, framing effect that brightens your entire face.
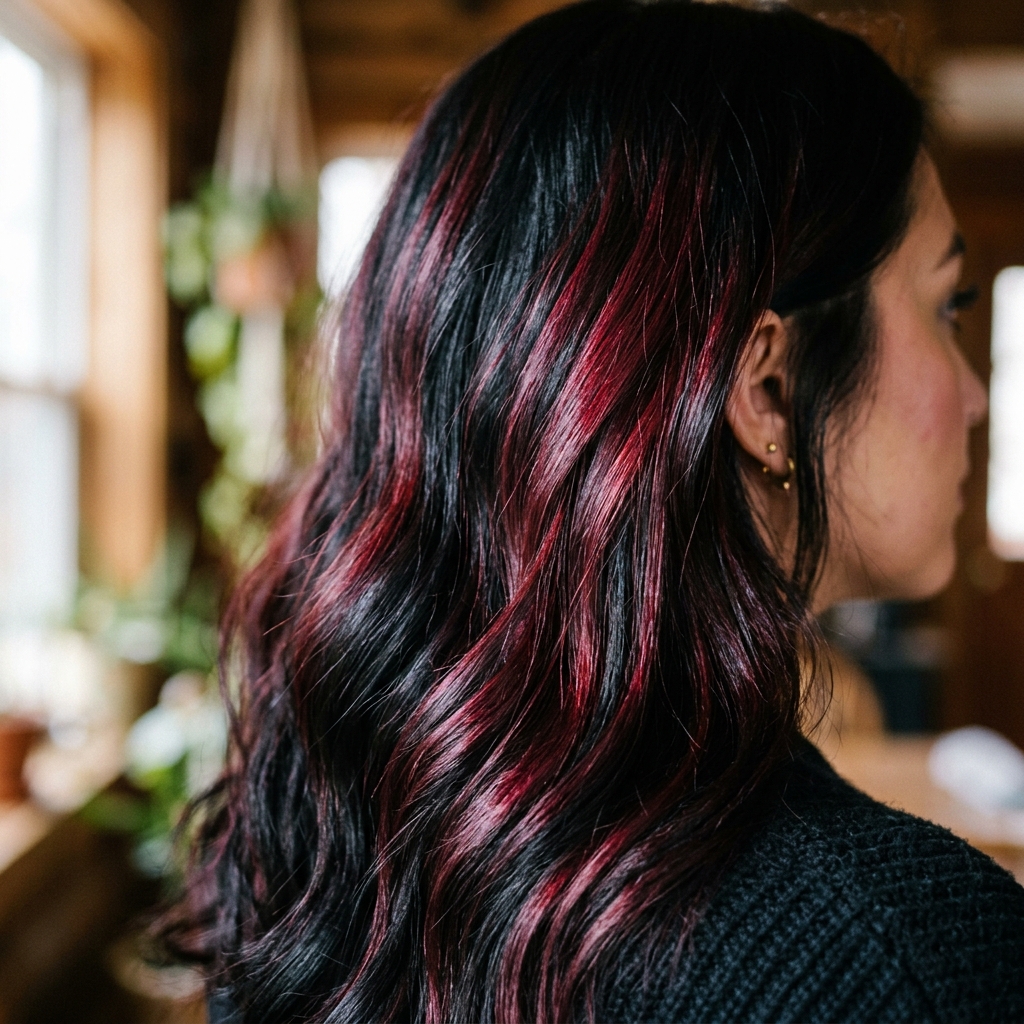
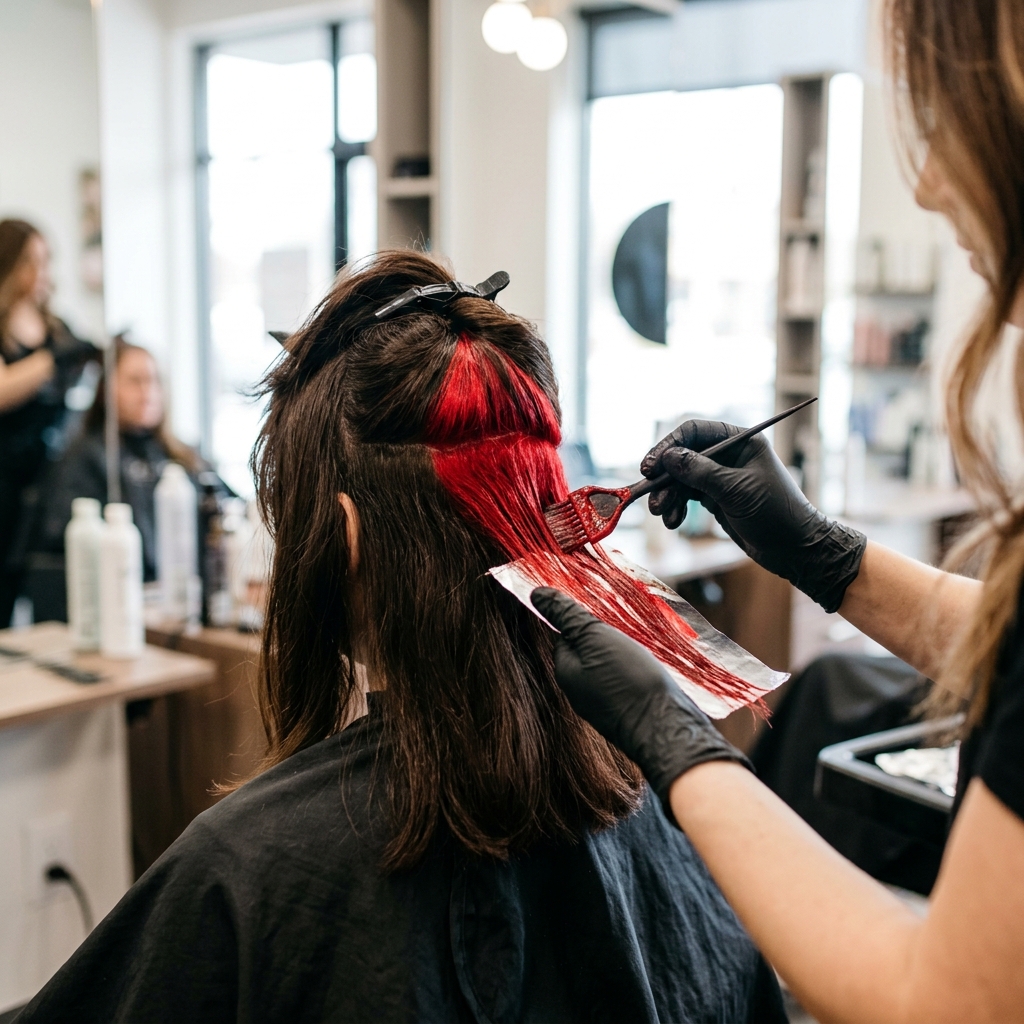
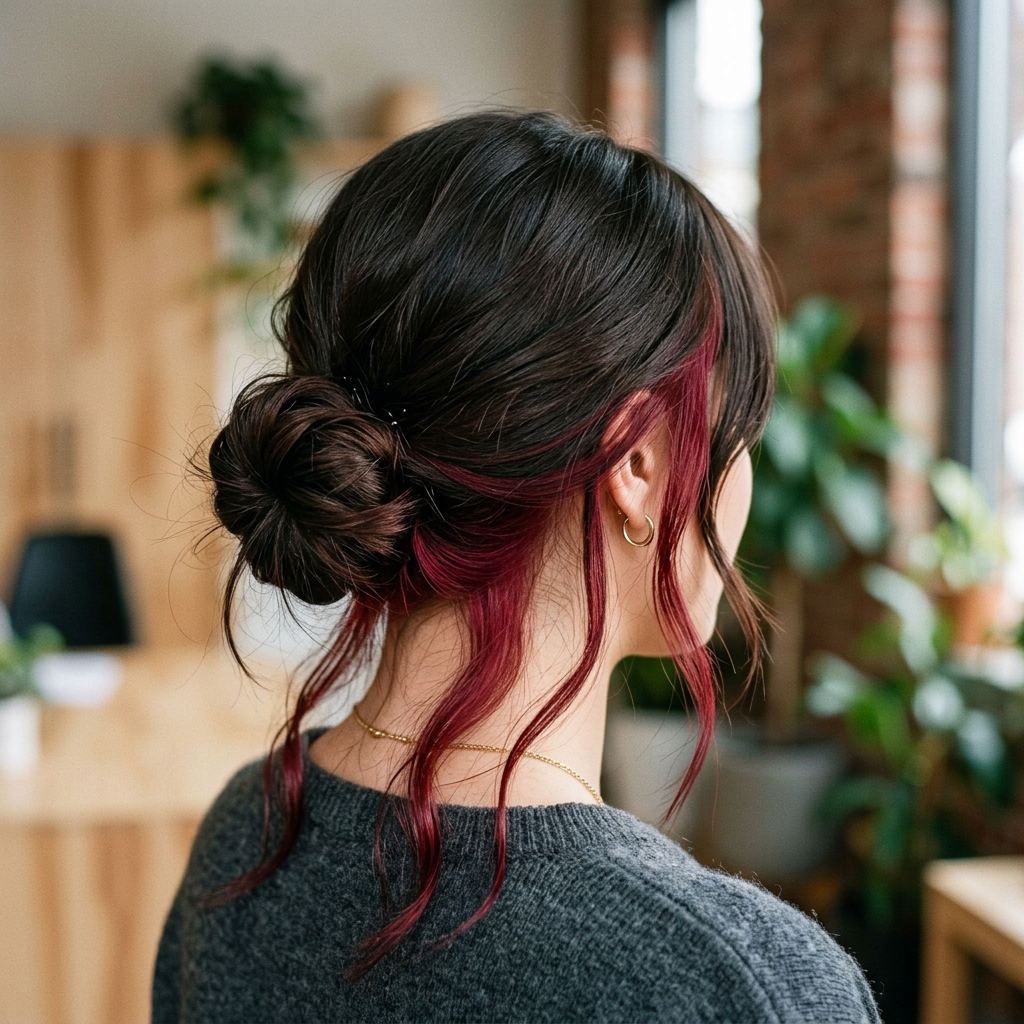
Applying the Red as Hidden Underlights
For a more subtle, surprise reveal, color the underlayer. Part off the top section of your hair securely. Apply the red color to the bottom layer only, from the nape of your neck up to your parietal ridge (where your head curves).
This creates an amazing peek-a-boo effect when your hair moves. It’s a less committal way to try the trend and feels very modern and cool, perfect for a quiet luxury bob with a twist.
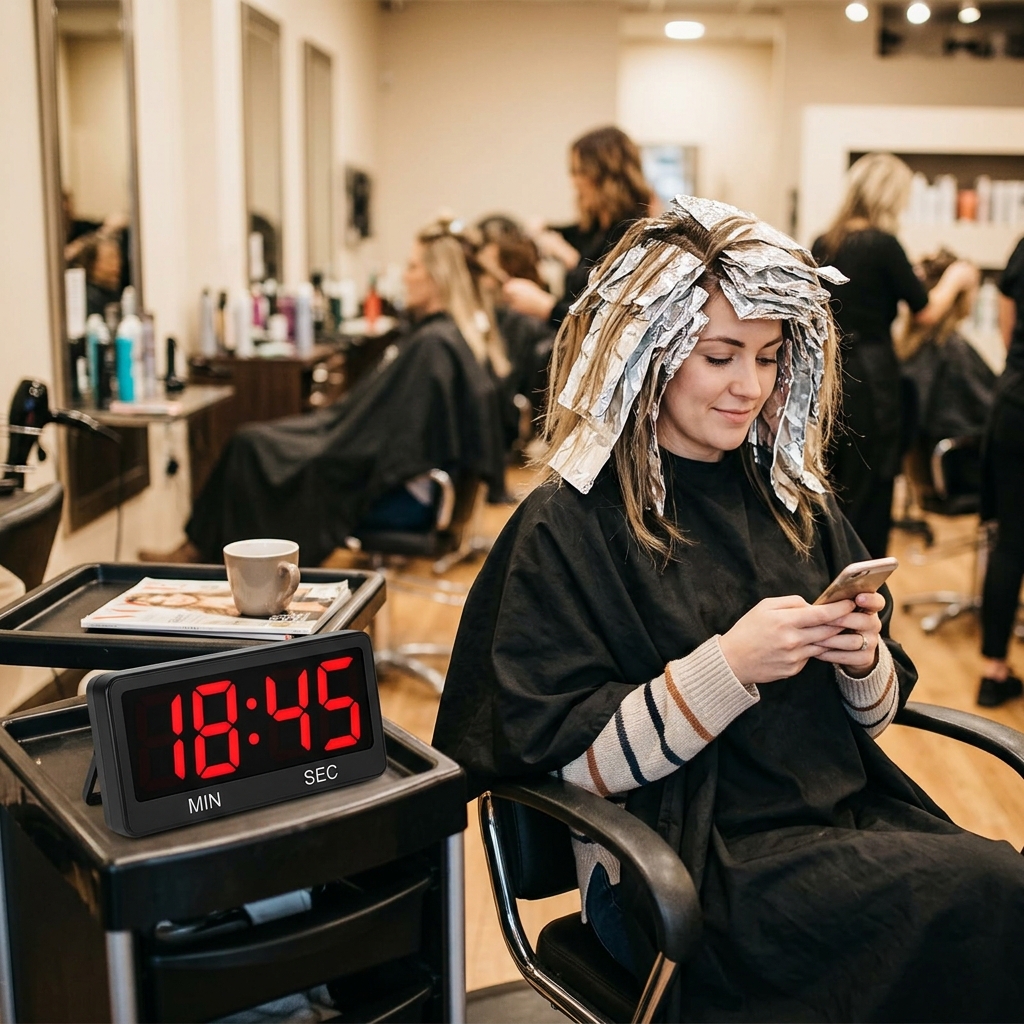
Processing Time and Development
Check your dye’s instructions for timing. Most semi-permanent reds need 30-45 minutes to develop. Use this time to clean up your tools and area. Don’t leave the color on for longer than recommended, as it won’t make it more vibrant and can dry out your hair.
The heat from your head helps the color process. You can cover your hair with a shower cap to trap heat and prevent drips. Set a timer so you don’t forget!
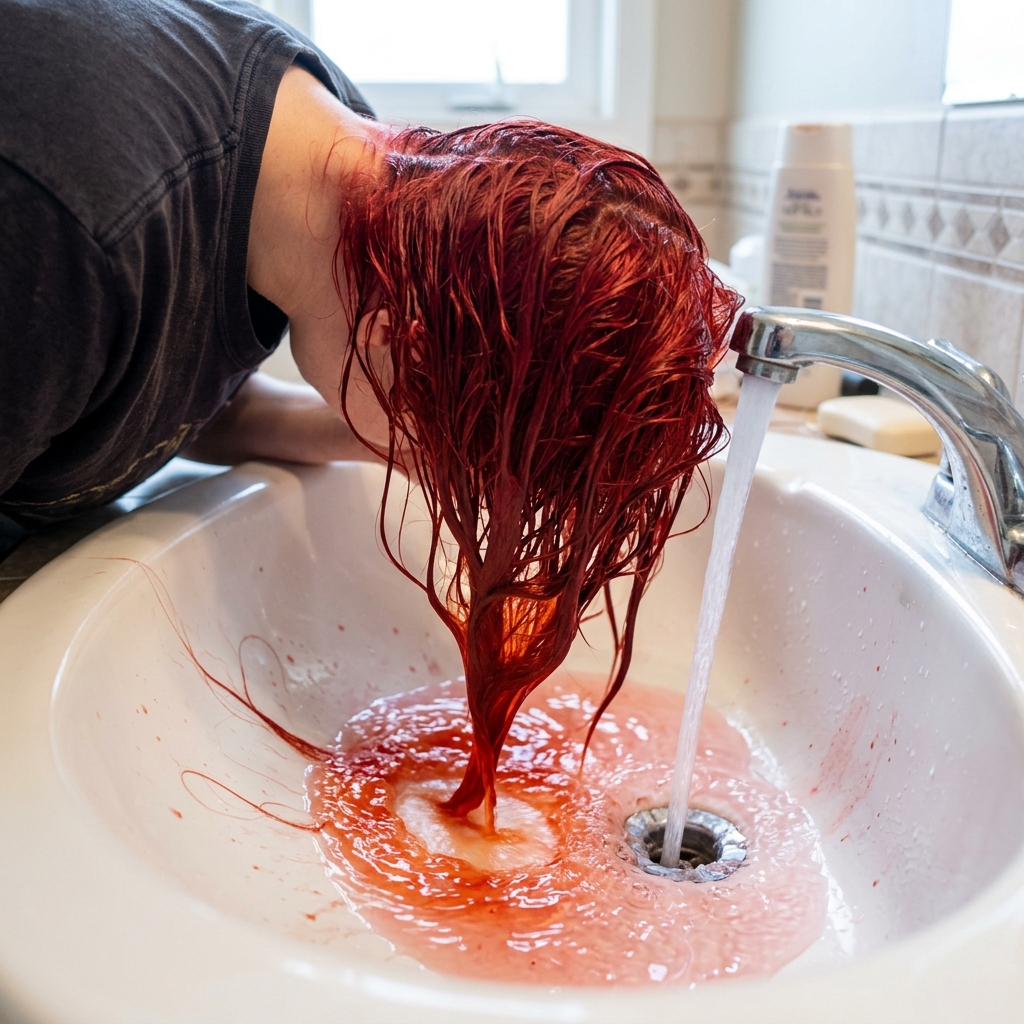
Rinsing and Washing Out the Dye
When time’s up, rinse your hair with cool, lukewarm water until the water runs completely clear. Cool water helps seal the hair cuticle and lock in color. Then, use a color-safe shampoo to gently wash the colored sections and your whole head.
Follow with a rich conditioner or hair mask, focusing on your ends. This replenishes moisture after the coloring process. Be gentle to avoid unnecessary fading.
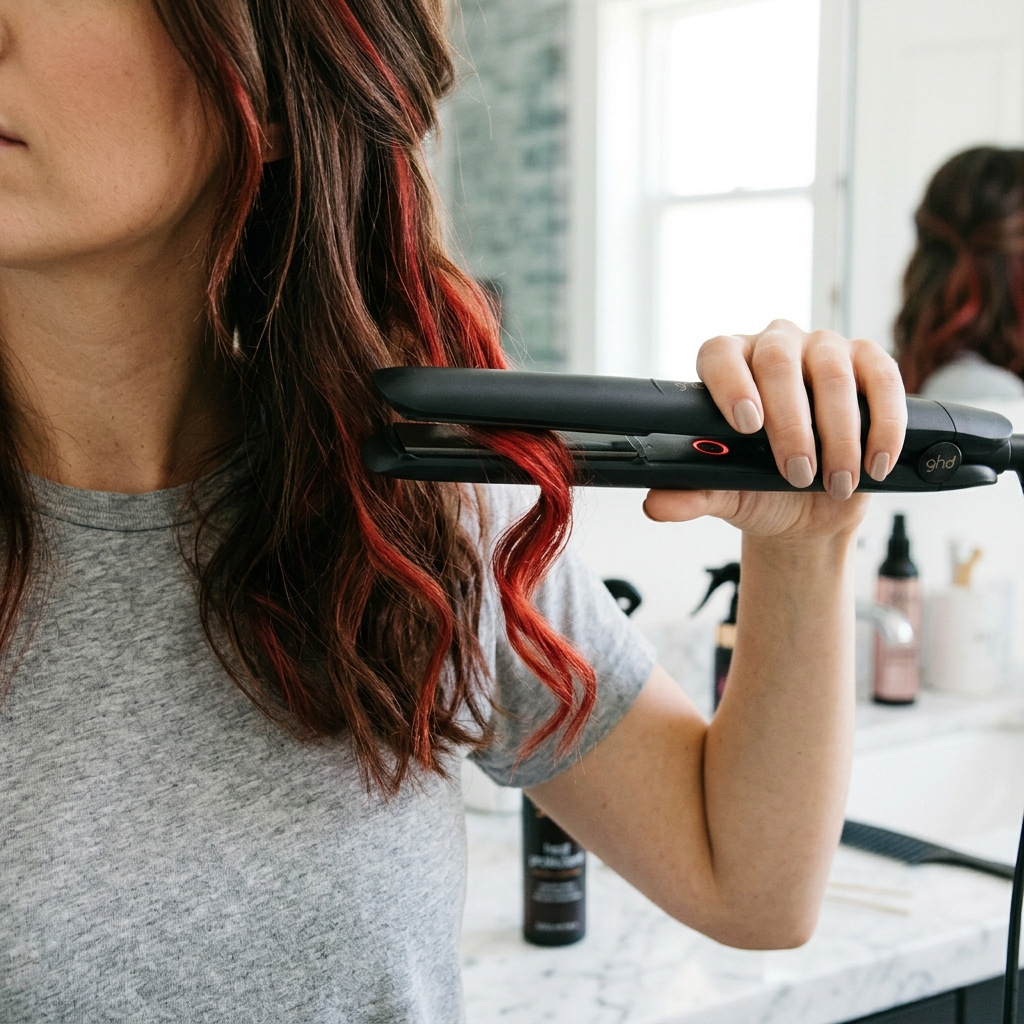
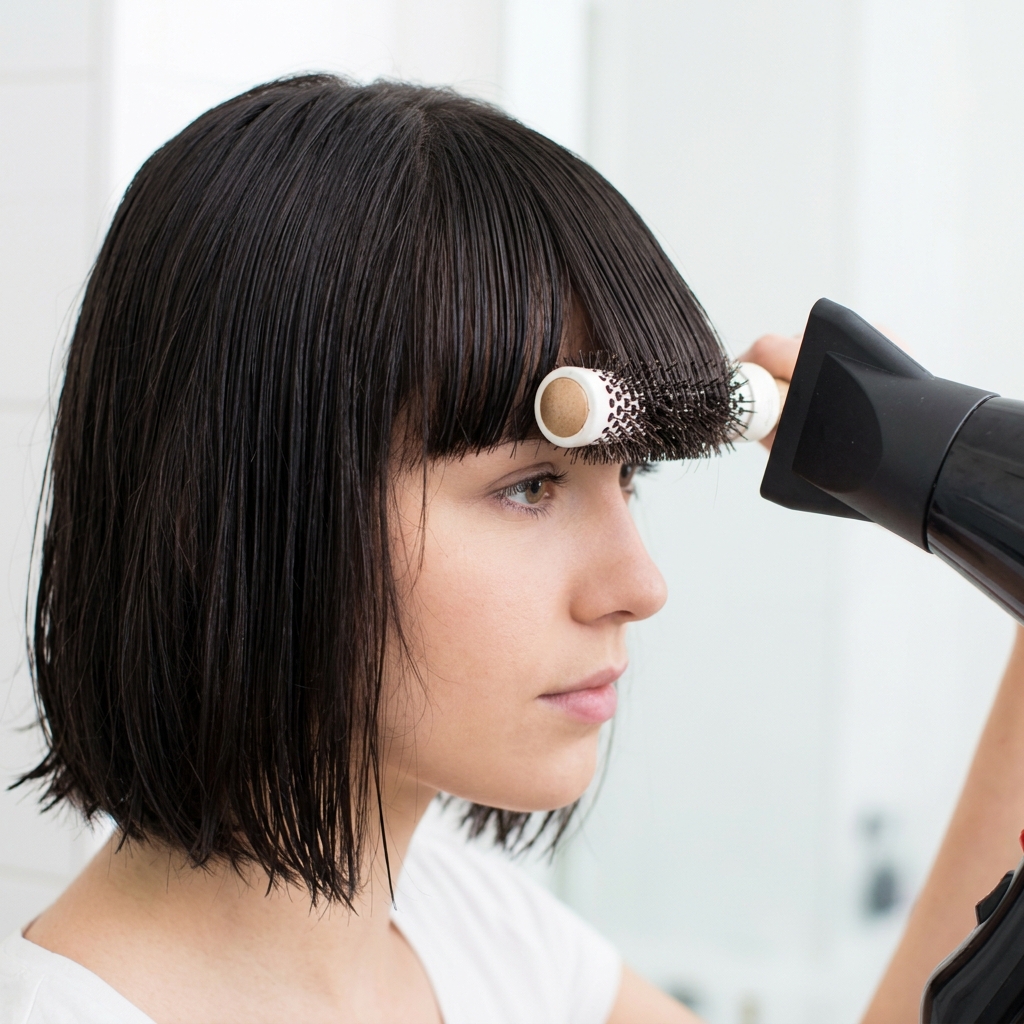
Drying and Styling for Maximum Impact
How you dry your hair can make the cut and color pop. For a sleek, sharp look, blow-dry using a round brush to smooth the layers. For more texture and that glitchy glam hair vibe, let it air dry mostly, then use a flat iron to create random bends and flicks.
A light texturizing spray on the ends adds to the undone, effortless feel. The goal is polished but not perfect, with lots of movement.
Styling the Fringe and Front Pieces
The fringe is the star of many vampire haircut styles. If you have bangs, style them straight and blunt for a graphic look, or sweep them to the side for a softer romantic goth hairstyles feel. Use a small round brush to direct them.
If you colored face-framing pieces, make sure they fall forward. A tiny bit of pomade can help you place these strands perfectly to highlight the red contrast against your darker base.
Quick Everyday Vampire Hair Styles
You don’t need to style this cut heavily every day. A simple middle part with tucked-behind-the-ears shows off face accents. A low, messy bun lets the underlayer red peek out.
A half-up style using small clips pulls the front pieces back dramatically. This cut is so versatile. It looks great with minimal effort, which is the whole point of a cool-girl cut.
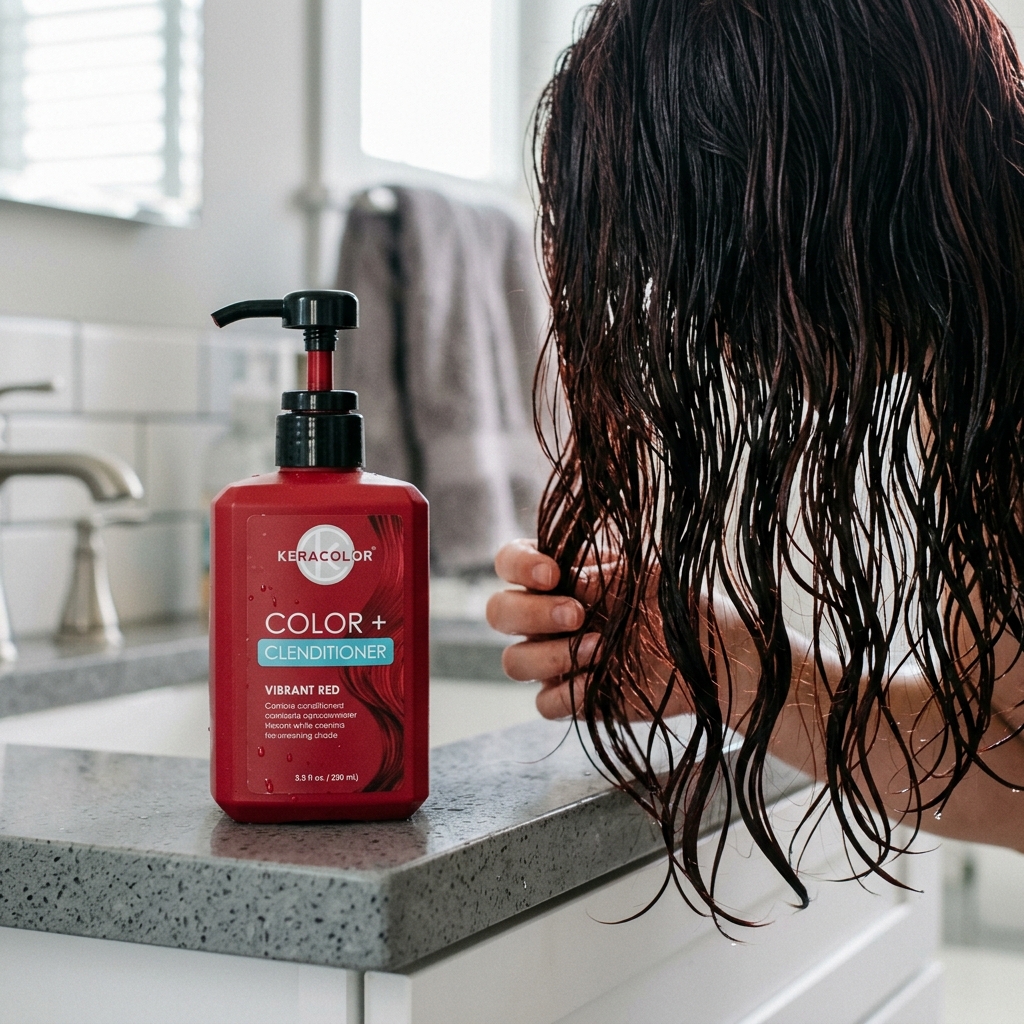
Maintaining Your Red Color at Home
Red fades faster than any other color. To keep it vibrant, wash your hair less often and with sulfate-free, color-protecting shampoo. Use cool water when you do. A color-depositing conditioner or mask in a red shade is a lifesaver.
Use it once a week to refresh the tone. Also, protect your hair from sun and chlorine, which will strip the color quickly. A little upkeep goes a long way.
Trimming Your Cut to Keep It Sharp
To maintain the shape of your asymmetrical lob or shaggy layers, get a small trim every 8-10 weeks. This prevents split ends and keeps the lines looking intentional, not grown-out.
You can often do this yourself by carefully point-cutting any ends that look frayed or by re-trimming the blunt line in the back. Keeping it sharp is key to the aesthetic.
What to Do If the Color Is Too Bright
If your red comes out more neon than noir, don’t panic. You can tone it down. Washing it several times with a clarifying shampoo can pull some excess color out. Using a darker, semi-permanent color over top can also mute it.
A blue or green tinted shampoo (used briefly) can cancel out orange tones. Always do a strand test first. Remember, it will fade naturally with each wash, too.
Pairing Your Hair with Makeup Looks
This hair begs for a strong makeup look to match. For daytime, keep skin fresh and lips a nude or berry stain. For full romantic goth hairstyles drama at night, try a smoky eye or a deep, dark lip.
You can’t go wrong with pale skin, a little contour, and a focus on the eyes. Let your hair be the boldest accessory, and keep your makeup complementary, not competing.
Common Mistakes and How to Avoid Them
The biggest mistake is rushing. Take your time with sectioning and application. Another is using a box dye meant for full-head coverage on small accents—it’s too runny. Use a dedicated semi-permanent cream formula.
Cutting too much at once is also common. Go slow. And finally, not doing a skin test for the dye can lead to reactions. Always patch test 48 hours before.
Inspiration for Your Next Variation
Once you love this, try a new variation! Add shadow roots for more dimension. Try a deep purple instead of red. Or go for a more extreme hime cut shape with your accents.
Look at 2026 hairstyles forecasts for more ideas, like mixing silver with red. This look is a playground for personal expression. Have fun with it and make it yours.
Final Thoughts Before You Begin
You are totally capable of doing this. It’s just hair, and it grows back. The goal is to have fun and express a side of your style that maybe felt too bold before.
Gather your tools, take a deep breath, and put on a good playlist. The process is part of the adventure. Trust your hands and your eye. You’ve got this.
And just like that, you’re ready to rock a look with serious attitude. This isn’t just a haircut or a color—it’s a confidence boost. It’s a way to shake up your routine and remind yourself that style is supposed to be fun and a little fearless.
Remember, the best part of trends like this is making them your own. Whether your red is a whisper or a shout, and your cut is a sharp bob or a soft shag, it’s all about the vibe you create. Wear it like you mean it.
Save this post to Pinterest to keep this guide handy for your next style refresh! And I’d love to hear—are you team hidden underlights or bold face-framing pieces? Drop your choice in the comments below!
