

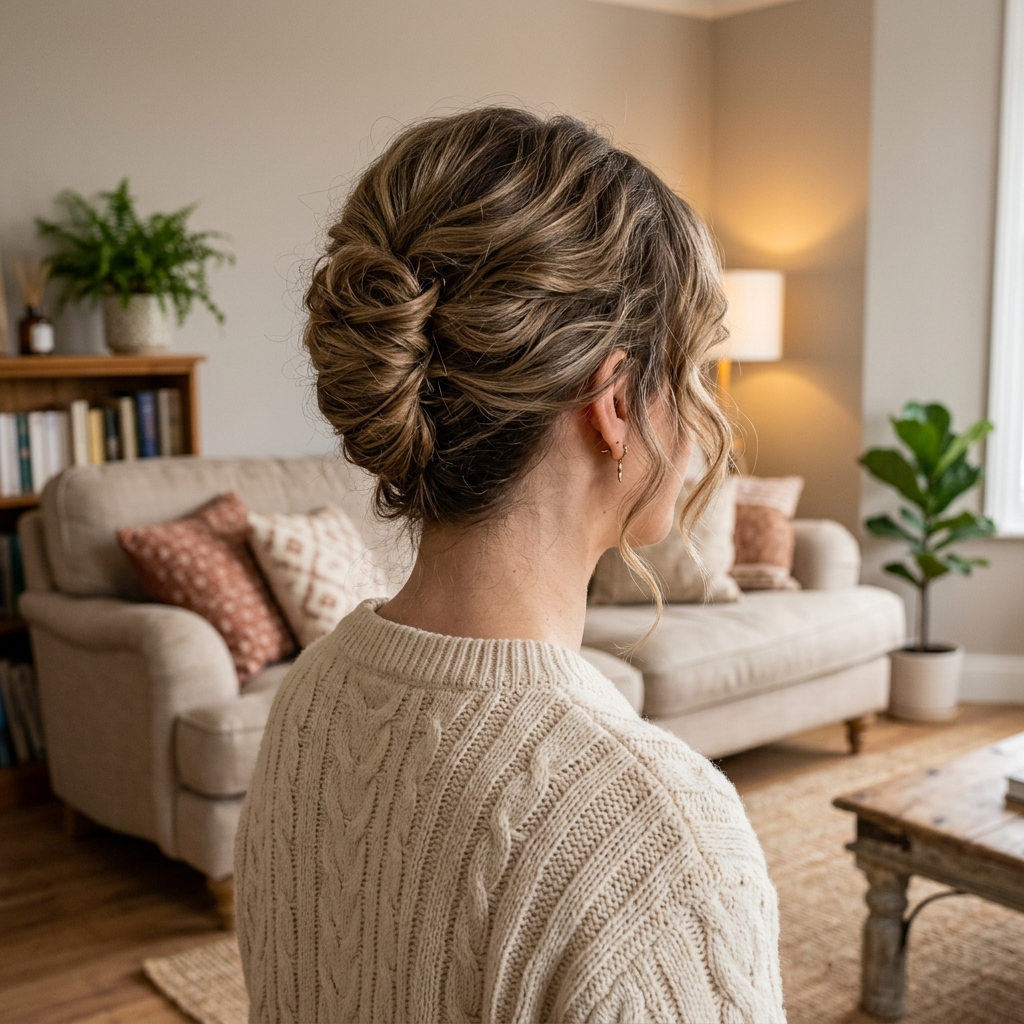
Okay, let’s talk about that hairstyle you keep seeing everywhere. You know the one. It’s on every “old money hair” and “quiet luxury” mood board. It looks perfectly undone, impossibly chic, and like it took zero effort.
That’s the magic of the modern French twist. It’s not your grandma’s stiff updo. We’re taking that classic, quiet luxury vibe and giving it a fresh, lived-in twist. Literally.
Think less “perfect ballerina” and more “I just threw this up and it looks amazing.” It’s romantic, it’s elegant, and it works for everything from the office to a wedding.
And the best part? It’s way easier than it looks. I’m going to walk you through the whole thing, step by simple step. Let’s get that effortless, modern elegance into your hair routine.
What is a Modern French Twist, Anyway?
First, let’s clear up what we’re making. The traditional French twist is a sleek, rolled updo pinned close to the head. It’s beautiful, but it can feel a bit formal.
The modern version is all about softness and texture. We’re letting pieces fall loose, creating a less structured roll, and aiming for that “I did this with my eyes closed” feel. It’s the quiet luxury bob of updos—understated but powerful.
This style sits perfectly between classic elegance and today’s more relaxed beauty standards. It’s a timeless shape with a 2026 attitude.
Why This Hairstyle is Having a Moment
This isn’t just a random trend. It fits right into the “quiet luxury” and “old money” aesthetic that’s everywhere. It’s about looking polished without trying too hard.
It also taps into the romantic, softer side we’re seeing—a distant cousin to romantic goth hairstyles but in the daylight. It’s elegant without being fussy, which is exactly what we all want from our hair.
Plus, it’s incredibly versatile. It can be adapted to fit so many personal styles, from minimalist to subtly glam.
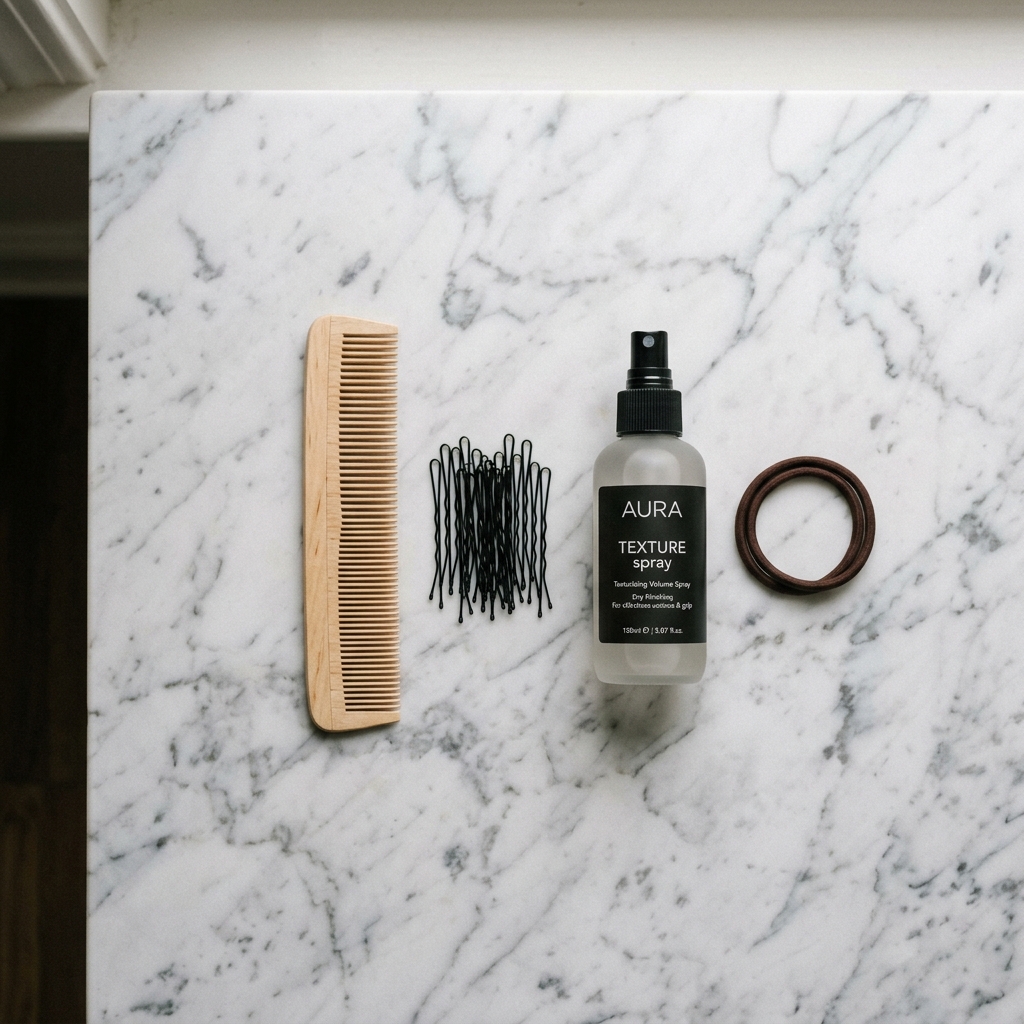
Tools You’ll Need to Get Started
You don’t need much! Here’s your simple toolkit:
- A fine-tooth comb for sectioning.
- Strong-hold hairspray (a good one is non-negotiable).
- Bobby pins that match your hair color. More than you think!
- Texturizing spray or a light-hold mousse. This is key for grip.
- A couple of small, clear elastic bands (optional, but helpful).
That’s really it. No fancy gadgets required. The magic is in the technique.
Start With the Right Hair Texture
This style works best on day-old hair. If your hair is freshly washed and too silky, it will be slippery. If it’s clean, spray some texturizing spray at the roots for grip.
For fine hair, mousse at the roots can add needed volume. For thick hair, a light smoothing cream can help control flyaways before you start twisting.
The goal is hair that has some “grip” but isn’t crunchy or dirty. That texture is what makes the modern twist look soft and lived-in.

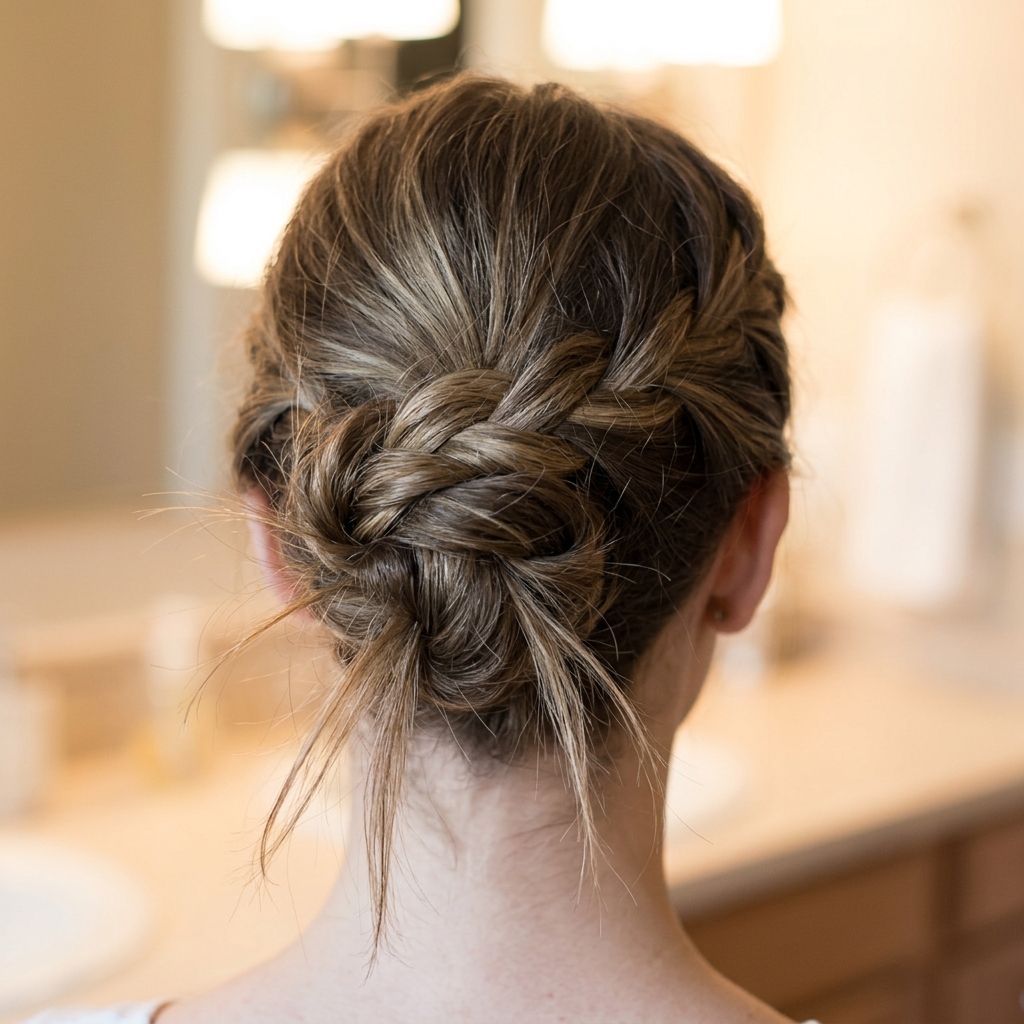
Step 1: Create a Solid Base
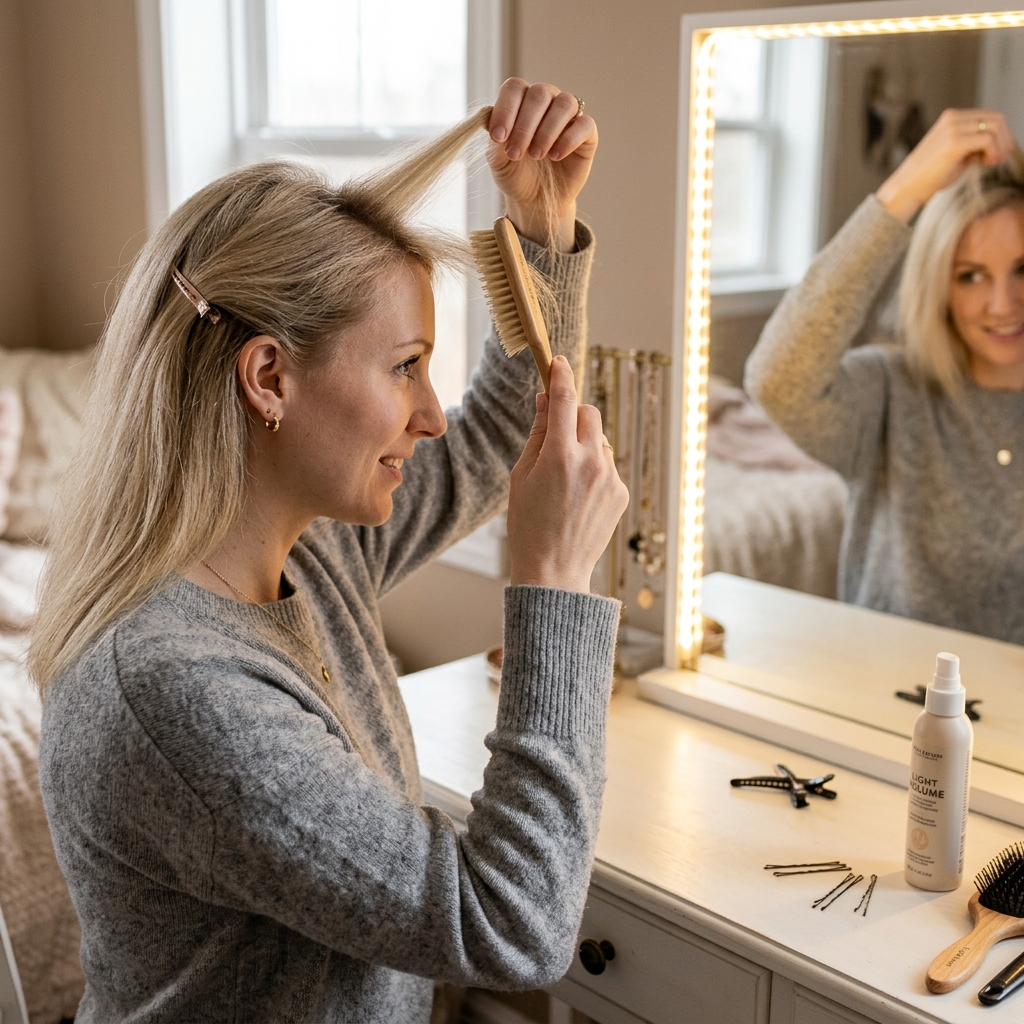
Don’t just grab and go. Start by brushing your hair back smoothly, but not tightly. You want a polished base, not a slicked-back scalp.
I like to make a deep side part or even a soft zig-zag part first. It instantly feels more modern than a harsh middle part. Gather all your hair low at the nape of your neck, as if you’re making a low ponytail.
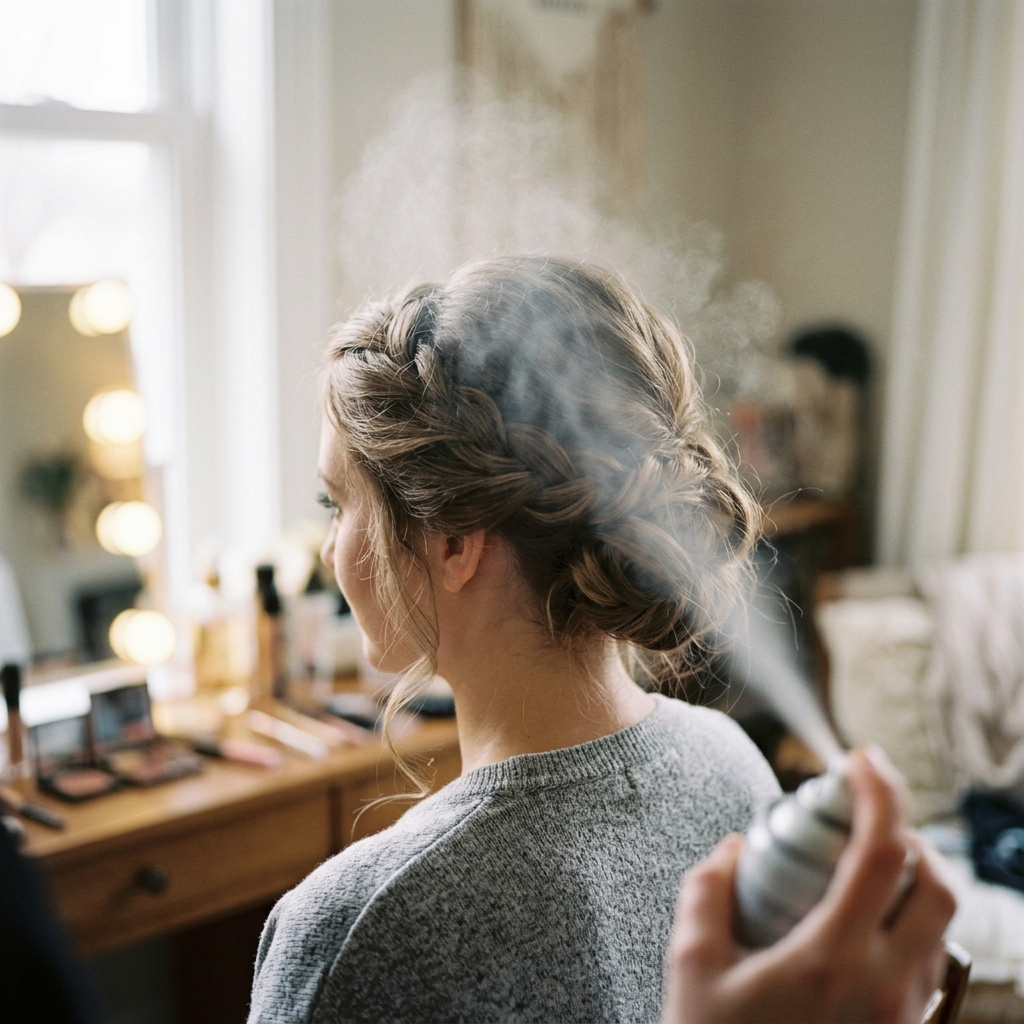
Lightly mist the gathered section with hairspray. This hidden layer of hold will keep everything secure for hours.

Step 2: The Initial Twist & Roll
Here’s the core move. Hold the gathered hair with one hand. With the other, start twisting the length of the hair away from your face. Twist it all the way down to the ends.
Now, instead of folding it upwards immediately, let the twisted rope of hair kind of collapse onto itself. Begin rolling it upwards toward the back of your head.
Keep the roll relaxed. Don’t pull it tight. You’re creating a soft, folded shape, not a tight cylinder.

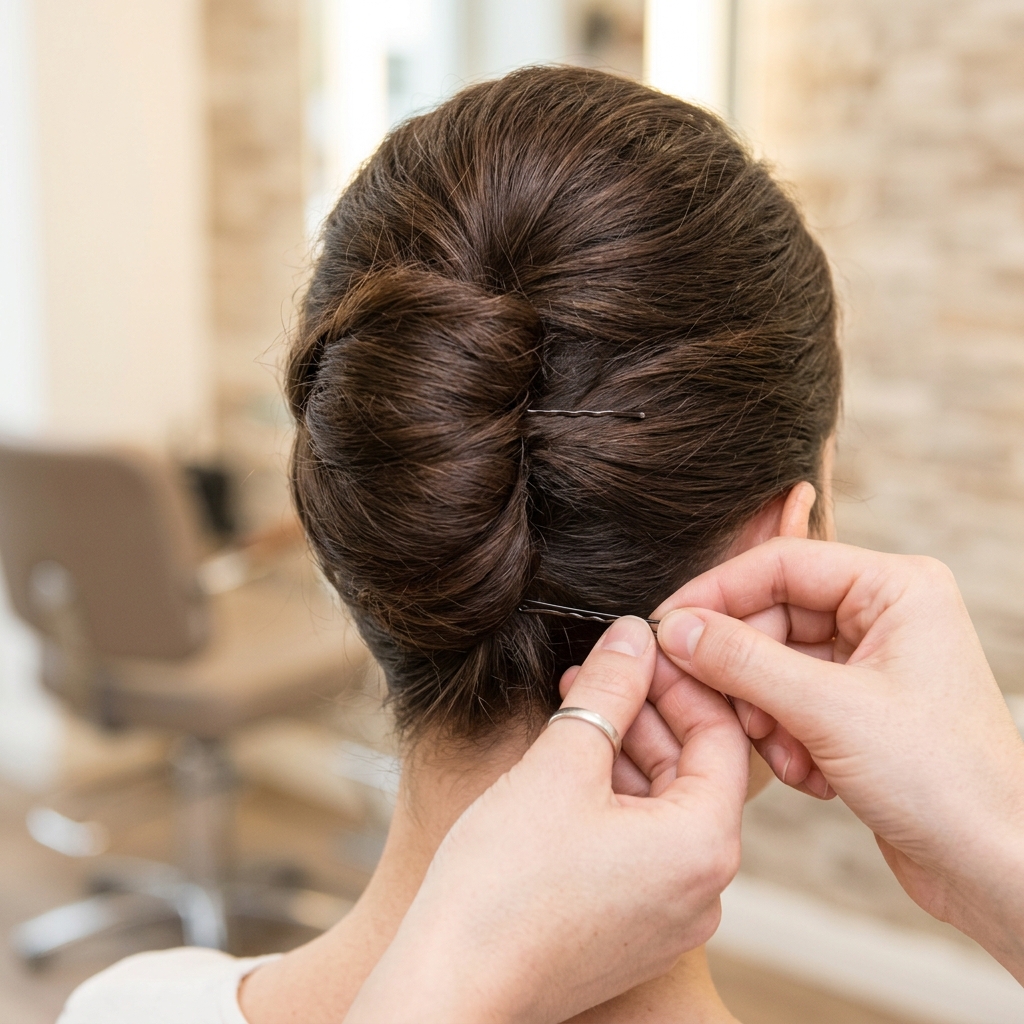
Step 3: Securing the Core Shape
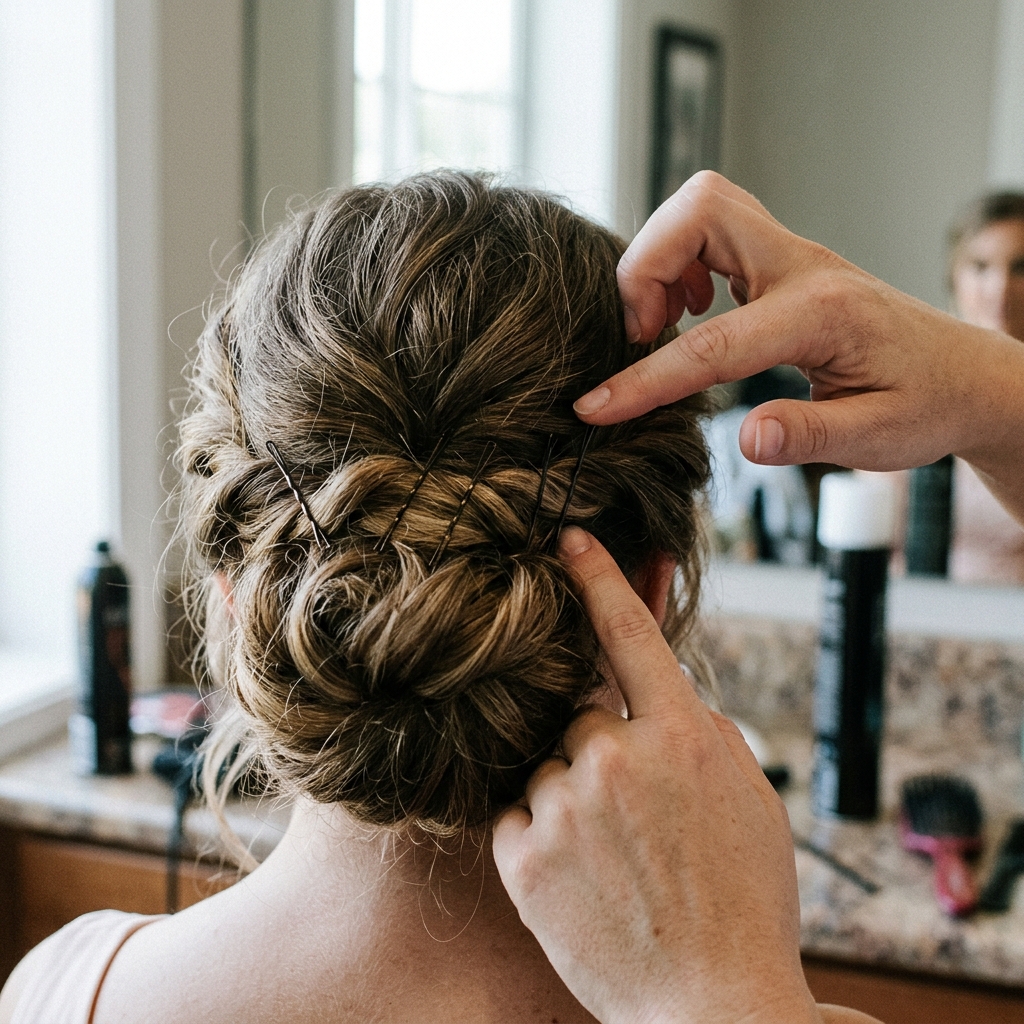
As you roll upwards, the twist will naturally want to fold in. Guide it so it sits neatly against your head. When you reach a point you like (around the center of the back of your head), stop.
Hold the roll in place with one hand. With the other, take a bobby pin and insert it horizontally through the base of the roll, catching hair from your scalp. Do this 2-3 times to anchor the center.
Don’t worry about perfection. We’ll fix gaps and loose pieces next.
Step 4: The Modern, “Undone” Finish
This is the most important step for the modern look. Once the core is secure, gently pull at the sides of the roll. Loosen small sections to create a fuller, softer shape.
Deliberately pull out a few face-framing pieces around your forehead and temples. These wispy bits are everything. They soften the entire look.
If any part feels too tight, tug it gently. We’re aiming for elegant mess, not perfection.

Step 5: Final Lock & Seal
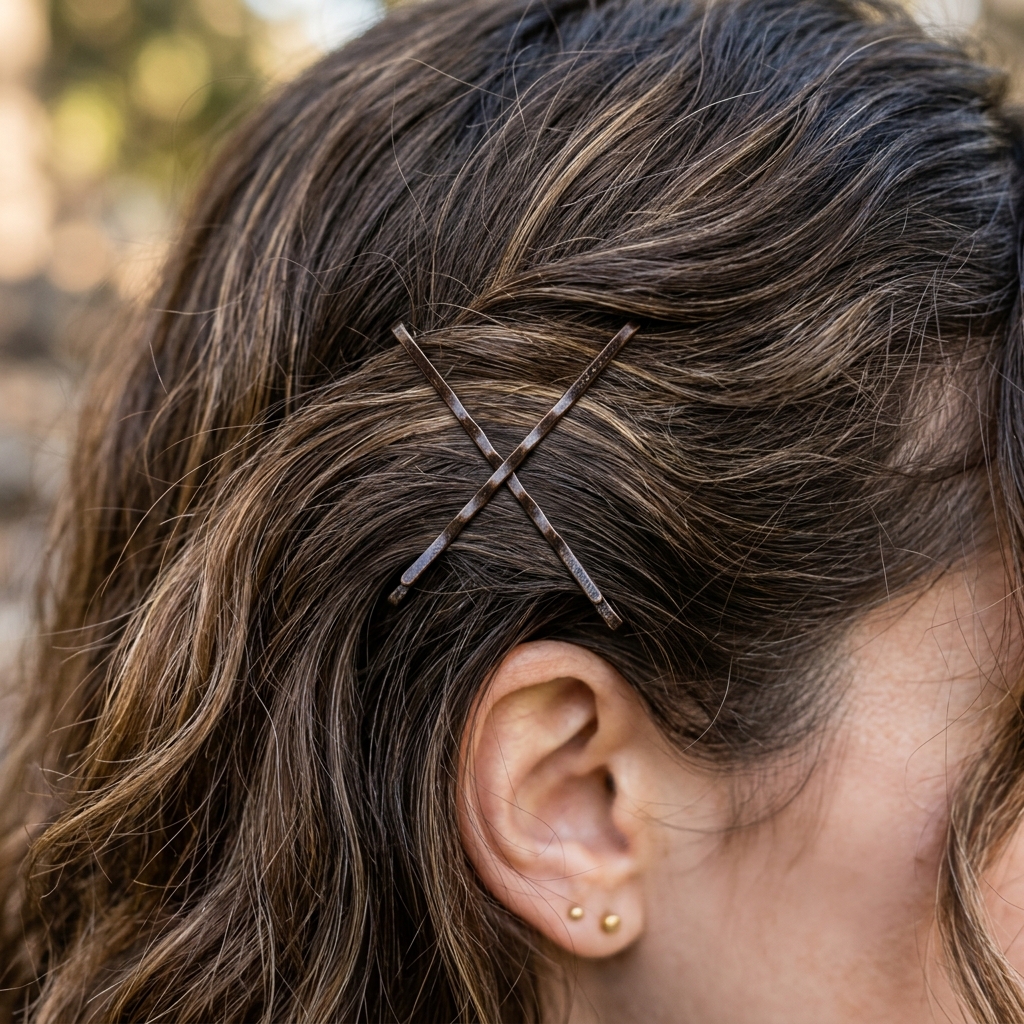
Now, lock it all in. Take more bobby pins and secure any areas that feel loose, especially the bottom and sides of the roll. Always insert pins in a criss-cross pattern for maximum hold.
Finally, hold a can of strong-hold hairspray about 10 inches away and give your entire head a light, all-over mist. This seals the style without making it stiff.
Give it one last gentle press with your hands to settle everything. You’re done!
Adapting It for Fine or Thin Hair
If you have fine hair, volume is your friend. Tease the hair at the crown lightly before you start twisting. Use a volumizing mousse at the roots.
When you roll, make the twist itself a bit looser to create the illusion of more bulk. You can also use a small, mesh “donut” or hair filler powder at the base for extra fullness before you pin.
Focus on securing it well with plenty of pins—fine hair needs more anchors to stay put all day.
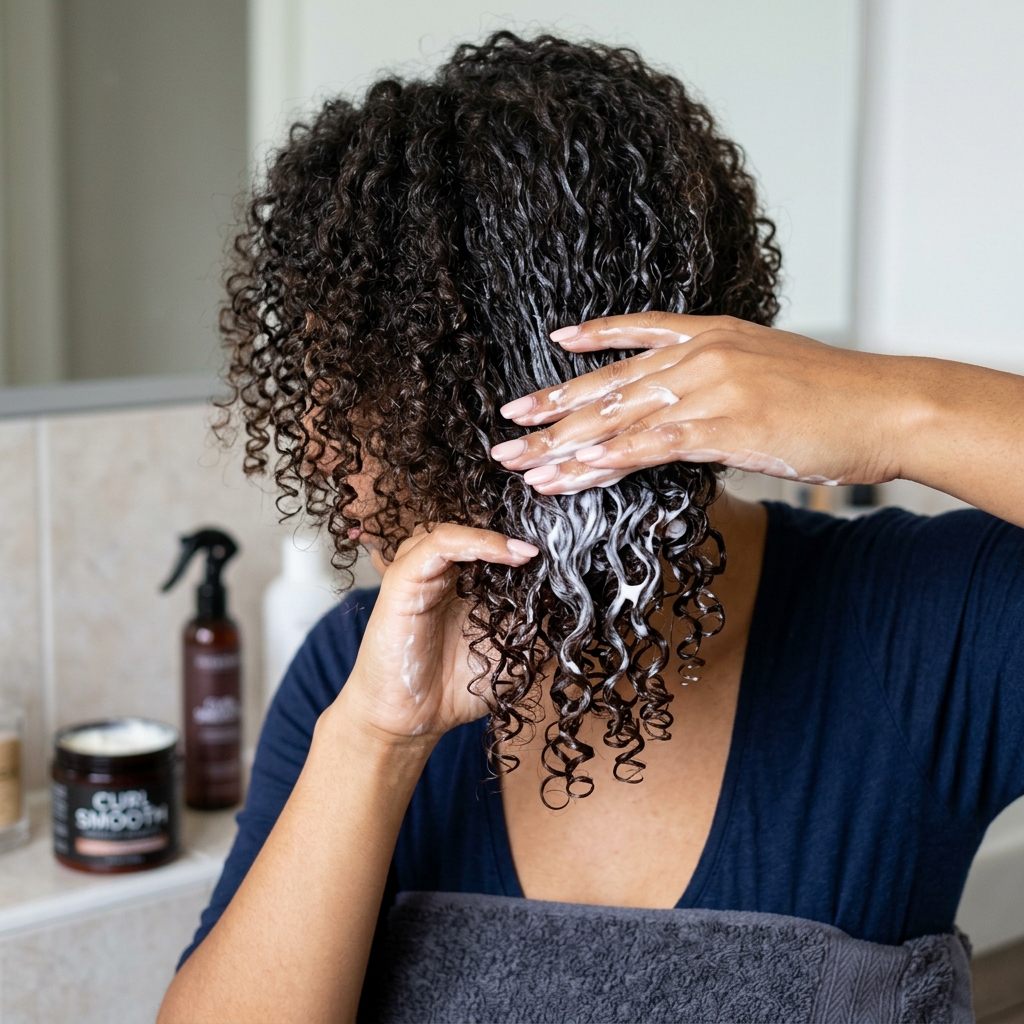
Adapting It for Thick or Curly Hair
For thick or curly hair, control is key. Use a smoothing cream or gel to tame frizz and define your texture before you start. You might want to make two smaller twists and then combine them, rather than one massive one.
Embrace your natural volume! The roll will look fuller and more dramatic. Use strong, durable bobby pins and don’t be shy with them.
Your version will have amazing body and a beautiful, robust shape. Let some curls escape as your face-framing pieces.
Making It Last All Day & Night
The right prep and products are everything. That texturizing spray in the beginning? Non-negotiable for grip.
When you pin, always criss-cross the bobby pins. This creates a locking mechanism that won’t slide out. If you have a big event, consider using a pinning spray on the bobby pins themselves for extra hold.
Carry a few extra pins and a travel hairspray for touch-ups. A quick press and a new pin can revive it in seconds.
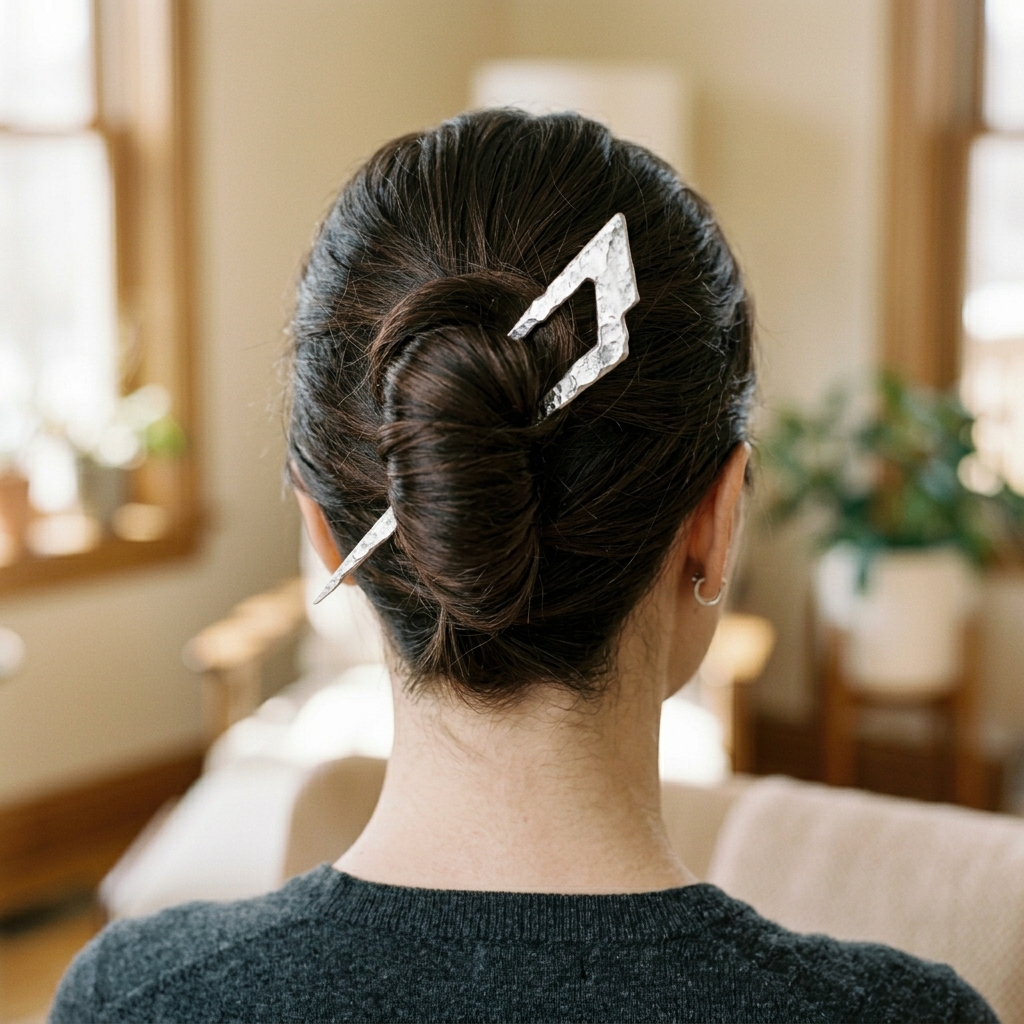
The “Glitchy Glam” Variation
Want to edge it up? This is where you play. After finishing the twist, add a single, stark accessory—like a stark black velvet ribbon woven through or a single pearl-tipped pin placed off-center.
Or, create a small, intentional “glitch” by pulling out one chunkier, more pronounced section near the twist. It’s a nod to glitchy glam hair—polished with one element deliberately “off.”
Keep the rest minimal. Let that one detail be the unexpected moment.
The Romantic, “Vampire” Variation
Lean into the romantic goth or vampire haircut aesthetic. Before twisting, curl a few face-framing pieces with a small iron for soft, tendril-like waves.
Keep the twist a bit lower and messier. Use pins with dark jewels or opt for no visible pins at all for a more ethereal, undone look.
It’s all about that soft, romantic feeling—think less “quiet luxury” and more “romantic poet.” It’s a beautiful blend of two trending vibes.

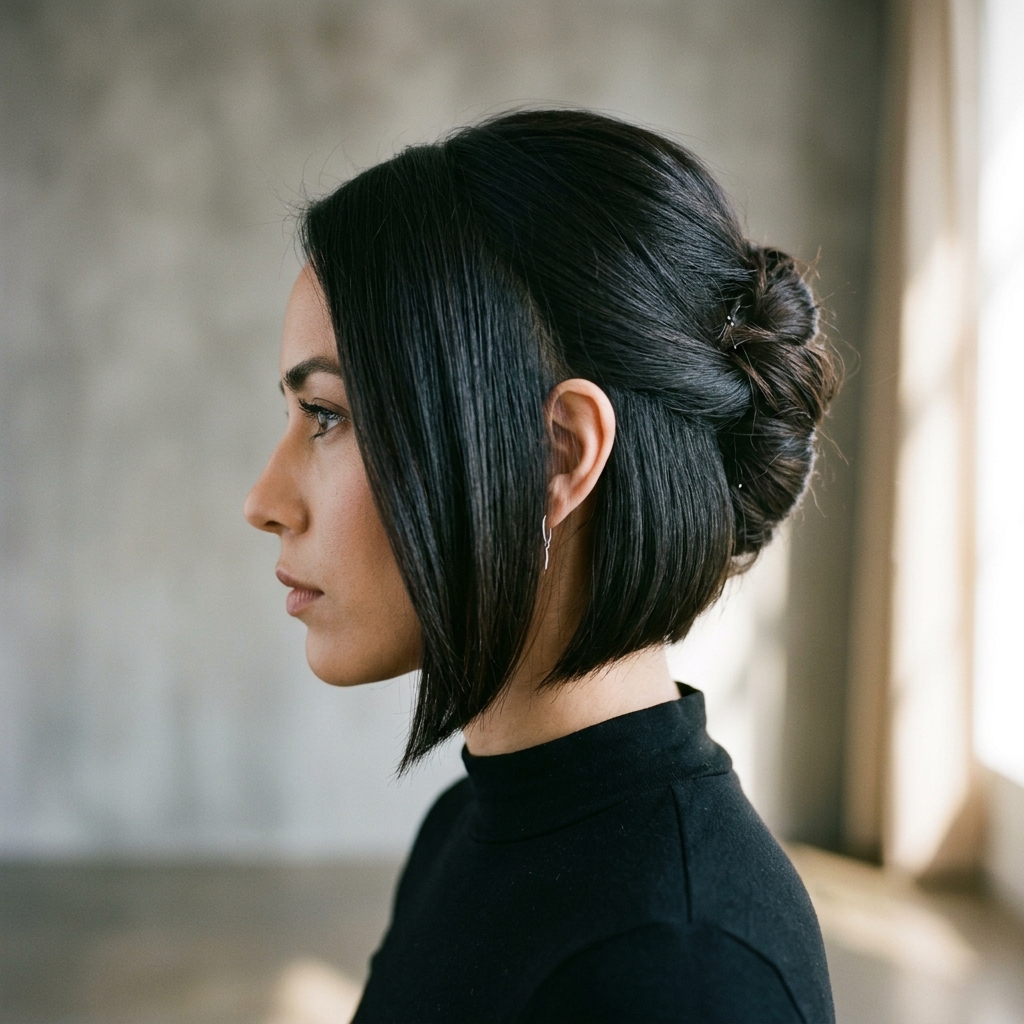
Pairing It With Modern Cuts
This updo looks amazing with contemporary cuts. If you have an asymmetrical lob or a sharp bob, you’ll get a gorgeous architectural effect with pieces falling around your neck.
A hime cut or a wolf cut with lots of layers will give you the most beautiful, effortless face-framing pieces. The shorter layers will naturally create that undone finish.
Even if you’re growing out a vampire haircut or a shag, this is the perfect style to look polished while your layers do their thing.
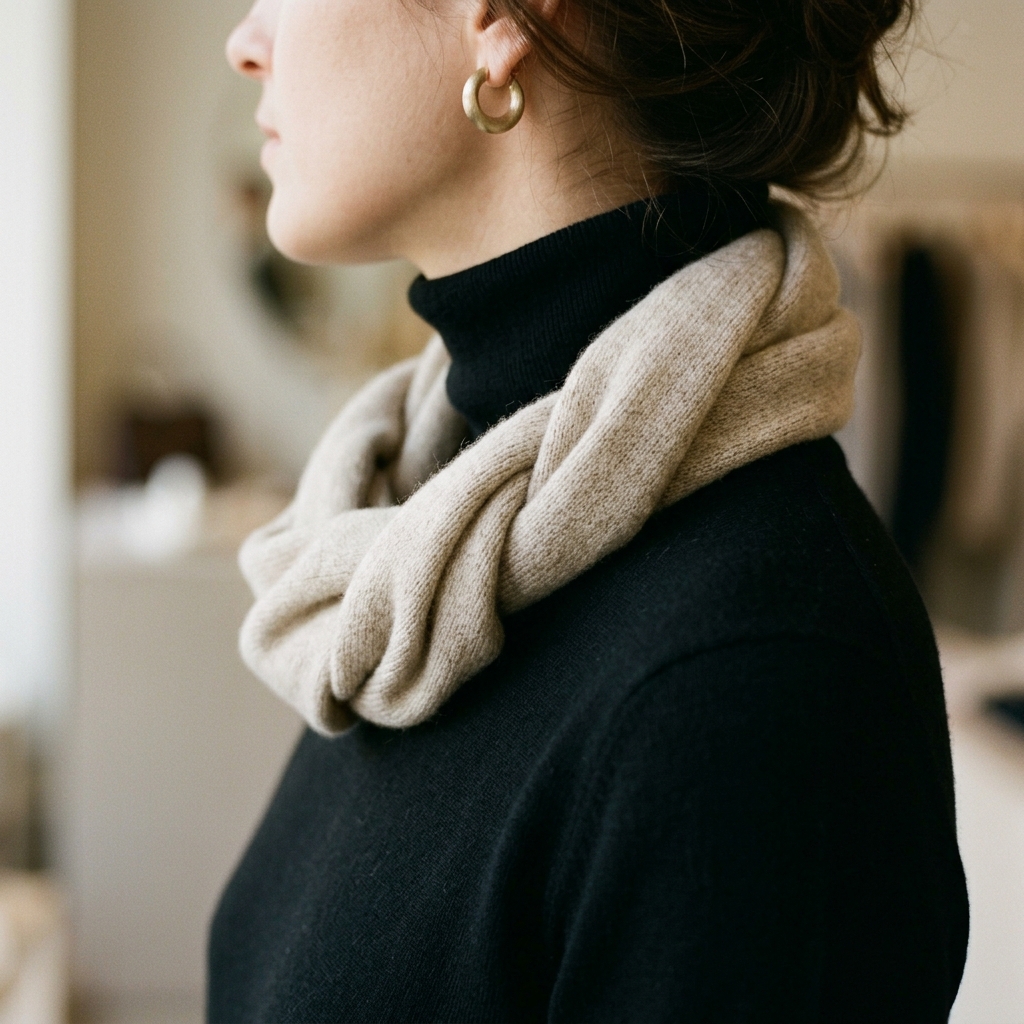
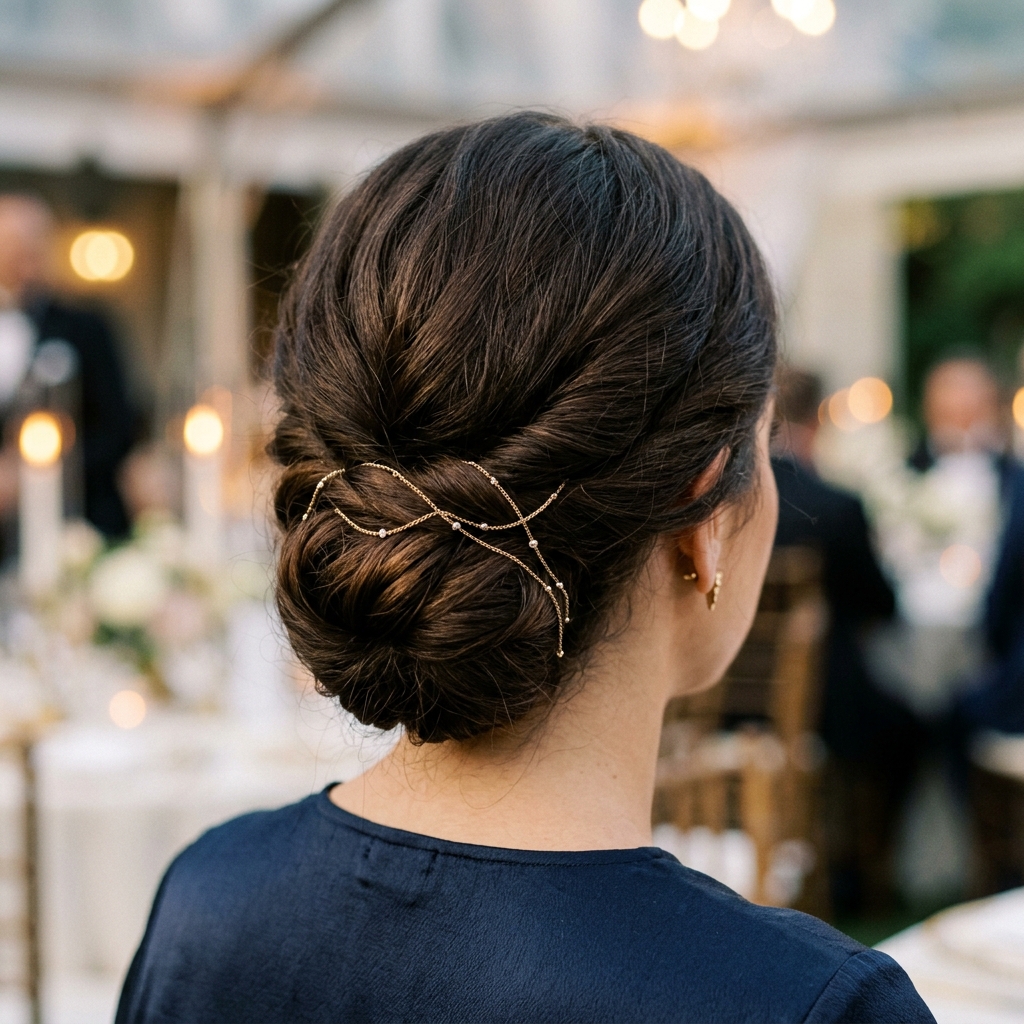
Accessorizing Your Modern Twist
Accessories can take this from day to night. The key is subtlety. Think a simple, thin gold chain woven through the base, or a few tiny, pearl-ended pins clustered together.
A small, elegant claw clip can be placed at the top or side of the roll as both decoration and extra security. Avoid anything too large or fussy.
You want the accessory to feel like part of the hairstyle, not an afterthought. Less is always more with this look.
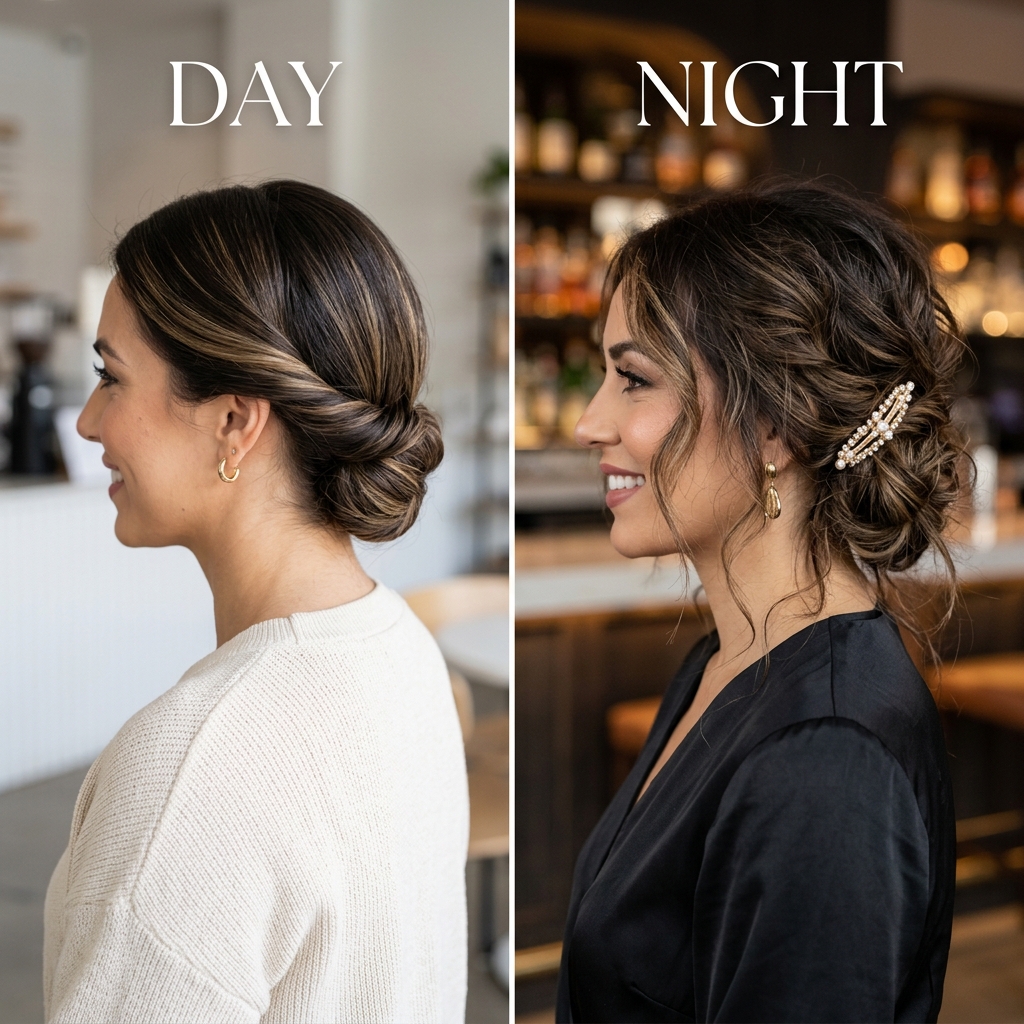
From Desk to Dinner: Styling Transitions
This is the ultimate transition hairstyle. Wear it sleek and polished for work. When it’s time for dinner or drinks, that’s when you have fun.
Pull out a few more pieces to soften it. Add a dramatic accessory. Spritz a shine spray for a more glamorous finish.
In less than a minute, you can change the entire vibe from professional to party-ready. It’s the versatility that makes it a true wardrobe staple for your hair.
Common Mistakes & How to Fix Them
Mistake 1: Twisting too tightly. It looks stiff. Fix it by loosening the roll with your fingers once it’s pinned.
Mistake 2: Placing it too high. It can feel old-fashioned. Aim for the center-back of your head or lower.
Mistake 3: Not enough pins. It falls out. Use more than you think, and always pin in criss-cross patterns. If a pin shows, gently tap it deeper into the hair.
Inspiration from 2026 Hairstyle Trends
Looking ahead, 2026 hairstyles are all about personalized elegance and texture. This modern French twist fits right in.
It takes a classic form and makes it feel new through imperfection and personal touch. It’s not about replicating a look exactly, but adapting it to your hair and your style.
Whether you pair it with a quiet luxury bob or use it to style your hime cut layers, it’s a timeless technique that will keep evolving.
Your Questions, Answered
Can I do this on short hair? Yes! If your hair is chin-length or longer, you can. You may have more face-framing pieces, which is a beautiful look. Use lots of small pins.
What if my hair is slippery? Texturizing spray is your best friend. Also, try styling on day-two hair. You need that natural grip.
How do I hide the ends? Tuck them under the roll as you pin. If they’re stubborn, a small, clear elastic at the end of the twist before rolling can help contain them.
Practice Makes Effortless
Don’t get frustrated if it’s not perfect the first time. This is a feel-based style. Your hands need to learn the motion.
Practice on a night when you’re just at home. Try it a few times without any pressure. Each time, you’ll get faster and your version will become more “you.”
That’s the goal—to make it look and feel effortless, because for you, it will become exactly that.
Final Thoughts from My Vanity
So there you have it. The modern French twist is more than just a hairstyle—it’s a mindset. It’s about embracing elegance that doesn’t take itself too seriously.
In a world of over-the-top glitchy glam hair and dramatic vampire cuts, sometimes the most powerful statement is one of understated, confident simplicity. This look gives you that.
It’s become my absolute go-to when I need to feel put-together but still like myself. It works with my favorite asymmetrical lob, and it always, always gets a compliment. I have a feeling it’s going to become a staple in your routine, too.
I really hope this breakdown helps you master this gorgeous, timeless look. Once you get the hang of it, you’ll find yourself reaching for it again and again. It’s that reliable.
Tell me, are you going to try it this week? What’s your biggest hair challenge? Let me know in the comments below—I read every single one.
Save this post to Pinterest so you can always come back to these steps when you need a quick, elegant hair win. You’ve got this!

