
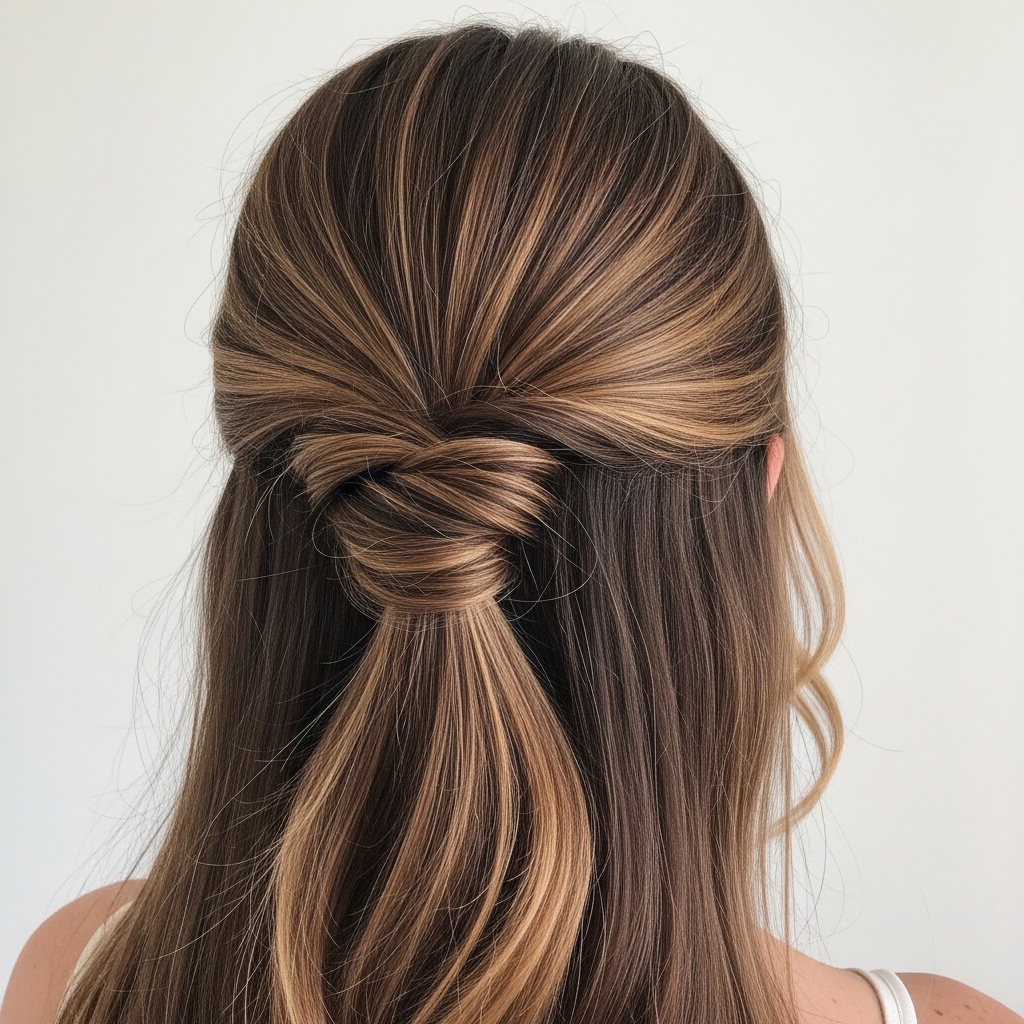
Okay, let’s talk about that hair you keep seeing everywhere. You know the one. It looks expensive, but not in a flashy way. It’s the kind of style that whispers “I woke up like this” while also looking perfectly put-together. That’s the old money hair vibe, and the half up half down style is its absolute champion.
It’s polished without being stiff, romantic without being fussy. The best part? It’s deceptively simple to do. This isn’t about chasing every single one of the 2026 hairstyles; it’s about mastering one timeless look that always works.
Think of this as your quick, practical guide to getting that effortless, polished finish. We’re breaking it down step-by-step, from the right prep to the final, perfect piece-y bits. Let’s get your hair looking quietly luxurious.
What “Old Money Hair” Really Means
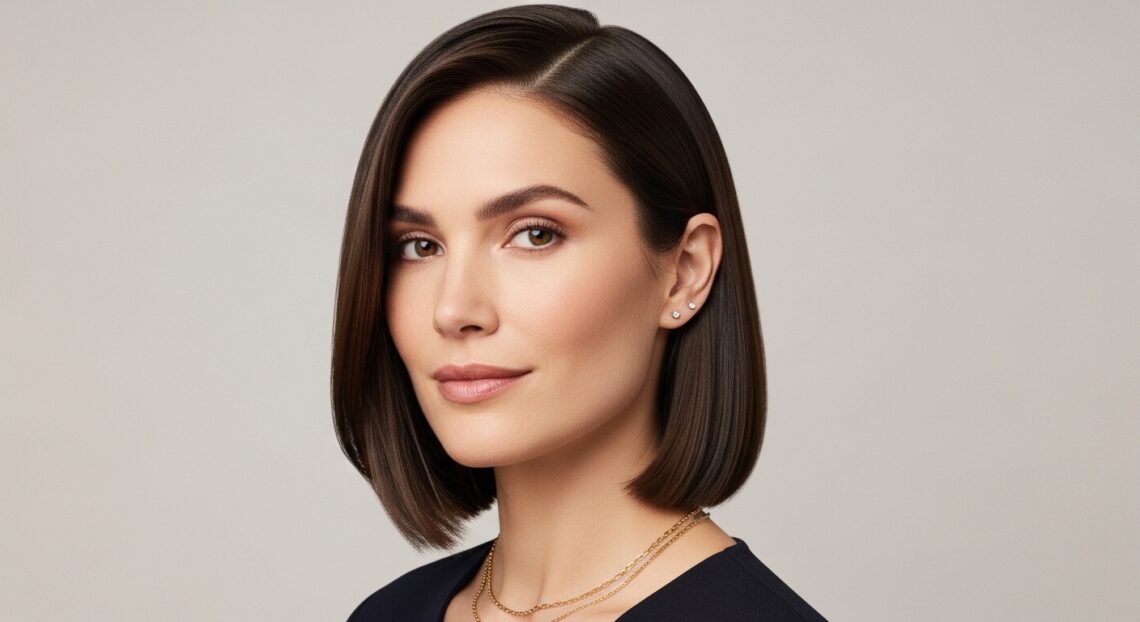
Before we start styling, let’s get the vibe right. Old money hair isn’t about a specific cut or color. It’s a feeling. It’s health, shine, and a sense of effortless grooming. The hair looks cared for, but never overdone.
It’s the opposite of glitchy glam hair or romantic goth hairstyles. It’s classic, clean, and confident. The half up half down style captures this perfectly by blending neatness with softness. It says you tried, but not too hard.
Start With the Right Haircut Foundation
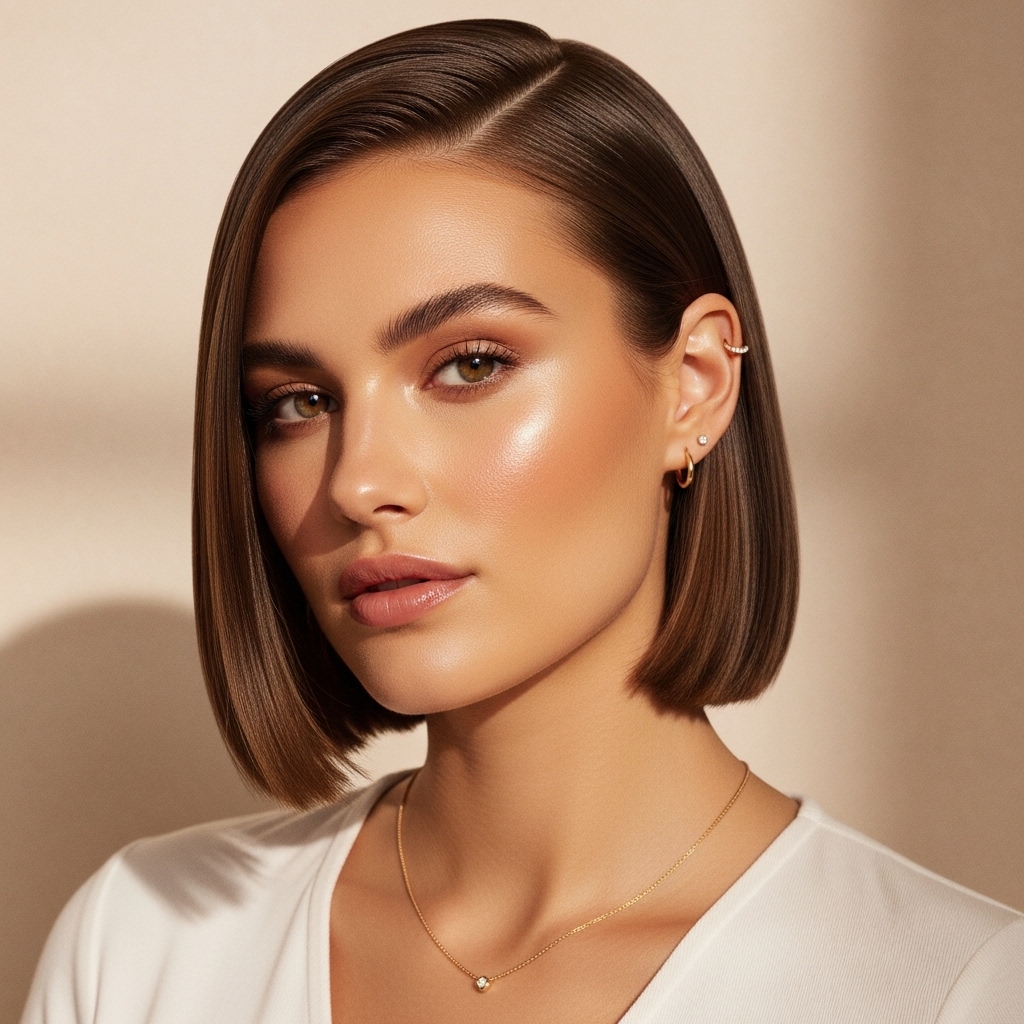
Great styling starts with a great cut. You don’t need a dramatic asymmetrical lob or a sharp hime cut for this. In fact, simplicity is key. A clean blunt cut or a soft quiet luxury bob is the perfect canvas.
Layers should be minimal and face-framing, not choppy. The goal is weight, movement, and a beautiful shape that behaves when you pull half of it up. A good cut does most of the work for you.
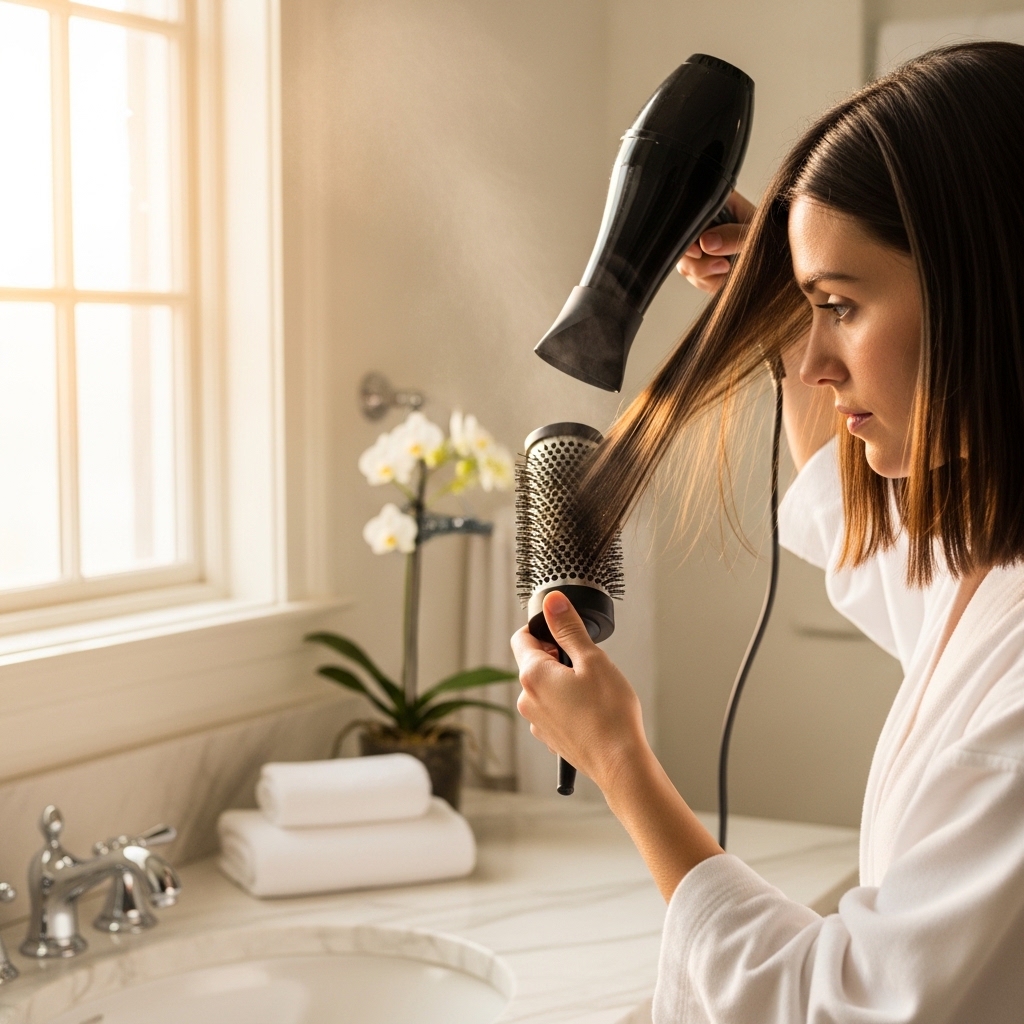
Non-Negotiable: A Super Smooth Blowout
This look is built on smoothness. Start with clean, towel-dried hair. Apply a heat protectant and a light smoothing cream. Then, blow-dry your hair in sections with a round brush.
- Direct the airflow down the hair shaft to seal the cuticle.
- Focus on getting the roots smooth and lifted.
- Don’t skip the ends! Curling them under slightly adds polish.
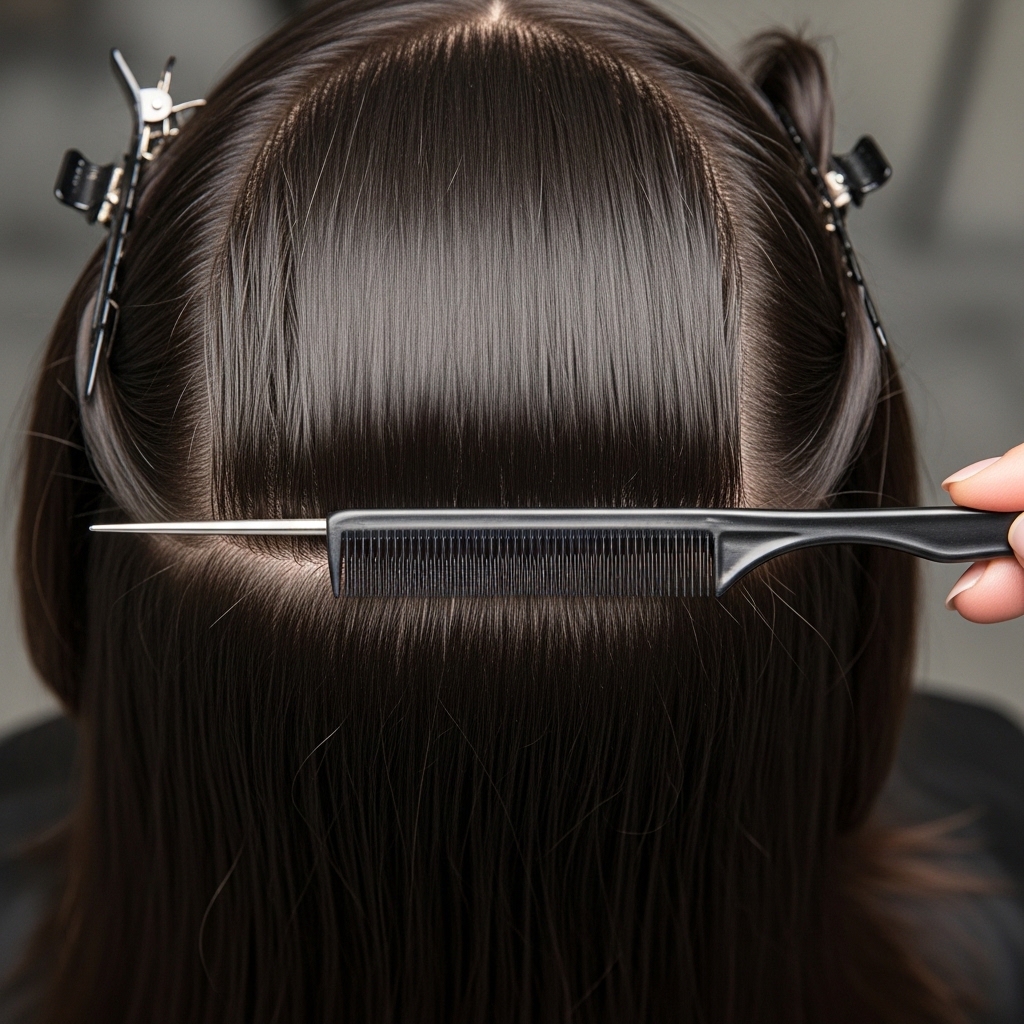
Sectioning Is Your Secret Weapon
Randomly grabbing hair won’t give you that polished look. The section matters. Use a tail comb to create a clean, curved part from ear to ear, over the crown of your head.
This front section is what you’ll pull up. Gently backcomb the hair at the crown underneath for a tiny bit of hidden volume. This keeps the style from looking flat and ensures it holds its shape all day.
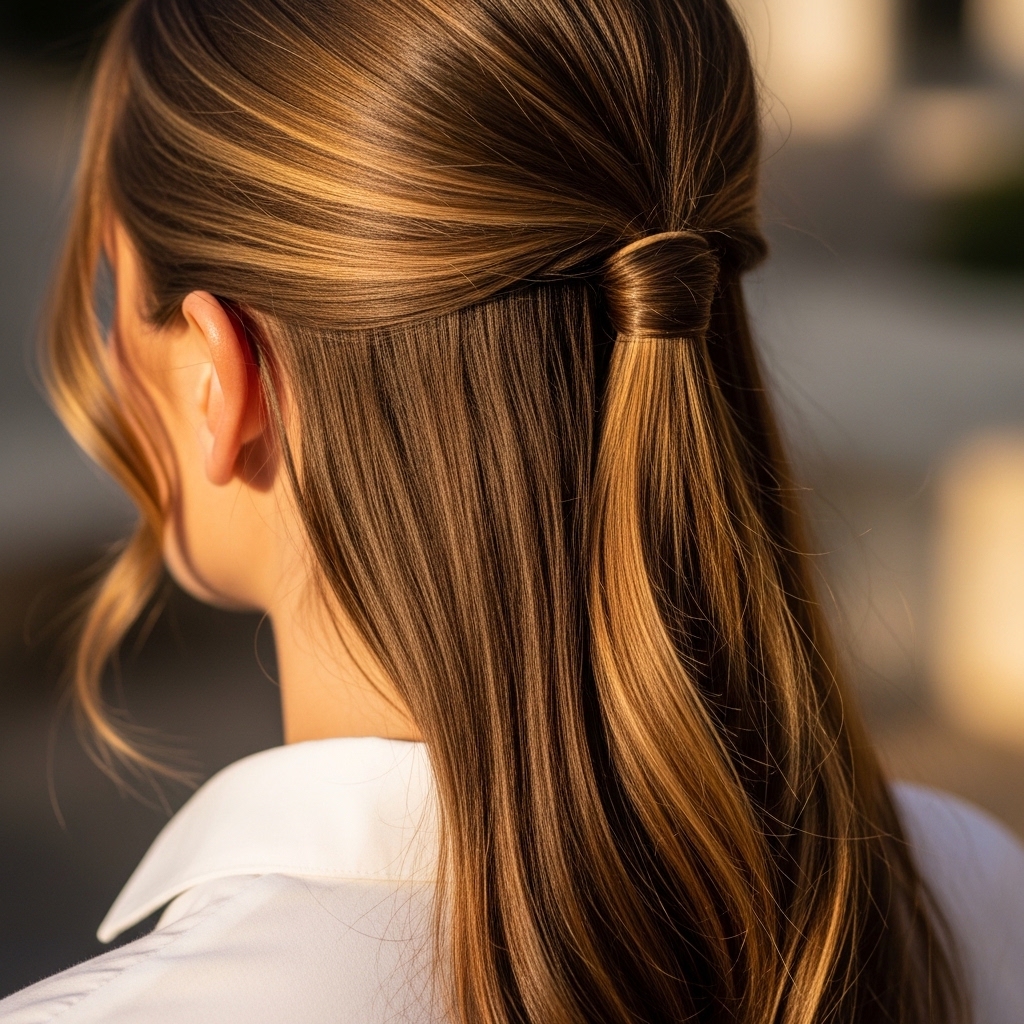
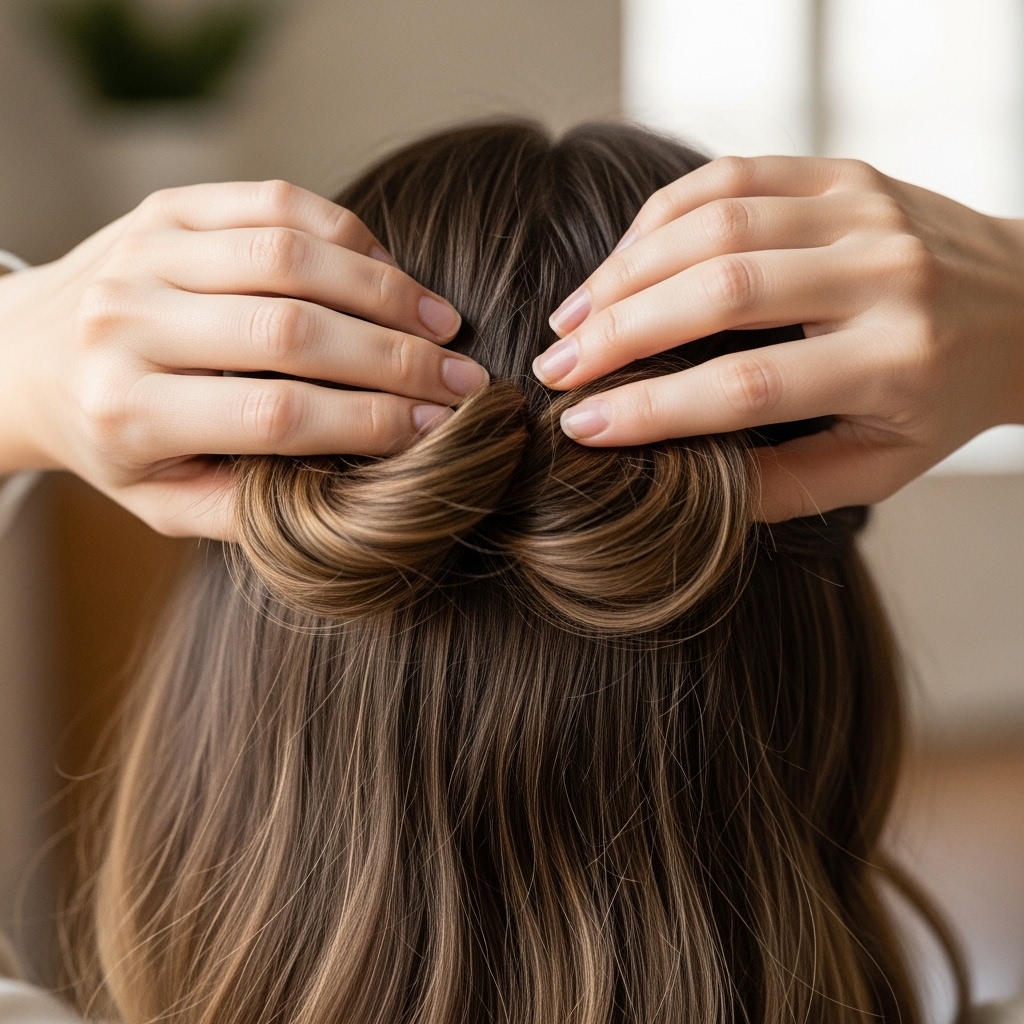
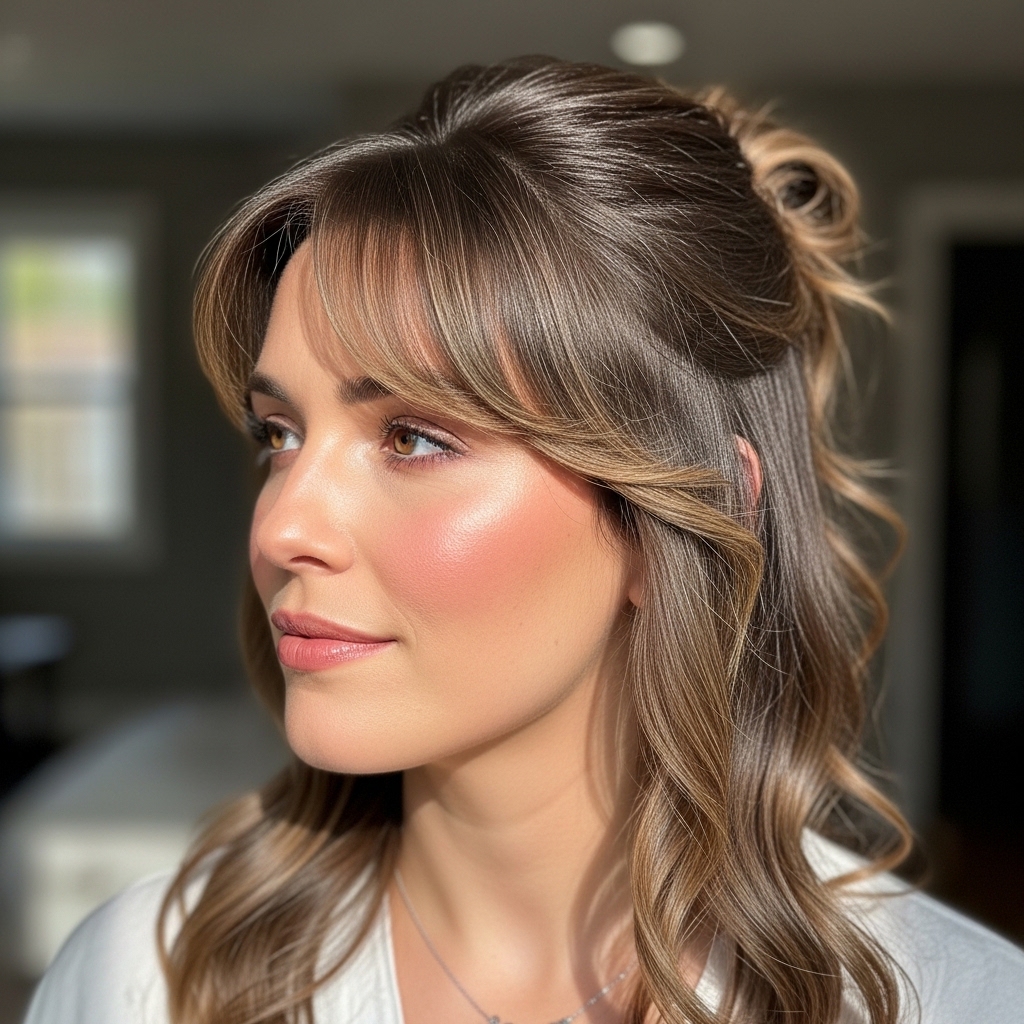
The Perfect Half-Up Ponytail Technique
Now, gather that top section. But don’t just make a ponytail. Here’s the trick for that relaxed-but-neat look:
- Comb the section back gently with your fingers, not a brush.
- Secure it with a thin, clear elastic or one that matches your hair color.
- Pull the ponytail slightly tighter, then gently push it forward to release tension at the scalp for soft volume.
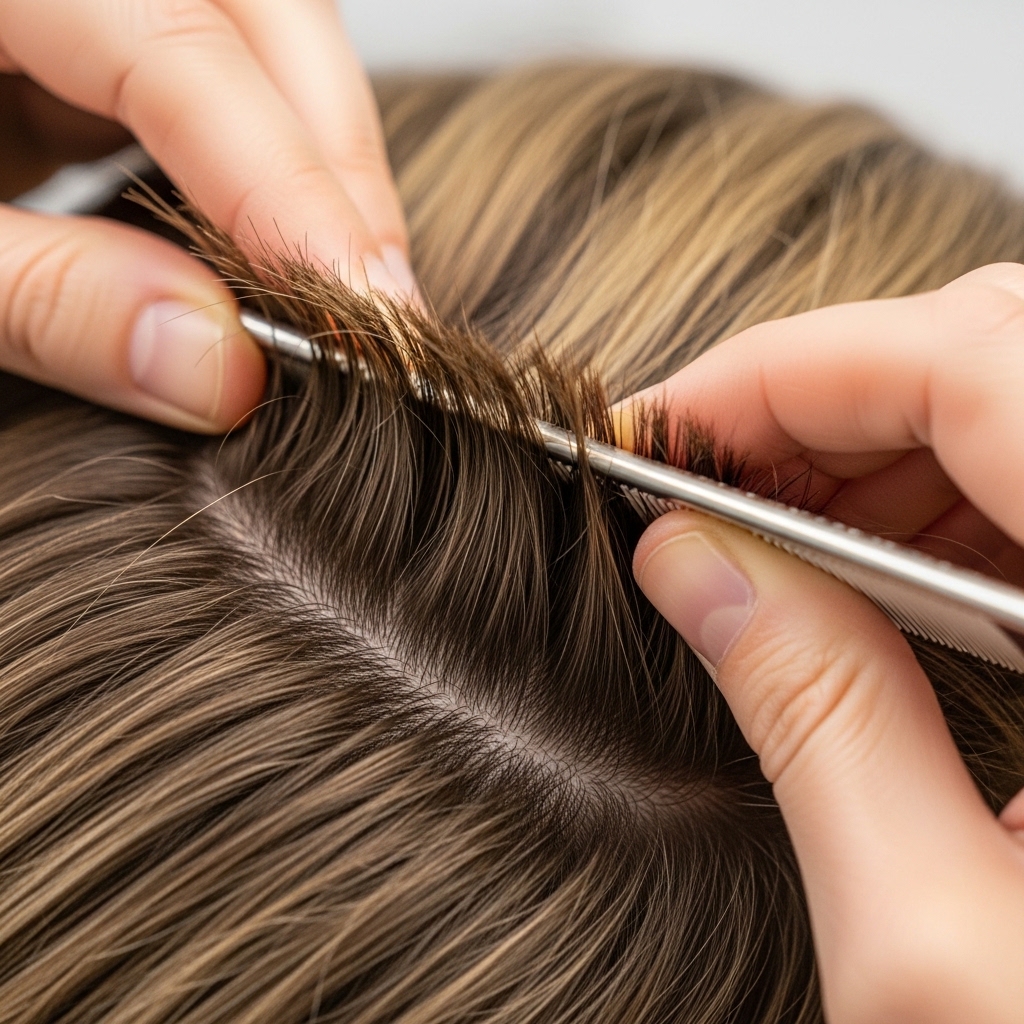
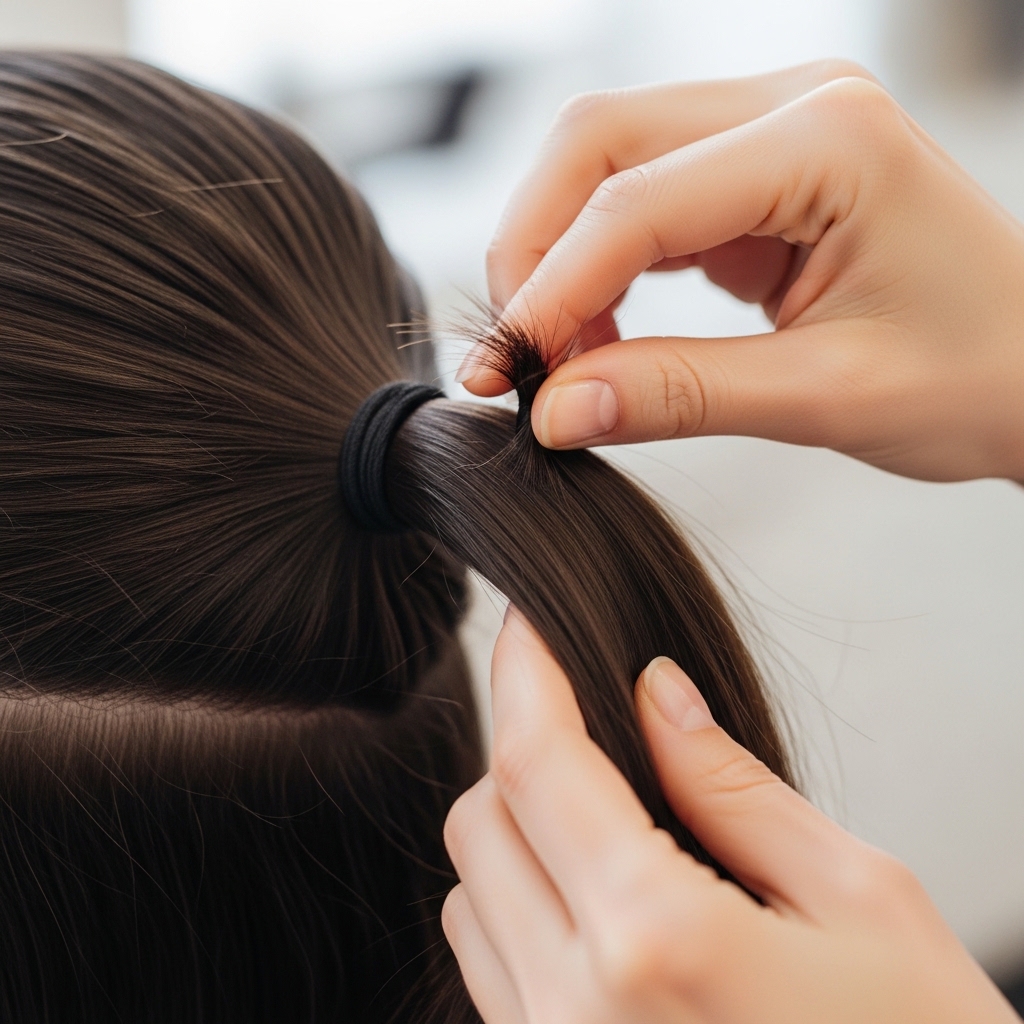
Creating the “Piece-Y” Face Framers
This step is everything. After securing the ponytail, carefully pull out a few small, wispy pieces around your face and temples. We’re talking 2-3 pieces per side, max.
Use the tip of a comb or your fingernail to gently tease them out. These pieces should be thin and intentional, not big chunks. They soften the entire look and are a hallmark of quiet luxury hair.
How to Tease for Hidden Volume
We want volume that you feel, not see. Lift the front of your half-up ponytail. Lightly backcomb (tease) just the root area underneath, close to the scalp.
Do this in small sections. Then, smooth the top layer back over it. This gives you lift and body without any visible teasing, keeping the surface sleek and polished.
The Art of the Slight Back Twist
For an even more refined look, try this. Before securing the ponytail, give the hair a single, elegant twist back. This adds subtle texture and detail.
It looks especially beautiful on a quiet luxury bob or an asymmetrical lob. It turns the half-up section into a feature, making the style look more deliberate and chic.
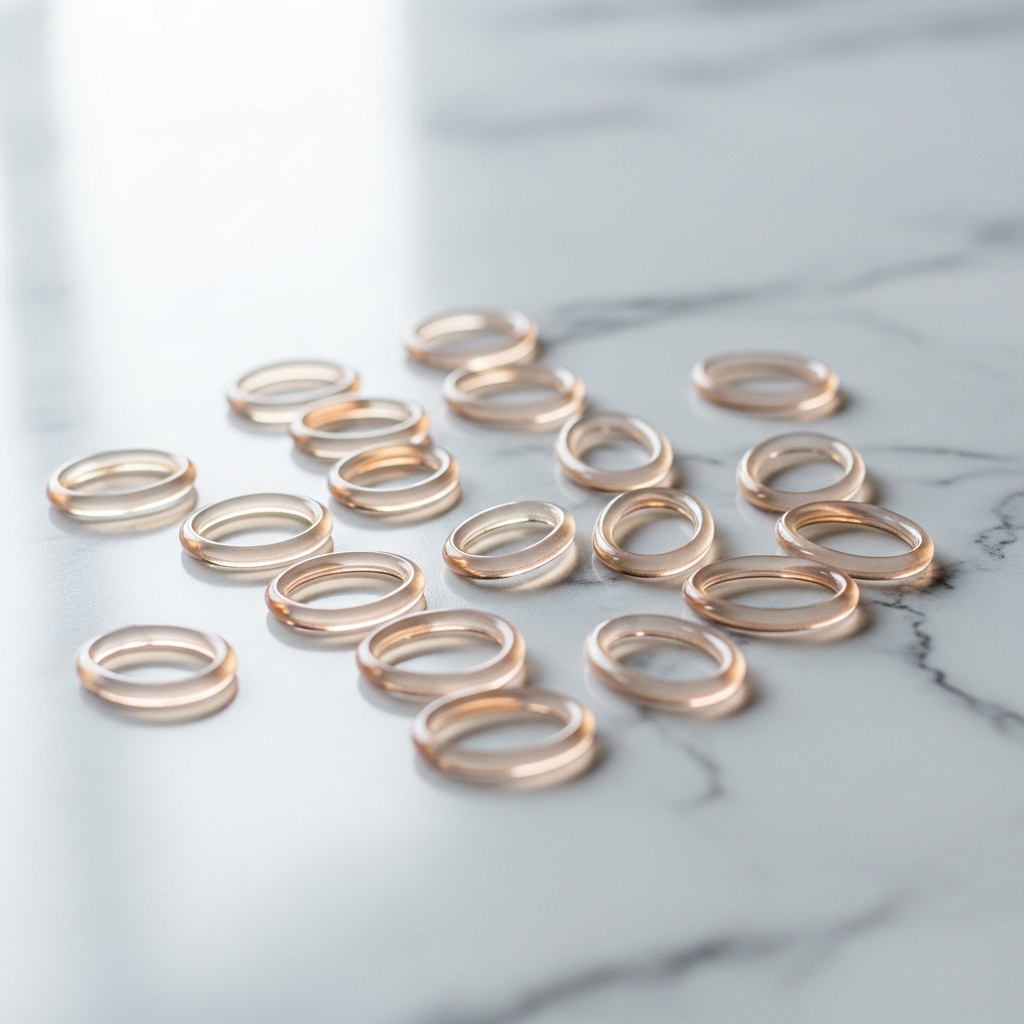
Choosing Your Holder: The Right Hair Tie
Ditch the thick, bulky hair tie. It ruins the vibe. Opt for a small, thin elastic that blends in. Clear or matte versions are perfect.
Silk scrunchies in a neutral color can also work for a softer feel. The goal is for the holder to disappear, letting the hair itself be the star of the show.
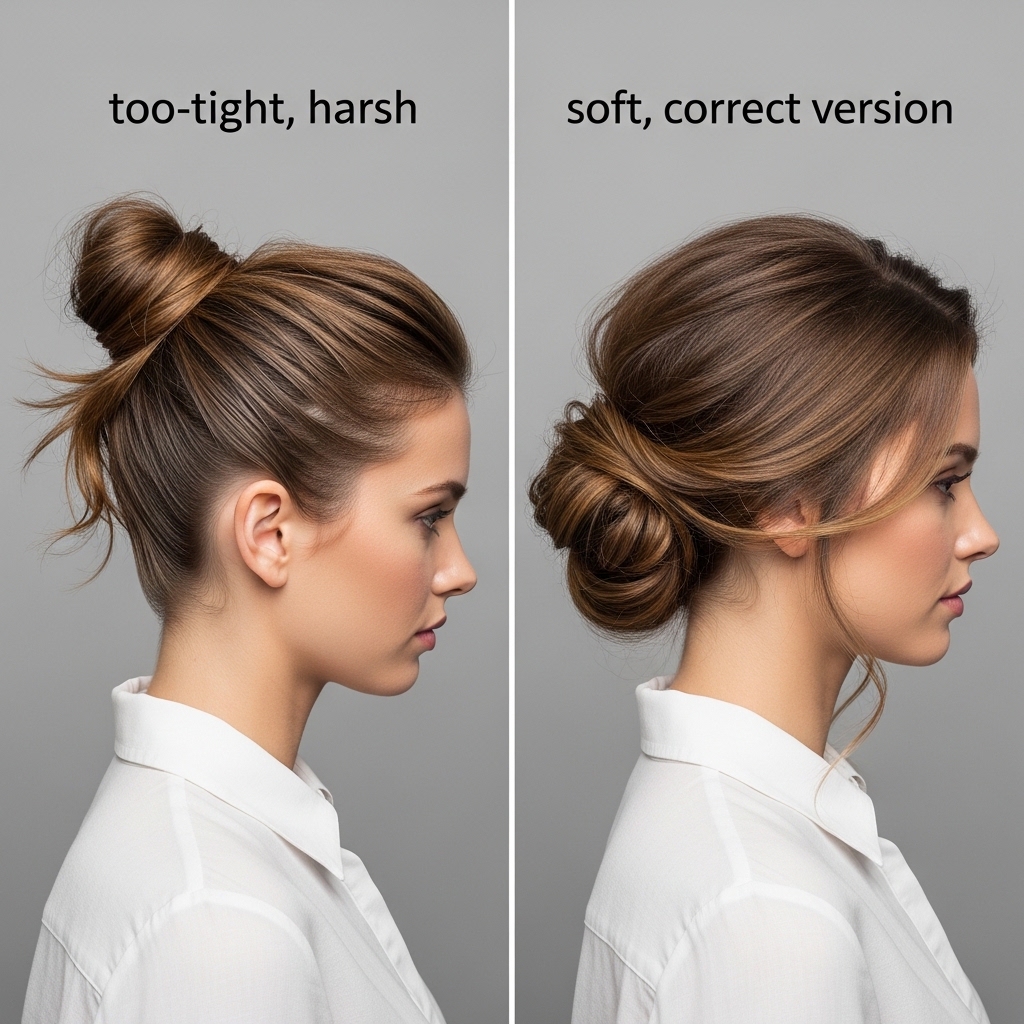
Securing Without the “Bump”
Ever put your hair up and get that awkward bump or dent? Avoid it. When you wrap the elastic for the final time, don’t pull all the hair through.
Stop when you have a small, loose loop. Then, gently fan the loop out and tuck any ends underneath. This creates a seamless, bump-free base that looks like a chic knot.
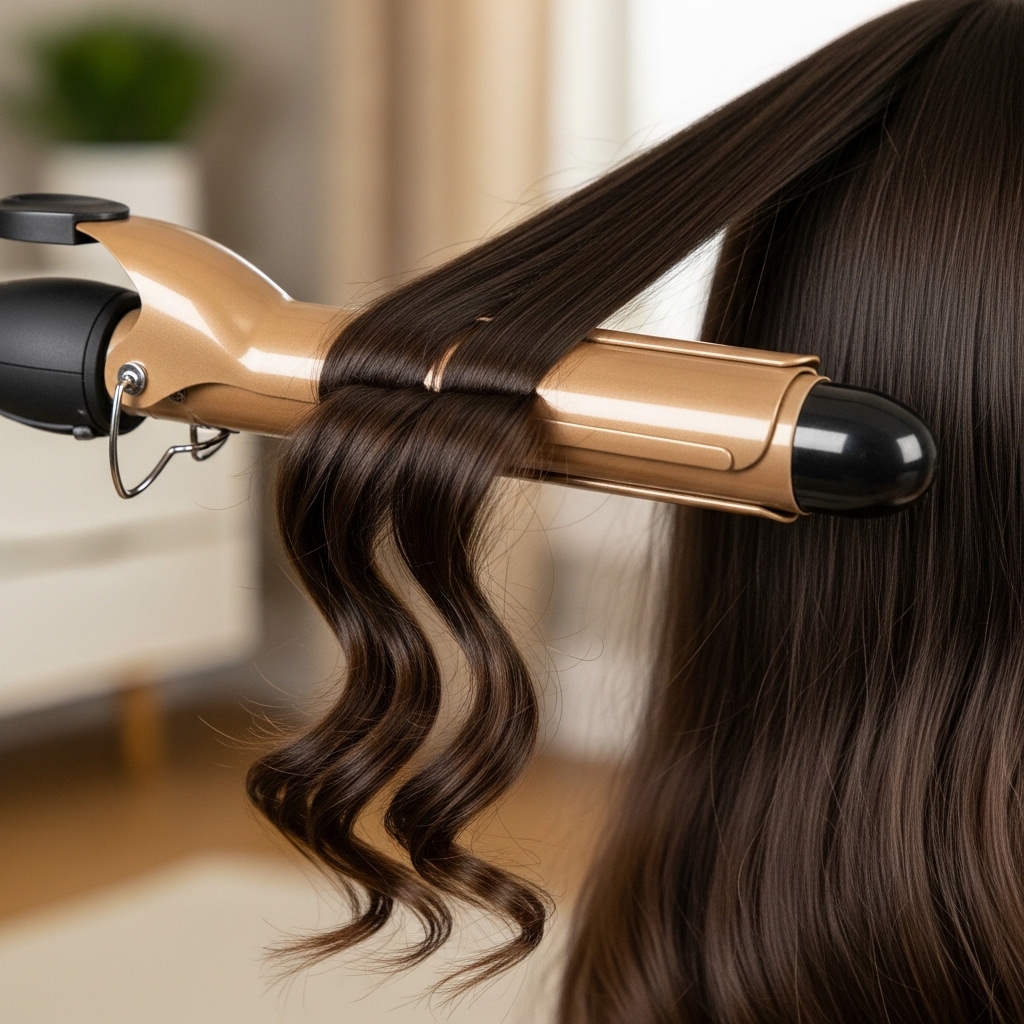
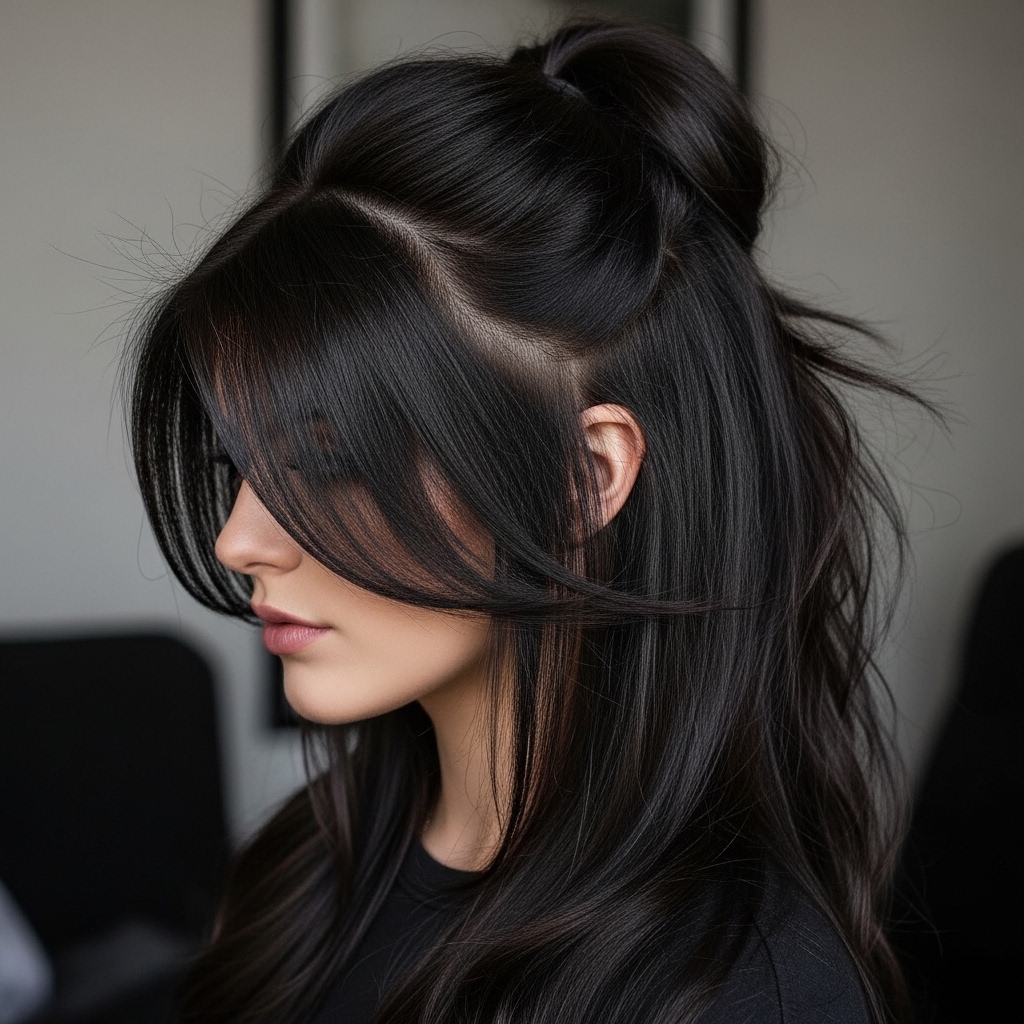
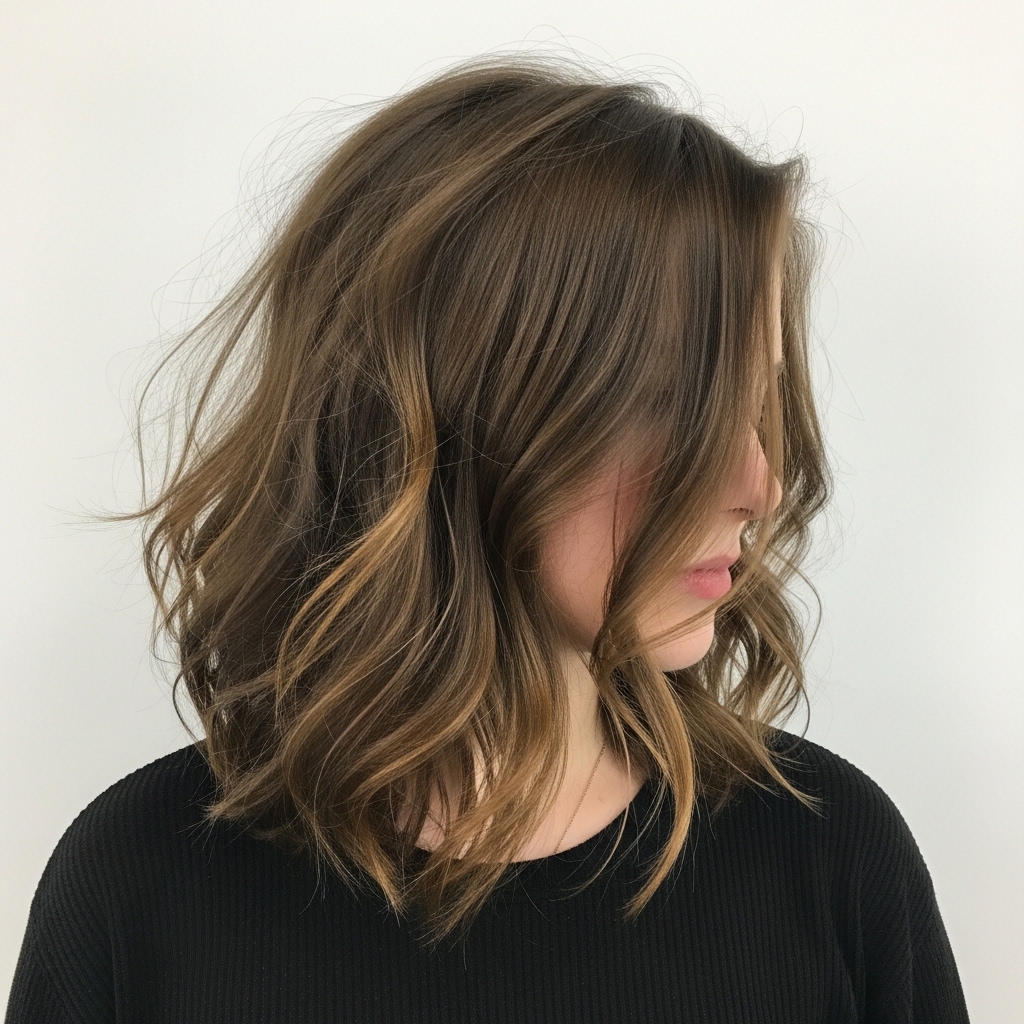
Soft Waves for the Down Portion
The hair left down should have a soft, lived-in wave. Use a large-barrel curling iron (1.5 inches or more). Wrap large sections away from your face.
Don’t clamp the ends; leave them straight for a modern feel. After curling, run your fingers through the waves to break them up. We want shape, not tight curls.
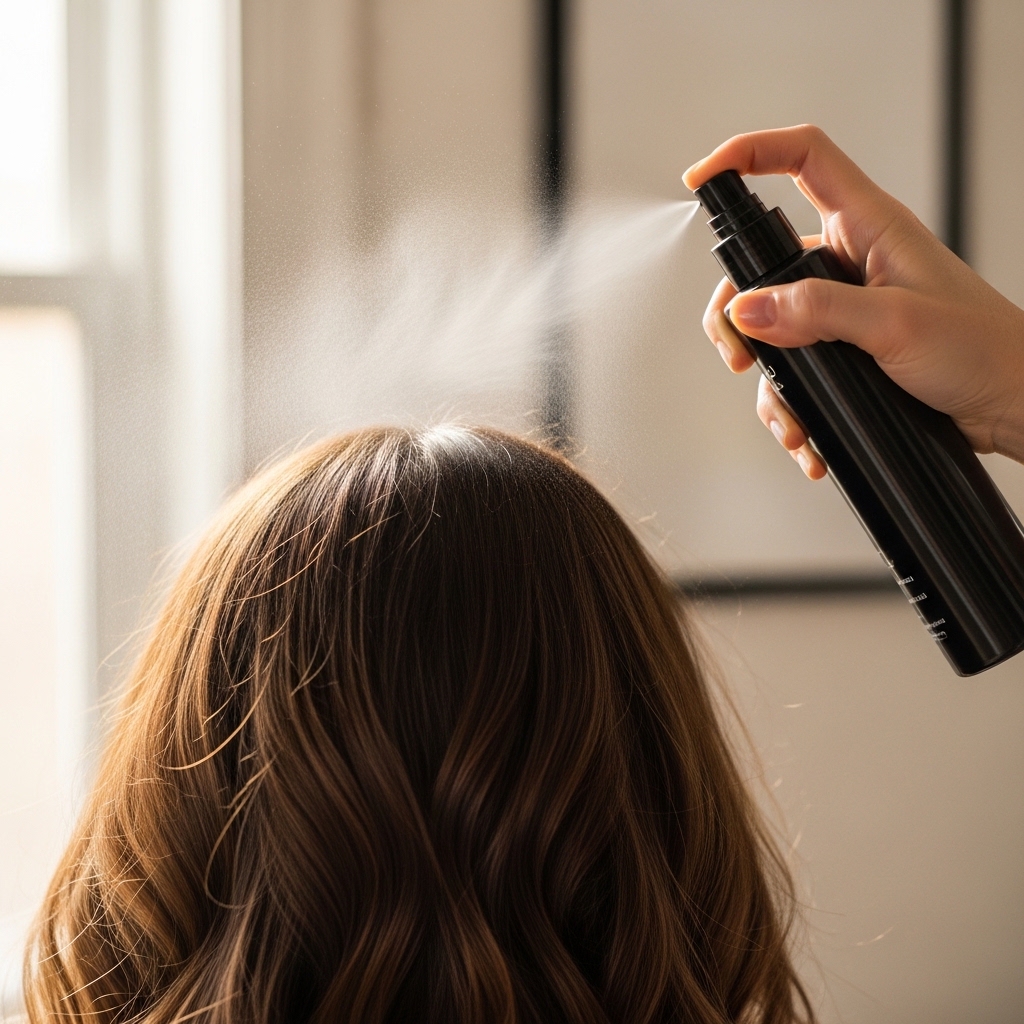
The Magic of a Texturizing Spray
Once your waves are set, a light texturizing spray is your best friend. Spritz it from a distance onto the mid-lengths and ends of your down hair.
This adds separation, grip, and that perfectly imperfect texture. It also helps the style hold without any crispy feeling. Remember, we’re going for touchable hair.
Fixing Flyaways Like a Pro
Polished means no halo of frizz. Use a tiny bit of hair serum or a light-hold hairspray on a clean toothbrush or a boar bristle brush.
Gently brush over the surface of your hair, especially around the crown and face-framing pieces. This tames flyaways and adds a beautiful, glass-like shine.

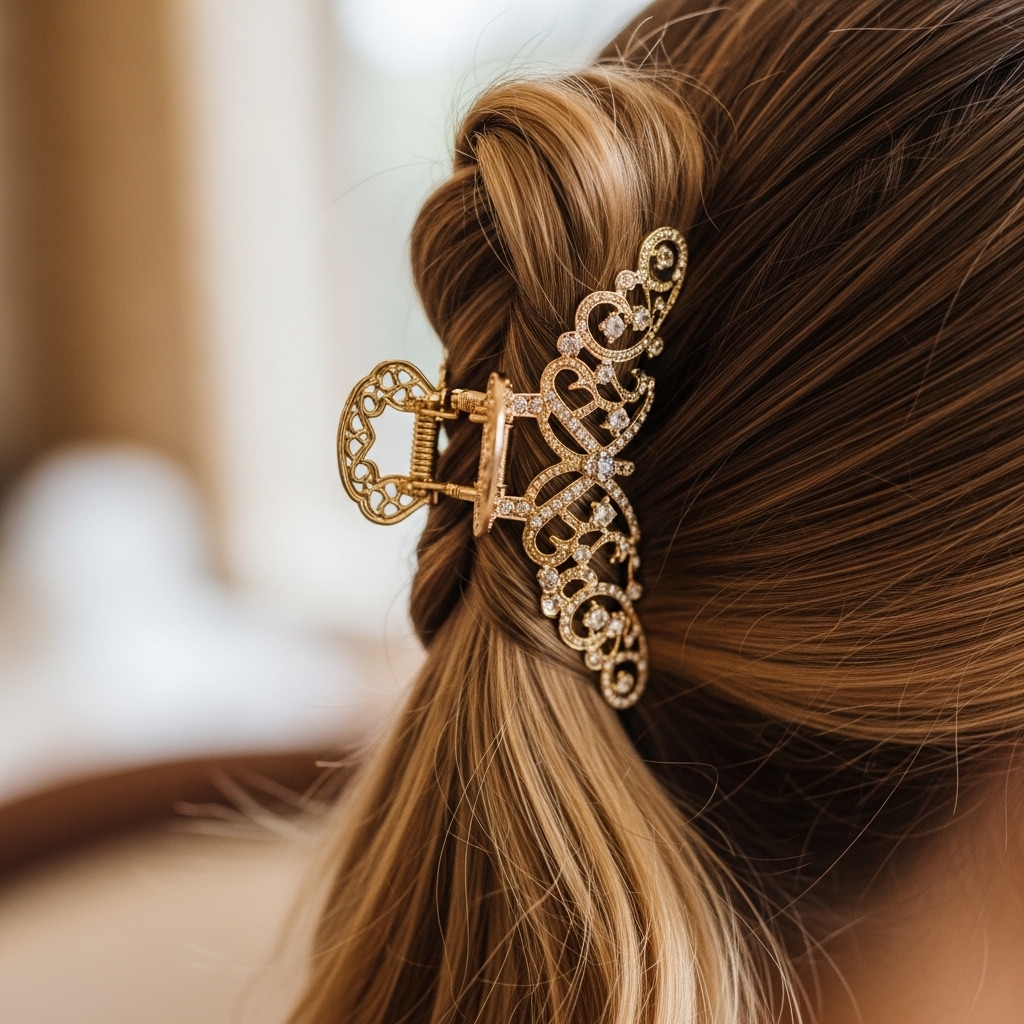
Adding a Luxe Hair Accessory
This is where you can nod to trends like romantic goth hairstyles or glitchy glam hair, but keep it subtle. A simple, elegant claw clip holding the twist, or a thin silk scarf tied around the base of the ponytail.
Choose one accessory in a neutral tone. The key is that it should look like a cherished heirloom, not a fast-fashion statement.
What to Do With Your Bangs
If you have bangs, incorporate them! They are the ultimate face-framers. Blow-dry them smooth and let them fall naturally with the piece-y pieces you pulled out.
Whether you have a full fringe or curtain bangs, they should blend seamlessly into the half-up section, adding to that soft, romantic feel.
Adapting for a Vampire Haircut or Shag
Got a trendier cut like a vampire haircut? The principle is the same. Use the half-up style to highlight your dramatic layers or bangs.
Just be more generous with your texturizing spray and let the pieces be a bit more rebellious. It blends the edgy cut with a polished, old-money sensibility.
Making It Last All Day & Night
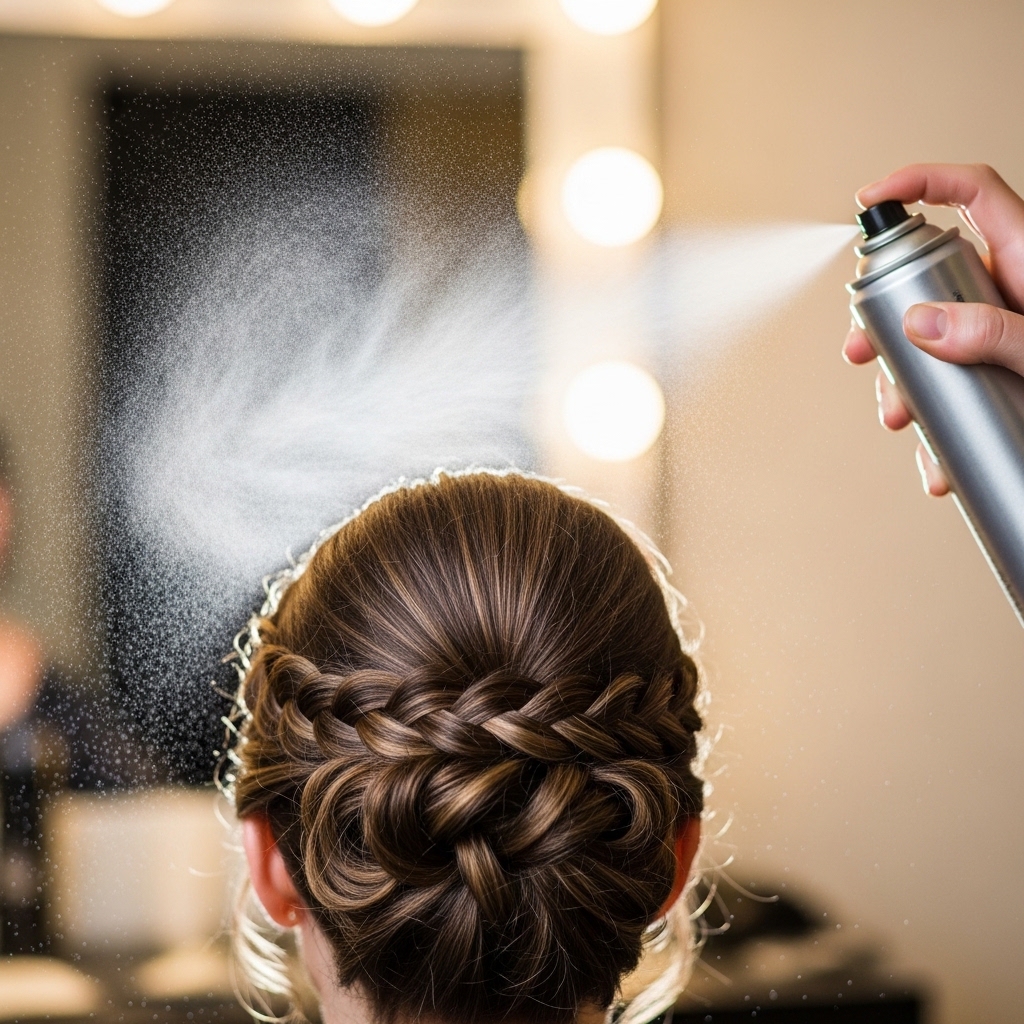
Longevity is part of the polish. After everything is set, use a light-hold, flexible hairspray. Hold the can far away and mist over the entire style.
This sets everything without making it stiff. Tuck a spare clear elastic and a travel-sized texturizing spray in your bag for quick touch-ups if needed.
The “Second Day” Version Is Even Better
Honestly, this style often looks better on day-two hair. The natural oils add texture and hold. Just refresh your waves with a flat iron, add a bit more texturizing spray, and go.
The half-up section might even have more grip. It’s the ultimate low-effort, high-impact look for busy days.
Common Mistakes to Avoid
Let’s quickly sidestep pitfalls. Avoid pulling the half-up section too tight—it should be relaxed. Don’t make the face-framing pieces too thick or uniform.
- Avoid over-teasing; we want hidden volume.
- Don’t use heavy products that weigh hair down.
- Skip the super-tight, slicked look. Softness is key.
How This Fits Into 2026 Hairstyle Trends
While this is a timeless look, it perfectly aligns with the move toward wearable, personality-driven 2026 hairstyles. It’s not a passing fad like a specific hime cut might be.
It’s about elegance, health, and subtlety—trends that are always in style. It’s your classic base that you can tweak with small, trendy accessories.

Your Final Check Before You Go
Do a last mirror check. Is the crown smooth? Are the face-framing pieces soft? Does the whole thing look touchable and easy? If yes, you’ve nailed it.
Remember, the goal is to look like you didn’t overthink it. That’s the true secret of old money hair—it appears effortless, even though a few smart steps got you there.
And there you have it. Your roadmap to that perfectly polished, half-up hair that looks like it took an hour but really only takes minutes once you get the hang of it. It’s one of those styles that just makes you feel put-together, no matter what you’re wearing.
The real beauty of this look is how it adapts to you. Use it as your reliable, go-to style for days when you want to feel quietly confident and pulled together. It never shouts, but it always gets noticed.
Save this post to Pinterest to keep this guide handy for your next hair day! And tell me in the comments—what’s your favorite trick for making your hair look expensive on a budget?

