
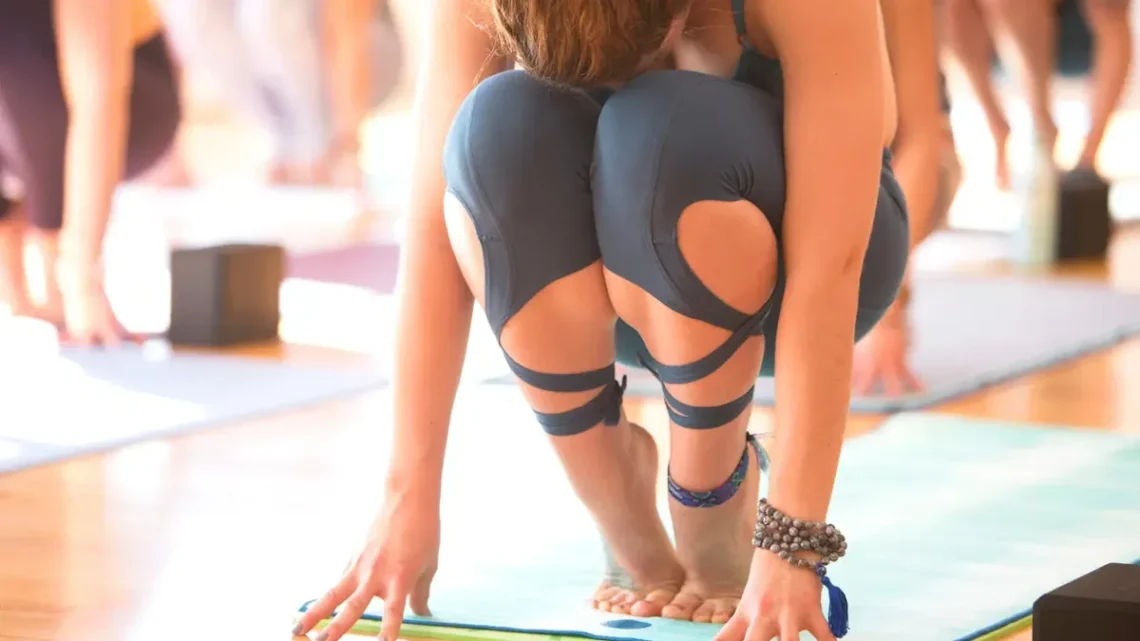
There is a particular moment every yogi knows: you fold into your first downward dog, your hair slides forward over your face, and suddenly you are trying to breathe, balance and tuck strands behind your ears all at once. A few poses later, a headstand or a shoulder stand tests the whole arrangement again, and by savasana the style that looked neat in the mirror is a tangled halo spread across the mat. The right hairstyles for a yoga class are built for exactly this — styles that stay anchored when you turn upside down, hold their shape when you sweat, and leave your face, neck and shoulders completely free to move.
This guide gathers 33 mat-friendly styles, from a braided low bun that survives a headstand to a claw clip twist you can redo in ten seconds between flows. It opens with eight practical explainers — how to keep a style put upside down, what sweat does to grip, the fastest fixes between poses, and what to avoid entirely — then walks through the styles themselves with honest notes on hold, comfort, hair type and cost, and finishes with straight answers to the questions people ask before their first class.
Styles That Stay Put Upside Down: What Actually Holds in an Inversion
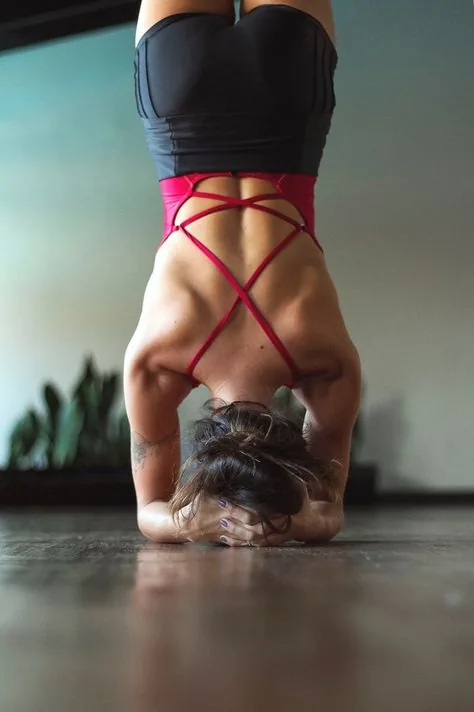
An inversion changes the physics of your hair completely. Gravity stops pulling your style down and starts pulling it toward your face, so a bun that felt secure standing up can slide forward in a headstand, and a ponytail that behaved in warrior pose can flop over your eyes in a shoulder stand. The styles that survive are the ones anchored close to the skull at more than one point: a braid plus a tie, a bun plus crossed pins, or a twist pinned at both ends. Anything held by a single elastic alone is gambling — one loose strand in an inversion is a distraction you do not need while you are balancing on your head.
The test that matters: before class, bend forward until your head is below your hips and shake gently. If anything shifts, it will shift more in a real inversion. What works: low buns, braids that lie flat against the head, and twists pinned at the nape. What fails: high, heavy top knots that lean forward, loose messy buns, and any style that depends on gravity to stay in place. Quick verdict: if it passes the forward-fold test at home, it will hold on the mat.
Sweat and Grip: Why a Style That Holds Dry Can Fail When You Perspire
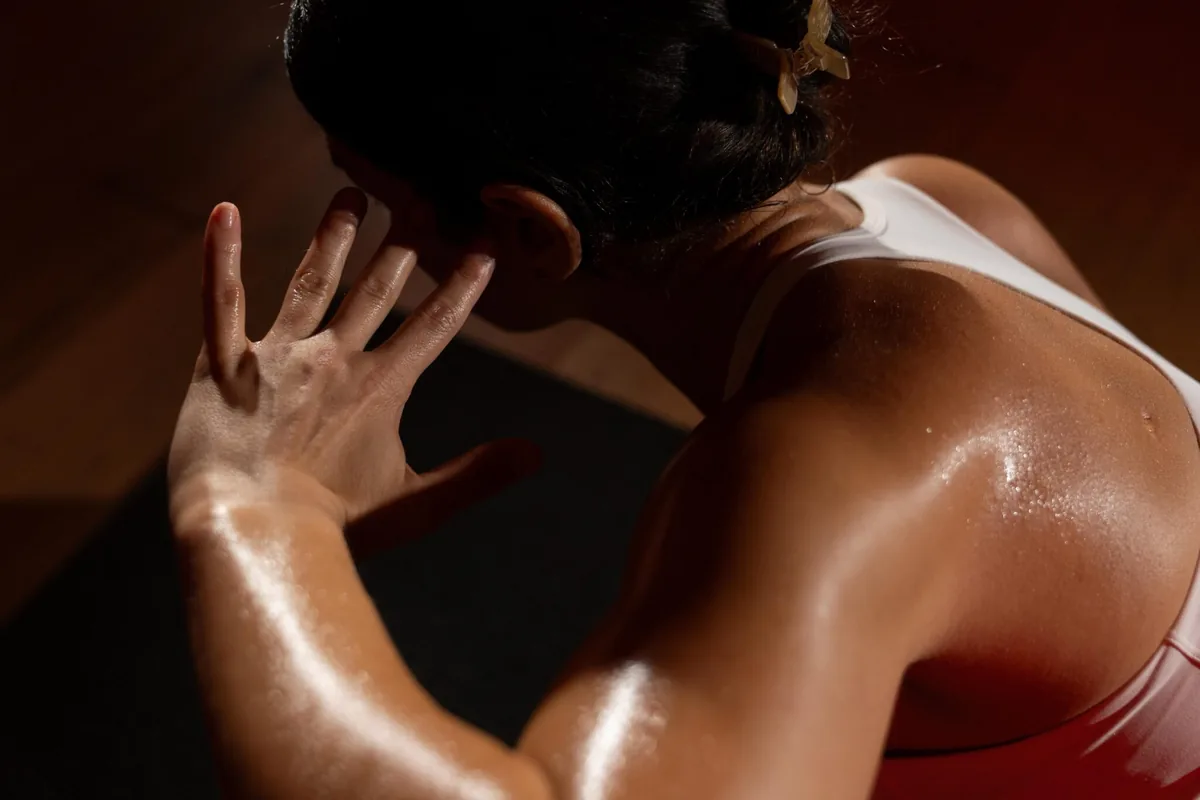
A hot yoga class or a fast vinyasa flow will make you sweat, and sweat changes everything about how hair behaves. Damp hair is heavier, smoother and more slippery, so elastics stretch, pins slide, and a style that held perfectly for the first twenty minutes can start creeping loose by the third sun salutation. Sweat also runs down from the hairline into the eyes, which is why so many people spend half a class pushing back damp strands. The fix is not more product — it is grip. Texturising spray or a little dry shampoo before class gives pins and elastics something to bite into, a fabric scrunchie grips better than a smooth elastic on damp hair, and a wide headband keeps sweat out of your eyes while taking pressure off the style itself.
Pros and cons: dry shampoo adds grip and absorbs sweat, but too much leaves a dusty residue; a headband solves the sweat-in-eyes problem but can slide on a very sweaty forehead unless it is the non-slip kind. Common mistake: starting class with freshly washed, conditioner-heavy hair — it is the slipperiest hair there is. Best for: anyone doing hot yoga, power yoga or a long flow class, where sweat is a certainty rather than a possibility.
Hair Off the Face on the Mat: The Nape, the Fringe and the Flyaways
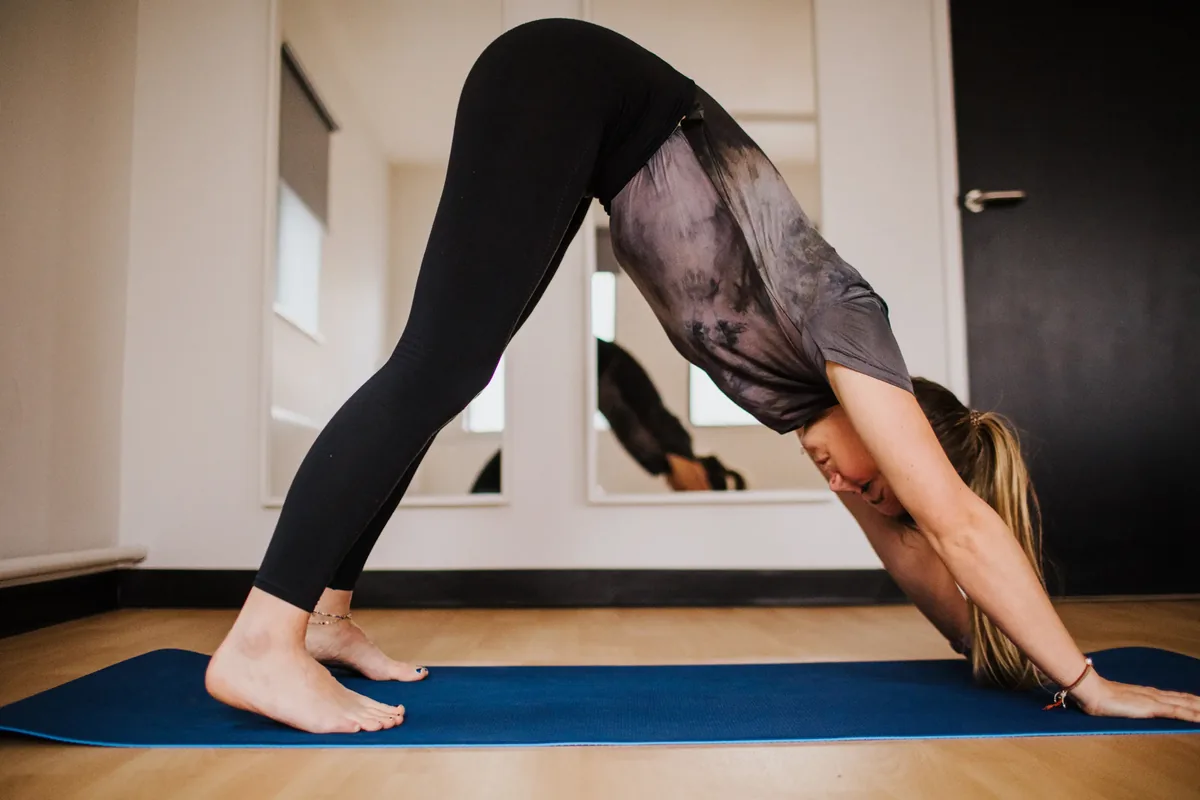
The hair that ruins a yoga class is rarely the bulk of it — it is the edges. The fringe that falls into your eyes in a forward fold, the nape hairs that tickle your neck in a twist, the flyaways that stick to a sweaty forehead in child’s pose. A style that looks contained from behind can still be a mess from the front, because the mat is where you spend most of your time looking down. The solution is to secure the edges first: pin the fringe back flat with two crossed bobby pins, tuck the nape hairs into the main style rather than leaving them loose, and smooth the hairline with a little gel or serum before you tie up.
How to check: look down at the floor and shake your head gently — anything that falls into your line of sight needs pinning. What to avoid: face-framing pieces pulled out for softness; they look lovely standing up and become a curtain the moment you fold forward. Quick fix: two flat clips at the temples solve most fringe problems in seconds, and a fabric headband covers the rest.
Quick Fixes Between Poses: Resetting Your Hair Without Leaving the Flow
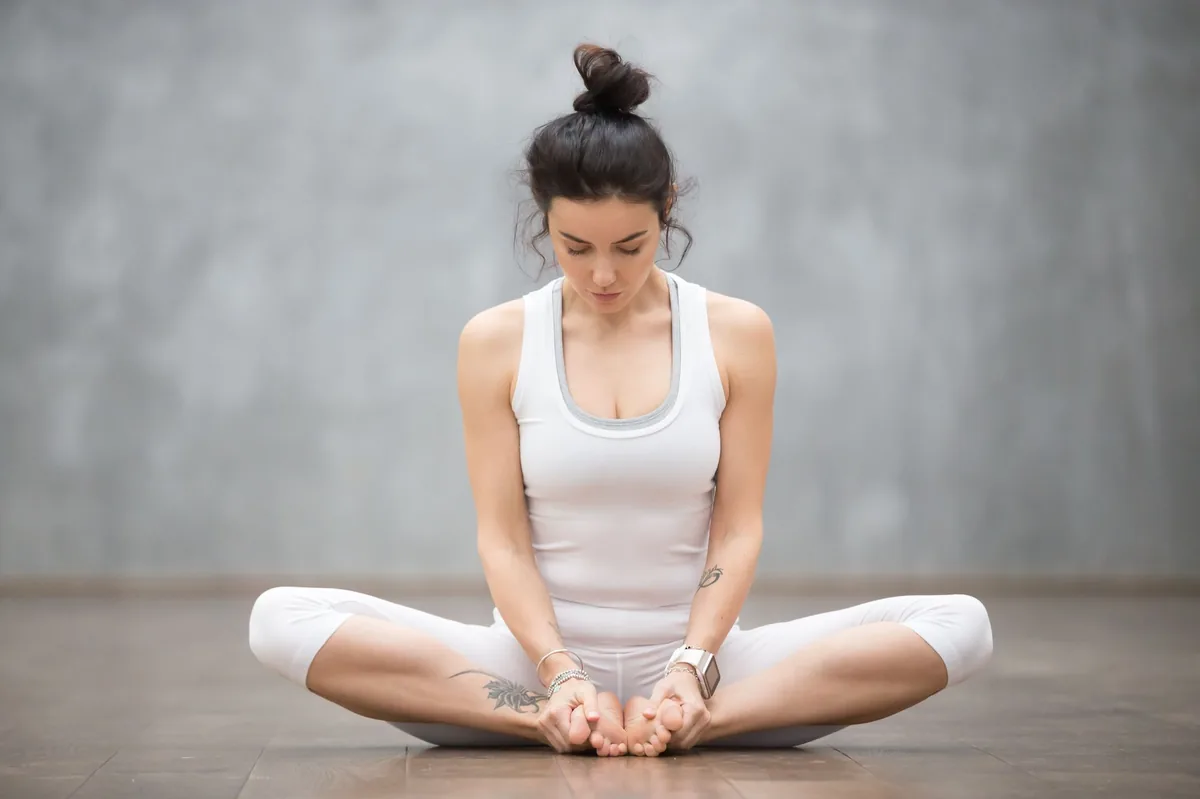
Even the best style can loosen during a long class, and the difference between a small fix and a ruined flow is knowing how to reset it in seconds. The trick is to fix it during a rest pose — child’s pose or a standing forward fold — when your head is already down and your hands are free for a moment. Keep one spare elastic on your wrist and two bobby pins tucked into your waistband or your mat bag; with those, you can re-tie a ponytail, re-pin a bun or tuck a loose braid back in place without ever stepping off the mat. A claw clip is the fastest reset of all: gather, twist, clamp, done in under ten seconds.
What it costs: a rushed fix mid-flow costs you a breath and a moment of focus, which is why the best fixes happen in rest poses. What to carry: one spare elastic, two pins, and a small claw clip in your bag. Maintenance note: if a style needs fixing more than twice in one class, it is the wrong style for you — switch to a braid or a double-anchored bun next time.
Washing and Caring for Hair After a Yoga Class

Sweat, heat and a tight style for ninety minutes leave hair in a particular state: damp at the roots, dented where the elastic sat, and often tangled where the style rubbed against the mat. Washing after every class is not always necessary — and for many hair types, daily washing does more harm than good — but sweat should not sit on the scalp for hours. A quick rinse, a dry shampoo at the roots, or a co-wash are all gentler options than a full shampoo every day. When you do wash, focus the shampoo on the scalp where the sweat is, let the lengths get only what runs down, and detangle gently from the ends upward before the hair dries, because yoga tangles set hard once they dry.
Pros and cons: dry shampoo buys you a day between washes, but it builds up if you use it every class; a rinse alone is the gentlest option but does not remove product. Common mistake: ripping a tight elastic out of sweaty, tangled hair — it snaps strands. Best for: loosening the style gently, finger-detangling first, and letting hair air-dry after class whenever you can.
Accessories That Survive a Flow: Ties, Pins, Headbands and Clips

Not all hair accessories are equal on a yoga mat. A metal clip or a hard plastic barrette will dig into your scalp the moment you lie back in savasana; a heavy decorative pin will slide out in a headstand; a smooth elastic will creep loose as you sweat. The accessories that survive a flow are soft, flat and light: fabric scrunchies that grip without snagging, spiral hair ties that hold without denting, flat bobby pins that lie against the head, and wide fabric headbands that stay put without digging in. A claw clip is the exception to the soft rule — it is hard, but it is so quick to use that it earns its place in your bag for mid-class fixes, even if you would not lie on it.
What to look for: flat, flexible and light, with no hard edges that press into the skull on the mat. What to avoid: metal clips, heavy pins, beaded accessories and anything with a sharp edge. Cost and time: a pack of fabric scrunchies and a set of flat pins costs very little and lasts months — the cheapest upgrade in this whole guide.
Short Hair vs Long Hair on the Mat: Different Problems, Different Fixes
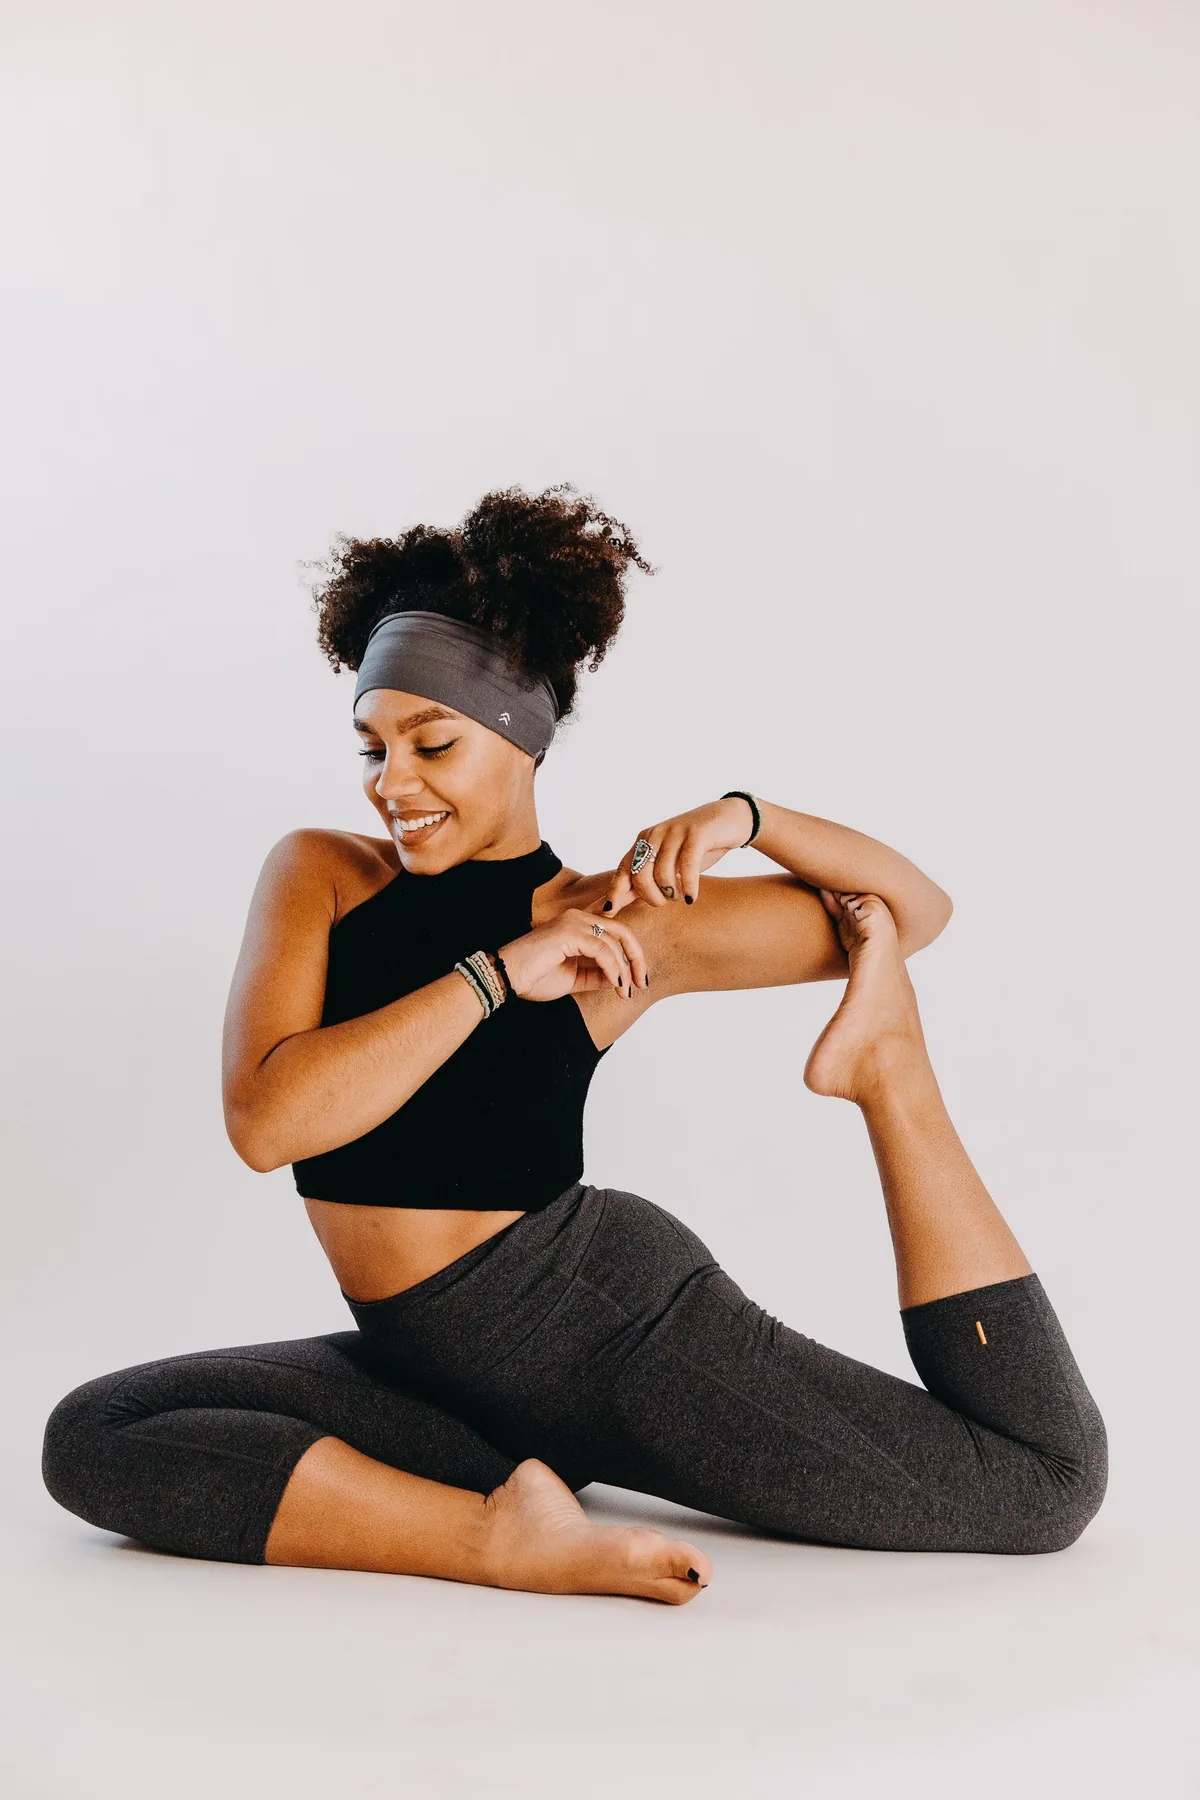
Short hair and long hair fail in a yoga class in completely different ways. Long hair is a weight and swing problem: it falls forward, it pulls on its anchors, and it needs real containment. Short hair is an edges problem: there is not enough length to tie, so the fringe, the sides and the nape all escape on their own. Long hair needs braids, buns and double anchors; short hair needs headbands, flat clips and scarves, with a half-up knot for anything long enough to gather. Neither is harder — they just need different tools, and the most common mistake is trying to force a long-hair style onto short hair, or leaving short hair completely unsecured because it feels too short to matter.
Best for: matching the fix to the length instead of fighting it. How to use this guide: short hair starts with the headband, clip and half-up styles; long hair starts with the braids and buns. Quick verdict: the right tool for your length beats the prettiest style for someone else’s length, every single time.
What to Avoid in a Yoga Class: Styles That Distract, Slip or Hurt

Some styles look wonderful in the studio mirror and become a problem within ten minutes of a flow. Loose hair worn down is the obvious one — it falls in your face, sticks to your neck and ends up under your shoulders on the mat. A high, heavy ponytail swings with every transition and thumps against your back in a backbend. Decorative pins, beaded braids and anything metal digs into your scalp in savasana and can scratch the mat. A style that depends on hairspray alone will fail as soon as you sweat, and a brand-new, untested style on the morning of an important class is a gamble with your focus.
Mistakes to avoid: wearing hair down, using hard or heavy accessories, and trusting a style you have never tested upside down. What works instead: anything in this guide that is anchored twice, sits low and flat, and has already passed the forward-fold test at home. Quick verdict: if a style needs your hands during class, it is the wrong style for the mat.
1. The Classic Low Bun: The Mat’s Most Reliable Style
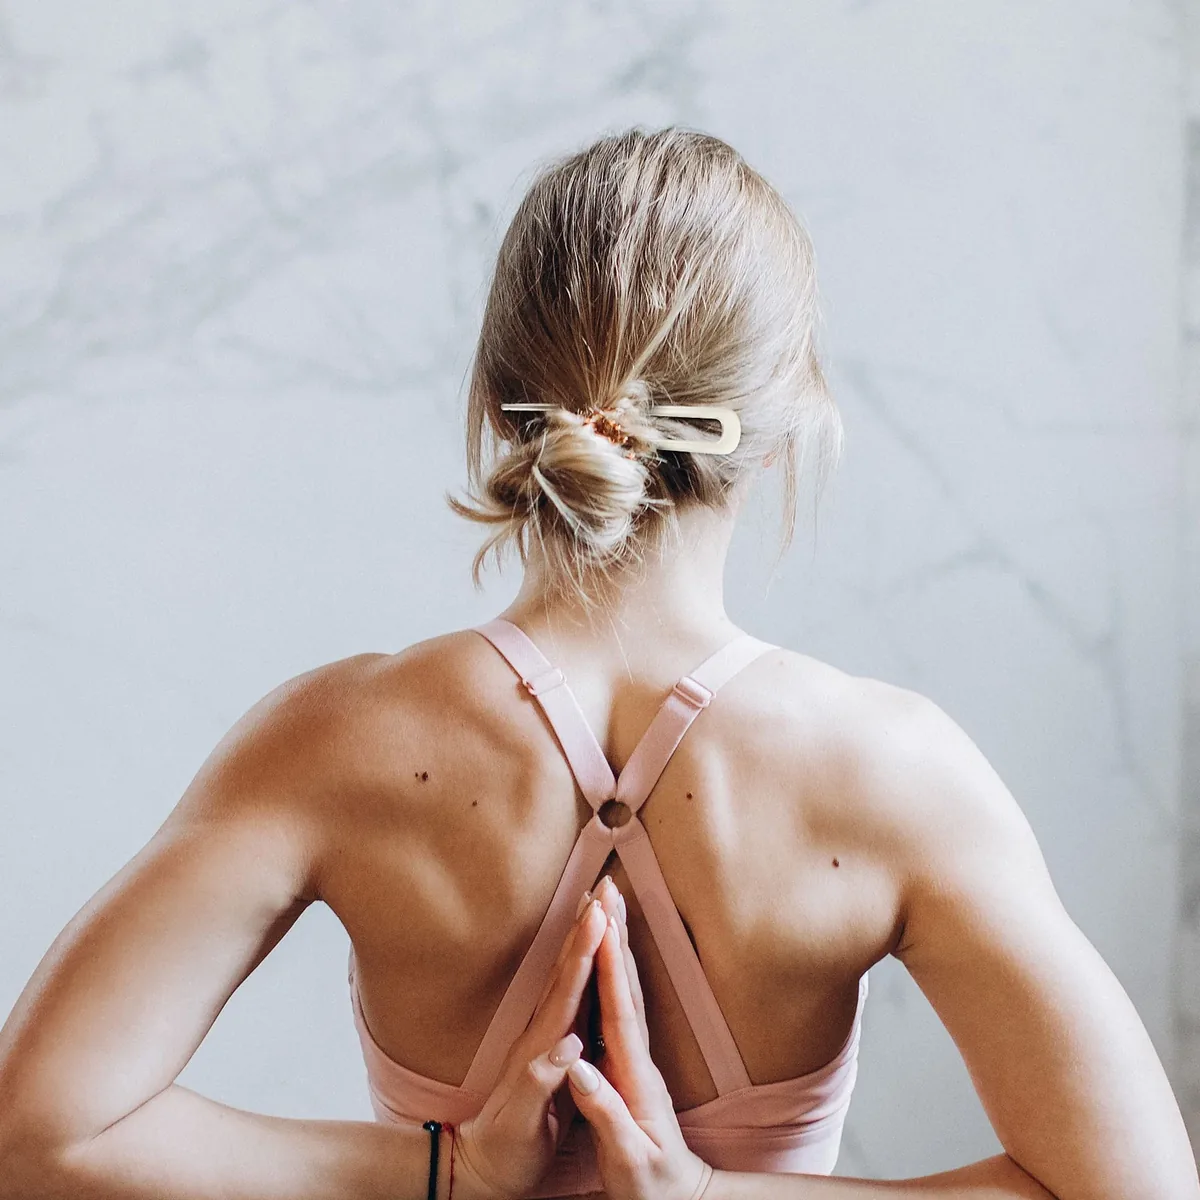
The classic low bun is the first style most yoga teachers recommend, and the reason is simple: it gathers every strand into one compact knot at the nape, sits low enough that it never swings forward in a fold, and lies flat enough that you can rest the back of your head on the mat in savasana without feeling a lump. Brush the hair back smoothly, gather it at the nape, twist it into a coil and pin it flat. Three minutes, two crossed pins, and a style that survives sun salutations, inversions and a full ninety-minute class without a single strand escaping.
Who it suits: almost everyone with hair past the shoulders, and it is the easiest option for thick hair because the weight sits low and balanced. Pros and cons: it is fast, secure and comfortable on the mat, but it can look plain in class photos unless you add a headband. Common mistake: pinning the bun too loosely so it droops by the second half of class — cross two pins over each other at the base and it will hold.
2. The High Top Knot: Cool, Compact and Completely Out of the Way
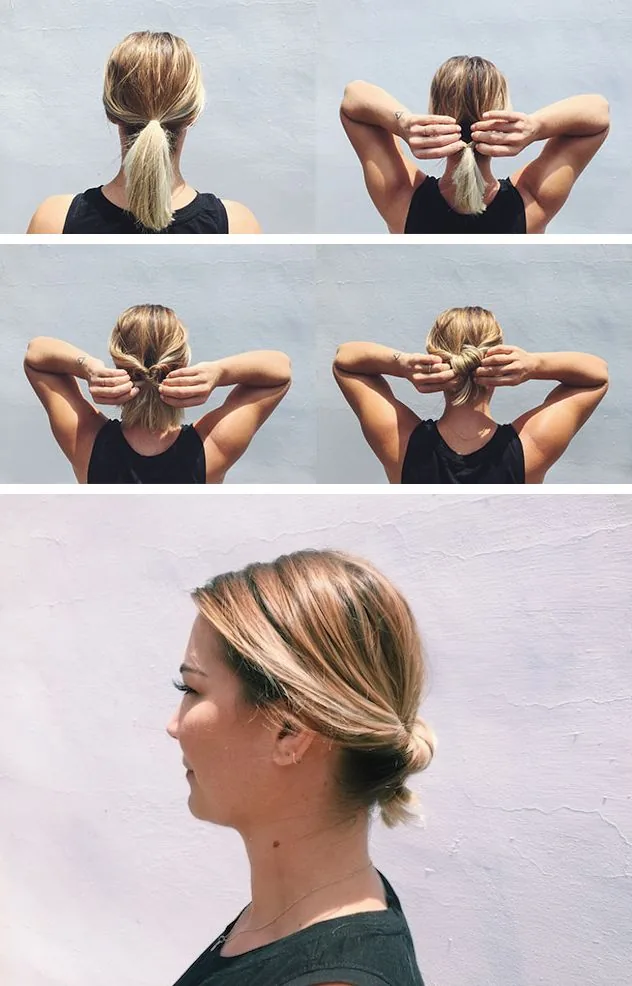
A high top knot lifts all the hair to the crown and coils it into a tight, compact knot that keeps your neck cool in a heated room and your hair far above the mat. It is the neatest of the bun family and the best choice for hot yoga, because nothing hangs near your neck or shoulders to trap heat. Use a strong elastic and pin the knot at the base, and keep it tight enough to hold but not so tight that it pulls — a top knot that aches after twenty minutes will distract you for the remaining seventy.
What it means: this is a style that trades a little comfort for a lot of clearance. What to avoid: a loose, floppy top knot that leans forward in a fold — that defeats the whole point. Quick verdict: choose the top knot for hot, fast classes, and the low bun if you prefer something gentler on your scalp and flatter on the mat.
3. The Braided Low Bun: Double Security for Thick Hair
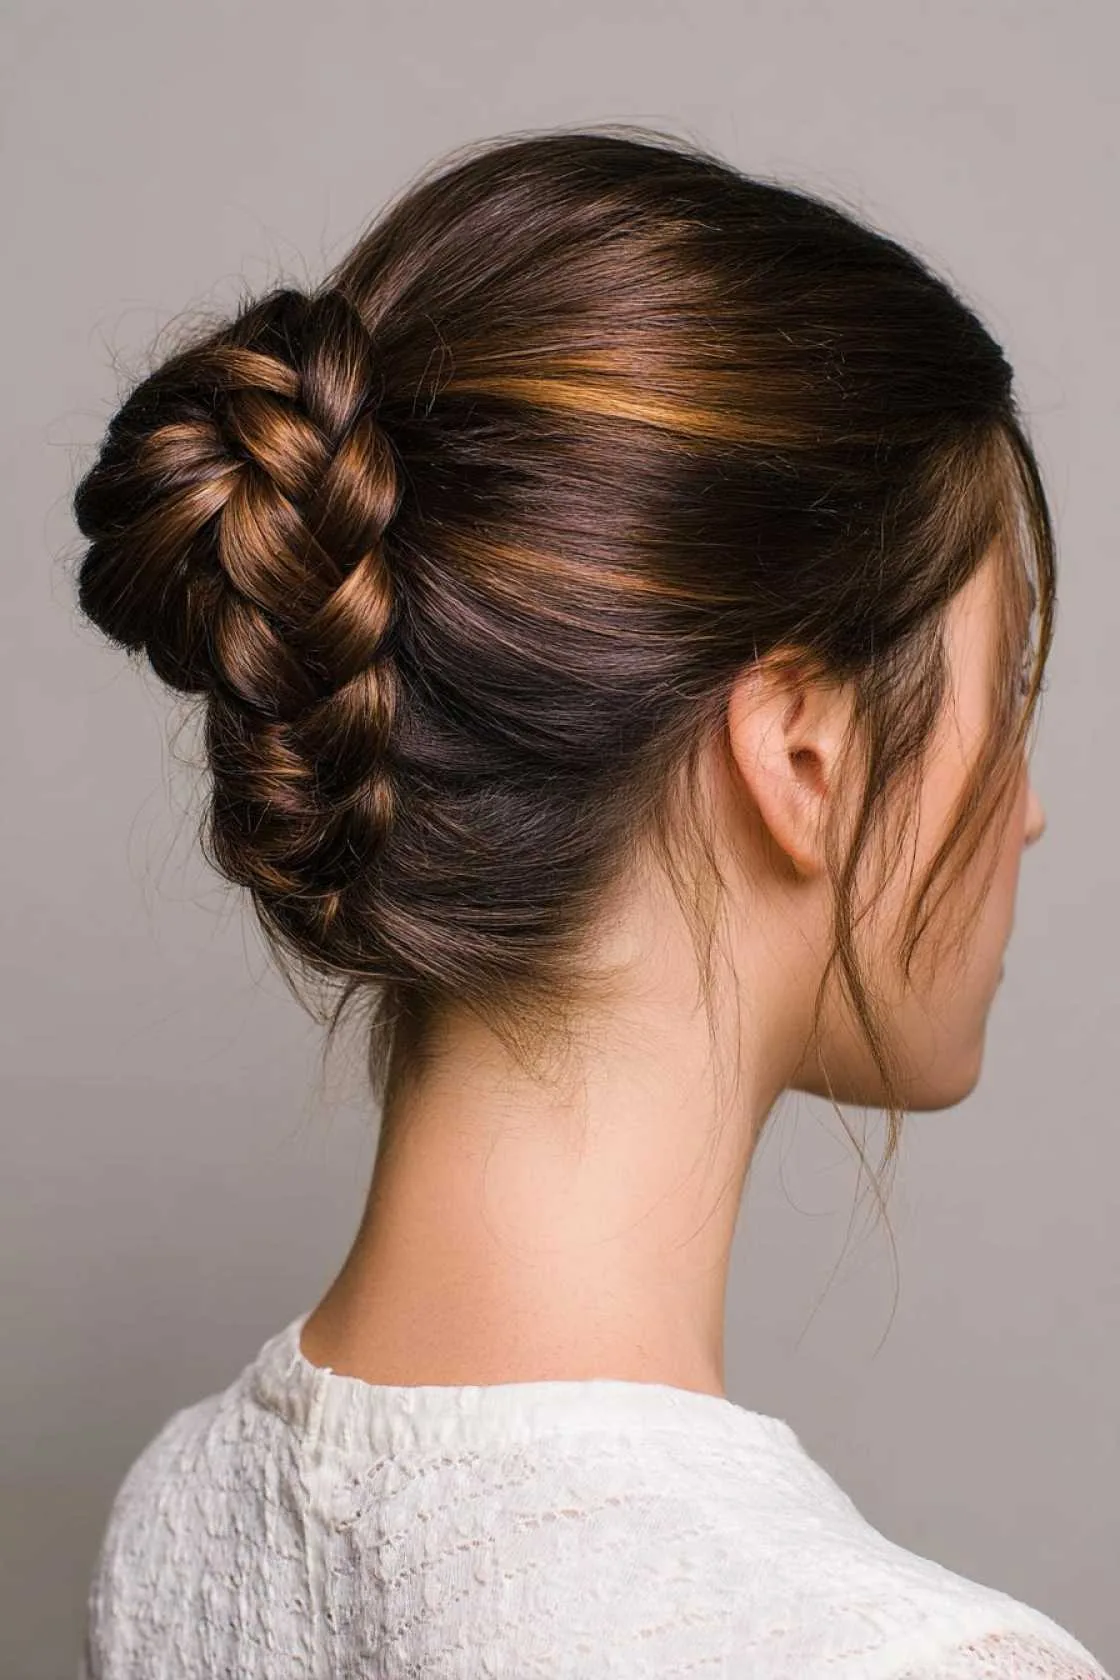
For thick or heavy hair, a single bun can be a losing battle — the weight pulls the pins out and the style sags by the middle of class. The braided low bun solves that by braiding the hair first, which distributes the weight and gives the pins something to grip, then coiling the braid into a low bun at the nape. The braid itself locks the strands together, so even if a pin loosens, the hair stays contained. It is one of the most secure hairstyles for a yoga class, and it lies flat enough for savasana, which a high bun never does.
Best for: thick, heavy or very long hair, and anyone whose buns usually fall apart mid-flow. How to style it: braid the hair loosely from the nape down, coil the braid flat, and pin it at four points around the circle. Common mistake: braiding too tightly, which pulls at the scalp over a long class — a loose, comfortable braid holds just as well.
4. The French Braid: The Classic That Never Lets Hair Escape
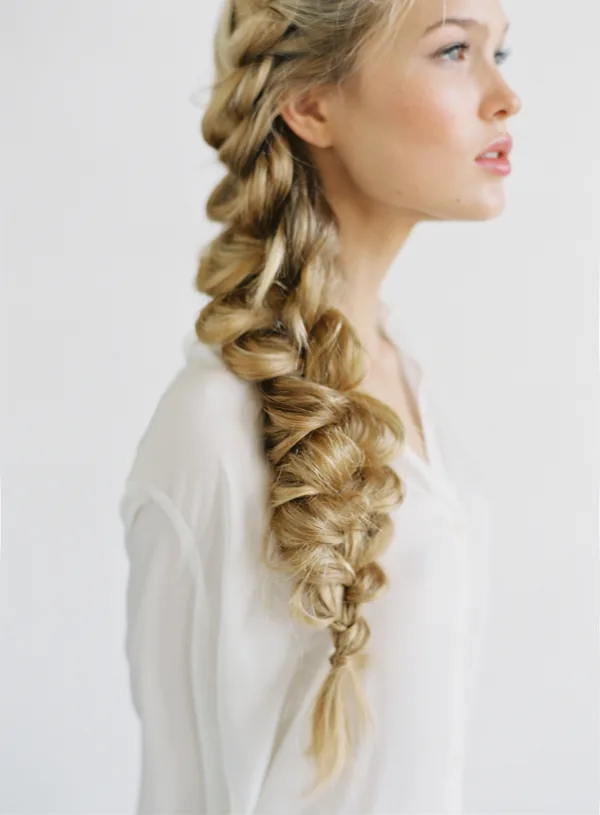
The French braid is the classic yoga hairstyle for a reason: it starts at the hairline, gathers every strand as it travels down the head, and finishes as a single neat plait that can be tucked under and pinned flat. Unlike a ponytail, nothing is left free; unlike a bun, the weight is spread along the whole head, so it never pulls or sags — and unlike a loose bun, it stays exactly where you put it when you turn upside down. It is the style yoga teachers reach for on long retreat days, and it works just as well in a one-hour class.
How to style it: start at the crown, add small sections as you braid down, and keep the tension even so the braid lies flat. What to avoid: leaving the tail long and loose — pin it up or coil it into a bun at the nape. Maintenance: a French braid rarely needs touching mid-class, which is exactly the point: your hands stay on the mat, not on your hair.
5. The Dutch Braid: The Flattest, Most Contained Braid
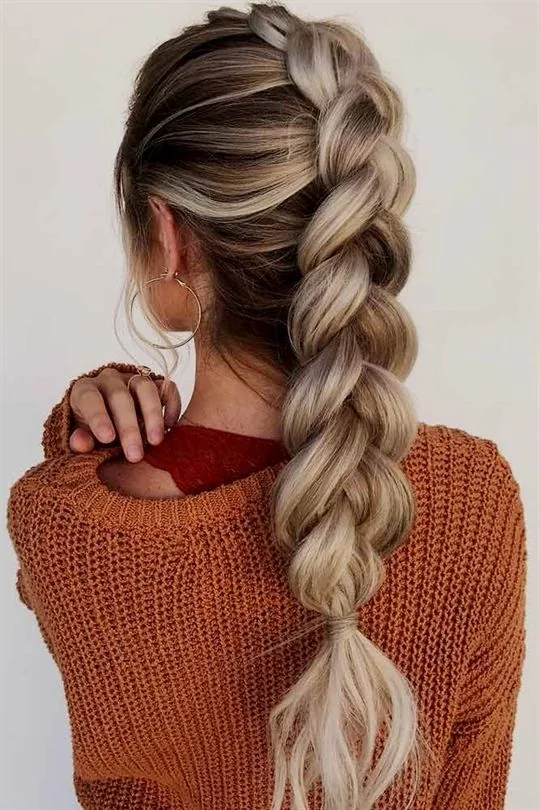
A Dutch braid — the reverse braid that sits on top of the hair — is one of the flattest and most contained styles you can wear on a mat, because it hugs the scalp from the hairline to the nape and leaves nothing loose at all. Start at the front hairline, cross the sections under rather than over, and keep the braid tight and close to the head as you work down. The tail can be tucked under and pinned, or coiled into a small bun, which means the finished style has no free ends whatsoever. It survives sweat, inversions and long hours better than almost any other style.
Who it suits: medium to long hair of any texture, and it is particularly good for layers, because the braid catches the shorter pieces that usually escape. Pros and cons: it is extremely secure and looks beautiful, but it takes practice and two hands in a mirror. Quick verdict: if you can Dutch braid, this is one of the best hairstyles for a yoga class you can choose.
6. The Fishtail Braid: Beautiful, Tight and Built to Last
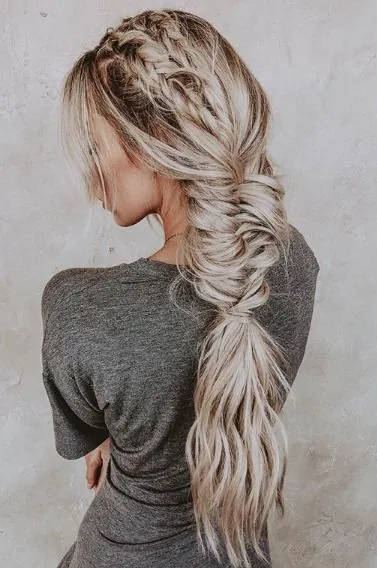
A fishtail braid looks delicate, but it is actually one of the tightest and most durable braids you can wear, because its fine, interlocking pattern locks the hair together strand by strand. That makes it a surprisingly practical style for a yoga class: it holds its shape through sweat and movement, it keeps layers contained, and the tail can be coiled into a bun or pinned up flat. It takes a little longer than a three-strand braid — five to ten minutes rather than two — so it suits a class you have planned for, not a last-minute dash out of the door.
Best for: long hair with layers, and anyone who wants a style that looks special in class photos. How to style it: split the hair into two sections, pull a small piece from the outside of one side to the inside of the other, and repeat, keeping the pieces small for a tight finish. Common mistake: making the pieces too big, which turns the fishtail into a loose braid that unravels — small sections are the whole secret.
7. Double French Braids: Total Control for Long or Layered Hair
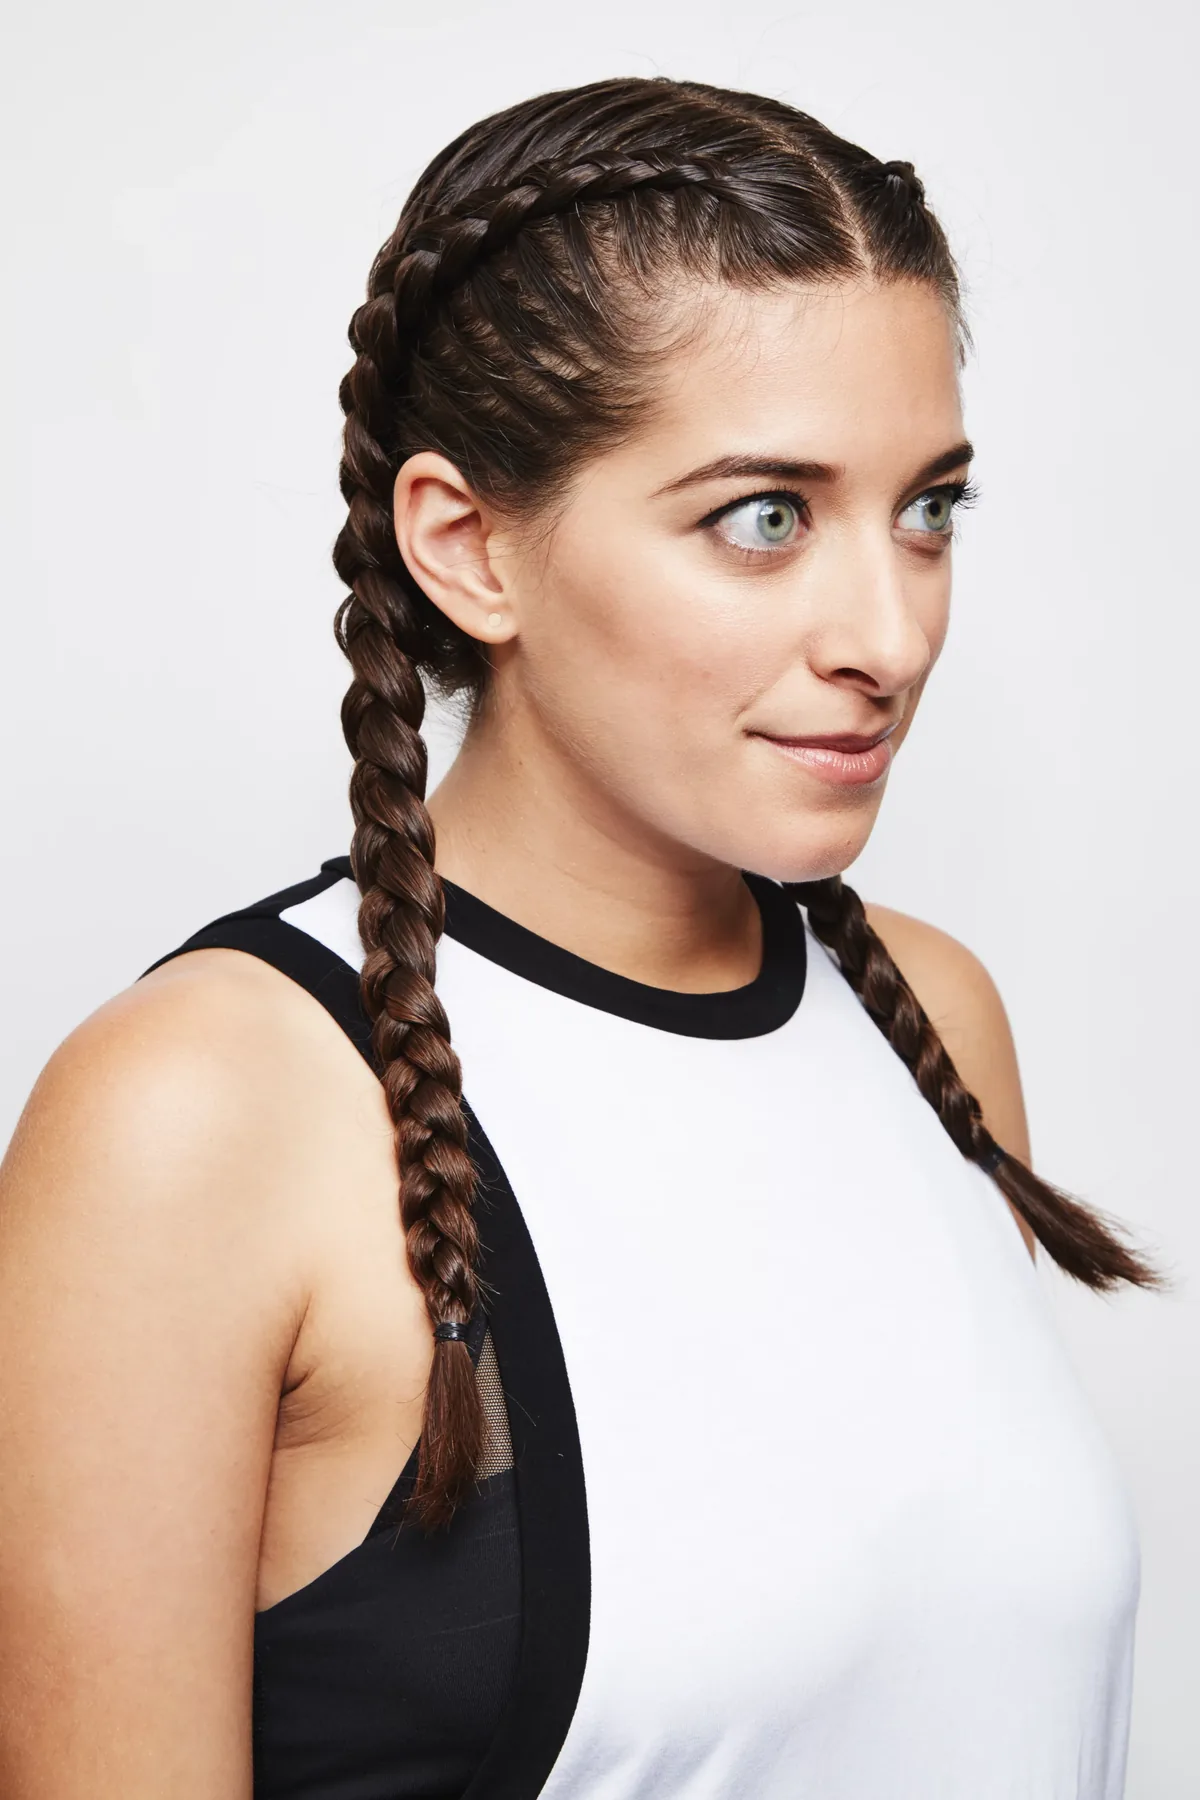
Double French braids — one on each side of the head — are the answer when a single braid cannot catch everything, which is usually the case with layered cuts, very thick hair or hair that is growing out. Each braid starts at the hairline and gathers its own half of the head, so no section is left unanchored, and both tails can be crossed and pinned at the nape for a finish with zero loose ends. They are the most contained style in this guide, and the one most likely to survive a long, hot, hands-on class completely unchanged — including a headstand.
Who it suits: long, thick or layered hair, and anyone who has ever found their hair in their face halfway through a flow. Pros and cons: maximum security and a youthful, sporty look, but they take ten minutes and a mirror. Quick verdict: if your hair defeats every other style, double braids will not — they are the nuclear option, and they work.
8. The Low Ponytail, Tucked: Simple, Fast and Surprisingly Safe
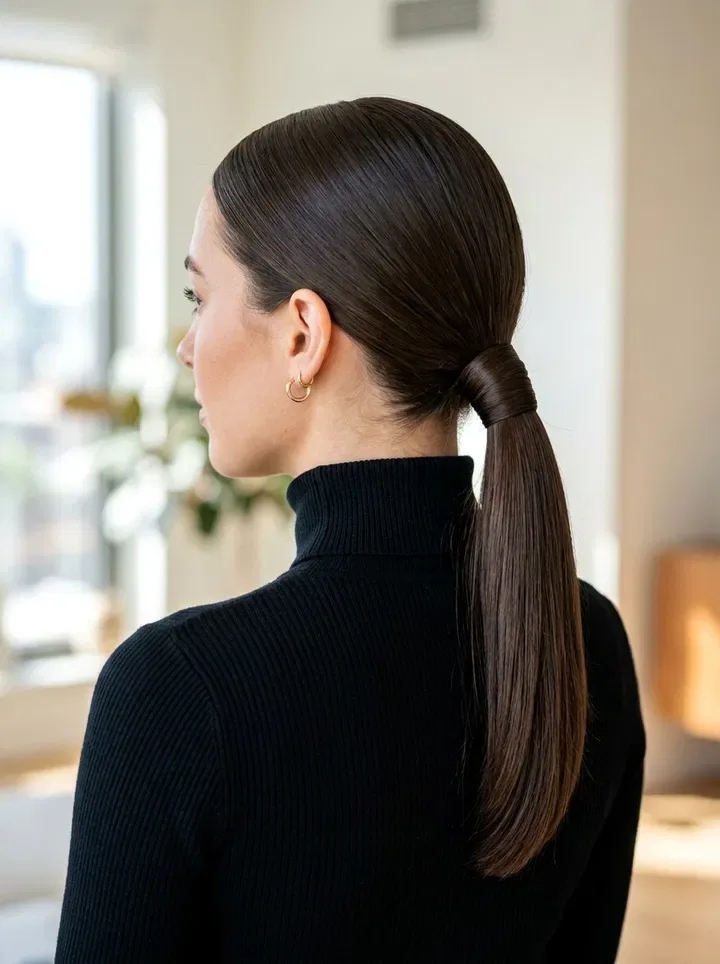
A low ponytail is the fastest hairstyle for a yoga class, and when it is done properly it is genuinely safe: gathered at the nape, tied firmly, and with the tail either tucked through the tie or pinned up so it cannot swing forward in a fold. The danger is the casual version — a loose ponytail that swings over your face every time you fold forward. Keep it low, keep it tight, and wrap a small section of hair around the elastic to hide it and add grip. For extra security, fold the tail up and pin it into a loop, which turns a ponytail into a tidy knot that cannot swing at all.
Pros and cons: it takes under a minute and works on almost any length, but a ponytail on its own is the least secure of the up styles — it needs a second anchor, like a pin or a loop, to be truly mat-safe. Maintenance: check the tie after the first few flows; elastic stretches with heat and sweat. Quick verdict: the low ponytail is the best last-minute option, and with the tail pinned up it is good enough for a full class.
9. The High Ponytail, Looped: A Ponytail That Cannot Swing
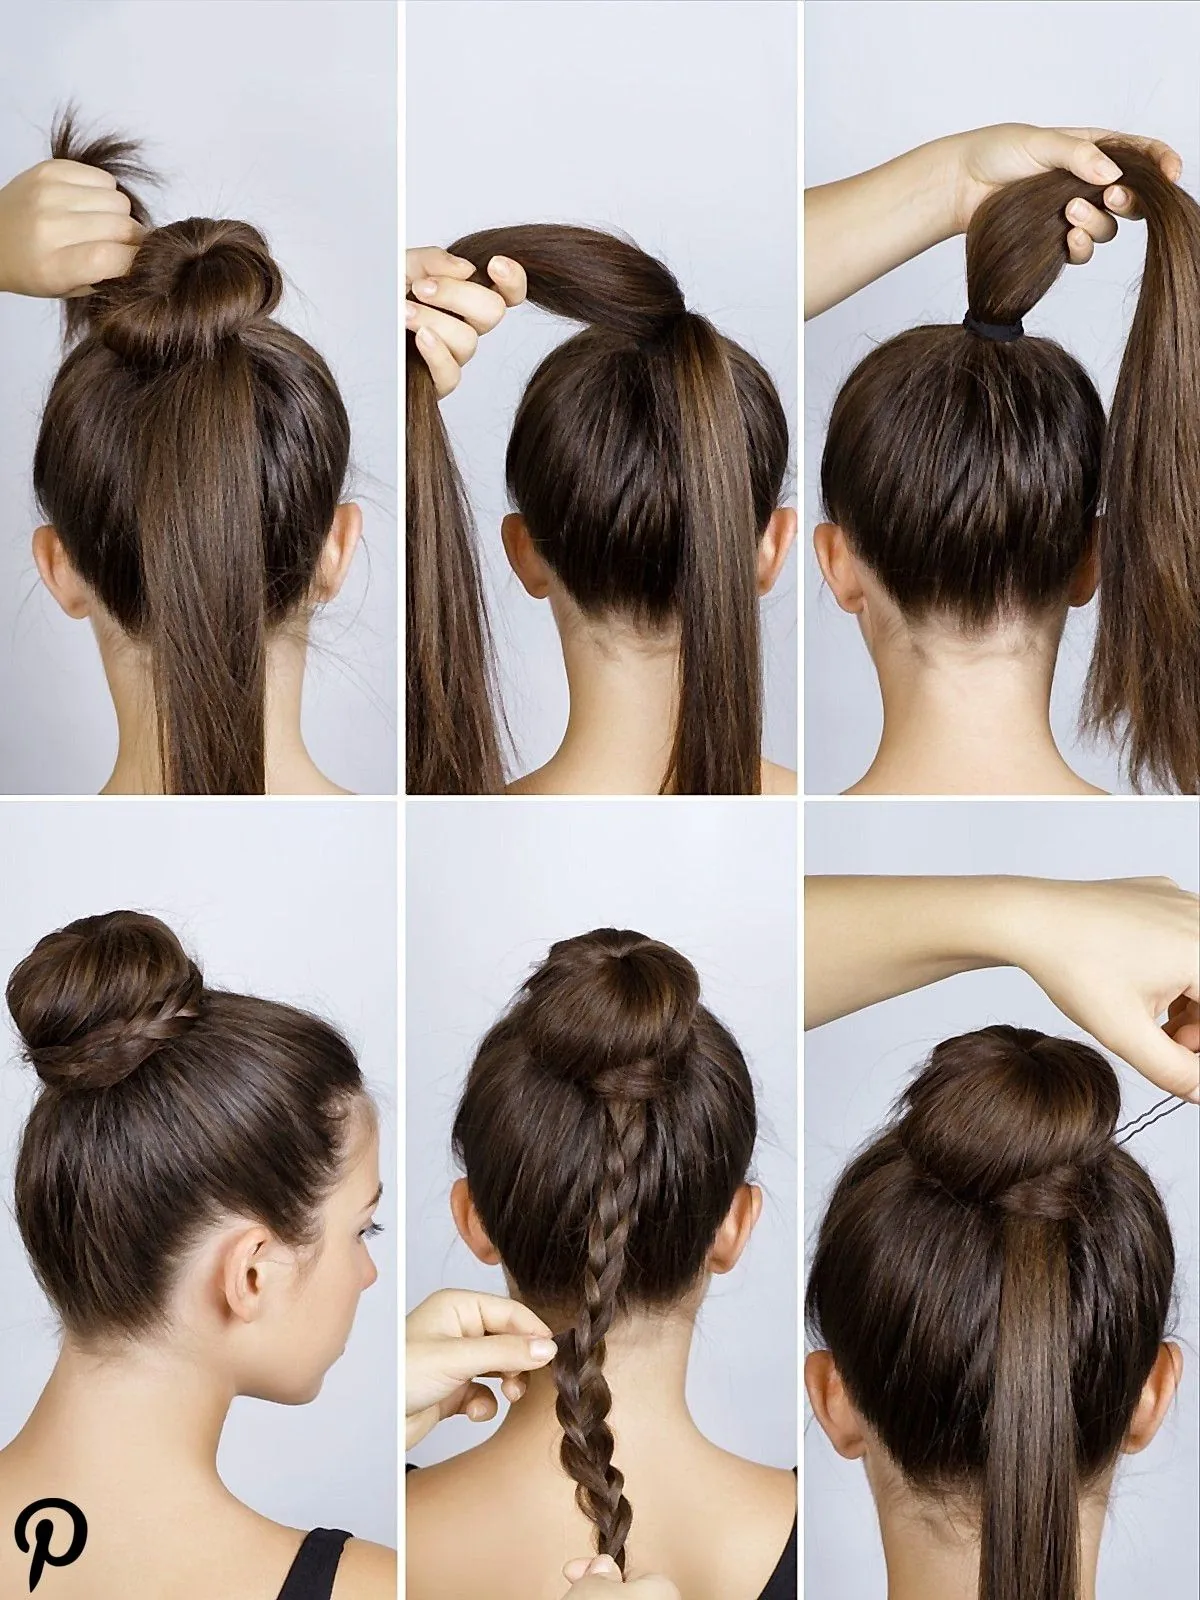
A high ponytail keeps hair off the neck and out of the way, and it is the go-to for shorter or more active classes — a fast vinyasa flow, a power yoga session, or a class where you are moving constantly. The fix that makes it mat-safe is simple: the tail must not be free to swing. On the last pass of the elastic, pull the tail only halfway through so it forms a loop, which keeps it compact and stops it flopping into your face in a forward fold. Without that fix, a high ponytail is the style most likely to land across your eyes in downward dog.
What to avoid: a high ponytail with loose, face-framing pieces, which fall forward over your face in every fold. How to style it: gather the hair high, tie it firmly, then loop the tail and pin the loop flat. Who it suits: medium to long hair with some natural grip; very smooth hair will need a second tie halfway down the tail to stop it sliding.
10. The Bubble Ponytail: Fun, Secure and Easy to Fix
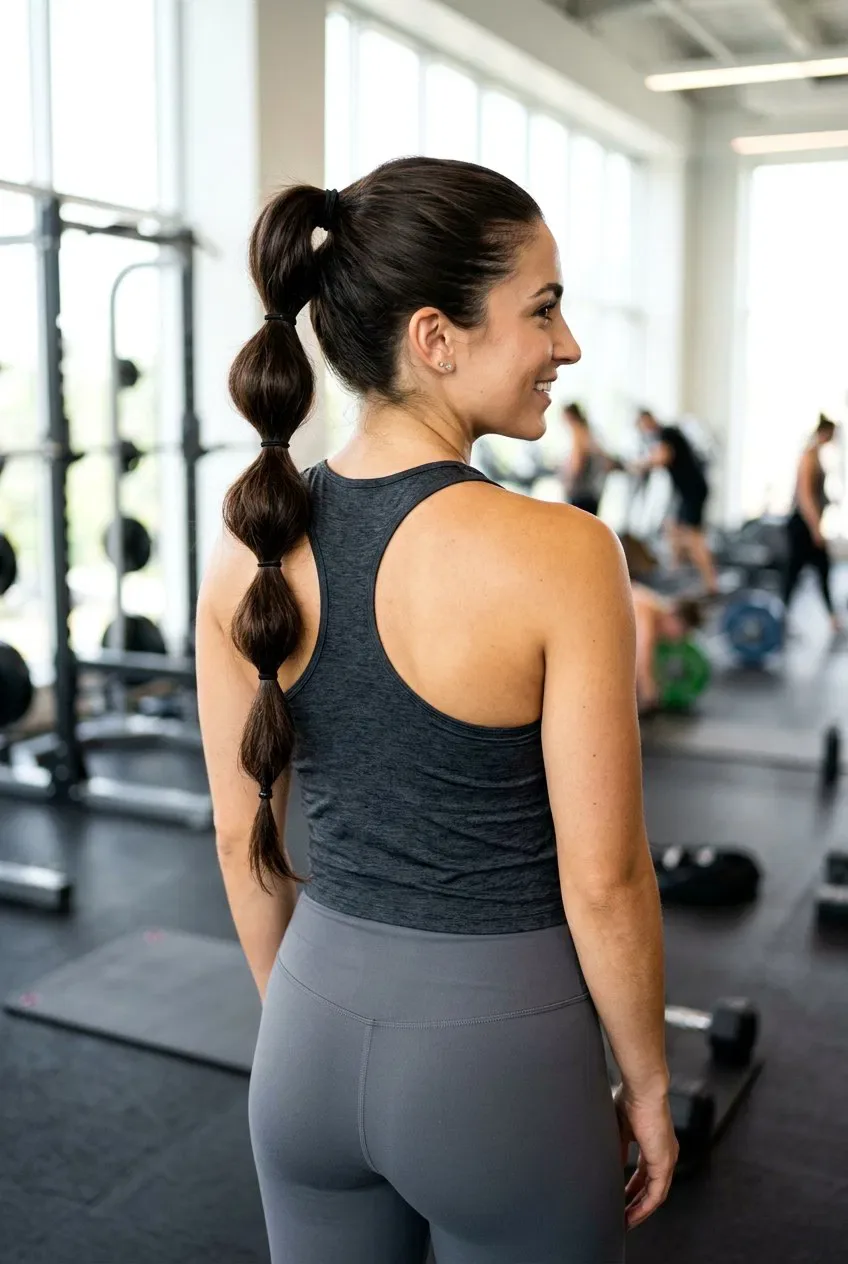
A bubble ponytail turns a plain ponytail into a series of neat, rounded sections, each held by its own elastic — and every extra elastic is an extra anchor point, which is why it works so well on the mat. The bubbles keep the tail compact and prevent it from swinging, and if one section loosens you can fix just that bubble instead of redoing the whole style. It is playful enough for a casual class or a yoga session with friends, and it holds up far better than a single ponytail over ninety minutes of folding and reaching.
How to style it: tie a low or mid ponytail, then add elastics every few inches down the tail, gently pulling each section out to form a bubble. What to avoid: placing the bubbles too high or too loose, which lets the tail swing. Maintenance: carry one spare elastic — if a bubble pops, it takes ten seconds to retie, and the rest of the style stays intact.
11. The Braided Ponytail: A Ponytail That Holds Through Inversions
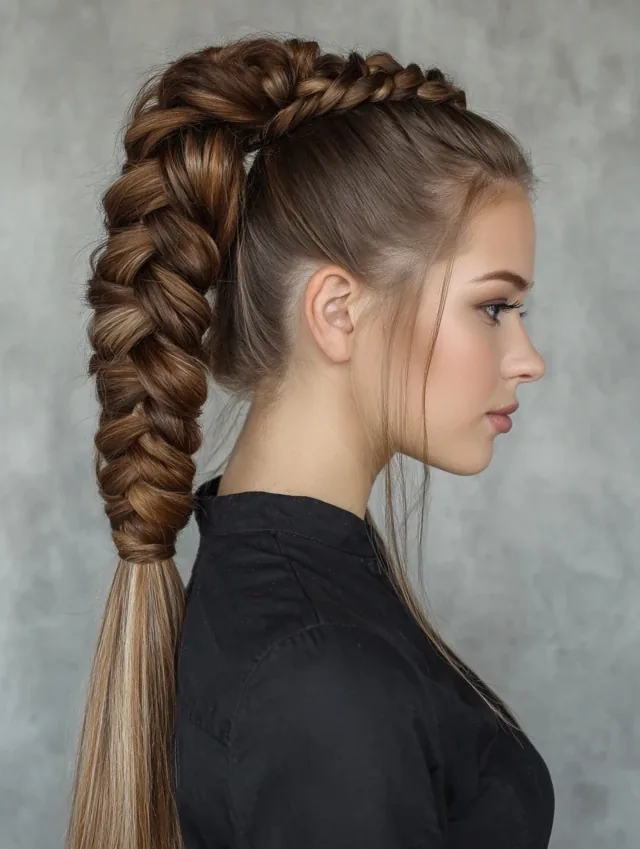
A braided ponytail takes the simplest style in the book and fixes its one weakness: the swinging tail. Tie a low ponytail, braid the tail, and secure the end with a small elastic — the braid makes the tail compact, heavy and far less likely to swing forward when you fold over. It is quick, it looks more finished than a plain ponytail, and it is one of the easiest styles to redo mid-class if it loosens. For extra security, pin the braided tail up against the back of the head so it cannot move at all, even upside down.
Best for: medium to long hair, and classes where you will be moving between standing poses and inversions. How to style it: tie low, braid tightly, and pin the tail up for the most secure version. Common mistake: braiding too loosely, which lets the tail swing anyway — a tight braid is the whole point of this style.
12. The Rope Braid: Two Strands, Maximum Hold

A rope braid uses just two strands twisted around each other, which makes it the fastest braid in this guide — about three minutes — and one of the tightest, because the twisting action locks the hair together as it goes. It works best on medium to long hair with a little texture, and it finishes as a compact, rope-like plait that can be coiled into a bun or pinned flat at the nape. It is a good choice when you are short on time but still want the security of a braid rather than the risk of a loose ponytail on the mat.
Best for: anyone who finds three-strand braiding fiddly, and hair that is thick enough to hold a twist. Pros and cons: very fast and very secure, but it can unravel if the ends are not tied firmly — use a strong elastic and a pin at the tip. Quick verdict: the rope braid is the best braid for beginners who need a mat-safe style in a hurry.
13. The Milkmaid Braid: A Crown That Locks Everything In
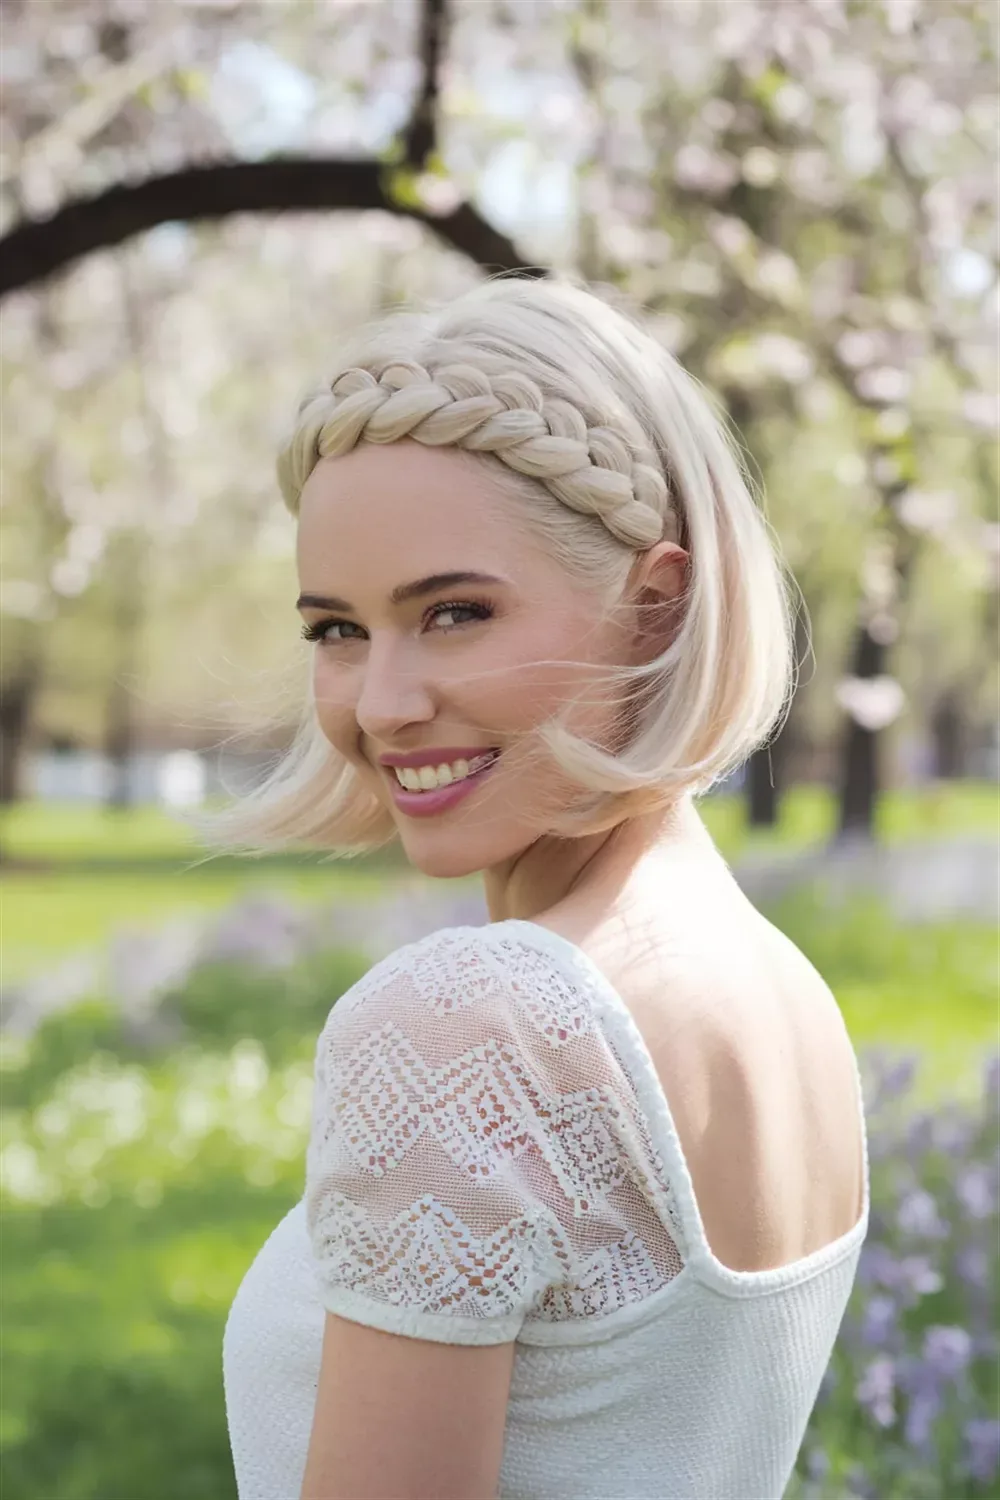
A milkmaid braid — two braids crossed over the top of the head and pinned like a crown — is one of the most secure hairstyles for a yoga class, because the hair is anchored all the way around the head and there is no tail at all. It keeps every strand off the face and neck, it looks beautiful in class photos, and it works with a headband over the top. It takes about ten minutes and a mirror, but it is worth it for a long class, a retreat day or any session where you will be upside down for a while.
Best for: long hair, and anyone who wants a style that simply cannot come undone. How to style it: make two low braids, cross them over the crown, and pin each one firmly at the opposite side. Who should avoid it: very short hair, which cannot reach across the head — a single crown braid or a pinned twist is the shorter-hair equivalent.
14. The Half-Up Top Knot: The Short-Hair Fix

When your hair is too short for a full updo, the half-up top knot is the fix: gather the top section — the hair from the crown forward — twist it into a small knot, and leave the rest down but clipped back. The top section is the part that falls into your face in a forward fold, so securing it solves most of the problem, and a couple of clips at the sides keep the rest out of the way. Add a headband and even a chin-length bob becomes completely mat-safe, with no pins fighting hair that is too short to hold them.
Best for: short to medium hair, bobs and growing-out cuts. How to style it: section the top third, twist it into a knot, pin it, then clip the sides back flat. What to avoid: leaving the sides loose — they will fall forward when you fold over, so clip them even if they feel fine standing upright.
15. The Claw Clip Twist: The Ten-Second Reset
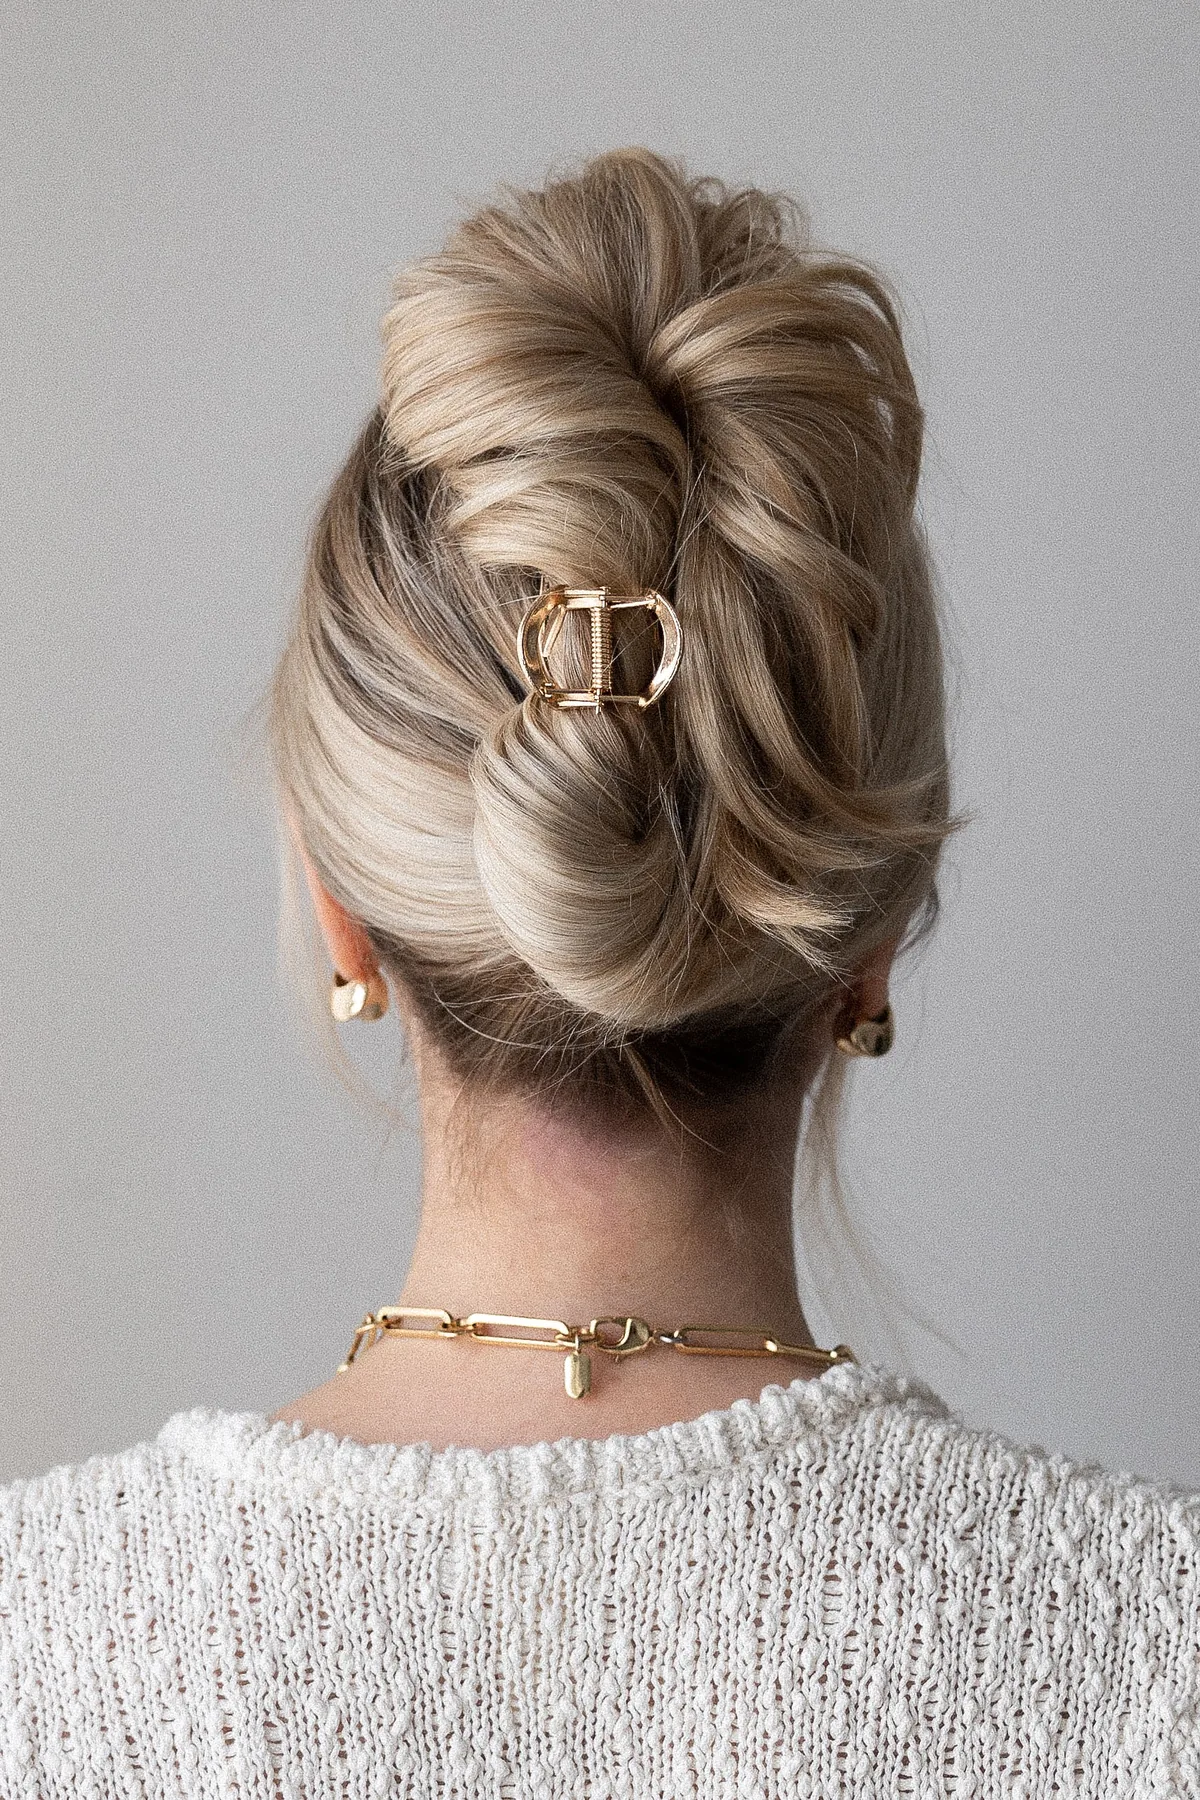
The claw clip twist is the ten-second classic that every yogi knows: gather the hair, twist it upward, and clamp it with a large claw clip. It is fast, it keeps the hair completely off the neck, and it is easy to redo if it loosens — but it only counts as mat-safe if the clip is strong enough and the twist is tucked in properly. Use a large, sturdy clip rather than a decorative one, twist the hair tightly, and tuck the ends under the clip so nothing pokes out. For a long class, add two pins at the base of the twist as insurance against the clip slipping.
Pros and cons: the quickest secure style in this guide and endlessly redoable, but a cheap clip can snap or slide, so quality matters — and a hard clip will dig into your scalp in savasana, so take it out for the final rest. Who it suits: medium to long hair; very thick hair needs an extra-large clip. Maintenance: carry a spare clip — if yours breaks mid-class, a ponytail and a headband will cover you until the break.
16. The Sleek Slicked-Back Low Bun: The Most Polished Finish

The sleek slicked-back low bun is the most polished hairstyle for a yoga class: the hair is brushed back with a little gel or serum, gathered low and coiled into a tight, smooth bun, with not a single flyaway anywhere. It is the style for a filmed session, a yoga photoshoot or any occasion where the camera will be close — and it is also one of the most secure, because the product locks the hairline down and the bun sits flat and low, comfortable against the mat. The trade-off is that it needs product and a little more effort than a plain bun, and it can feel severe if you prefer a softer look.
Best for: medium to long hair, and occasions where you want to look completely put-together. How to style it: apply a small amount of gel, brush everything back smoothly, gather low, coil and pin flat, then smooth the hairline with a toothbrush and a little more product. Who should avoid it: anyone who dislikes product in their hair — a headband and a plain low bun give a similar clean look without the gel.
17. The Secured Messy Bun: Casual, Comfortable and Mat-Safe
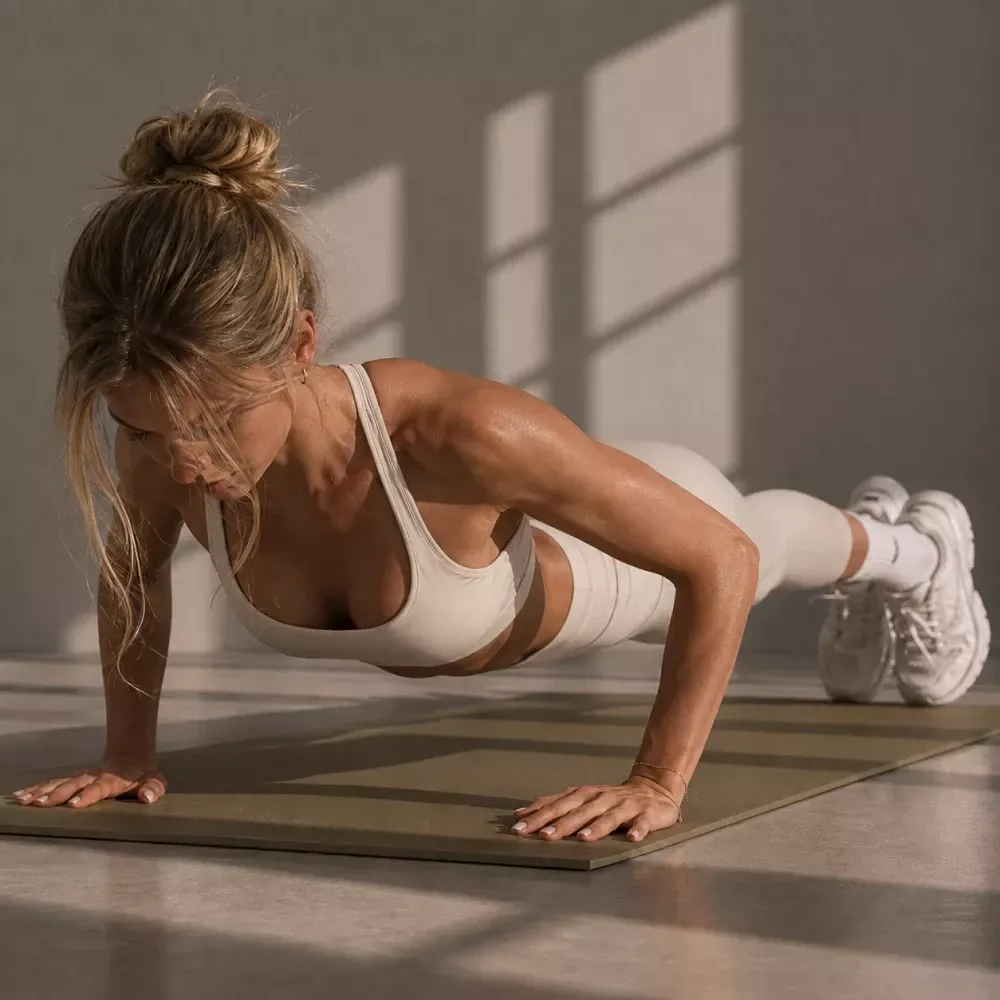
A messy bun is the style most people actually wear to a yoga class, and it can be perfectly safe — provided it is secured rather than just loosely twisted. The difference is in the anchoring: a proper secured messy bun uses a strong elastic plus at least four pins, has the nape hairs tucked in, and has no free pieces framing the face. The relaxed, textured look stays, but nothing can fall out. It is the most comfortable style in this guide for a long, gentle class, and it is the easiest to redo quickly if it does loosen.
Who it suits: medium to long hair with some natural texture; very straight hair will need texturising spray to stop it sliding out. Common mistake: pulling out face-framing pieces for a softer look — those are the first strands to fall into your eyes in a fold. Maintenance: keep the pins in and the pieces tucked; a messy bun that stays messy in the right places and tidy at the edges is the goal.
18. The Side Braid, Pinned Up: Safe, Not Swinging
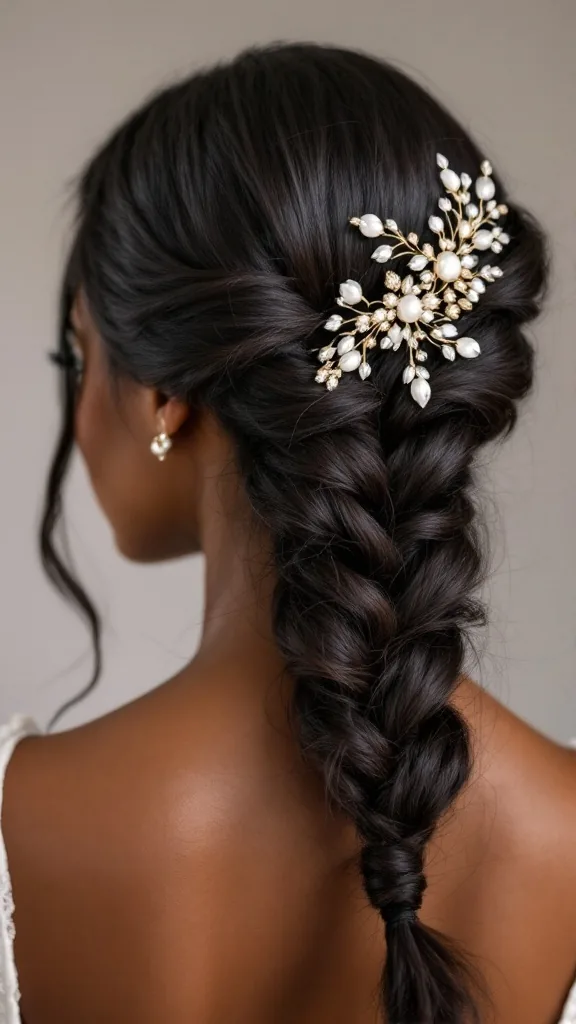
A side braid looks lovely, but a braid that hangs over one shoulder is a hazard on the mat — it swings forward every time you fold over. The fix is to braid to the side and then tuck the tail up and pin it flat at the back of the head, which keeps the pretty, asymmetrical look from the front while removing the danger from the side. The result is a style that photographs beautifully and is completely safe, because nothing hangs anywhere near your face. It is a good choice for a social yoga class or a sunrise session you want to remember.
What to avoid: leaving the tail free, however tempting — a free side braid will find its way across your face in downward dog. How to style it: braid over one shoulder, then fold the tail up behind the ear and pin it flat with two crossed pins. Maintenance: check the pins after the first few flows; the weight of the braid pulls on them more than a centre braid does.
19. The Twisted Low Ponytail: A Two-Minute Upgrade
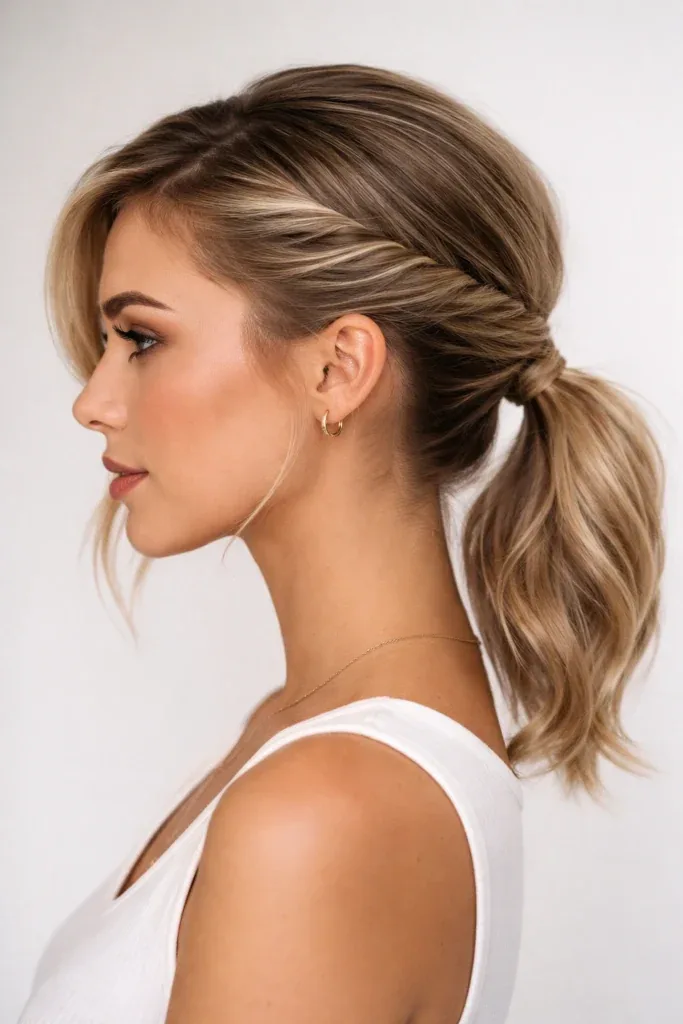
The twisted low ponytail is a small twist on a familiar style that makes a real difference: instead of tying the hair straight back, you twist two sections from the sides and join them at the nape, which pulls the hairline smooth and anchors the style at two points instead of one. It takes about two minutes, it looks more polished than a plain ponytail, and it holds better because the twists distribute the tension across the head. Add a pin at each twist and the style will survive a full class without a touch.
Pros and cons: fast, flattering and more secure than a plain ponytail, but it needs enough length to twist — very short hair cannot manage it. Who it suits: medium to long hair, especially hair that slips out of a single tie. Quick verdict: if you have two minutes and want something neater than a ponytail, this is the upgrade to choose.
20. The Gibson Tuck: Vintage, Elegant and Completely Contained
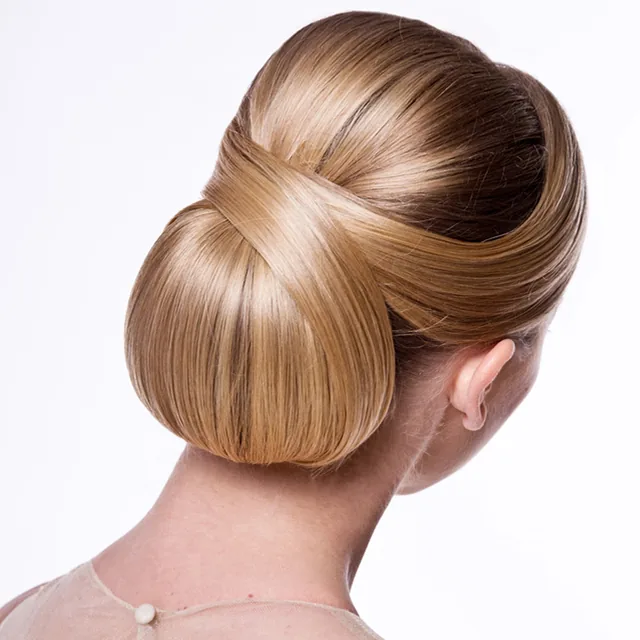
The Gibson tuck is a vintage style that is almost made for the mat: the hair is gathered low, rolled upward and tucked into a pocket at the nape, so there are no loose ends, no tail and nothing hanging anywhere. It looks soft and elegant rather than severe, which makes it a lovely choice for a slow, restorative class or a yoga retreat. It works best on medium to long hair, and it needs a few pins along the roll to hold it — but once it is tucked, it stays tucked, because the weight of the hair sits inside the roll rather than pulling on it.
Best for: medium to long hair, and anyone who wants a vintage look that is genuinely practical. How to style it: gather the hair low, twist it upward, tuck the ends into the roll and pin along the fold. Who should avoid it: very thick hair, which can be too bulky to tuck neatly — a braided bun is the better option there.
21. The Sock Bun: Perfectly Round, Perfectly Secure
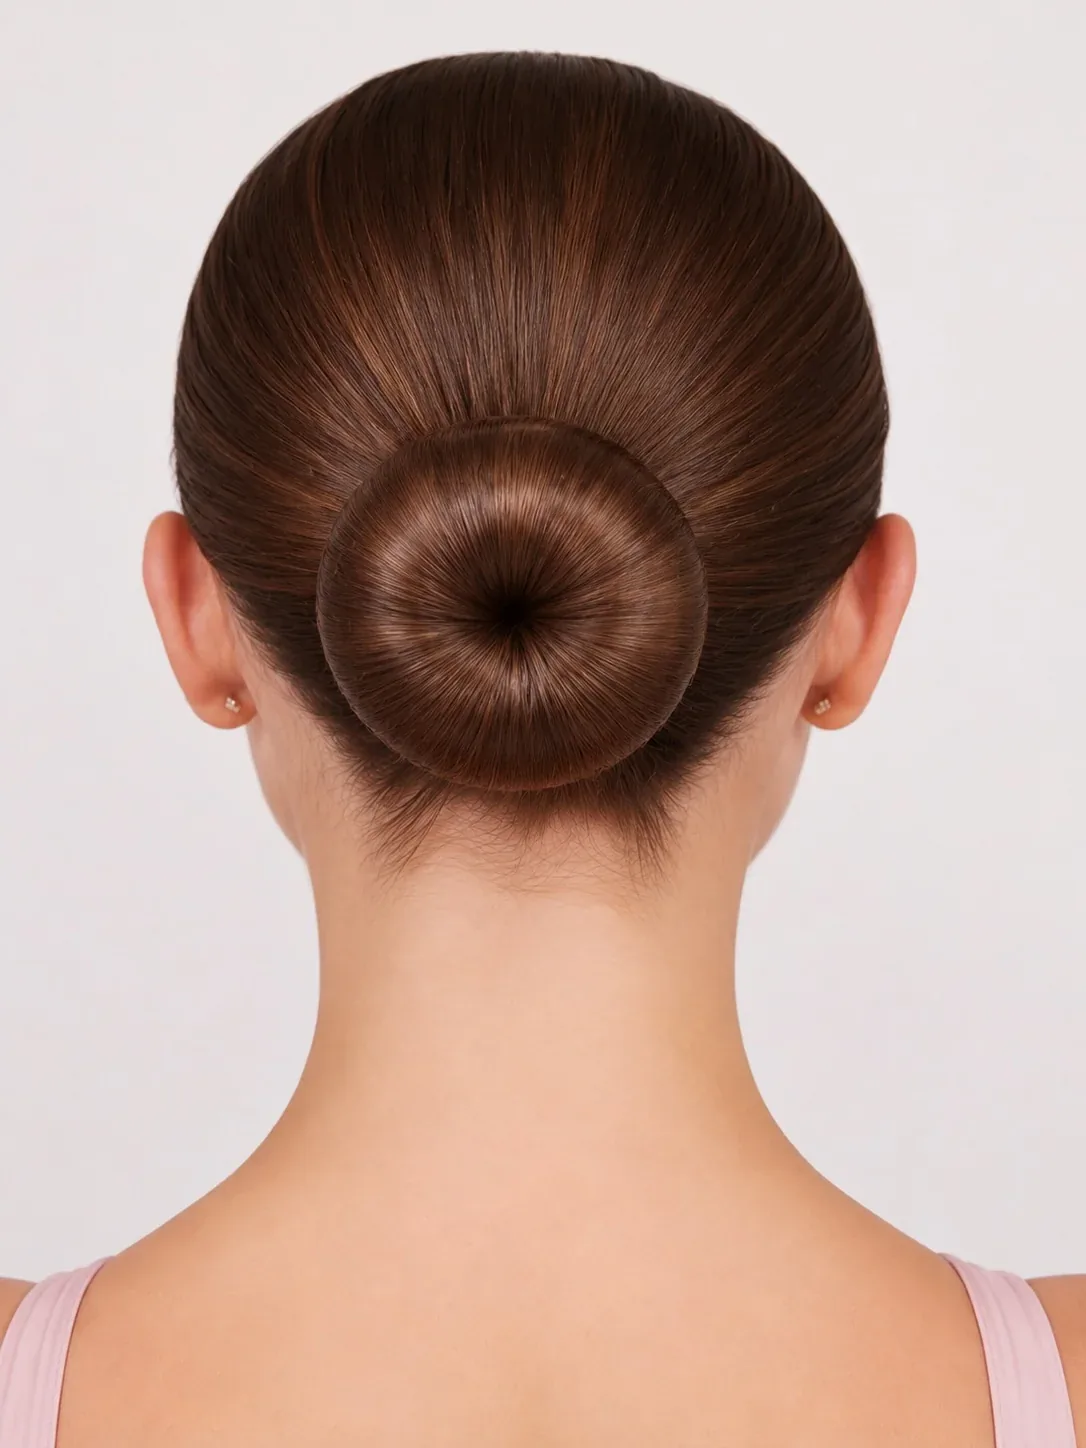
A sock bun — made with a hair donut or a rolled sock — gives you a perfectly round, even bun that sits flat against the head and holds its shape for hours, which is why it is a favourite for long classes and yoga retreats. Thread the ponytail through the donut, spread the hair evenly over it, tuck the ends underneath and pin the whole thing flat. The donut fills out the bun and gives the pins something solid to grip, so the style is more secure than a bun made from hair alone, especially on fine or thin hair.
Who it suits: fine, thin or medium hair that needs volume, and anyone who wants a neat, symmetrical bun. What to avoid: a donut that is too big for your hair, which leaves gaps and slips — match the donut to your hair thickness. Cost and time: a hair donut costs very little, and the style takes about five minutes once you have done it once.
22. The Scarf-Wrapped Bun: Style, Grip and Extra Coverage
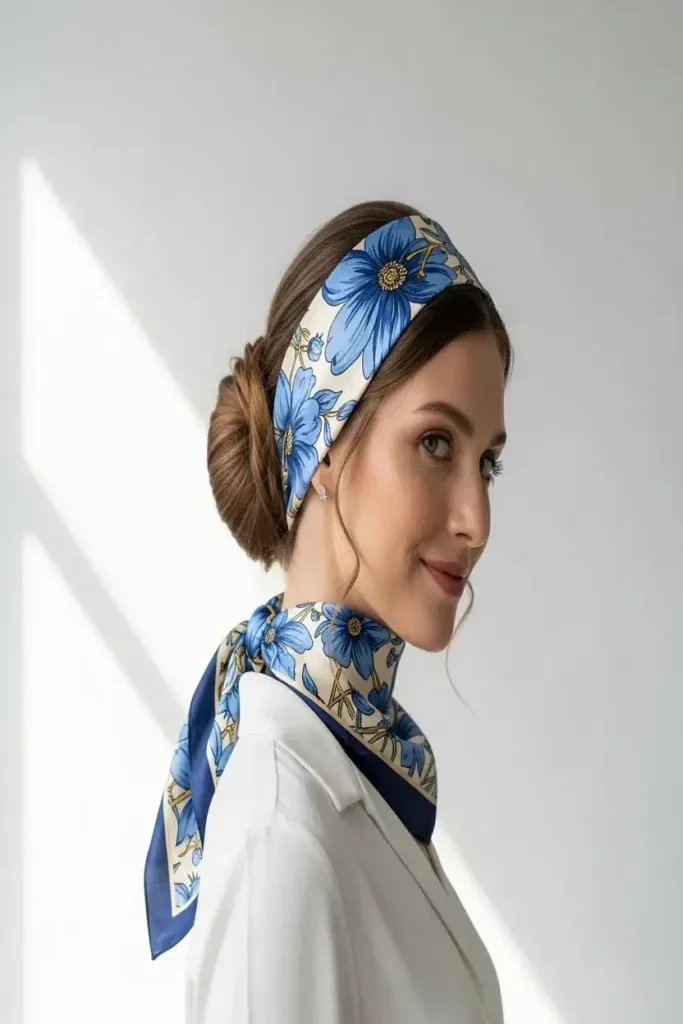
Wrapping a light cotton scarf around a low bun does three useful things at once: it adds a second layer of hold, it covers the hairline and nape where wisps escape, and it looks wonderful. Choose a lightweight scarf, fold it into a band, wrap it around the bun and tie it at the nape or the top, tucking the ends in so nothing dangles. The scarf absorbs sweat, protects the style from slipping, and catches any strand that does work loose — which makes it one of the most practical as well as the prettiest options in this guide.
Pros and cons: extra security, extra style and sweat control, but a scarf needs retying if it slips, and a heavy fabric can feel warm in a heated room. What to avoid: a long, flowing scarf tail near your face in a fold — always tuck the ends in. Cost and time: a scarf costs little, takes a minute to wrap, and turns a plain bun into a finished look.
23. The Silk Scarf Head Wrap: Elegant Coverage for Any Hair Length
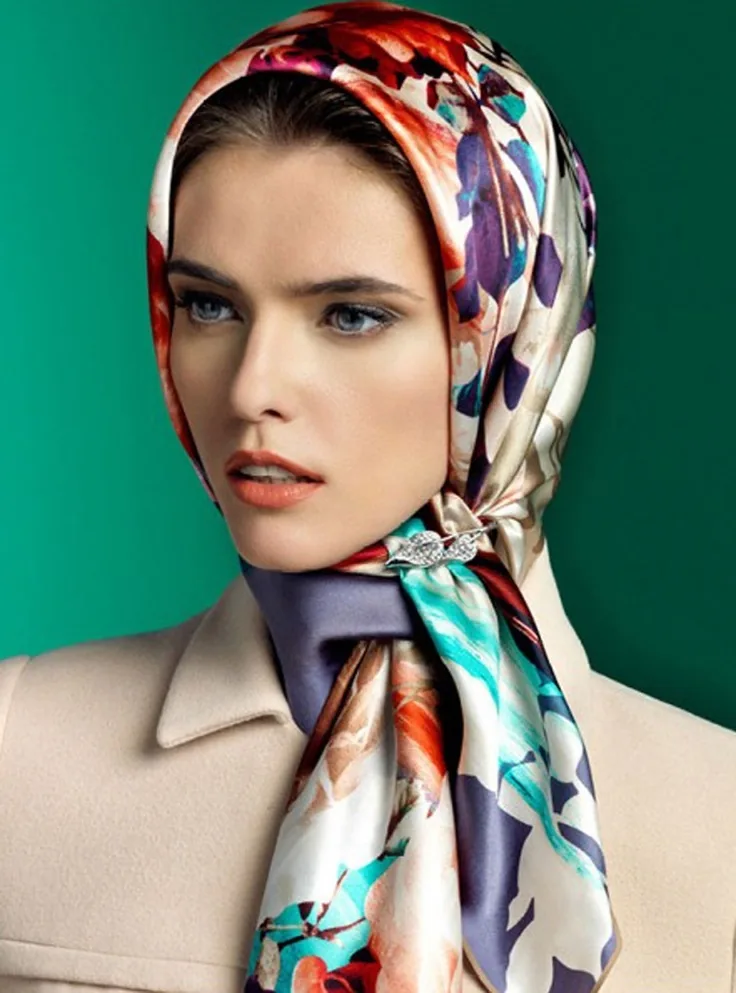
A silk scarf head wrap is the most elegant way to contain hair in a yoga class, and it works at any length — including short hair that cannot be tied back at all. Wrap the scarf over the crown, cross it at the nape, bring the ends forward and tie them neatly on top, tucking every loose end away. The silk is smooth against the hair, so it does not cause frizz the way cotton can, and it keeps the hairline, the nape and the crown all covered at once. It is the best option for anyone whose hair is too short for a bun but too long to leave loose.
Who it suits: short, medium and long hair alike, and anyone who wants a polished look without pins. What to avoid: a slippery silk scarf that slides — anchor it with two flat clips at the sides. Cost and time: one good scarf, two minutes to wrap, and no pins, ties or products needed at all.
24. The Wide Headband and Low Bun: Sweat Control Built In
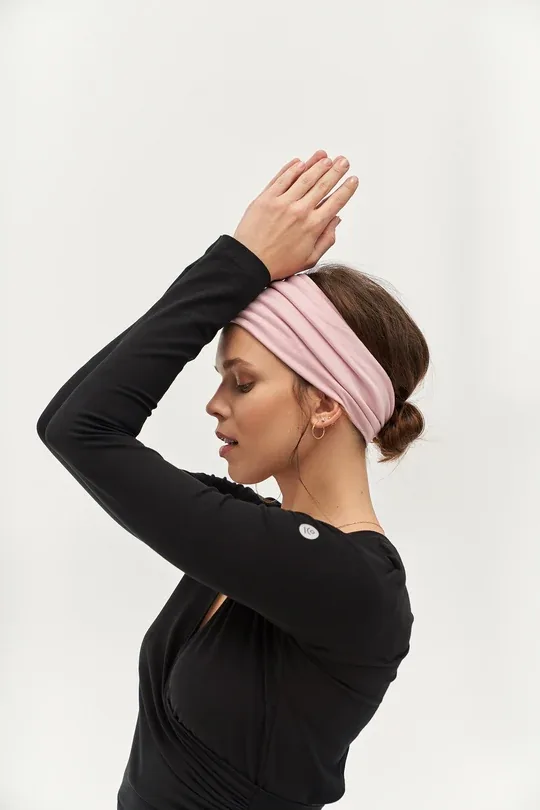
A wide fabric headband over a low bun is the most practical combination in this guide for anyone who sweats a lot: the bun does the containing, and the headband does the rest — it keeps sweat out of your eyes, holds back the fringe and the flyaways, and takes pressure off the pins. Choose a wide, non-slip fabric band rather than a narrow plastic one, which slides on a sweaty forehead and digs in during savasana. Push it back from the hairline, tie the bun low, and you have a style that handles a hot, fast class with no fuss at all.
Best for: anyone with a fringe, layers or a sweaty forehead, and hot yoga in particular. Pros and cons: excellent sweat control and no pins needed at the front, but it covers the hairline completely, which changes the look. Maintenance: carry a spare headband; a clean, dry one at the break feels much better than a damp one after an hour of flow.
25. The Pixie With a Headband: Short Hair, Zero Fuss
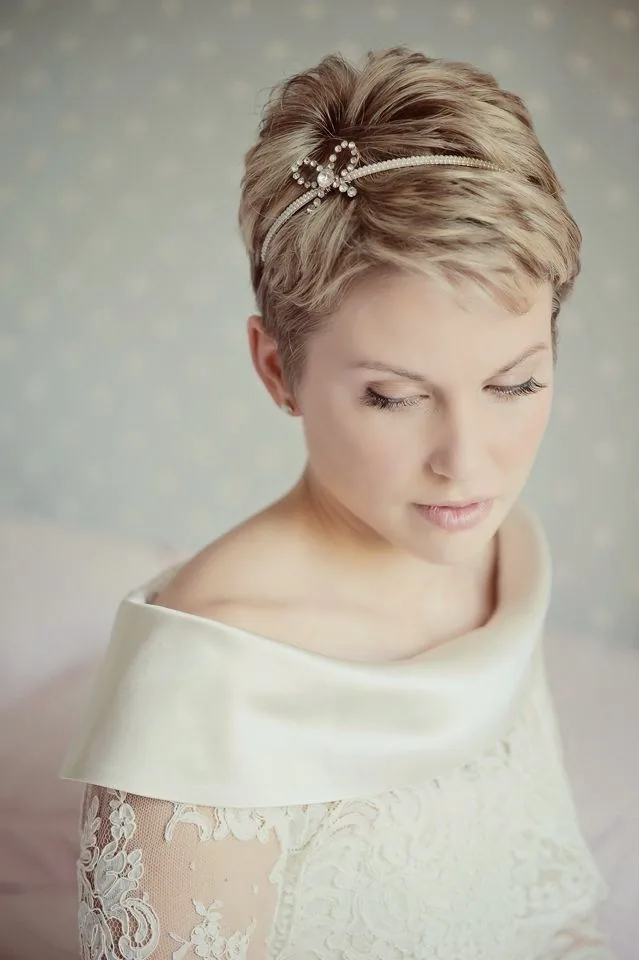
A pixie cut is one of the easiest lengths for a yoga class, because there is so little hair to contain — but the fringe and the sides still need managing, and that is what a headband is for. A wide, non-slip headband pushed back from the hairline keeps the fringe out of your eyes and your face clear, and it takes about five seconds to put on. Choose a fabric band that grips rather than a smooth plastic one, which slides, and keep a spare in your bag in case the first one gets damp with sweat.
Who it suits: pixie cuts and very short hair of any texture. Pros and cons: the fastest option in this guide and completely comfortable on the mat, but it only works because the hair is short — a headband alone cannot contain longer hair. Quick verdict: if you have a pixie, a good headband is all you need, and it is the one style here that needs no pins at all.
26. The Curly Pineapple Updo: Working With Curls, Not Against Them

Curly hair has its own rules on the mat: fighting the curl pattern with a tight, smooth style usually fails, because the curls spring free as soon as sweat and heat hit them. The pineapple updo works with the curls instead — gather them loosely on top of the head, tie them gently so the curls fall forward like a pineapple top, and pin the sides back so nothing hangs near your face. The curls stay contained at the crown, far above the mat, and the style actually looks better as the class goes on, because the movement adds volume rather than destroying the shape.
Best for: curly and coily hair of any length past the shoulders. How to style it: flip the head forward, gather the curls loosely at the crown, tie with a soft scrunchie, and pin the sides flat. Common mistake: tying it too tightly, which flattens the curls and pulls at the scalp — a loose, high gather is both more comfortable and more secure for curls.
27. The Short Bob With Clips: Small Pins, Big Difference
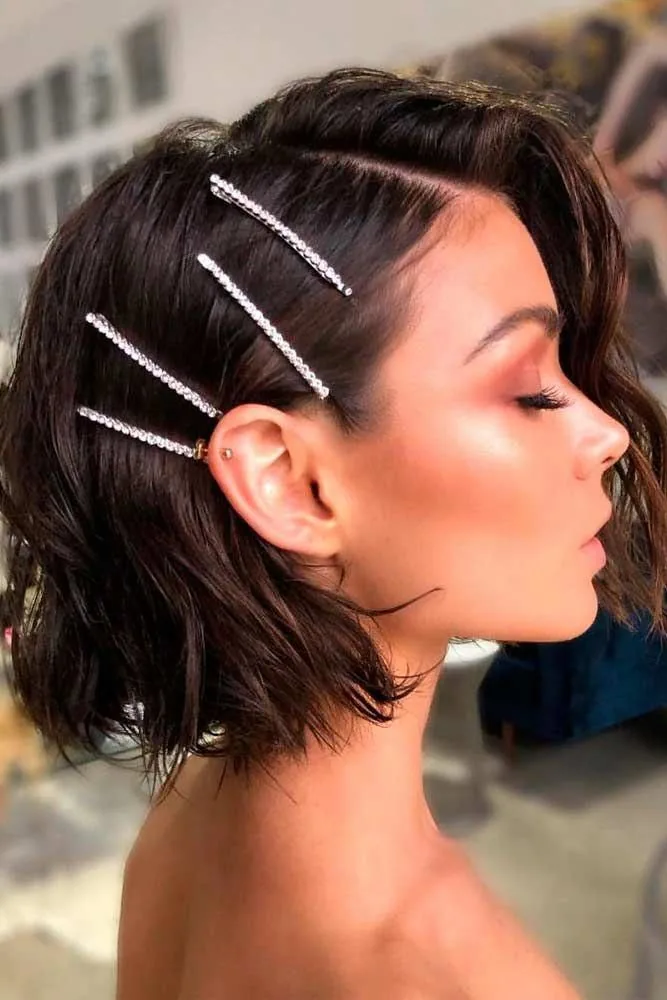
A chin-length bob is too short to tie and too long to ignore: the sides fall forward in every fold and the fringe lands in your eyes in downward dog. The fix is not a tie at all — it is a set of flat clips. Pin the sides back flat with two crossed bobby pins on each side, clip the fringe to one side or pin it straight back, and add a headband if you want a second layer of hold. The whole thing takes a minute, uses no elastic, and leaves nothing that can pull or swing.
Who it suits: bobs, lobs and growing-out cuts of any texture. Pros and cons: fast, comfortable and completely flat on the mat, but it depends on the clips staying put — use flat, non-slip pins and carry spares. Quick verdict: for a bob, four good clips beat a ponytail you cannot make, and they take less time than any bun.
28. The French Twist: Elegant, Secure and Photo-Ready
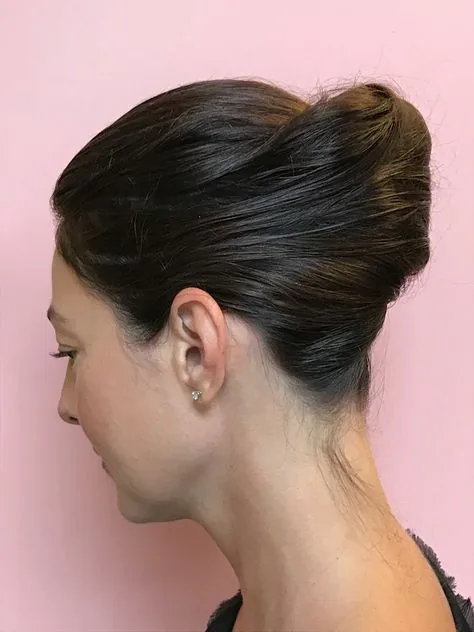
The French twist is the most elegant of the yoga-class hairstyles, and it is also one of the most secure: the hair is swept up, folded inward and pinned vertically along the back of the head, so there are no loose ends anywhere and the whole style lies flat against the skull. It looks at home in a slow, graceful class, a yoga retreat or a sunrise session on a rooftop, and it photographs beautifully from every angle. It takes a little practice — a French twist comb or a few strong pins help enormously — but once you have the technique, it holds for hours without a touch, even upside down.
Best for: medium to long hair, and anyone who wants to look polished in class photos. How to style it: brush the hair to one side, twist it upward, tuck the ends in and pin along the fold, then smooth the hairline with a little serum. Who should avoid it: very fine, slippery hair without product, which can slide out of the twist — add texturising spray first, or choose a braided bun instead.
29. The Low Chignon: The Polished Choice for Slow Classes
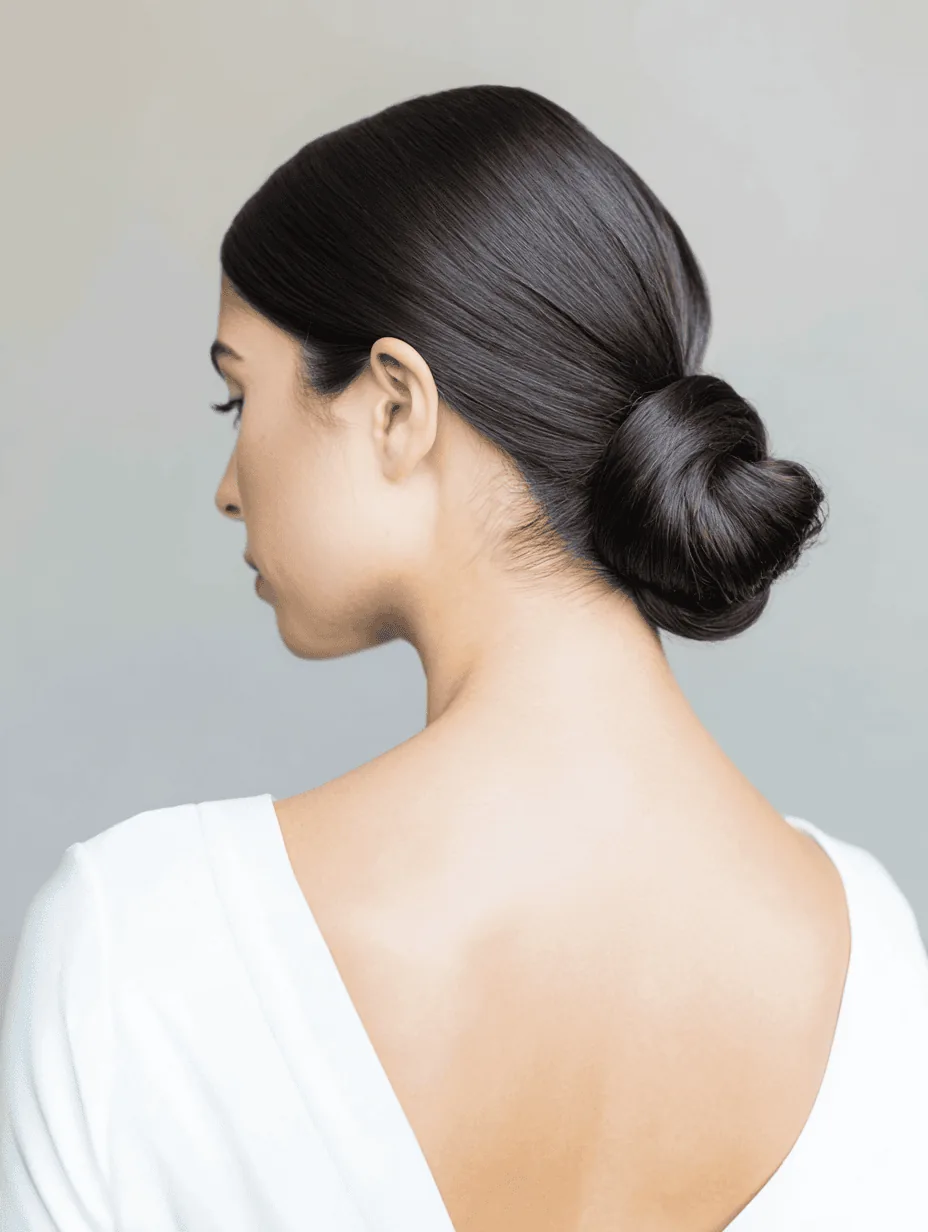
A low chignon is the polished cousin of the low bun: the hair is gathered at the nape, twisted into a soft roll and pinned flat, with a smooth, elegant finish that suits a slow, restorative class, a yin session or a yoga retreat. It sits low and close to the head, so it is every bit as safe as a bun and just as comfortable against the mat, but it looks deliberate and dressed-up rather than practical. A few pins along the roll and a light mist of hairspray are all it needs to hold, and it works beautifully with a wide headband over the top for extra coverage.
Best for: medium to long hair, and occasions where the class ends with a group photo or a long savasana. How to style it: gather the hair low, twist it into a roll, tuck the ends underneath and pin along the fold. Who should avoid it: very short hair, which does not have enough length to form the roll — try a pinned twist or a scarf wrap instead.
30. The Bubble Braid: Playful, Tight and Surprisingly Secure

A bubble braid takes the bubble ponytail one step further: instead of elastics down a tail, you build a braid of puffs, each section tied off and gently pulled out to form a bubble, running from the crown to the nape. Every elastic is an anchor point, so the style is far more secure than a plain braid and far more playful to look at. It holds through folds, twists and inversions because the bubbles are compact and the weight is spread evenly, and if one bubble loosens you can fix just that section without redoing the whole braid.
How to style it: tie a high or mid ponytail, add elastics every few inches down the tail, and pull each section out gently to form a bubble. What to avoid: pulling the bubbles out too far, which loosens the whole braid. Maintenance: carry a spare elastic; a bubble that pops mid-class takes ten seconds to retie.
31. The Braided Crown With Pins: A Halo That Holds All Day
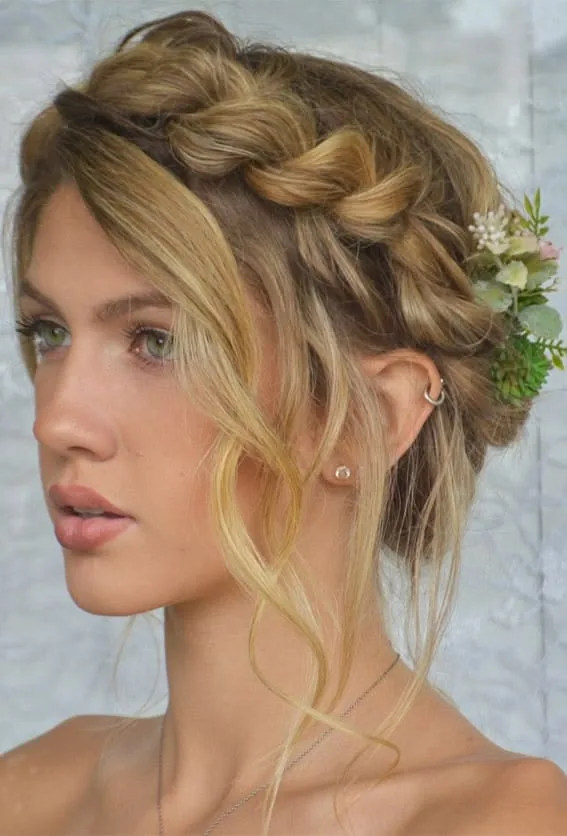
A braided crown — a single braid wrapped around the head and pinned like a halo — keeps every strand off the face and neck with no tail and no loose ends, which makes it one of the most secure styles in this guide. It is also one of the prettiest, and it photographs beautifully, which is why it suits a special class, a retreat day or a yoga experience you want to remember. The key is pinning: use enough pins, cross them over each other, and place them at regular intervals around the crown so the braid cannot shift.
Who it suits: long hair with enough length to wrap around the head, and anyone who wants a style that cannot come undone. Pros and cons: maximum security and a beautiful finish, but it takes practice and ten minutes in front of a mirror. Common mistake: using too few pins — a crown braid needs at least six, spaced evenly, to stay put through a long class.
32. The Twisted Crown: A Softer Halo for Medium Hair
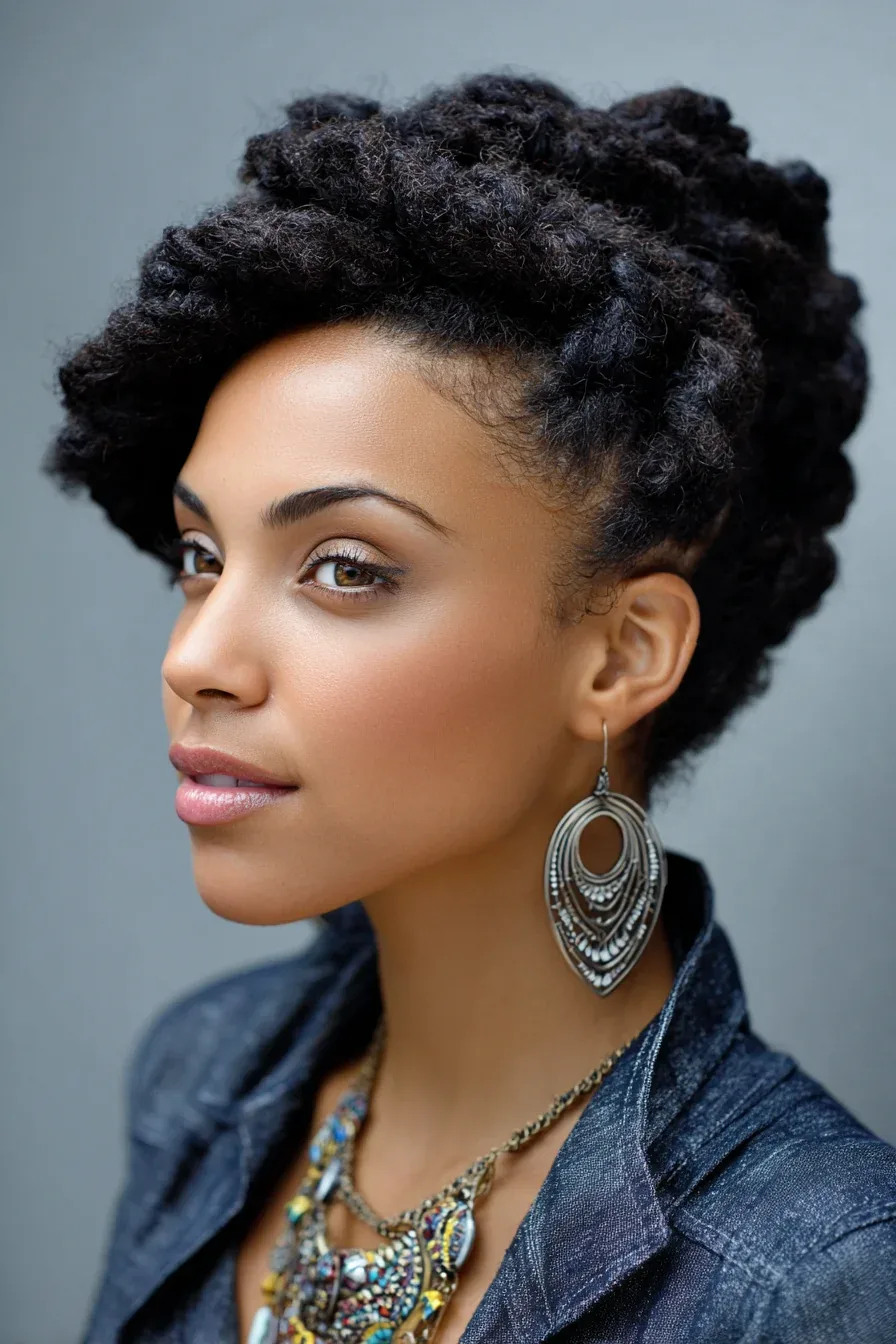
The twisted crown is the softer cousin of the braided crown: instead of braiding, you twist two sections of hair from each side of the head, cross them at the back and pin them into a halo shape. It is faster than a crown braid — about five minutes — and it works on medium hair that is too short to wrap a full braid around the head. The twists lie flat against the skull, so the style is comfortable on the mat, and it keeps the fringe and the sides pinned back, which is the part that usually fails first.
Best for: medium-length hair, and anyone who wants a crown effect without the braiding skill. How to style it: twist a section from each temple toward the back, cross them, and pin the ends flat at the nape. Who should avoid it: very slippery hair without texture — add dry shampoo first so the twists grip.
33. Mini Twists, Pinned Up: The Protective Style That Stays Put
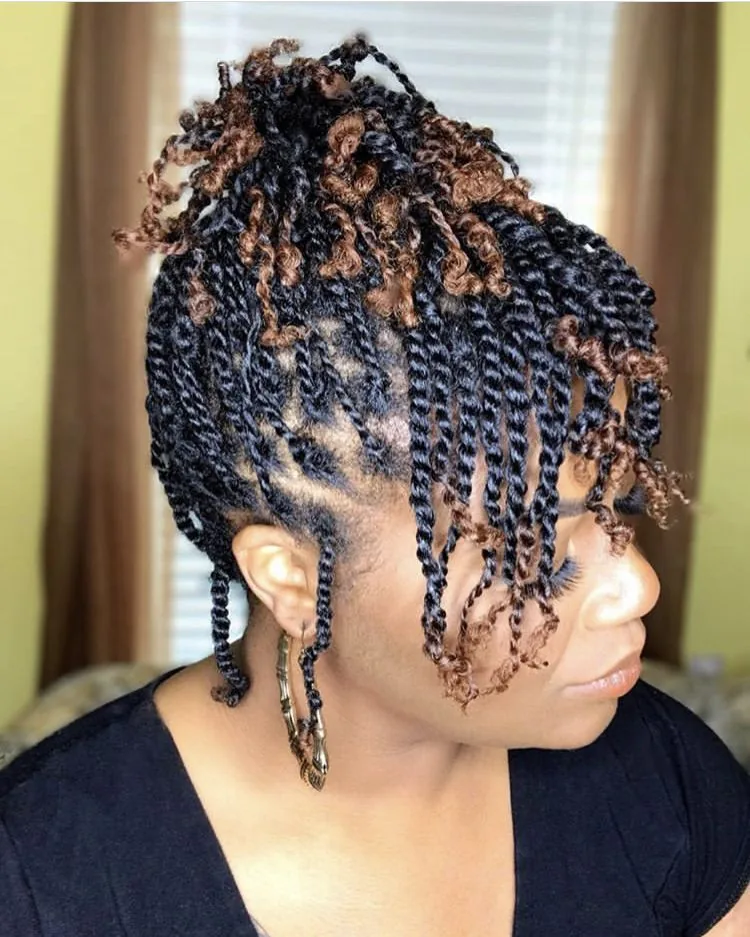
Mini twists — small two-strand twists made all over the head and then gathered up — are a protective style that also happens to be one of the most secure options for a yoga class. Each twist is small and light, so the gathered style has no heavy tail to swing, and the twists themselves grip each other, which means the pinned-up bundle barely moves at all. Gather the twists into a low bun or a top knot, pin them flat, and you have a style that survives sweat, inversions and a long savasana without a single strand out of place.
Who it suits: textured, coily and curly hair, and anyone who already wears twists. Pros and cons: superb hold and real hair protection, but making the twists takes time — this is a style you prepare the night before, not ten minutes before class. Quick verdict: if you already wear mini twists, pinning them up is the easiest mat-ready style you own.
Do I need to tie my hair up for a yoga class?
Most yoga studios ask you to tie your hair back, and even when they do not, you will want to — loose hair falls into your face in forward folds, sticks to a sweaty neck, and ends up under your shoulders on the mat. A low bun, a braid or a pinned-up style keeps your face clear and your focus on the practice. If your hair is too short to tie, a headband or a set of flat clips does the same job.
What is the best hairstyle for a yoga class with long hair?
The best hairstyle for a yoga class with long hair is a French braid, a braided low bun or a Dutch braid, because all three keep every strand contained and stay put when you turn upside down. A braided low bun is the fastest option, a French braid is the most secure for slippery hair, and a Dutch braid is the flattest and most comfortable on the mat. Whichever you choose, pin the tail up and test it with a forward fold before class.
Can I do a headstand with my hair in a bun?
Yes, you can do a headstand with your hair in a bun, as long as the bun is low and flat rather than high and bulky. A low bun or a braided bun sits at the nape, clear of the crown where your head meets the mat, so it does not get in the way or press into your skull. A high top knot is the one to avoid for headstands — it sits exactly where your head needs to rest and will throw off your balance.
How do I keep my hair from falling in my face during downward dog?
Keep your hair from falling in your face during downward dog by pinning the fringe back flat with two crossed bobby pins and choosing a style that anchors at the front as well as the back, such as a French or Dutch braid that starts at the hairline. A wide fabric headband is the fastest fix of all — it holds the hairline back and keeps sweat out of your eyes at the same time.
What hairstyle is best for hot yoga?
The best hairstyle for hot yoga is a braided low bun or a Dutch braid with a wide non-slip headband, because both stay secure when you sweat and the headband keeps perspiration out of your eyes. Start with dry shampoo or texturising spray for grip, use a fabric scrunchie rather than a smooth elastic, and avoid styles held by a single clip, which will slide as soon as you start sweating.
Can I wear a claw clip to a yoga class?
You can wear a claw clip to a yoga class, and it is one of the fastest styles there is — gather, twist, clamp, done in ten seconds. Use a large, sturdy clip and tuck the ends in properly, and add two pins at the base for a long class. The one exception is savasana: a hard clip digs into the back of your head when you lie on the mat, so take it out and let your hair down for the final rest.
How do I keep short hair out of my face in yoga?
Short hair is best managed with a wide non-slip headband, a silk scarf wrap or a set of flat clips that pin the sides and fringe back from your face. A half-up top knot works for bobs and growing-out cuts, and a scarf wrap covers everything at any length. Pin the fringe first, because that is the part that falls forward when you fold over — and check the nape, where short hairs escape most easily.
Should I wash my hair after every yoga class?
You do not need to wash your hair after every yoga class, but you should not leave sweat sitting on your scalp for hours either. A quick rinse, a dry shampoo at the roots or a co-wash are gentler options than a full shampoo every day, especially for curly or dry hair. When you do wash, focus the shampoo on the scalp, detangle gently from the ends upward, and let your hair air-dry whenever you can.
What hair accessories should I avoid in a yoga class?
Avoid metal clips, heavy decorative pins, beaded accessories and anything with a hard edge in a yoga class, because they dig into your scalp when you lie on the mat and can scratch it. Smooth elastics that creep loose when you sweat are also a poor choice. Use fabric scrunchies, spiral ties, flat bobby pins and wide fabric headbands instead — soft, flat and light is the rule for the mat.
What hairstyle looks good in yoga class photos?
The hairstyles that look best in yoga class photos are the ones that stay neat all the way through the class: a French braid, a braided crown, a milkmaid braid, a sleek slicked-back bun or a scarf-wrapped bun. All five keep their shape through sweat and inversions, so they still look polished in the end-of-class photo. A wide headband or a silk scarf also adds colour to photos, and it has the practical benefit of keeping the style intact while you practise.
Conclusion: A Style That Lets You Forget Your Hair Entirely
The best hairstyles for a yoga class are the ones you forget about once the class starts — a braided low bun, a French braid, a Dutch braid or a pinned-up twist that keeps every strand contained while you flow, fold, balance and rest. They are not about looking plain; they are about giving your attention back to the practice, instead of spending it on hair that keeps falling into your face. Pick a style that suits your hair, test it with a forward fold at home the day before, and keep a spare elastic and two pins in your bag just in case.
Start with one of the all-rounders — the low bun, the French braid, the braided low bun or the Dutch braid — and build from there as your confidence grows. A yoga class should be about breath, movement and the quiet at the end of it, and the right hairstyle makes sure that is exactly what you remember, with no stray hair in the story at all.

