

Okay, let’s be real. You’ve seen the hime cut all over your feed. It’s that stunning, storybook-princess-meets-edgy-icon look. But when you picture it, you might think it’s way too dramatic, too high-maintenance, or just not “you.” I totally get it.
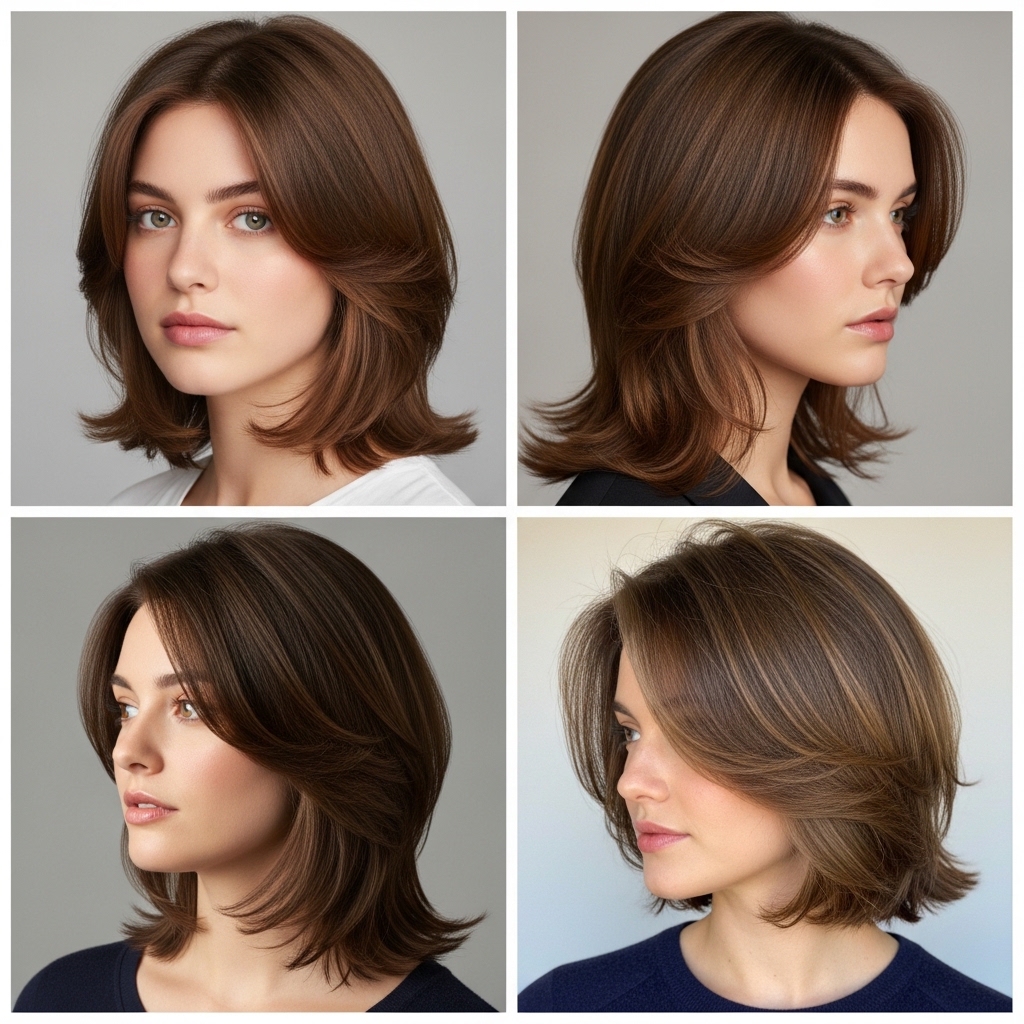
What if I told you there’s a perfect beginner version? We’re talking a hime cut straight with layers that’s wearable, flattering, and honestly, kind of life-changing. It keeps the signature shape but softens it for everyday magic.
This isn’t about a full anime transformation (unless you want that!). It’s about borrowing that elegant, face-framing power for your own look. Think of it as the quiet luxury bob‘s cooler, more artistic cousin.
Stick with me. I’m breaking down everything—from explaining it to your stylist in simple terms to styling it in two minutes flat. This is your no-stress guide to getting the look without the panic.
What Is A Hime Cut, Really?
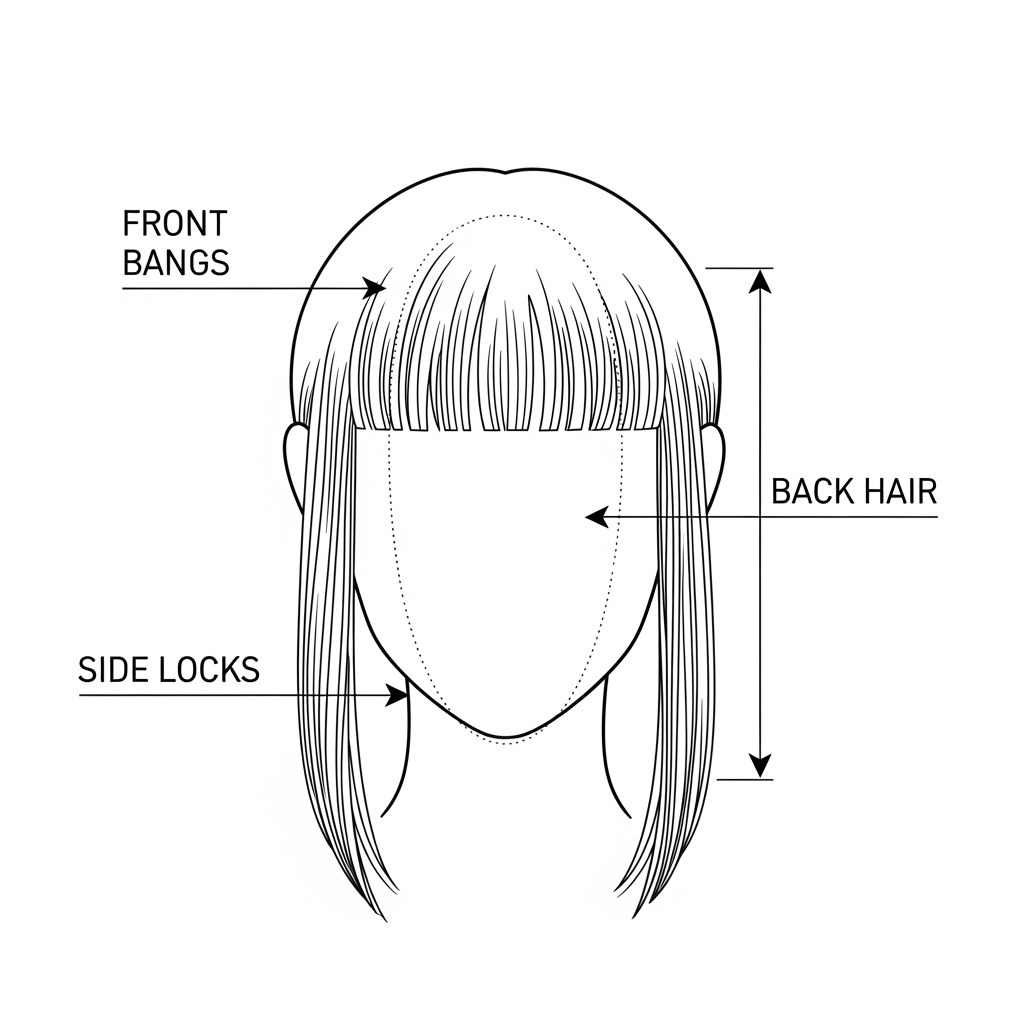
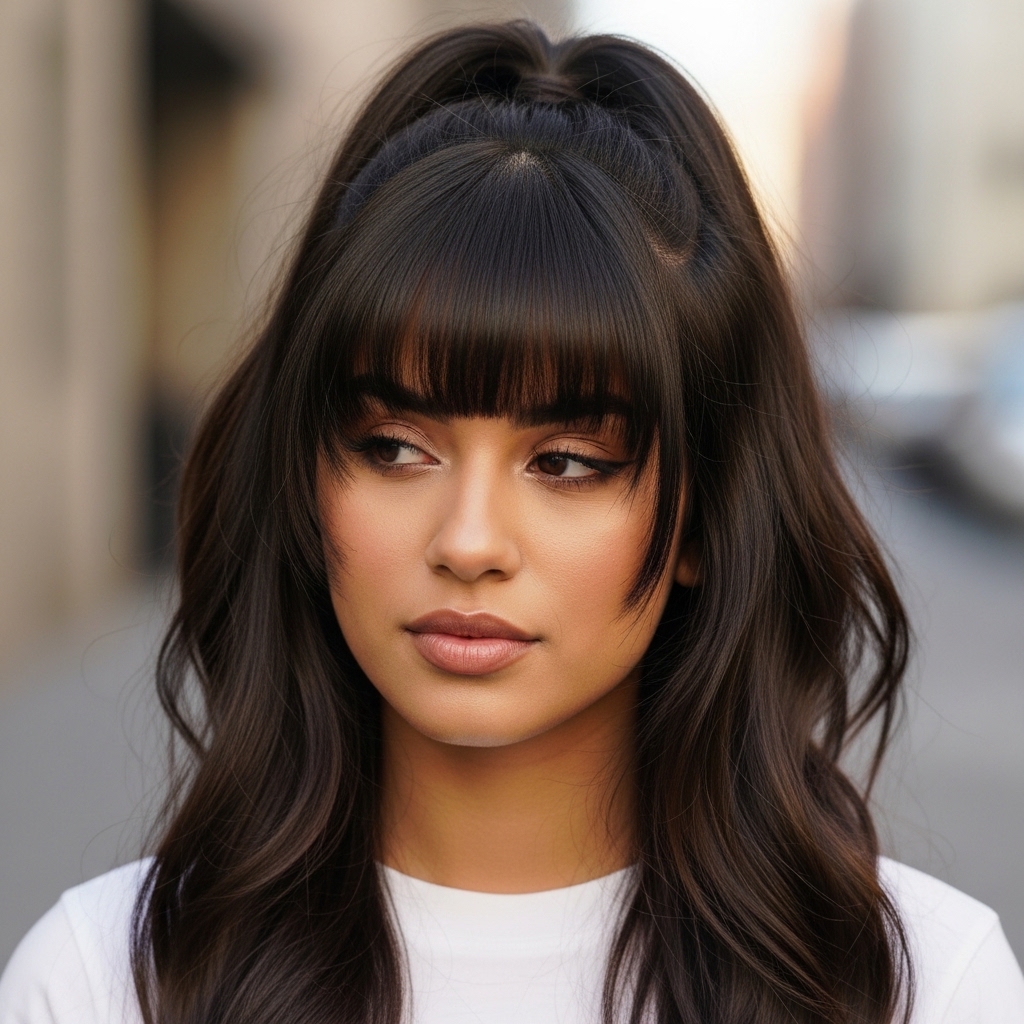
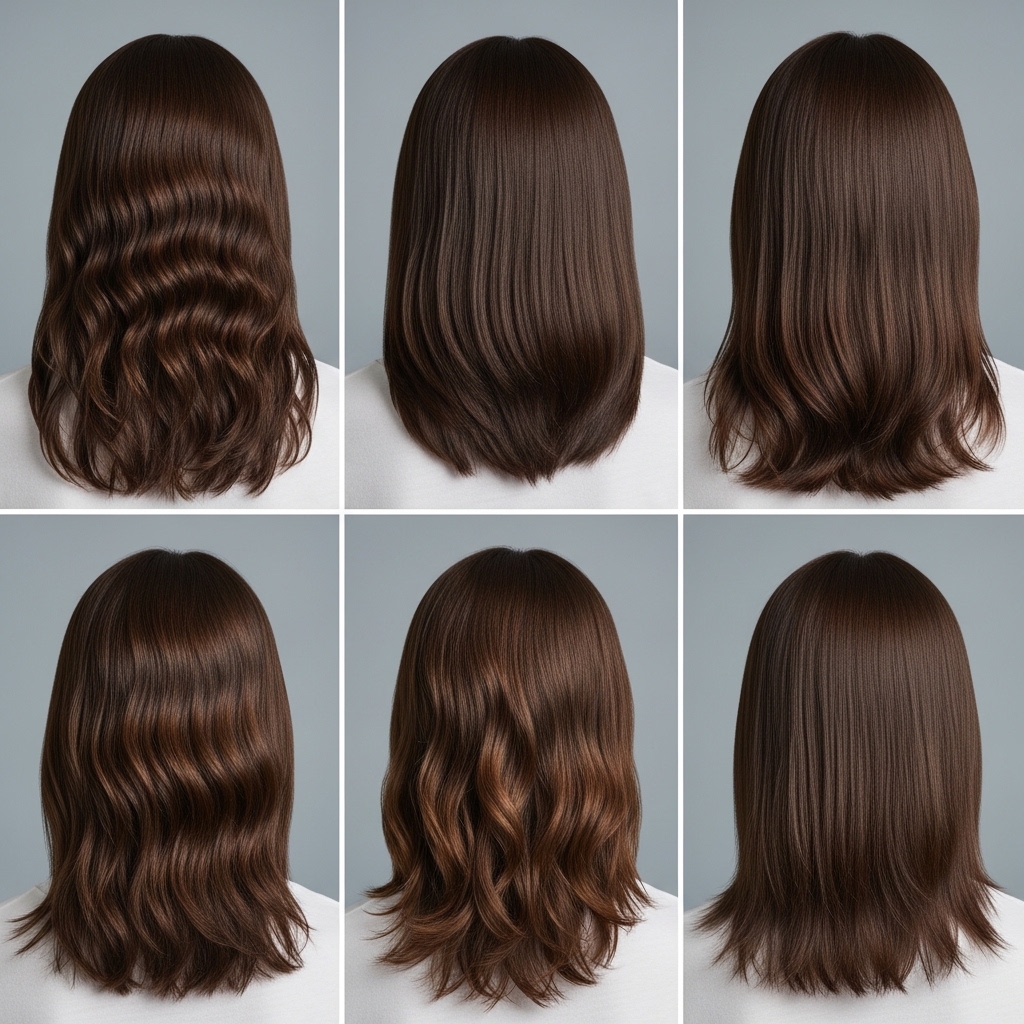
The traditional hime cut, or “princess cut,” is a Japanese style. It’s defined by straight, heavy-across-the-bangs and straight, heavy-at-the-sides hair, with the back often cut shorter. It’s a graphic, bold statement.
The beginner version we’re talking about today uses layers to soften that hard line. It makes the style move, blend, and suit more face shapes. It takes the core idea—a strong, face-framing shape—and makes it adaptable.
You get that iconic look without it feeling like a costume. It’s a nod to romantic goth hairstyles and vintage elegance, all in one.
Why The “Straight With Layers” Version Is Perfect For Beginners
This adaptation is your best friend. The layers add movement and texture, which means two things: it’s more forgiving as it grows out, and it’s way easier to style. You’re not fighting one solid block of hair.
If you have even a slight wave, the layers will help it look intentional. It also lets you play with texture—sleek one day, piecey and glitchy glam hair the next. It’s versatile.
Most importantly, it feels like you. It’s an evolution of your look, not a shocking chop. This approach is why it’s trending for 2026 hairstyles already—it’s personalized.

Face Shapes This Cut Loves (It’s More Than You Think!)
People often think this only works for oval faces. Not true! The layered version is a master of illusion. Here’s the quick guide:
- Round or Square Faces: The long, face-framing layers create length and slim. Ask your stylist to angle them.
- Oval Faces: You can pull off anything. Go for a more pronounced, blunt look if you want the drama.
- Heart-Shaped Faces: The fullness at the jawline from the side pieces balances a narrower chin.
The key is in the customization. Those front pieces can be cut to flatter your unique bone structure perfectly.
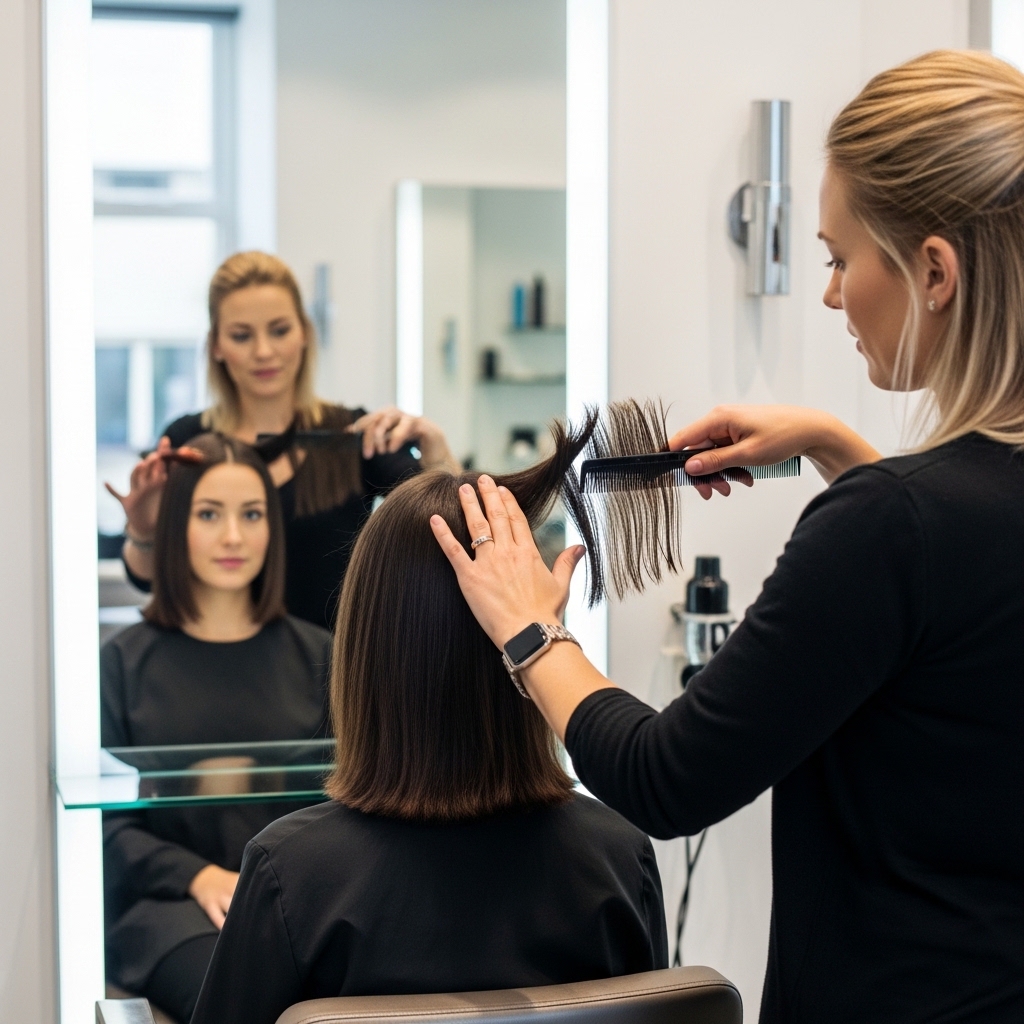
Bringing The Picture: How To Talk To Your Stylist
Walking in and saying “hime cut” can lead to misunderstandings. Use this script: “I want a modified hime cut. I’d like straight, heavy, face-framing pieces that start at about my mouth or chin, with the rest of my hair longer and layered to blend.”
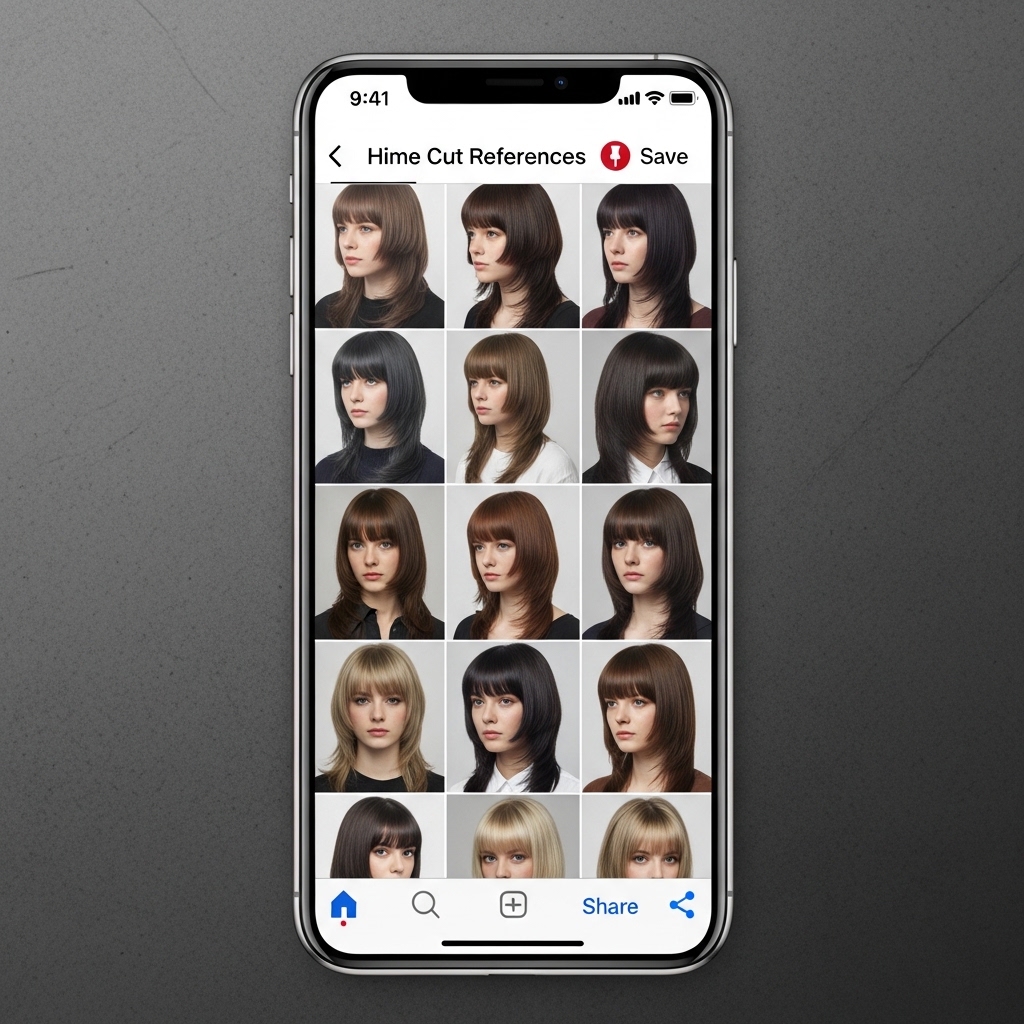
Show pictures! But point specifically to the layered versions. Say, “I love this shape, but I want it softened with layers so it’s not too blunt.”
Mention old money hair or a “lived-in” feel. This tells them you want elegance, not harsh lines. A good stylist will get excited about this creative cut.
The Essential Consultation Questions To Ask
Don’t leave the chair unsure. Ask these questions before they start cutting:
- “How will this cut look with my natural hair texture?”
- “Can we customise the length of the front pieces for my face shape?”
- “How does this grow out? Will it need frequent trims?”
- “Can you show me on my hair where the shortest layer will be?”
This turns you from a passenger to a co-pilot. It ensures you and your stylist are literally on the same page. A clear consultation prevents haircut tears.
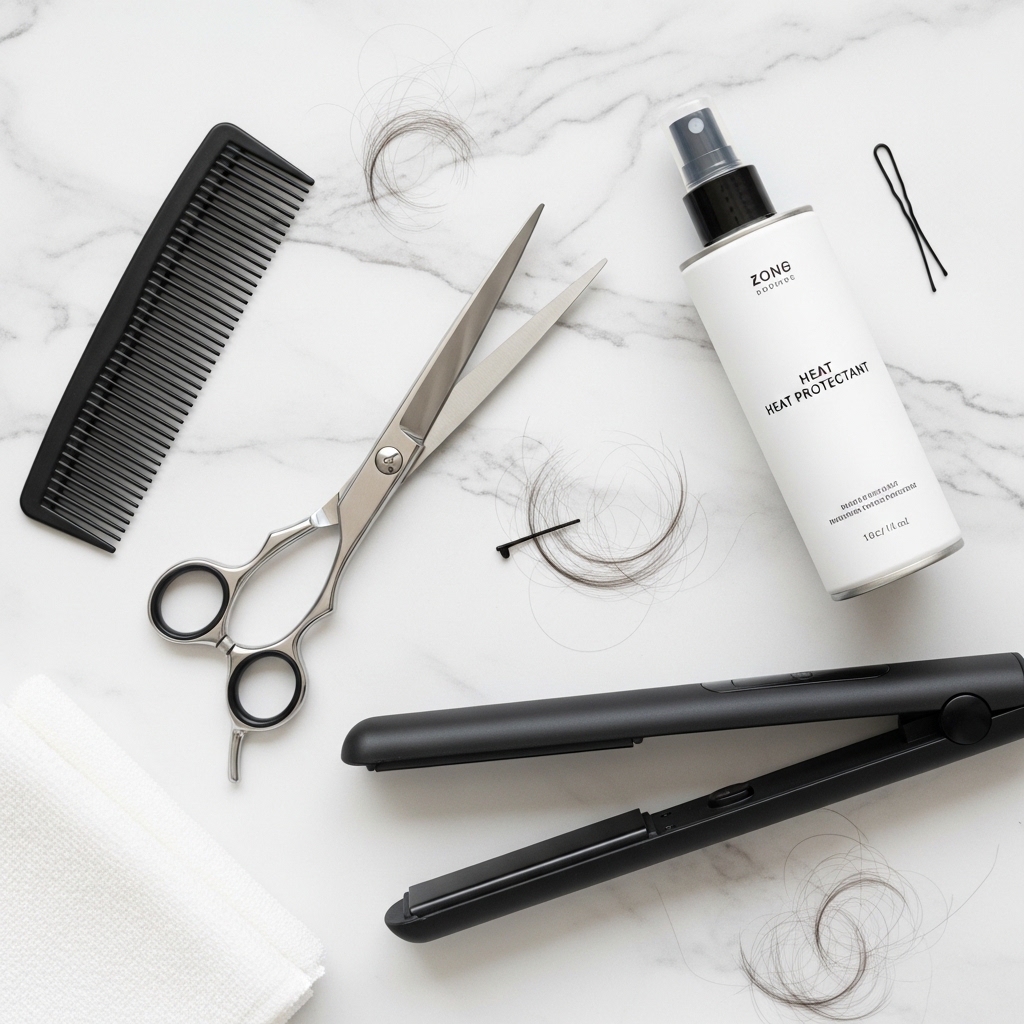
Tools You’ll Need For Home Maintenance
You won’t need much! A good haircut does most of the work. But to keep it sharp, have these on hand:
- Sharp Hair Shears: Only for snipping the tiniest split ends on those front pieces. Never use kitchen scissors.
- A Fine-Tooth Comb: For precise sectioning when you do any micro-trims.
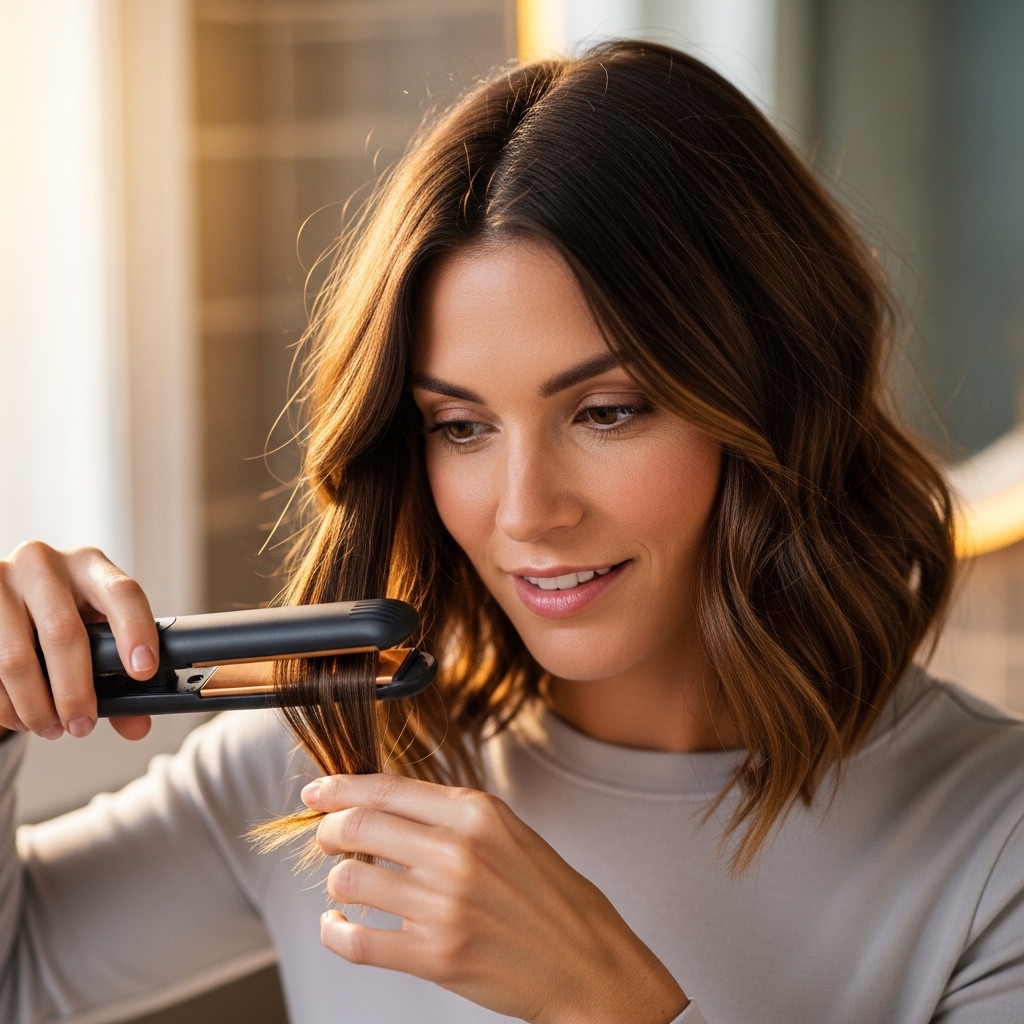
- Heat Protectant: Your straightening tool’s best friend. Non-negotiable.
- A High-Quality Flat Iron: A 1-inch plate is perfect for getting those sleek, straight lines.
That’s really it. This isn’t a high-tech style, which is part of its beauty.
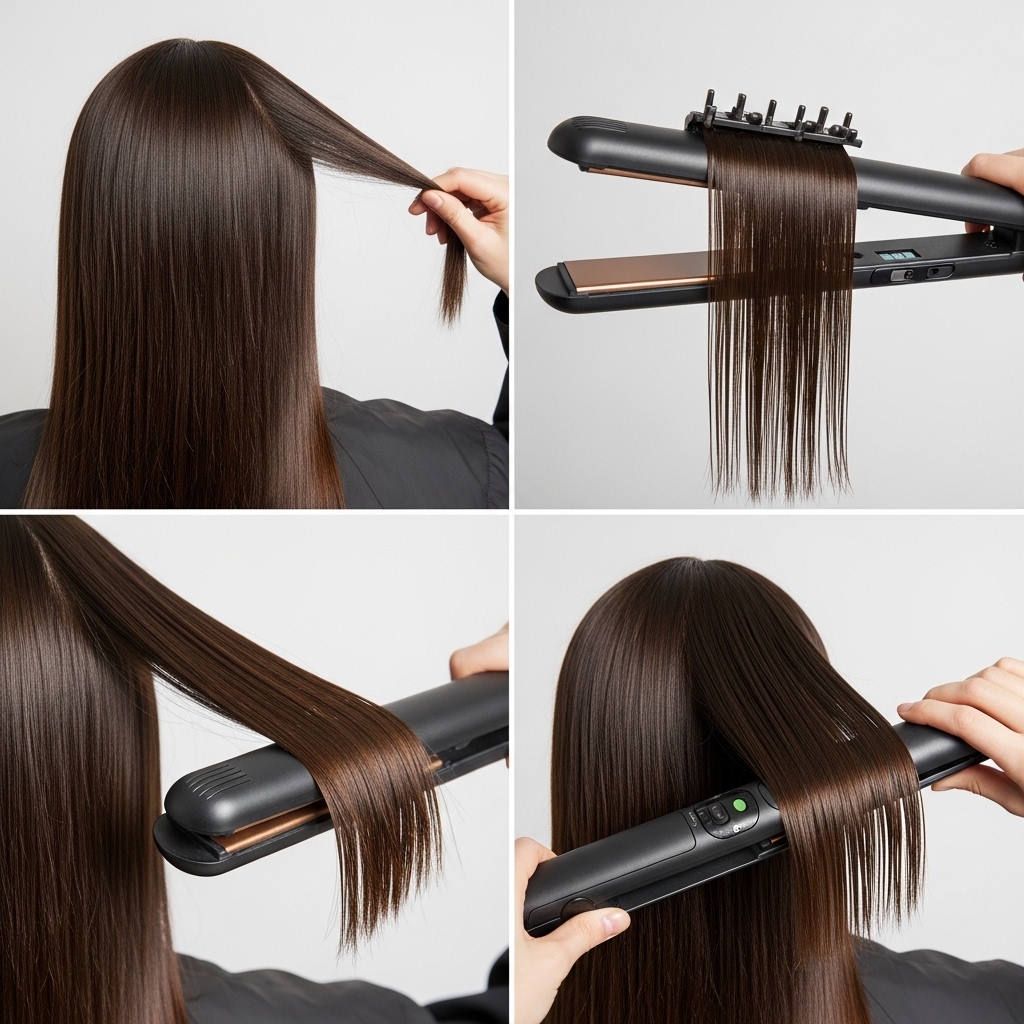
The 5-Minute Daily Styling Routine
This is where the layered cut shines. Your daily routine is a breeze. Start with a light, smoothing cream on towel-dried hair to fight frizz.
Blow-dry the roots for volume, then use your flat iron. Focus on getting those front pieces and the underlayer super sleek. The top layers can have a slight bend for movement.
A tiny drop of hair oil on the ends seals it. That’s it. You’re going for polished, not plastered. It should feel effortless, like a great quiet luxury bob.
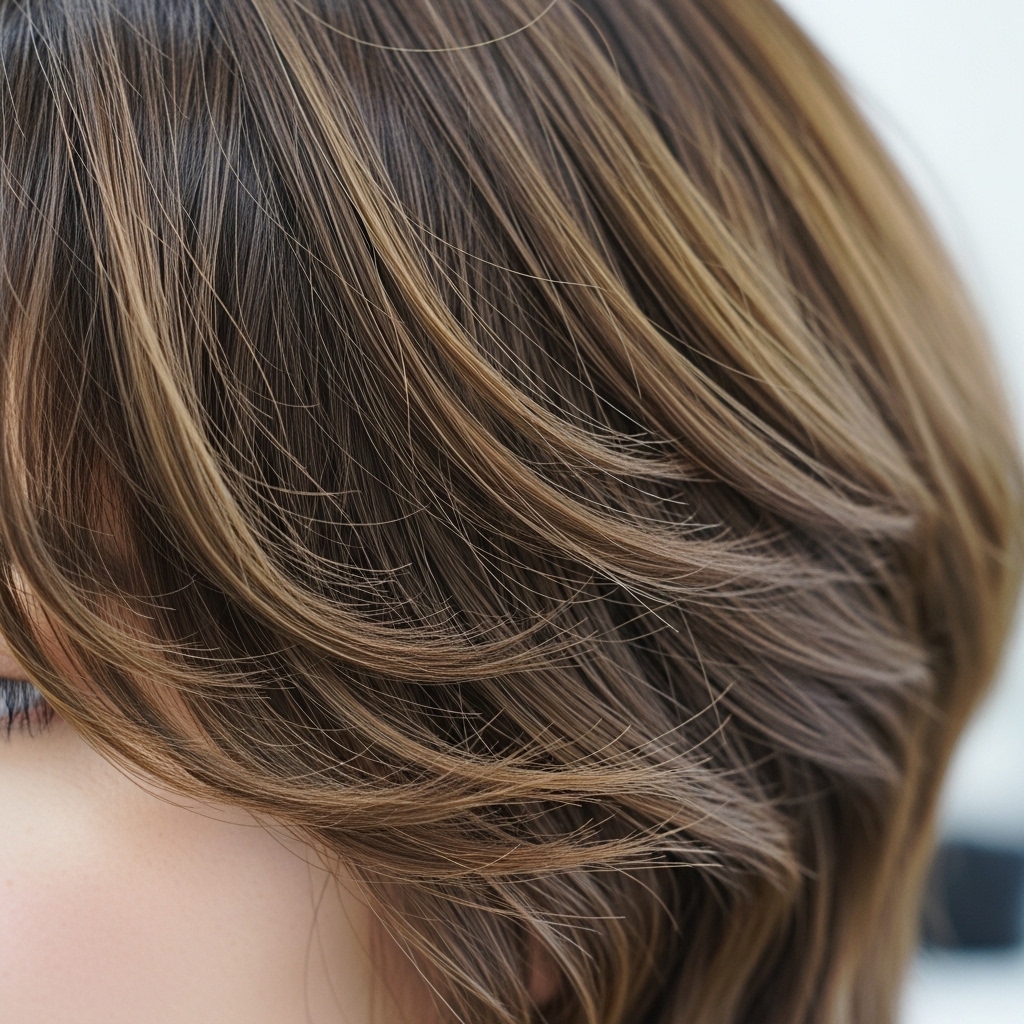
How To Get That “Lived-In” Texture
Want that piecey, glitchy glam hair texture? Skip the heavy serums. After straightening, let your hair cool completely.
Then, gently run your fingers through the layers, focusing on the mid-lengths. A light-hold texturizing spray on the ends, not the roots, adds separation.
You can even twist small sections of the layers and pinch them to break up the uniformity. The goal is soft, touchable pieces, not crunch.
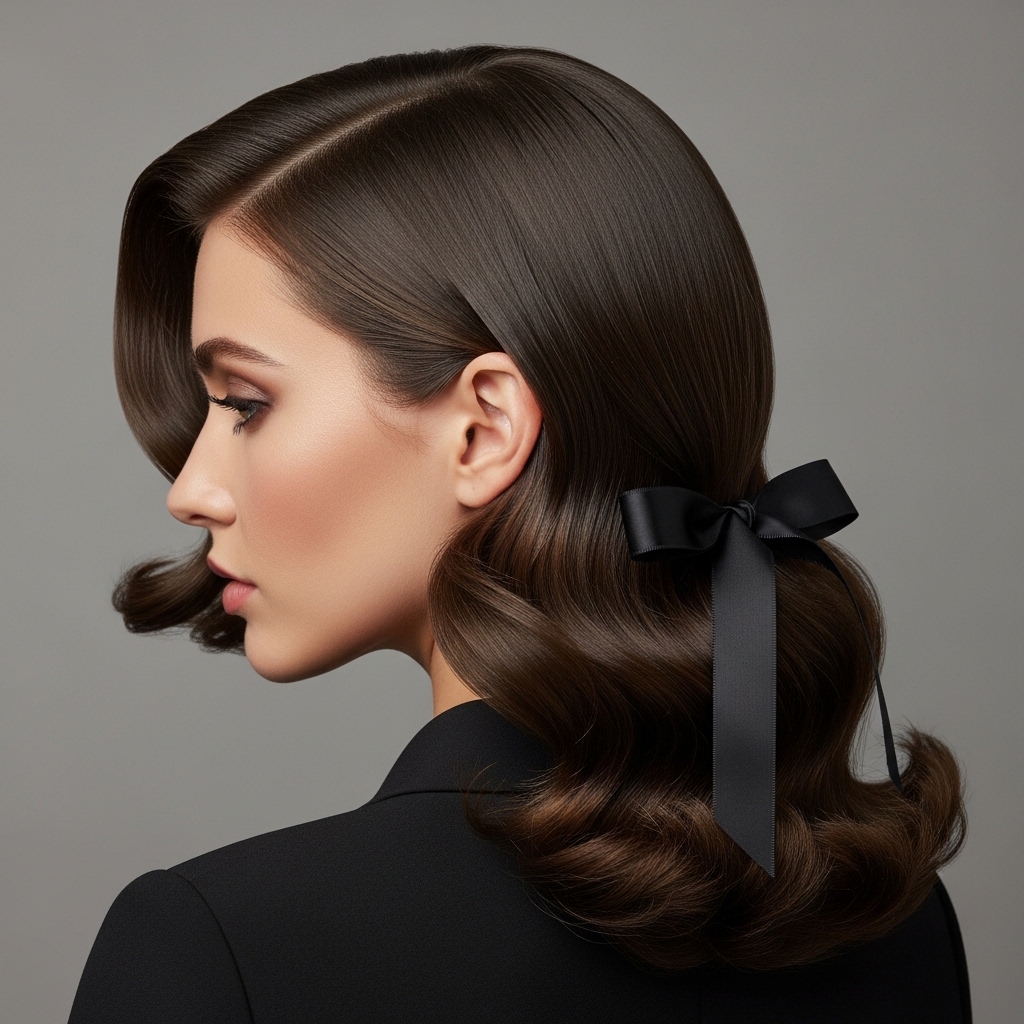
Switching To A Romantic, Goth Vibe
This cut is a gateway to romantic goth hairstyles. For evening, lean into the drama. Deepen your side part and make the front pieces extra sleek.
Add a few face-framing curls or waves just to the longer layers in the back with a small-barrel iron. It creates a beautiful contrast.
Accessorize with a single, ornate clip or dark velvet ribbon. It’s about highlighting the cut’s inherent vintage drama, like a modern vampire haircut.
What To Do On Day 2 Or 3 Hair
Your day 2 hair might be your best hair! The natural oils add to that old money hair vibe—slightly undone but still pristine.
If the front pieces have lost their line, quickly run the flat iron over them only. For the rest, a dry shampoo at the roots adds volume and freshness.
You can also braid the longer back sections overnight for soft waves, letting the front pieces stay straight. The mix of textures is gorgeous.
Mastering The Half-Up, Half-Down Style
This is the ultimate style for this cut. Gather just the top layer of hair from your temples back, as if you’re making a very small half-ponytail.
Leave all the face-framing pieces and the shorter side layers out. Secure it loosely at the back of your crown.
This highlights the beautiful structure of the cut and keeps hair out of your face while showing off the signature pieces. It’s elegant and easy.
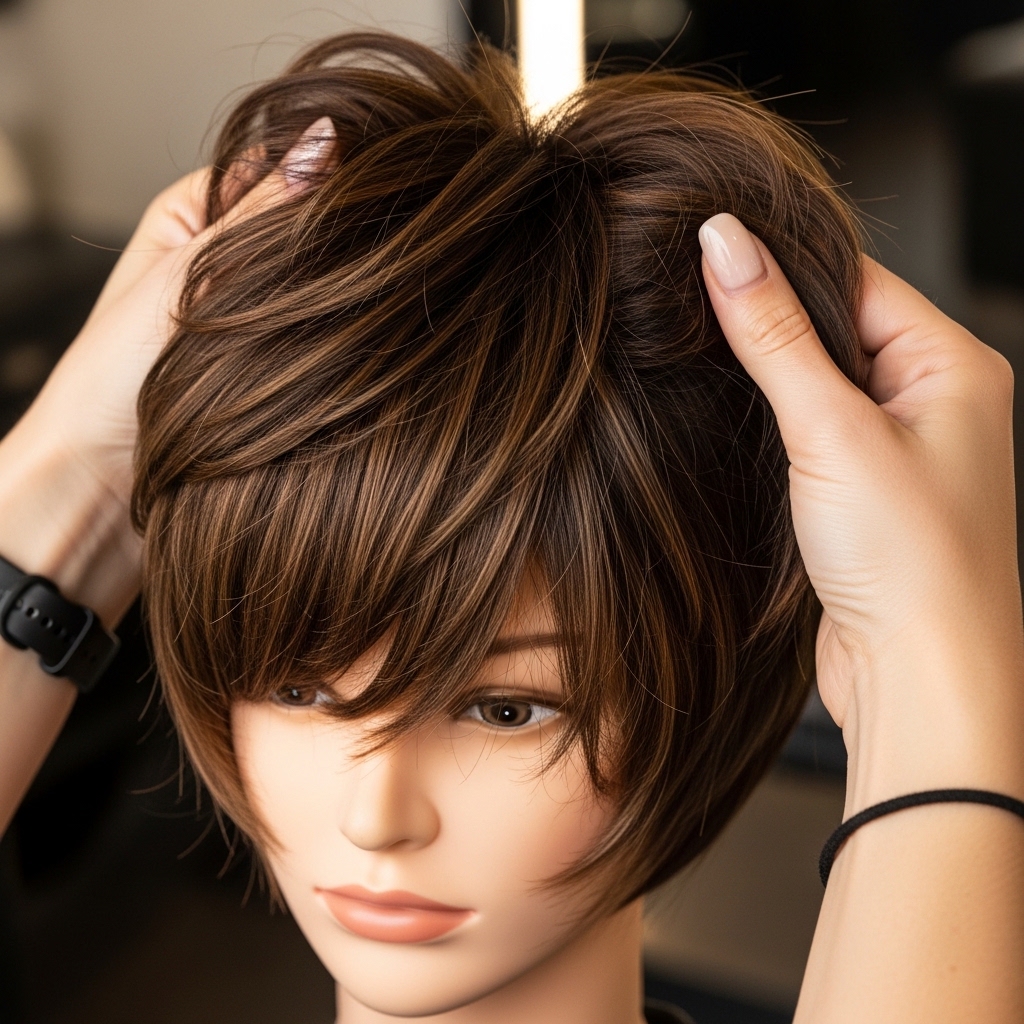
Adding Invisible Layers For More Volume
If your hair is fine, ask for “invisible” or “interior” layers during your cut. These are layers cut underneath the top surface of the hair.
They remove weight without changing the external shape. You get all the lift and movement without losing the sleek, solid-looking outline.
It’s a pro trick that makes a huge difference. It gives that full, luxurious feel that’s key to the look.
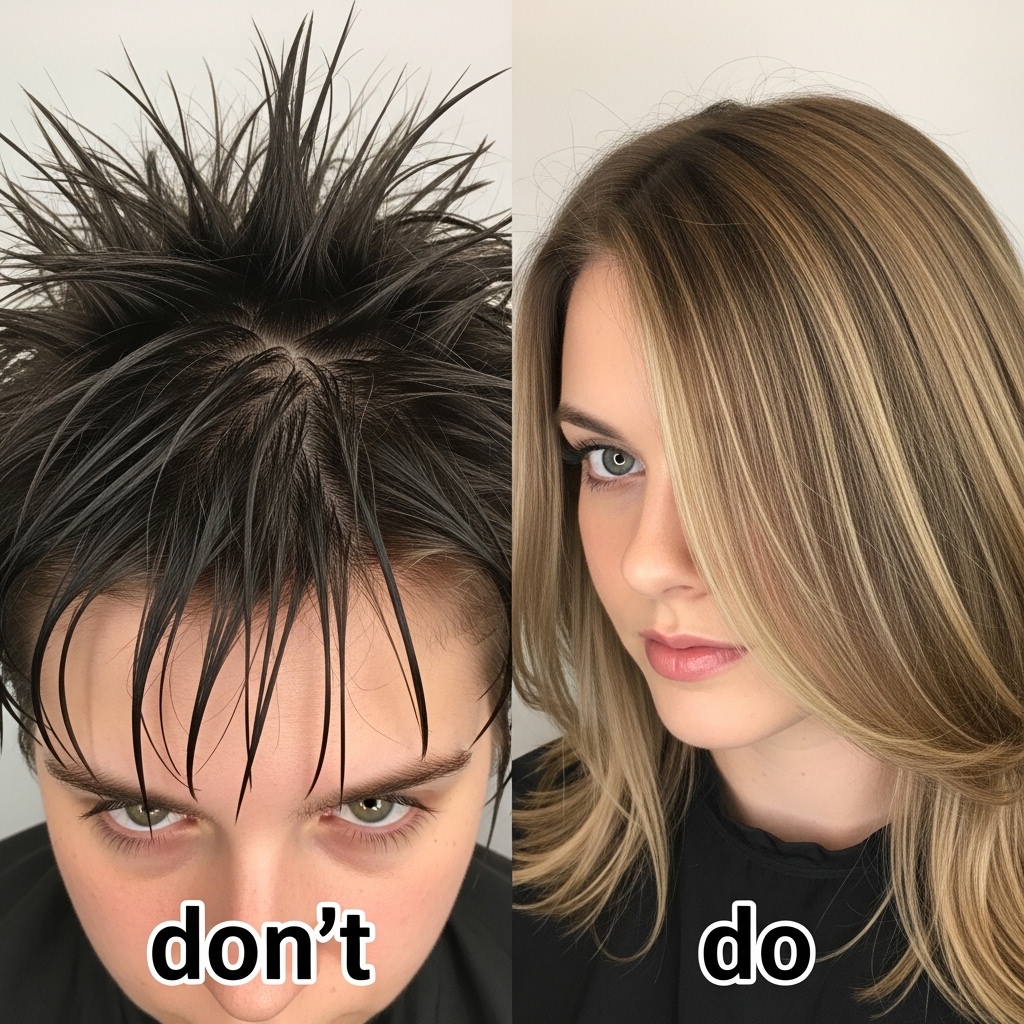
Common Mistakes To Avoid (Save Your Hair!)
First, don’t cut the front pieces yourself on a whim. It’s very easy to misjudge the angle. Leave micro-trims to the pros.
Avoid overloading the front pieces with product. Heavy waxes or gels will make them look greasy and separate from the rest of your hair.
Don’t neglect your ends. Even with layers, dry, split ends will make the whole cut look messy. Regular tiny trims are your friend.
How This Cut Grows Out Gracefully
Here’s the best part: it grows out beautifully. The front pieces simply become longer face-framing layers.
After a few months, you might have a gorgeous, asymmetrical lob. The layers blend, and the shape evolves rather than collapsing.
You can always choose to re-sharpen the blunt lines later, or let it morph into a new style. It’s a low-commitment high-impact cut.
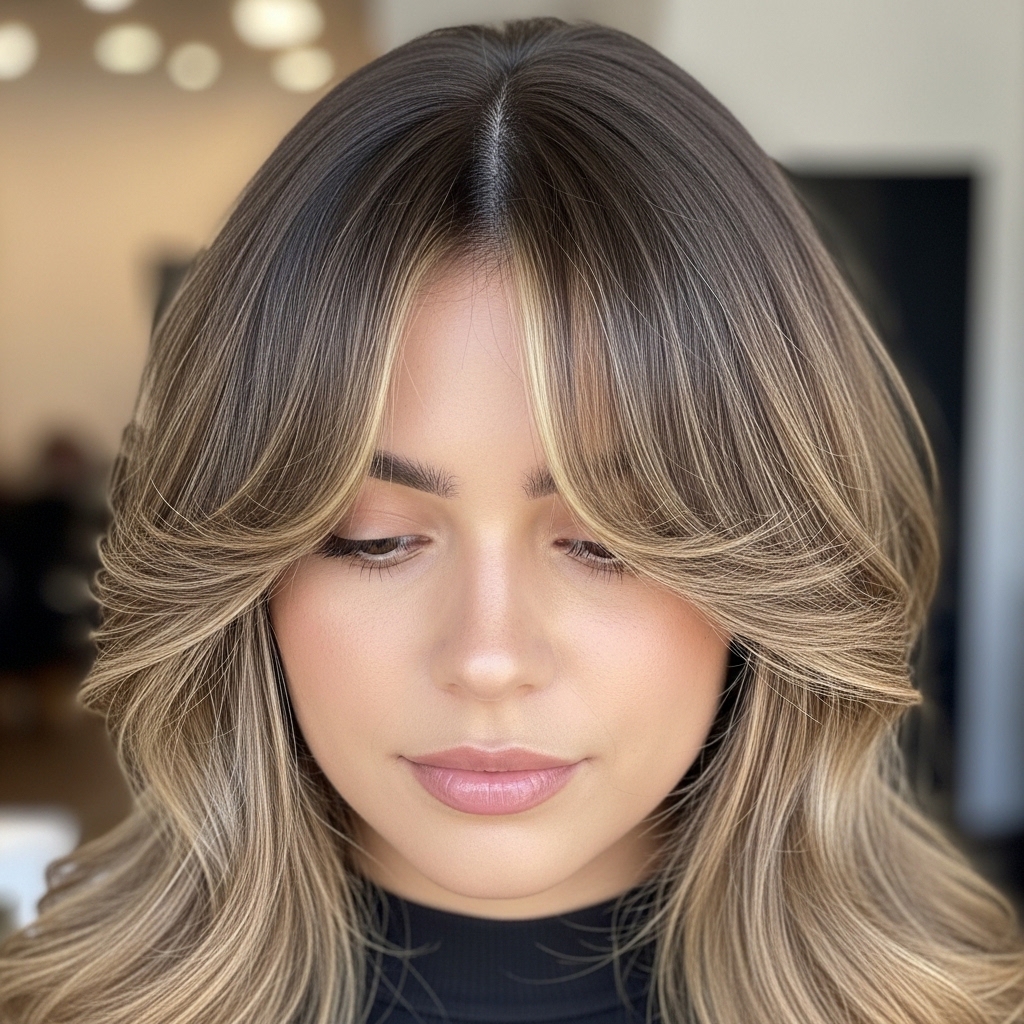
Pairing It With Curtain Bangs
If a full, heavy bang feels too scary, integrate curtain bangs. Ask your stylist to blend the front pieces into longer, wispier curtain bangs.
This creates a softer, more blended frame around the face. It’s less graphic but equally flattering and very much in line with 2026 hairstyles trends.
It offers more styling flexibility. You can part them down the middle or sweep them to the side for a different vibe.
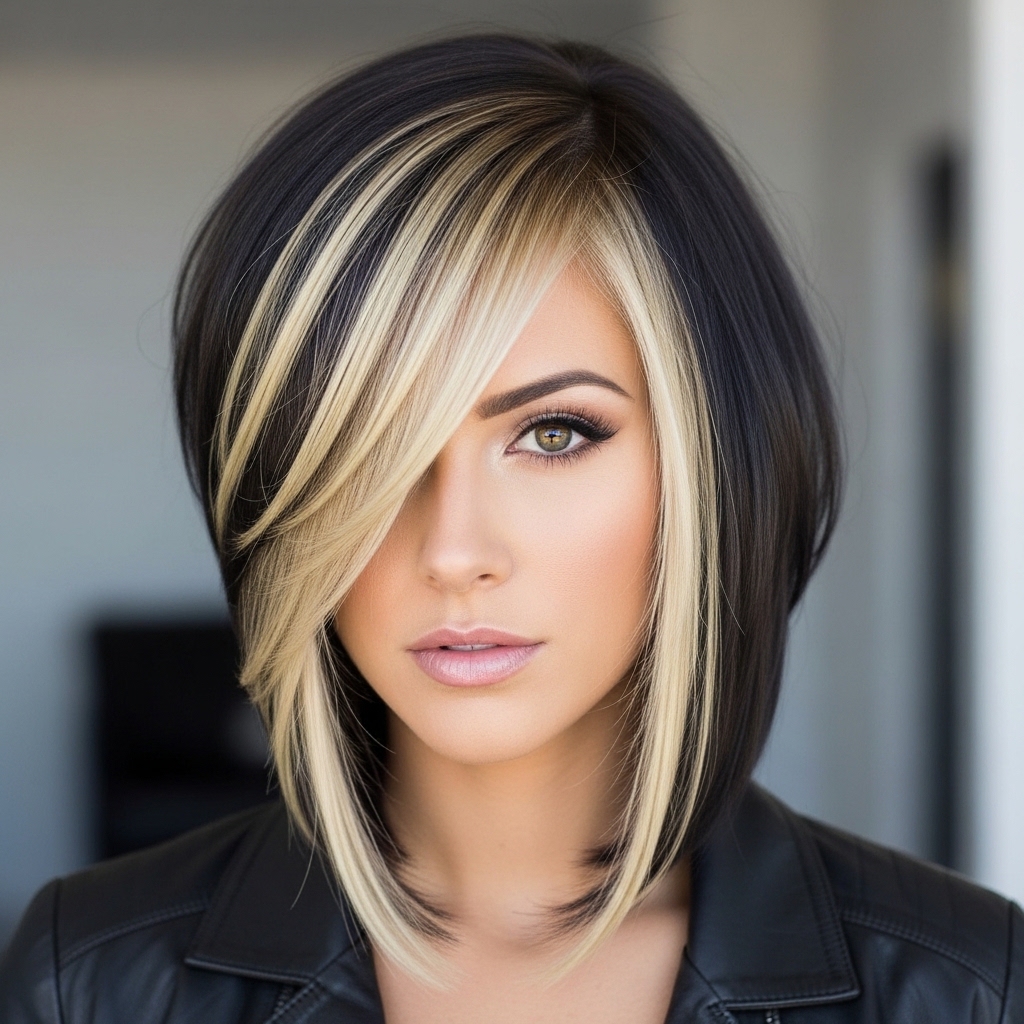
Color Ideas To Elevate The Cut
Color can make this cut pop. Consider face-framing highlights or a money-piece to accentuate the front sections.
For a edgier look, a shadow root or a dark-to-light ombre following the line of the layers is stunning. It emphasizes the architecture of the cut.
Solid, rich colors also look amazing—think deep blacks, chocolates, or cool ash browns. It gives that polished, quiet luxury effect.
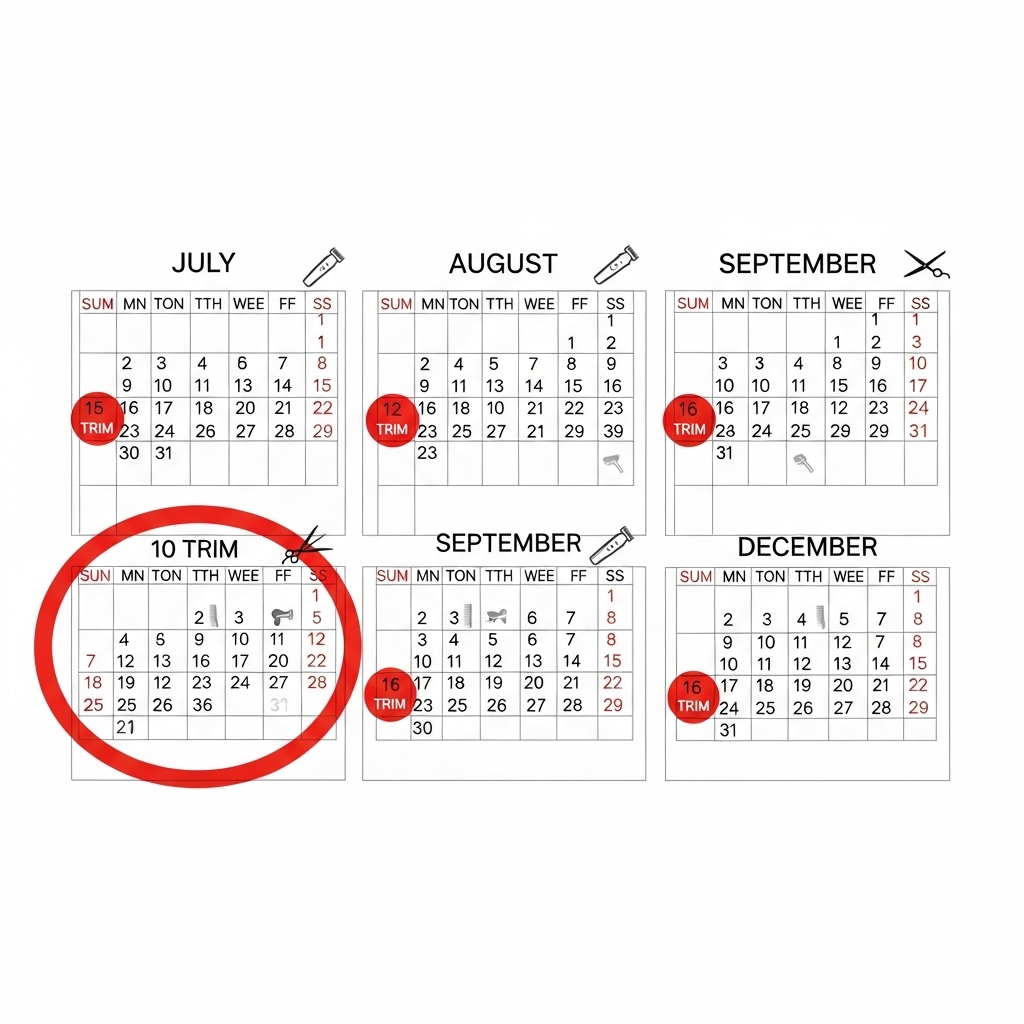
Is This Cut High Maintenance?
It’s surprisingly low-maintenance for such a statement style. The layered version needs a trim every 10-12 weeks to keep the shape crisp, just like any good cut.
The daily styling is minimal if your hair is naturally straight. For wavy hair, you’ll need that flat iron for the signature sleek look.
It’s less maintenance than many romantic goth hairstyles or intricate braids. The effort is front-loaded in the cut itself.
My Personal Experience With This Cut
I was nervous before my first hime cut! I asked for the layered version, and it was the best decision. It felt like “me” but upgraded.
The compliments I get are on the shape—people call it “architectural” and “cool.” It made me feel put-together with very little effort.
It grew out so well that I kept the shape for over a year, just getting occasional trims. It’s a confidence-booster.

Adapting It For Wavy Or Curly Hair
If you have waves or curls, you can still do this! The principle is the same: strong face-framing pieces.
The cut is done on straightened hair to get the shape right, then styled according to your natural texture. The layers will give your curls beautiful shape and reduce bulk.
The front pieces may require some straightening or careful curling to mimic the shape, but the result is a unique, personalized take on the trend.

Why It Feels Fresh For Right Now
In a world of messy buns and super-long hair, this cut is a deliberate choice. It’s artistic and personal.
It taps into the glitchy glam and old money aesthetics perfectly—it’s polished but not perfect, elegant but edgy.
It stands out because it has a point of view. It’s not just another asymmetrical lob; it’s a signature. And that’s always in style.
Your Final Checklist Before The Chop
- Have multiple reference photos saved on your phone.
- Practice the consultation script in the mirror.
- Wash your hair the night before (stylists prefer day-old hair).
- Trust your stylist, but speak up if something feels off.
- Get excited! You’re about to get a seriously cool haircut.
You are so ready for this. Walk into that salon with confidence. You’re not just getting a haircut; you’re getting a style upgrade.
So, there you have it. The complete, no-sweat guide to dipping your toes into the world of the hime cut. I hope this demystifies the style and shows you how wearable it can truly be.
Remember, the best haircuts are the ones that feel like an extension of your personality. This layered version is all about giving you that iconic shape with a soft, lived-in touch that works for real life.
If this inspired you, do me a favor? Save this post to Pinterest to keep this guide handy and to share it with anyone else who might be curious! And I’d love to know—are you thinking of taking the plunge? What’s holding you back? Let’s chat in the comments below.
All my love,
Hailey & Team

