

Starting a layered pixie when you’re new to natural hair can feel like a big leap. I get it. You want movement, not a helmet. You want soft shape, not a style that fights your texture every single morning.
Here’s the good news. Layered pixies are one of the most forgiving cuts out there, especially on curls and coils. The right layers do most of the work for you.
In this post I’m sharing 25 layered pixie ideas for beginners, plus the small details that make them actually wearable. Where to place layers, how to ask your stylist, and the products that keep the shape alive between washes.
You’ll finish this in a few minutes and leave with two or three cuts saved to your phone. Let’s go.
What Makes a Pixie “Layered”?
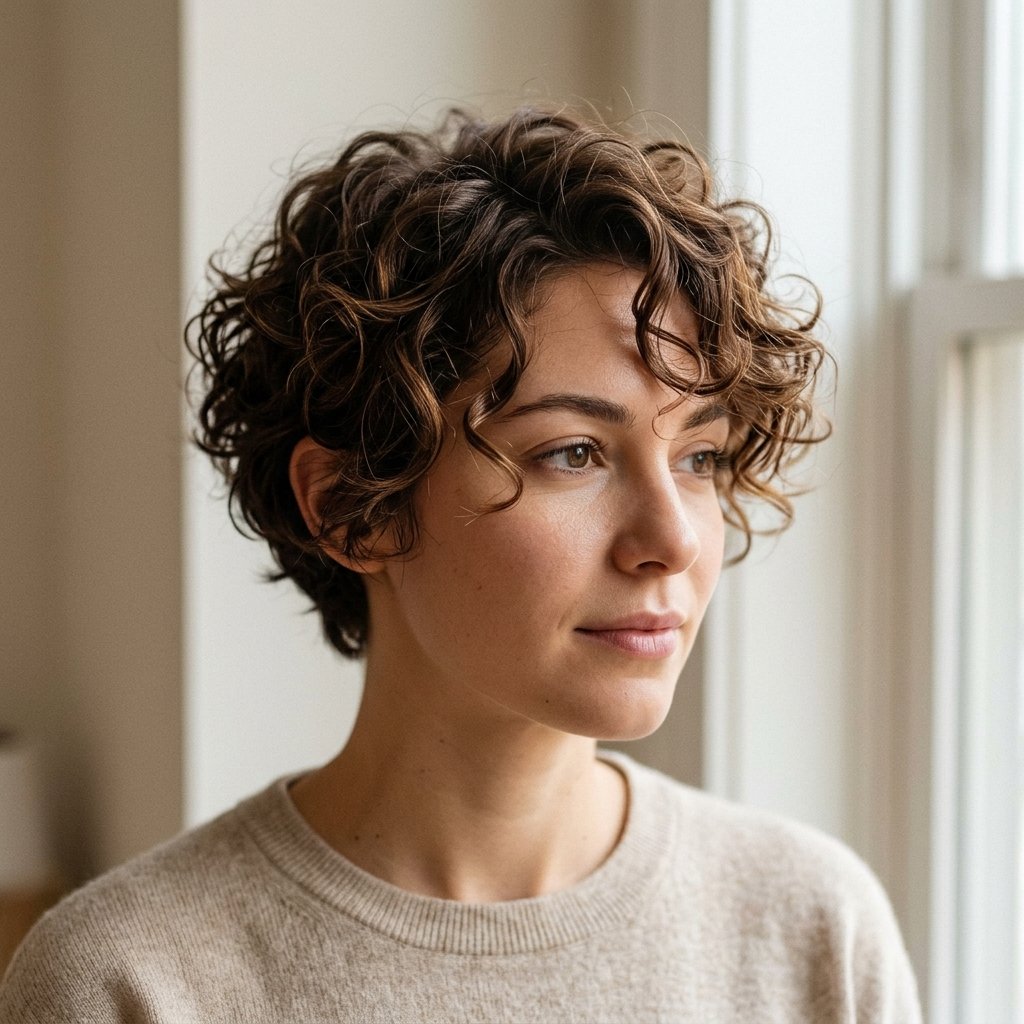
Layers are just shorter pieces cut inside longer ones. On a pixie, that means your top and front stay longer while the sides and back get shorter, blended pieces.
That blend is what creates movement. Without layers, a pixie can look flat or boxy. With them, your curls have room to spring up instead of stacking on each other.
- Short layers remove bulk and add lift at the root
- Long layers keep softness and frame the face
- Point-cut ends stop the cut from looking like a hard line
Why Layered Pixies Love Natural Hair
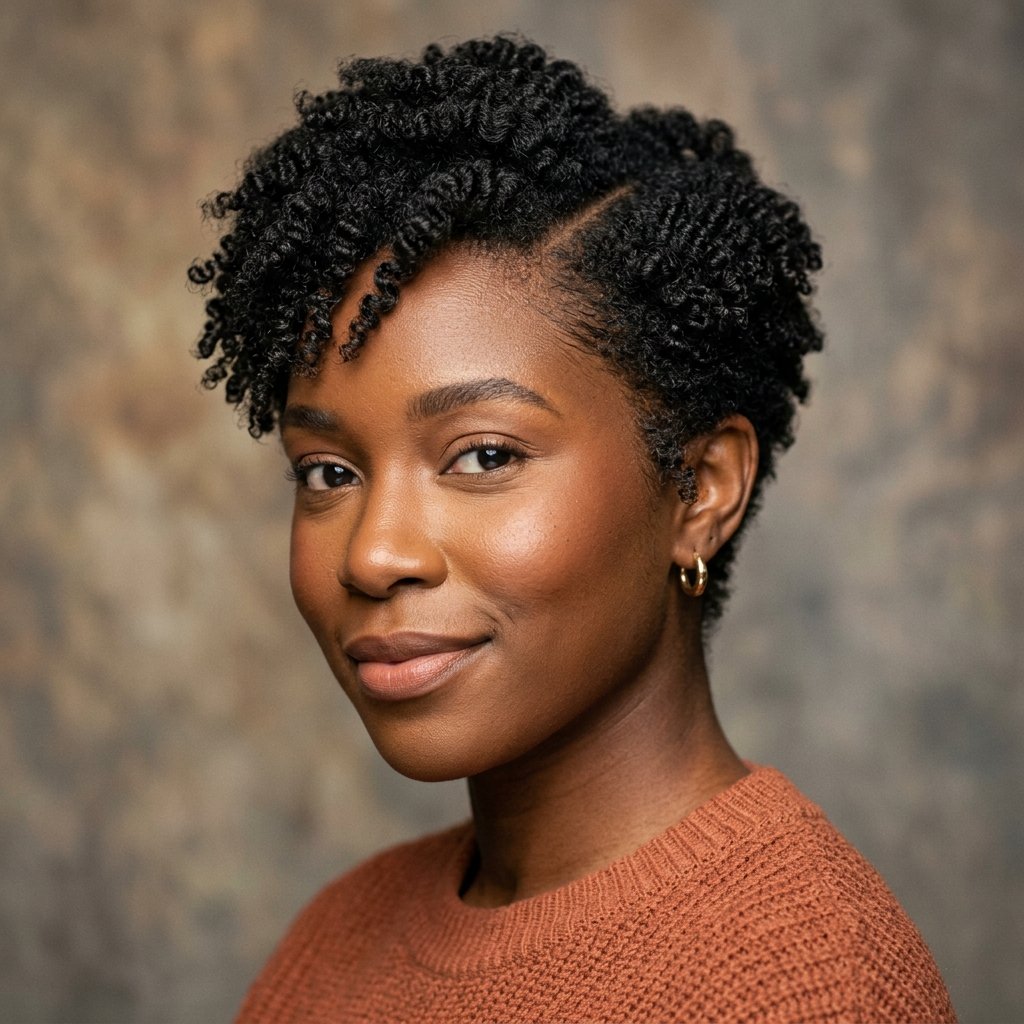
Curls and coils shrink. A layered pixie works with that instead of against it, because the layers are cut to sit where your hair naturally falls.
It’s also one of the fastest routines you’ll ever have. Less hair means less drying time, less product, and way fewer detangling sessions.
- Shrinkage becomes shape instead of a problem
- Layers give volume on top so the cut doesn’t look flat
- Wash days get cut in half
1. The Soft Rounded Pixie for Total Beginners

This is the safest first layered pixie. The top stays around two to three inches and the sides are blended, never chopped into a hard line.
It grows out beautifully, which matters when you’re testing short hair for the first time. You get the pixie shape without the commitment shock.
- Ask for soft, blended sides, not a tight fade
- Keep the crown the longest point
- Request point-cut ends so it looks airy
2. The Tapered Pixie With a Curly Crown
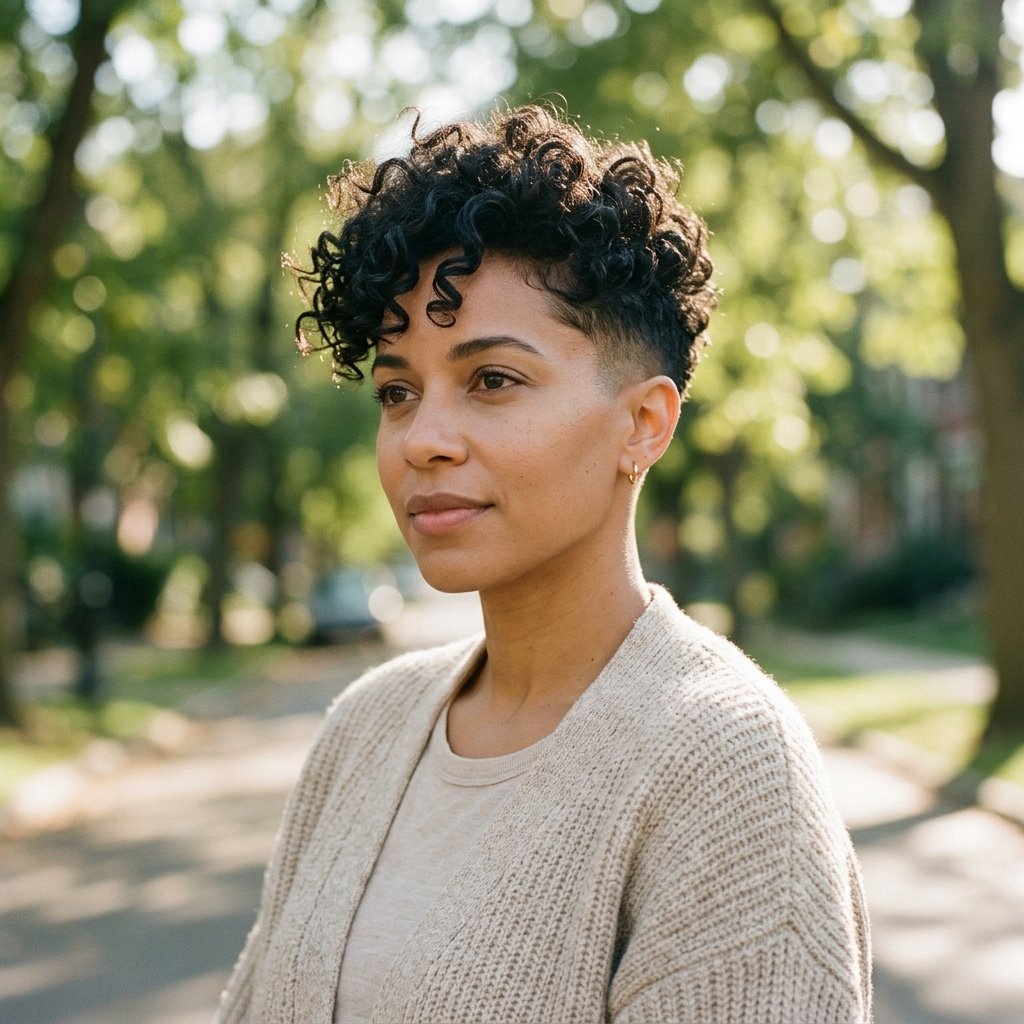
The taper keeps the back and sides close while the top stays long enough to actually curl. That contrast is where all the movement comes from.
It’s ideal for 3c to 4c hair with good density. The shape holds itself up, so you’re not fighting gravity every morning.
- Ask for a low taper, not a bald fade
- Layers go on top only
- Style with a twist-out on the crown and fluff
3. The Asymmetrical Lob Pixie Hybrid
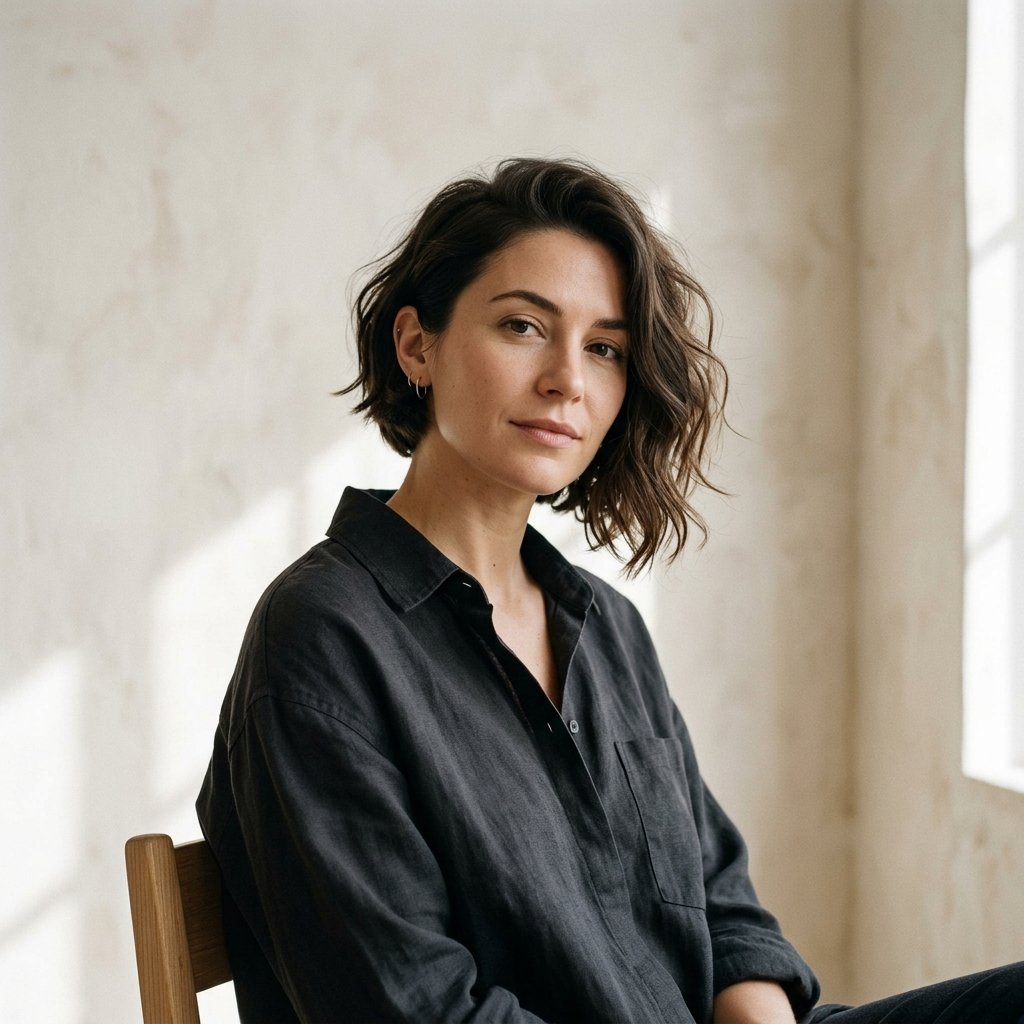
Not ready to go full pixie? This is your bridge cut. One side sits near the jaw, the other is cropped short like a pixie, so you get an asymmetrical lob feel with pixie ease.
It’s flattering on almost every face shape and gives you a little drama without going extreme.
- Keep the long side layered so it drapes instead of shelfing out
- Ask for a diagonal parting line
- Blend the short side into the long side slowly
4. The Quiet Luxury Pixie (Old Money Hair Energy)
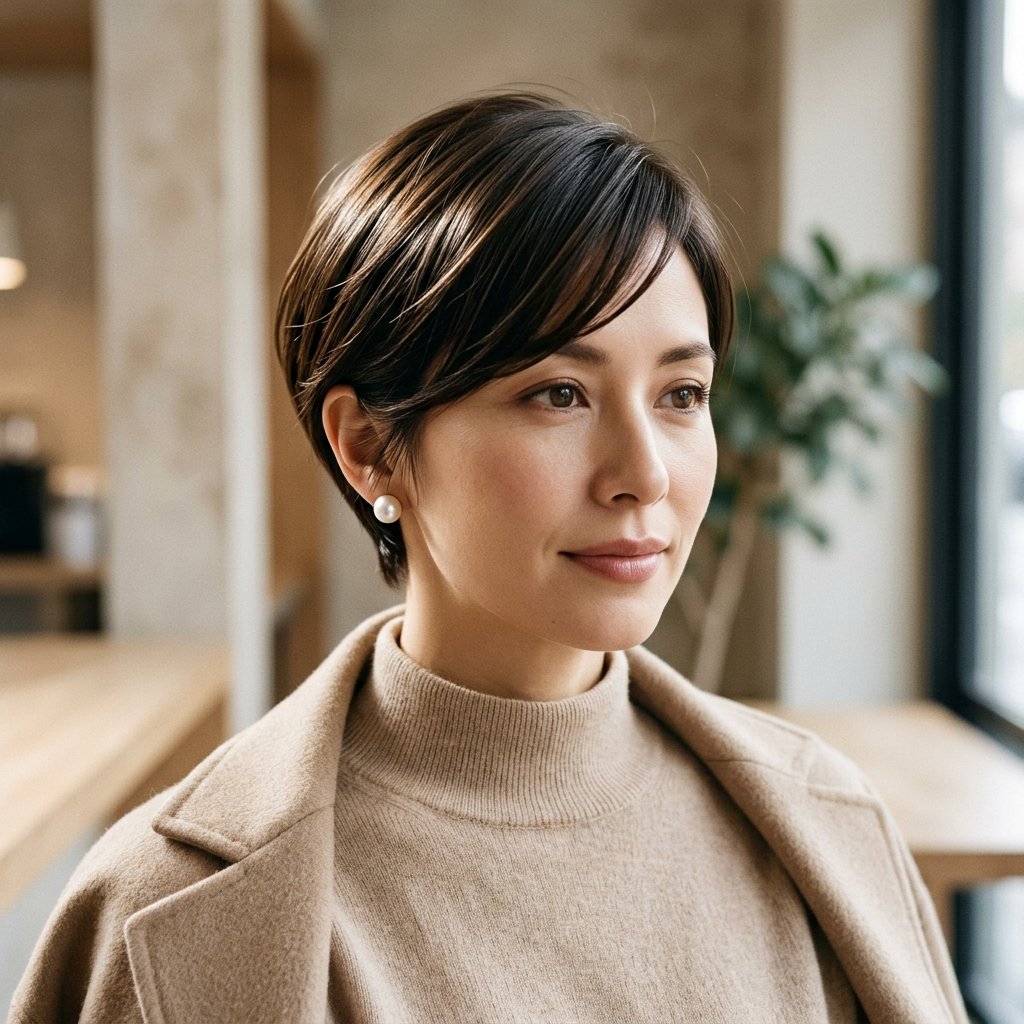
Old money hair is all about smooth, intentional shape. For natural hair, that means stretched or pressed curls cut into a clean, soft layered pixie with no obvious hard lines.
Think of it as the short version of a quiet luxury bob. Polished, simple, and quietly expensive looking.
- Deep side part for instant elegance
- Blunt-ish ends, softly blended layers
- Glossy finish with a light serum, not heavy oil
5. The Romantic Goth Layered Pixie
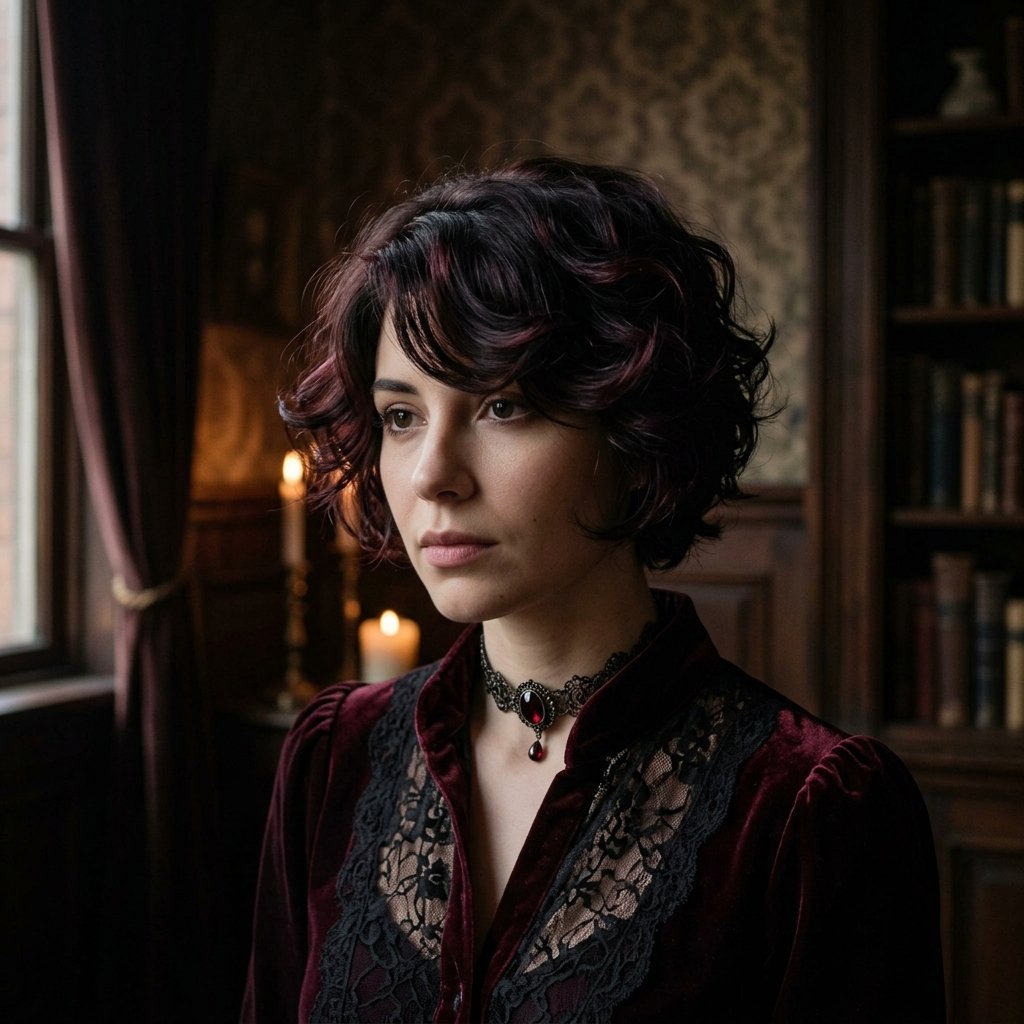
Soft, dark, and a little moody. Romantic goth hairstyles lean on texture, not spikes, and this pixie version is no different.
Long face-framing layers in front, closer in the back, and a cool black-brown or deep burgundy tone. The softness is what makes it romantic instead of costume-y.
- Ask for soft baby fringe or long face pieces
- Go for brushed-out curls over tight definition
- Finish with a matte cream, not a wet gel
6. The Glitchy Glam Pixie
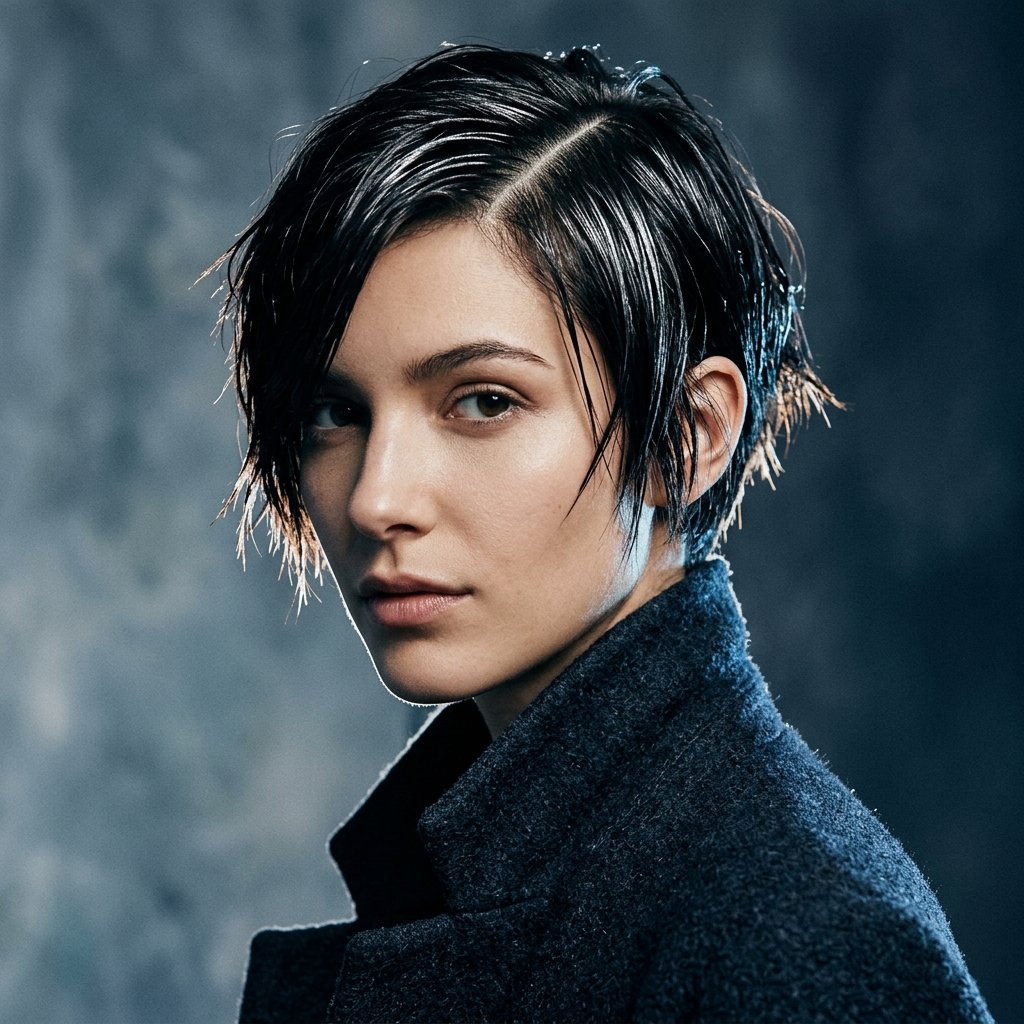
Glitchy glam hair is the fun one. Choppy, slightly uneven layers, one sharp side, and a little shine on top. It looks undone on purpose.
The trick is that “uneven” has to be cut with intention. Ask for short point-cut layers mixed with one longer piece at the front to keep it looking designed.
- Mix very short layers with one long front piece
- Keep edges clean so it reads glam, not messy
- A little shine spray finishes it
7. The Vampire Haircut Pixie
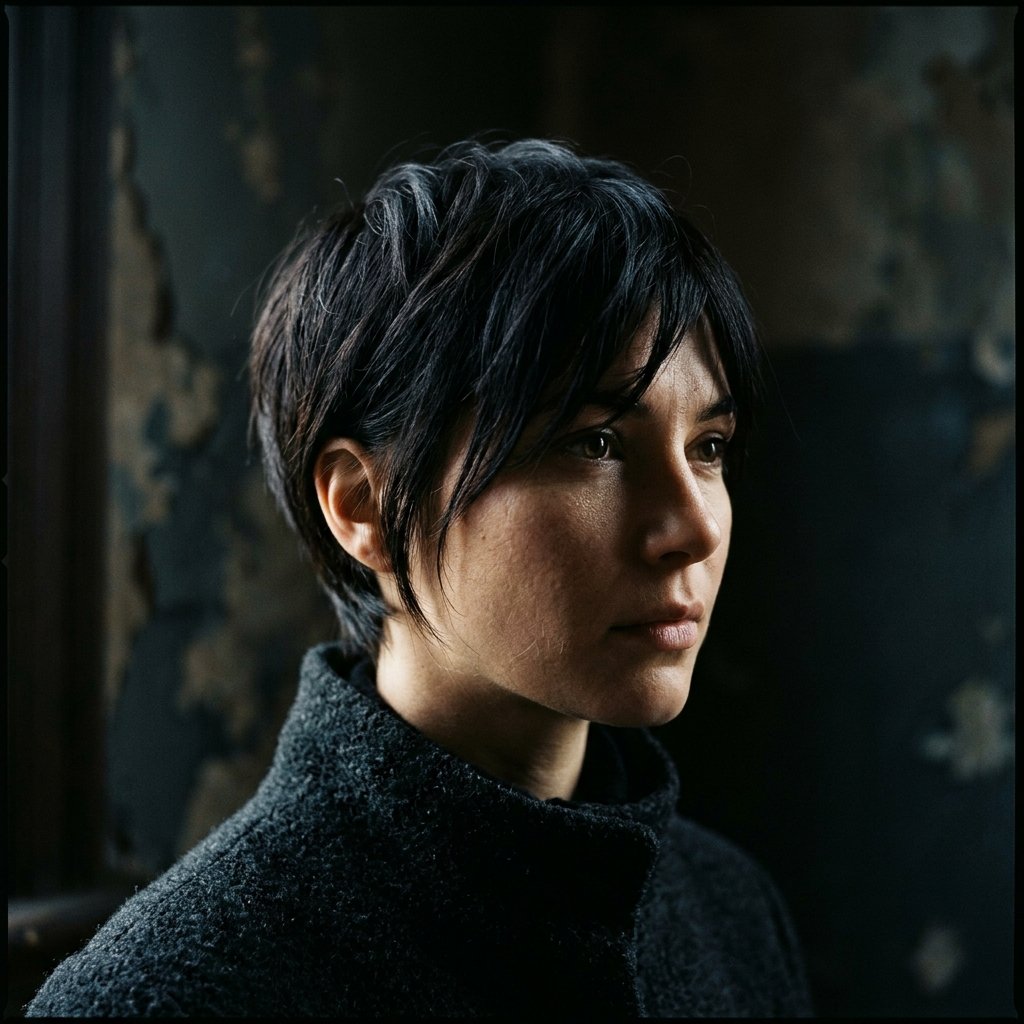
The vampire haircut is a layered cut with a wide face-framing curve and long front pieces that graze the cheekbones. In pixie form, it’s dramatic and super slimming.
This one is great if you want your cheekbones to do the talking. It also softens a strong jawline really nicely.
- Keep front pieces hitting below the brow bone
- Blend the sides into the back gradually
- A soft middle or slight side part works best
8. The Hime Cut Pixie
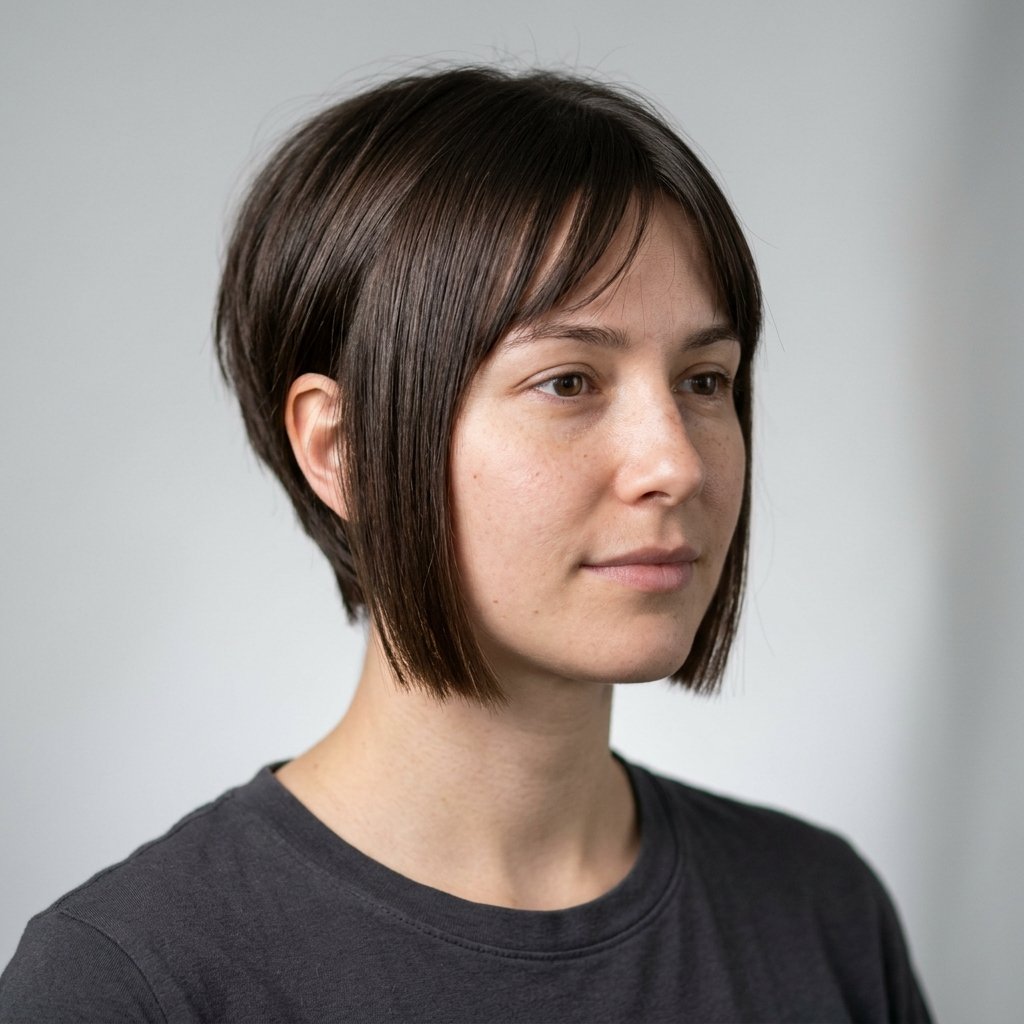
The hime cut means blunt side pieces with a softer back. On a pixie, you keep blunt jaw-length strands framing the face and layer the top and back short.
It’s a bolder beginner move, but honestly it’s forgiving. The blunt pieces hide a lot on days you don’t feel like styling.
- Keep the side pieces genuinely blunt
- Layer only the top and back
- Sleek or stretched hair shows the shape best
9. The Choppy Textured Pixie

Choppy layers are point-cut, so the ends look like little feathers instead of lines. That texture is what keeps a short cut from looking stiff.
It’s especially forgiving on coily hair, because the natural texture and the choppy layers do the same job.
- Ask for point-cutting, not thinning shears
- Keep layers uneven but blended
- Scrunch and go, no perfecting needed
10. The Pixie With Micro Bangs

Micro bangs are a short fringe cut just above the brow, and they change the whole mood of a pixie. Suddenly it feels intentional and a little edgy.
The trick with natural hair is keeping the fringe layered so it frames instead of curling straight up into a wall.
- Ask for a soft, layered fringe, not a blunt block
- Keep it just above the brow line
- Style with a tiny bit of gel on a spoolie
11. The Curly Top Pixie With Faded Sides
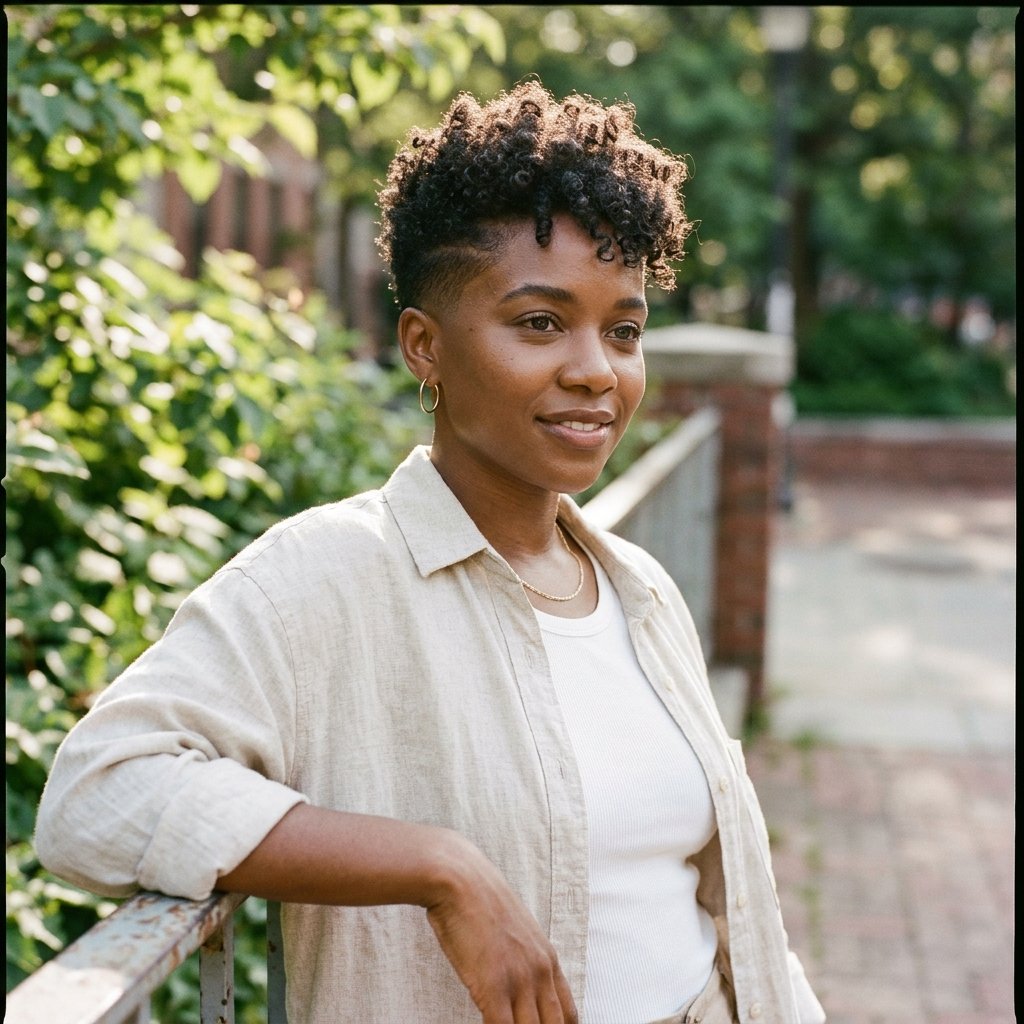
A fade on the sides and back with curls on top. Honestly, this might be the lowest maintenance cut on this whole list.
The contrast between smooth sides and textured top is what makes it pop, and the faded parts need almost nothing to look good.
- Ask for a mid fade, blended into the top
- Keep two to three inches on top
- Refresh the fade every four to six weeks
12. The Coily Pixie With Deep Layers
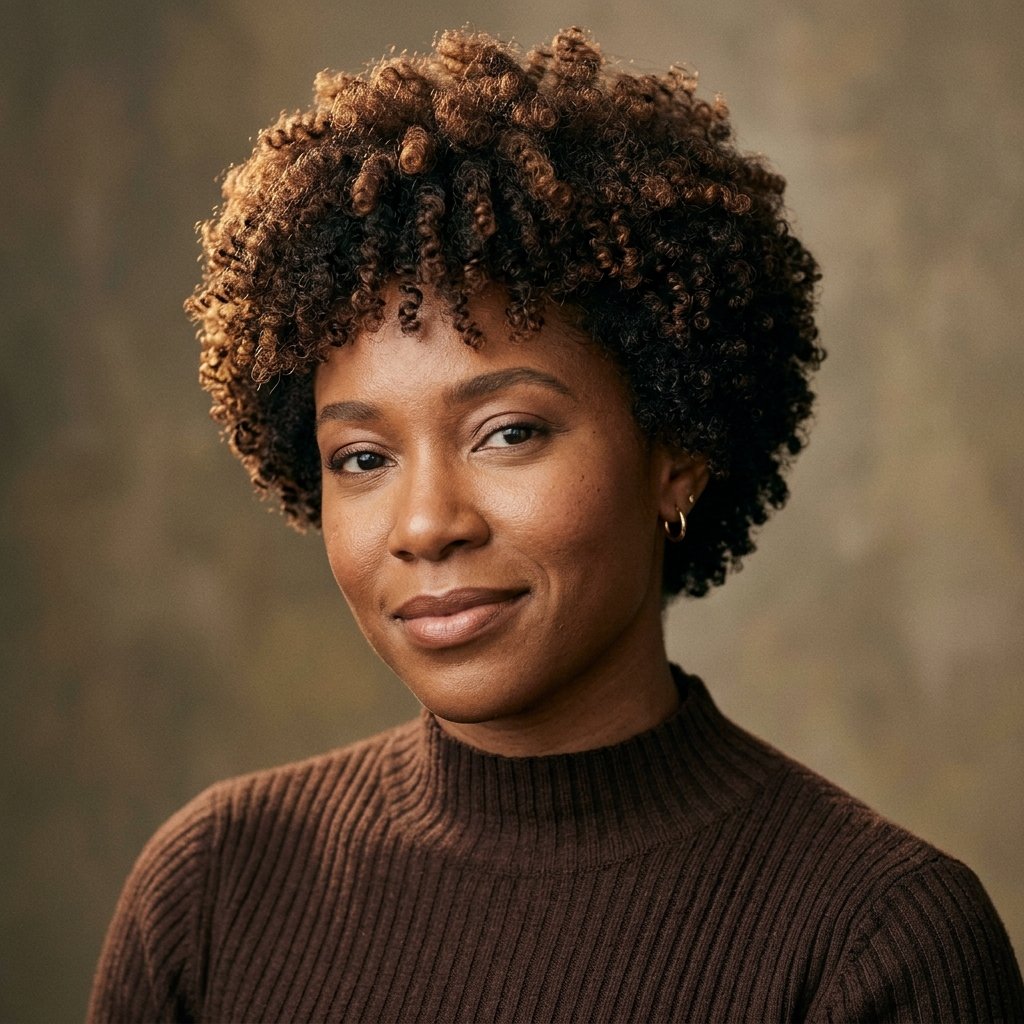
Deep layers mean the top is significantly longer than the sides. For 4b and 4c hair, that’s a game changer because shrinkage starts working for you instead of against you.
The result is a rounded, full shape that looks styled even when all you did was spritz and shake.
- Ask for deep layers, not just blended edges
- Cut the shape on dry, shrunken hair if possible
- Use a curl cream with light hold
13. The Side-Swept Layered Pixie

Long, graduated layers swept to one side. This cut gives you that classic, soft, almost old Hollywood feeling in a very short length.
It’s also one of the easiest pixies to style, because the direction is already built in.
- Ask for graduated layers that get shorter toward the back
- Keep the sweep side soft, not glued down
- Use a brush and a touch of edge control
14. The Wash-and-Go Layered Pixie
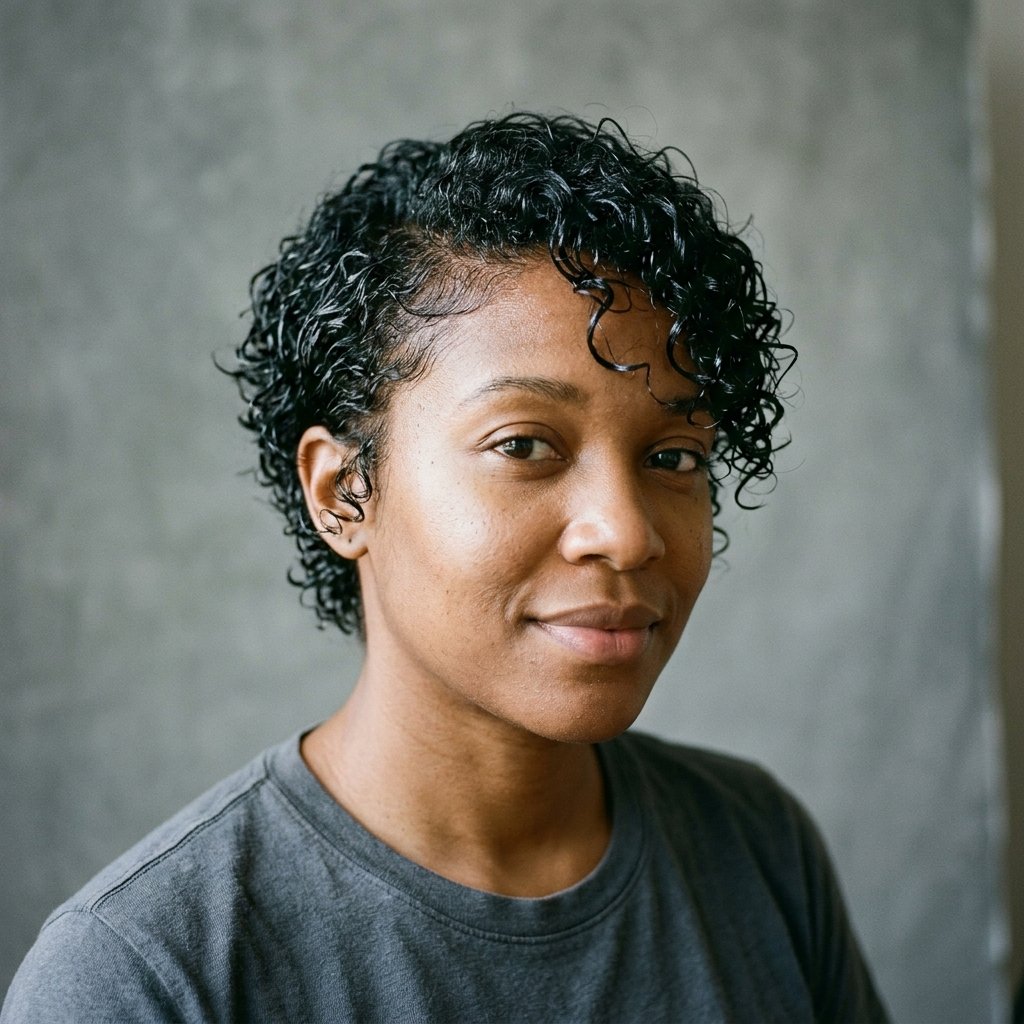
This is a pixie cut specifically layered so it can be styled with just conditioner and gel. No twist-outs, no rod sets, no waiting.
The big thing here is asking your stylist to cut it on dry, shrunken hair. Otherwise you’ll get layers that only work when your hair is stretched.
- Cut on dry, shrunken hair
- Keep layers light so curls clump easily
- Style on soaking wet hair for definition
15. The Protective Pixie With Finger Coils
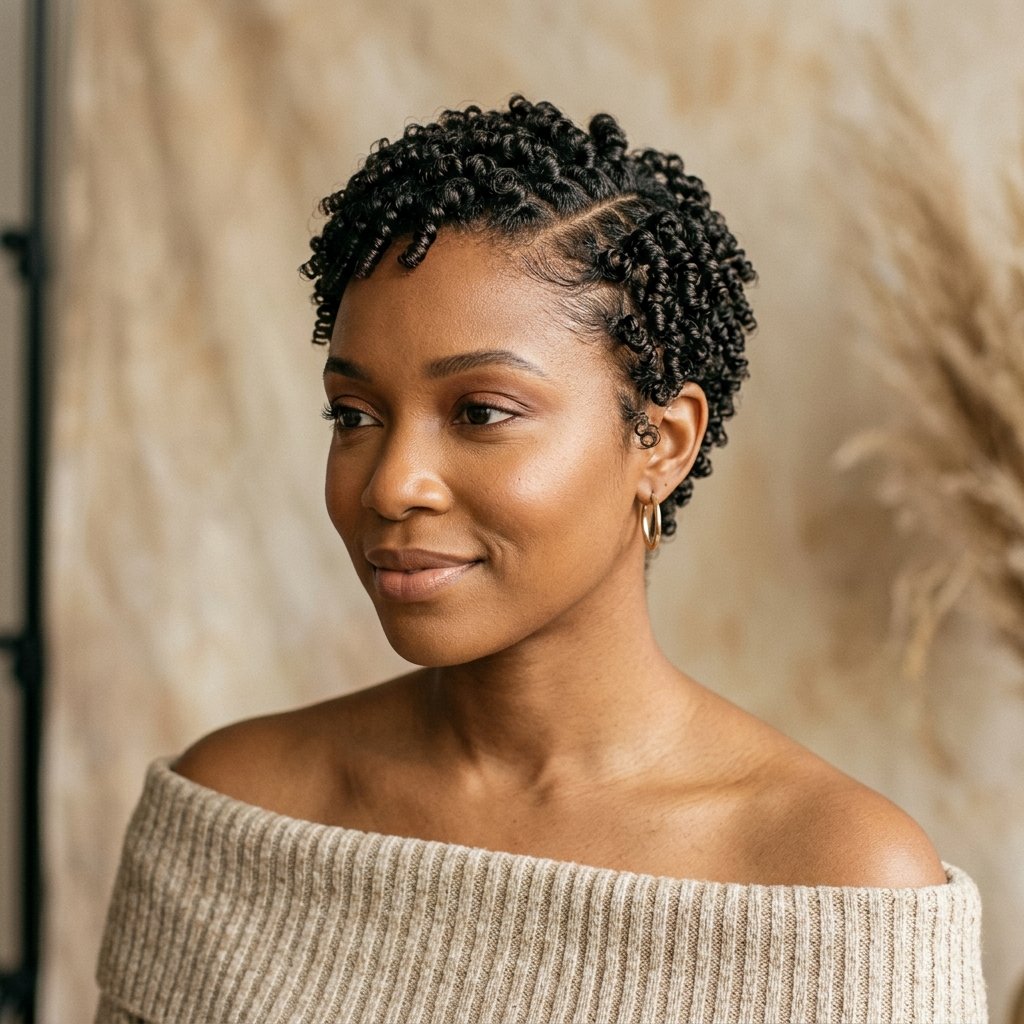
Finger coils on a pixie give you a mini halo of definition. It looks polished, lasts several days, and protects your ends while they’re still short.
It’s a bit of hands-on work upfront, but the payoff is a week of easy mornings.
- Section small, even pieces
- Twirl with a cream or light gel
- Sleep with a loose scarf to keep definition
16. The 2026 Layered Pixie With Curtain Fringe

Curtain fringe is everywhere in 2026 hairstyles, and it translates beautifully to short hair. Two soft pieces that part in the middle, framing the face instead of covering it.
It softens a pixie instantly and makes the cut feel more modern and wearable.
- Keep the fringe pieces below the brow
- Part slightly off-center for volume
- Style with a small round brush or your fingers
17. The Grown-Out Pixie With Soft Layers

This is the “I’m growing it out and it looks intentional” cut. Long soft layers, blended sides, and just enough length at the nape to feel different.
It’s a great option if you liked your pixie but want a few more styling choices.
- Keep the nape blended, not blocky
- Add long layers rather than short ones
- Trim every six to eight weeks to hold shape
18. The Pixie With a Hidden Undercut
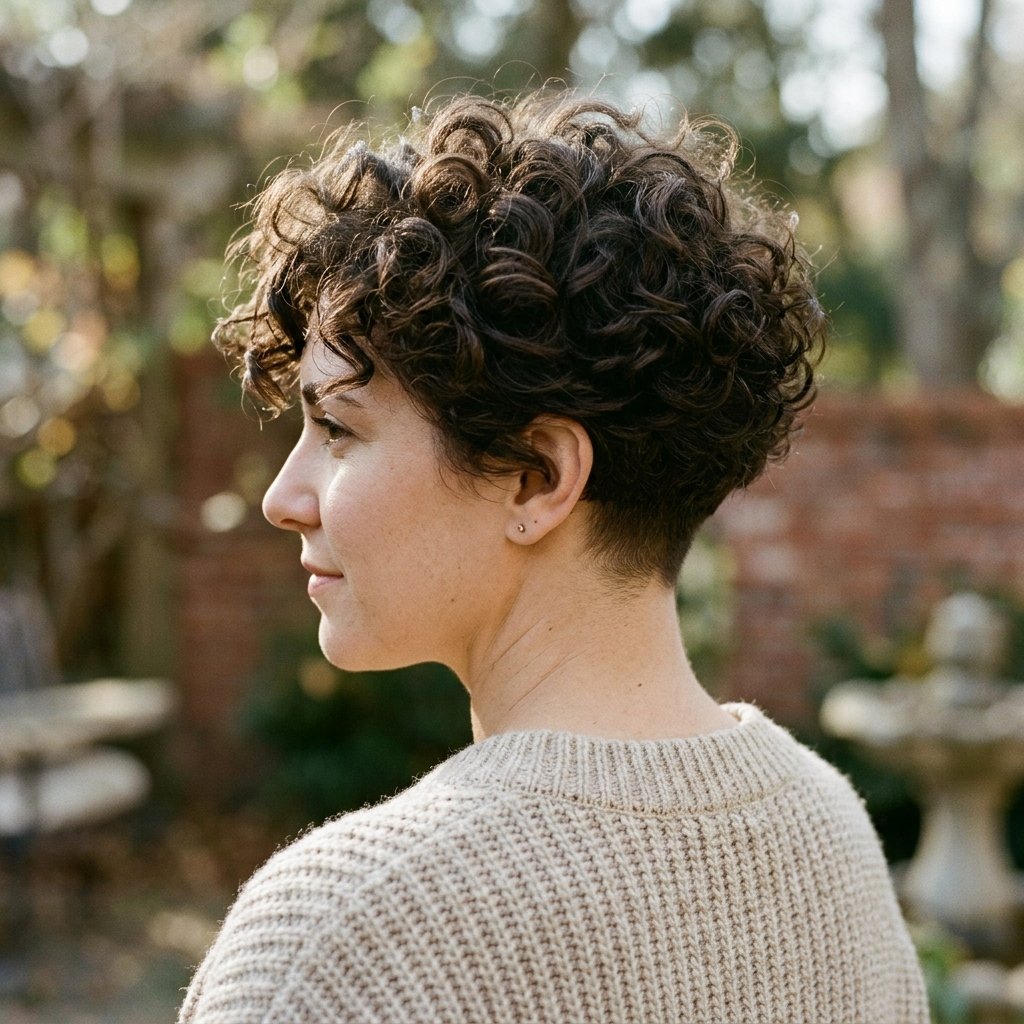
Looks full, feels light. The undercut hides underneath so you keep all the volume on top while the heavy part disappears.
It’s a smart pick if your hair is thick but you want the ease of a pixie.
- Ask for a nape undercut, kept hidden
- Keep the top full for shape
- Refresh the undercut at home with clippers if you’re comfortable
19. The Curly Shag Pixie

Part shag, part pixie. Shaggy layers with a little extra length at the nape and soft fringe around the face.
It’s great if you love the shag trend but want something shorter and easier to manage.
- Keep the nape slightly longer than a classic pixie
- Ask for choppy, blended layers
- Let curls dry loose, no diffuser needed
20. The Bixie With Layers
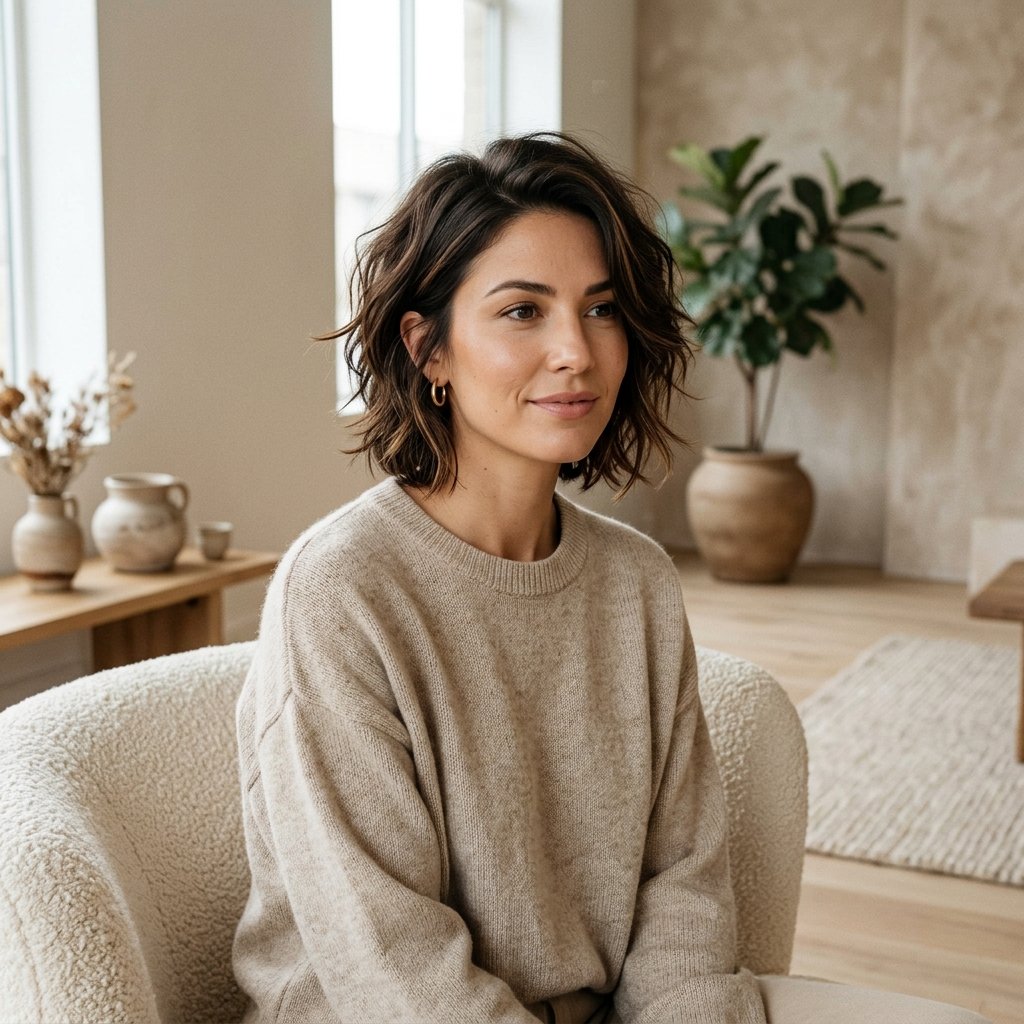
The bixie is the perfect middle ground between a bob and a pixie. It sits around the ear to jaw line, which means more styling options than a true pixie.
It’s the most popular transition cut for a reason, and layered bixies look especially good on natural hair.
- Ask for jaw-level length with soft layers
- Keep the back slightly shorter than the front
- Works with straight, wavy, or curly texture
21. The Wet-Look Layered Pixie
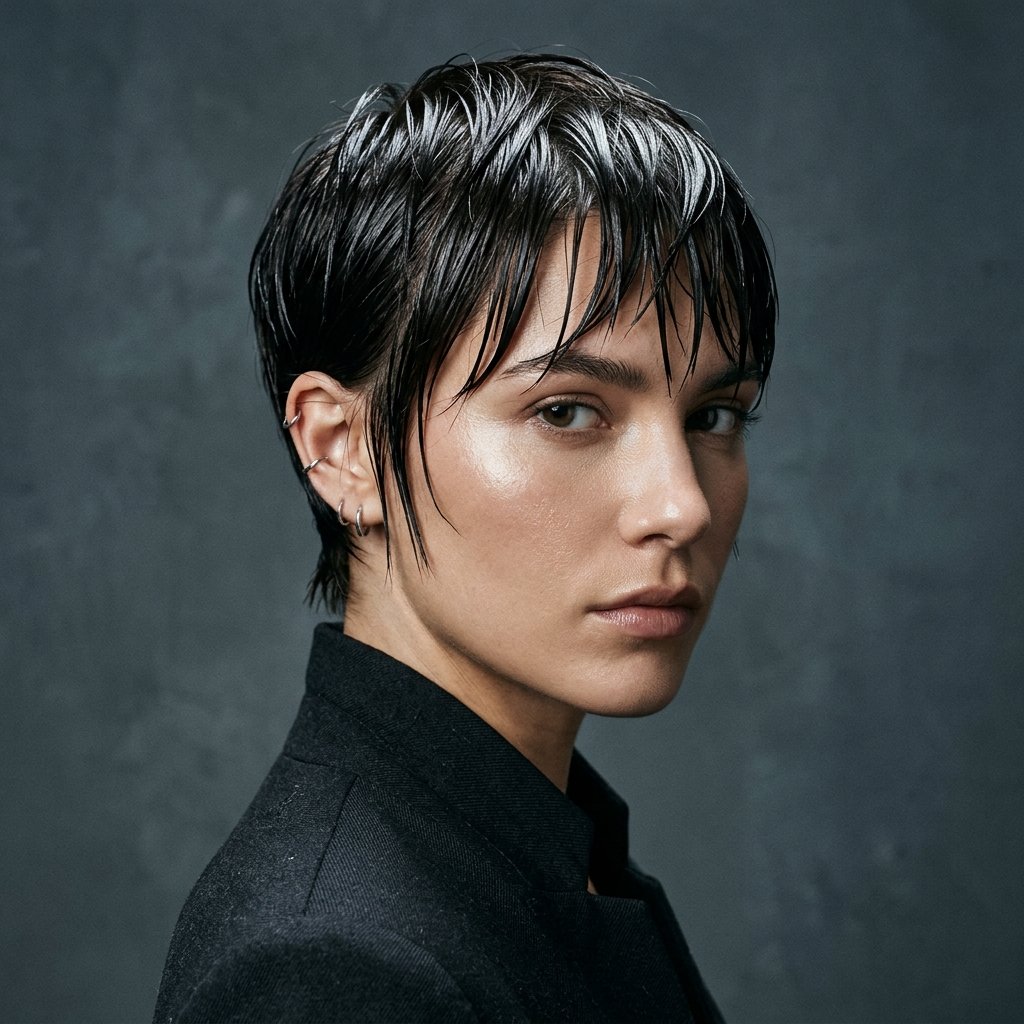
Slicked, defined, and glossy. This is the look for days you want to feel sharp and put together in about three minutes.
It works best on stretched, pressed, or loosely curly hair, and it stays neat through humidity.
- Use a strong-hold gel on damp hair
- Smooth with a brush in one direction
- Finish with a light oil for shine
22. The Layered TWA
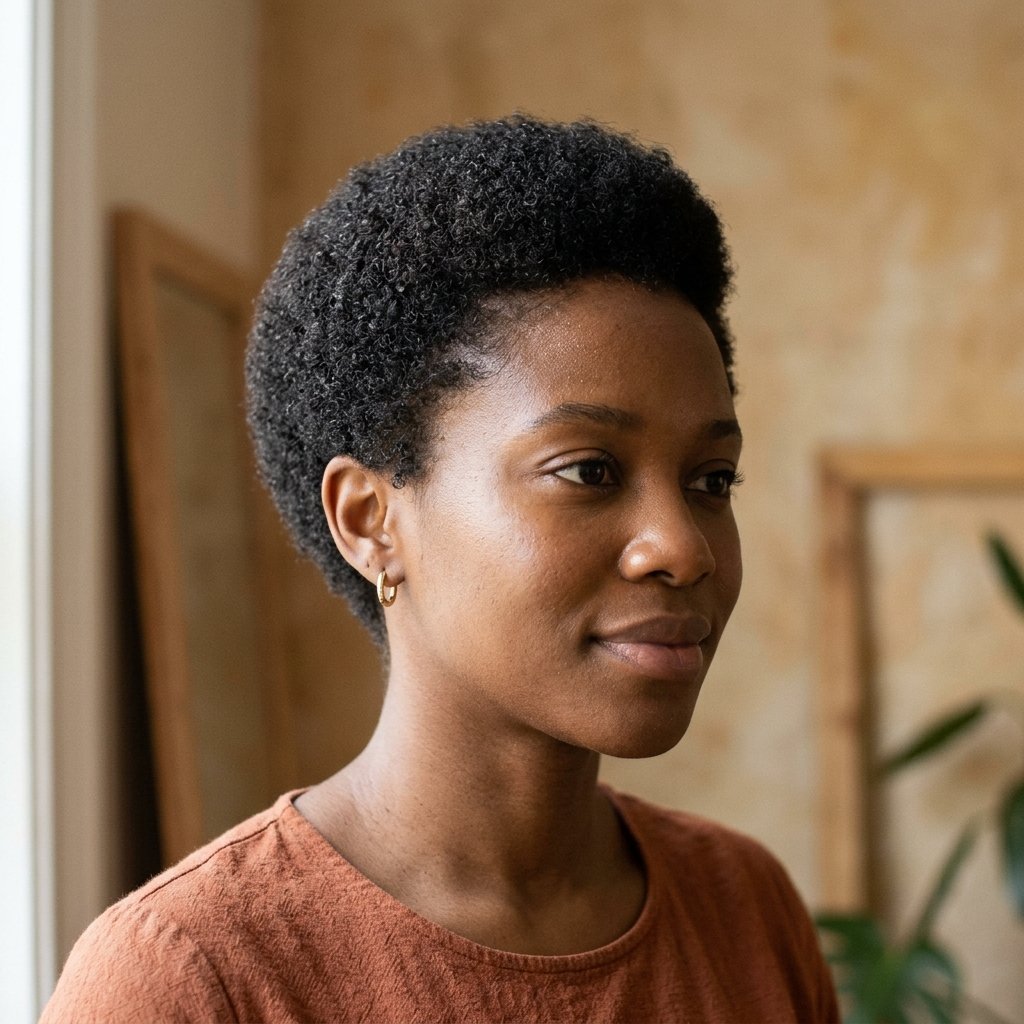
A teeny weeny afro with layers carved in gives you shape without adding length. It’s the gentlest way to try a short layered cut.
It also makes the growing-out phase way less awkward, because the shape stays intentional at every stage.
- Ask for shape, not length, to be removed
- Keep the layers soft and rounded
- Trim regularly to hold the silhouette
23. The Layered Pixie With a Deep Side Part
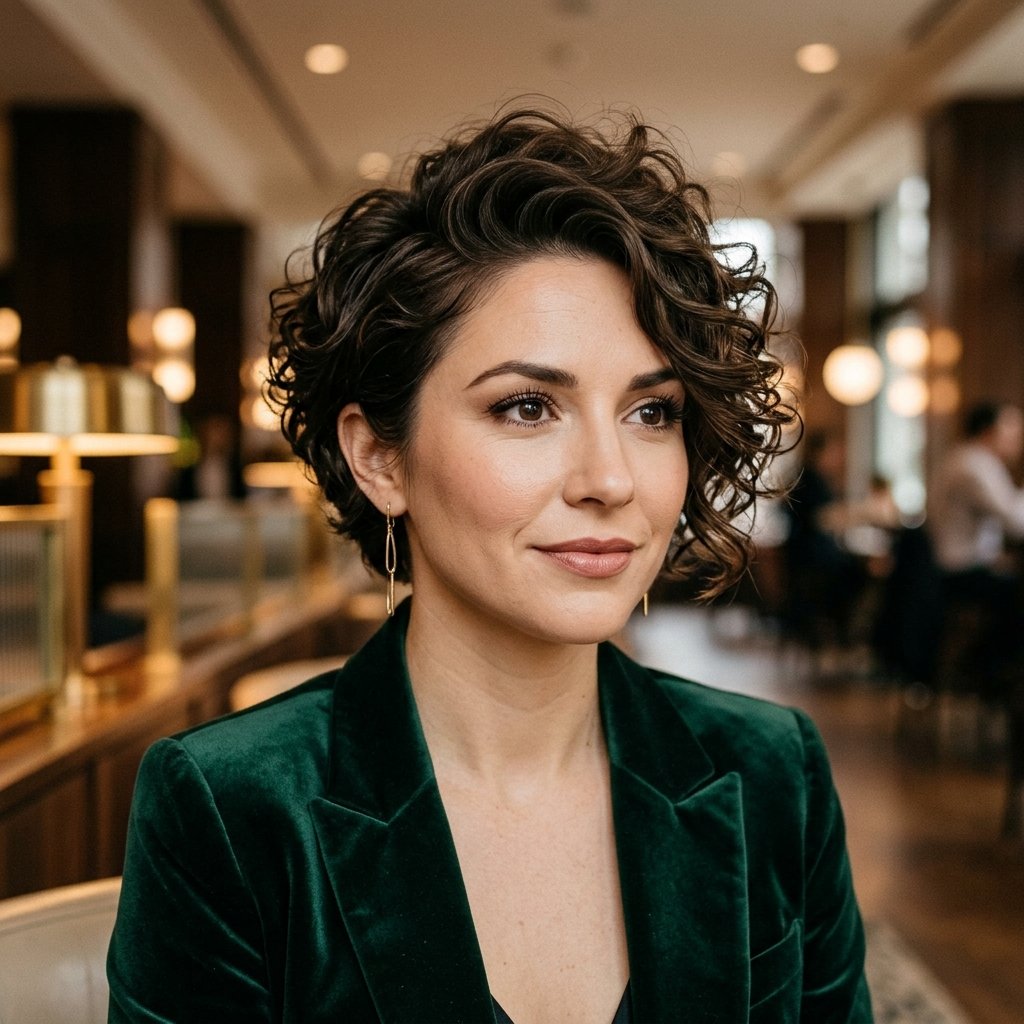
A deep side part is the simple symmetry trick. It adds volume on one side and instantly makes a short cut look fuller and more styled.
It’s also the easiest way to fake a good hair day on day-four hair.
- Part while hair is damp so it sets
- Lift the root on the fuller side
- Smooth the shorter side with edge control
24. The Frohawk Pixie
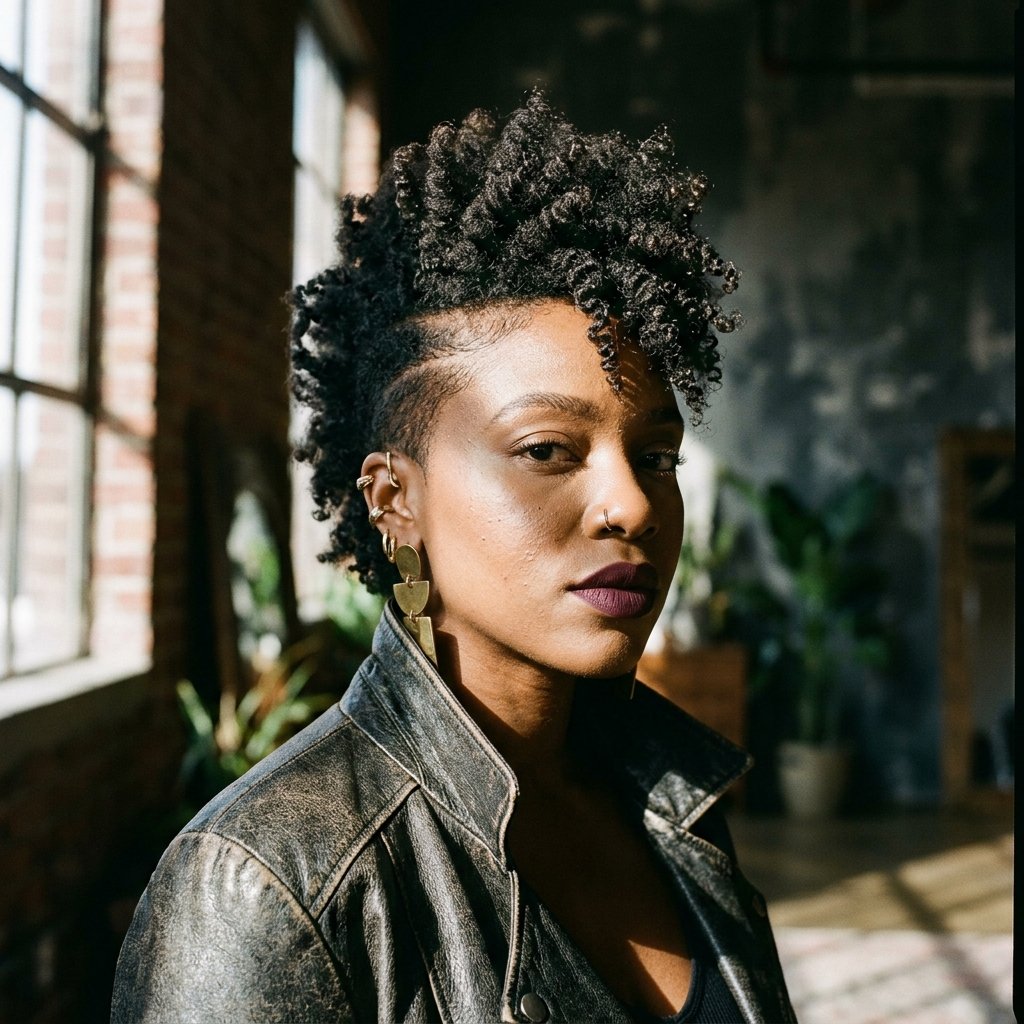
Tapered sides, center lifted into a mini mohawk shape. The frohawk pixie is bold but totally doable on natural hair.
You can make it subtle for work or dramatic for a night out, depending on how high you style the center.
- Taper the sides lightly, not all the way down
- Style the center with gel for height
- Pin sections up if you want extra lift
25. The Bowl-Cut-Inspired Pixie

The bowl cut got a serious upgrade. Rounded, soft, and layered with no hard line, it’s basically a modern pixie with a curved silhouette.
It suits round and oval faces beautifully and feels very 2026 without trying too hard.
- Ask for rounded layers, not a blunt bowl
- Keep the fringe soft and piecey
- Blend the sides into the back smoothly
Styling Products Your Pixie Actually Needs
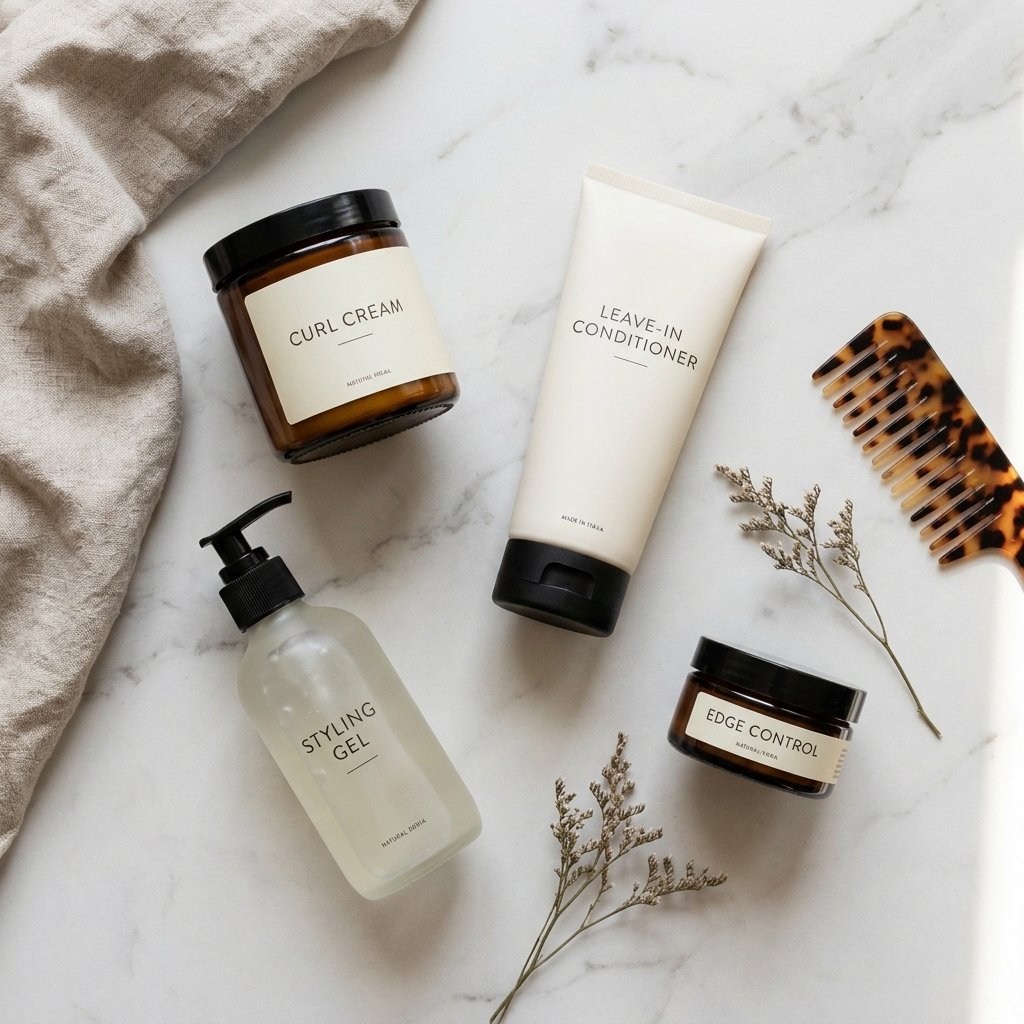
You don’t need a whole cabinet. Five products will cover almost everything a beginner layered pixie needs.
- Leave-in conditioner for softness and moisture
- Curl cream for definition without crunch
- Light gel for hold on the top and edges
- Edge control for the hairline and front pieces
- Lightweight oil or serum for shine and finishing
Start with less product than you think. Short hair shows buildup fast.
The 5-Minute Morning Pixie Routine
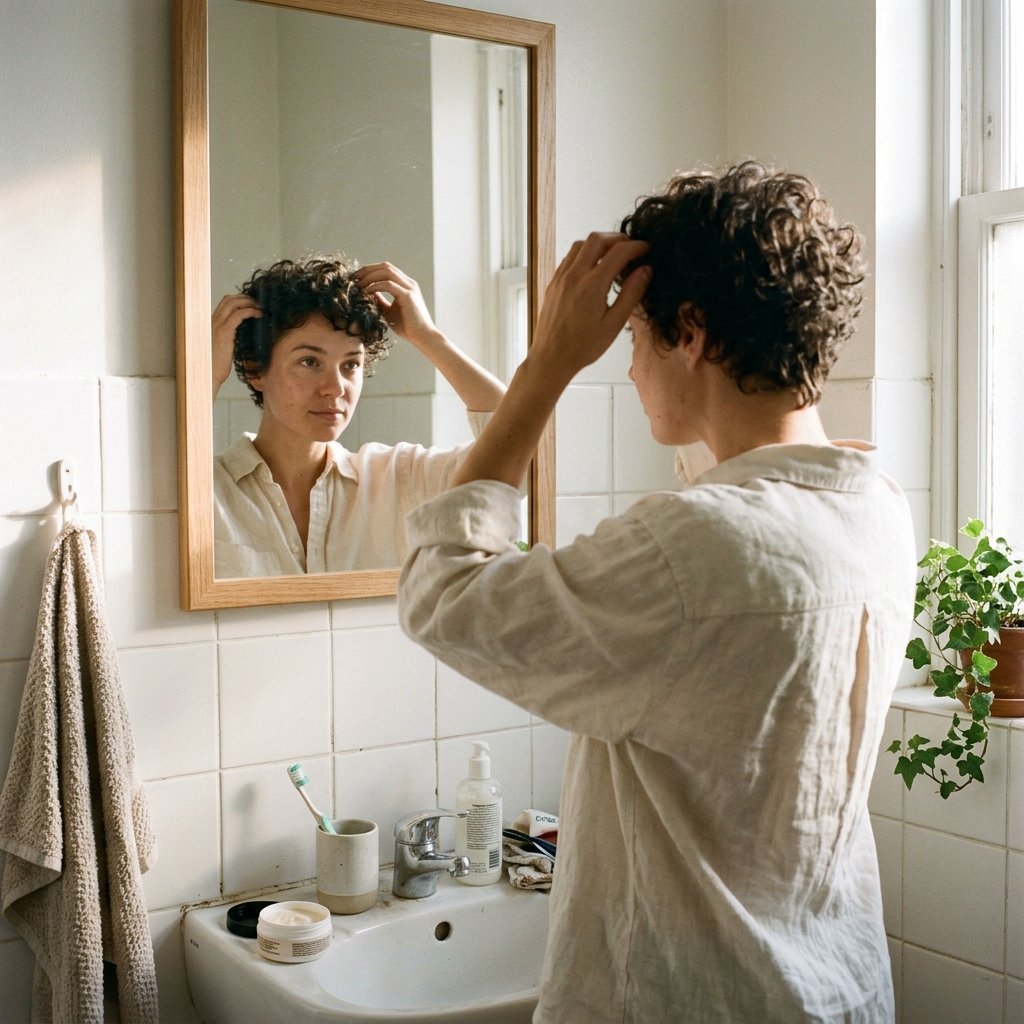
Short hair should be fast. Here’s the routine that actually keeps a layered pixie looking good on busy mornings.
- Spritz the whole head with water until damp
- Scrunch in a small amount of curl cream
- Lift the top with your fingers for volume
- Smooth the edges with a little gel
- Flip your head over, shake, and go
No diffuser needed unless you’re going somewhere special.
How to Ask Your Stylist for Layers
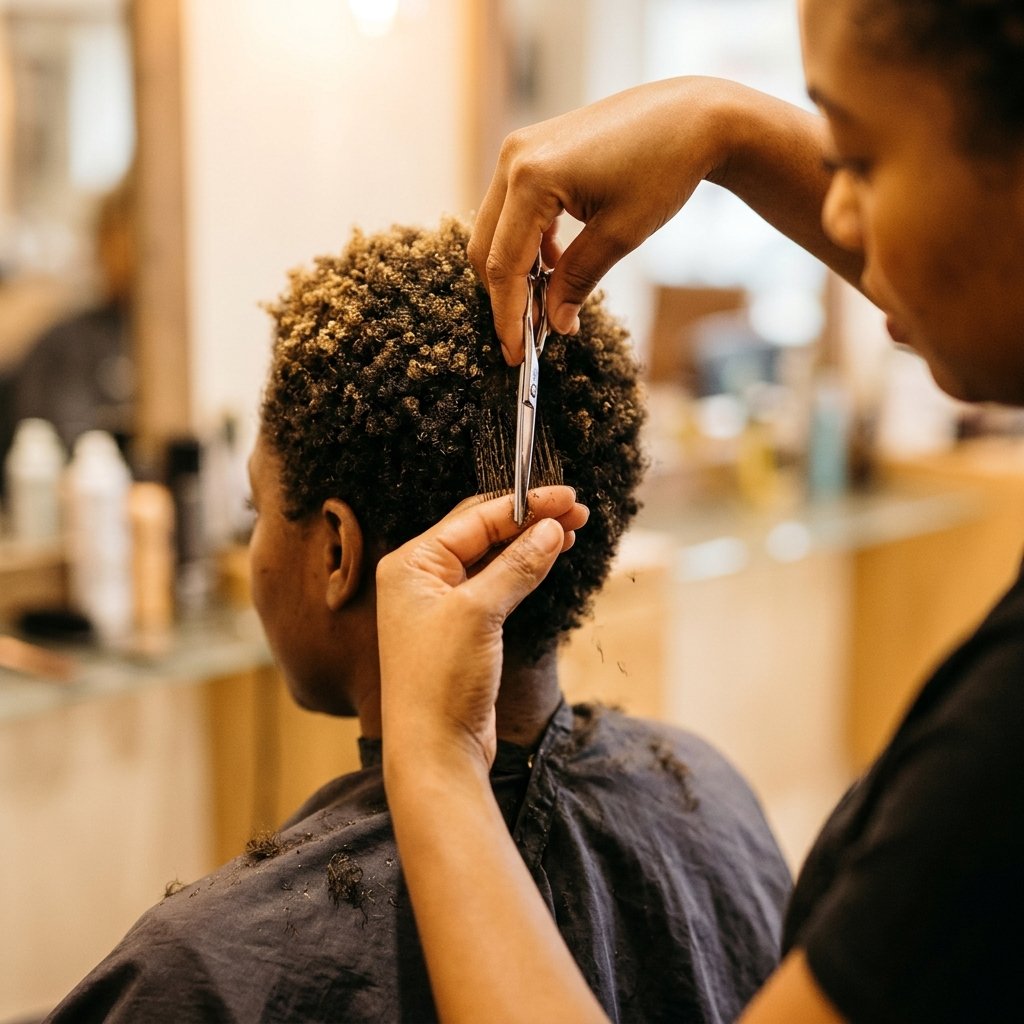
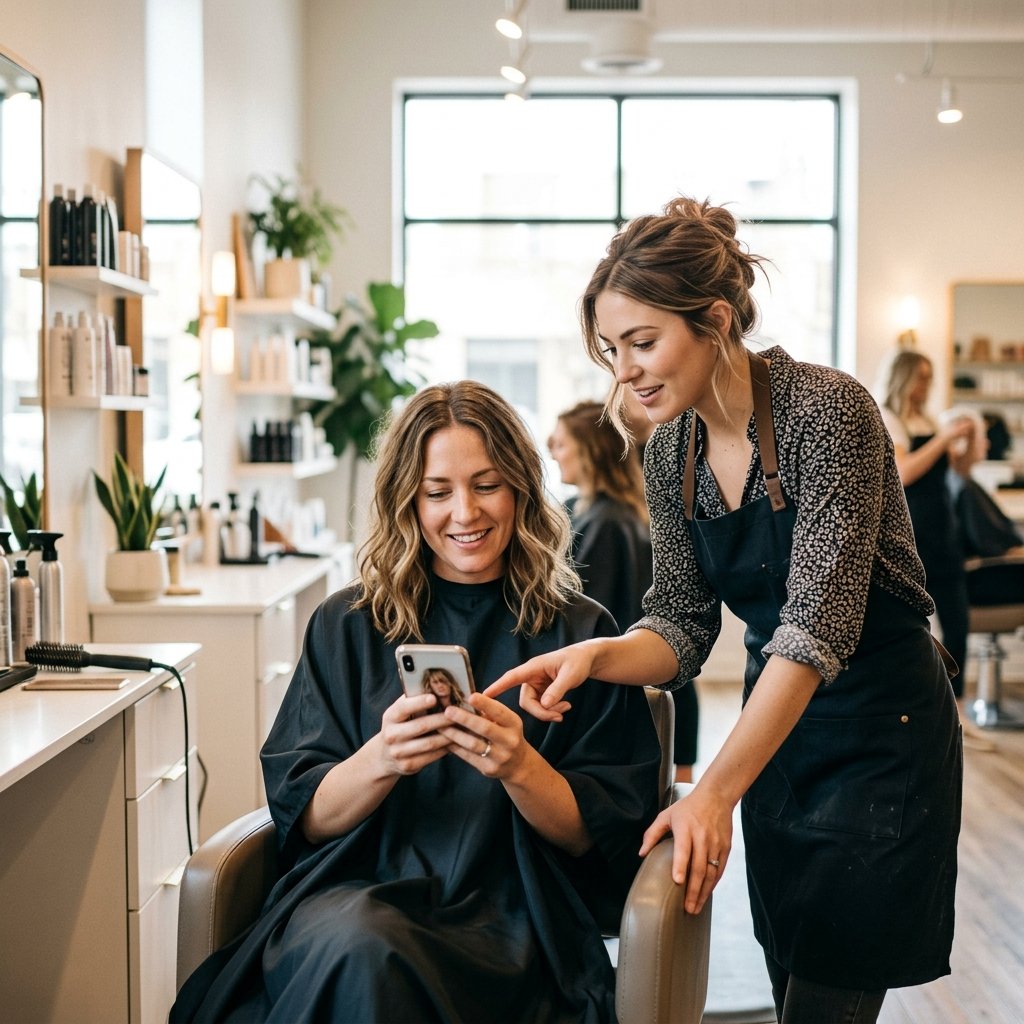
Bring two photos and use plain words. Vague requests are how people end up with a pixie they didn’t ask for.
- “I want soft blended layers, not choppy ones”
- “Keep the top the longest and blend the sides”
- “Please cut it on dry, shrunken hair”
- “Point-cut the ends so it looks airy”
- “I want to be able to do a wash-and-go”
Also ask how long the cut will hold its shape. That tells you how often you’ll be back.
Growing Out a Pixie Without Losing Shape

Growing out a pixie only looks messy when you skip trims. A tiny trim every six to eight weeks keeps the layers working while the length builds.
Focus on the back and the sides first. Let the top and front lead the growth, then reshape every couple of months.
- Trim the nape regularly
- Blend the ear area as it grows
- Add soft layers around the face to avoid a mullet moment
Layered Pixie Mistakes to Skip
Most pixie regrets come from a few small things. Avoid these and you’ll be fine.
- Getting too many short layers too fast
- Letting thinning shears do the layering
- Cutting on stretched hair when you wear it curly
- Skipping the shape check two weeks later
- Going to someone who doesn’t cut natural hair regularly
If something feels off, say it before you leave the chair. Fixing it then is way easier than fixing it later.
A Little Pep Talk Before You Book
Short natural hair is not a risk. It’s a reset. The right layered pixie gives you movement, a faster routine, and a shape that makes your texture look intentional.
Start with a soft, blended cut if you’re nervous. You can always go shorter later, and the layers will carry you through every grow-out stage.
Save this post to Pinterest so you have your reference photos ready when you sit in that chair. And tell me in the comments which pixie you’re leaning toward, I read every single one.

