
Okay, let’s be real. You have that special event coming up—maybe a wedding, a fancy dinner, or a date night that deserves a little extra sparkle. You want to look polished, elegant, and like you didn’t spend three hours wrestling with a curling iron. I get it. That’s where the magic of a simple, twisted bun comes in.
This isn’t just any bun. We’re talking about the kind of effortless, old money hair vibe that whispers quiet luxury. It’s the perfect blend of romantic and refined, and it works for absolutely every hair type and length.
I’ve put together 22 of my favorite ways to twist, wrap, and secure this timeless look. Think of this as your quick, no-fuss guide to looking incredibly put-together. Let’s dive in and find your perfect special-occasion style.
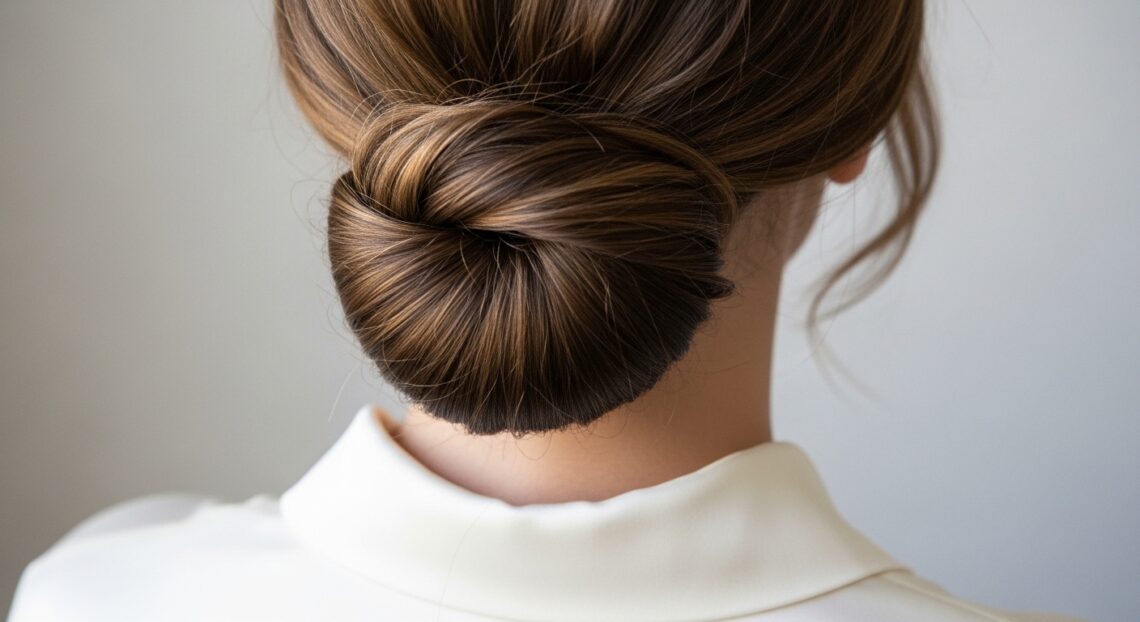
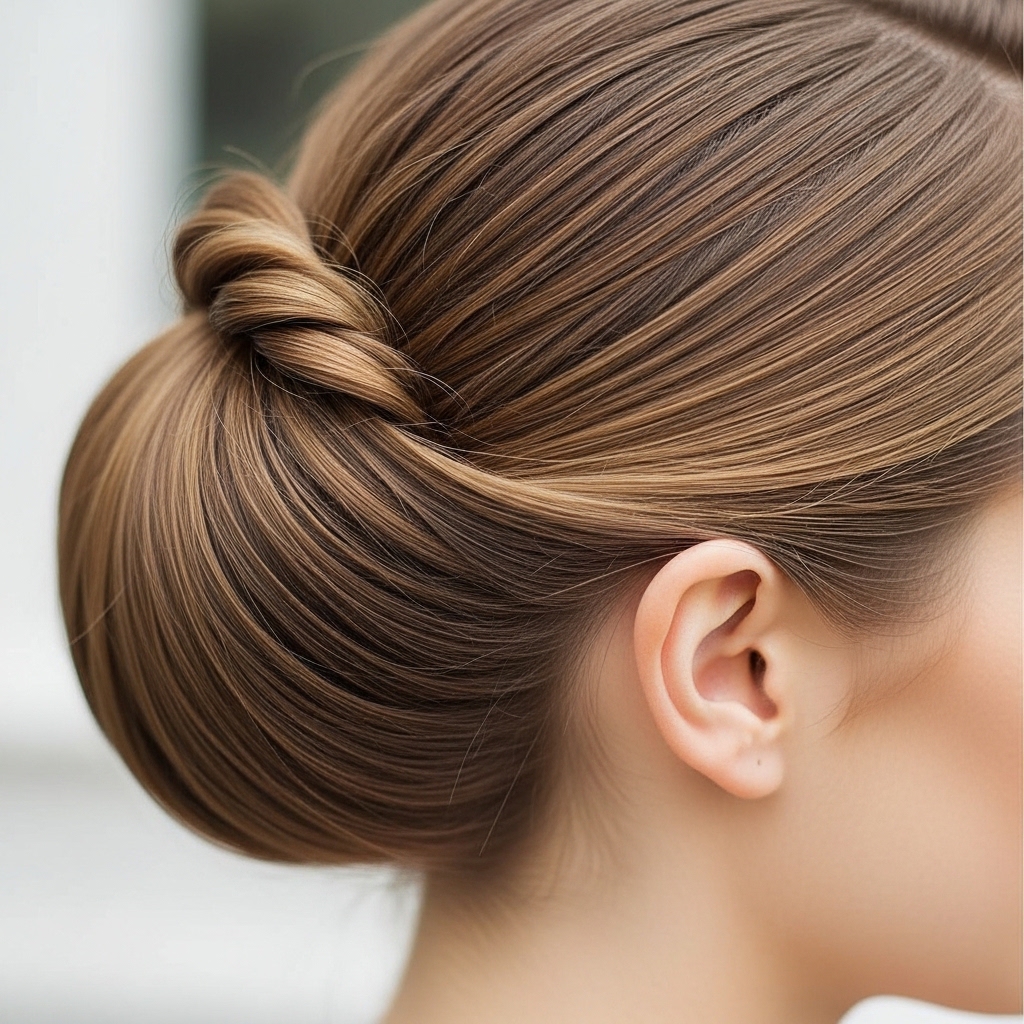
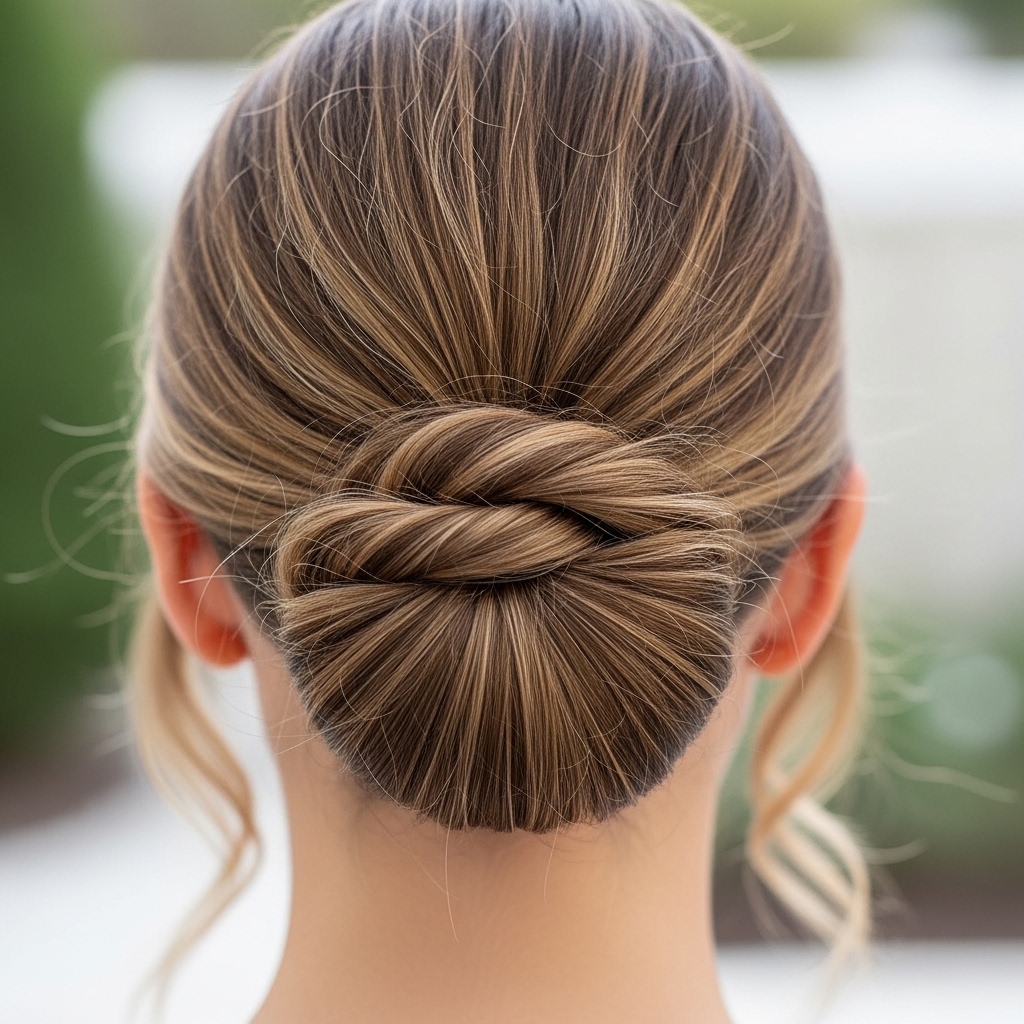
The Classic Low Twisted Bun
This is your foundation. It’s the starting point for so many gorgeous variations and the epitome of timeless elegance. Perfect for a black-tie event or a sophisticated brunch.
Start with a low ponytail at the nape of your neck. Twist the length tightly, then wrap it around the base, tucking the end under. Secure with pins. The key is to keep it neat but not too perfect—a few face-framing pieces soften the look instantly.
The Messy Romantic Twist
For a softer, more ethereal feel, this bun is a dream. It pairs beautifully with romantic goth hairstyles aesthetics when done with dark hair, adding a touch of poetic drama.
Follow the steps for the classic low bun, but before you pin, gently pull on the edges of the twist to create volume and a slightly undone texture. Don’t be afraid to let a few more pieces escape.
The Twisted Ballerina Bun
Channel graceful, classic beauty. This higher placement feels youthful and polished. It’s a stunning choice to show off your neckline and earrings.
Gather your hair into a high ponytail. Twist and wrap it into a compact coil, securing it directly at the crown. Use a hairnet or a sock bun for that flawless, smooth ballerina finish.
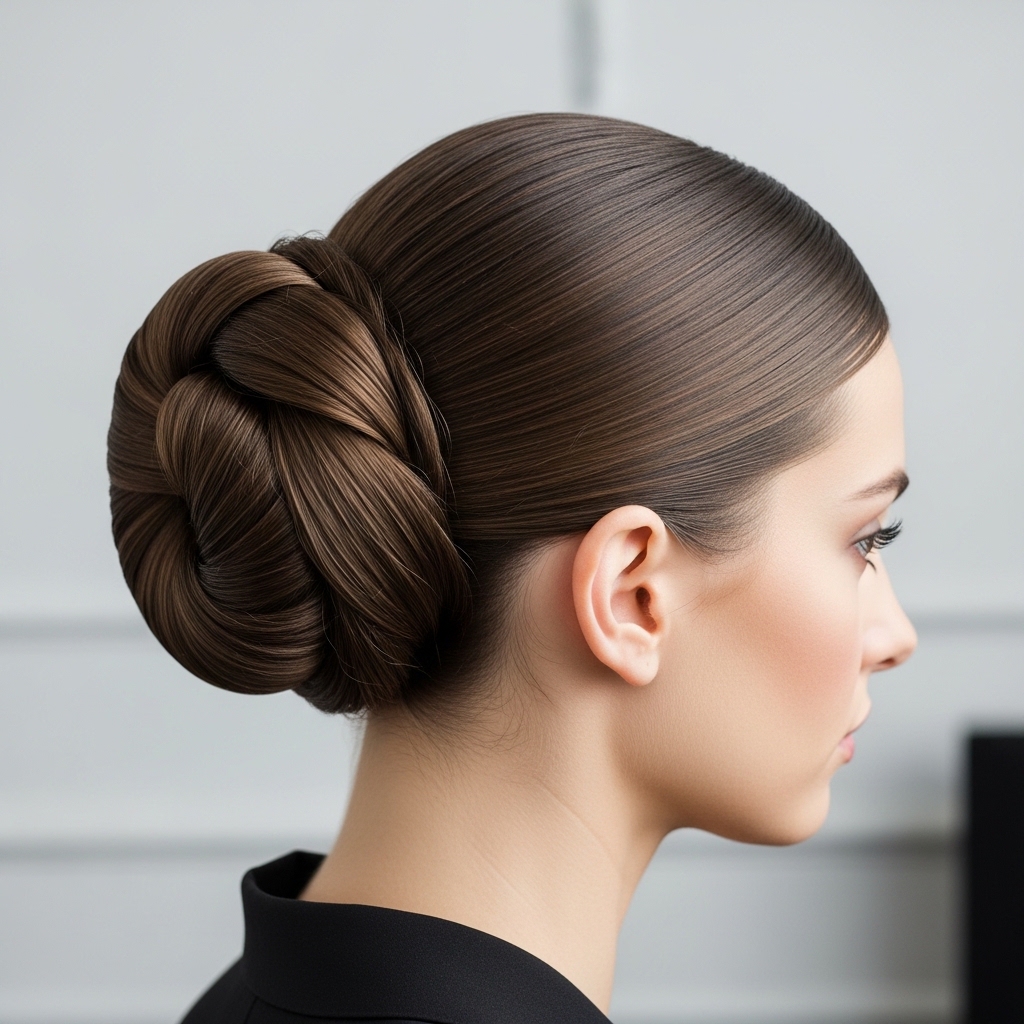
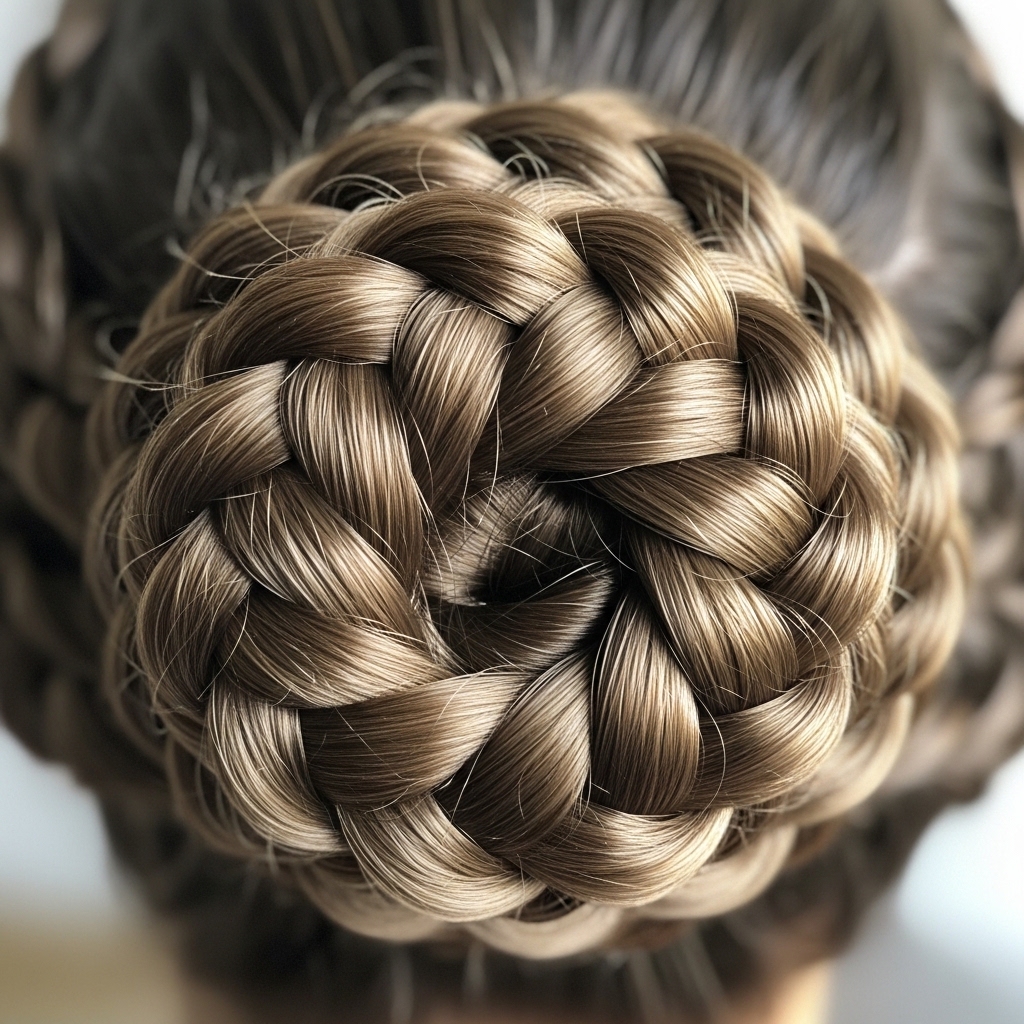
The Braided Rope Twist Bun
Add intricate detail with a simple braiding technique. This style looks far more complicated than it is, giving you major style points for minimal effort.
Split your low ponytail into two sections. Twist each one clockwise, then twist them together counter-clockwise. Wrap this “rope” into a bun and pin. The texture is beautiful.
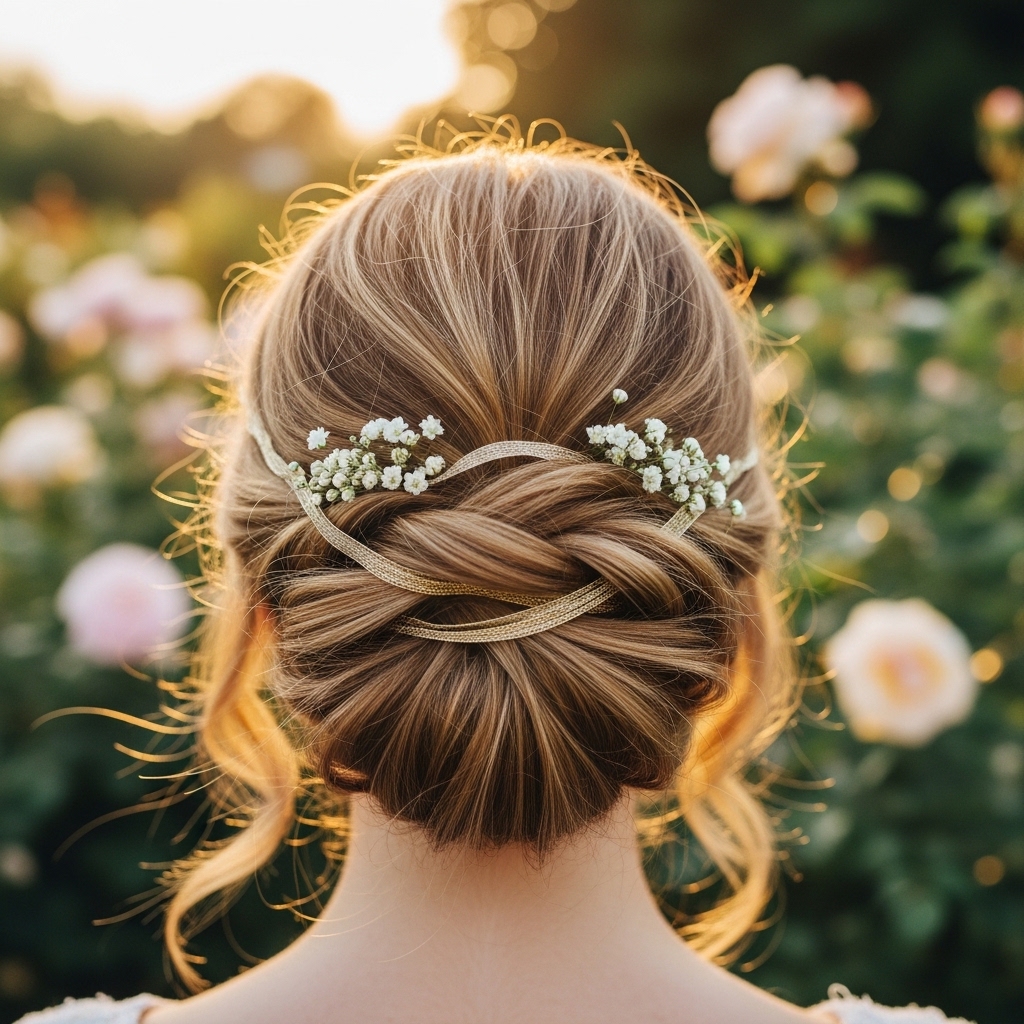
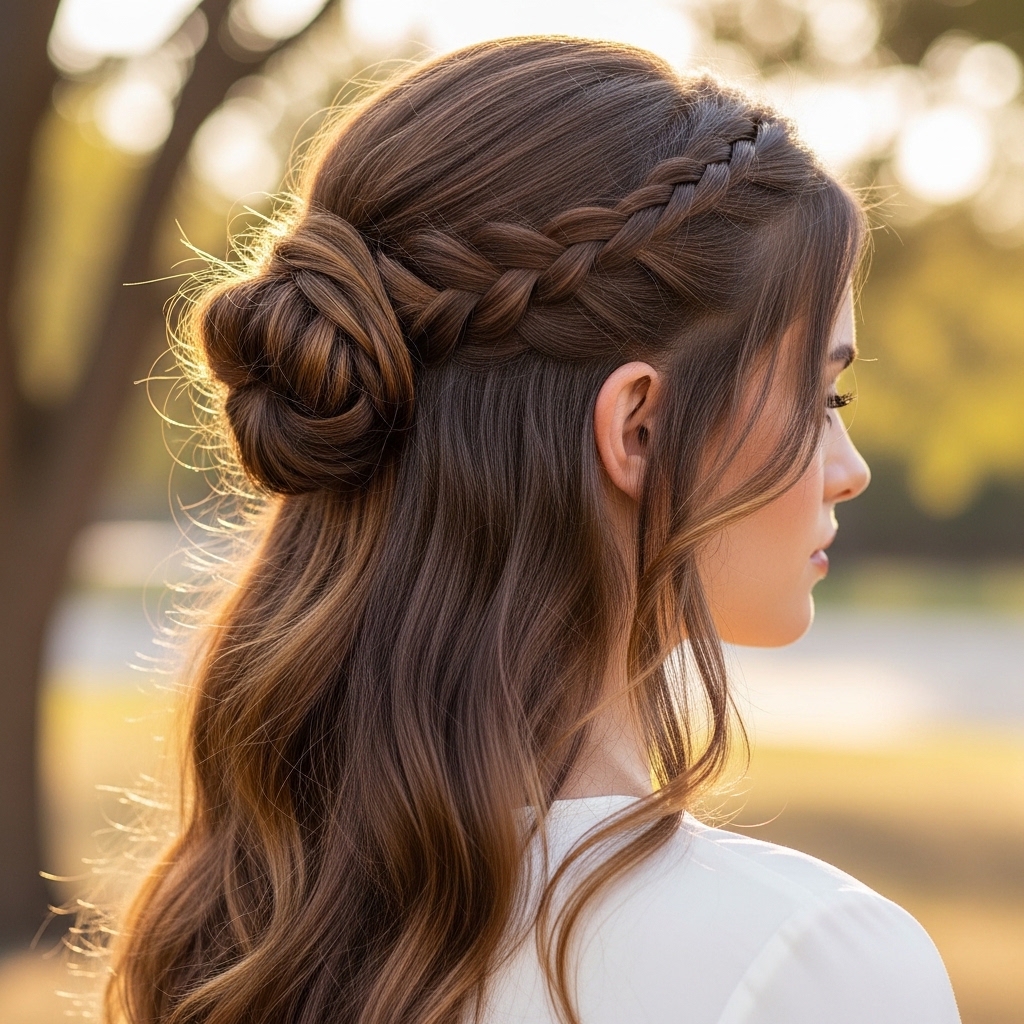
The Half-Up Twisted Crown
Not ready to commit all your hair up? This is your perfect compromise. It keeps hair off your face while letting your length shine, ideal for showcasing beautiful waves.
Take two sections of hair from above your temples. Twist each back, then cross and pin them at the back of your head, incorporating them into a small, delicate twisted bun.
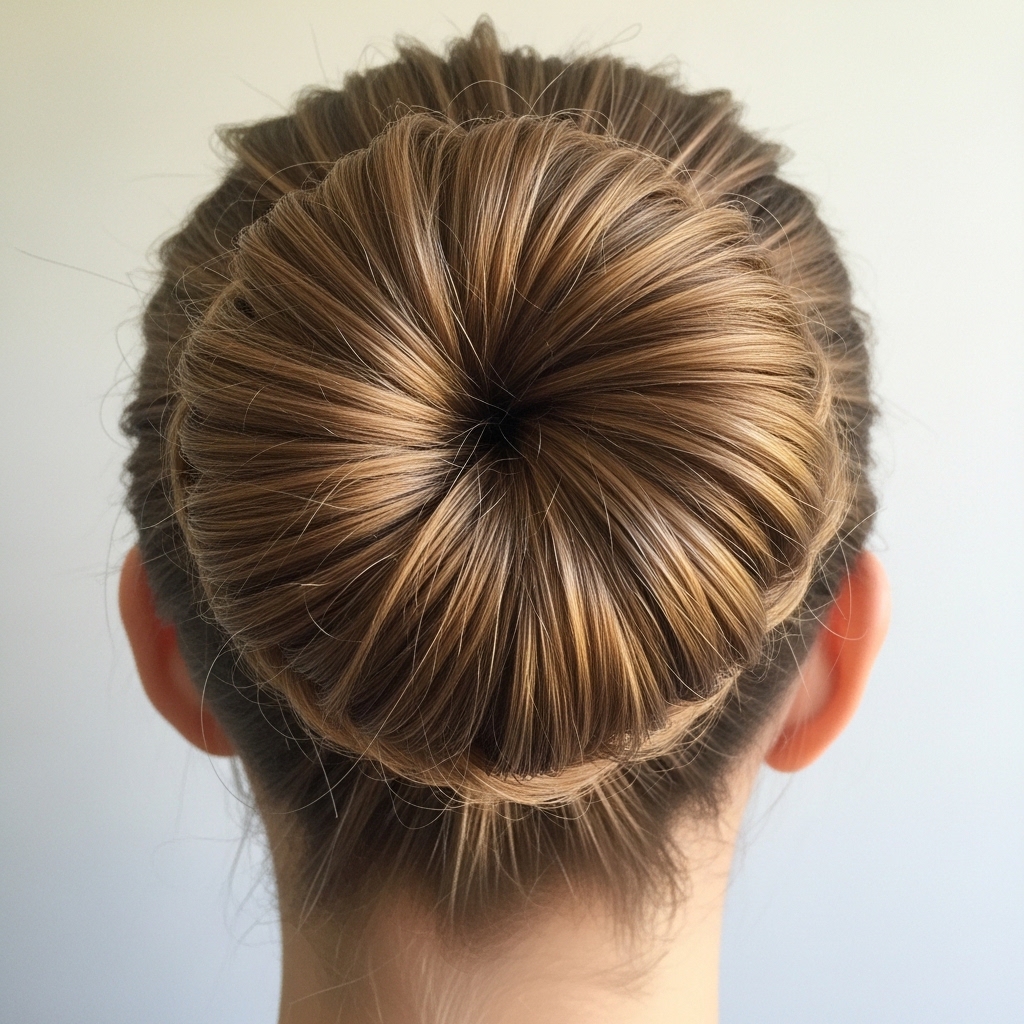
The Twisted Donut Bun
For instant volume and a perfect shape, a donut bun maker is your best friend. This tool guarantees a full, symmetrical bun every single time, great for thicker hair.
Place your ponytail through the donut. Fan your hair over it evenly, then wrap a hair tie around the base. Twist the excess length and tuck it, securing everything with pins.
The Gibson Tuck Twist
A vintage-inspired look that feels fresh again. It’s a gorgeous option for medium-length hair that might not have the length for a big bun, offering lots of volume at the crown.
Create a deep side part. Loosely twist the hair at your nape, then tuck the ends upward, pinning them underneath the roll of hair you create. It’s a very “old money” aesthetic.
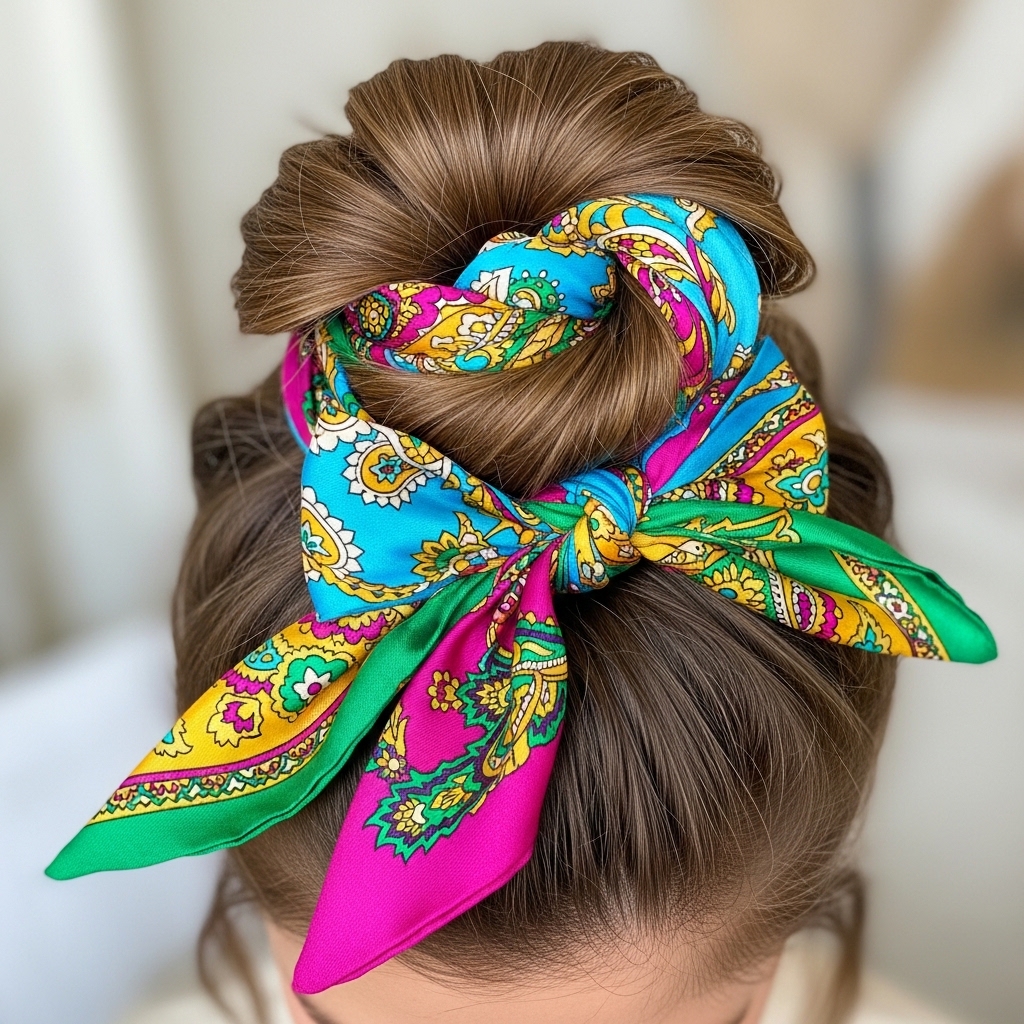
The Twisted Messy Bun with Scarf
Infuse color and personality. A silk scarf takes a simple bun from pretty to a standout accessory. This is a fun way to play with 2026 hairstyles trends of personalized accessories.
Fold a long scarf into a band. Tie it around your head or incorporate it into your ponytail before twisting and wrapping your bun. Let the ends flow or tie them into a bow.
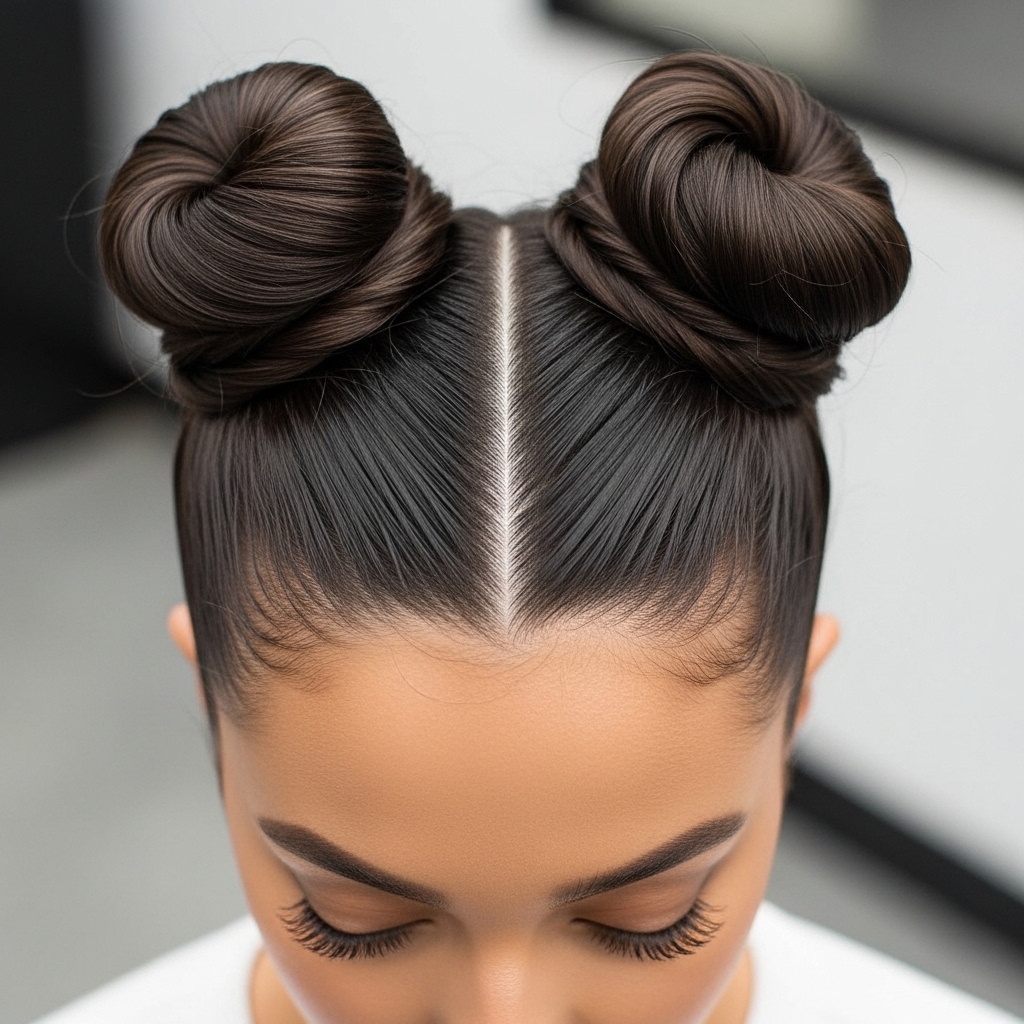
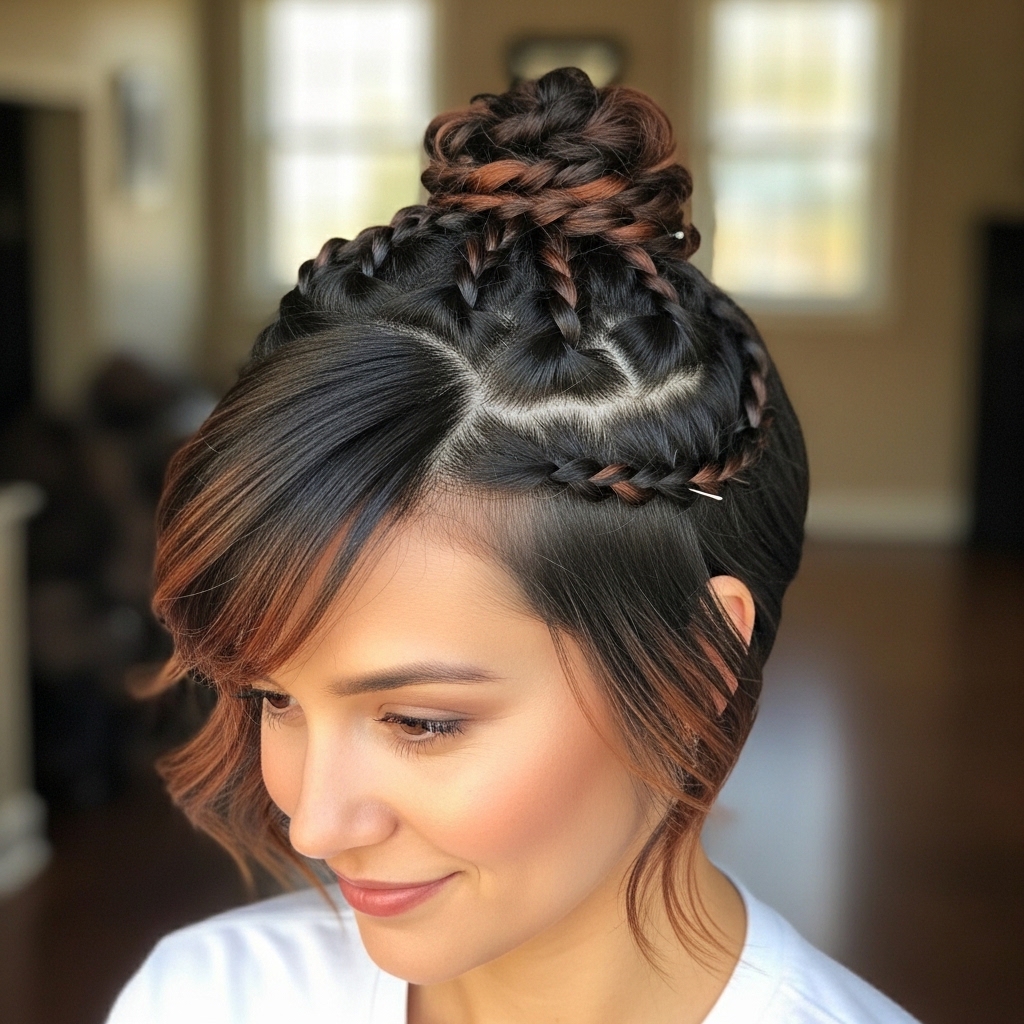
The Double Twisted Bun (Space Buns)
Playful yet chic when done neatly. This isn’t just for festivals; paired with elegant attire, it makes a stunning, modern statement. A cool take on glitchy glam hair.
Part hair down the middle. Create two high ponytails. Twist each tightly and wrap them into buns, securing them high on your head. Keep them tight and polished.
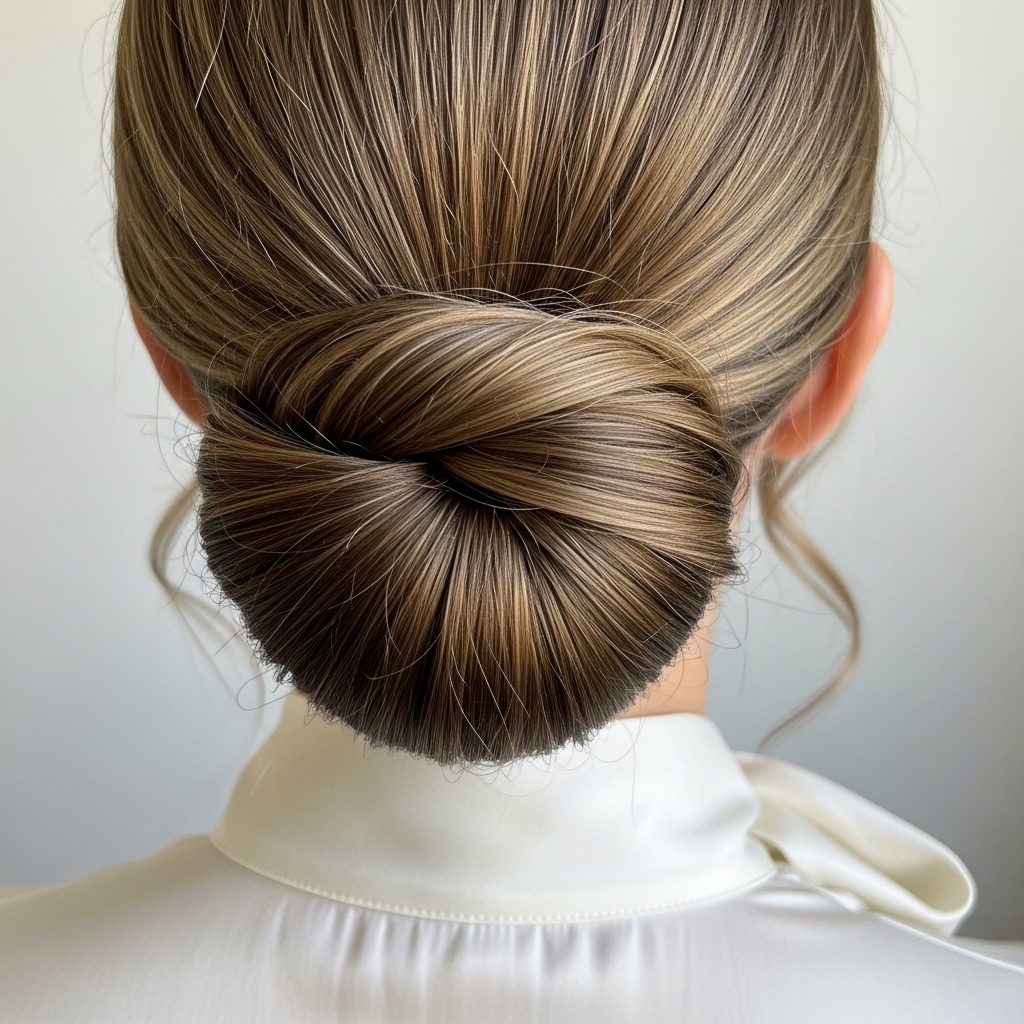
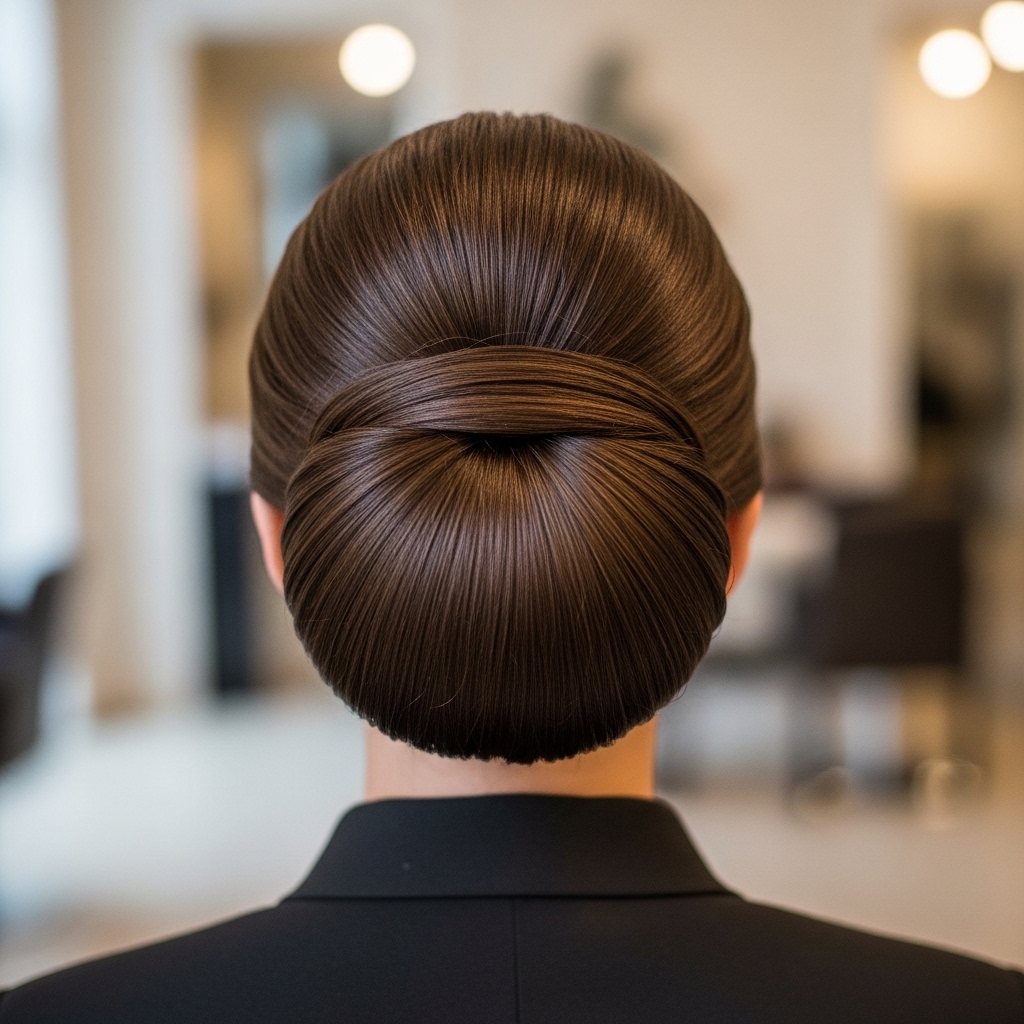
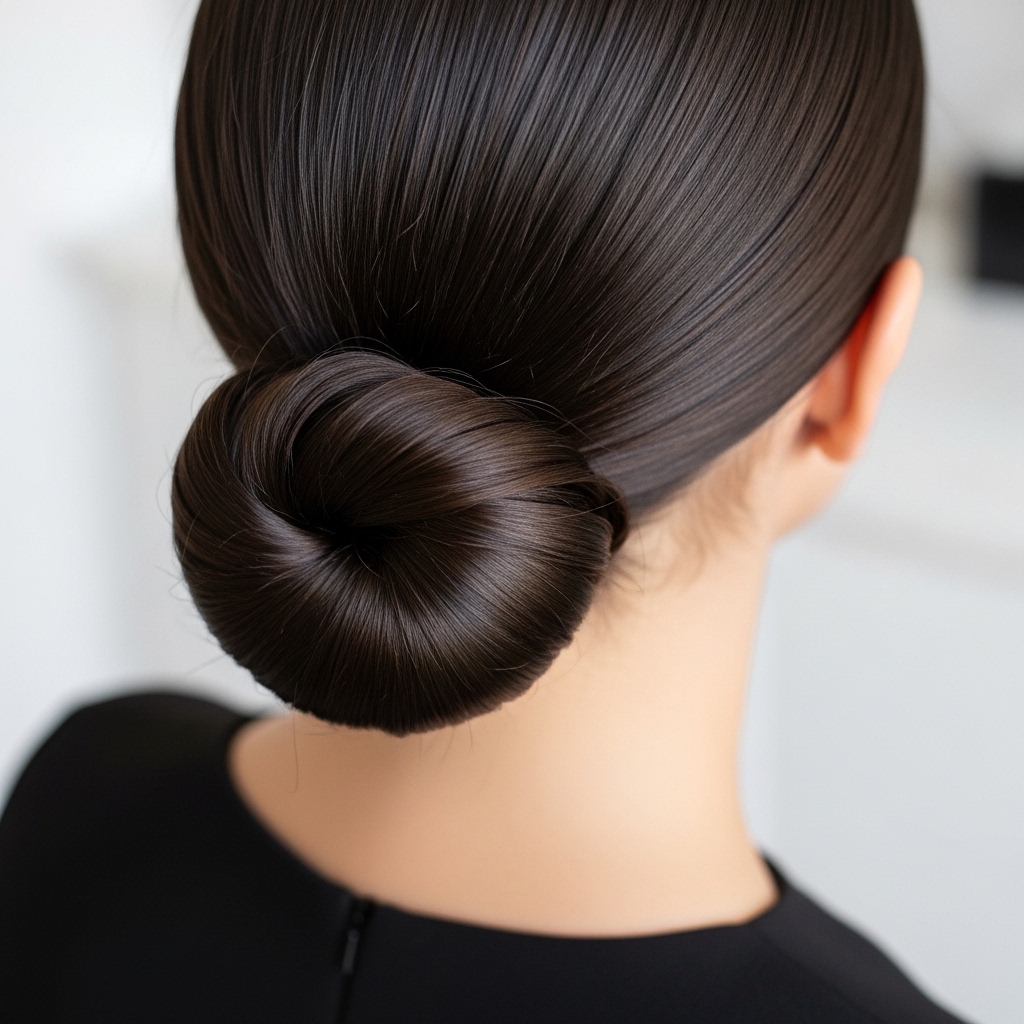
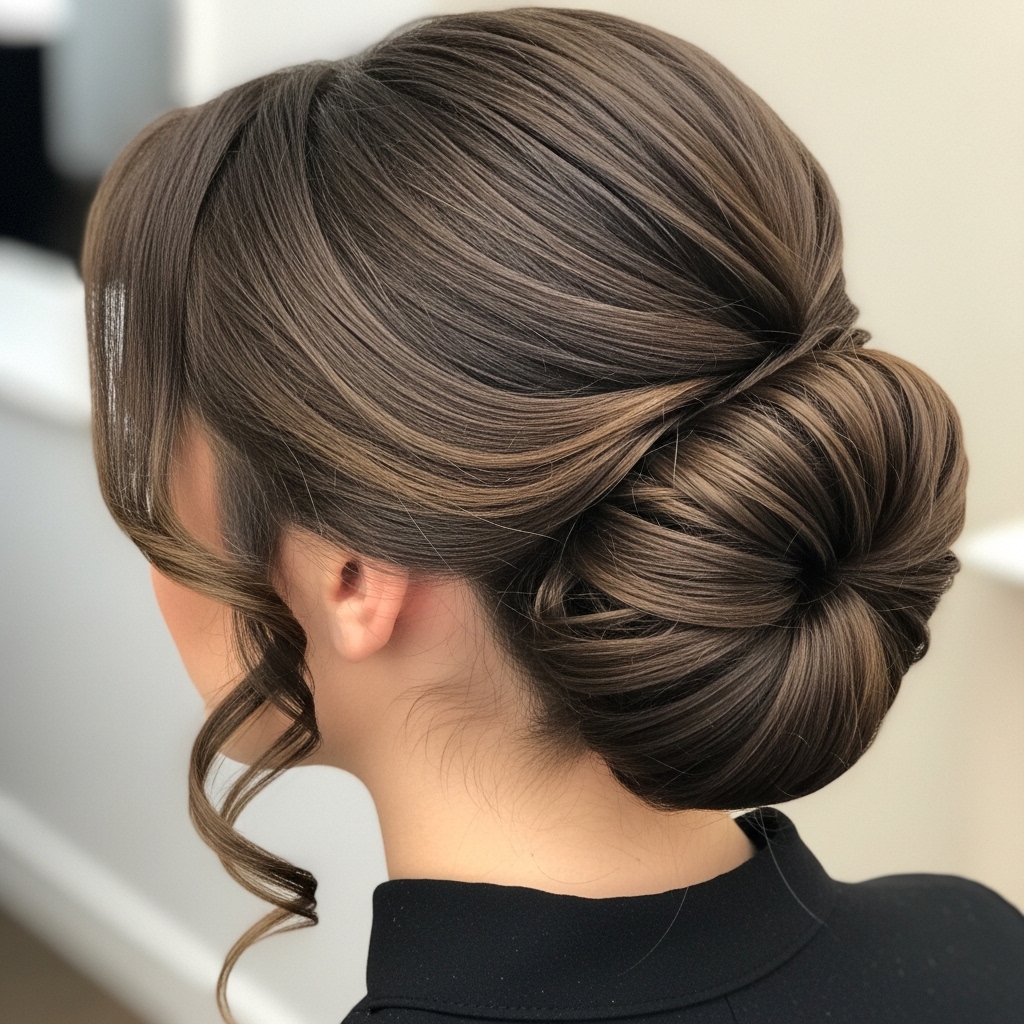
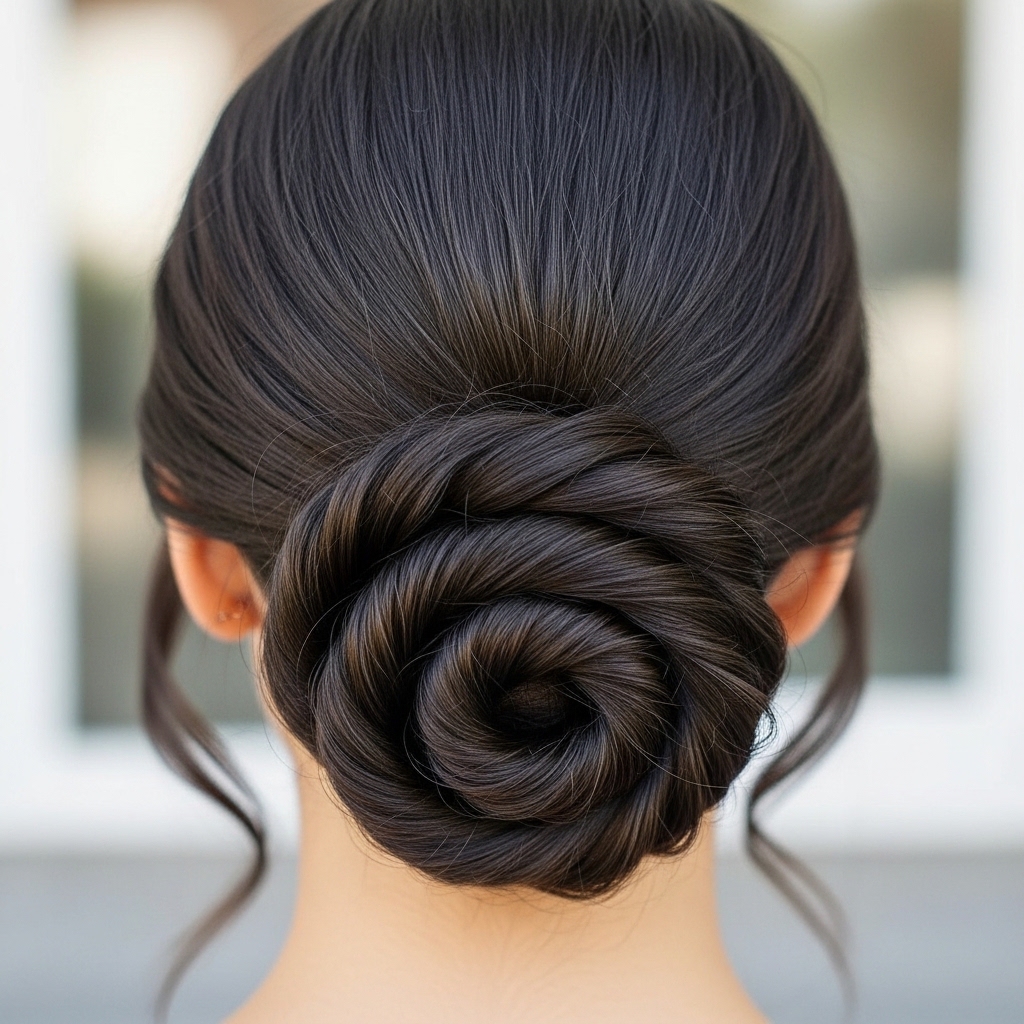
The Twisted Chignon
The ultimate in sleek sophistication. This low, tucked style is a red-carpet favorite for a reason. It works beautifully on an asymmetrical lob or longer hair.
With hair at the nape, twist and then fold the length under itself, creating a horizontal figure-eight. Pin meticulously. A shine spray gives the final luxe touch.
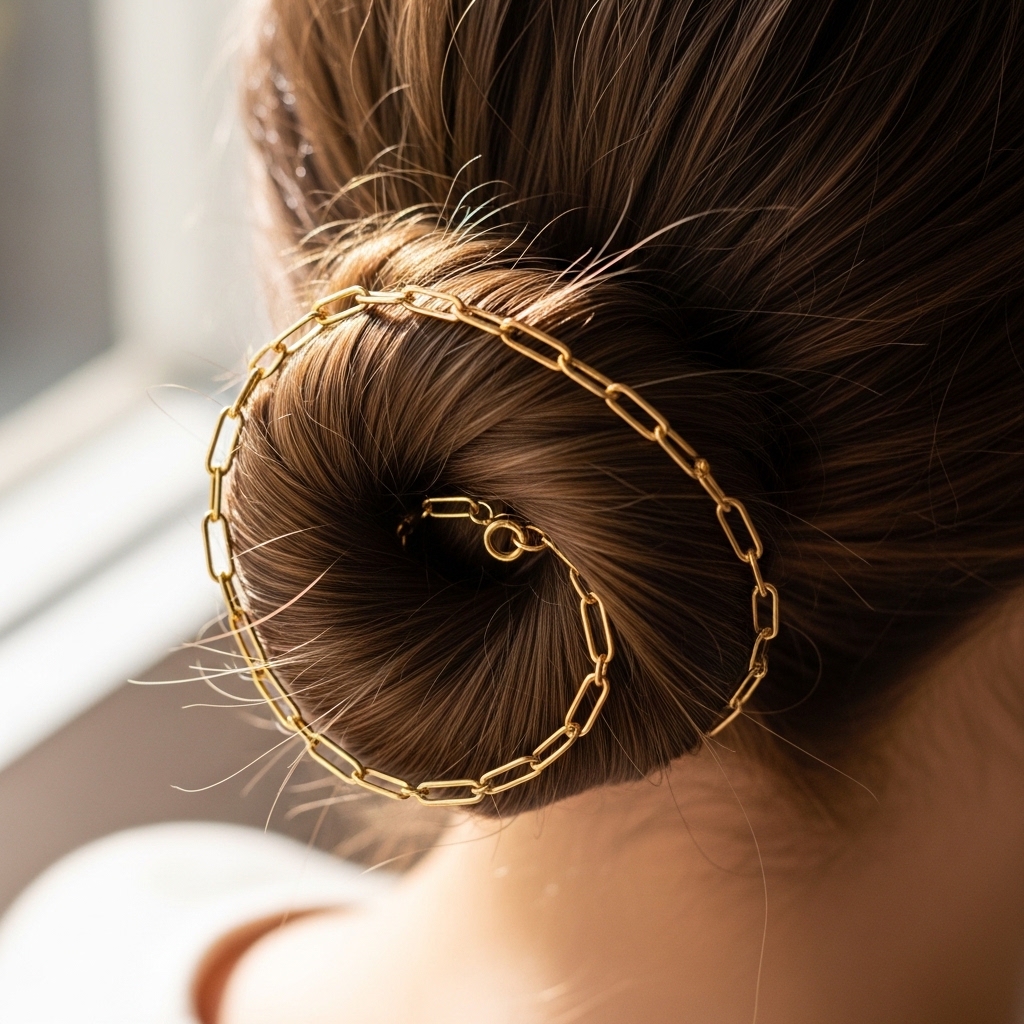
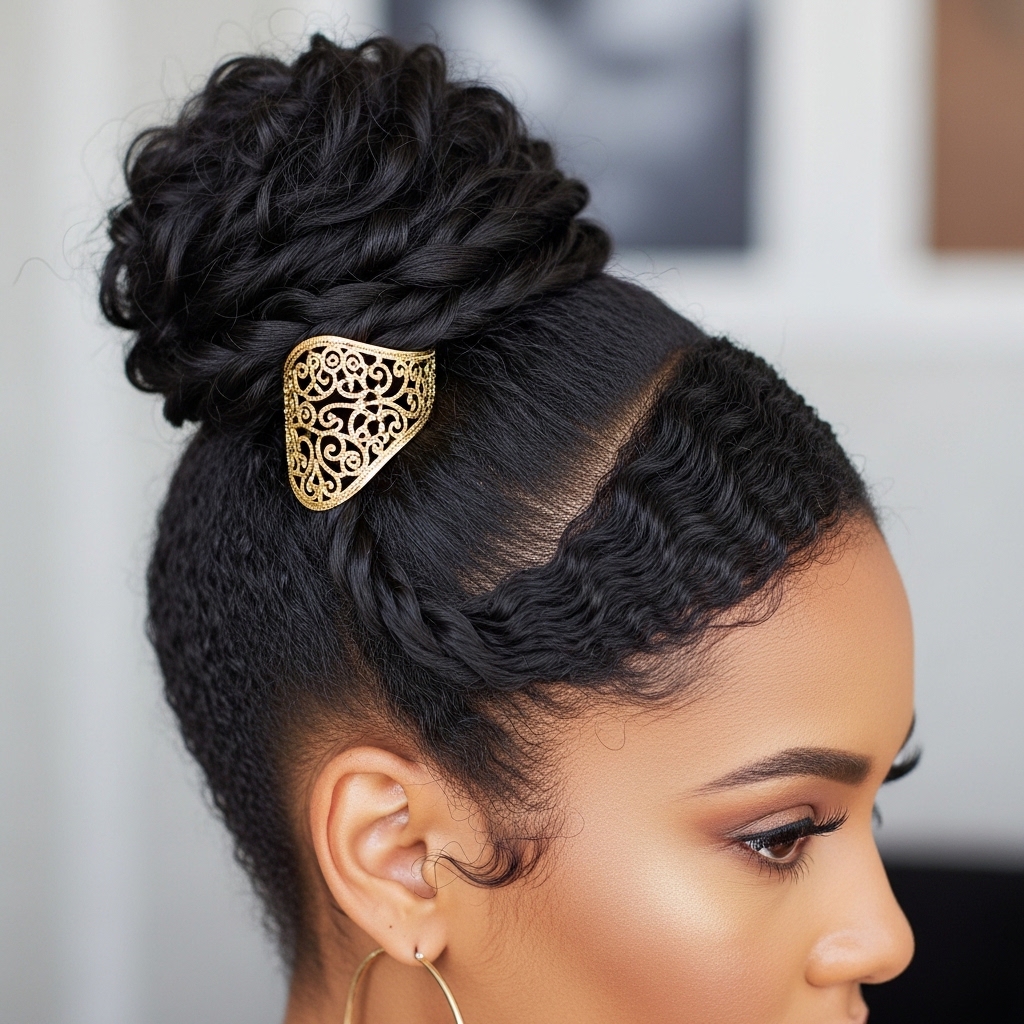
The Twisted Bun with Hair Jewelry
Elevate instantly. Strategic pins, a chain, or a barrette can transform your basic bun into a piece of art. This is pure quiet luxury bob energy, even on an updo.
After creating your bun, slide in a few pearl-ended pins or a delicate chain that wraps around the base. Less is more—let one beautiful piece be the focus.
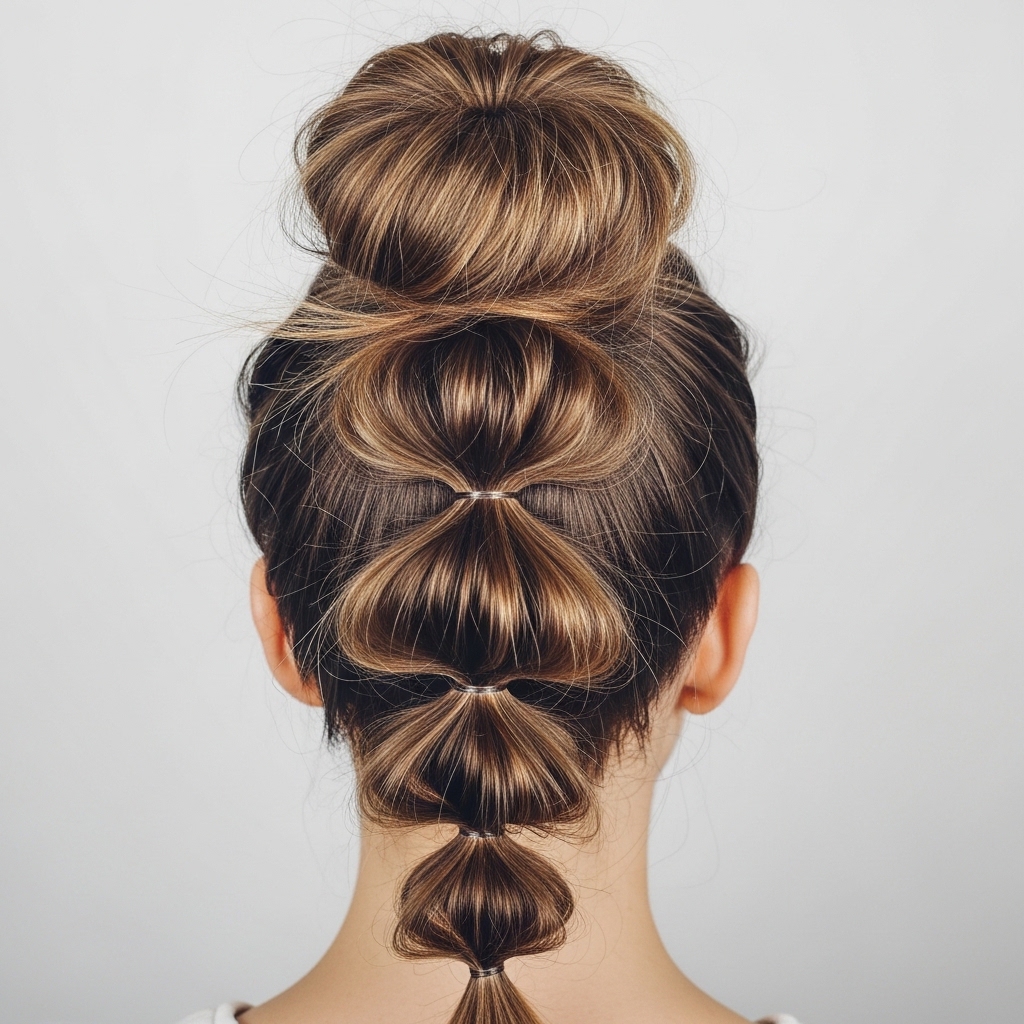
The Bubble Twist Bun
A fun, modern twist on the classic. The bubble effect adds incredible volume and a touch of playful geometry to your look, playing with texture.
Create a high ponytail and put a hair tie every few inches down its length. Gently pull each section to create “bubbles,” then twist the end and wrap it into a bun.
The Twisted Updo for Short Hair
Yes, you can do this with shorter cuts! This style adds fantastic texture and keeps hair elegantly off the face, perfect for a vampire haircut or pixie grow-out.
Work with layers. Twist sections back from your face, pinning them at the crown to create a gathered, textured effect. Use a strong-hold texturizing spray.
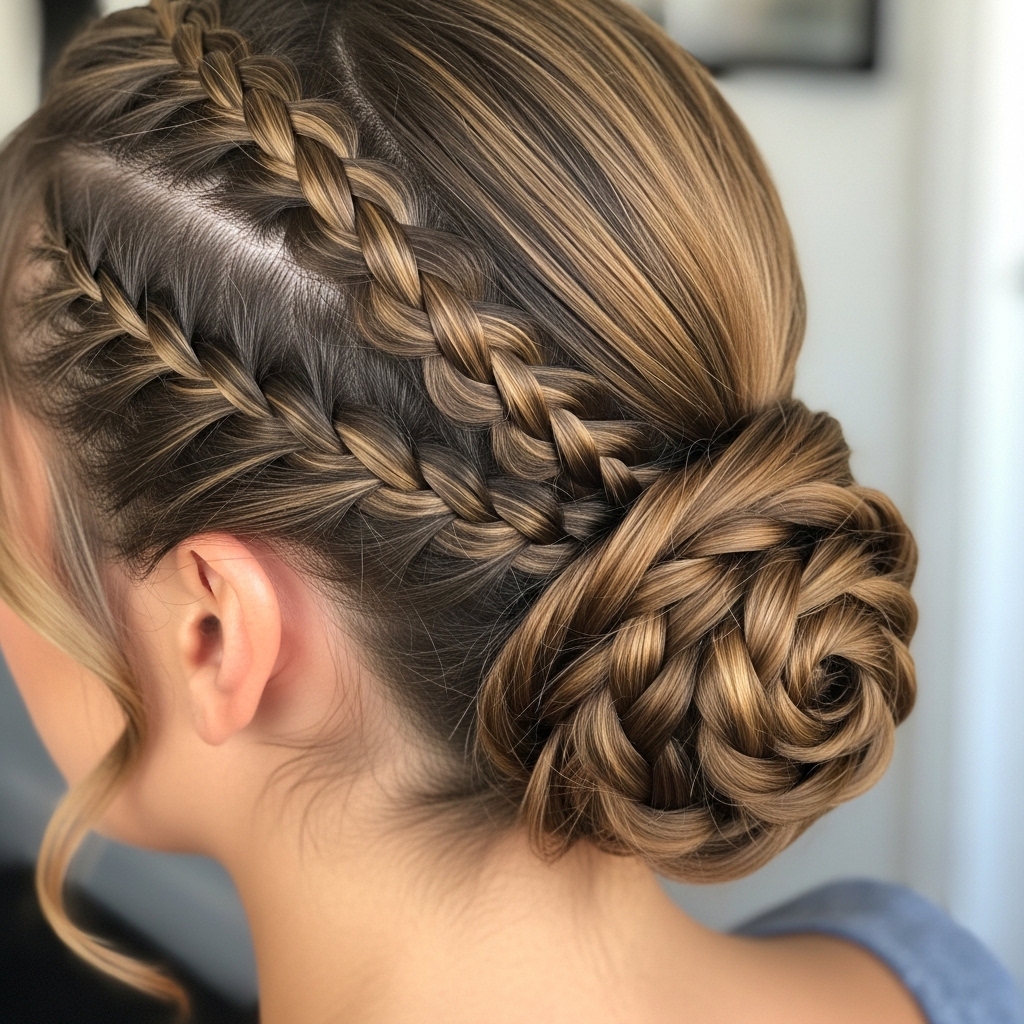
The Dutch Braid into a Twisted Bun
Combine two classic techniques for a look that’s secure and detailed from every angle. The braid adds a beautiful guiding line to your style.
Create a Dutch braid (an inverted braid) along your hairline, ending in a low ponytail. Twist the remaining length and wrap it into a bun at your nape.
The Twisted Bun with Curled Tendrils
Frame your face with soft, romantic curls. This detail is universally flattering and adds a touch of softness and movement to a structured updo.
After securing your bun, use a small curling iron to curl a few strategic pieces around your face and at the nape of your neck. Finger-comb them for a natural look.
The Topsy-Tail Twisted Bun
A 90s throwback with an elegant twist. This creates a beautiful, inverted detail at the base of your bun that looks intricate and chic.
Make a low ponytail. Create a small hole above the hair tie and pull the ponytail through (a topsy-tail). Then, twist the length and wrap it into a bun over that detail.
The Twisted Bun for Thin Hair
Volume and hold are key. The right technique can create the illusion of a fuller, more luxurious bun, even with fine hair textures.
Tease the crown lightly before gathering your hair. Use a small, color-matched bun donut to add bulk. Twist your hair around it and pin securely. Dry shampoo at the roots adds grip.
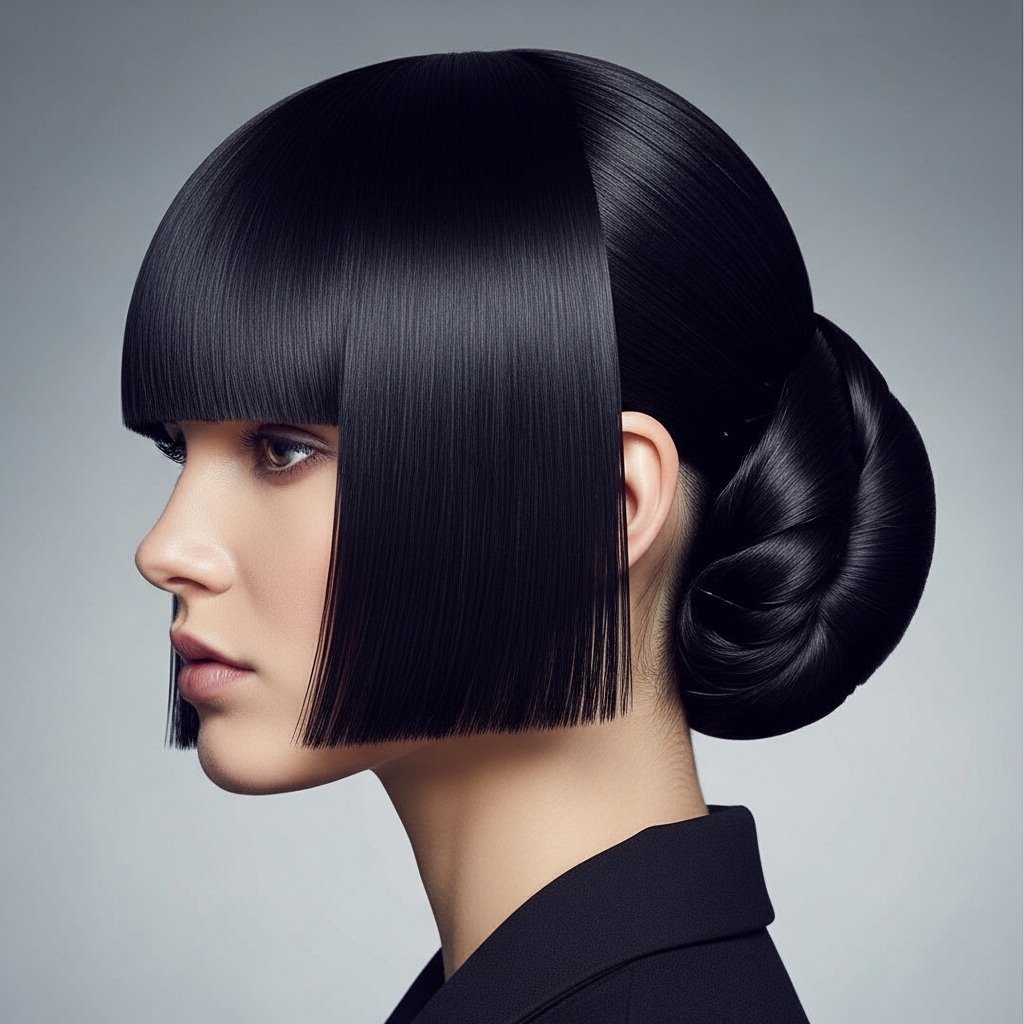
The Hime Cut Inspired Twisted Accents
Incorporate the dramatic, straight-across fringe and face-framing layers of the hime cut into an updo. It’s a striking, editorial look.
If you have a hime cut or blunt bangs, style them straight and sharp. Pull the rest back into a clean, low twisted bun. The contrast is incredibly chic.
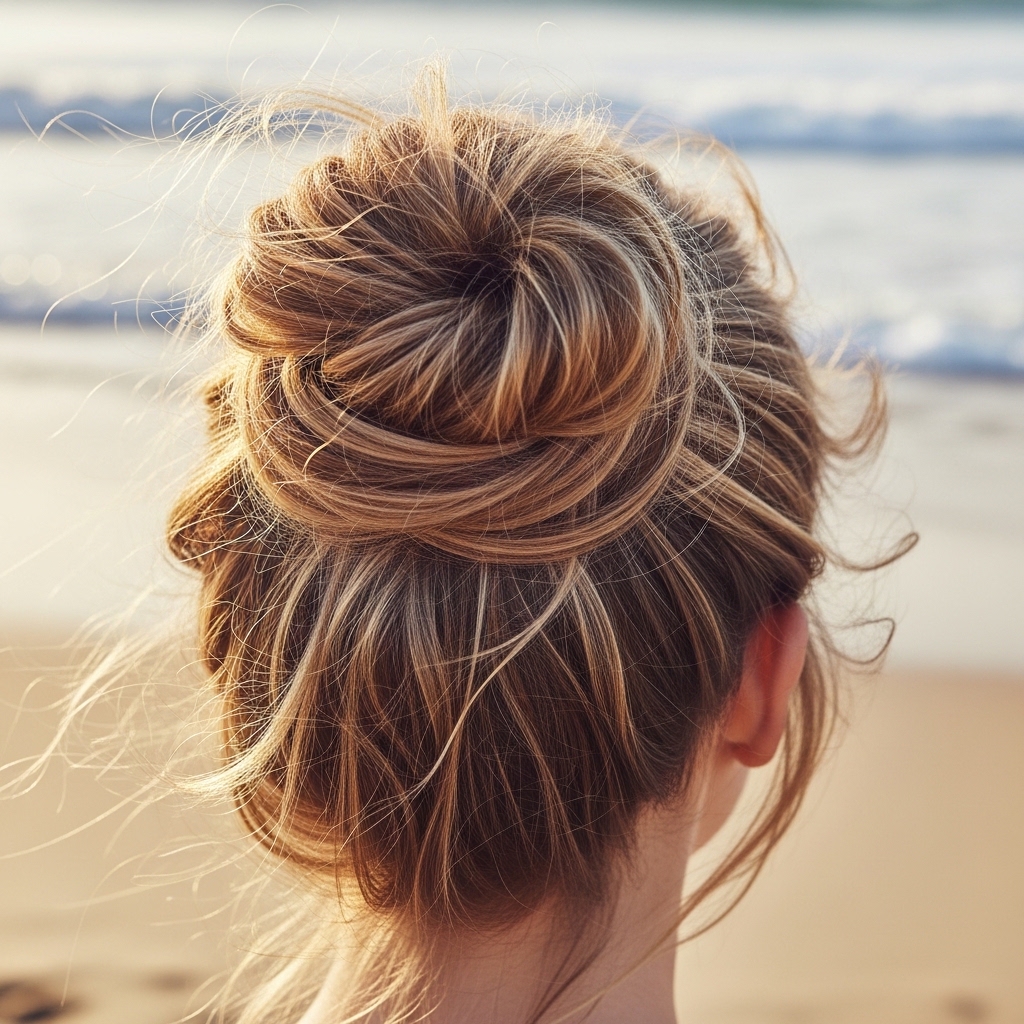
The Twisted Mermaid Bun
Loose, flowing, and effortlessly sexy. This style is perfect for beach weddings or events where you want a more bohemian, relaxed elegance.
Start with tousled, beachy waves. Gather hair loosely, twist it just once or twice, and then wrap it into a bun, allowing many pieces to naturally fall out. Pin lightly.
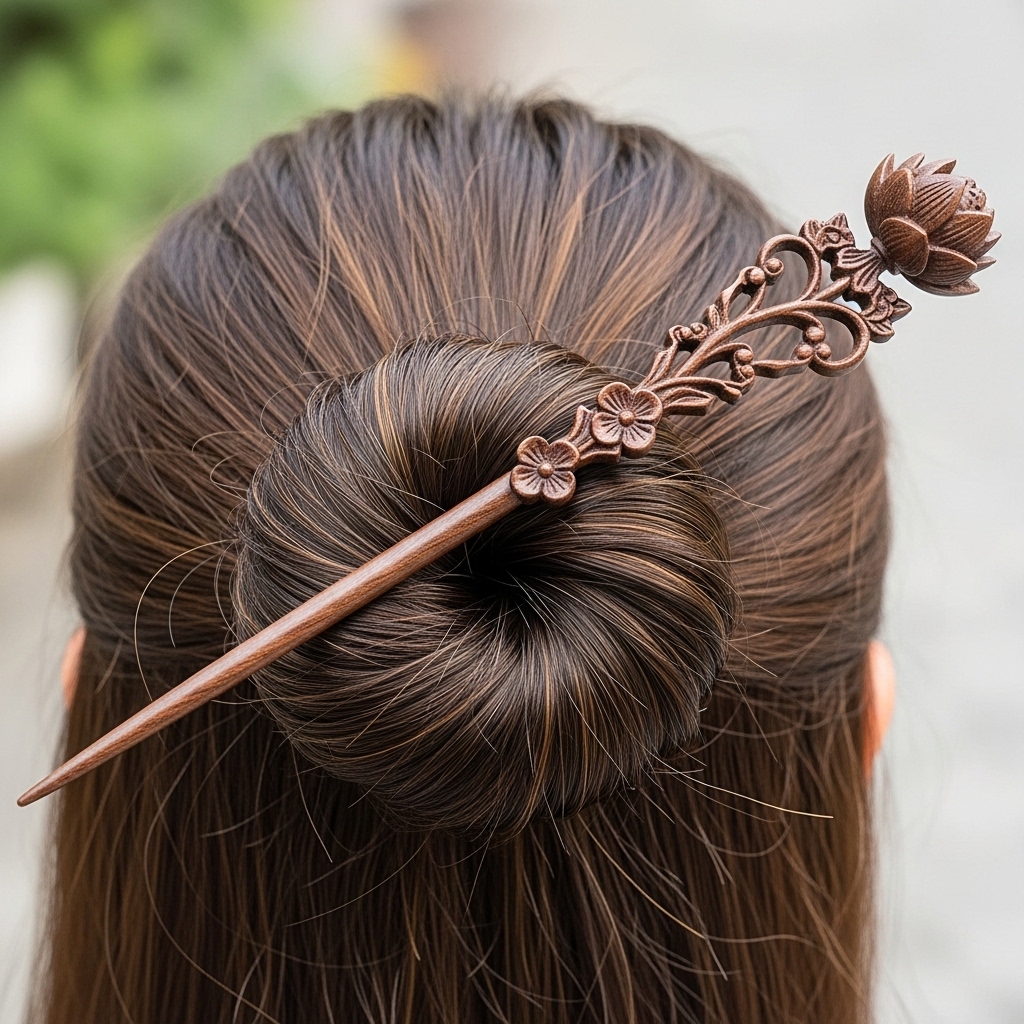
The Twisted Bun with a Hair Stick
Secure your style with a beautiful functional accessory. Hair sticks offer a unique, artistic look and are surprisingly secure once you get the technique down.
After twisting your hair into a bun, hold it in place. Push a hair stick through one side of the bun, across the base, and out the other side, catching scalp hair for security.
The Asymmetrical Twisted Bun
Break the rules for a modern, fashion-forward silhouette. This works brilliantly with an asymmetrical lob cut or just as a creative updo.
Pull your hair to one side of your head, creating a low side ponytail. Twist and wrap the bun so it sits just behind your ear. It’s instantly cool and different.
The Twisted Bun for Natural Hair
Celebrate and secure your beautiful texture. This style protects your ends while looking incredibly elegant and sophisticated for any special event.
On stretched or defined curls, apply a holding product. Twist two-strand twists or simply twist the entire mass of hair, then wrap it into a bun, pinning securely at the base.
The Final Touch: Making It Last
To ensure your masterpiece survives the night, a few pro tips are non-negotiable. Preparation is everything for a flawless finish.
Start with day-old hair for grip. Use a light-hold texture spray before styling. After pinning, mist with a strong-hold hairspray. Always carry a few extra bobby pins in your clutch!
And there you have it—22 ways to master the twisted bun. This one technique is so versatile, it can take you from a garden party to a gala without any stress. The beauty is in its simplicity and how it makes you feel: put-together, graceful, and ready for anything.
Remember, the best style is the one that makes you feel most confident. Don’t be afraid to practice a few times before the big day. Play with the variations, find your favorite, and own it.
Save this post to Pinterest so you always have this guide handy for your next special occasion! Which look are you most excited to try? Tell me in the comments below—I love hearing from you!

