

A nursing shift does not care about your hair. Twelve hours on your feet, a mask pressing on your ears, a scrub cap flattening everything underneath it, patients to turn, charts to finish, and somewhere in between a ten-minute break that is definitely not for restyling. By hour eight, most hairstyles have given up — strands escaping around the face, a bun sliding sideways, a ponytail thumping against a collar. The styles in this guide are built for the opposite: hair that goes up in minutes, stays put until handover, and still looks intentional when you finally take the cap off.
Here are 36 nurse hairstyles, from the classic low bun and the single French braid to flat twists, sock buns and crown twists that sit comfortably under a scrub cap. Each one notes how long it takes, which hair length and texture it suits, and what to watch out for on a long shift. Eight guides cover the hospital hair rules that actually matter, how to choose a style by shift length, scrub-cap fit, masks and glasses, the braid-versus-bun decision, and the ten-minute recovery routine your hair deserves when the shift ends. No style here needs heat tools, and most need nothing more than an elastic, a few pins and two spare minutes.
Hospital Hair Rules, Plainly Explained

Most hospitals share the same basic rule, even when the wording differs: hair must be fully contained, off the collar, and kept out of the face and away from patients, sterile fields and equipment. Long hair is tied back; in surgical, labour and delivery, and intensive care areas, a scrub cap or bouffant usually covers it completely. The rule exists for infection control — loose hair sheds, carries microbes, and can contaminate a wound or a sterile tray — and for safety, since hair caught in a bed rail, a hoist or a confused patient’s grip is a real hazard. Your facility’s policy is the final word, so check it before your first shift, but the styles in this guide are all designed to meet the strictest common version of the rule.
What the rules usually do not cover is comfort, and that is where most nurses improvise badly. A style that passes inspection at 7 a.m. can still cause a headache by noon if it pulls at one point all day, and a style that survives a desk job will not survive bending, lifting and a cap pressing down on it. The practical test is simple: shake your head, bend forward, and press a hand flat over the crown as a cap would. If nothing moves, slips or digs in, the style will probably last the shift. If it needs constant patting and re-pinning, it is the wrong style for the ward, however pretty it looks in the mirror.
Pick Your Style by Shift Length and Hair Length

Short shifts forgive almost anything. An eight-hour day shift with no cap requirement is the one time a simple ponytail or a claw clip twist is genuinely enough, because you can redo it on a break and the style only has to hold for a few hours. Twelve-hour shifts are a different problem: the style must survive sweat, a cap, a mask, and no mirror for hours at a time. For those days, choose a braided or pinned style — a French braid, a braided bun, flat twists — because braids distribute tension and hold their shape long after an elastic alone would have stretched out. Night shifts add one more factor: you will probably sleep in the car or collapse straight into bed, so pick something that comes out without a fight, like a loose braid rather than a tightly pinned updo.
Hair length decides what is possible, not what is professional. Short hair and pixie cuts often need only clips, a headband and a cap, and section 26 covers that properly. Shoulder-length hair is the trickiest length on the ward: too long to leave down, too short for most buns, so braids, twists and pinned styles do the heavy lifting. Long hair has the most options but the most weight, so the best styles anchor low at the nape rather than high on the crown, where the weight pulls all day. Very thick hair needs sectioning — two braids instead of one, two clips instead of one — while fine hair needs texture first, a little dry shampoo or a light mousse, so pins and elastics have something to grip.
Styles That Sit Flat Under a Scrub Cap
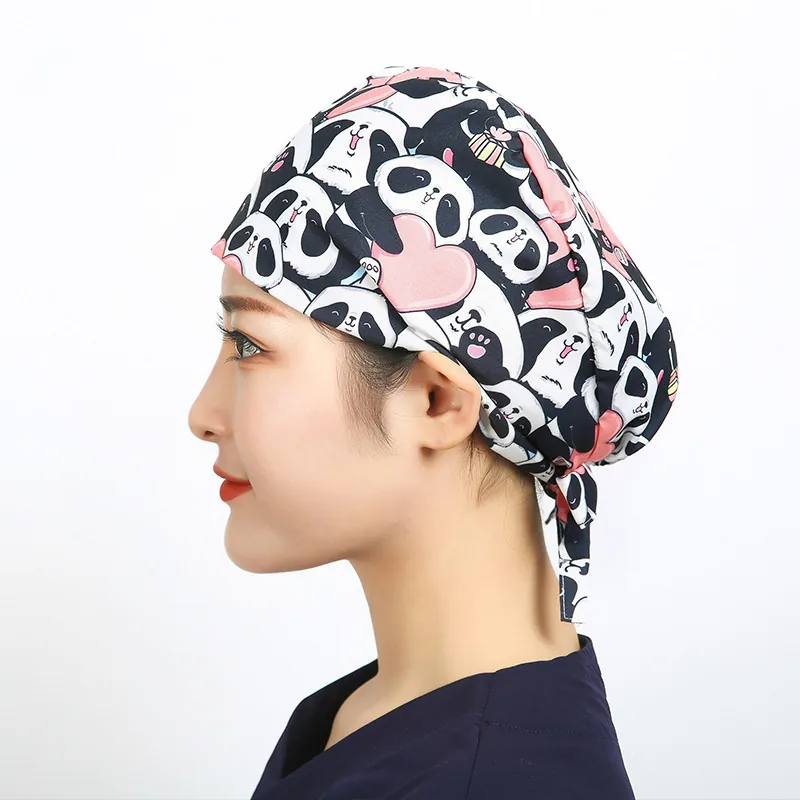
A scrub cap rewards flatness and punishes height. Anything stacked on the crown — a high bun, a top knot, a tall twist — pushes the cap up, slides it back, and creates a pressure point that aches by mid-shift. The styles that work best under a cap sit low and close to the head: low buns at the nape, flat braids that follow the skull, twists pinned close, and ponytails folded up and tucked flat. Before you leave home, put the cap on over the finished style and move your head through its full range. The cap should sit where it sat on loose hair, with no lump forcing it forward onto your forehead or backward off your crown.
Two practical tricks make cap days easier. First, put the style in before the cap, and let the cap be the last thing you adjust — pulling a cap over a finished style disturbs it far less than building a style around a cap that is already on. Second, choose a cap with ties or an elastic band that matches your hair volume: a bouffant-style cap swallows a low bun whole, while a fitted tie-back cap works better over flat braids. If your facility allows printed caps, keep a spare in your locker; a cap that has absorbed twelve hours of sweat is not something you want to put on twice. And if long hair will not fit under a fitted cap at all, a low braid folded up and pinned flat almost always solves it.
The Five-Minute Pre-Shift Routine
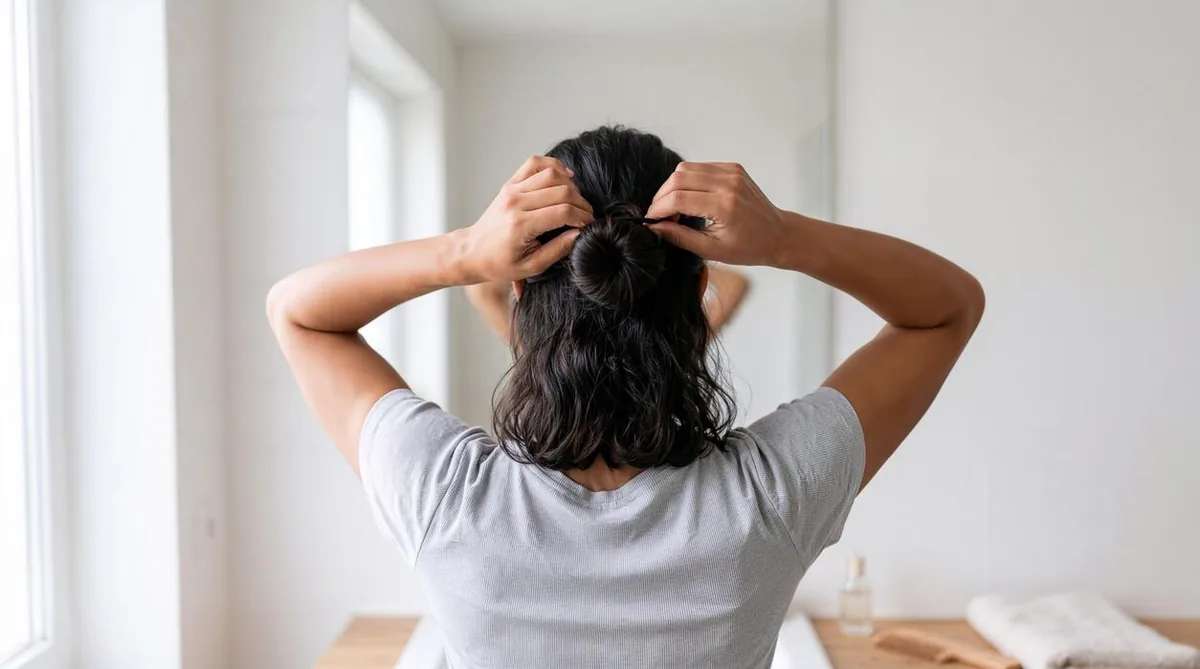
Most nurses do their hair half-awake, standing in a bathroom, with a bag to pack and a commute to catch. The routine that actually happens on a work morning has four steps and no heat tools. First, detangle from the ends upward with a wide-tooth comb — never a brush on wet hair, which snaps it. Second, add grip: a pea-sized amount of styling cream on damp hair, or dry shampoo at the roots on second-day hair, gives elastics and pins something to hold. Third, build the style in the order it will be stressed: anchor the base first, then shape, then pin. A bun that is pinned before it is secured will loosen; a braid that is started loosely at the crown will sag by lunch. Fourth, finish with a light mist of flexible-hold spray, not a helmet of strong hold, so the style can flex without cracking and flaking.
Keep a small kit in your locker or bag and the routine survives even the worst mornings: three snag-free elastics, six bobby pins, two small claw clips, a travel comb, a mini dry shampoo, and a spare scrub cap. That kit fixes nearly every mid-shift hair emergency — a snapped elastic, a braid coming undone, a fringe escaping — without a trip to the bathroom mirror. One more habit worth building: do the style once on a day off, timed, before you trust it on a shift. A style you have practised twice takes three minutes; a style you are learning at 6 a.m. takes fifteen and still falls apart.
Masks, Glasses and Stethoscopes: Keeping Everything in Place
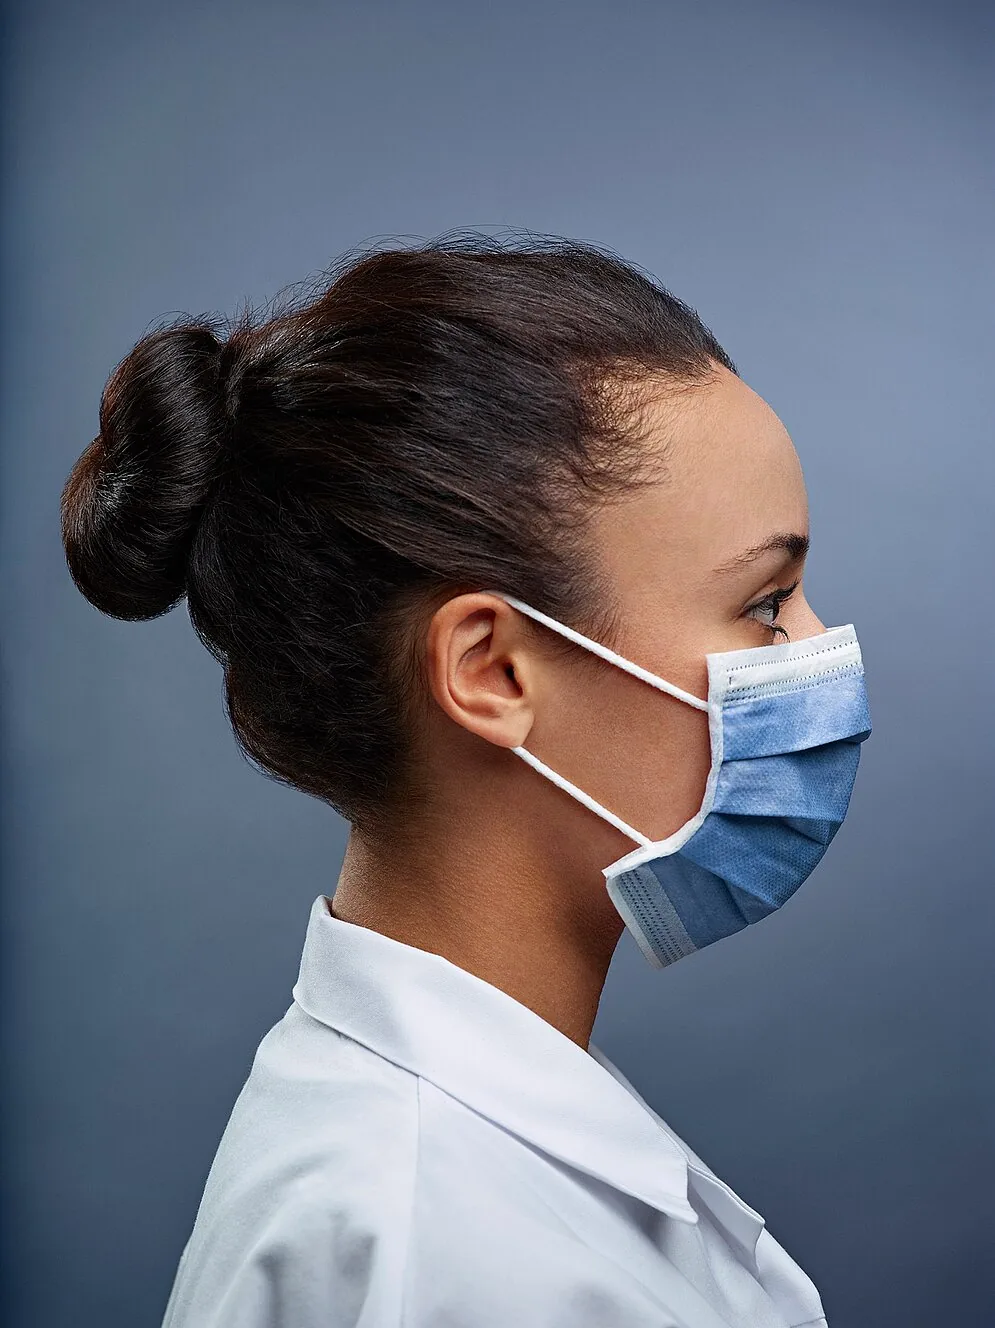
A nurse hairstyle does not exist in isolation — it shares the head with mask loops, glasses arms, a cap, and often a stethoscope around the neck. Mask loops are the most common enemy: they hook behind the ears, pull on any hair near the face, and over twelve hours they saw at the same spot until it is sore. The fix is to keep the hair behind the ears completely smooth and flat, with no pins or clip edges sitting where the loop rests, and to use a mask extender or a headband with buttons on long shifts if your facility allows it. Glasses arms need a clear path too: a style that bulks up behind the ears will push glasses forward all day, so keep twists and braids either well above or well below the glasses line.
Stethoscopes and lanyards create a different problem at the nape. A low ponytail that hangs free will tangle with a stethoscope every time you bend over a bed, and a long braid swinging forward while you lean over a patient is both unhygienic and distracting. The ward-safe answer is to contain the ends: tuck a ponytail up, fold a braid and pin it, or choose a bun that keeps every end inside the silhouette of the head. Earrings deserve a mention as well — small studs are the ward standard for a reason, because anything dangling catches in hair, masks and gloves. The goal is a head with nothing loose, nothing dangling and nothing fighting for the same square inch of space.
Braids vs Buns vs Ponytails: What Lasts 12 Hours
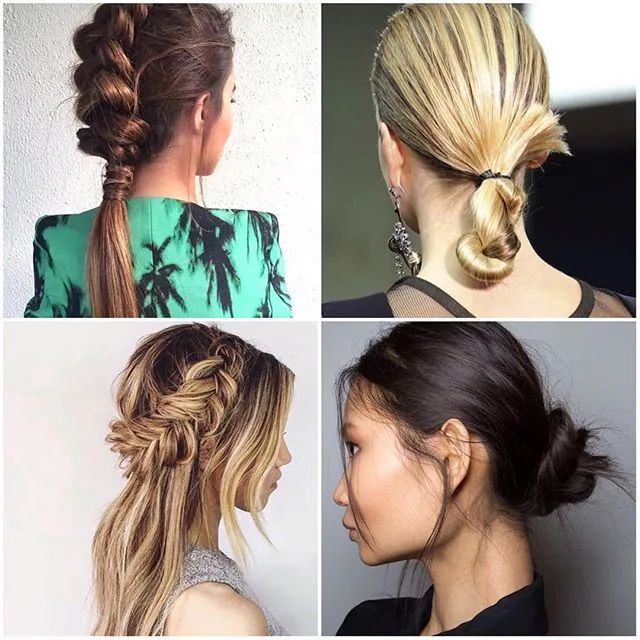
Each of the three workhorse families has a different failure mode, and knowing it helps you choose honestly. Ponytails fail by stretching: the elastic loosens, the tail drops, and by afternoon the whole style sits two inches lower than it started. They are fastest to build and easiest to redo, which makes them fine for short shifts and a poor bet for twelve hours unless the tail is braided, knotted or wrapped. Buns fail by sliding: a bun anchored at one point rotates under its own weight, especially on silky or freshly washed hair. They are the neatest option and the best under a cap, provided they are pinned in at least three points and built on hair with some grip. Braids fail slowest of all, because the structure itself holds the hair — a braid distributes weight along its whole length and rarely comes undone catastrophically, which is why braided styles dominate the recommendations in this guide.
The smartest ward styles combine families: a braid that ends in a bun, a ponytail that is braided before it is wrapped, a twist that is pinned like a bun. These hybrids inherit the braid’s staying power and the bun’s neatness, and they survive the two things that kill simple styles — sweat and caps. If you can only learn three styles for nursing, learn one braid (the French braid), one bun (the low bun) and one hybrid (the braided low bun). Between them they cover every shift length, every cap requirement and every bad hair day, and each takes under five minutes once practised.
Mistakes That Cause Headaches and Breakage
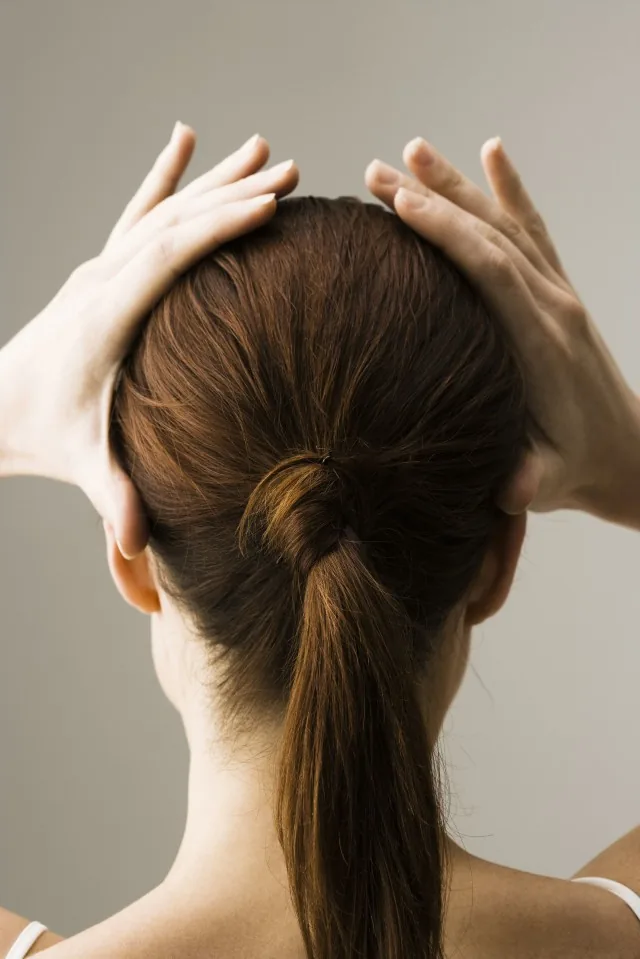
The most common nursing hair mistake is pulling everything too tight. A style anchored with maximum tension feels secure at 7 a.m. and causes a genuine tension headache by midday, because the scalp is being pulled in one direction for hours without relief. Worse, repeated tight styling in the same spot causes traction damage — thinning at the hairline, broken hairs at the crown, and in severe cases traction alopecia. The fix is not looser styling but distributed tension: braid before you gather, use two elastics instead of one overtight one, vary the anchor point from day to day, and never sleep in a style that was tight enough for a shift. If a style hurts within the first hour, take it down and redo it — pain is information, not a badge of neatness.
- Same spot every day: rotating between a low bun, a braid and a side-anchored style spreads the strain and protects the hairline.
- Metal and rough elastics: snag-free elastics, fabric-covered bands and smooth pins prevent the snap-and-tear damage that shows up as frizz and flyaways.
- Wet-hair styling: hair is weakest when wet; styling it soaking wet into a tight bun stretches and breaks it. Damp is fine, dripping is not.
- Skipping the take-down: ripping pins and elastics out at the end of a shift breaks more hair than the shift did. Remove pins one at a time and detangle gently.
After the Shift: Hair Recovery That Takes Ten Minutes

Twelve hours under a cap, in a warm ward, with sweat and sanitiser in the air, is hard on hair — and the recovery routine does not need to be elaborate to work. Start by taking the style down slowly, removing pins before elastics, and letting the scalp breathe for a few minutes before you touch a comb. Detangle from the ends upward, then wash only if the hair actually needs it: many nurses wash every shift day out of habit, but alternating a full wash with a scalp rinse or a dry-shampoo refresh keeps natural oils intact and reduces the dryness that comes from constant washing. A weekly deep-conditioning mask, left on while you eat dinner, does more for shift-damaged hair than any expensive daily product.
Give your hair at least one genuinely free day a week — down, unpinned, no elastic, no cap — so the follicles recover from constant tension in the same direction. On that day, a silk or satin pillowcase earns its keep: it reduces the friction that roughs up the cuticle overnight, which matters more than it sounds when your hair spends five days a week compressed under a cap. If you notice persistent soreness, flaking or thinning at the hairline, mention it to your doctor or a dermatologist rather than pushing through; scalp problems caught early are usually easy to fix, and no hairstyle is worth permanent damage.
1. The Classic Low Bun
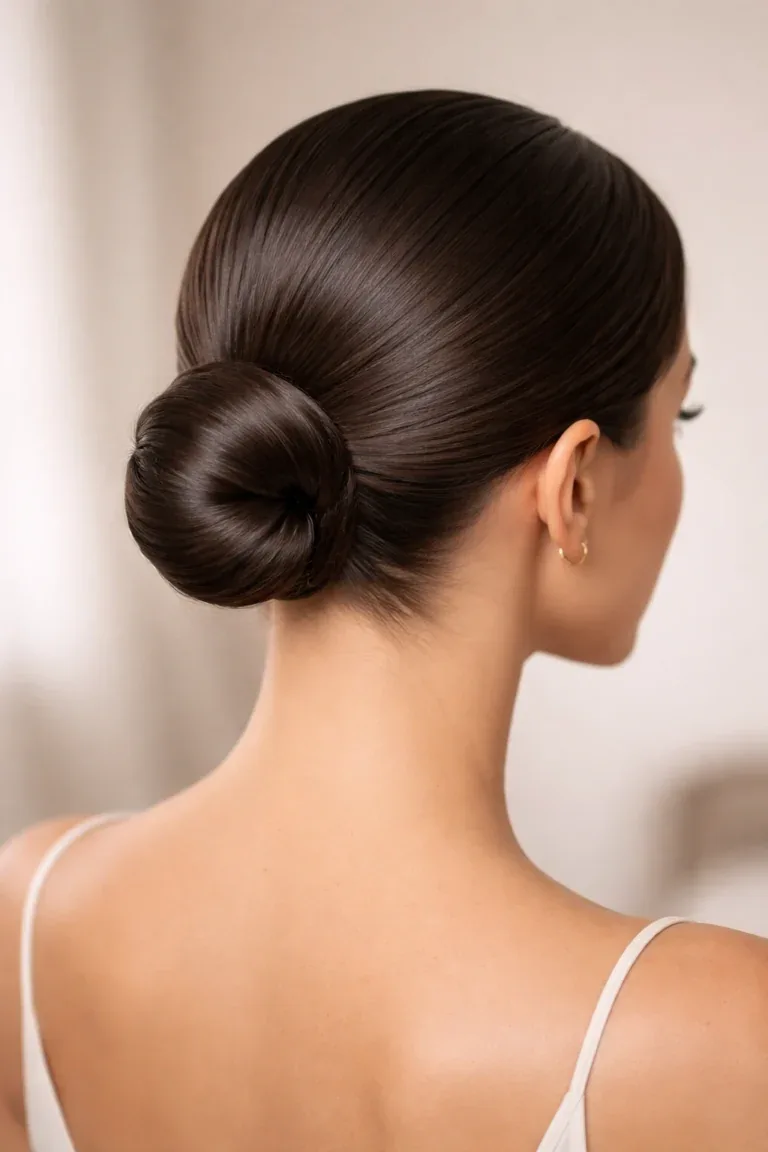
The classic low bun is the default nurse hairstyle for a reason: it sits at the nape, stays clear of the collar, fits flat under any cap, and takes two minutes. Gather the hair low, twist it into a coil, wrap it around its own base and pin in three places. The low position is the whole point — the weight hangs from the strongest part of the head rather than pulling from the crown, so it stays comfortable through a full shift and does not fight the cap. On silky or freshly washed hair, add a little texturising spray first, or the bun will slowly rotate and loosen by afternoon.
Time needed: 2–3 minutes. Best for: medium to long hair, all textures, every cap style. Watch out for: pinning at only one point — use at least three pins spread around the bun, or it will slide sideways when you bend over a bed.
2. The Braided Low Bun
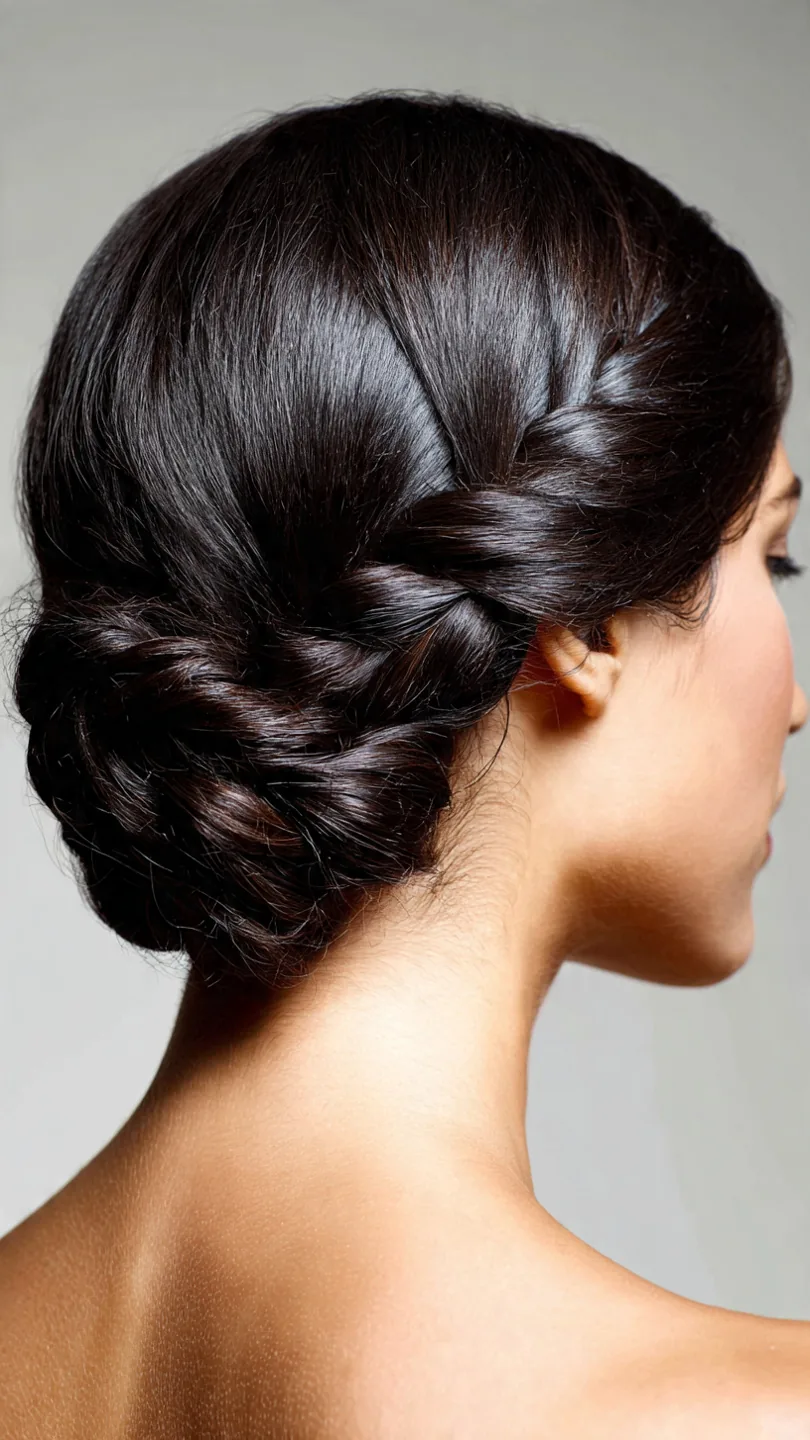
Braid the hair first, then coil the braid into a bun, and you get the neatest style in this guide with the best staying power. The braid gives the bun internal structure, so it holds its shape for twelve hours without re-pinning, and the plaited texture looks deliberate and polished even after a cap has pressed on it all day. It works on any hair long enough to braid, and it is particularly good for thick hair, where a plain bun can feel heavy and unstable. The braid also solves the flyaway problem: short layers and new growth that escape from a plain bun stay woven into the plait.
How to do it: gather into a low ponytail, braid to the ends, secure with a small elastic, coil the braid flat against the head and pin through the braid itself, not just around it. Best for: long and thick hair, layered cuts, twelve-hour shifts. Skip it if: your hair is too short to braid — the twist-and-pin chignon below is the short-hair equivalent.
3. The Twist-and-Pin Chignon
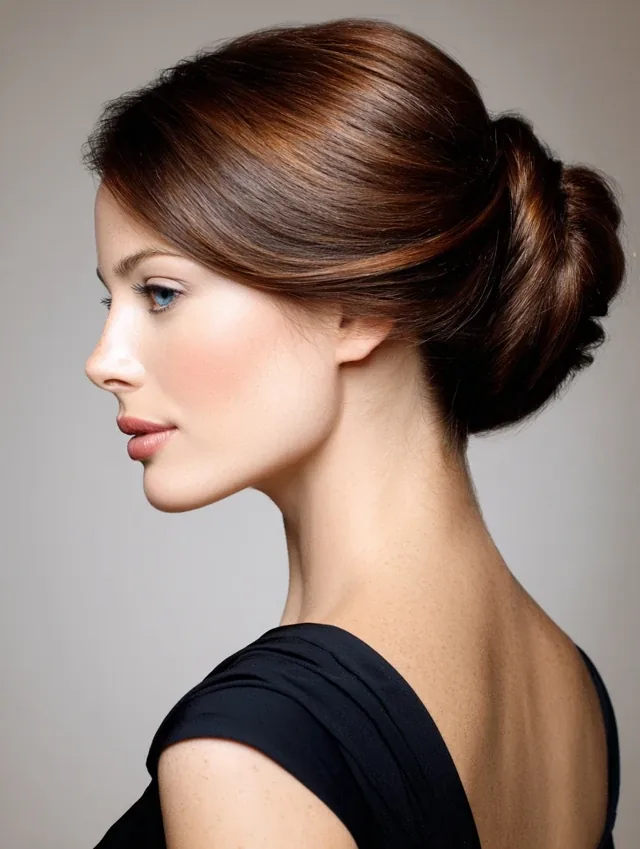
The twist-and-pin chignon is the answer for hair that is too short for a proper bun but too long to leave down. Gather the hair at the nape, twist it upward into a roll, tuck the ends in, and pin along the fold. The roll sits flat against the head, which makes it one of the best styles under a fitted scrub cap, and it needs no elastic at all — just pins — so there is nothing to snap mid-shift. It looks softer and more finished than its two-minute build time suggests, and it flatters nearly every face shape because the twist follows the natural curve of the head.
Time needed: 2–4 minutes. Best for: shoulder-length hair, fine hair that slips out of elastics, fitted caps. Watch out for: using too few pins on thick hair — work along the whole fold with five or six pins, and cross two pins in an X at the base for real security.
4. The Single French Braid
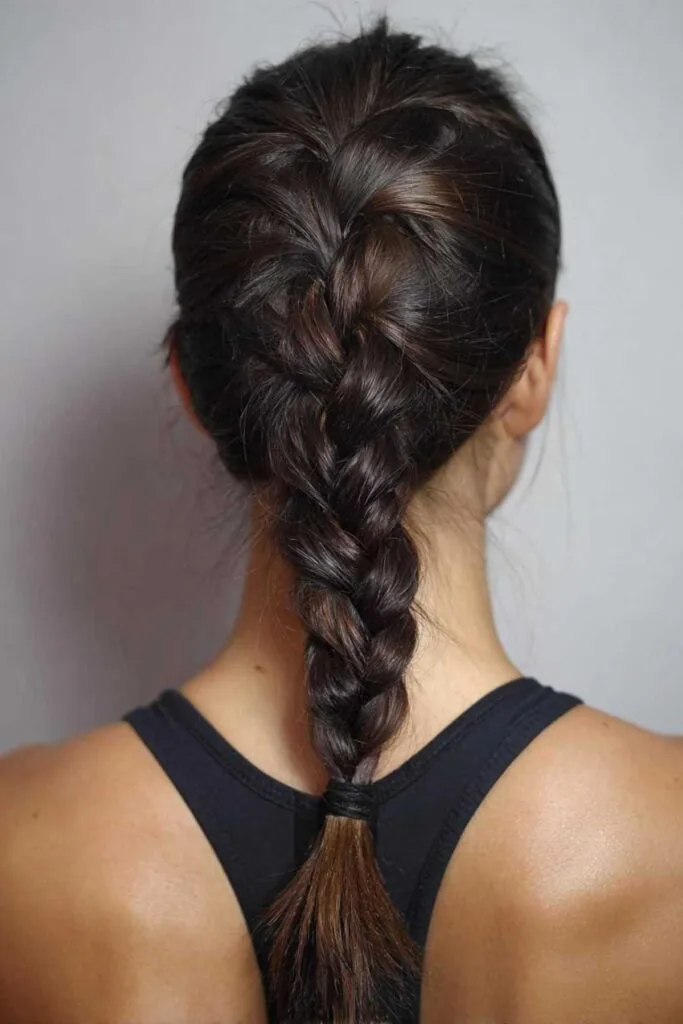
One French braid down the centre of the head is the most reliable long-shift style ever invented. It keeps every strand contained from hairline to ends, distributes tension evenly across the whole scalp so nothing aches, and survives caps, masks and twelve hours of movement without a single re-do. Start at the crown, add small sections as you go, and braid all the way to the ends. For ward work, fold the tail up and pin it flat at the nape rather than leaving it hanging — a hanging braid swings forward when you lean over a patient, which defeats the purpose.
- Pros: longest-lasting style in this guide; no pins needed; comfortable under any cap.
- Cons: needs practice to braid neatly on your own head; very short layers escape near the nape.
- Quick verdict: if you learn one style for nursing, learn this one.
5. Double French Braids
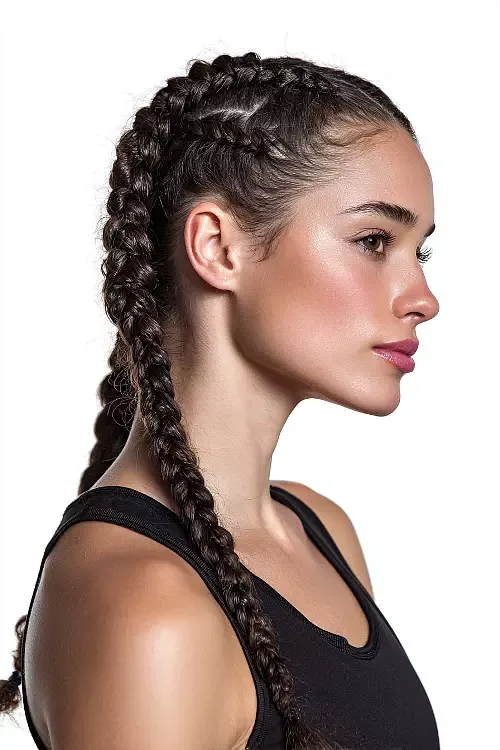
Two French braids, one on each side, solve the problems that a single braid cannot. They handle very thick hair better, because each braid carries half the weight; they keep short layers and face-framing pieces contained, because the braids start right at the hairline on both sides; and they sit flatter under a cap than one central braid, which can create a ridge. Part the hair down the middle, braid each side from the front hairline to the nape, then either join the tails into one low bun or fold each tail up and pin it. The joined-bun finish is the tidiest for the ward.
Time needed: 6–8 minutes once practised. Best for: thick hair, layered cuts, long shifts with a cap. Watch out for: braiding too tightly at the hairline — firm is good, painful is not, and the braids will hold even with moderate tension.
6. The Dutch Braid Into a Bun
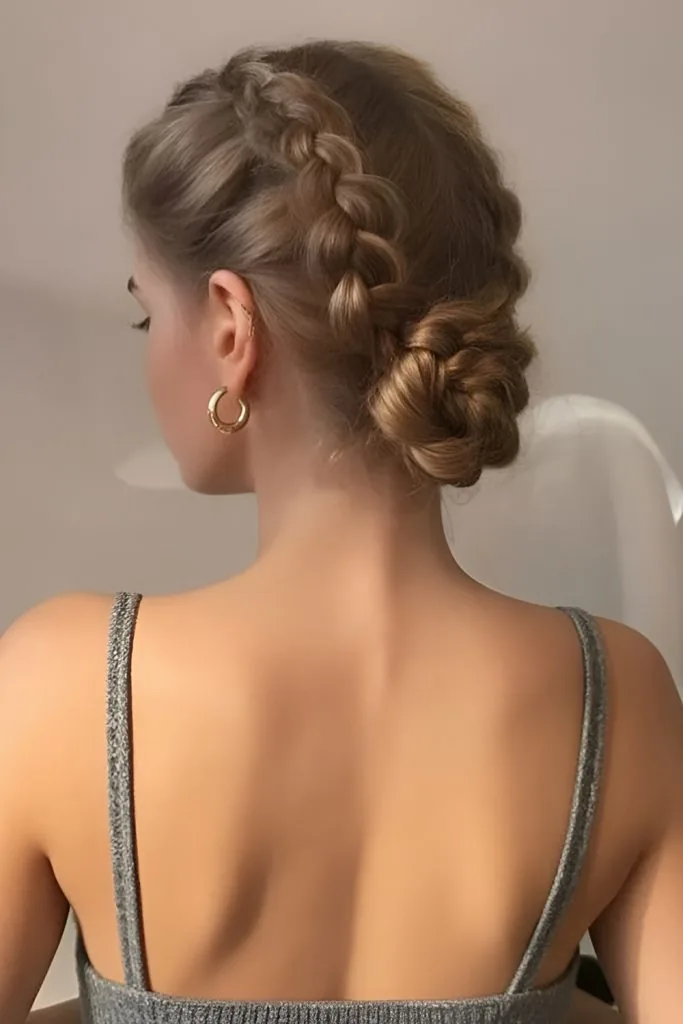
A Dutch braid — the inside-out cousin of the French braid, where sections pass under instead of over — sits proud of the head in a raised plait that looks striking and grips even better than a French braid. Braid from the crown to the nape, then coil the remaining length into a low bun and pin it. The raised braid gives the style a finished, intentional look that survives a cap far better than a plain bun, because the braid’s texture is still visible around the edges of the cap. It is also one of the best styles for fine hair, since the underhand technique creates the illusion of more volume and thickness.
Time needed: 5–7 minutes. Best for: fine to medium hair, anyone who finds French braids slip out, shifts where you want to look polished. Watch out for: the raised braid adds a little height — check the cap fit before you leave home.
7. The Fishtail Braid
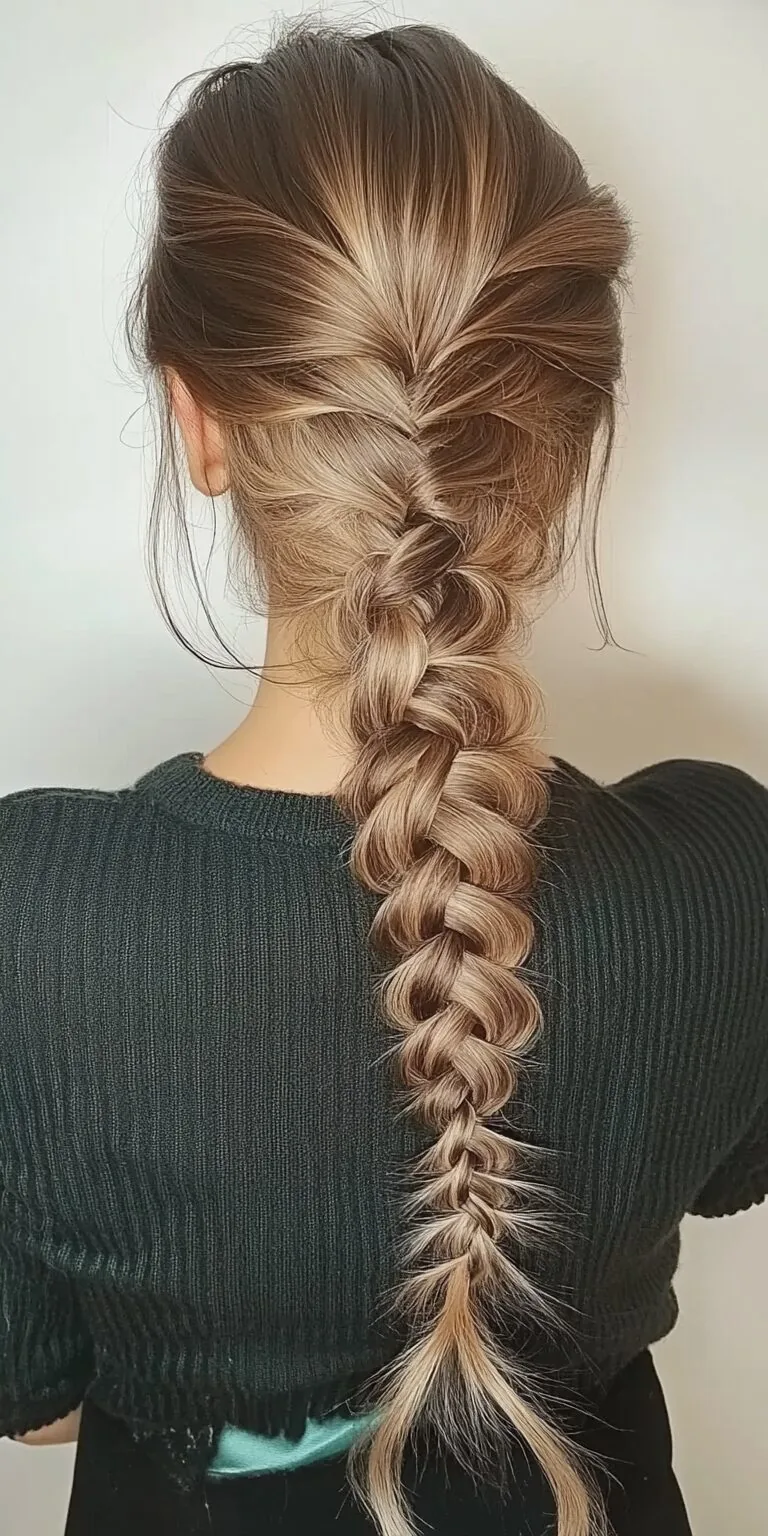
The fishtail braid looks intricate and holds like a seatbelt. Built from two sections with small pieces crossed over, it creates a dense, flat plait that resists loosening better than a three-strand braid, which makes it excellent for long hair on long shifts. The flat profile sits beautifully under a cap, and the braid’s woven texture keeps even silky hair contained without much product. Start with a low ponytail to make the fishtail easier on your own head, then braid to the ends and fold the tail up and pin it flat for ward work. It takes a little longer than a French braid, but the staying power repays the extra two minutes.
Time needed: 6–9 minutes. Best for: long, silky or slippery hair that escapes from other braids. Skip it if: you are short on time — a standard braid is faster and nearly as secure.
8. The Wrapped Low Ponytail
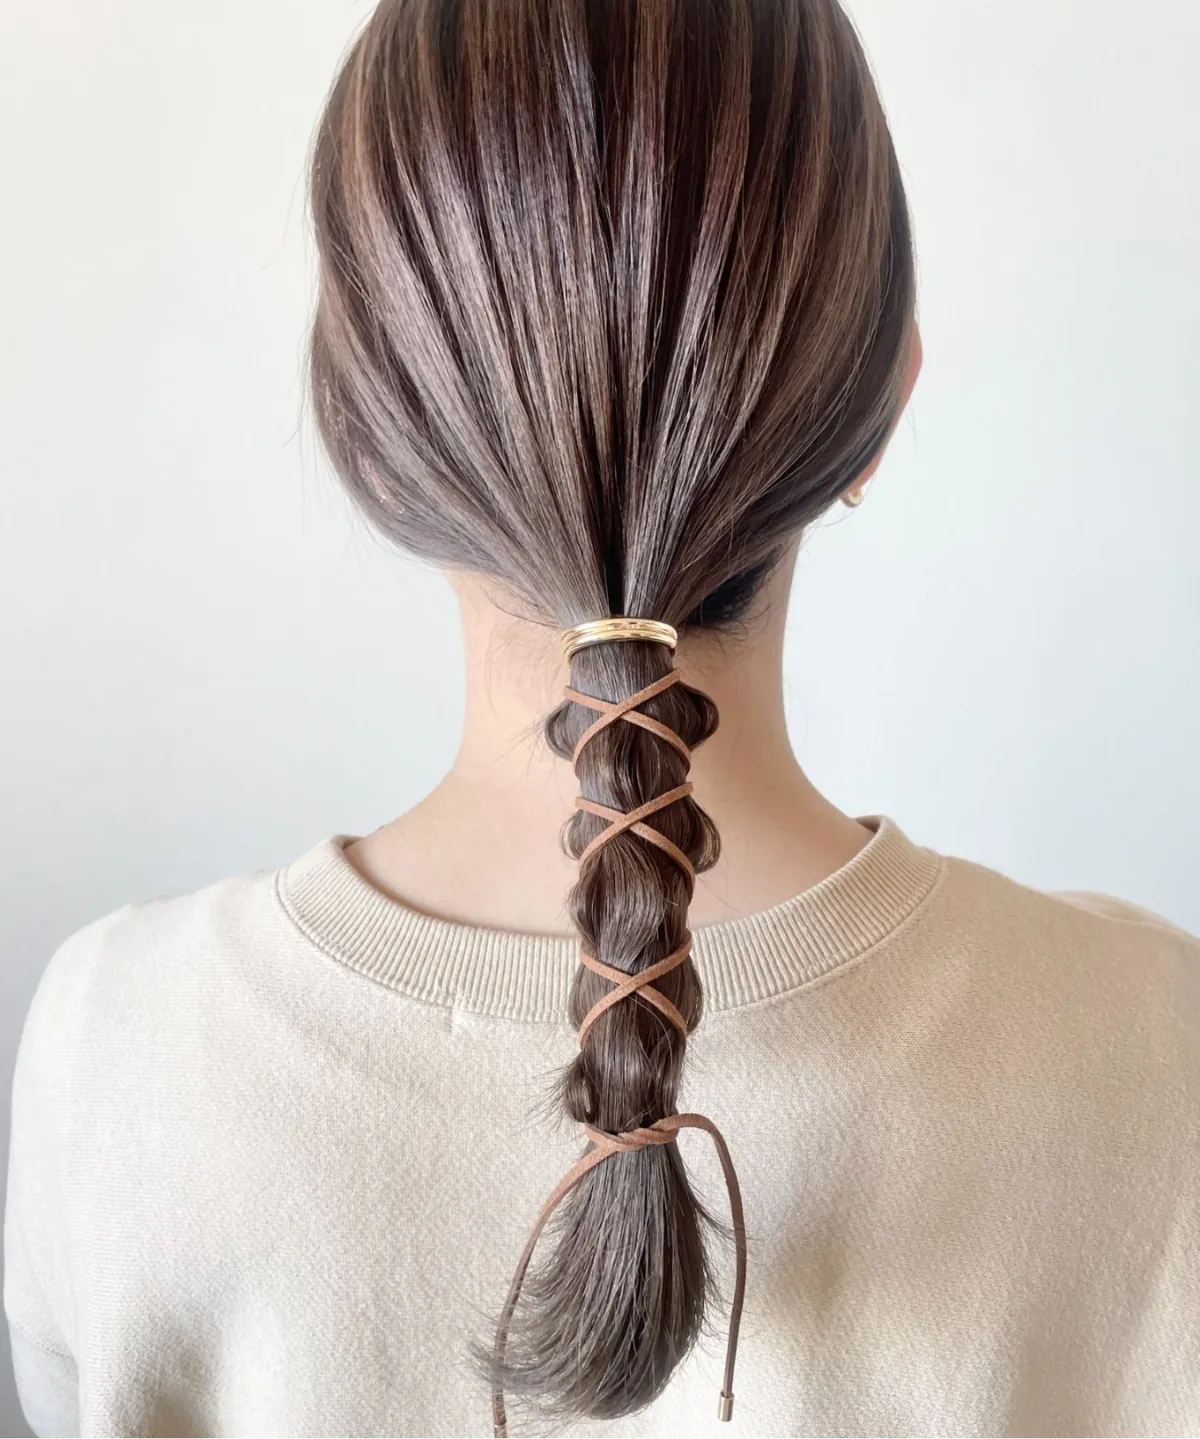
A low ponytail with a wrapped base is the fastest style in this guide that still looks professional. Gather the hair at the nape, secure it, then take a thin strand from underneath the tail, wrap it around the elastic, and pin the end underneath. The wrap hides the elastic, stops the ponytail from sagging visibly, and gives the style a finished look that a bare elastic never achieves. For ward safety, keep the tail short enough that it does not swing forward when you bend — on very long hair, braid the tail or fold it up. This is the best choice for short shifts and for days when you overslept and have ninety seconds.
- Pros: fastest polished style here; no braiding skill needed; easy to redo on a break.
- Cons: the tail can tangle with a stethoscope; the elastic stretches over twelve hours.
- Quick verdict: perfect for eight-hour shifts, a backup plan for twelve-hour ones.
9. The Bubble Ponytail
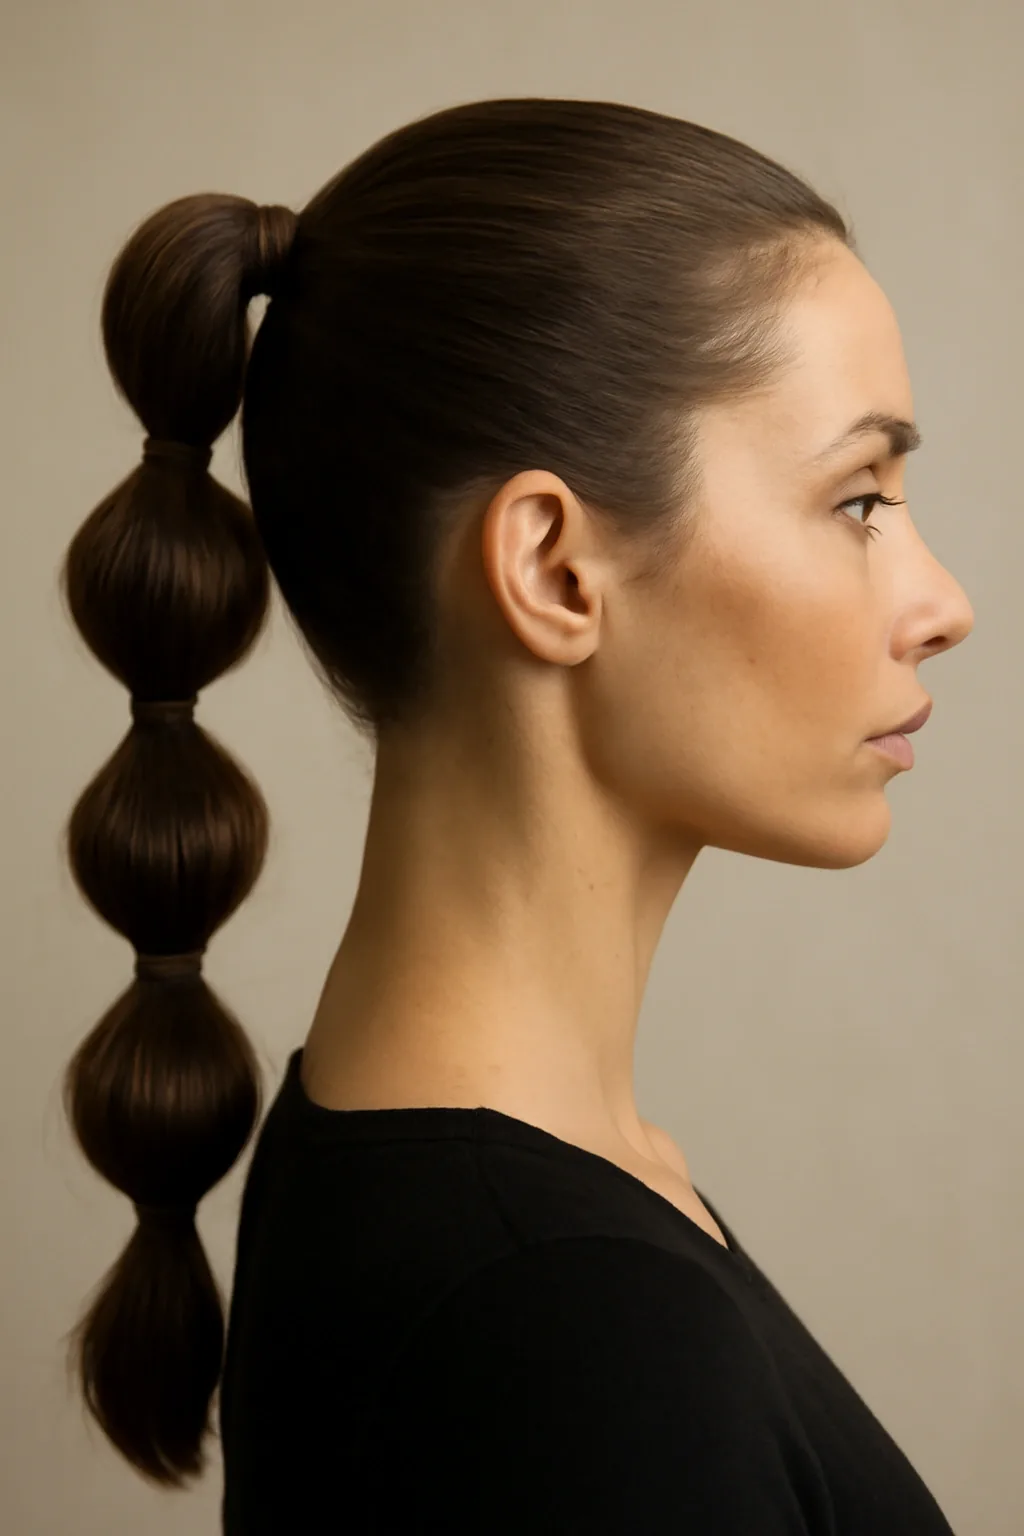
The bubble ponytail turns a plain ponytail into a contained, segmented style: secure a low ponytail, then add small elastics at intervals down the tail, gently puffing each section between elastics. The segments stop the tail from tangling, keep the ends controlled, and distribute the weight so the style pulls less at the front hairline. It is surprisingly practical for the ward — nothing hangs loose, nothing swings, and the whole tail moves as one controlled unit. It also works well on hair that is too short or too layered for a braid, since the elastics do the containing that a plait would otherwise do.
How to do it: low ponytail, then elastics every two to three inches, puffing each bubble gently with your fingertips. Best for: medium to long hair, layered cuts, nurses who want something a little different without sacrificing security. Watch out for: using too many elastics on fine hair — three or four segments is plenty.
10. The Flat Top Knot for Scrub Caps
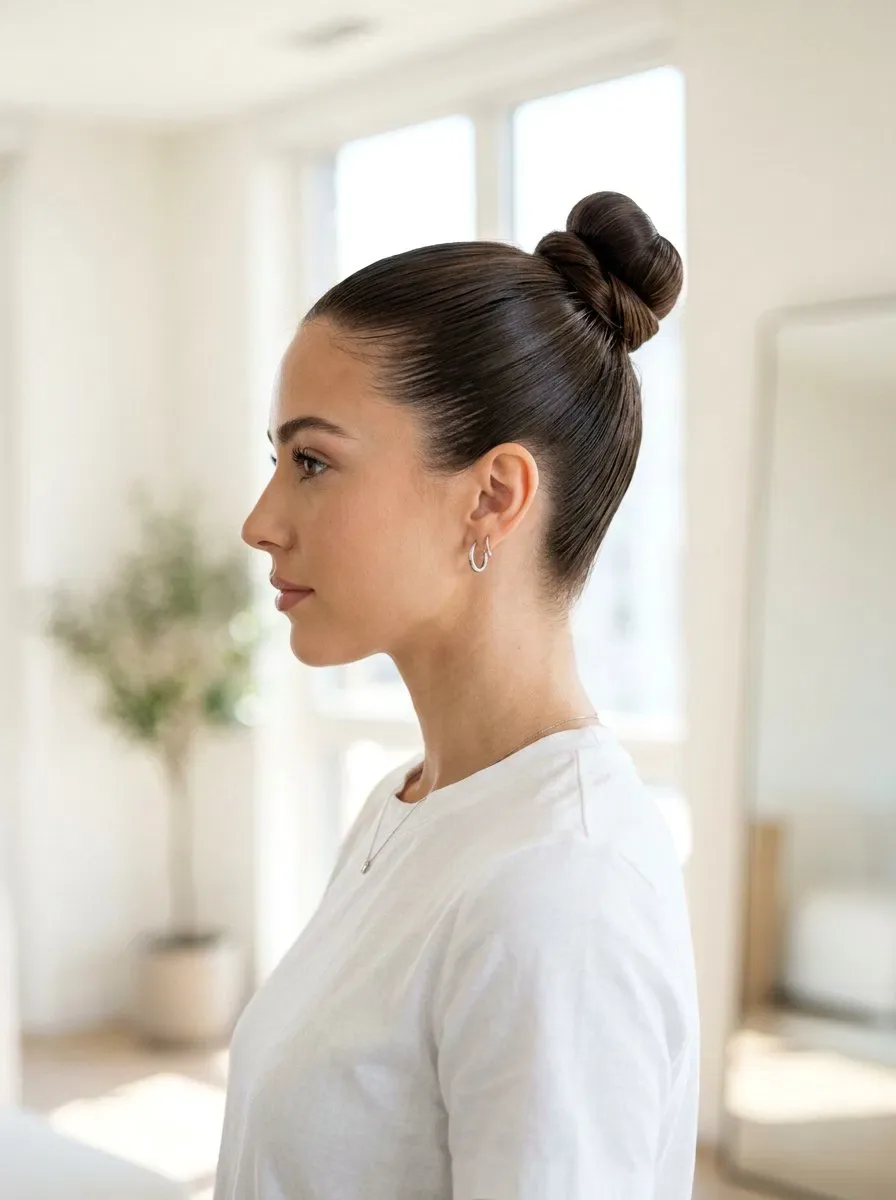
A top knot sounds like the enemy of a scrub cap, but a flat one — coiled wide and low-profile rather than stacked high — fits under a bouffant cap and keeps long hair completely contained. The trick is placement and shape: gather the hair at the crown, twist it, and coil it outward into a wide, flat disc rather than a tall tower, pinning around the edge. The wide base spreads the weight, so it pulls less than a small tight bun, and the flat shape lets the cap sit normally. This is the style to choose when your cap is a roomy bouffant and your hair is long enough that a low bun feels heavy at the nape.
Time needed: 3–4 minutes. Best for: long hair, bouffant-style caps, nurses who prefer the weight higher on the head. Skip it if: your cap is a fitted tie-back — a low bun will fit far better.
11. The Nautilus Bun
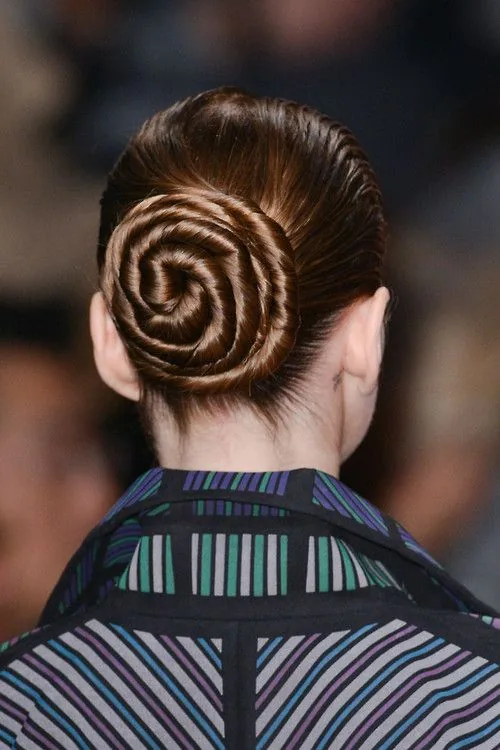
The nautilus bun is a single-loop bun that looks like a shell spiral and holds with a single hairstick or two pins. Gather the hair, loop it once around your hand, tuck the ends through the centre of the loop, and pin. Because the structure is a loop rather than a coil, it lies remarkably flat against the head and distributes weight evenly, which makes it comfortable for very long hair that overwhelms a standard bun. It takes practice — the first three attempts usually unravel — but once the hand movement clicks, it becomes a thirty-second style. Practise it on a day off before trusting it on a shift.
Time needed: 1–2 minutes once learned, longer while learning. Best for: long and very long hair, smooth textures, minimal-pin styling. Watch out for: hairsticks and forks — check your facility’s policy, as some wards restrict rigid hair accessories.
12. The Figure-Eight Bun
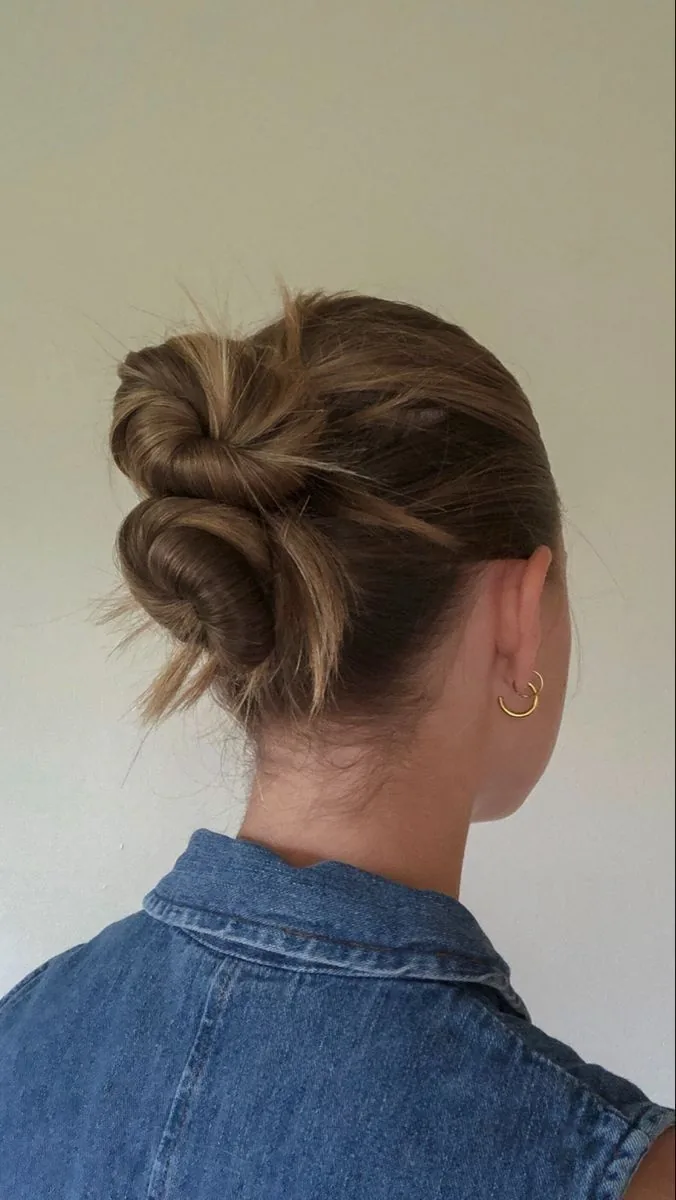
The figure-eight bun splits the hair into two loops that cross like a figure eight, pinned at the centre. The two-loop structure is inherently stable — each loop braces the other — so the style resists the slow rotation that undoes a single-coil bun, and it lies flat enough for any cap. It is a particularly good choice for thick hair, because the two loops share the volume instead of stacking it all in one coil. Build it by dividing a low ponytail into two halves, looping each half up and around, and pinning where the loops cross. The result looks far more complicated than it is, which is a pleasant bonus on a ward where nobody has time for complicated.
Time needed: 4–5 minutes. Best for: thick and heavy hair, long shifts, anyone whose single buns always slide. Watch out for: uneven loops — take a second to match their size before pinning, or the bun will look lopsided under the cap edge.
13. The Gibson Tuck
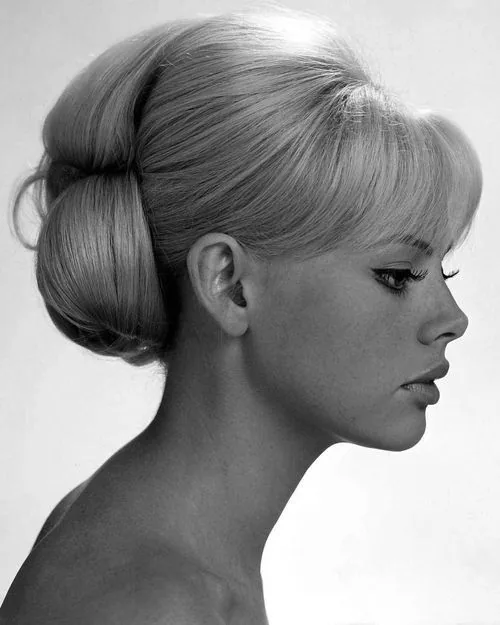
The Gibson tuck is a vintage roll with a modern ward advantage: the ends are completely hidden inside the roll, so nothing escapes, ever. Gather the hair into a low ponytail, loosen the elastic slightly, part the hair above the elastic, and tuck the whole tail up through the gap, rolling it inward until it sits as a neat horizontal roll at the nape. Pin along the roll. The style is gentle on the hair — no tight coil, no twisting — and it suits medium-length hair that is too short for a full bun. It reads as elegant and intentional, which makes it a good choice for clinic and outpatient roles where the cap comes off and patients see the style itself.
- Pros: ends fully hidden; gentle tension; elegant finish; works on medium hair.
- Cons: needs several pins to stay put on thick hair; can loosen if the initial ponytail is too tight.
- Quick verdict: the prettiest secure style in this guide, and easier than it looks.
14. The Milkmaid Braid
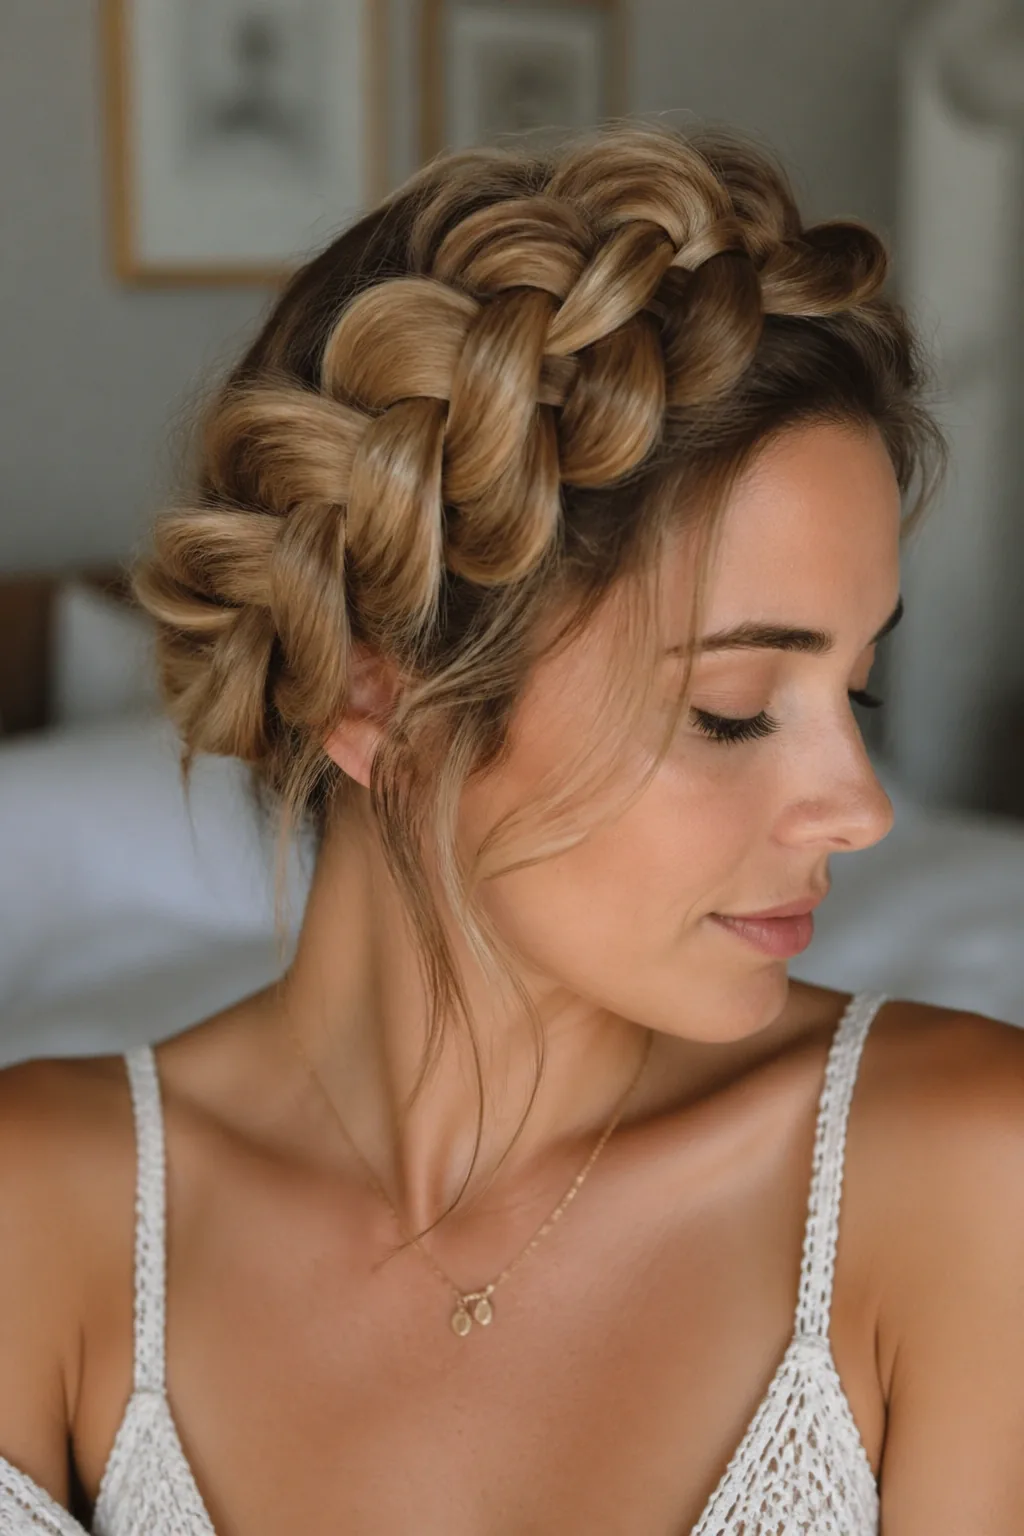
Two braids wrapped up and over the crown, pinned into a halo, give the milkmaid braid its name and its ward credentials: every strand is up, the style sits close to the skull, and the braided structure holds for hours without attention. Braid two low pigtail braids, cross them over the top of the head, tuck the ends under, and pin generously. The result is flat enough for a cap, secure enough for a twelve-hour shift, and charming enough that patients comment on it. It works best on medium to long hair; on very long hair, the braids overlap more than once, which only makes the style more secure.
Time needed: 6–8 minutes. Best for: medium to long hair, long shifts, nurses who want a style that looks special. Watch out for: pinning the ends properly — an untucked braid end is the one thing that will work loose by afternoon.
15. The Rope Braid Ponytail
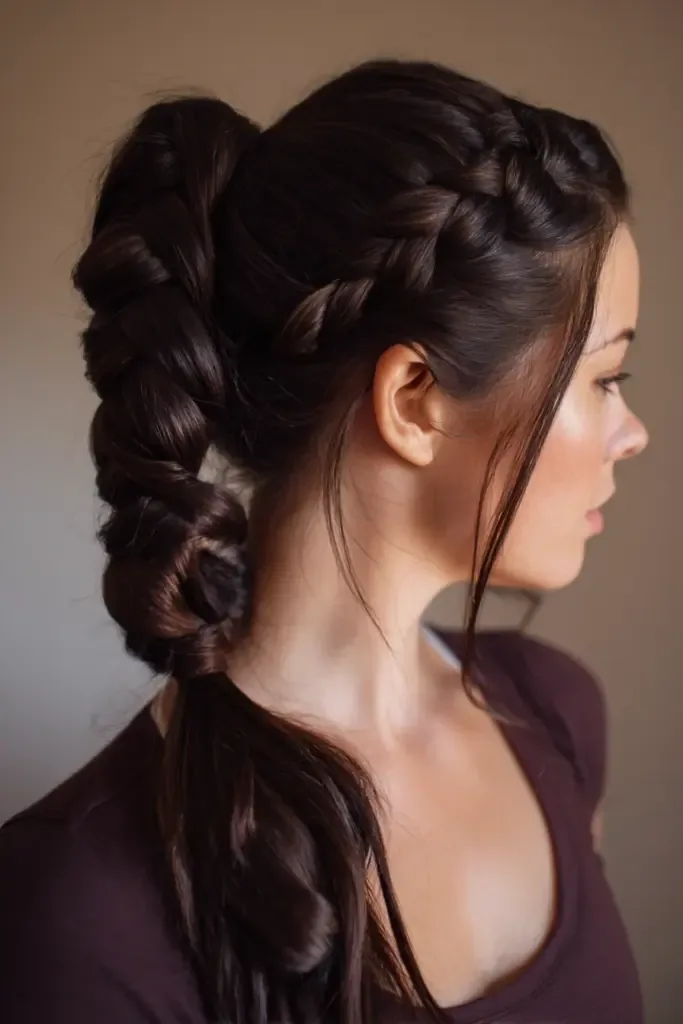
A rope braid is the simplest braid there is — two sections twisted in the same direction, then twisted around each other in the opposite direction — and as a ponytail it is one of the most secure styles in this guide. The opposing twists lock the hair together, so the braid barely loosens over a shift, and the rope texture keeps the tail compact and controlled instead of swinging free. Gather into a low ponytail, divide into two, twist each section clockwise, then wrap them around each other anticlockwise and secure. The whole thing takes three minutes, survives a cap, and comes out with a gentle shake and a comb.
Time needed: 3–4 minutes. Best for: anyone who struggles with three-strand braids, long hair, humid wards where braids frizz. Watch out for: letting go mid-twist — the sections will unwind instantly, so keep tension until the elastic is on.
16. The Halo Braid

The halo braid is a single braid that travels all the way around the head, following the hairline like a crown. It contains every strand — including the short pieces at the nape and temples that escape from other styles — and it sits perfectly flat, which makes it arguably the best style in this guide for fitted scrub caps. It is also the most technically demanding braid here: braiding around your own head in a full circle takes practice, and the braid must stay close to the scalp all the way round. Start behind one ear, work around the hairline, and tuck the tail under the starting point. Once learned, it is the most secure and elegant style a nurse can wear.
Time needed: 8–12 minutes. Best for: medium to long hair, fitted caps, special shifts where you want to look exceptional. Skip it if: you are still learning to braid — the milkmaid braid gives a similar result with far less skill.
17. The Side Braid Into a Low Bun
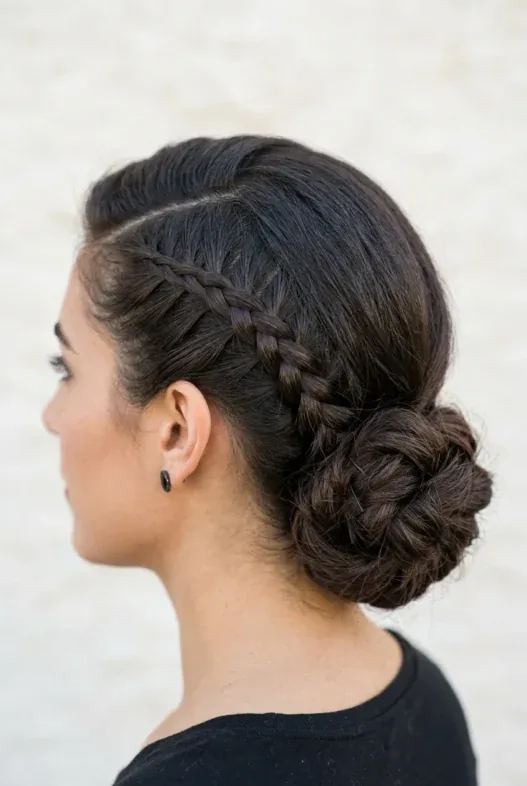
Start a braid at one temple, work it diagonally across the back of the head, and finish it in a low bun at the opposite nape. The diagonal path is the clever part: it pulls the hair in a direction that resists the cap’s tendency to push everything backward, and it anchors the bun off-centre, where it is less likely to press against a pillow, a headrest or a cap seam. The style also keeps the front hairline completely tidy — the braid starts right at the hairline, so no pieces fall forward into the face or the mask. It suits all textures and is especially flattering on oval and heart-shaped faces, where the diagonal line softens the forehead.
How to do it: side part, French or Dutch braid from the temple across to the opposite nape, coil the remaining length into a bun, pin through the braid. Best for: medium to long hair, face-framing layers, nurses who hate hair falling forward. Watch out for: braiding too high — keep the diagonal below the crown so the cap sits flat.
18. The Claw Clip Twist
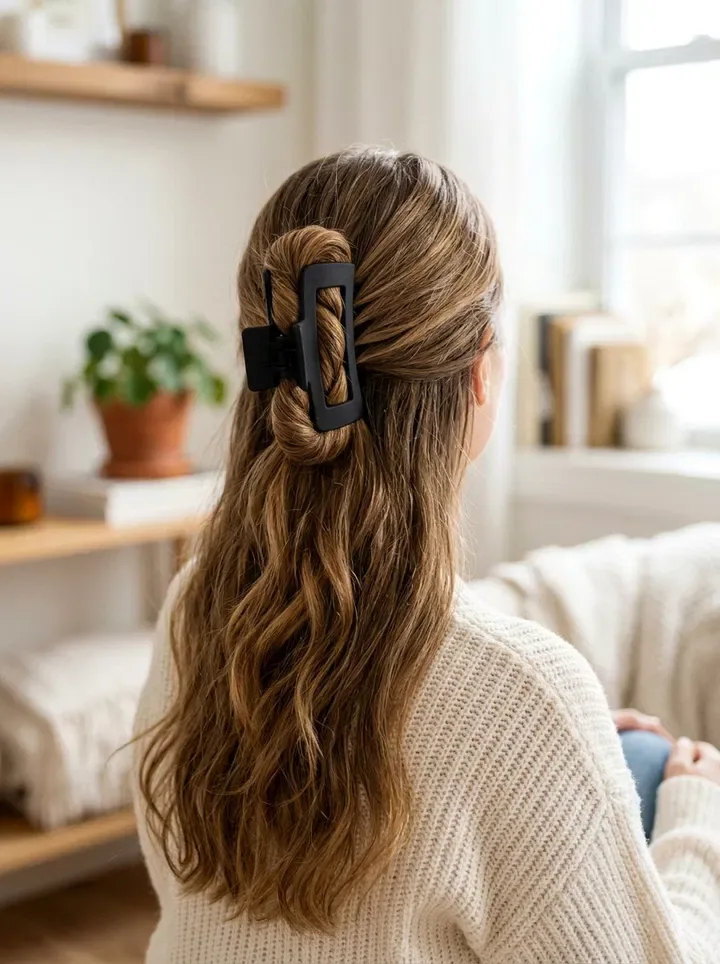
Gather the hair, twist it up the back of the head, fold it over, and clamp a large claw clip over the fold. The claw clip twist is the fastest updo in existence, it causes almost no tension headache because the clip carries the weight rather than an elastic, and it is the easiest style to redo mid-shift — unclip, re-twist, re-clip, ten seconds. The catch is security: a single clip can work loose during heavy physical work, so for ward use choose a large, strong clip with flat teeth, and add two bobby pins through the fold as insurance. Some facilities restrict large clips in certain areas, so check the policy, but in most wards this is a daily workhorse.
- Pros: ten-second build; almost no scalp tension; easiest mid-shift fix of any style here.
- Cons: one clip can loosen; the fold adds bulk under a fitted cap; large clips may be restricted in some areas.
- Quick verdict: unbeatable for short shifts and clinic days; add pins for twelve-hour shifts.
19. The Double Claw Clip Updo
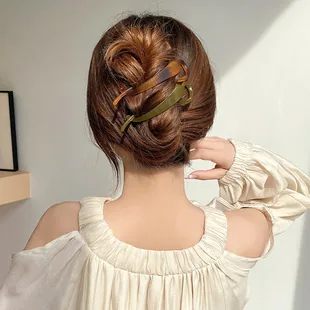
Two medium claw clips, placed one above the other, solve the single clip’s security problem. Twist the lower half of the hair up and clip it at the nape, then twist the upper half down and clip it just above, so the two twists brace each other. The result holds through a full shift, distributes weight across two anchor points, and still comes out in seconds at the end of the day. The two-clip method is also the best claw-clip option for very thick hair, which overwhelms a single clip, and for layered hair, where the second clip catches the shorter pieces the first one misses. Keep the clips flat and close to the head for cap compatibility.
Time needed: 2–3 minutes. Best for: thick hair, layered cuts, nurses who love claw clips but need real security. Watch out for: clips with sharp teeth or decorative bulk — smooth, flat clips sit better under a cap and do not snag.
20. The Scarf-Wrapped Low Bun
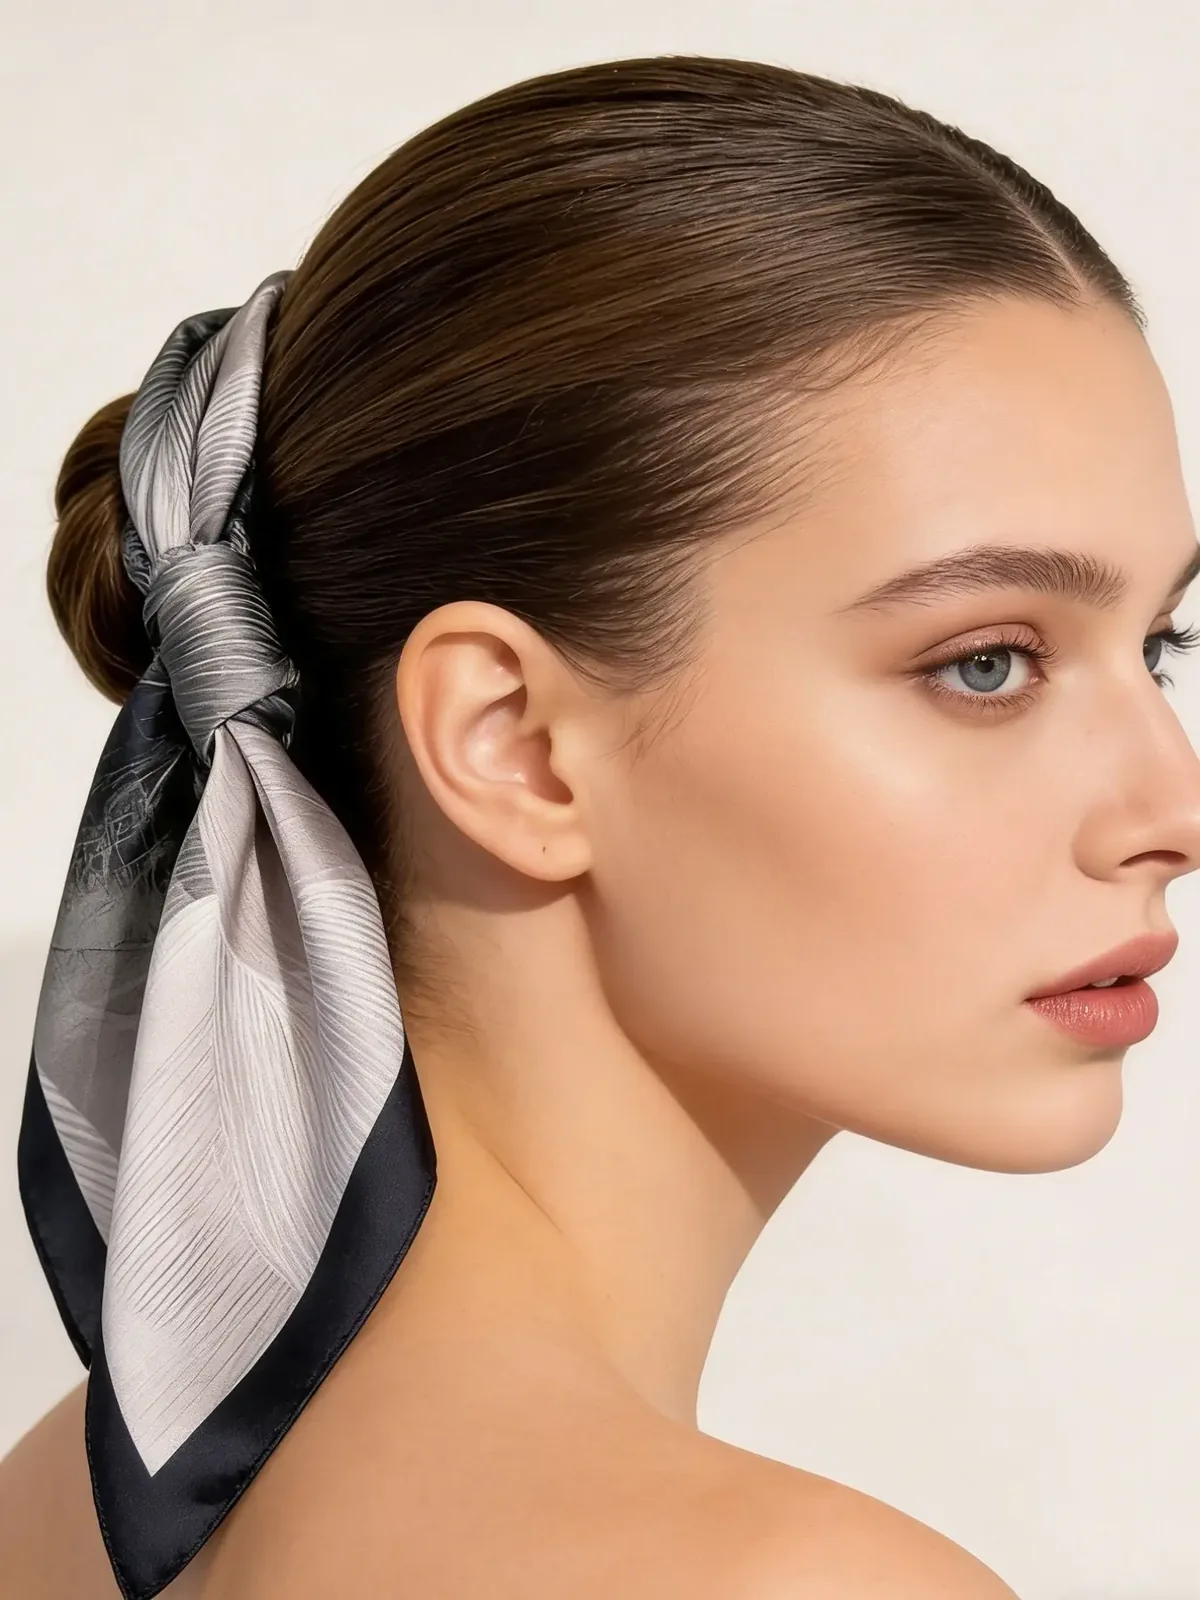
Wrap a narrow silk or satin scarf around the base of a low bun and two things happen: the bun gains an extra layer of grip that stops it rotating, and the style gains a polished, intentional finish that looks far more considered than its three-minute build. The scarf also protects the hair from friction against the cap and absorbs a little sweat at the hairline, which keeps the bun fresher for longer. Choose a small, washable scarf in a dark or neutral colour, wrap it twice around the bun’s base, and tuck the ends in flat — no trailing ends, which would be unhygienic on the ward. This is a good option for nurses who want a touch of personal style inside a strict dress code.
Time needed: 3–4 minutes. Best for: medium to long hair, silky hair that slips, nurses who want subtle personal style. Skip it if: your facility bans fabric accessories in clinical areas — check before wearing it on the ward.
21. The Braided Ponytail With a Headband
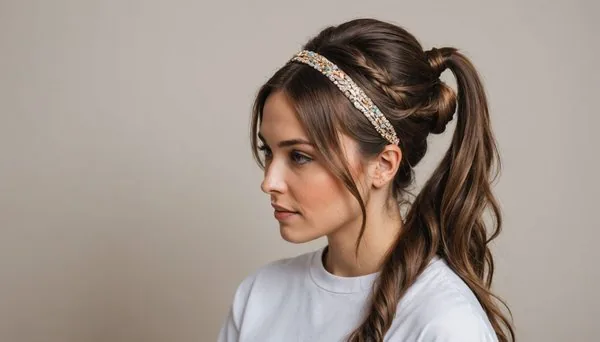
A wide, flat headband does two jobs at once: it holds back the front hairline and fringe, and it gives mask loops a smooth surface to rest against instead of bare skin behind the ears. Pair it with a braided low ponytail and you have a style that controls the hair from the forehead to the ends with no pins at all. Put the headband on first, smooth the front hair back under it, then gather and braid. The headband must be flat and fabric-covered — a hard or ridged band will dig in under a cap and leave a mark across the forehead by lunchtime. This combination is particularly good for nurses growing out a fringe, since the headband solves the one problem braids cannot.
Time needed: 4–5 minutes. Best for: growing-out fringes, wavy hair that escapes at the front, nurses who wear glasses. Watch out for: headband slippage on silky hair — a band with a silicone grip strip stays put.
22. The Pineapple Updo for Curls
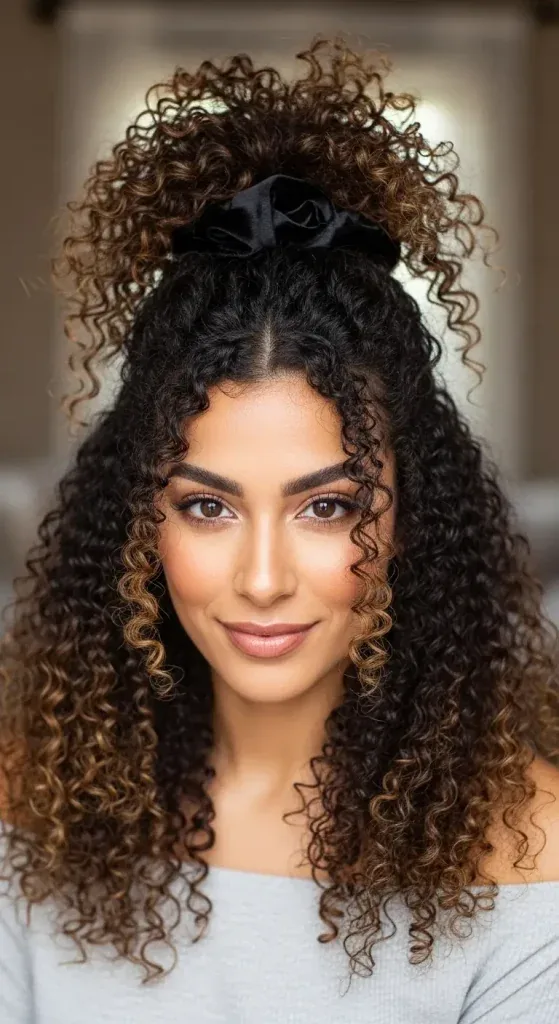
Curly hair has its own ward logic, and the pineapple updo respects it. Gather the curls loosely at the very top of the head with a soft scrunchie or a satin-covered elastic, letting the curls fall forward and outward like a pineapple top. The loose, high gather preserves the curl pattern instead of crushing it, keeps every strand off the collar and out of the face, and sits comfortably under a roomy bouffant cap. The key word is loose: the elastic should hold the hair, not compress it, so the curls keep their shape and the scalp stays comfortable. For fitted caps, gather lower and flatter, or switch to the puff ponytail below.
Time needed: 1–2 minutes. Best for: curly and coily hair, curl-pattern preservation, bouffant caps. Watch out for: ordinary elastics, which snag and break curls — use a scrunchie, a satin band or a spiral tie.
23. The Puff Ponytail for Natural Hair
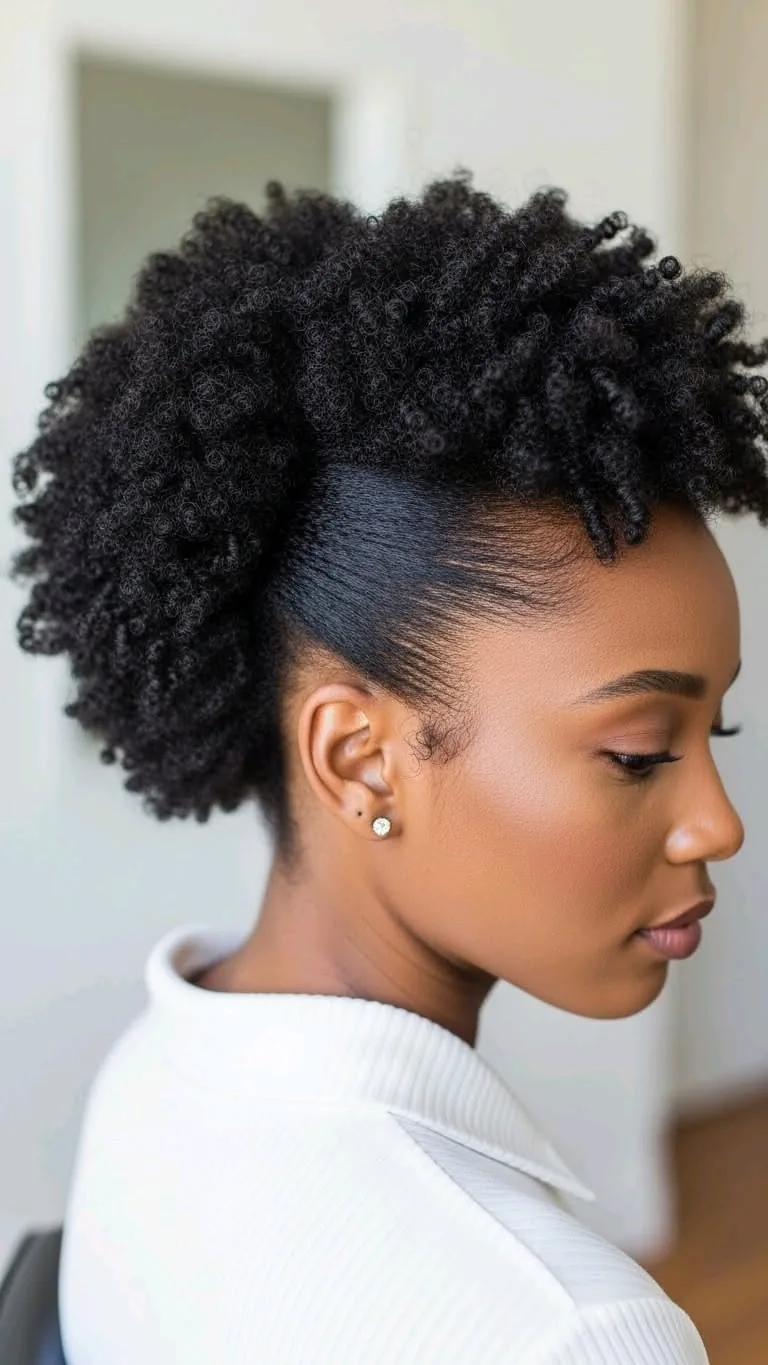
The puff ponytail gathers natural hair into a rounded, cloud-like puff at the crown or nape, using a wide stretch band or a puff cuff rather than a tight elastic. The wide band distributes pressure, which protects delicate edges and the hairline, and the puff shape keeps the hair fully contained while showing off its natural texture. For ward work, position the puff low at the nape so it fits under a cap, and smooth the edges with a little gel or edge control applied with a soft brush. The style takes two minutes, needs no heat and no pins, and works on any length that can be gathered — from a short TWA to a full head of long natural hair.
Time needed: 2–3 minutes. Best for: natural and coily textures, edge protection, quick pre-shift styling. Watch out for: pulling the band too tight — the puff should sit on the hair, not strangle it.
24. Flat Twists Into a Low Bun
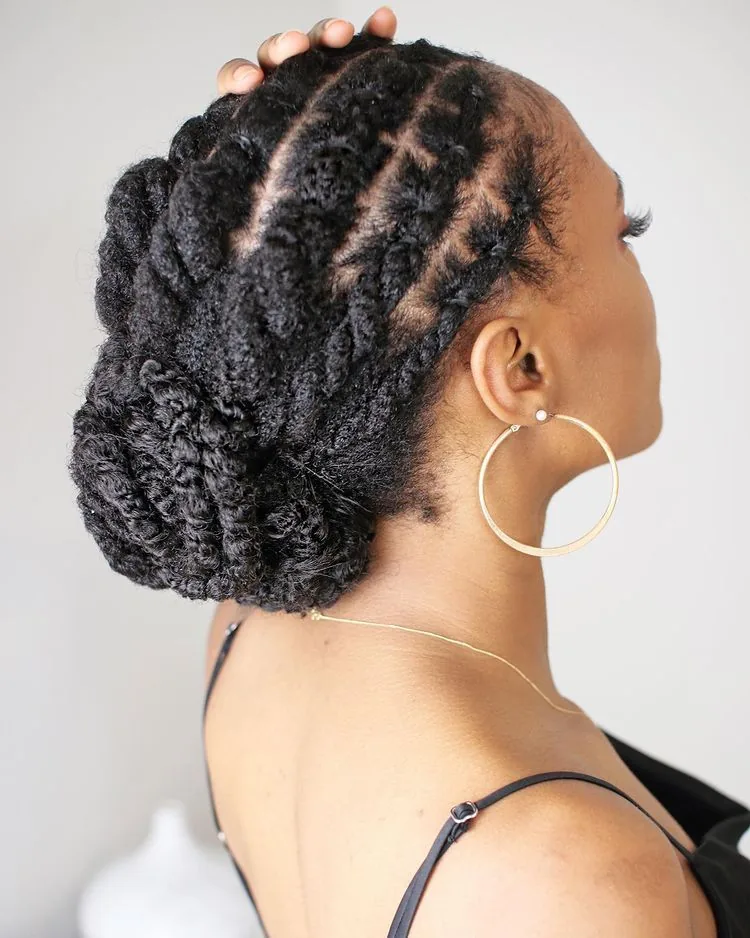
Flat twists are the two-strand equivalent of cornrows: sections twisted flat against the scalp, following the head’s curve, then gathered into a low bun. They are gentler on the scalp than braids, quicker to install, and they hold natural hair securely for days — which means a nurse can install them on a day off and wear the same base style all week, re-forming the bun each morning in a minute. The flat profile is ideal under any cap, and the twists keep the hairline and nape completely tidy. Four to six twists across the head is enough for the ward; more twists give a more intricate look but take longer to install.
- Pros: lasts several days; gentle on edges; flat under caps; quick daily re-styling.
- Cons: installation takes 30–45 minutes; needs some twisting skill to keep neat.
- Quick verdict: the best multi-day option for natural hair on a ward rota.
25. Cornrows Into a Bun
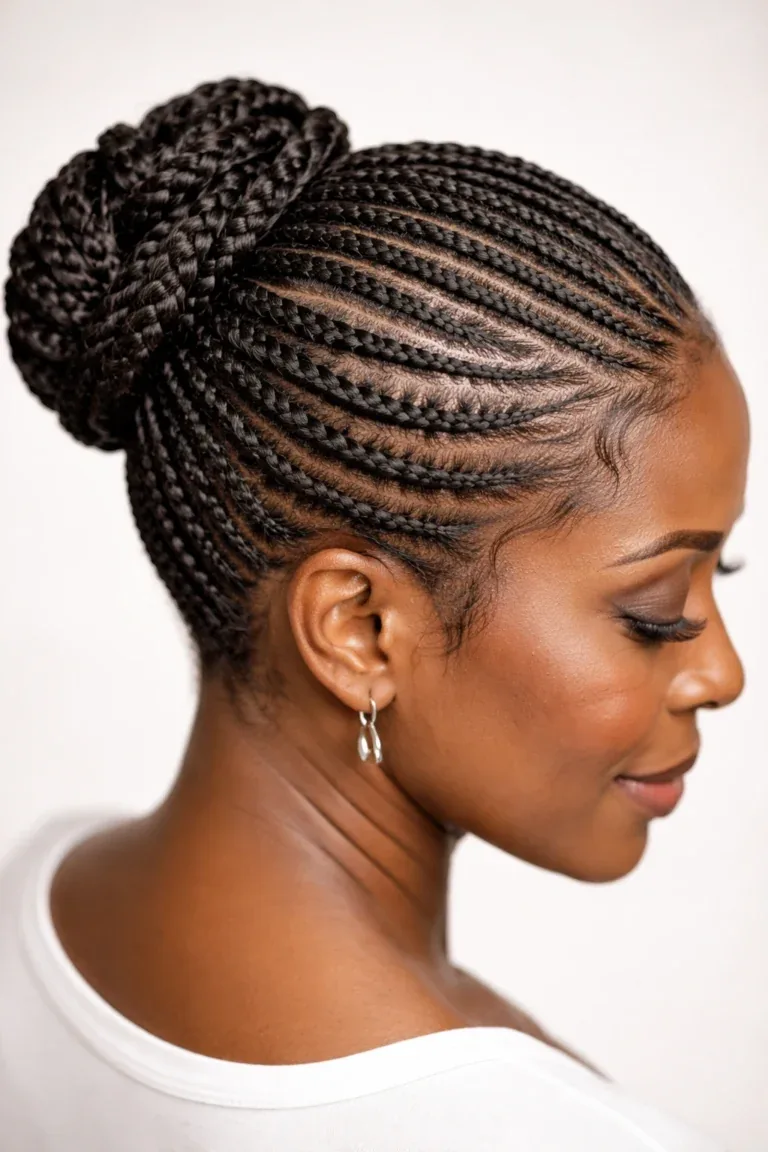
Cornrows braided back from the hairline and gathered into a low bun are the longest-lasting style in this guide — installed once, they can carry a nurse through a whole run of shifts with only the bun to re-form each morning. The braids keep every strand contained, protect the hair from daily manipulation, and sit completely flat under a cap. The bun at the end can be a simple coil, a braided coil, or a wrapped twist, depending on length. The important ward consideration is tension: cornrows should feel firm, never painful, and the edges should never be pulled tight enough to bump or ache. A skilled braider who understands protective styling is worth finding, and the investment pays off in weeks of zero-effort mornings.
Time needed: 1–3 hours to install, 1 minute daily. Best for: natural and textured hair, multi-day shift runs, maximum protection. Watch out for: excessive tension at the hairline — speak up during installation if it hurts.
26. The Pinned-Back Pixie
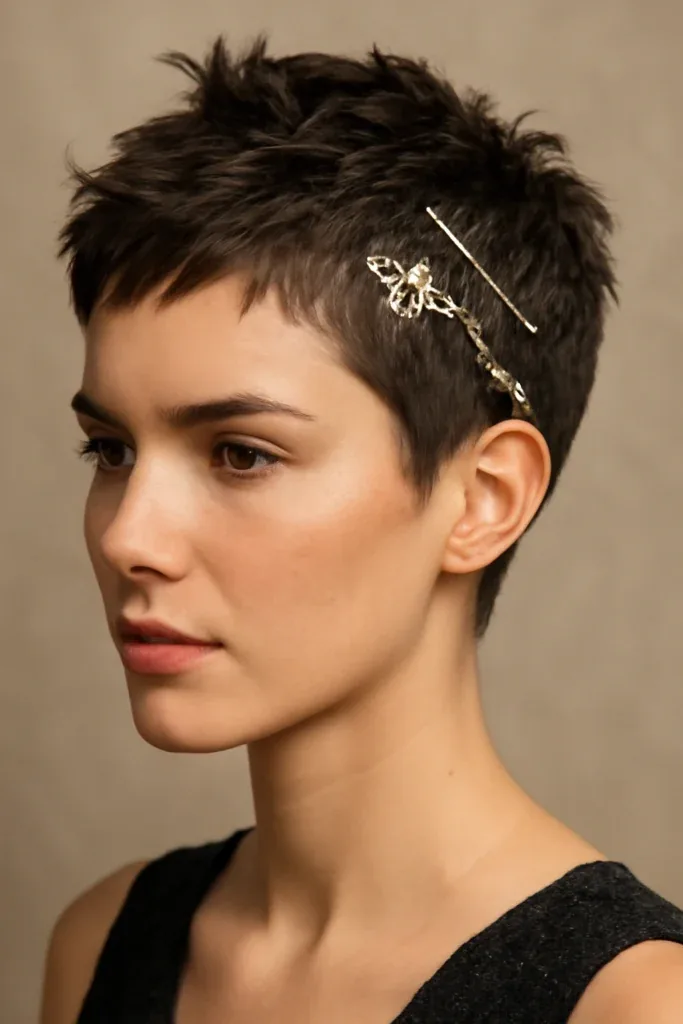
Short hair is not automatically ward-ready: a pixie cut still sheds strands into the face, still catches mask loops, and still needs containing under a cap. The pinned-back pixie handles all three with clips and a little product. Smooth the front and sides back with a light styling cream, pin the longer top sections back with two flat clips, and let the cap do the rest. The clips must be flat and smooth — no bulky decorative clips that dig in under a cap — and they should sit behind the ears, clear of the mask loops. A narrow fabric headband is a good alternative on days when clips slip, and a tiny amount of gel at the nape keeps the shortest hairs from escaping.
Time needed: 2 minutes. Best for: pixie cuts, short bobs, growing-out short styles. Watch out for: clips placed where mask loops rest — keep the area behind the ears completely clear.
27. The Micro-Braided Crown
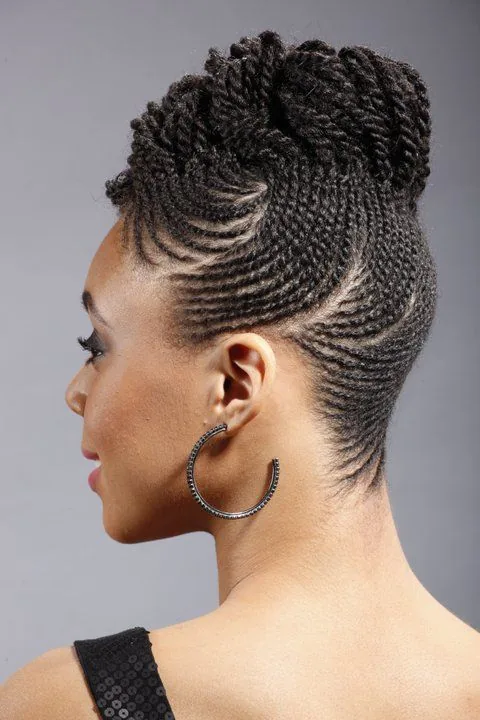
Micro braids gathered and wrapped into a crown combine a protective style with a ward-safe updo. The small braids are individually light, so the crown distributes weight beautifully, and the wrapped shape keeps every braid end tucked away — nothing dangles, nothing swings, nothing escapes under the cap. Wrap the braids around the head in a flat coil, pin at intervals, and tuck the ends underneath. The style lasts as long as the braids themselves, which makes it one of the lowest-maintenance options in this guide, and it looks polished enough for any clinical setting. As with cornrows, the installation tension matters more than the styling: comfortable braids, comfortable shift.
Time needed: 3–4 minutes daily once braids are installed. Best for: micro braids and small box braids, long shift runs, low daily effort. Watch out for: the weight of very long braids — wrap in two layers rather than one heavy coil.
28. The Sock Bun
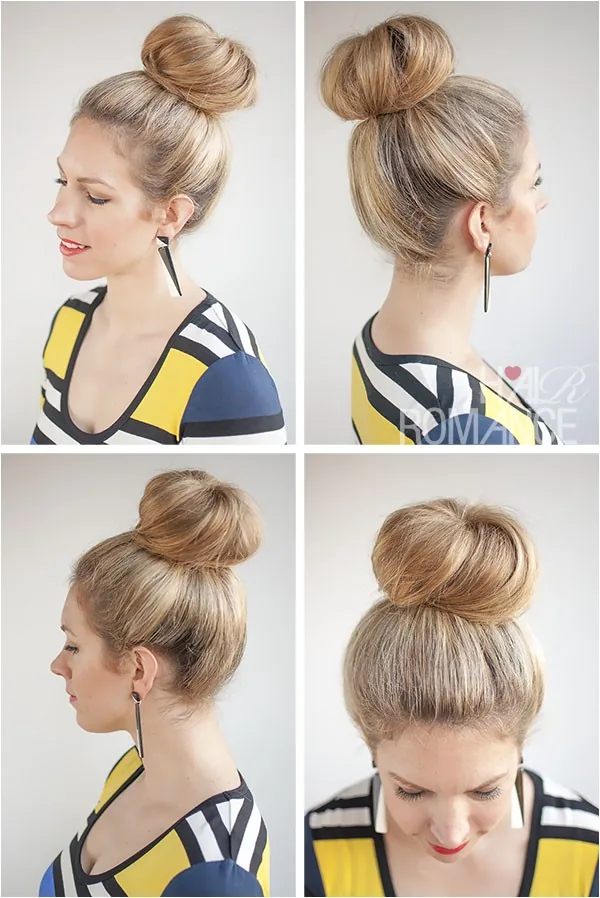
A sock bun — built around a foam donut or a rolled sock — produces the neatest, roundest bun in this guide with the least skill. Pull the ponytail through the donut, spread the hair evenly over it, roll the donut down toward the head while tucking the hair under, and pin. The donut gives the bun its shape, so the result is perfectly round every time, and the structure is remarkably stable: the bun cannot rotate because the donut anchors it. For ward use, choose a donut that matches your hair colour and keep the bun low at the nape, where it fits under a cap without pushing it up. This is the style to choose when neatness matters most — inspections, interviews, clinic days.
Time needed: 3–4 minutes. Best for: medium to long hair, fine hair that needs volume, maximum neatness. Watch out for: a donut that is too large — it adds height under the cap, so match the size to your hair volume.
29. The Braided Headband With a Low Bun
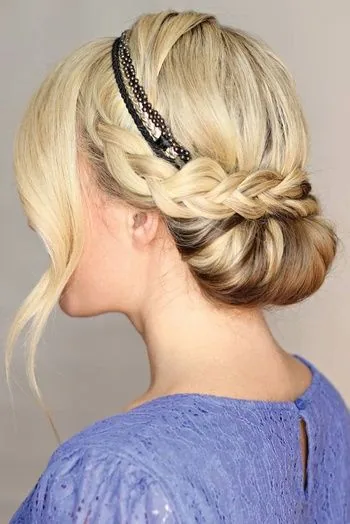
Braid a small section from behind one ear, bring it across the front hairline like a headband, pin it behind the other ear, and gather the rest into a low bun. The braided headband solves the front-hair problem permanently for the shift — no fringe falling forward, no flyaways around the face, no strands catching in the mask — while the low bun handles the length. The combination looks thoughtful and finished, and it works on any hair long enough for a small braid. It is particularly useful for nurses with curtain bangs or face-framing layers, which are the pieces most likely to escape from every other style in this guide.
How to do it: small braid from one temple, across the hairline, pinned at the other side; remaining hair into a low bun. Best for: bangs, face-framing layers, nurses who are constantly pushing hair out of their face. Watch out for: braiding the headband too tightly — it should lie flat, not pull the hairline.
30. The Topsy-Tail Ponytail
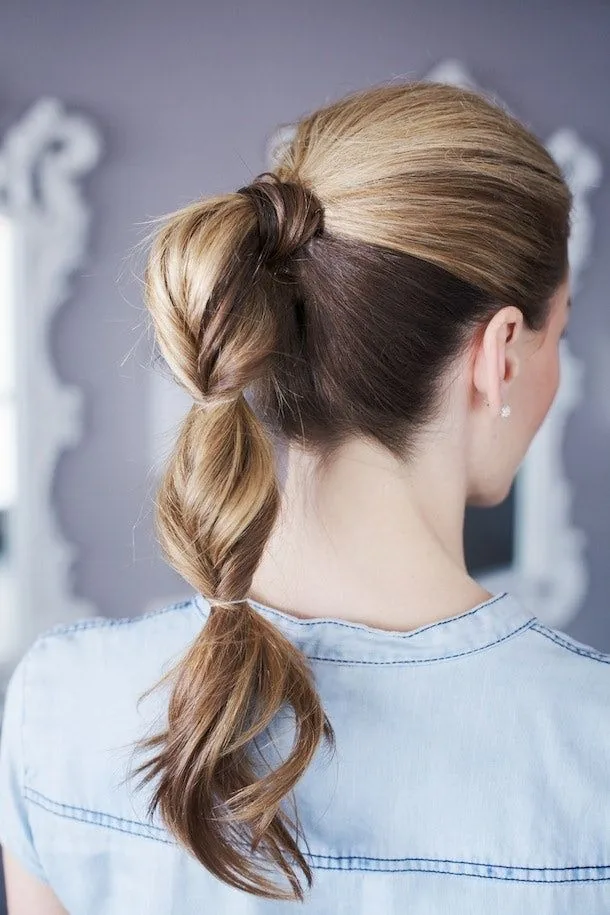
The topsy-tail is the Gibson tuck’s simpler cousin: a low ponytail flipped through itself once, creating a twisted loop that locks the style in place. Gather low, loosen the elastic slightly, part the hair above it, flip the tail up through the gap, and gently tighten. The flip creates a self-locking twist that resists loosening far better than a plain ponytail, and the looped shape keeps the tail close to the head instead of swinging. It takes ninety seconds, needs no pins, and works on medium hair that is too short for most buns. For a twelve-hour shift, flip the tail a second time or braid the tail after flipping — the double structure holds all day.
- Pros: ninety-second build; self-locking; no pins needed; works on medium hair.
- Cons: the loop can loosen on very silky hair; the tail still hangs free unless braided.
- Quick verdict: the best no-pin style for medium-length hair.
31. The Knotted Low Ponytail
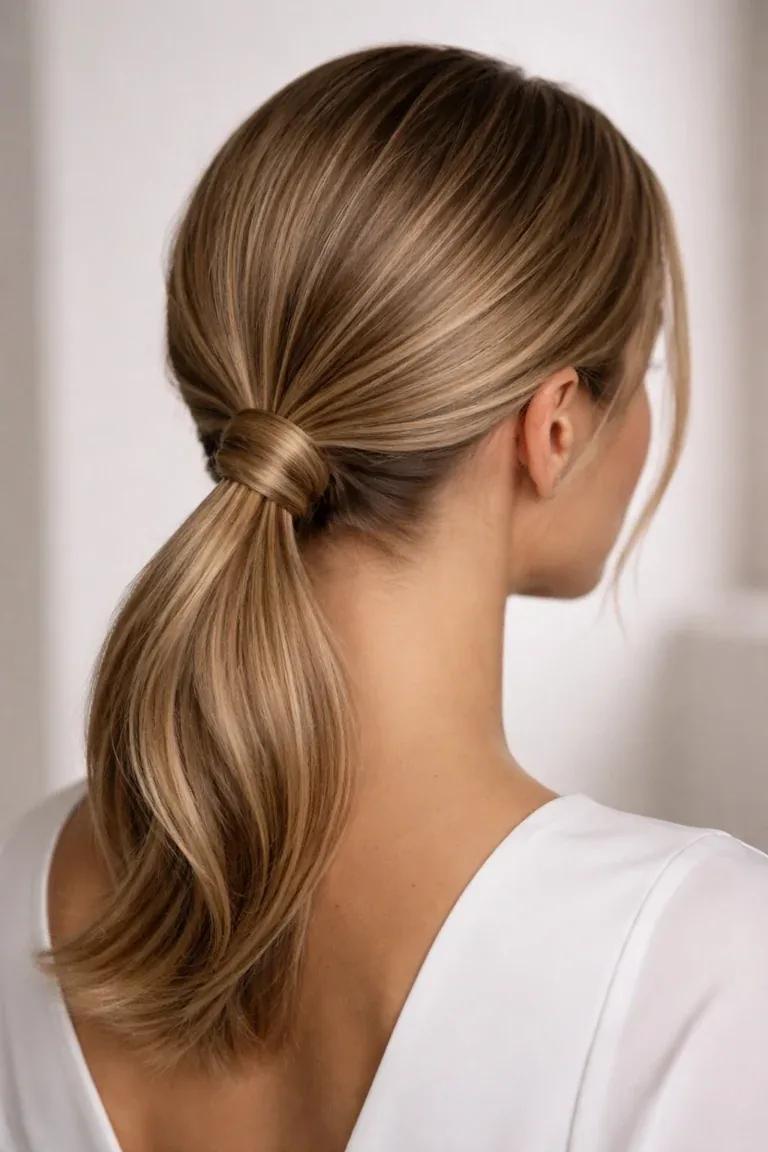
Divide a low ponytail into two sections and tie them in a simple knot — then another knot, if the length allows — and secure with a small elastic hidden underneath. The knots act as physical locks that stop the ponytail from sliding down, which is the plain ponytail’s fatal flaw on long shifts, and they give the tail a textured, intentional look. The style needs no braiding skill, works on any hair long enough to knot, and survives a cap because the knots sit low and flat. It is also one of the few styles in this guide that actually gets more secure as the day goes on, since the knots settle and tighten slightly with movement rather than loosening.
Time needed: 2–3 minutes. Best for: medium to long hair, nurses who find ponytails always slip, low-skill high-security styling. Watch out for: untying at the end of the shift — undo the knots gently rather than pulling, to avoid tangles.
32. The Low Double Buns

Two small buns at the nape, one on each side, split the hair’s weight in half and sit completely flat under any cap. Part the hair down the middle, coil each side into a small bun, and pin each in three places. The two-bun structure is inherently balanced — neither bun can rotate far, because the other braces it — and it handles very thick hair far better than one large bun. The style also keeps the nape clear and cool, which matters on warm wards, and it works on hair that is too short for a single bun, since each side needs only enough length for a small coil. Keep the buns low and close to the centre for the neatest ward look.
Time needed: 4–5 minutes. Best for: thick hair, short-to-medium hair, hot wards, fitted caps. Watch out for: placing the buns too high or too far apart — low and close reads professional, high and wide reads playful.
33. The French Twist
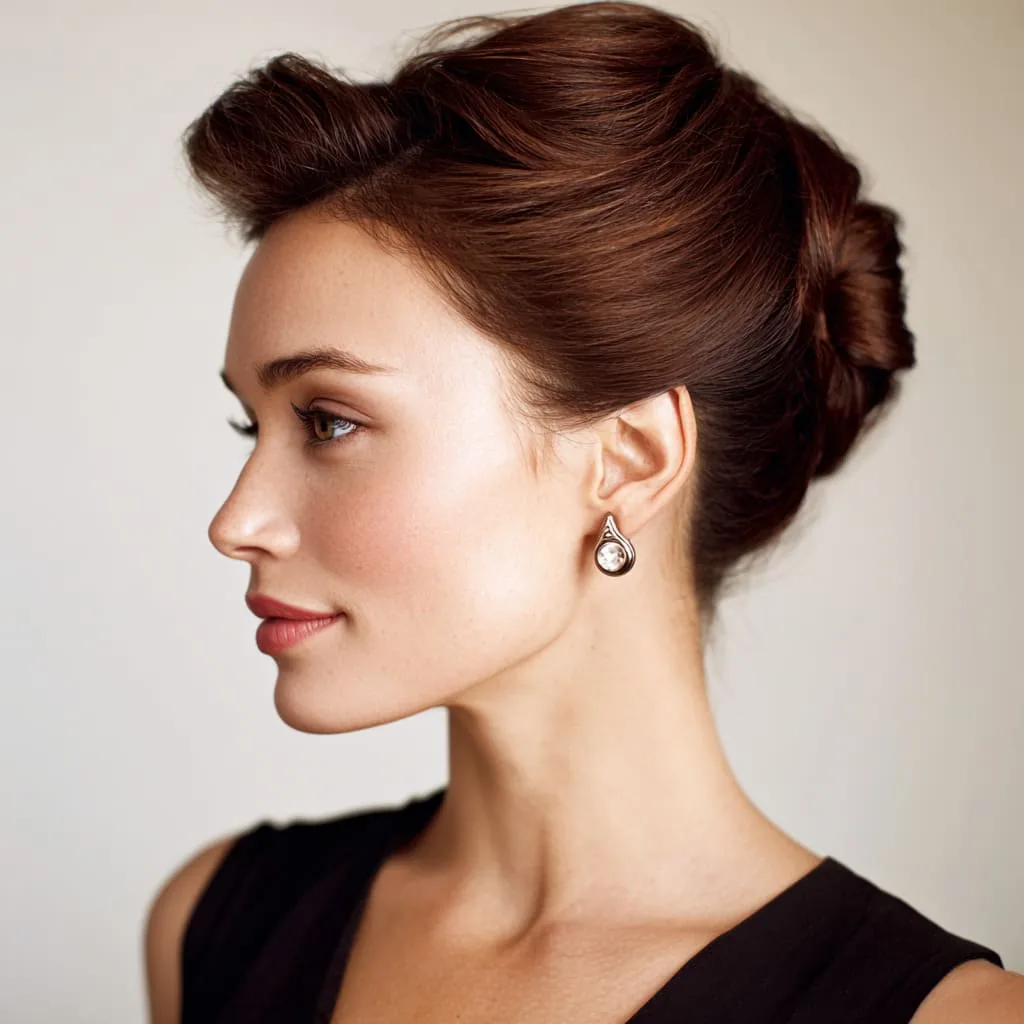
The French twist is the most elegant style in this guide and one of the most secure, once learned. Gather the hair to one side, twist it upward along the back of the head into a vertical roll, tuck the ends inside the roll, and pin along the seam. The vertical roll lies flat against the skull, fits under a cap without a lump, and holds its shape for hours because the twist itself is the structure. It suits medium to long hair and looks polished enough for any role, from the ward to the clinic to a job interview. The learning curve is real — the first attempts twist the wrong way or unravel — so practise on a day off, and use a French twist comb or a few strong pins until the hand movement is automatic.
Time needed: 4–6 minutes once learned. Best for: medium to long hair, polished professional settings, nurses who want one elegant go-to style. Skip it if: you need something you can build half-asleep — the twist-and-pin chignon is the easier cousin.
34. The Woven Three-Strand Bun
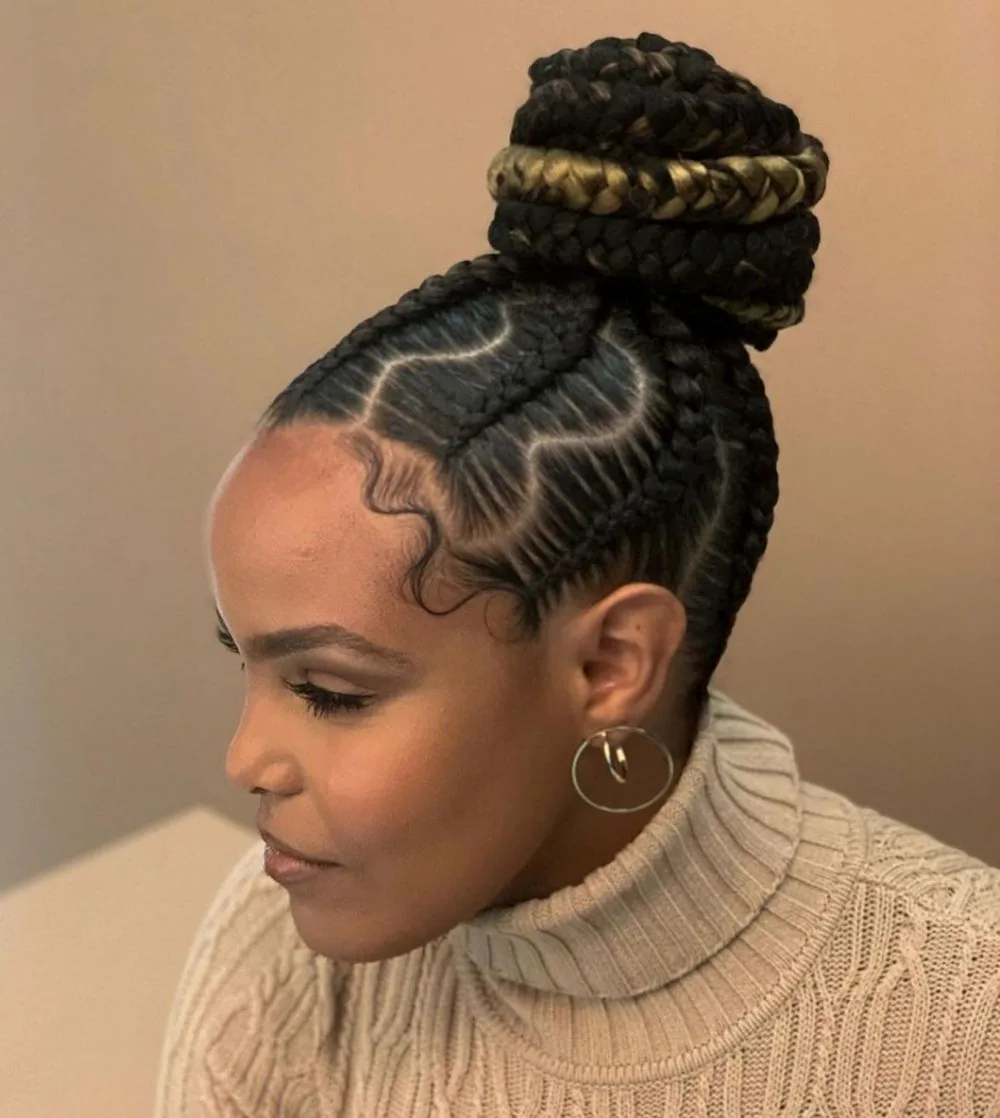
Braid three separate small braids from a low ponytail, then weave the three braids together into a single bun and pin. The woven structure is the most stable bun in this guide — three braids interlocking cannot rotate, slide or unravel the way a single coil can — and the woven texture looks genuinely beautiful, like basketwork. It is the style to choose for the longest, hardest shifts, when you need to forget about your hair completely from clock-in to handover. The build takes a few minutes longer than a plain bun, but the result holds without a single touch-up, and it survives caps, sweat and everything else a ward can do to it.
Time needed: 7–9 minutes. Best for: long hair, twelve-hour shifts, maximum security. Watch out for: braiding the three sections unevenly — matching their thickness keeps the weave flat and even.
35. The Lace Braid Into a Ponytail
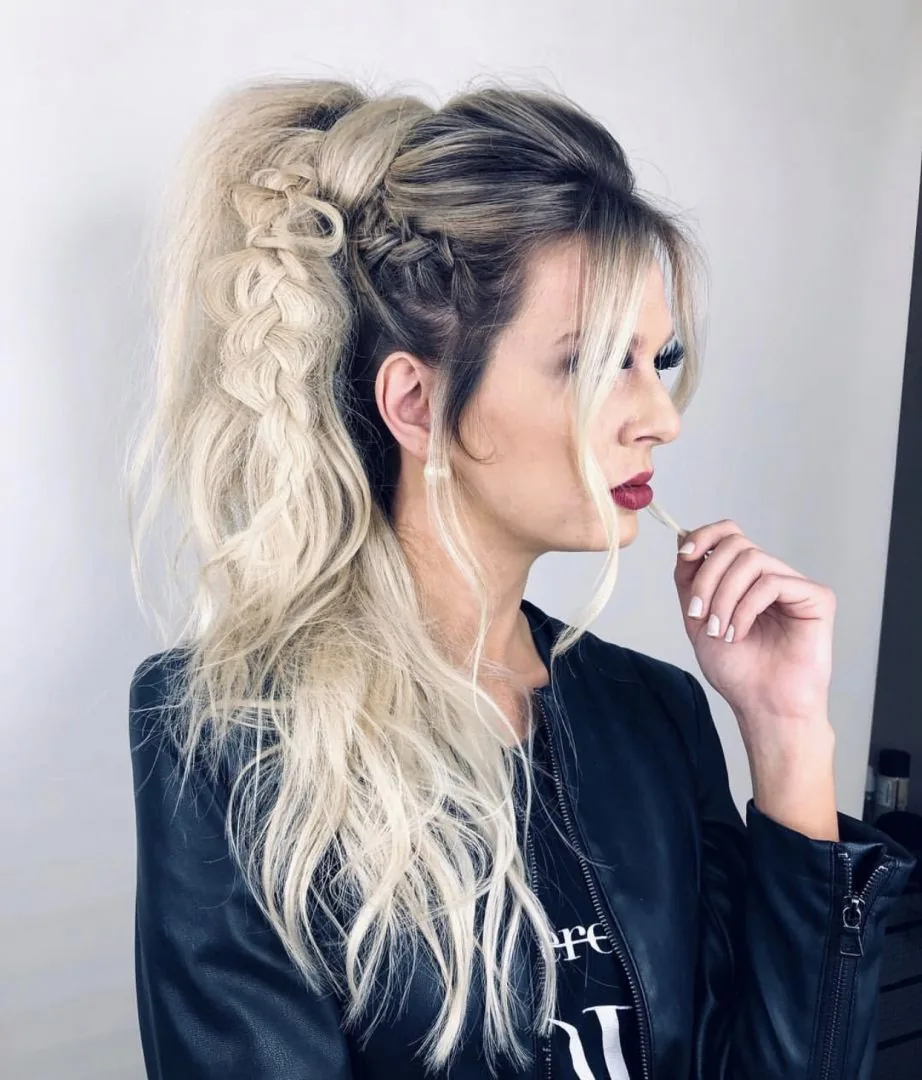
A lace braid adds hair from only one side as it travels, which makes it faster and easier than a French braid while still containing the front hairline beautifully. Start at one temple, lace-braid along the hairline toward the nape, adding sections only from the front, then gather everything into a low ponytail and braid or knot the tail. The lace braid is the best choice for nurses who like the look of a French braid but find it fiddly, and it is particularly good at controlling the short, wispy hairs at the temples that escape from other styles. The ponytail finish keeps the build quick, and the lace detail makes the whole style look considered rather than rushed.
Time needed: 5–6 minutes. Best for: medium to long hair, temple flyaways, nurses learning to braid. Watch out for: the one-sided technique feeling strange at first — practise the motion twice on a day off.
36. The Crown Twist Updo
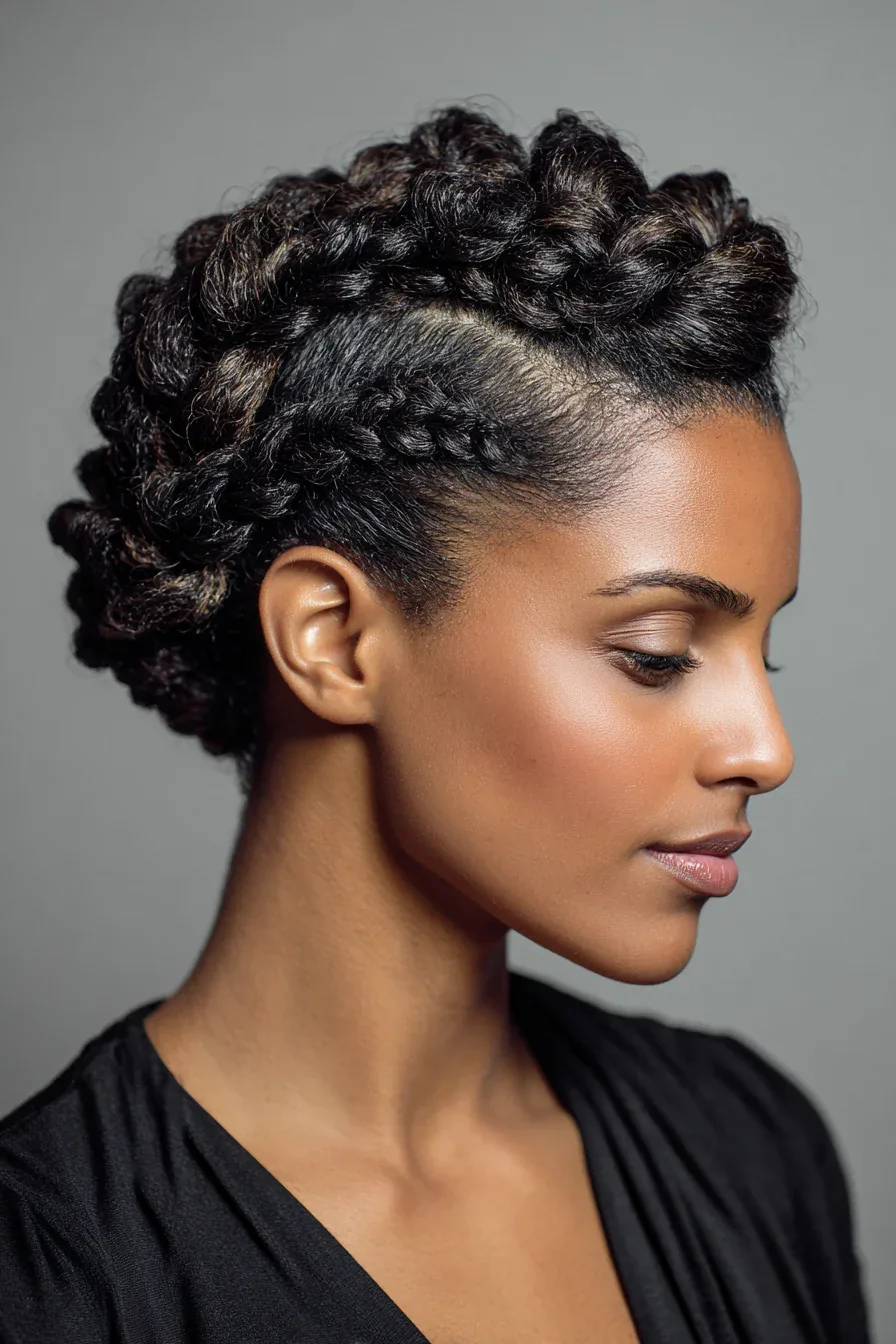
The crown twist finishes this guide with the simplest halo style of all: two rope twists, one from each side, wrapped around the head and pinned into a crown. No braiding, no complicated technique — just twist, wrap, pin, tuck. The twists sit flat, contain the entire hairline, and hold for a full shift because the two twists brace each other where they meet. It works on medium to long hair of any texture, and it is the best halo option for nurses who have never managed a halo braid. Finish by tucking the ends under the twists and pinning through the twist itself, not just the surface, so the crown cannot shift when the cap goes on.
Time needed: 5–7 minutes. Best for: medium to long hair, all textures, nurses who want a halo style without braiding. Watch out for: twists that are too loose — a firm twist holds its shape, a loose one unravels by mid-shift.
What is the best hairstyle for a 12-hour nursing shift?
A braided style — a French braid, double French braids, or a braided low bun — because braids distribute tension evenly and hold their structure for twelve hours without re-pinning. Buns are the next best option, provided they are pinned in at least three places and built on hair with some grip. Plain ponytails are the least reliable for twelve hours, since the elastic stretches and the tail drops.
Can nurses wear their hair down?
No, not in clinical areas. Hospital policy almost always requires hair to be fully tied back, off the collar and out of the face, for infection control and safety. Hair worn down sheds into sterile fields, catches on equipment, and can be grabbed by confused patients. Check your facility’s policy, but assume hair must be fully up on every clinical shift.
What hairstyles fit under a scrub cap?
Styles that sit low and flat: low buns at the nape, flat braids, twists pinned close to the head, and folded ponytails. Anything stacked on the crown pushes the cap up and creates a pressure point. Before a shift, put the cap on over the finished style and check that it sits where it normally sits, with no lump forcing it forward or back.
How do I stop my nurse bun from falling out?
Build grip first with dry shampoo or styling cream, anchor the bun low at the nape, and pin in at least three places spread around the bun. Braiding the hair before coiling it into a bun adds internal structure that stops rotation. If the bun still slides, the hair is probably too silky or too clean — second-day hair holds styles far better than freshly washed hair.
Are claw clips allowed for nurses?
In most wards, yes, but it depends on the facility and the area. Large or decorative clips may be restricted in surgical, ICU or mental-health settings, where rigid accessories can be a hazard. Choose a smooth, flat clip, add bobby pins for security on long shifts, and check your facility’s dress code before relying on a clip every day.
What hairstyle is best for nurses with short hair?
A pinned-back pixie with flat clips and a little styling cream, or a narrow fabric headband to hold the front hair back. Short hair still needs containing under a cap and still catches mask loops, so keep the area behind the ears clear and smooth the nape with a small amount of gel. A cap covers the rest.
What hairstyle is best for nurses with curly or natural hair?
Protective styles that contain the hair without crushing the curl pattern: a pineapple updo or puff ponytail for daily wear, and flat twists, cornrows or micro braids for multi-day shift runs. Use satin-covered elastics or wide stretch bands rather than tight ordinary elastics, which snag and break curly hair, and protect the edges with a light gel rather than tight pulling.
How can nurses prevent hair damage from wearing it up every day?
Vary the anchor point from day to day so the same follicles are not pulled in the same direction constantly, avoid maximum-tension styling, use snag-free elastics and smooth pins, never style soaking-wet hair tightly, and give the hair at least one free day a week with no elastic or cap. Take styles down gently, removing pins before elastics, and detangle from the ends upward.
Should nurses wash their hair after every shift?
Not necessarily. Washing after every shift strips natural oils and can leave hair dry and brittle, especially with frequent cap use. Many nurses alternate a full wash with a scalp rinse or a dry-shampoo refresh, and use a weekly deep-conditioning mask. If the shift involved heavy sweating, visible soiling or exposure to bodily fluids, wash fully. Otherwise, let the hair’s condition decide.
What should I keep in my locker for hair emergencies?
Three snag-free elastics, six bobby pins, two small claw clips, a travel comb, a mini dry shampoo, and a spare scrub cap. That kit fixes a snapped elastic, a braid coming undone, or a fringe escaping, without a trip to the mirror. Add a small mirror and a travel-size styling cream if you have the space.
Conclusion: Hair That Works as Hard as You Do
The best nurse hairstyle is not the prettiest one — it is the one you forget about. A style that goes up in minutes, stays put through a twelve-hour shift, sits comfortably under a cap, and comes out without a fight has done its job, whether it is a simple low bun or a halo braid you practised until it was automatic. Start with the three essentials — one braid, one bun, one hybrid — and build from there as your confidence grows. Rotate your styles to protect your scalp, keep a small kit in your locker, and give your hair a free day whenever you can. Your patients need your full attention, and your hair should never be the thing competing for it. Pick a style from this guide, try it on your next day off, and walk into your next shift knowing your hair will still be where you left it at handover.
