
Okay, let’s be real. Wedding season is coming, and the pressure to look perfect is real. You want something elegant, something that lasts all night, and honestly, something that doesn’t take a PhD in hairstyling to pull off. I’ve been there, fussing with my hair while my best friend is texting me “WHERE ARE YOU?!”
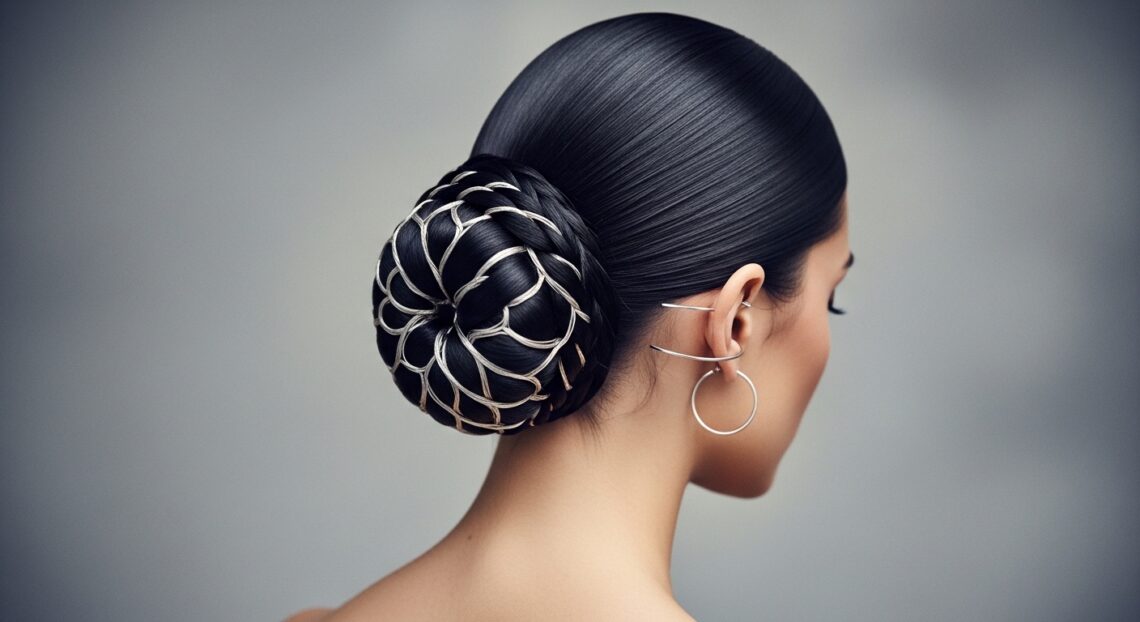
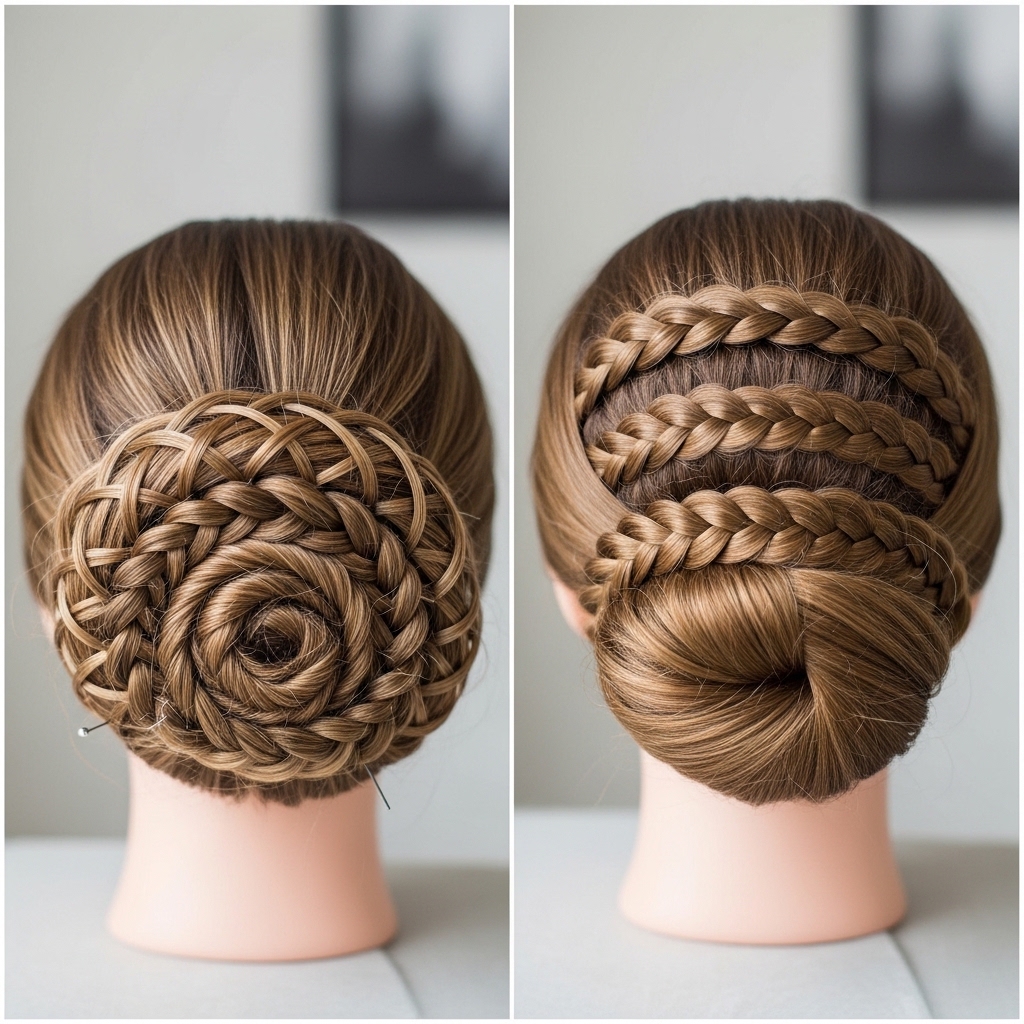
That’s why I’m obsessed with the laced up low bun. It’s my secret weapon. It looks intricate and fancy—like you spent hours—but the truth? It’s surprisingly simple. It’s the perfect mix of romantic and structured, and it works on almost every hair type and length.
This style is a total crowd-pleaser, fitting for everything from a beach ceremony to a black-tie ballroom. It gives off major “old money hair” vibes—that timeless, quiet luxury look that never goes out of style. So, take a deep breath. I’m going to walk you through every single step, from prep to finish, so you can nail this look with zero stress.
Why the Laced Up Bun is a Wedding Winner
This isn’t just another bun. The laced detail is what makes it so special. It adds texture, interest, and a beautiful handmade feel that looks incredibly luxurious. It’s far more unique than a standard chignon or a messy bun.
It’s also incredibly secure. Once those laced pieces are pinned, this style isn’t going anywhere. You can dance all night without worrying about a hairpocalypse. It’s the perfect practical choice for a long, emotional, and active day.
Gathering Your Hairstyling Toolkit
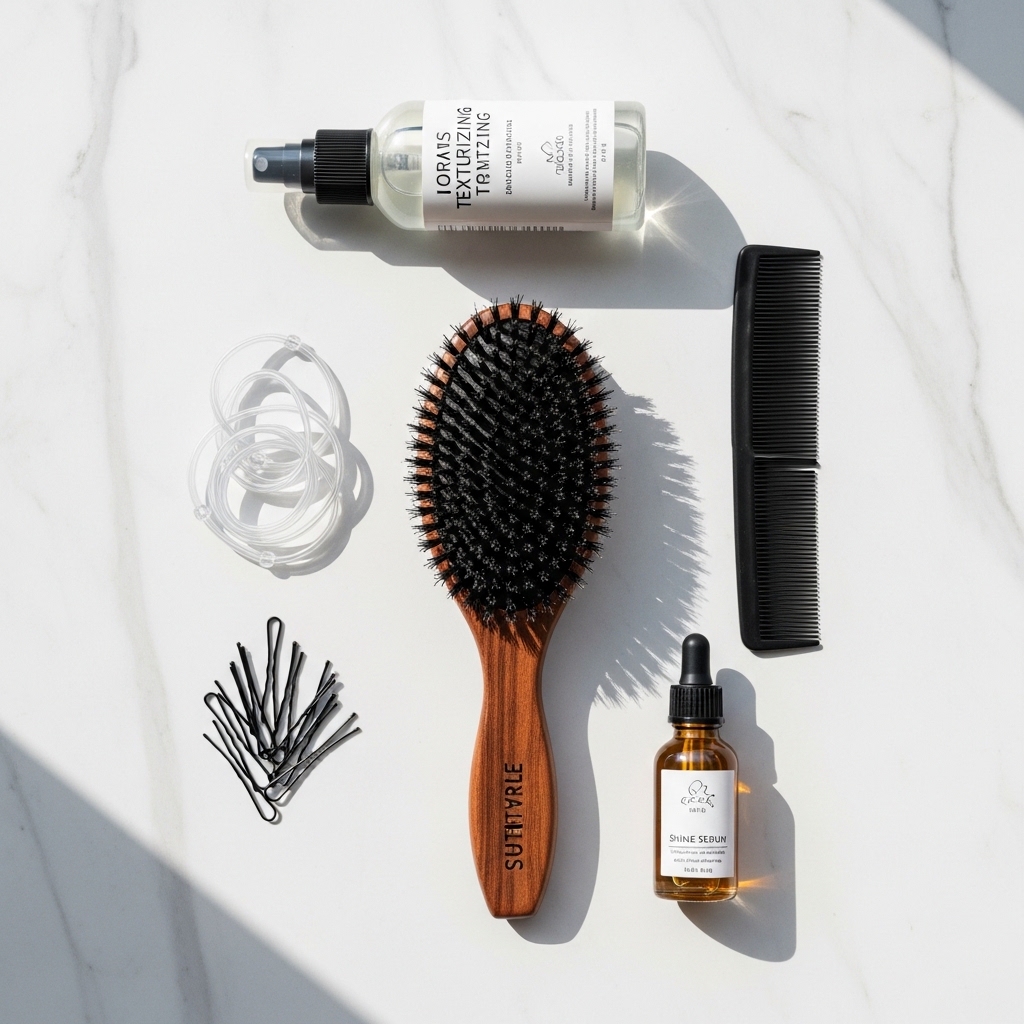
You don’t need a salon’s worth of products, but the right tools make all the difference. Here’s your non-negotiable list:
- Fine-tooth comb or tail comb: For clean parts and precise lacing.
- Strong, clear elastics: To create the base bun.
- Lots of bobby pins (matte to match your hair color): You’ll use more than you think.
- Texturizing spray or dry shampoo: Gives your hair grip so nothing slips.
- Strong-hold hairspray: For the final, all-night lock.
Step 1: Creating the Perfect Base
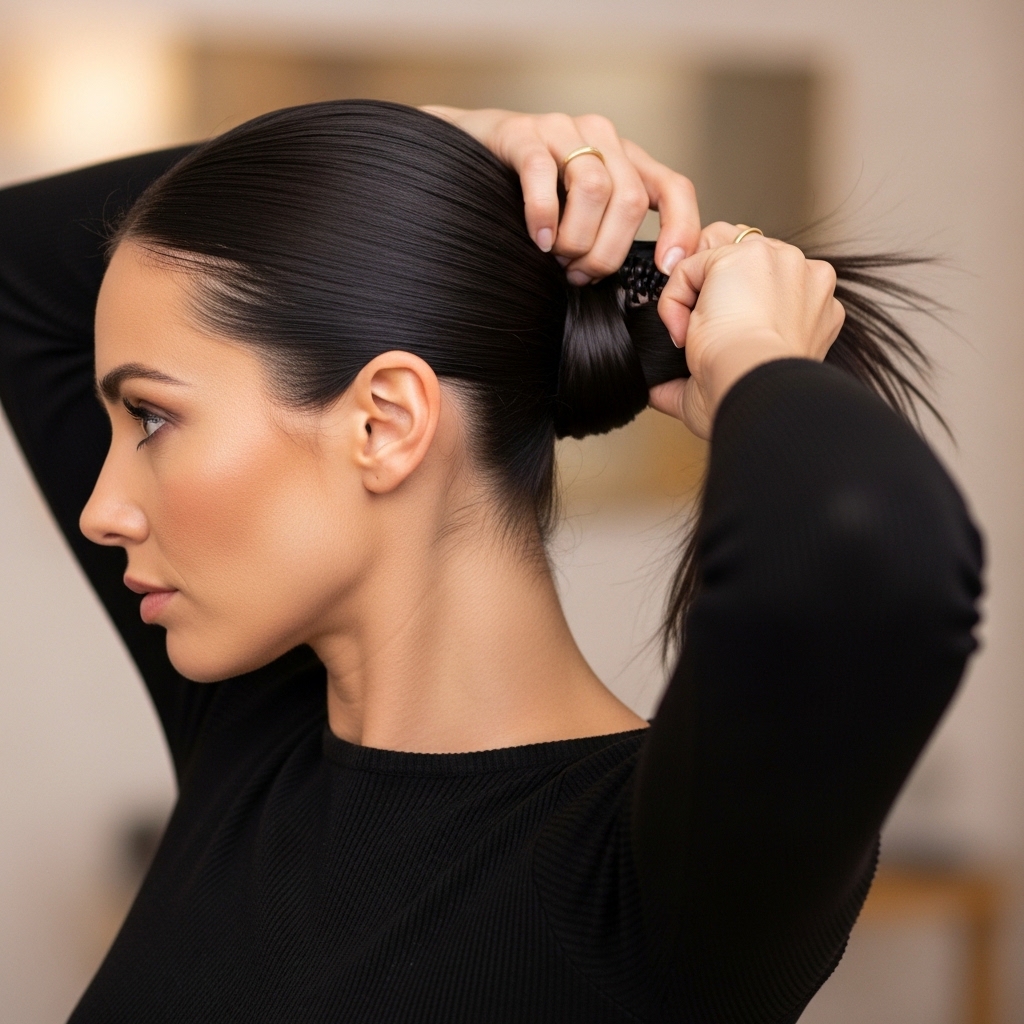
Start with day-old hair. Freshly washed hair can be too slippery. Spritz some texturizing spray at the roots and through the lengths. This gives your hair some grit and makes it easier to work with.
Brush your hair thoroughly to remove any tangles. Then, gather it at the nape of your neck—not too low, just where your head meets your neck. Secure it with a clear elastic. Don’t make it super tight; you want a little softness. This ponytail is the foundation for your bun.
Step 2: Forming the Bun Itself
Now, twist the ponytail until it starts to coil on itself. Wrap it around the base of the ponytail to form a bun. This isn’t a perfect ball; a slightly looser, more organic shape is prettier.
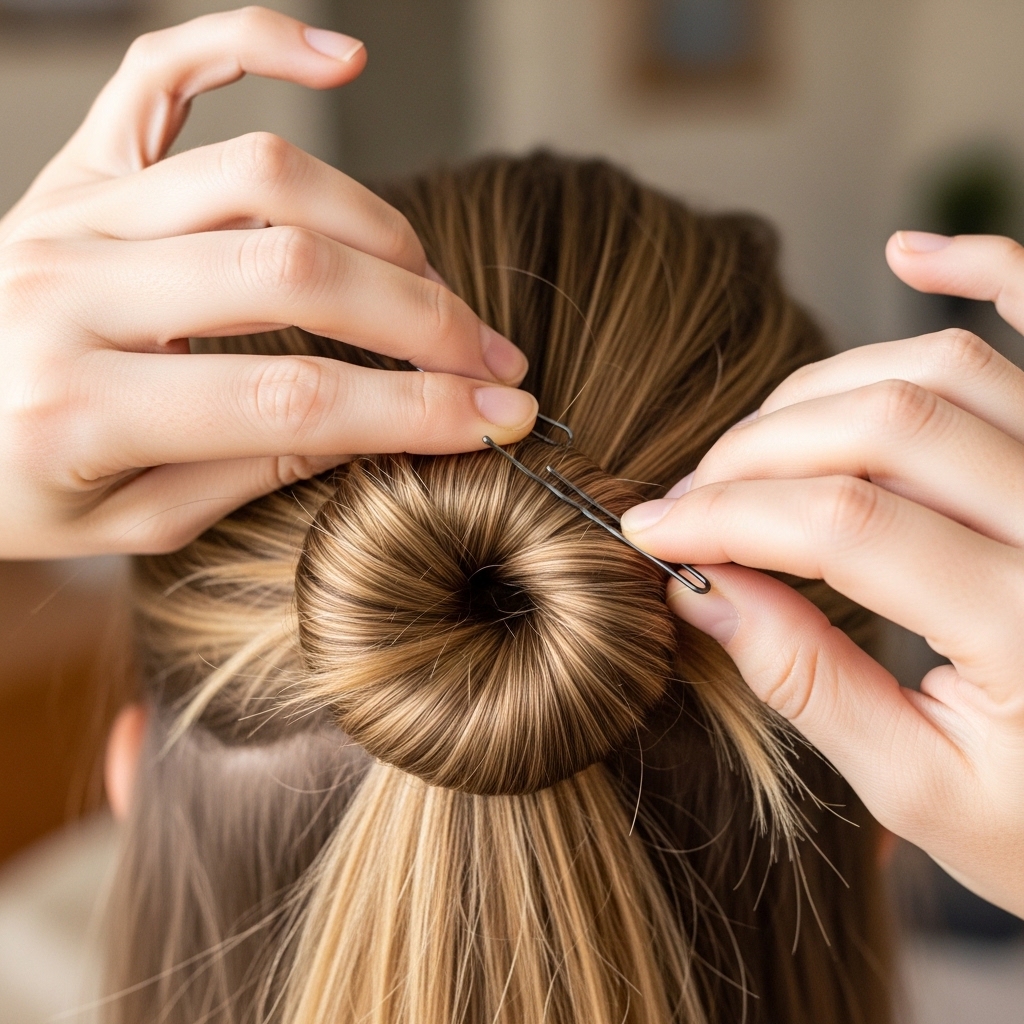
As you wrap, use one hand to hold the bun in place. With the other, start inserting bobby pins through the bun and into the base of your ponytail. Criss-cross them for maximum hold. You should now have a simple, secure low bun.
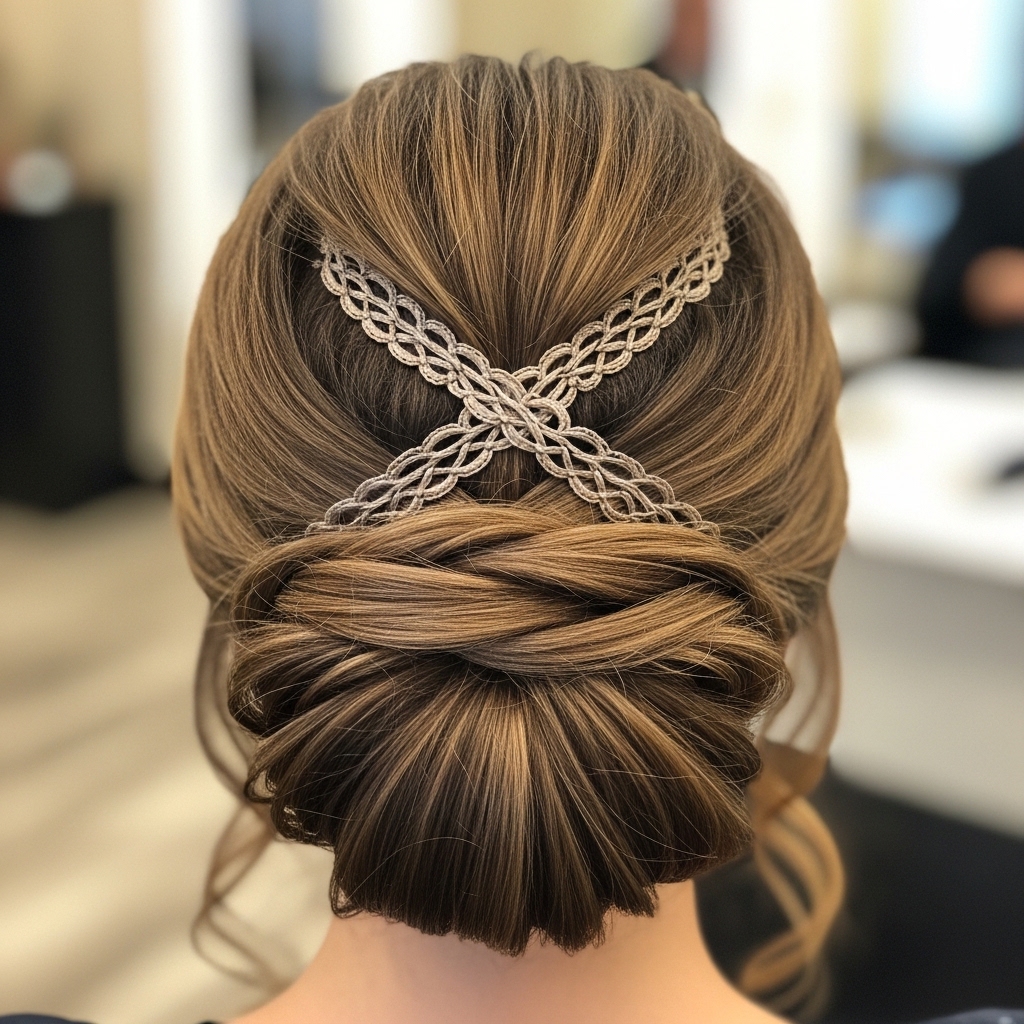
Step 3: The Secret to the “Laced” Effect
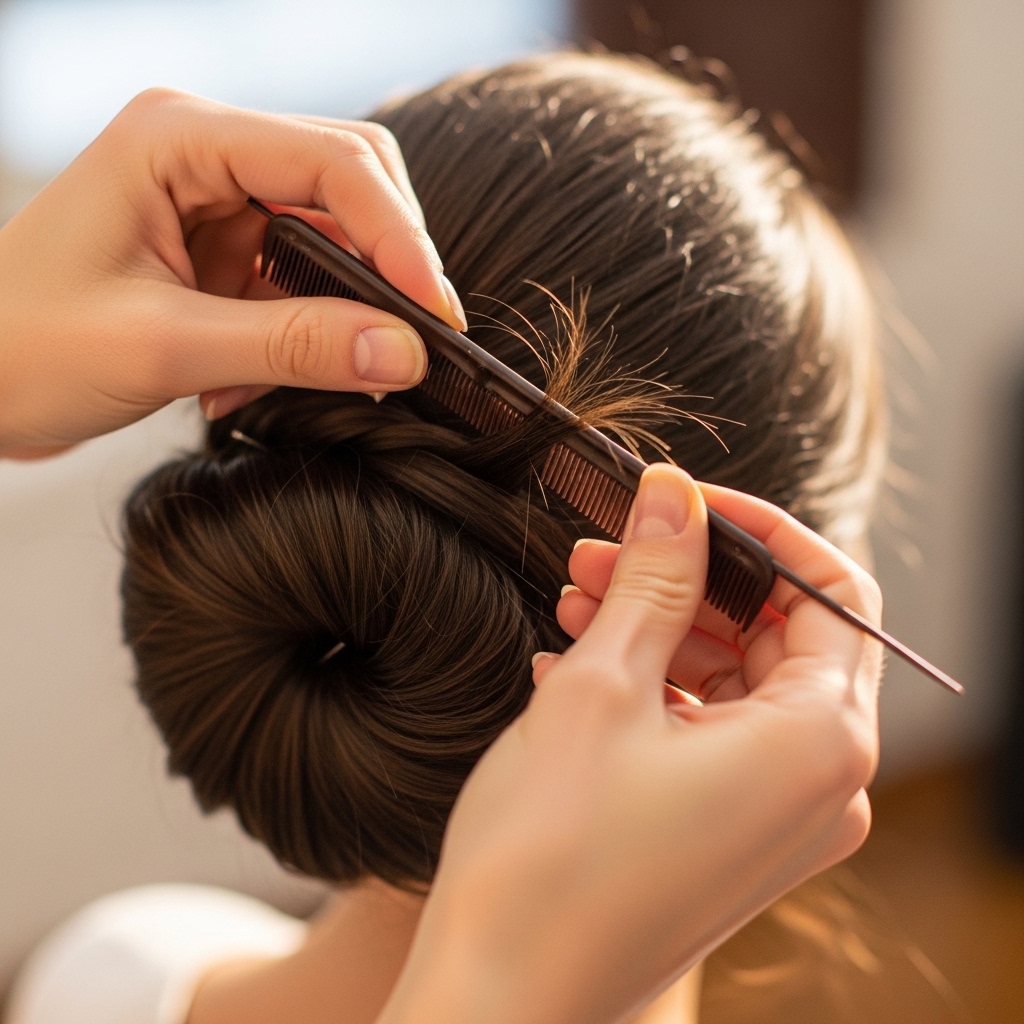
This is the magic step. Take your fine-tooth comb. Gently pull out a very small, thin section of hair from the edge of the bun. Think “one single strand of spaghetti,” not a whole chunk.
You’ll be creating a loose, ribbon-like piece. Pull it out about an inch or two. Don’t worry if it’s not perfect; the imperfection is what makes it beautiful. This is the “lace” you will use to weave.
Step 4: Starting Your First Weave
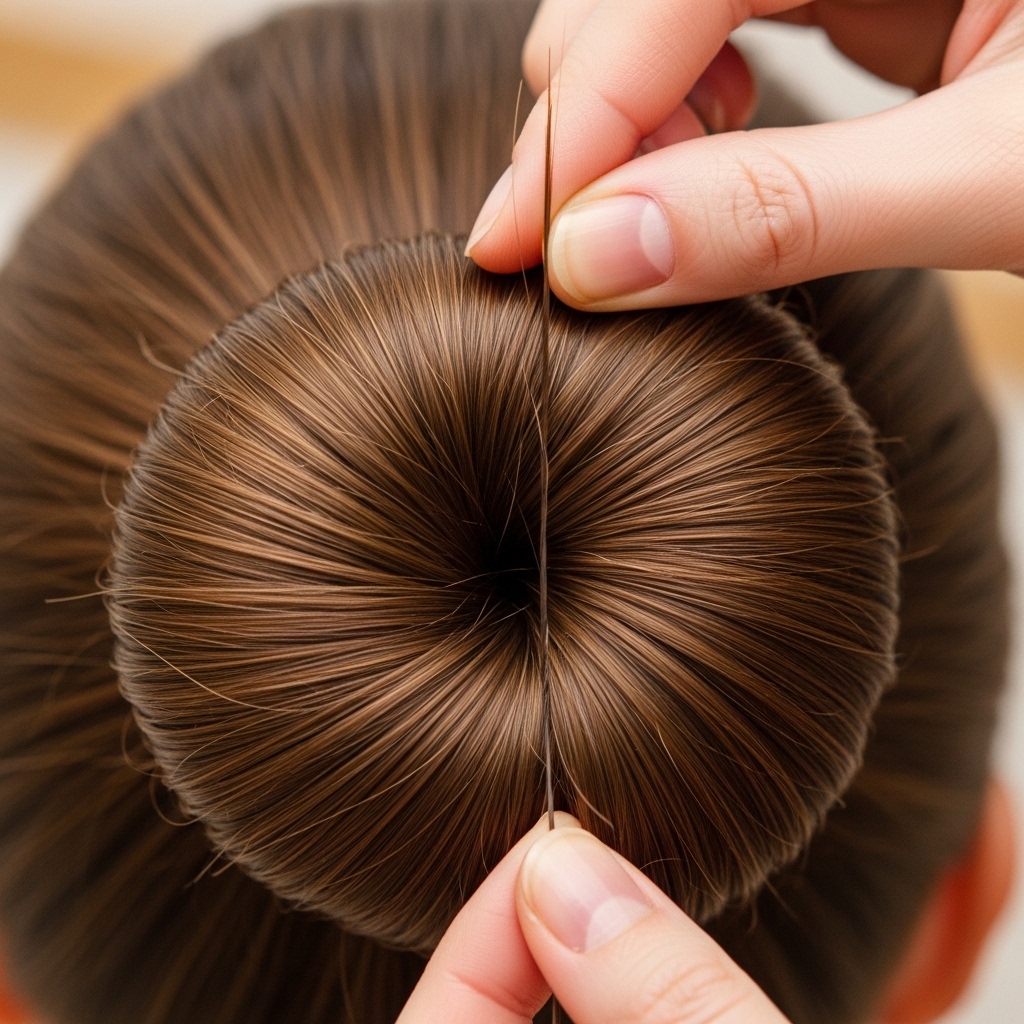
Take that thin strand you just pulled loose. Gently guide it under the bun, coming up on the opposite side. Think of it like you’re threading a needle, but the bun is the fabric.
Pull it through gently so you have a soft loop. You don’t want it tight against the scalp. The goal is a draped, soft effect. Secure the end of this strand on the opposite side with a bobby pin, hidden underneath the bun.
Step 5: Adding a Second Lace Strand
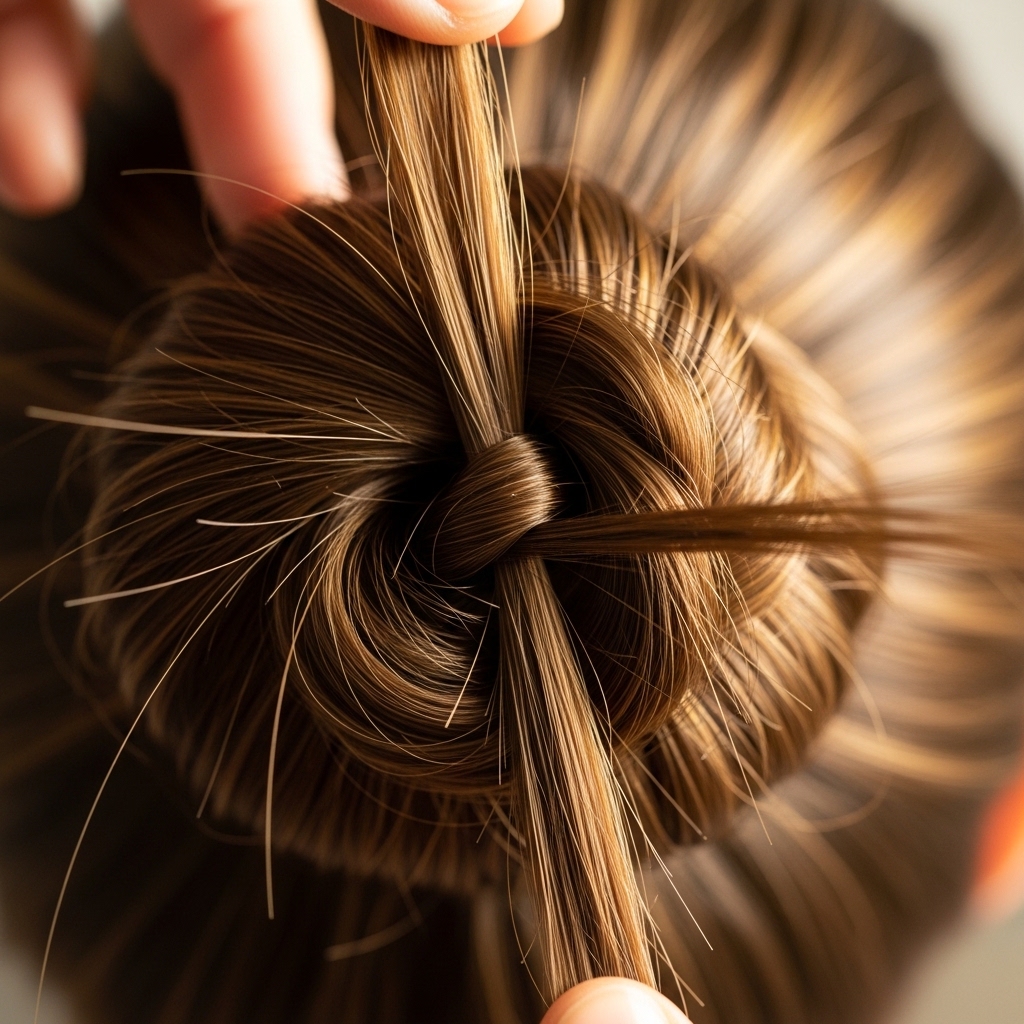
Now, go to a different section of the bun. Use your comb to pull out another thin strand, maybe an inch or two away from your first one. This creates that criss-cross, laced look.
Repeat the same process. Weave this new strand in the opposite direction of your first one. If your first went left to right, this one goes right to left. Pull it through gently and pin the end discreetly underneath.
Step 6: Building Texture and Security
You can add a third or even a fourth strand if your bun is larger or you want more detail. The key is to space them out evenly. Don’t crowd them all in one spot.
As you pin each strand, give it a tiny tug to create a little slack. This prevents the lacing from looking too tight or severe. You want it to look soft and romantic, not like a tennis racket.
Step 7: Locking It All In Place
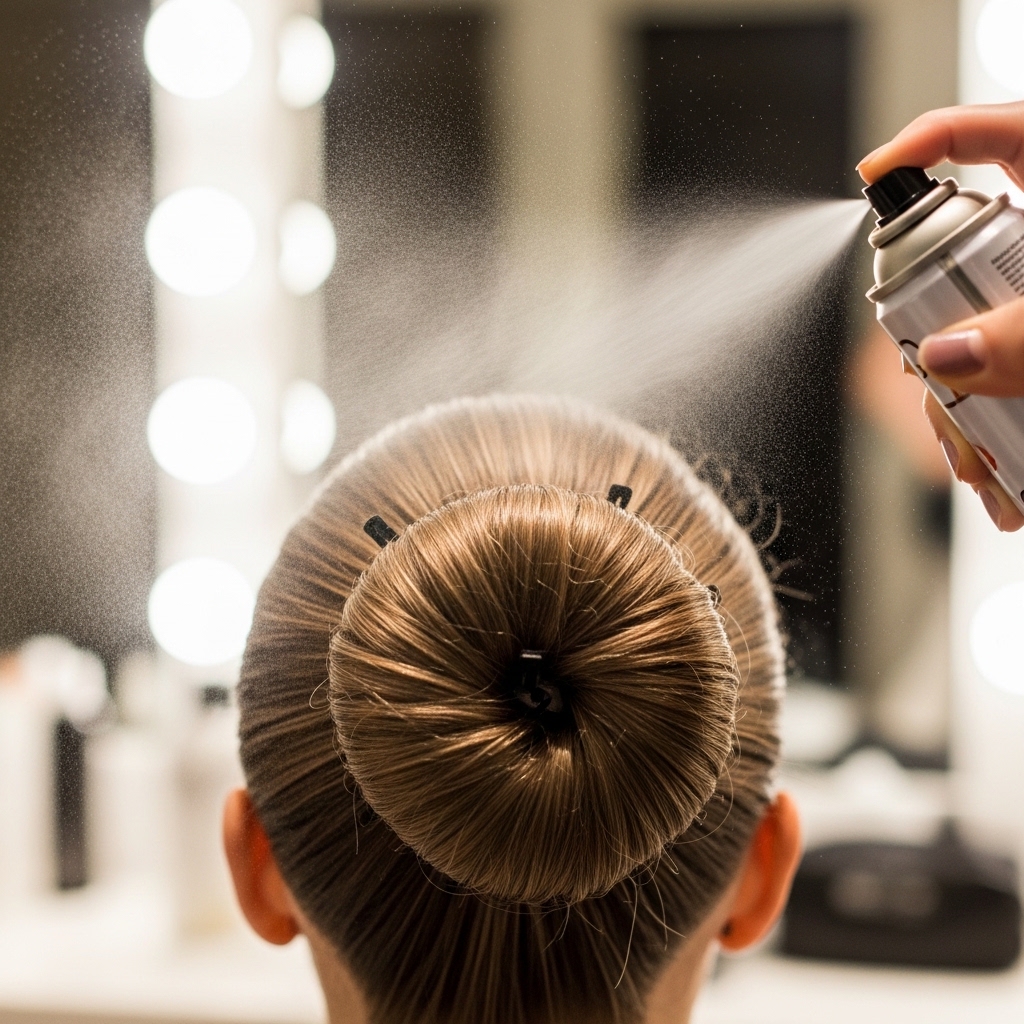
Once you’re happy with the lacing, it’s time for the final seal. Take your strong-hold hairspray. Hold it about a foot away from your head and give the entire bun a light, even mist.
Pay special attention to the laced strands and any little flyaways. Let it dry for a minute. Then, for extra security, you can use a light-hold shine serum on your fingertips to gently smooth any baby hairs around your face.
Adapting for Fine or Slippery Hair
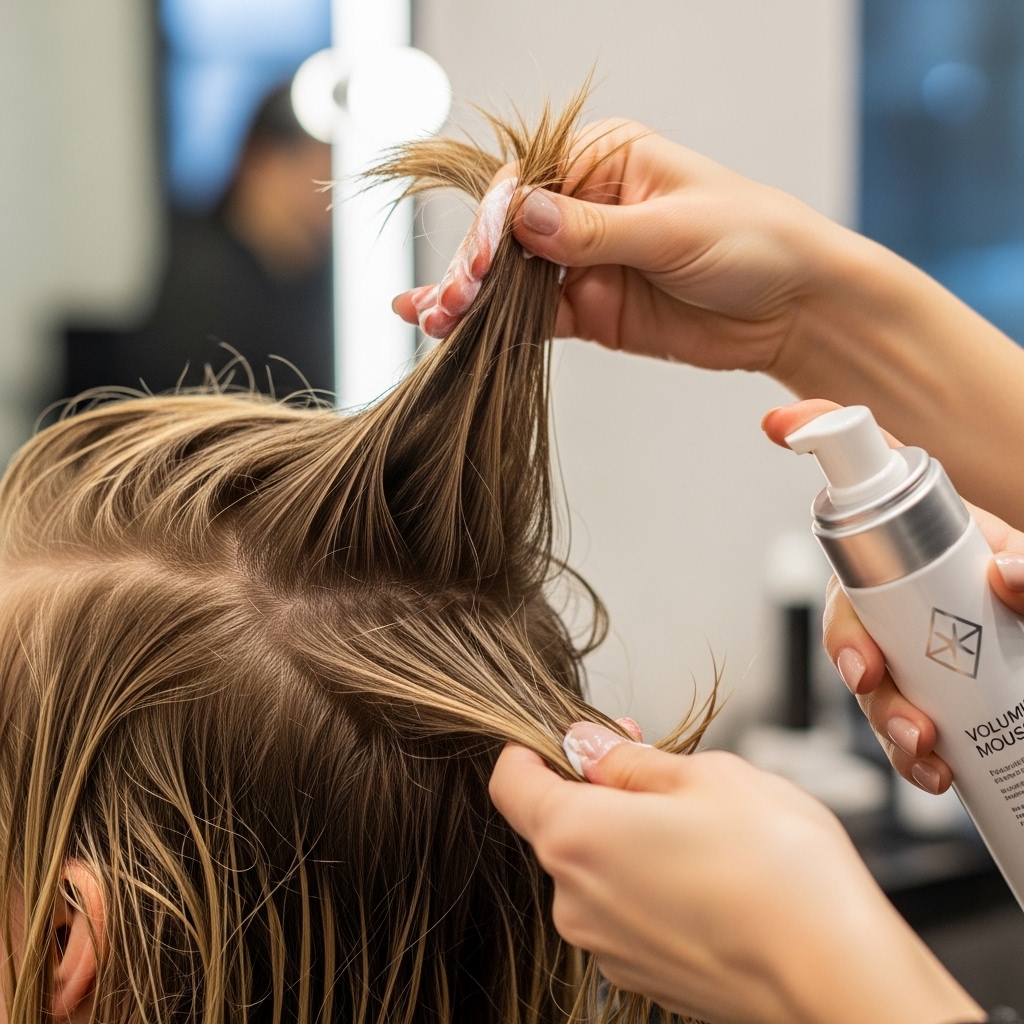
If your hair is fine or silky, prep is even more important. Use a volumizing mousse on damp hair before you blow-dry. At the styling stage, a texturizing powder at the roots can be a game-changer.
When making your initial ponytail, loop the elastic three times on the third twist, but only pull the hair halfway through on the last loop. This creates a smaller, tighter base that gives more for your hair to grip onto.
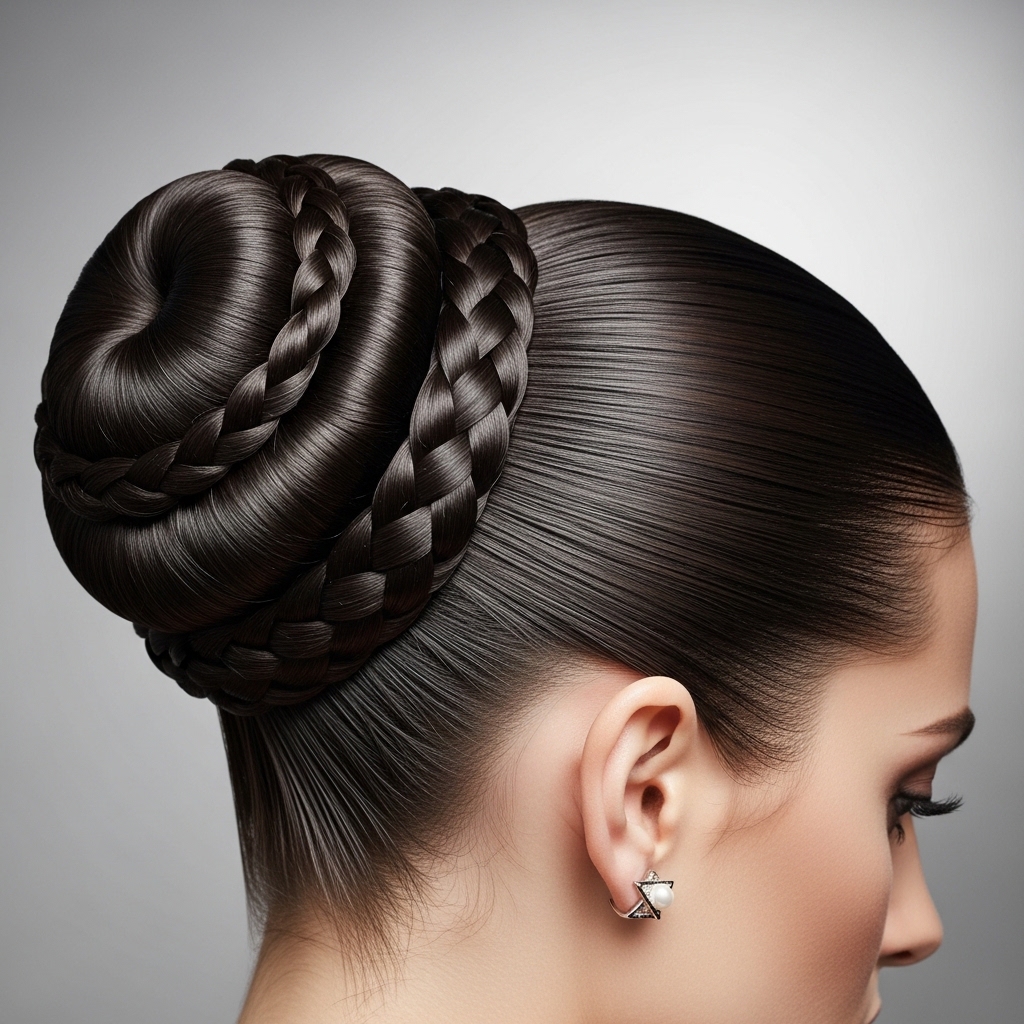
Making It Work for Thick or Curly Hair
For thick or curly hair, you have a gorgeous canvas. Make sure your hair is detangled and has a curl-defining cream or gel applied to control frizz and define your pattern before you start.
You may need two elastics for your base ponytail for extra security. When you create your bun, don’t fight your hair’s natural volume. Embrace a slightly larger, more generous bun. The laced strands will look amazing against your texture.
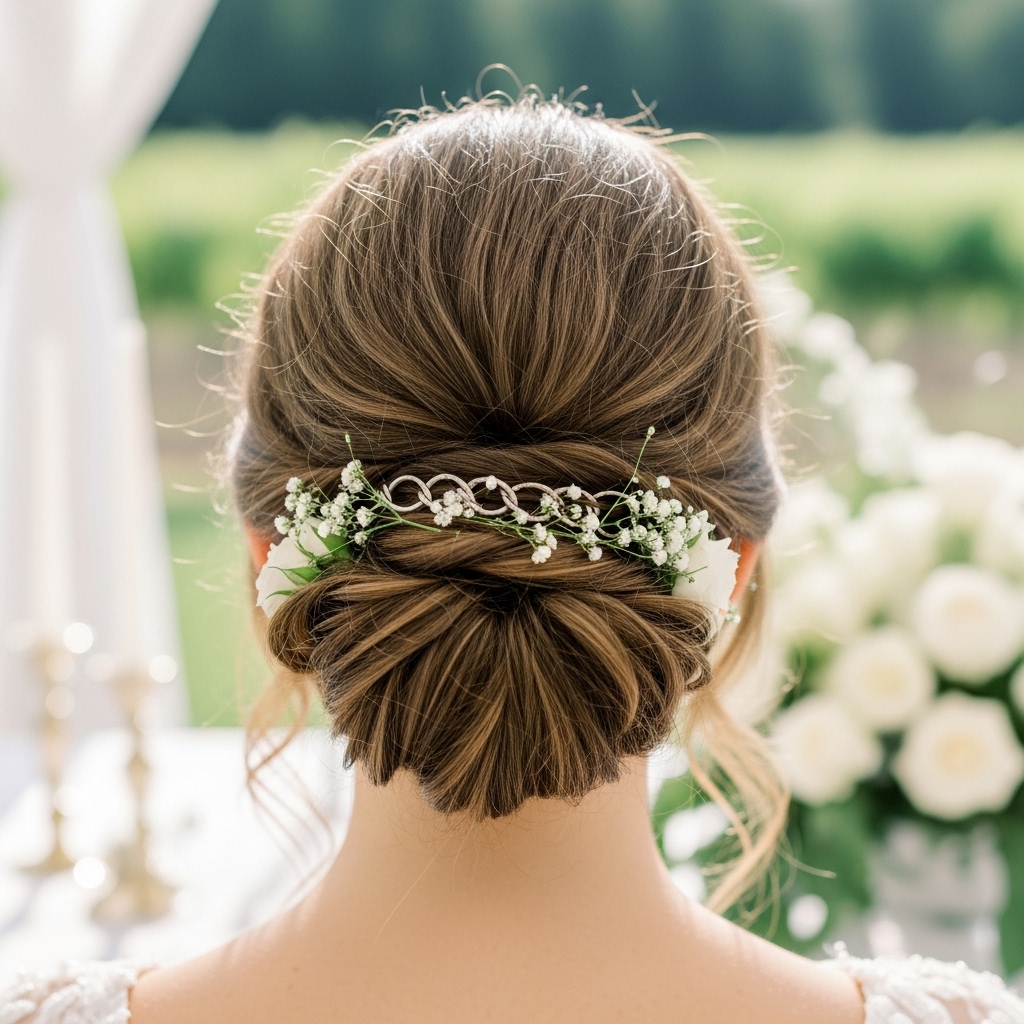
Adding Wedding-Day Accessories
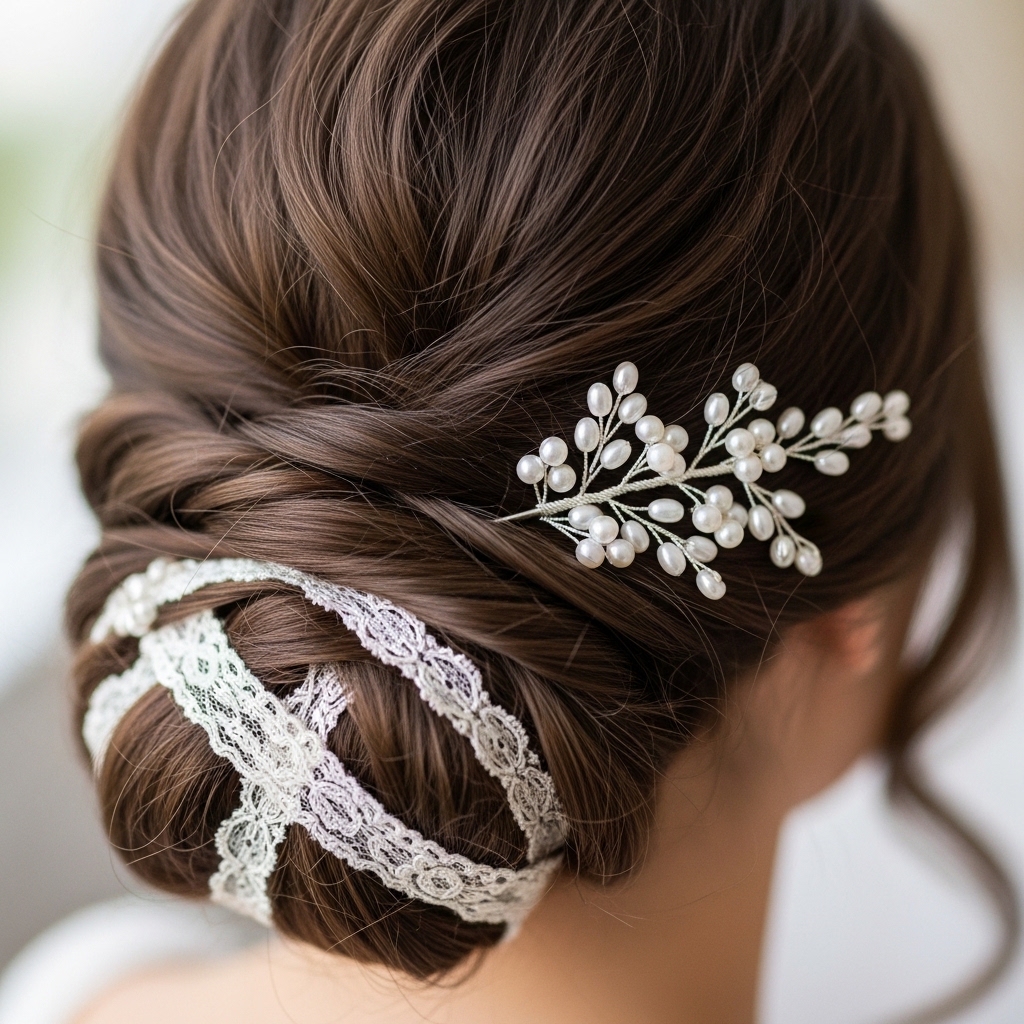
This style is a perfect backdrop for accessories. A simple pearl or crystal hairpin tucked near the lacing looks stunning. You could also use a delicate chain or a small, elegant clip.
Less is more. Choose one statement piece or a few tiny, scattered pins. The hairstyle itself is a detail, so you don’t want to overwhelm it. Place the accessory where a lace strand meets the bun for a cohesive look.
Pairing with Different Necklines
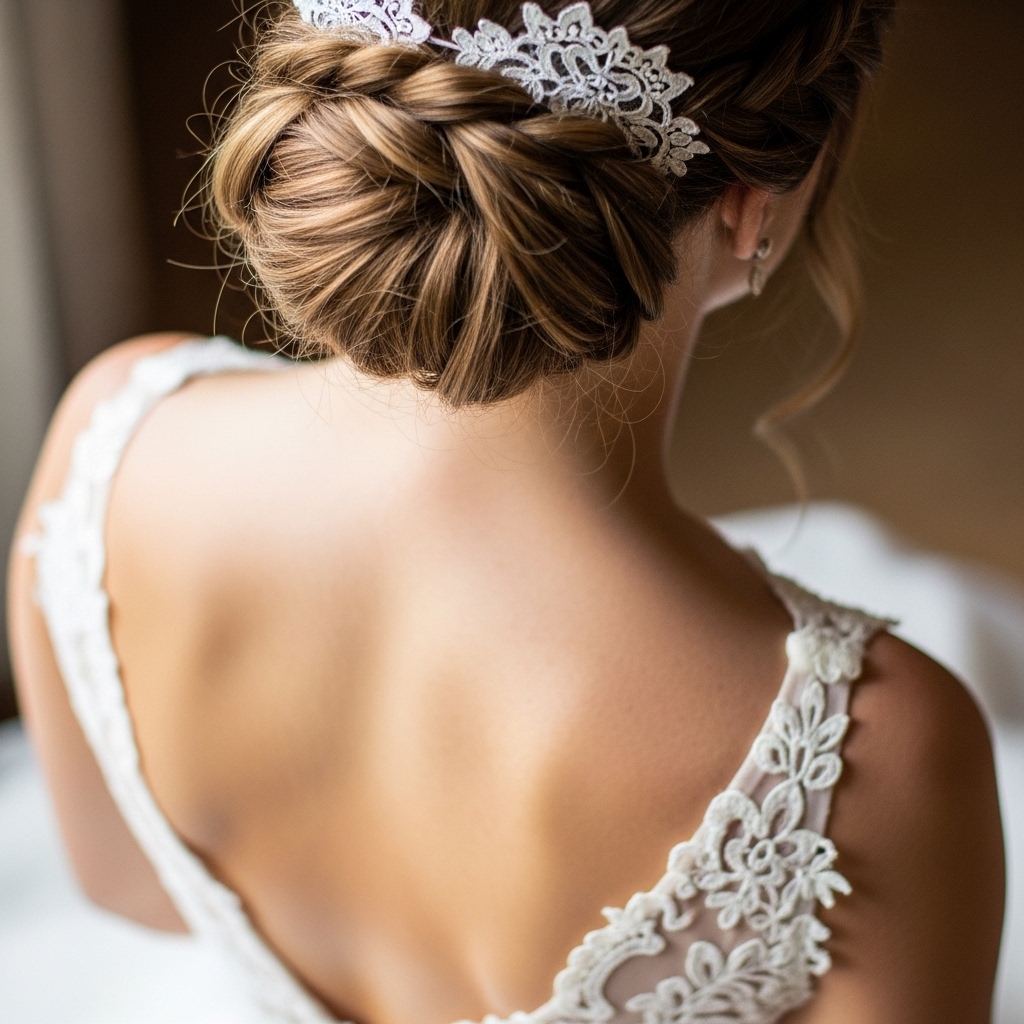
This bun is a dream for showing off your dress. With a high neckline or detailed back, it keeps the focus right where it should be. It’s the ultimate companion for a low-back or keyhole dress.
If your dress has a lot of detail at the shoulders or chest, the clean elegance of this low bun balances it perfectly. It never competes with your outfit; it only enhances it.
Creating a More Romantic, Soft Version
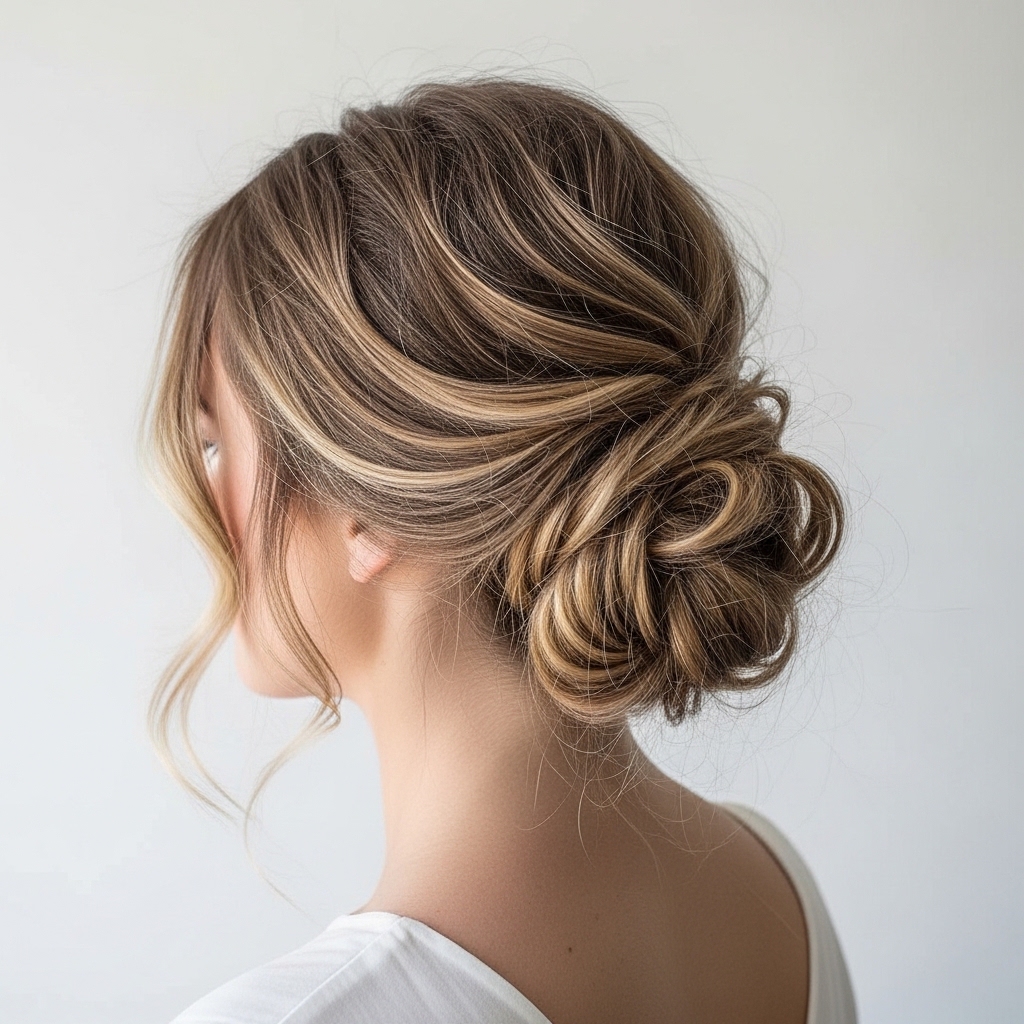
For a garden or bohemian wedding, soften the look. Before you start, leave out more face-framing pieces. Curl them loosely with a curling iron.
When you pull your lace strands, make them slightly thicker and pull them more loosely. You can even gently tug at the edges of the bun itself to create a more undone, ethereal feel that fits the romantic goth hairstyles aesthetic without the dark edge.
Going for Sleek and Modern
For a modern, minimalist, or black-tie wedding, go sleek. Apply a smoothing serum or cream before you brush your hair into that initial ponytail. Use a boar bristle brush for maximum shine.
Keep the lacing very precise and symmetrical. The result is incredibly chic and fits right in with the quiet luxury bob mentality—understated but impeccably done. It’s a timeless look that feels fresh.
How This Style Fits 2026 Hairstyle Trends
Looking ahead to 2026 hairstyles, we’re seeing a move towards personalized, detailed looks. It’s not about one specific cut, but about unique touches. This laced bun fits perfectly with that trend.
It has the custom, handcrafted feel that’s becoming so popular. It’s a nod to the individuality we see in trends like the glitchy glam hair or vampire haircut—it’s about adding your own unique signature to a classic shape.
Prepping the Night Before for Less Stress
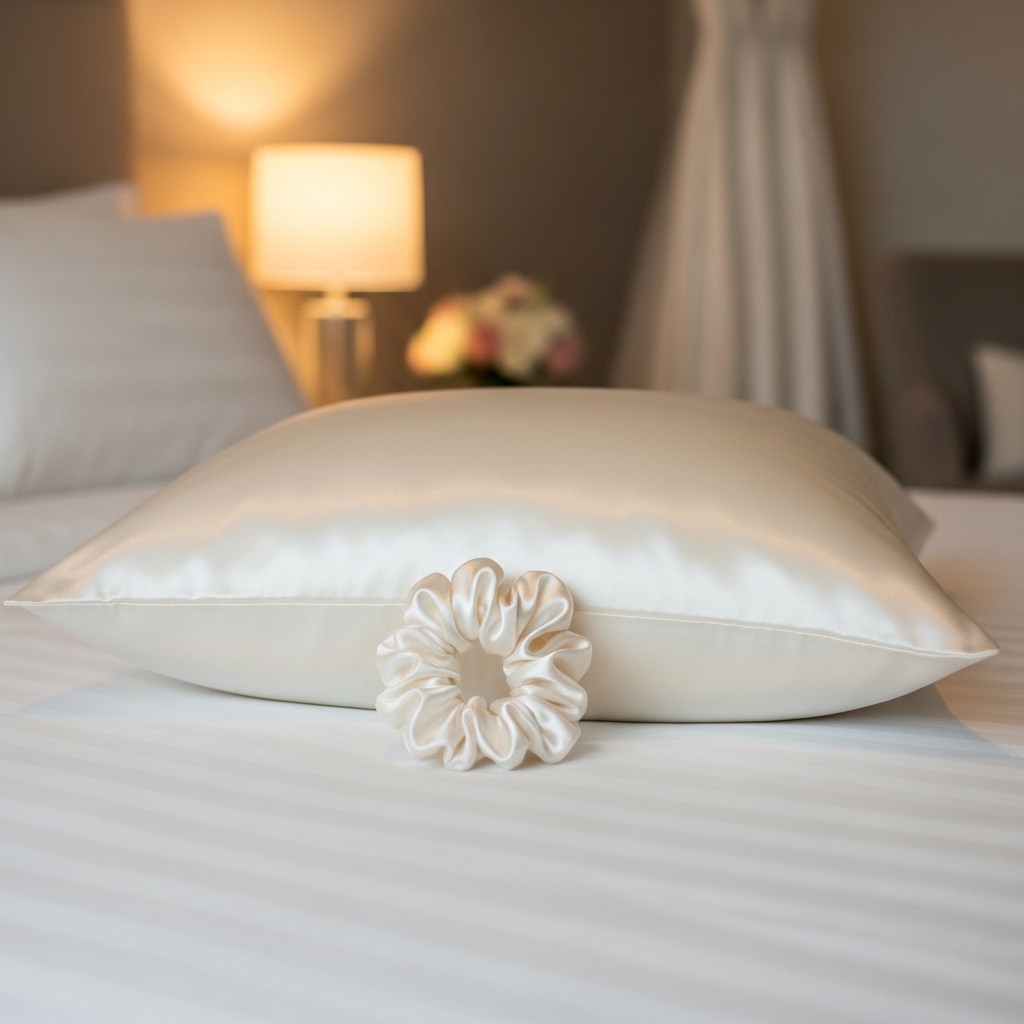
To make your morning easier, wash and dry your hair the night before. Sleep on a silk pillowcase to prevent frizz and tangles. You can even put your hair in a very loose braid to create a soft wave.
Lay out all your tools and pins on your bathroom counter. Having everything ready to go saves so much time and stress on the big day. A calm morning makes for a much prettier result.
Troubleshooting Common Issues
Issue: The bun feels loose. Fix: Use more bobby pins, always criss-crossing them for a grip. Pin through the bun and into the base of your ponytail.
Issue: The laced strands look too tight. Fix: Gently pull on them to create slack before pinning. Remember, softness is key. If a piece won’t behave, a tiny dot of hairspray on your finger can tame it.
Making It Last From Ceremony to Last Dance
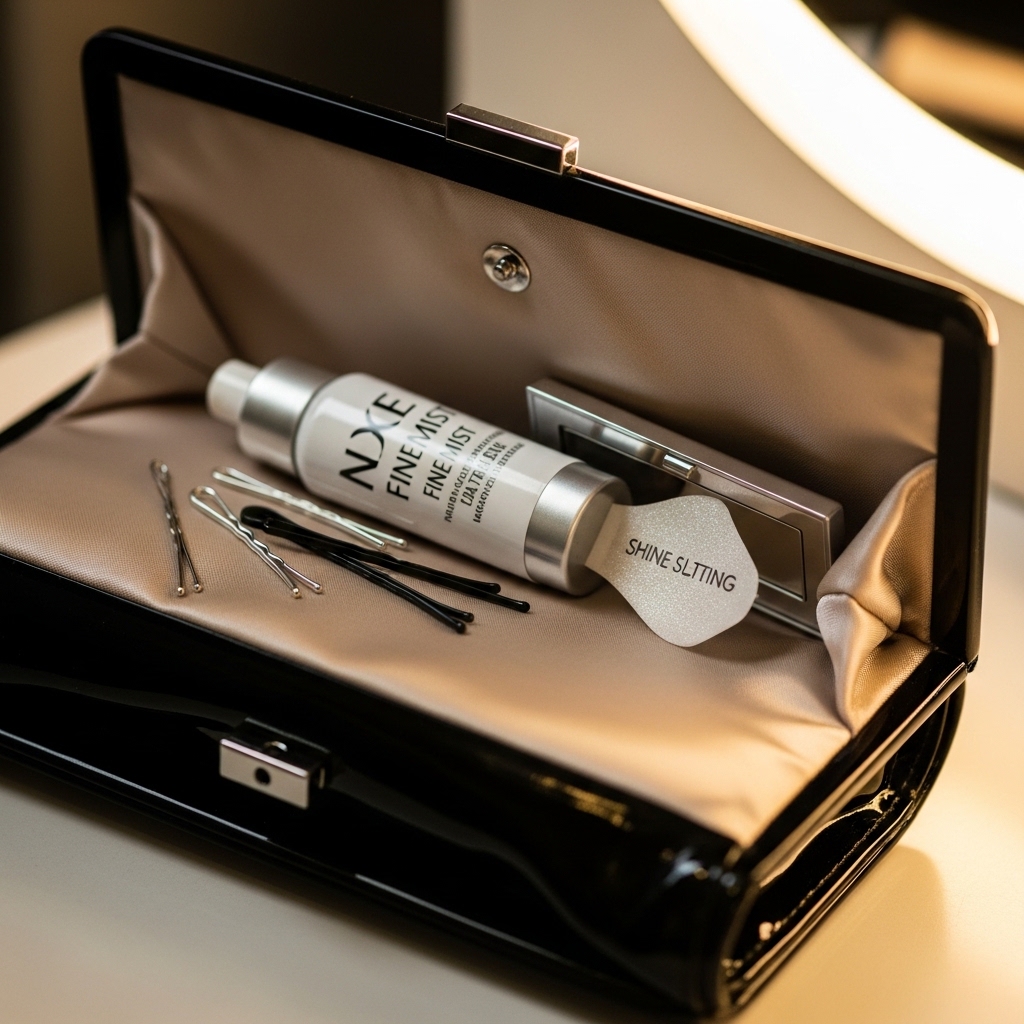
Pack a wedding-day touch-up kit! Throw a few extra bobby pins and a travel-sized hairspray into your clutch or give it to your maid of honor. After the ceremony, you can do a quick check.
If you feel any slippage, you can discreetly add a pin. A quick spritz of hairspray from a distance will reset any flyaways without making your hair crunchy. This ensures you look flawless in every photo.
Inspiring Variations to Try
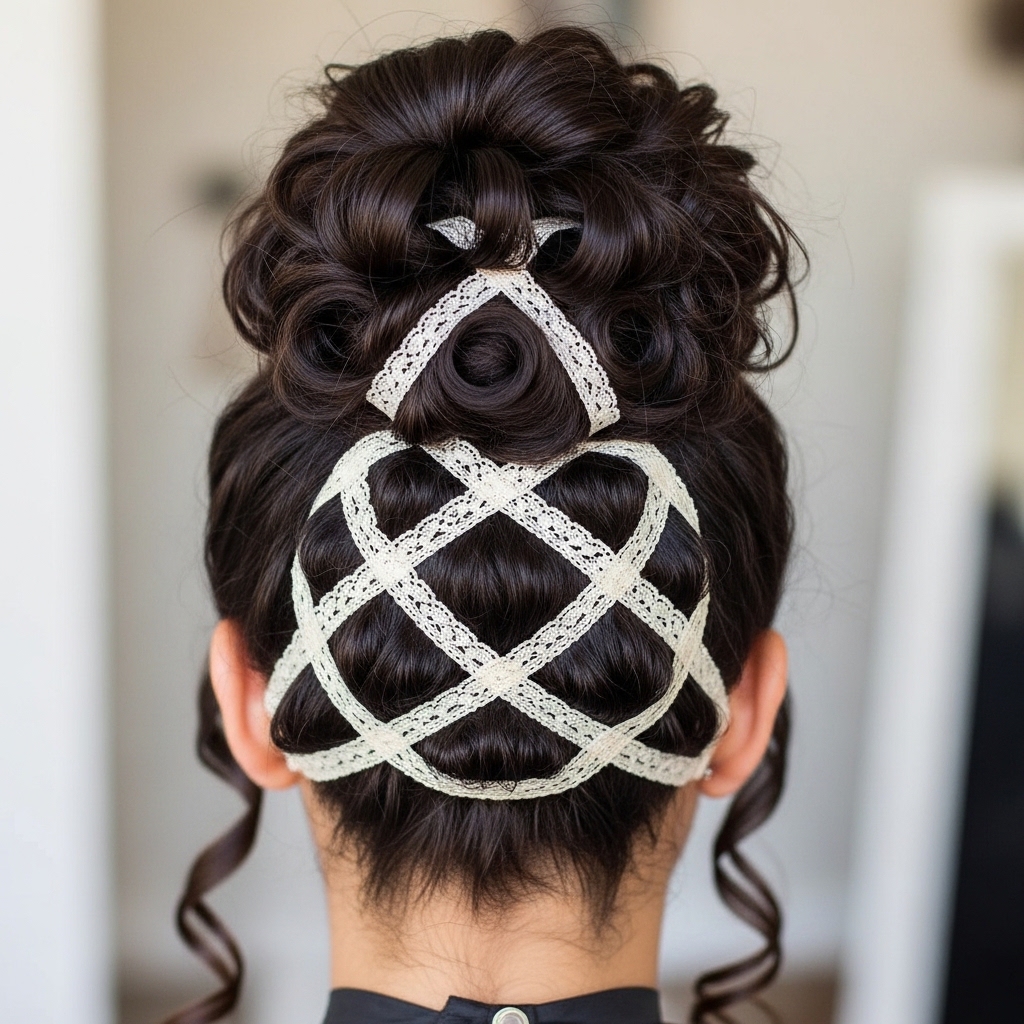
Once you master the basic laced bun, play with it! Try incorporating a small, delicate braid as one of your “lace” strands. Or, create a smaller bun and let the laced strands be longer and more dramatic.
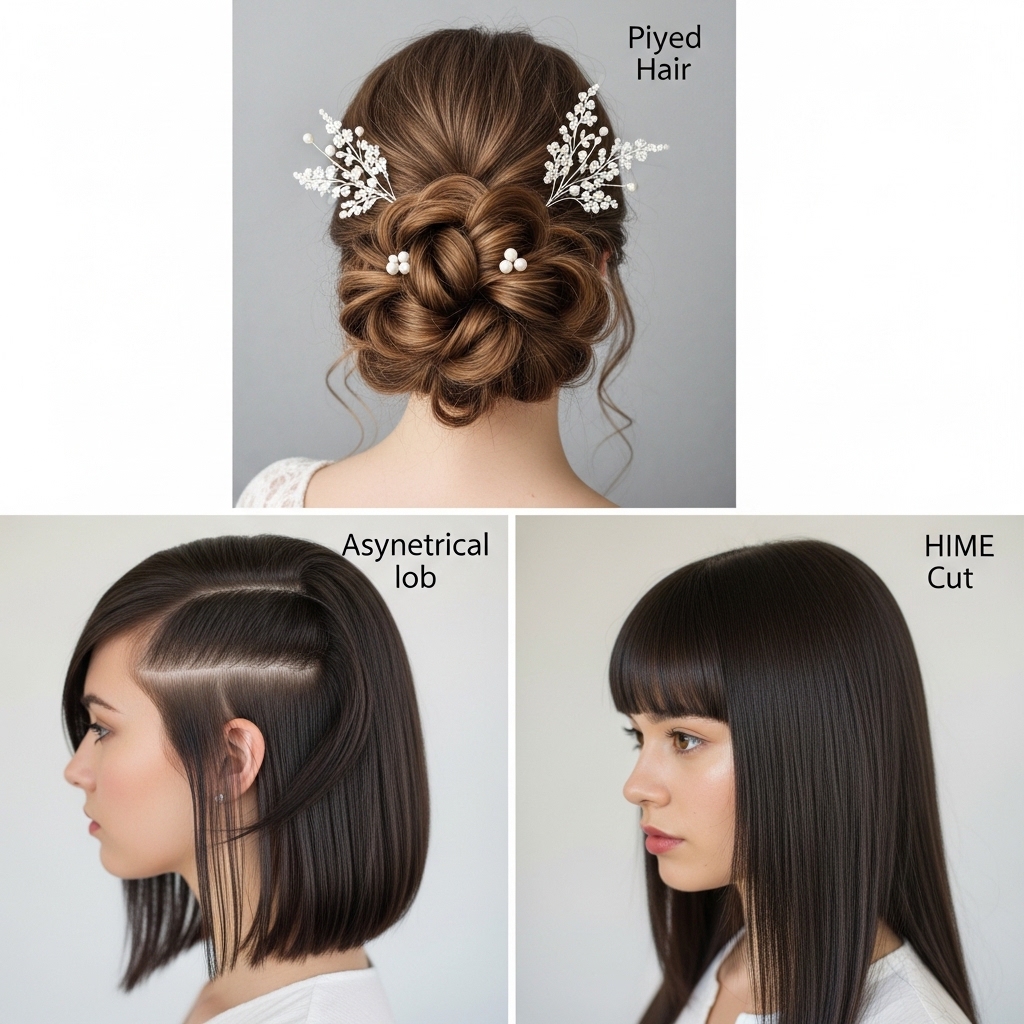
You can also pull out more face-framing pieces and curl them for a softer look. This style is a fantastic base for so much creativity, much like playing with the concepts behind an asymmetrical lob or hime cut—it’s all about personalized detail.
Why This Hairstyle Feels So “Old Money”

The old money hair aesthetic is all about looking effortlessly polished, timeless, and high-quality. It’s not about loud trends. This laced bun embodies that perfectly.
It’s intricate without being fussy, elegant without being dated. It speaks to a sense of tradition and grace, which is exactly the vibe you want for a wedding. It looks expensive and well-kept, which is the ultimate quiet luxury goal.
Your Final Look in the Mirror
Take a step back and look. Turn your head side to side. Make sure you love the profile and the back view. Do a little head shake—if it moves as one piece, you’ve nailed it.
This is the moment to feel confident. You’ve created a beautiful, sophisticated hairstyle with your own two hands. You’re ready to celebrate, dance, and enjoy the day without a single worry about your hair.
And there you have it! Your complete, stress-free guide to the most elegant wedding guest hairstyle. It might look like it came from a high-end salon, but now you know the secret: it’s all about the simple steps and that beautiful laced detail.
This is the kind of style that gets you compliments all night. It makes you feel put-together and beautiful, which is exactly how you should feel at a celebration of love. Remember, the best part is that you did it yourself.
Save this post to Pinterest so you have it ready for every wedding on your calendar this year! Did you try it? Tell me in the comments—what’s your go-to wedding hairstyle when you want to look amazing but keep it simple?

