
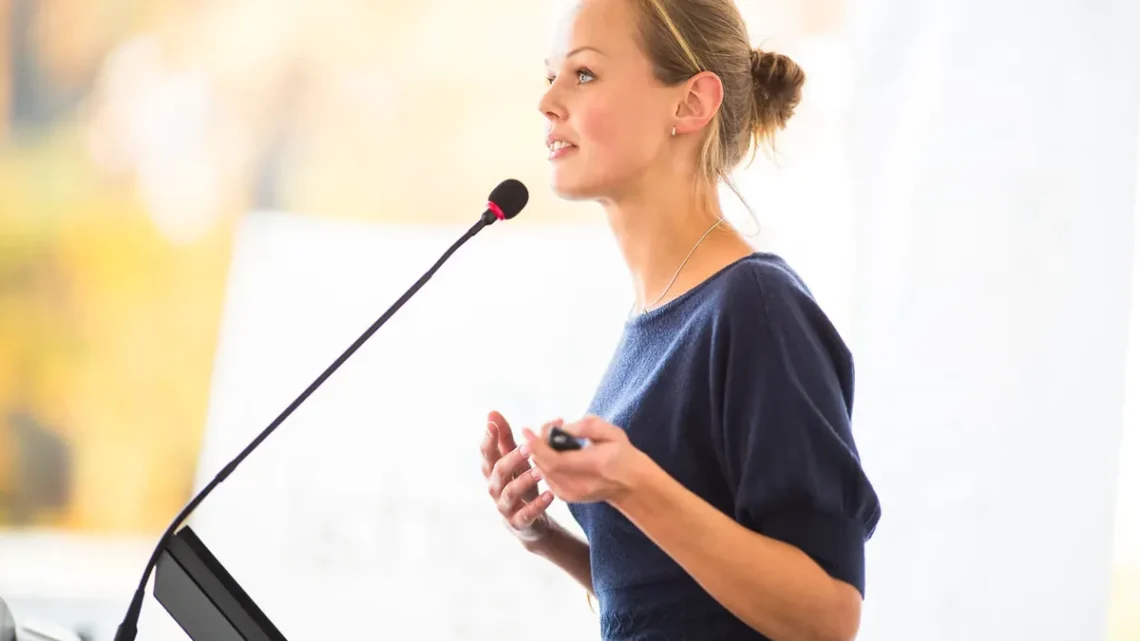
Your hairstyle is the first thing an audience notices after your smile — and the last thing you want to think about while you are presenting. The right hairstyle for a presentation does three things at once: it keeps your hair out of your face, it stays exactly where you put it for the whole talk, and it makes you look polished from every angle, including from the side and the back, where a surprising number of audience members are sitting. This guide is built around that simple test.
It starts with eight practical explainers — what makes a hairstyle presentation-ready, why your hair matters more than you think, how to match your style to the setting, your hair length, your face shape and texture, the small kit of tools and products worth packing, the common mistakes that distract an audience, and a five-minute check to run before you walk in — then walks through 36 complete hairstyles for a presentation, from the classic low bun and French twist to soft waves, braided crowns, sleek ponytails and defined curls. Every section notes who the style suits, how long it takes, and what to ask a stylist, so you can pick the one that fits your hair, your setting, and your confidence.
What Makes a Hairstyle Presentation-Ready

A presentation-ready hairstyle passes four tests, and if a style fails any one of them, it will let you down mid-talk. First, it keeps your face clear — no hair falling across your eyes when you look down at your notes. Second, it stays put: it survives turning to a slide, leaning toward a question, and an hour under warm lights. Third, it looks the same from the side and the back as it does from the front, because a large part of your audience is not sitting directly in front of you. And fourth, it feels comfortable enough that you can forget about it completely and focus on what you came to say.
What it means: a presentation hairstyle is chosen for reliability first and beauty second — though the best ones give you both. What to look for: styles that are anchored with pins or an elastic, not just held by product; hair that is smooth at the hairline; and a silhouette that reads clearly from a distance. Quick check: shake your head gently, turn both ways, and look down at your notes. If anything moves, pin it now, not during your second slide.
Why Your Hairstyle Matters When You Present

It is tempting to think your hairstyle does not matter — that the audience is there for your ideas, not your hair. And that is true, which is exactly why your hair matters: the moment your audience notices your hair, they have stopped listening to your ideas. A strand falling across your face, a ponytail swinging into the microphone, a bun slipping sideways — each one is a small distraction that pulls attention away from what you are saying, and each one is entirely preventable.
What it means: your hairstyle is part of your presentation, not a decoration on top of it. What to look for: styles that make you feel confident and in control, because confidence reads on stage — and a style you keep touching or adjusting does the opposite. Quick verdict: choose a style you have worn for a full day before, not a brand-new experiment on the morning of the talk.
Matching Your Hairstyle to the Setting: Work, School or Stage

A boardroom, a classroom and a stage ask for different things from your hair, and the best hairstyles for a presentation are chosen for the room you will actually be in. A formal work presentation calls for a classic, controlled style — a low bun, a French twist, a sleek blowout — because the room expects polish and the camera, if there is one, expects clean lines. A school or university presentation allows something friendlier and more relaxed: a half-up twist, soft waves, a braided crown. A stage talk needs the most presence of all, because the audience is far away and the lights are bright — a style with volume and a clear silhouette carries further than a flat one.
Best for: work — classic updos and sleek down styles; school — half-up styles and soft waves; stage — voluminous blowouts, high buns, and styles with a strong shape. What to avoid: a style that is too casual for the room, or so dramatic that it becomes the talk instead of your talk. Quick tip: if you are unsure, choose the more polished option — nobody ever lost a presentation by looking too put-together.
Choosing by Hair Length: Short, Medium and Long
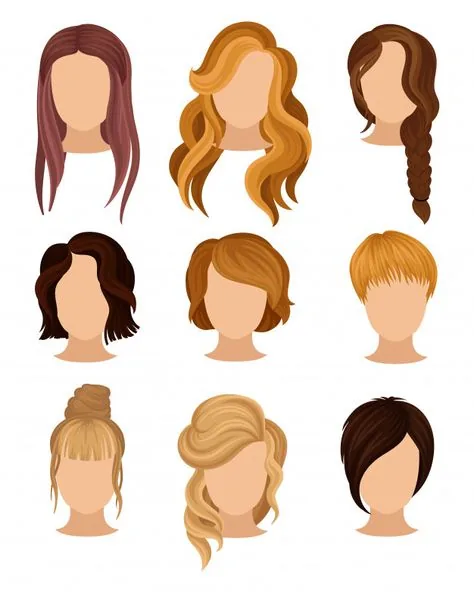
Your hair length decides which hairstyles for a presentation are even possible, and each length has its own strengths. Short hair — a pixie or a bob — is the easiest of all: it stays put with almost no effort, it needs no pins, and a little shine serum and a clean part are usually all the styling it needs. Medium hair — a lob or shoulder-length cut — is the most versatile, because it can be worn up or down and holds a wave or a twist beautifully. Long hair needs the most planning, because it has the most to go wrong, but it also has the most options: buns, braids, ponytails and blowouts of every kind.
Best for: short hair — sleek pixies, classic bobs with tucked ends, and deep side parts; medium hair — lobs, half-up styles, and low buns; long hair — French twists, braided updos, and polished ponytails. What to avoid: forcing a style your length cannot hold — a top knot that will not stay up, or a braid that falls apart halfway through the talk. Quick verdict: work with your length, not against it, and the style will hold itself.
Face Shape and Hair Texture: What Flatters You on Camera
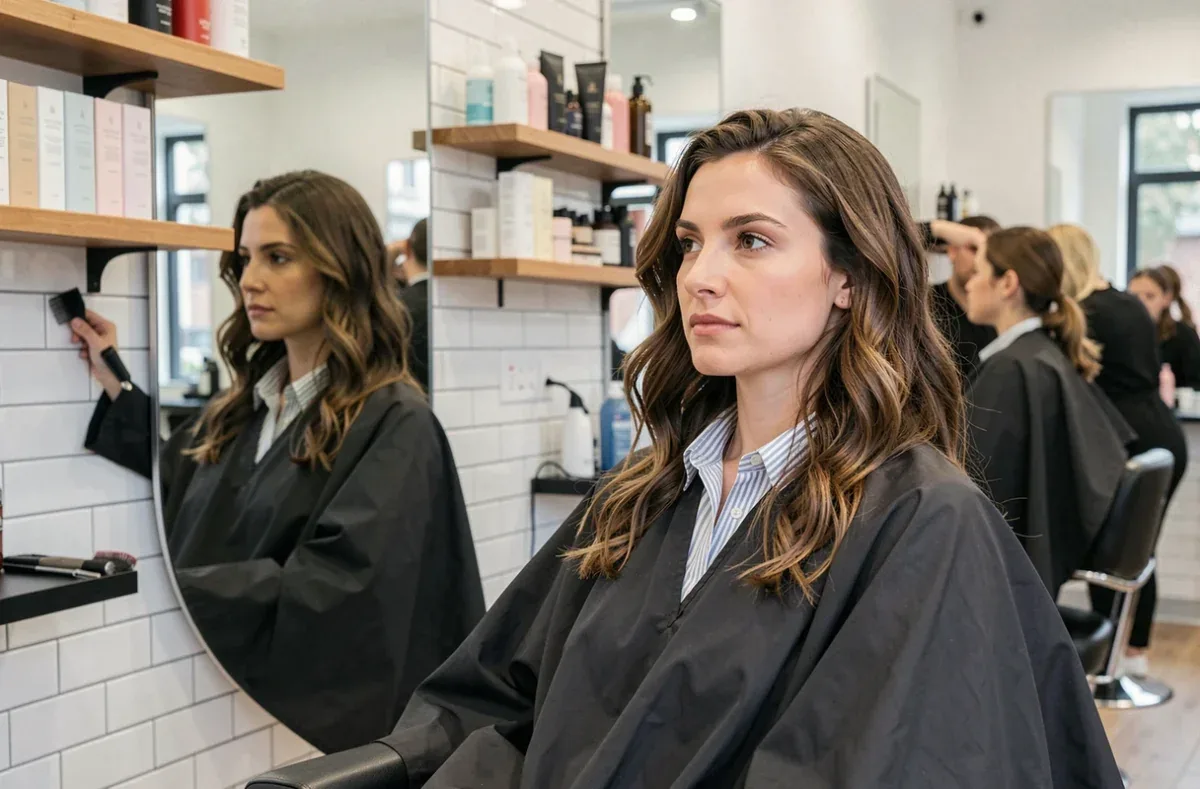
On camera, your hairstyle does more than frame your face — it decides how your face reads on screen, where a flat image exaggerates every imbalance. A round face benefits from height at the crown and a side part, which lengthen the face; a long face benefits from softness at the sides and a little width, which shorten it; a square face softens with waves and face-framing pieces; a heart-shaped face balances with volume at the jaw. Texture matters just as much: fine hair needs volume at the roots, thick hair needs weight taken out, curly hair needs definition and control, and straight hair needs a little texture to stop it looking flat under bright lights.
Best for: round faces — high buns and side parts; long faces — soft waves and side-swept styles; square faces — curls and face-framing layers; heart-shaped faces — low buns and chin-length volume. What to avoid: a style that fights your texture — straightening curly hair for hours, or curling fine hair that drops within the hour. Quick tip: test your style on camera, not just in the mirror, before the presentation day.
The Tools and Products Kit Worth Packing
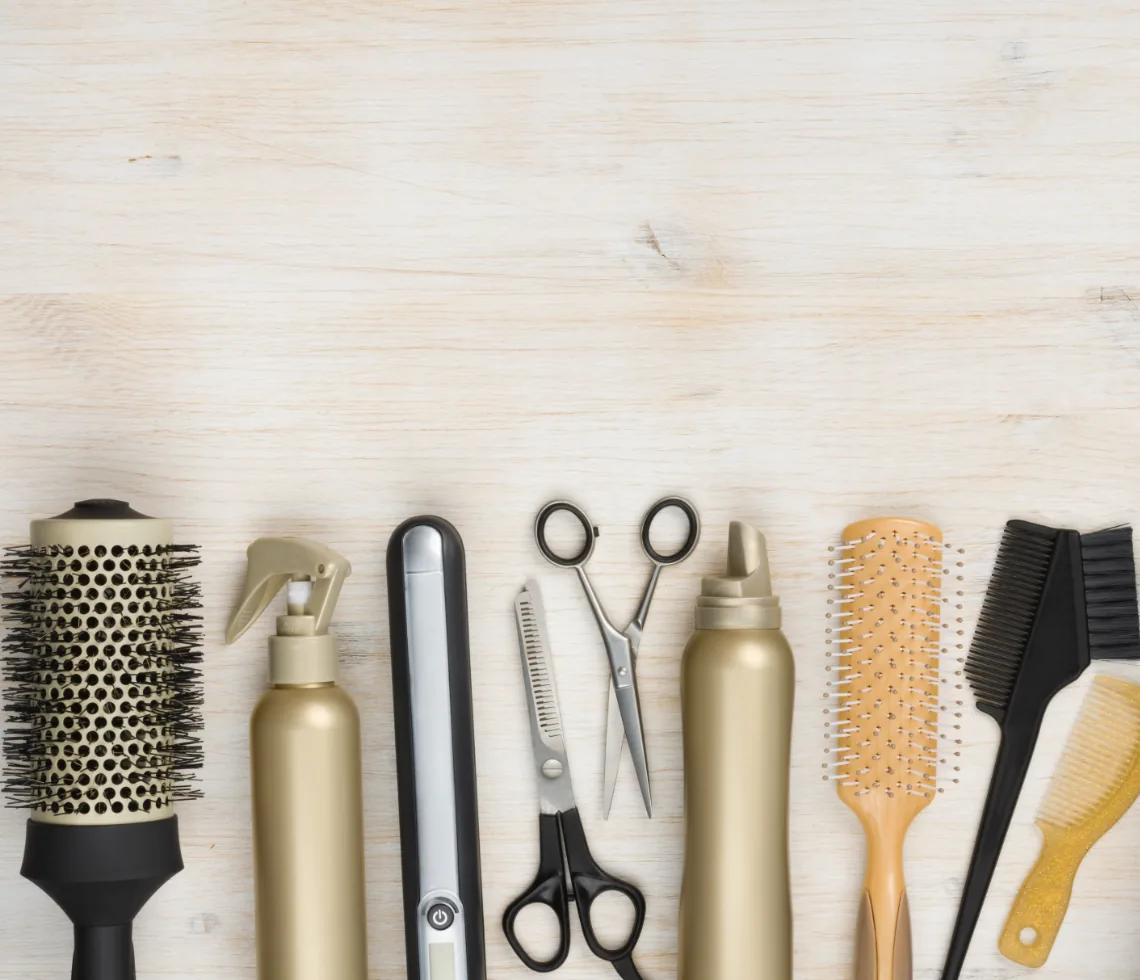
Even the most secure hairstyle can be undone by a warm room, a long day, or a gust of wind on the walk in, which is why every presenter should carry a small kit. It does not need to be large — a few bobby pins that match your hair colour, a small bottle of flexible-hold hairspray, a travel-size shine serum, a spare elastic, and a pocket mirror. That is the whole kit, and it fits in a handbag or a jacket pocket. The point is not to restyle your hair mid-talk; it is to fix the one thing that goes wrong before anyone notices it.
What to pack: bobby pins (crossed in an X for a stronger hold), flexible-hold spray, a little serum for flyaways, a spare elastic, and a comb. What to avoid: heavy products that weigh the hair down, and strong-hold spray that makes the hair look stiff on camera. Quick verdict: pack the kit the night before, and check your hair once before you go on — then forget about it and give the talk.
Common Mistakes That Distract an Audience
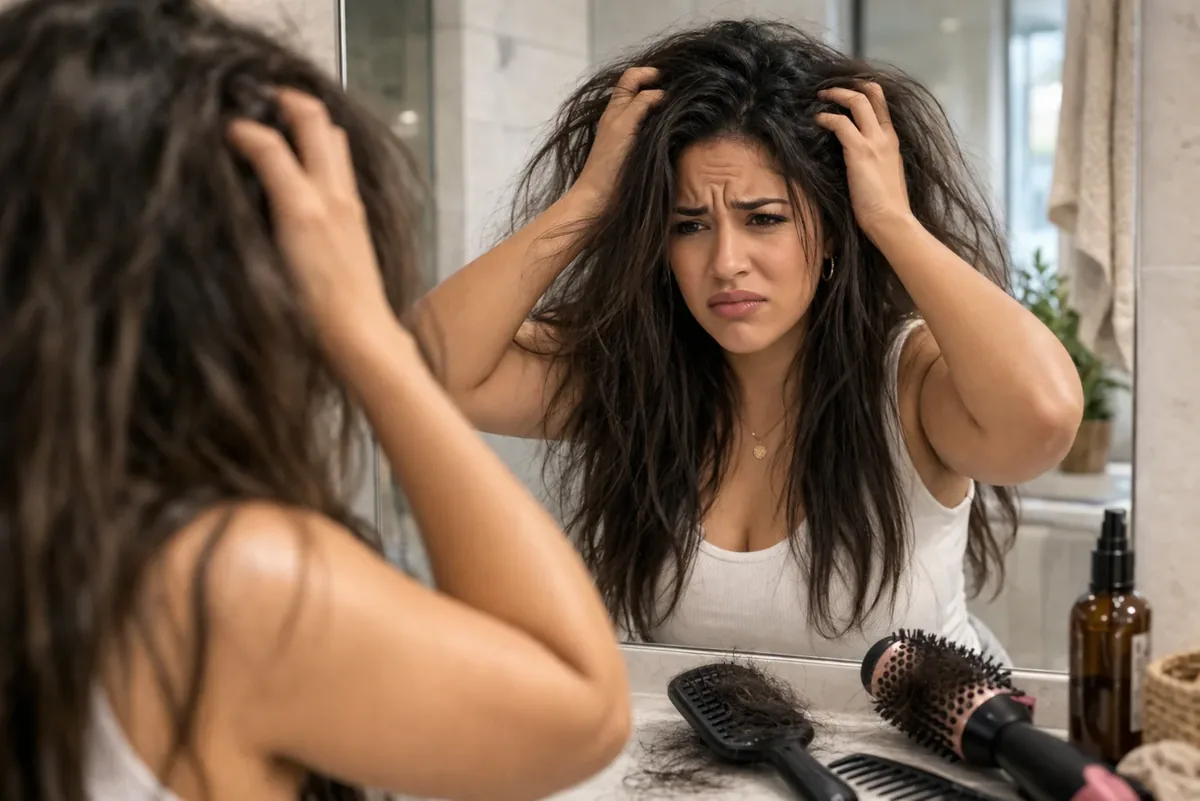
The mistakes that distract an audience are almost never about the hairstyle itself — they are about the things that go wrong with it. Hair that falls into your face every time you look down. A ponytail that swings when you turn. A bun that slips to one side. Flyaways that catch the light. A style so new that you keep touching it, tucking it, checking it in every reflective surface. Each of these is small on its own, but together they tell the audience that you are uncomfortable — and an uncomfortable speaker makes an uncomfortable audience.
Mistakes to avoid: a brand-new style on the day, a style that needs constant adjusting, hair that is not anchored, and a look that fights your texture. Quick fixes: rehearse in the style, anchor it with pins, smooth the hairline with serum, and do the five-minute check below before you go on. What to remember: the audience will forget your hairstyle within a minute — unless it distracts them, in which case they will remember nothing else.
The Five-Minute Check Before You Walk In
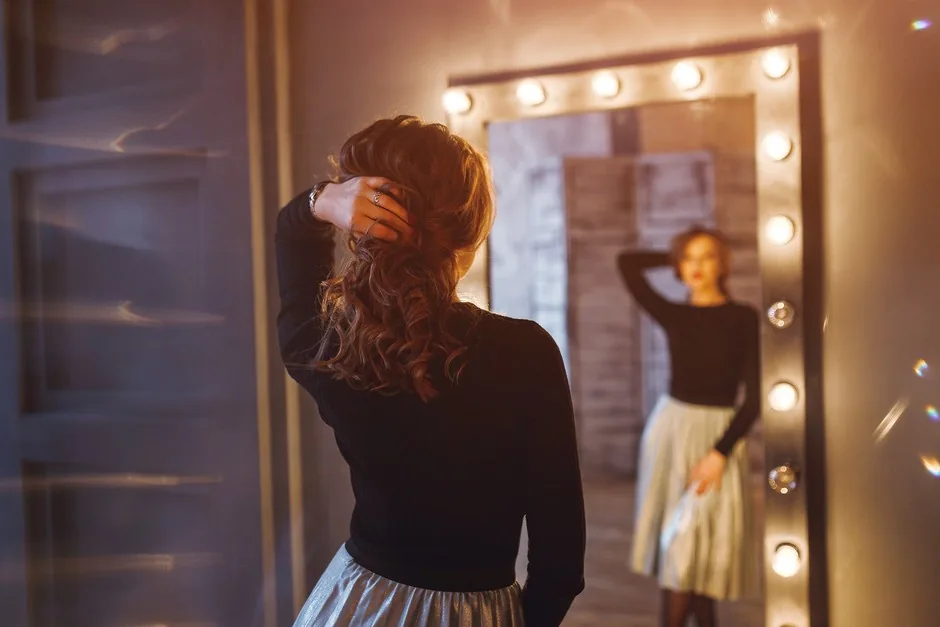
Five minutes before your presentation, run this check — it takes less time than reading your first slide. Stand in front of a mirror, shake your head gently, turn to the left and the right, look down at your notes, and then look at yourself from the side. If anything moves, pin it. If a strand falls forward, tuck it and spray it. If the style looks different from the back than you expected, fix it now, not after the audience has seen it. Check the hairline for flyaways, smooth them with a drop of serum, and give the whole style one light mist of spray from a distance.
Why it works: the check catches the three things that actually go wrong — movement, falling pieces, and flyaways — and it catches them while you can still fix them. Time-saving tip: do the check in the same light as the presentation room if you can, because warm stage lights show flyaways that a bathroom mirror hides. Quick verdict: five minutes of checking buys you a whole presentation of not thinking about your hair — which is the entire point.
1. The Sleek Low Bun
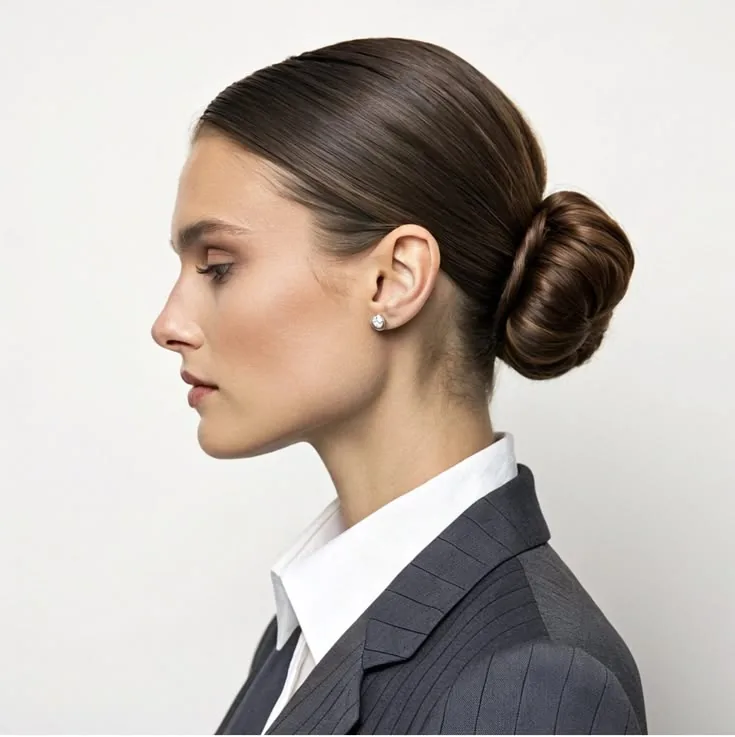
A sleek low bun is the single most reliable of all hairstyles for a presentation, and it earns that reputation because it does everything a speaker needs: it keeps every strand off your face, it looks the same from every seat in the room, and it does not move when you turn to a slide or lean toward a question. Brush the hair smooth, gather it at the nape, twist it into a neat coil, and pin it flat so the silhouette stays clean and close to the head.
Best for: formal work presentations, job talks, and panel discussions. How to style: work a little smoothing cream through damp hair, blow-dry it straight, then gather and twist — a centre part looks classic, a side part adds softness. What to ask a stylist: for a low bun that sits at the nape with a smooth crown and no bumps, finished with flexible-hold spray so it moves slightly but never falls.
2. The Classic French Twist

The French twist is the old-school elegant updo that still turns heads in a boardroom, and it works so well for presentations because it lifts the hair up and back in one clean vertical line, leaving your face completely open to the audience. It suits medium to long hair best, and once it is pinned it is one of the most secure styles you can wear — no swinging ponytail, no falling pieces, nothing to think about while you talk.
Pros: timeless, extremely secure, flattering from the side, and it pairs beautifully with a blazer or a structured dress. Cons: it takes practice to do on yourself, it needs plenty of pins, and it can feel tight if you pull it too hard. Quick verdict: learn it the week before, not the morning of — and if your hair is very fine, ask your stylist for a little backcombing at the crown so the twist has something to grip.
3. The Polished Low Ponytail
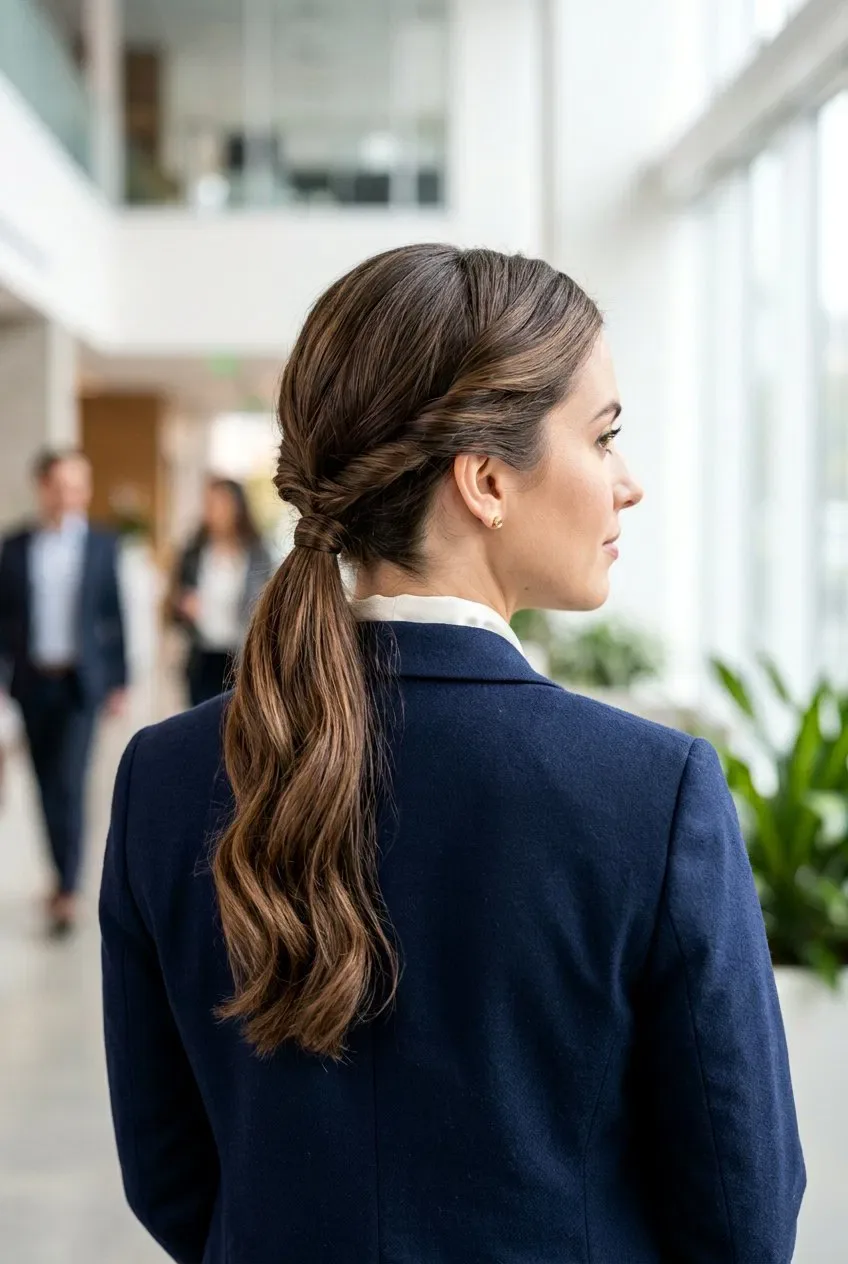
A low ponytail sounds simple, and that is exactly its strength: it is the fastest polished style in this guide, it suits almost every hair type, and it keeps your hair controlled without the formality of a full updo. The trick is in the finish — smooth the crown, hide the elastic by wrapping a strand of hair around it, and let the tail fall straight and clean. Done well, it looks deliberate and expensive; done carelessly, it looks like a gym ponytail.
Common mistakes: a visible elastic, a bumpy crown, and a tail that swings into your face when you turn. Quick fixes: wrap a strand around the base and pin it underneath, smooth the crown with a brush and a light spray, and keep the ponytail low at the nape so it barely moves. What to ask a stylist: for a low ponytail with a wrapped base and a straight, blunt-cut tail that falls neatly over one shoulder when you turn.
4. The Smooth Blowout With a Side Part
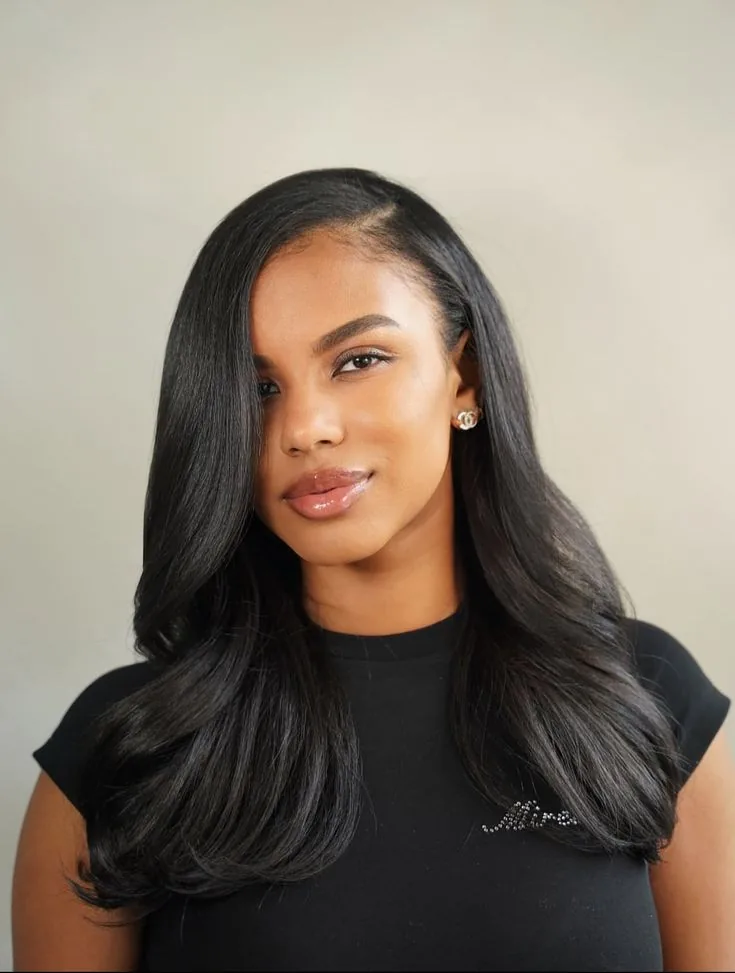
A smooth blowout with a deep side part is the camera-friendly down style that makes you look like you spent an hour in a salon, even when you did it yourself in twenty minutes. The side part adds instant shape and movement, the smooth finish catches the light beautifully on camera, and the hair frames your face without ever covering it. It is the best choice when you want your hair down but still need to look completely in control.
Time and cost: about 20–25 minutes at home with a round brush, or a standard blow-dry appointment at a salon. Maintenance: it holds well for a full day on most hair, though fine hair may need a little dry shampoo at the roots by the afternoon. Who should avoid it: anyone presenting outdoors in wind, or in a very humid room — the smooth finish will not survive either, and a pinned-back style will serve you better.
5. The Half-Up Twist
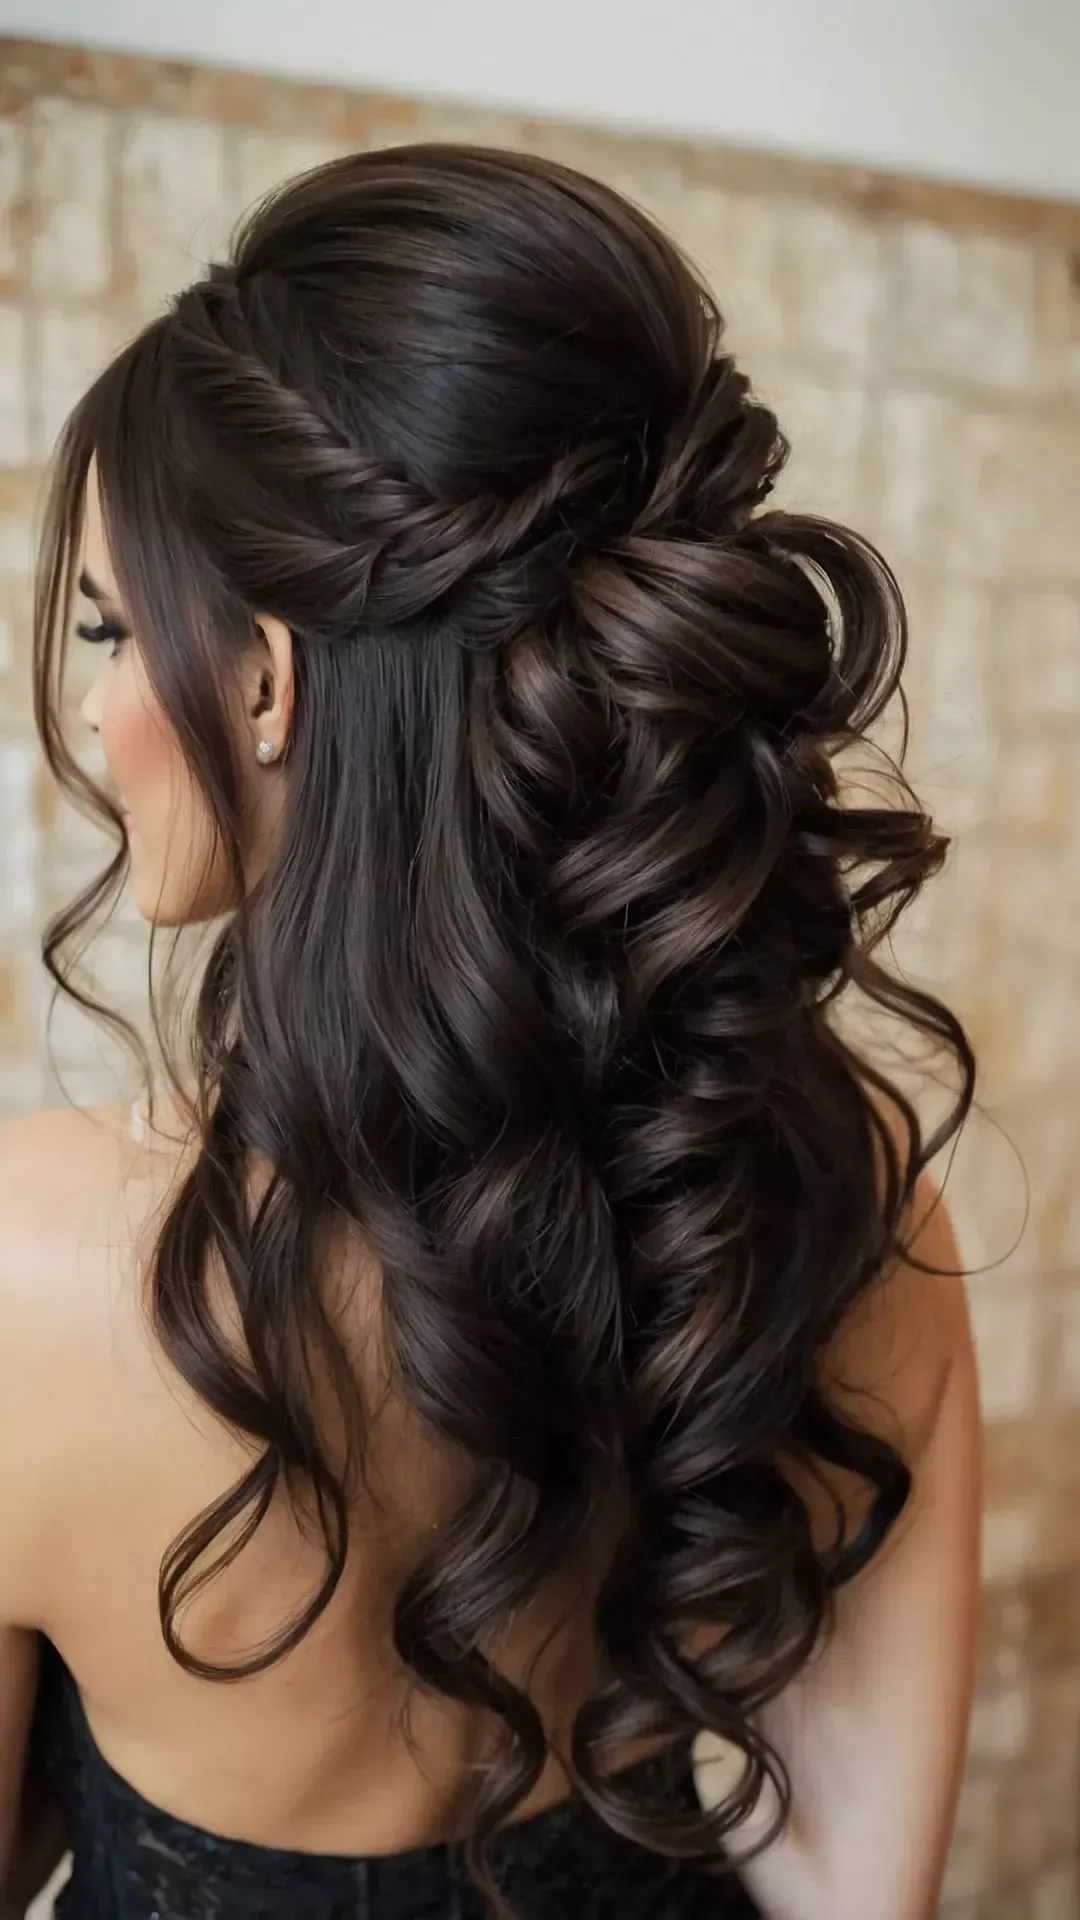
The half-up twist is the friendly middle ground between hair up and hair down: the top section is twisted back and pinned, so your face stays clear and you look polished, while the rest of your hair falls naturally over your shoulders. It is ideal for school and university presentations, creative workplaces, and any talk where you want to look approachable rather than formal, and it works on wavy, straight, and curly hair alike.
Best for: medium to long hair, and anyone who feels too severe in a full updo. How to style: take two sections from above the ears, twist each one back, cross them at the back of the head, and pin them flat — leave a few soft pieces at the front if your face shape suits them. What to ask a stylist: for a half-up twist with soft volume at the crown and the rest of the hair left smooth or lightly waved, so the style reads as intentional from the back rows too.
6. The Low Chignon With a Centre Part
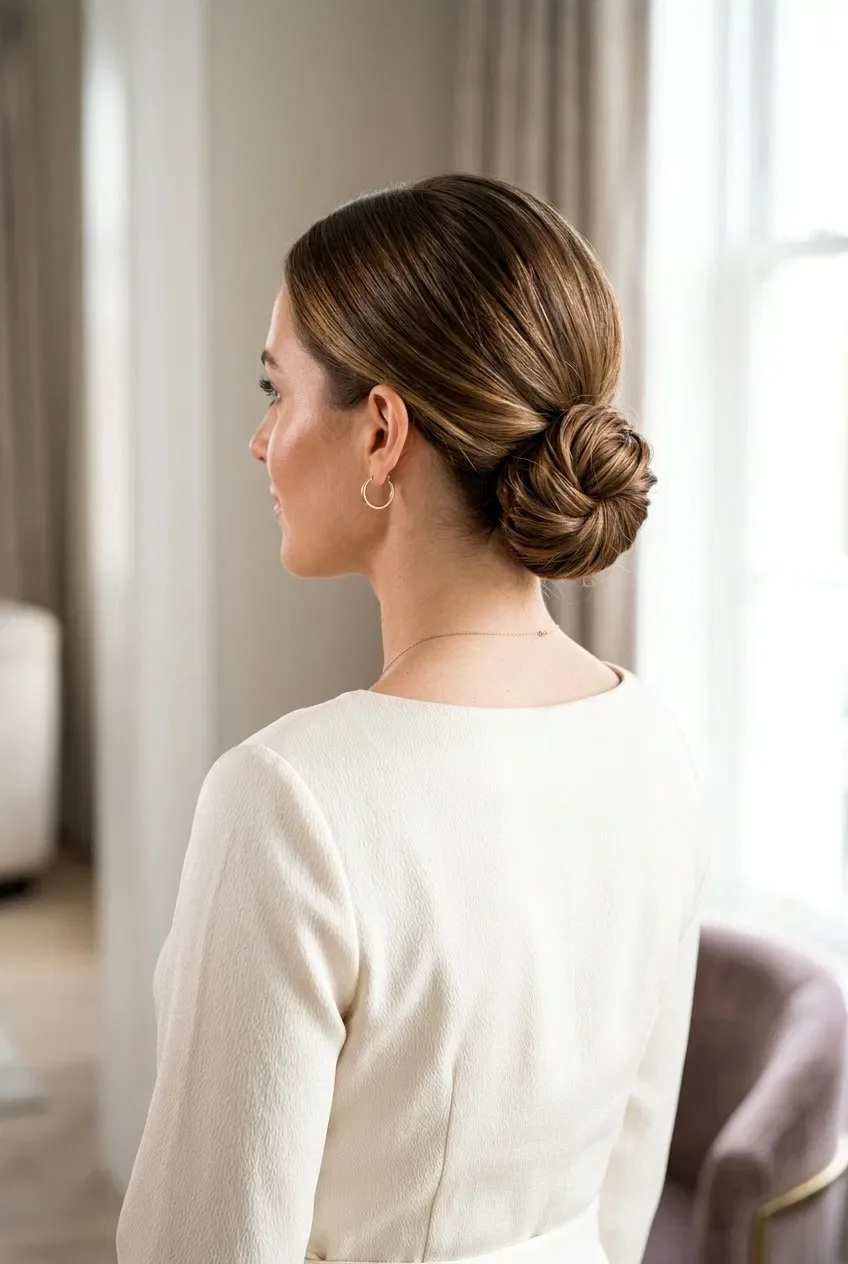
A low chignon with a centre part is the quiet, symmetrical style that photographers and conference organisers love, because it looks flawless from every angle and never fights with a microphone headset or a name badge. The centre part gives it a calm, balanced feel, and the chignon itself — a soft, folded bun at the nape — is softer than a tight bun, which makes it kinder on the face and more comfortable for a long day of talks.
Step by step: part the hair cleanly in the middle, smooth both sides back with a brush, gather at the nape, fold the length up into a soft loop, and pin it flat with bobby pins that match your hair colour. What to ask a stylist: for a low chignon with a clean centre part, a smooth crown, and a soft, slightly loose finish rather than a scraped-back one, so it looks elegant without looking severe.
7. The Sleek High Ponytail
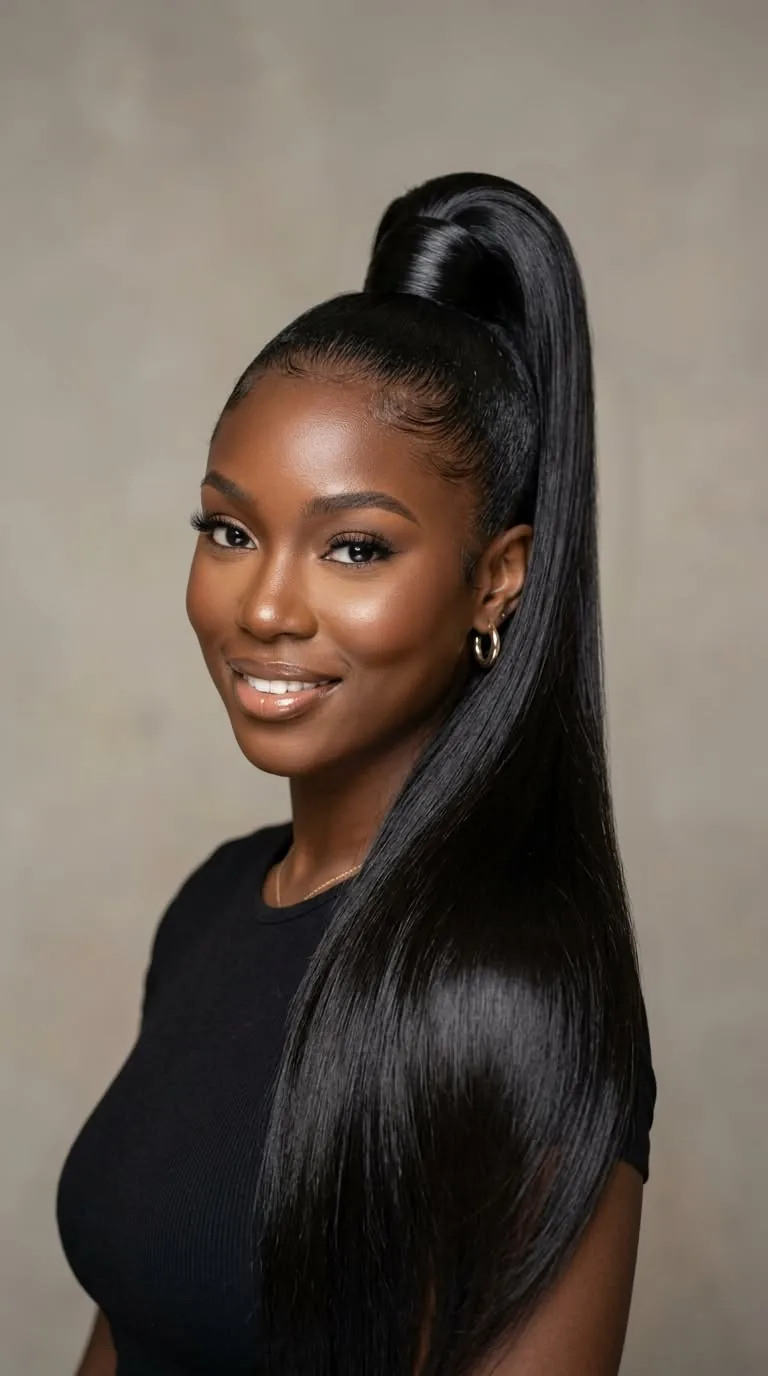
A sleek high ponytail brings energy and confidence to a presentation, and it is the style to choose when you want to look sharp, modern, and wide awake. It lifts the face, shows off your features, and reads beautifully on stage, where a high silhouette carries further than a low one. The key is the sleekness: the crown must be completely smooth, with no bumps and no flyaways, or the whole effect falls apart.
Pros: youthful, confident, great on stage, and it keeps long hair completely out of the way. Cons: it can feel tight over a long day, it swings when you turn your head, and it suits a formal boardroom less than a low bun does. Quick verdict: choose it for a pitch, a demo, or a stage talk — and anchor it with two elastics and a wrapped strand so it stays high and still through the whole presentation.
8. Soft Low Waves
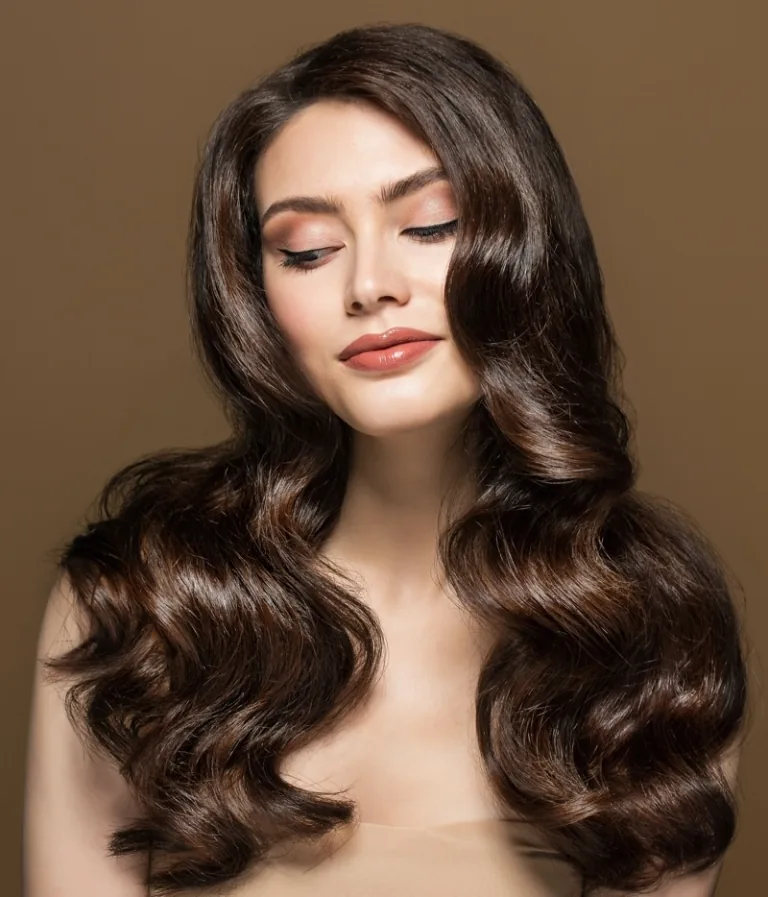
Soft low waves are the most forgiving down style for a presentation, because they add movement and polish without the stiffness of a straight blowout or the fuss of tight curls. The waves start below the ears, so the top of the hair stays smooth and your face stays clear, while the ends move gently when you talk. It is a warm, confident look that works for work, school, and stage alike, and it photographs beautifully.
Time and cost: about 15 minutes with a large-barrel curling iron, or a salon blowout with soft waves built in. Maintenance: brush the waves out gently with your fingers, not a brush, and a light mist of flexible spray keeps them soft rather than stiff. Who should avoid it: anyone presenting in high humidity without an anti-frizz product, and anyone whose hair drops its curl within an hour — in that case, a pinned-back style will hold its shape far longer.
9. The Braided Crown
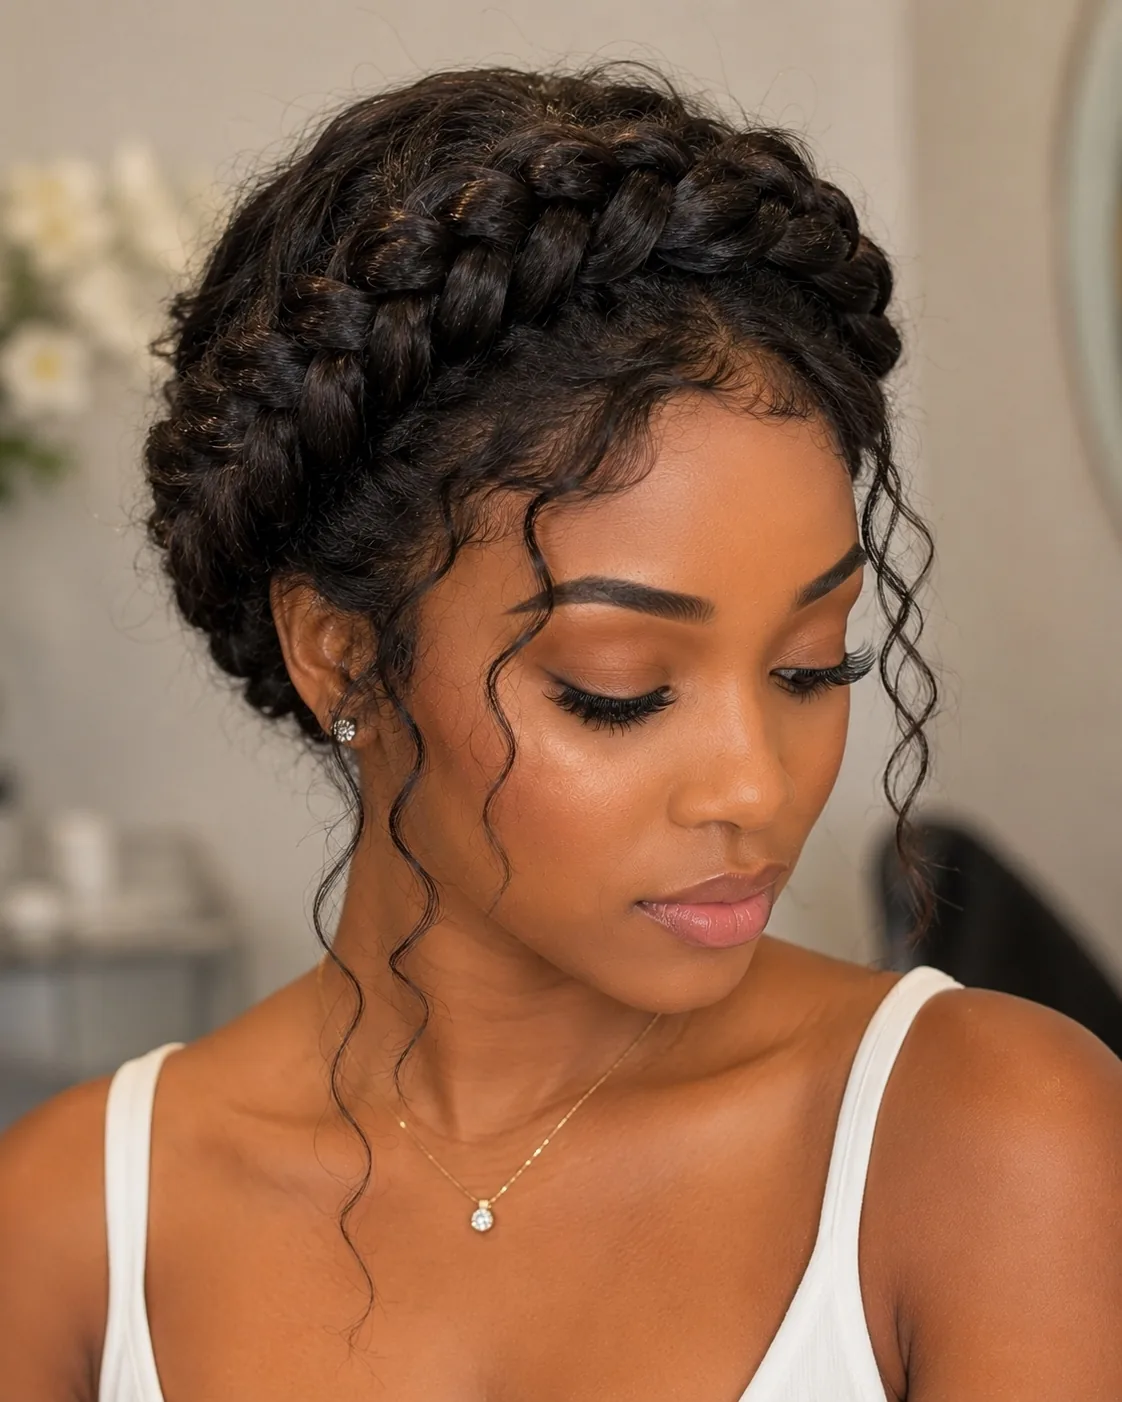
A braided crown — a braid wrapped around the head like a halo — is the most secure way to wear your hair down for a presentation, because the braid itself holds everything in place while the rest of your hair falls naturally. It looks intricate and impressive, yet it is really just two braids pinned across the crown, and it keeps every strand away from your face for the entire talk.
Best for: long hair, creative and academic settings, and warm rooms where an updo would feel too heavy. How to style: braid two sections from behind each ear, cross them over the crown, and pin the ends flat underneath. What to ask a stylist: for a braided crown with soft, slightly pulled-out braids and a smooth hairline, so the style looks romantic rather than severe — and ask them to show you how to re-pin it yourself if it loosens.
10. Side-Swept Curls
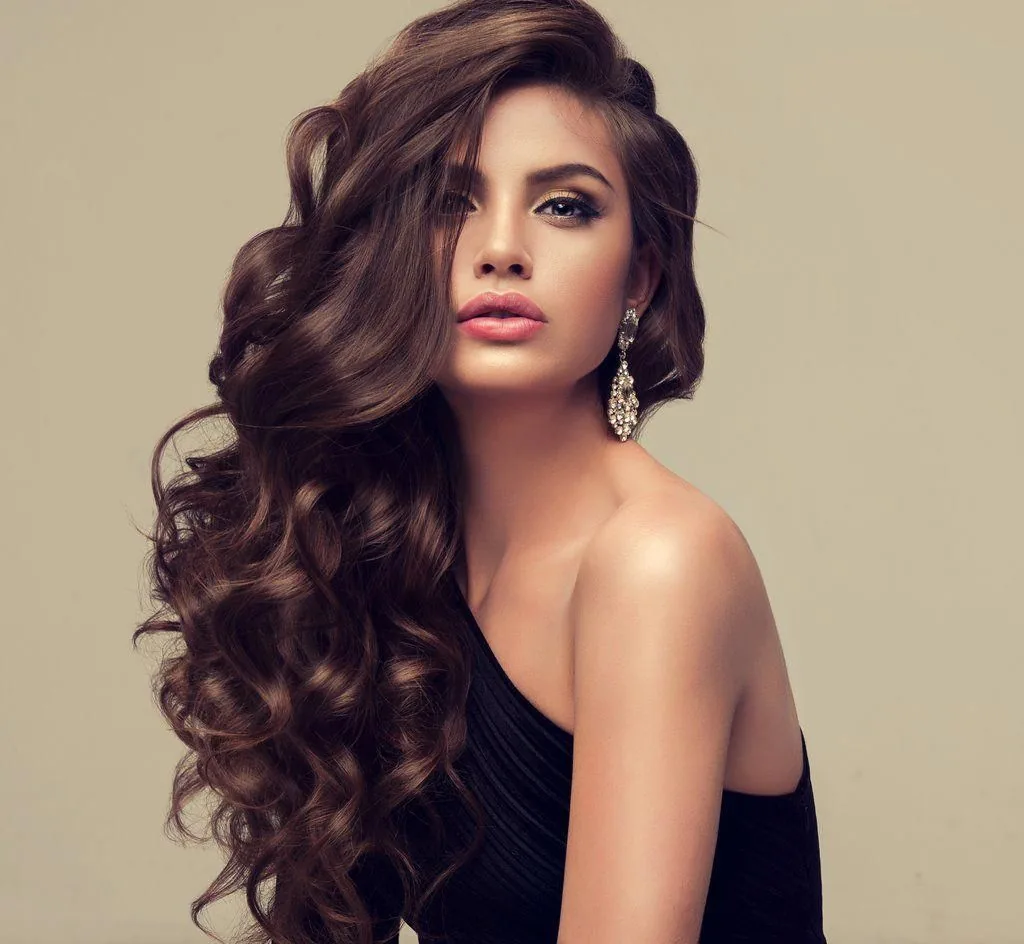
Side-swept curls are the glamorous presentation style for anyone who wants their hair down but still wants one side of the face completely clear — the curls fall over one shoulder, leaving the other side open, which is perfect when you are speaking to an audience seated mostly on one side, or when a microphone sits on one side of your face. The asymmetry looks deliberate and elegant, and the curls add volume that carries well in a large room.
Common mistakes: curls that fall into the eyes, a part that drifts during the talk, and too much volume on the swept side. Quick fixes: pin the swept side flat behind the ear, set the curls with a light spray, and rehearse turning your head both ways. What to ask a stylist: for side-swept curls with the part set low on one side and the curls brushed out soft, so the style moves gently instead of bouncing when you speak.
11. The Textured Low Bun With Face-Framing Pieces

A textured low bun with a few soft pieces framing the face is the modern, approachable version of the classic bun — polished, but not severe. The texture gives the bun grip and fullness, so it looks bigger and more interesting than a slick bun, and the face-framing pieces soften the whole look, which is especially kind on camera, where a scraped-back style can look harsh under bright lights.
Step by step: add texturising spray to dry hair, loosely twist it into a low bun, pull a few pieces out at the front and curl them lightly, and pin the bun with a mix of bobby pins and a couple of U-pins. What to ask a stylist: for a low textured bun with soft, face-framing layers left out at the front and a slightly undone finish — and to keep the pieces short enough that they stay beside your face rather than falling across it mid-sentence.
12. Straight and Sleek With a Middle Part
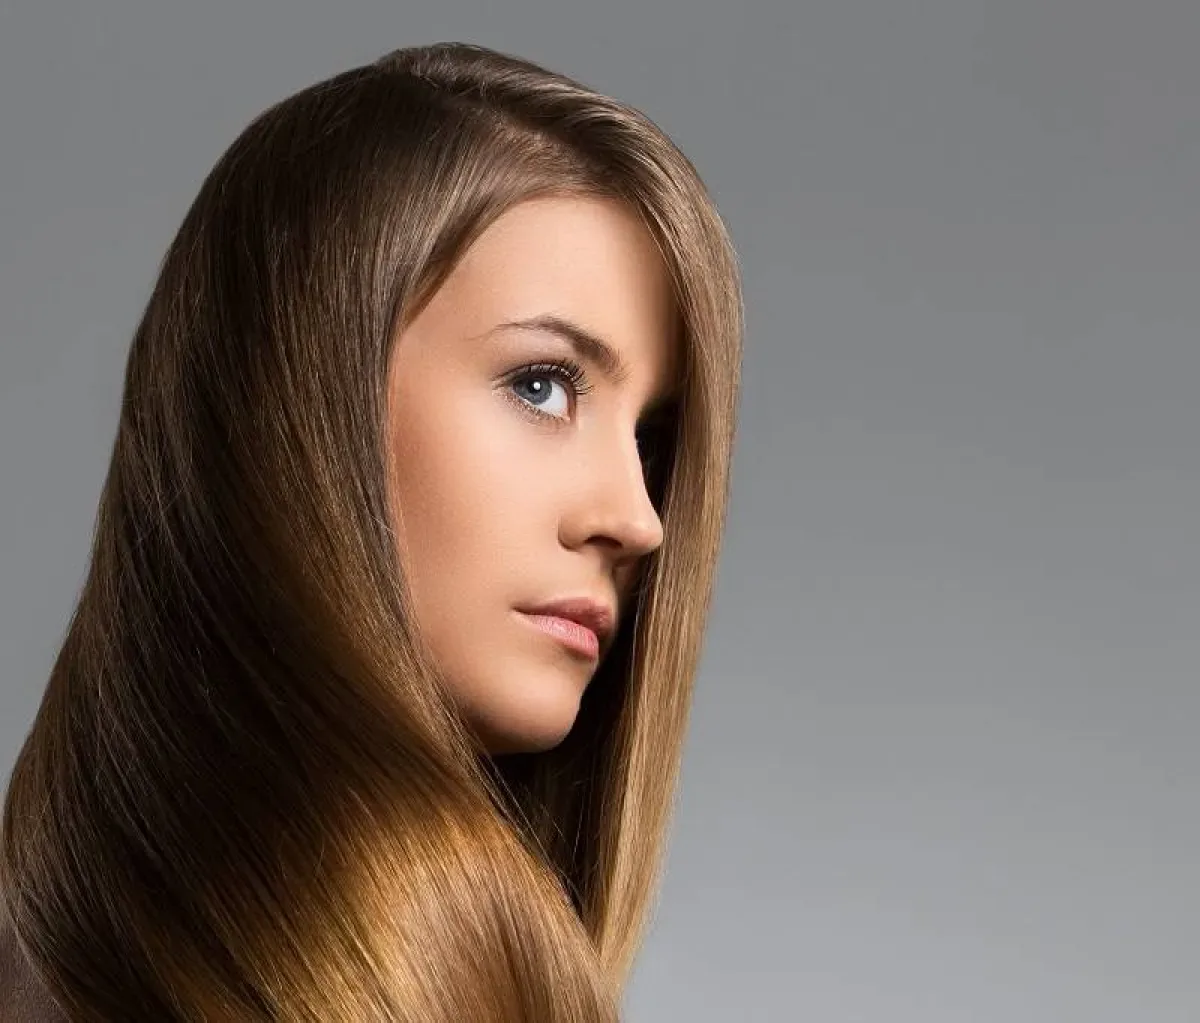
Straight, sleek hair with a middle part is the minimalist presentation style: no fuss, no volume tricks, just a clean, symmetrical frame around your face that lets the audience focus entirely on you. It works best on hair that is naturally straight or easily straightened, and it is the style to choose when your outfit is already doing the talking — a bold suit, a bright dress — and your hair should stay quiet.
Pros: fast, simple, looks expensive, and photographs cleanly from every angle. Cons: it shows every flyaway, it can look flat on fine hair, and it will not survive wind or humidity without help. Quick verdict: keep a small bottle of shine serum and a travel spray in your bag, run the straighteners over the front sections one last time before you go on, and this simple style will carry a whole presentation.
13. The Classic Bob With Tucked Ends
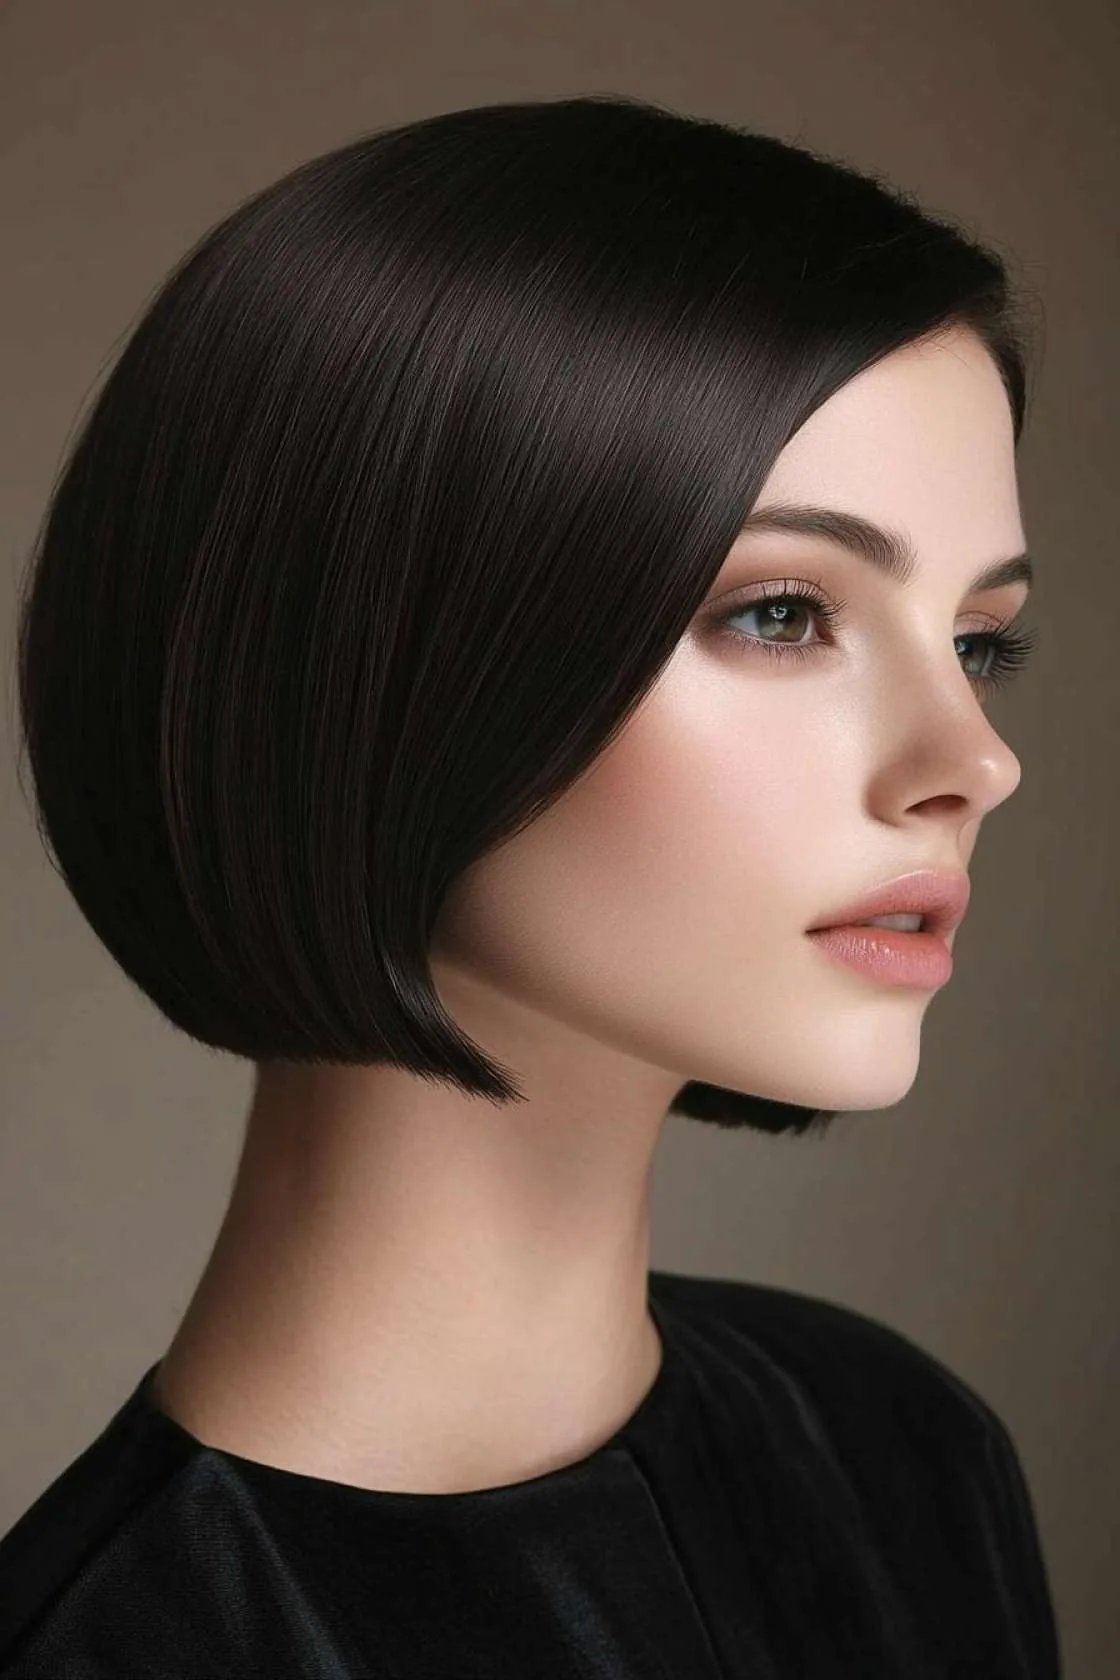
A classic bob with the ends tucked under is the short-hair presentation style that never fails: it frames the face, it stays put, and it looks finished without a single pin. The tucked ends give it a neat, rounded shape that reads as polished from the front row to the back, and the length — just at or above the jaw — keeps the hair well away from a collar or a microphone. It is one of the easiest hairstyles for a presentation if your hair is already bob-length.
Best for: short to medium hair, formal offices, and video calls, where the clean shape reads beautifully on camera. How to style: blow-dry with a round brush, turning the ends under, then smooth the crown and add a drop of serum for shine. What to ask a stylist: for a bob cut with the ends shaped to turn under naturally, and a length that sits just above the jaw so it never touches your collar during a long talk.
14. The Elegant Top Knot
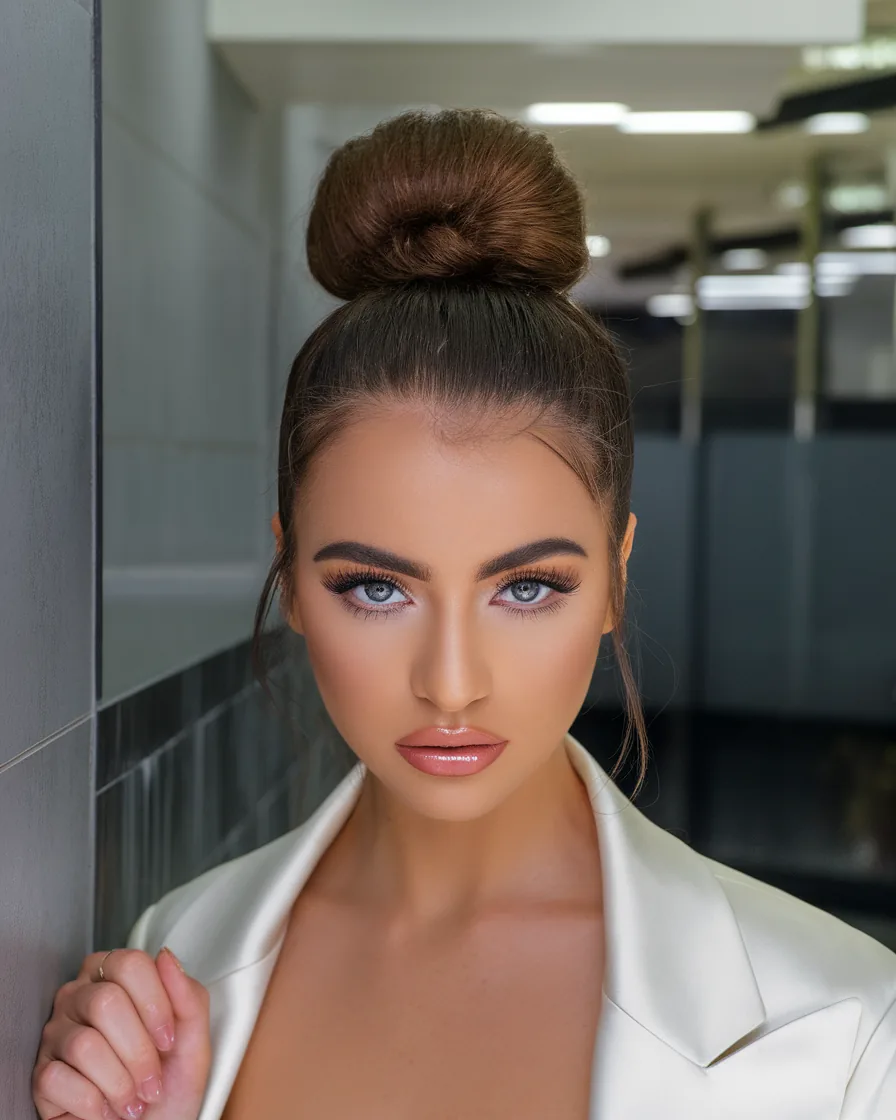
An elegant top knot is the high, neat bun that lifts everything up and out of the way, and it is a gift for long presentations in warm rooms — your neck stays cool, your face stays clear, and the style holds its shape for hours. The elegant version is smooth and compact, not messy: the hair is gathered high, twisted neatly, and pinned into a small, tidy knot that sits on the crown rather than sliding to the back.
Time and cost: about 10 minutes at home once you have practised it, and no salon visit needed. Maintenance: it is one of the most secure styles here, but check the base halfway through a long day — a top knot that slips looks tired fast. Who should avoid it: anyone with a very round face, where a high knot can emphasise width, and anyone whose hair is too short to gather cleanly at the crown — a low bun will suit you better.
15. The Loose French Braid to the Side
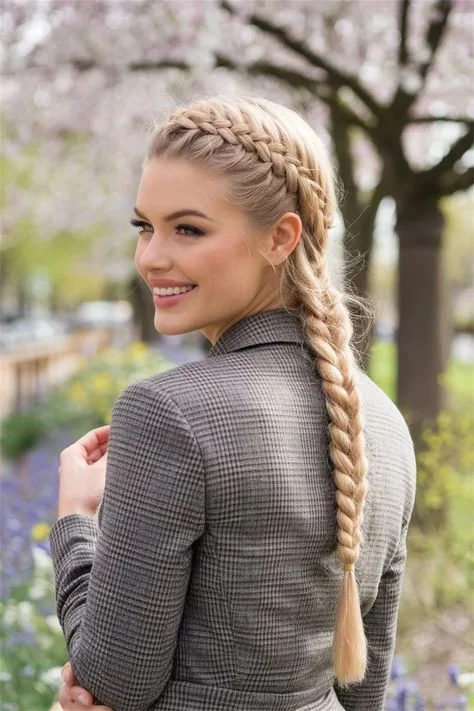
A loose French braid swept to one side is the relaxed, friendly presentation style that works beautifully in classrooms, creative studios, and community talks, where a formal updo would feel stiff. The braid keeps your hair completely under control while still looking soft and approachable, and because it sits over one shoulder, it never swings into your face when you turn to the audience or to a screen.
Common mistakes: braiding too tightly, which looks severe and pulls at the hairline, and leaving the tail too long, which swings when you move. Quick fixes: braid loosely, pull a few pieces out gently for softness, and tie the end with a clear elastic wrapped in a strand of hair. What to ask a stylist: for a soft side French braid with the hairline smoothed and the braid started just behind the ear, so it sits neatly over the shoulder all day.
16. The Voluminous Blowout
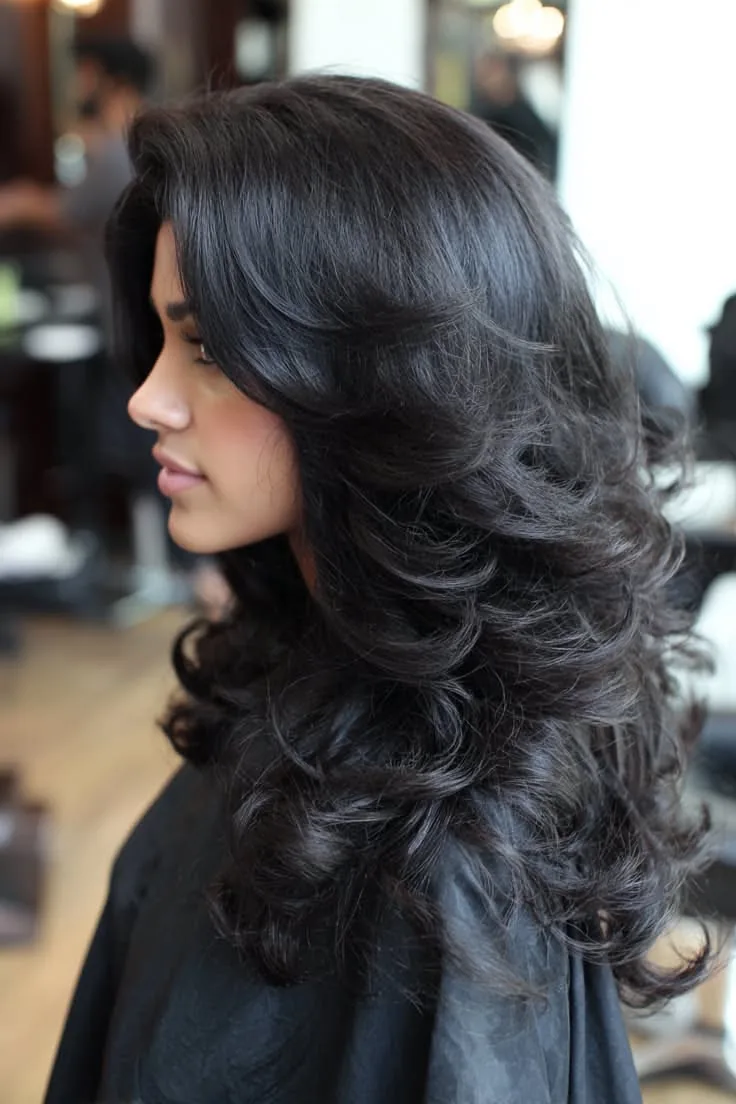
A voluminous blowout is the big-stage presentation style: full, bouncy, and confident, it fills the frame on camera and carries to the back rows of a hall in a way a flat style never will. The volume comes from the roots — lift the hair at the crown while you blow-dry, roll the ends under, and let the shape fall naturally. It is the style to choose when you are the keynote, the host, or the person everyone is there to see.
Pros: confident, camera-ready, and it makes thin hair look much fuller. Cons: it takes the longest of the down styles, it needs a round brush and a good dryer, and humidity is its natural enemy. Quick verdict: book it at a salon if the presentation matters, do a trial run the week before, and carry a travel-size volumising spray for a root refresh before the Q&A.
17. The Slicked-Back Low Bun
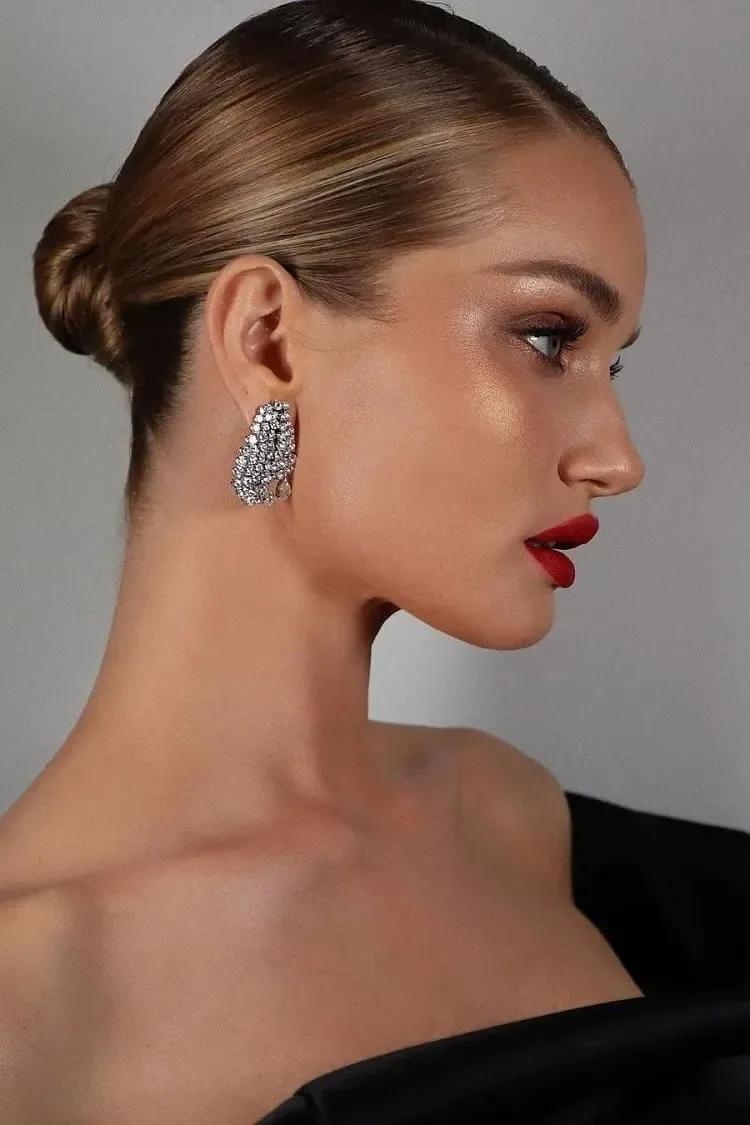
A slicked-back low bun is the most editorial of all the presentation styles — hair swept straight back from the face into a tight, glossy bun at the nape, with not a single strand out of place. It is striking, modern, and deeply confident, and it is the style to wear when your outfit is simple and your hair needs to make the statement. It also photographs exceptionally well, because the clean lines and the shine read clearly even in a wide shot.
Best for: fashion and media presentations, product launches, and stage talks. How to style: work a strong-hold gel or pomade through damp hair, brush it straight back, gather it low, and twist it into a small, tight bun. What to ask a stylist: for a slicked-back bun with a high-shine finish and a neat, compact shape — and to check the hairline from the side, because this style shows every uneven edge.
18. The Romantic Low Ponytail With Soft Curls

A romantic low ponytail with soft curls is the softer sister of the polished ponytail: the tail is curled into gentle waves, a few pieces are left loose at the front, and the whole style feels warm and approachable rather than severe. It is ideal for wedding-industry talks, teaching presentations, and any setting where you want to look friendly and polished at the same time, and it suits wavy and curly hair especially well.
Step by step: curl the lengths in large sections, brush them out softly, gather the hair low at the nape, wrap a strand around the elastic, and pull two thin pieces out at the front to frame the face. What to ask a stylist: for a low ponytail with soft, brushed-out curls in the tail and the front pieces curled away from the face, so they stay beside your cheeks instead of falling across your eyes while you speak.
19. The Pixie Cut Styled Smooth
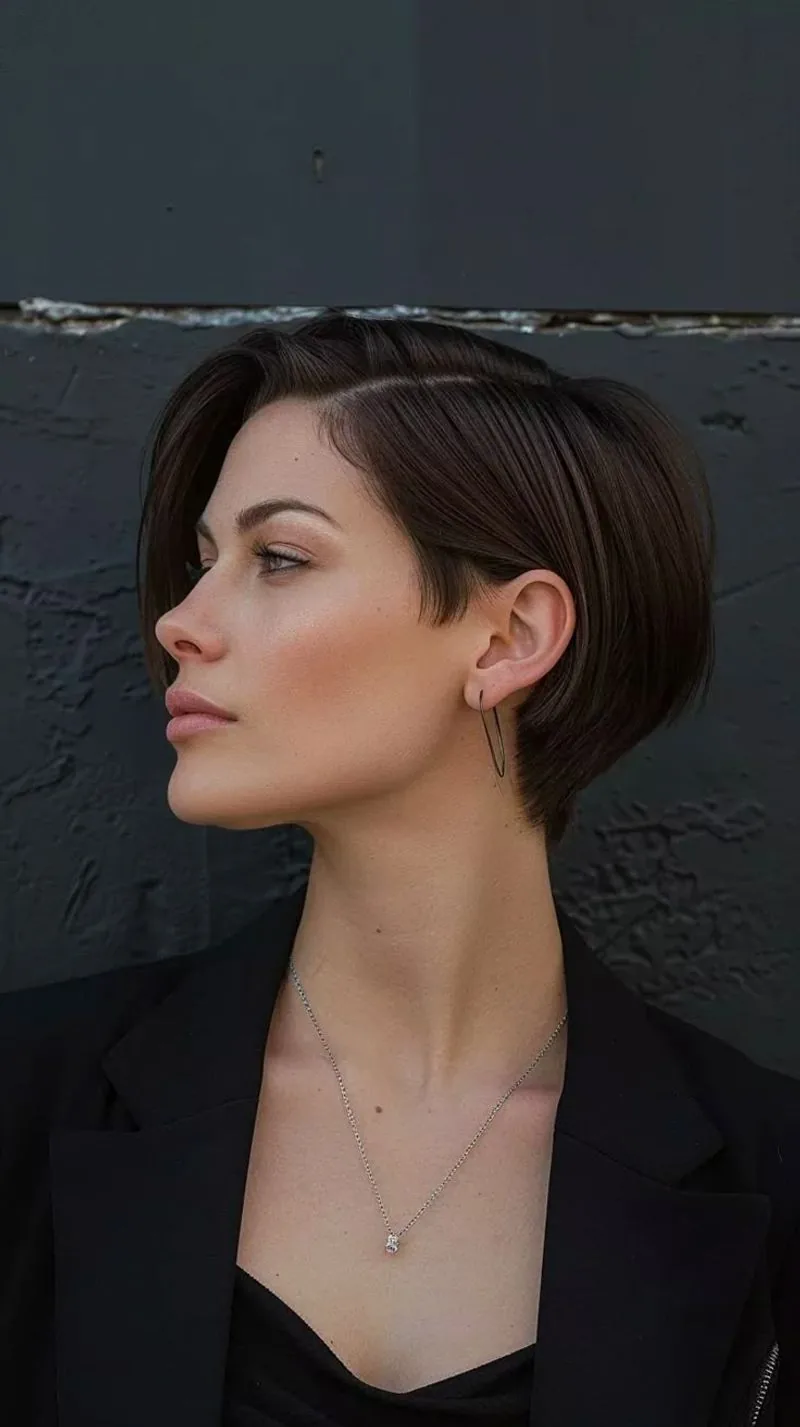
A pixie cut styled smooth is the shortest path to a polished presentation look: there is almost nothing to fall out of place, nothing to pin, and nothing to distract the audience. The style is all in the finish — smooth the top, define the side part, and add a little shine or texture at the crown so the cut looks deliberate rather than just grown out. It is confident, modern, and it puts your face and your words front and centre.
Time and cost: five minutes with a little pomade and a comb, plus a regular trim every four to six weeks to keep the shape sharp. Maintenance: the easiest style in this guide — a quick comb and a drop of product before you go on is all it needs. Who should avoid it: nobody, really — but if your pixie is growing out and the back is starting to flip, smooth it down with a little gel or book a tidy-up trim before the big day.
20. Defined Curls Pinned Back
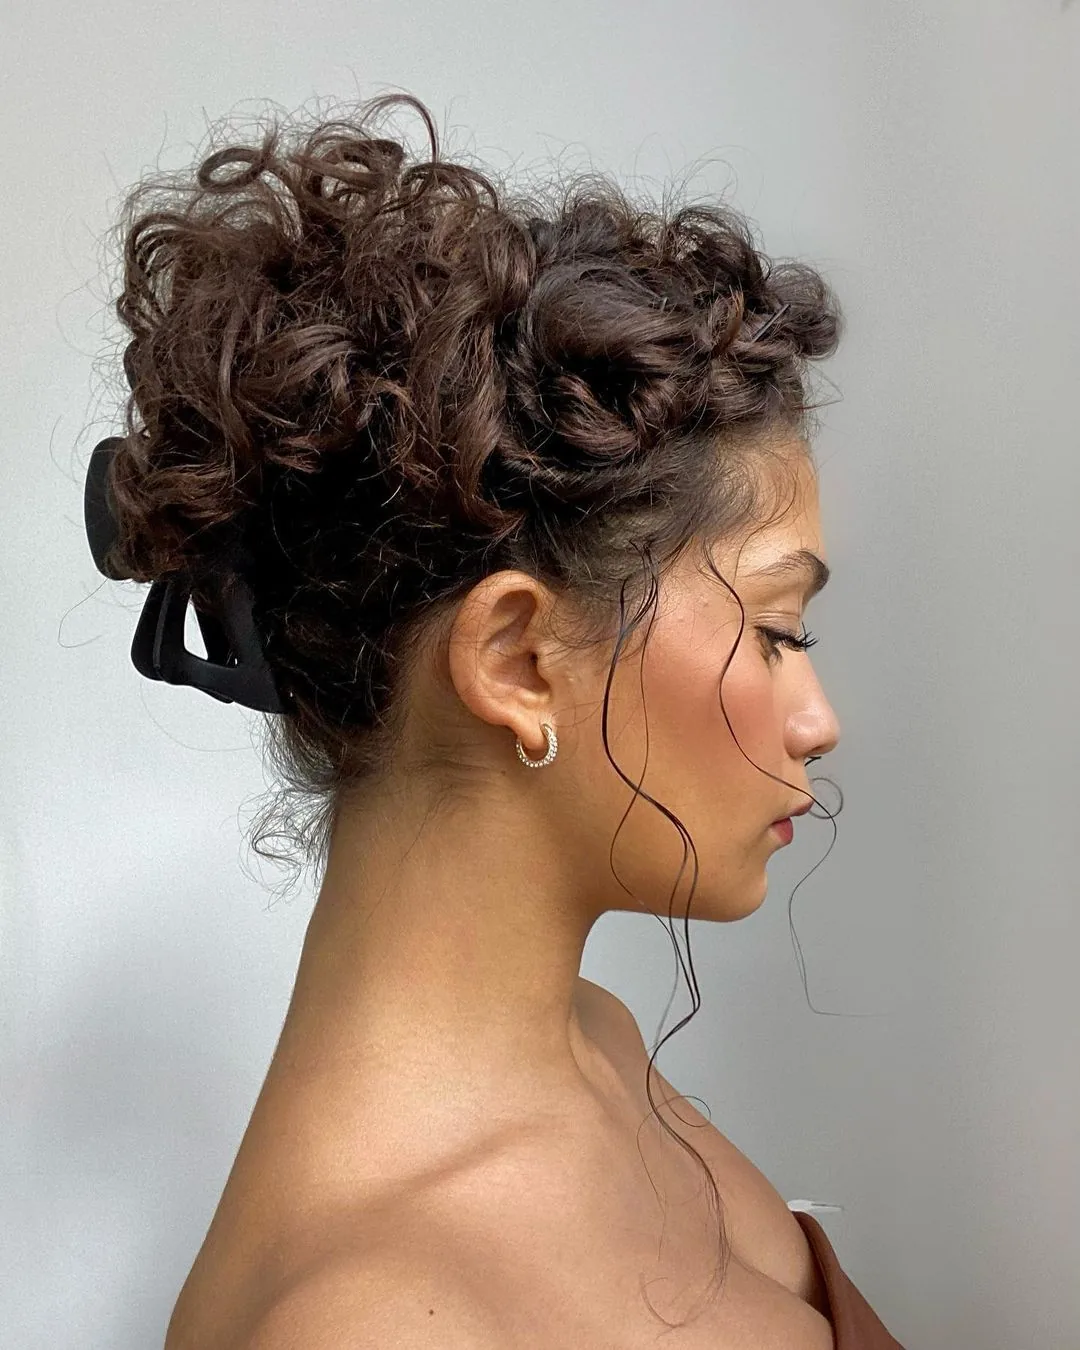
Defined curls pinned back are the best presentation choice for naturally curly hair, because they work with your texture instead of fighting it. The curls are defined with cream or gel, the front sections are pinned back from the face, and the rest falls naturally — polished, but still unmistakably you. It is a style that looks great on camera, holds up under lights, and stays comfortable through a long talk, because nothing is pulled tight.
Pros: celebrates natural texture, very comfortable, and it looks fuller and more interesting than straightened hair. Cons: it needs a good wash-day routine, and humidity can change the curl pattern mid-talk. Quick verdict: define the curls the night before or the morning of, pin the front back with flat clips that match your hair, and carry a small bottle of curl refresher spray for a mid-day touch-up.
21. The Dutch Braid Into a Low Bun
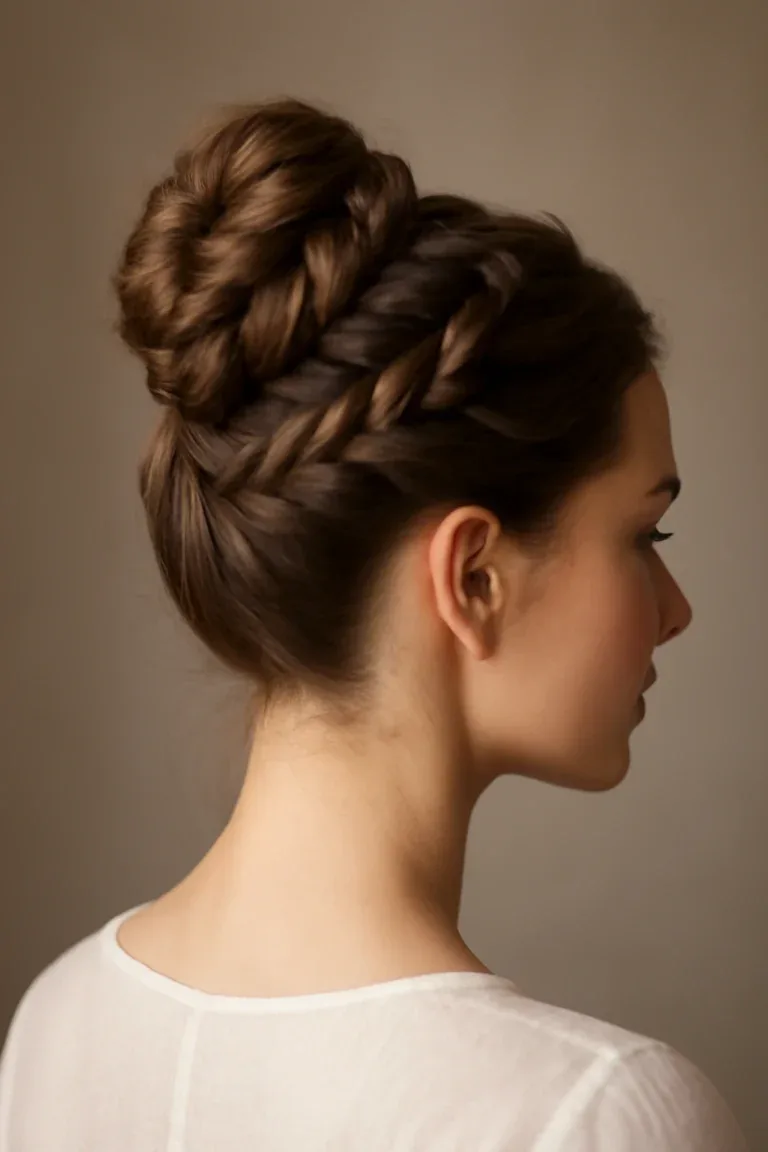
A Dutch braid that flows into a low bun is the most secure updo in this guide — the braid anchors the hair from the crown all the way down, and the bun locks the ends away, so nothing moves no matter how much you gesture, turn, or walk around the stage. It looks intricate and impressive, which makes it perfect for a high-stakes presentation, yet it is really just one braid and a twist, and it holds for hours without a single re-pin.
Best for: long, thick hair, all-day conferences, and outdoor presentations where wind is a factor. How to style: start a Dutch braid at the hairline, braid down to the nape, then twist the remaining length into a low bun and pin it flat. What to ask a stylist: for a Dutch braid into a low bun with the braid pulled out slightly for fullness, and the bun pinned low and flat so it never catches on a collar or a headset.
22. The Side-Part Lob
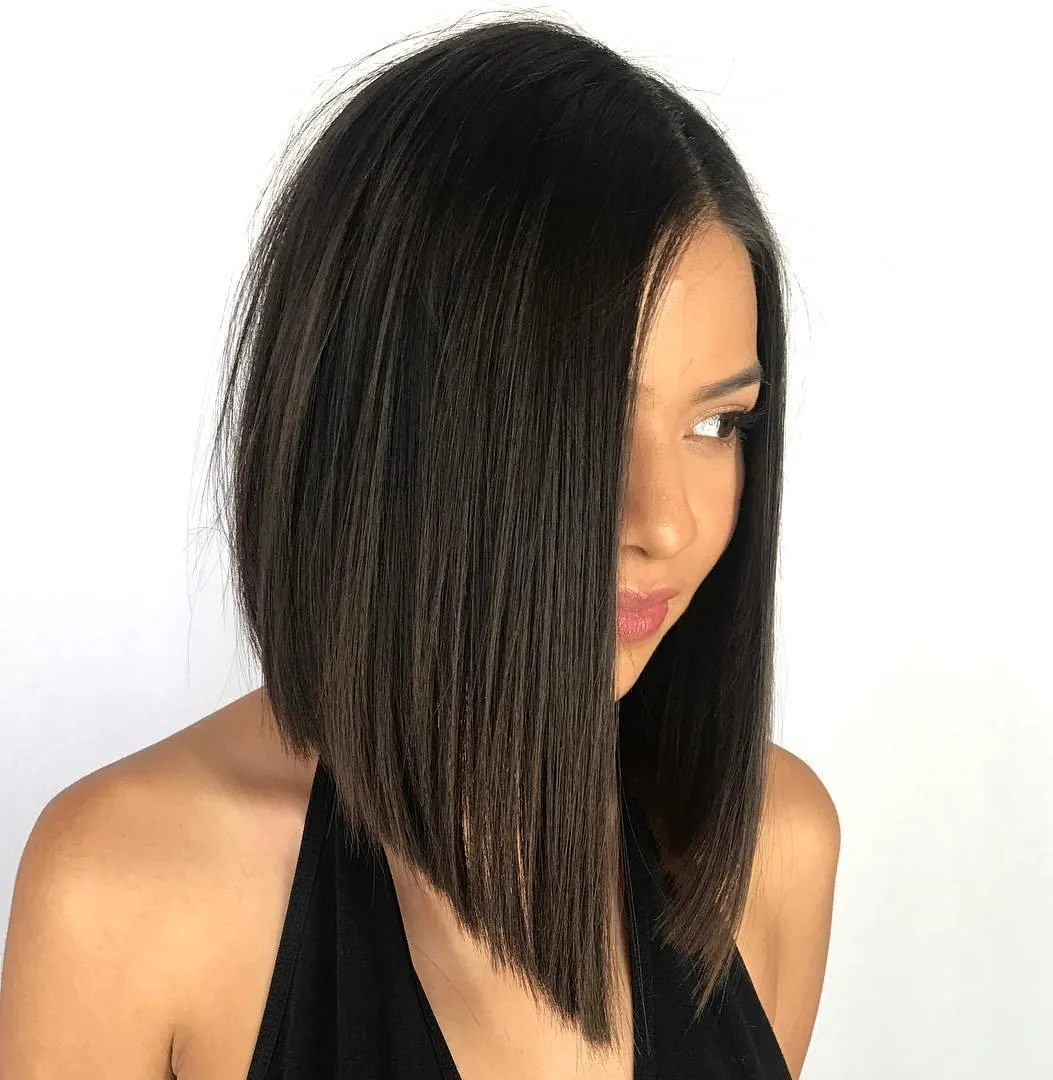
The side-part lob — a long bob that falls between the chin and the shoulders — is the most versatile medium-length presentation style, and it is the one to choose when you want your hair down but need it to behave. The side part adds instant polish and asymmetry, the length is short enough to stay out of your way, and the shape frames the face without ever covering it. It is neat, modern, and it works in every setting from a job interview to a keynote.
Common mistakes: a part that wanders during the talk, ends that flip outwards, and a lob that is too long at the back and catches on a collar. Quick fixes: set the part with a comb and a little spray, tuck one side behind the ear, and smooth the ends under with a round brush. What to ask a stylist: for a lob cut to sit just above the shoulders with the ends shaped to fall inwards, and a side part that suits your face shape.
23. The High Bun With a Wrapped Base
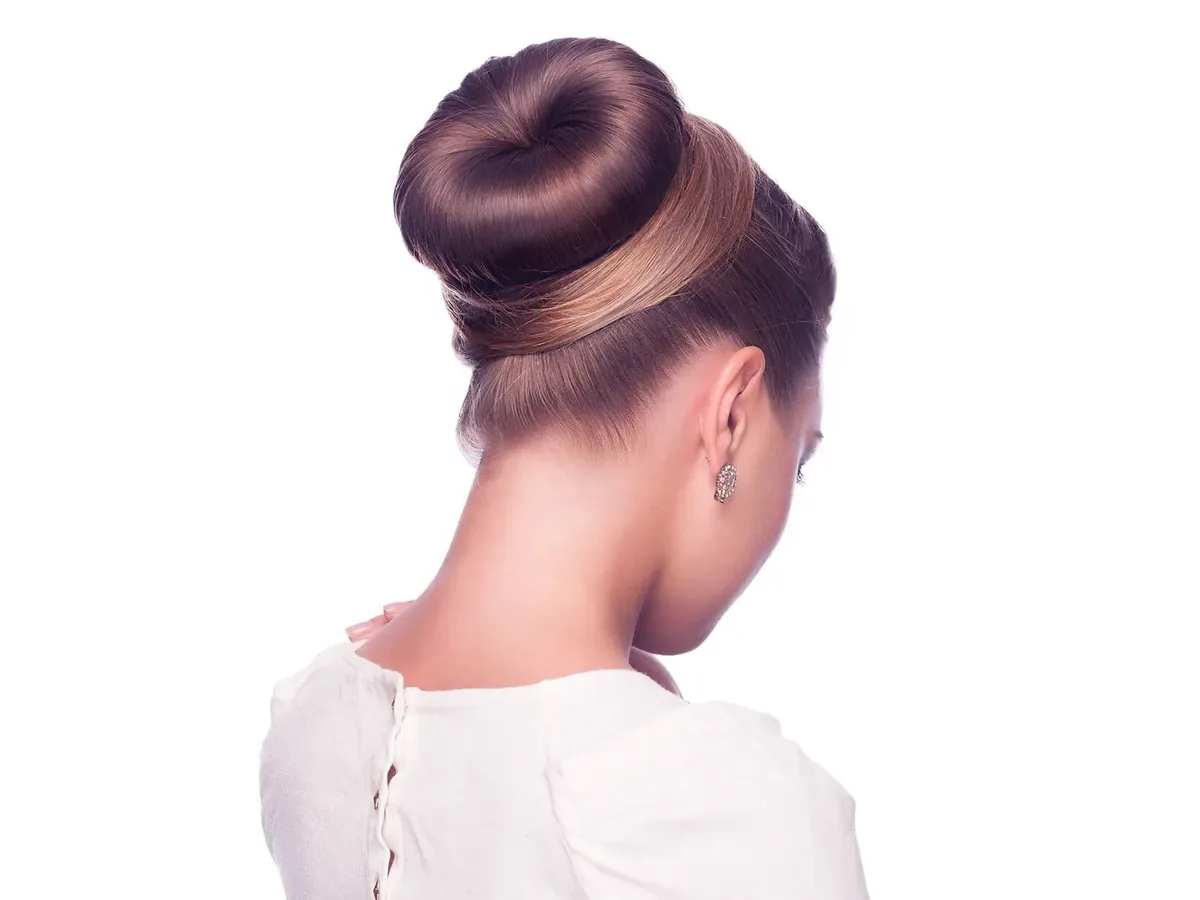
A high bun with a wrapped base is the polished, camera-ready version of the everyday top bun: the hair is gathered high, twisted into a neat bun, and a strand is wrapped around the base to hide the elastic and give the style a finished, salon-quality look. It lifts the face, lengthens the neck, and keeps long hair completely out of the way — ideal for a long day of presenting, teaching, or pitching.
Step by step: gather the hair high, secure it with an elastic, twist the length around the base, pin it with U-pins, then wrap a thin strand around the base and pin the end underneath. What to ask a stylist: for a high bun with a wrapped base and a smooth, bump-free crown — and to keep the bun compact rather than large, so it reads as elegant on camera rather than dramatic.
24. Hollywood Waves
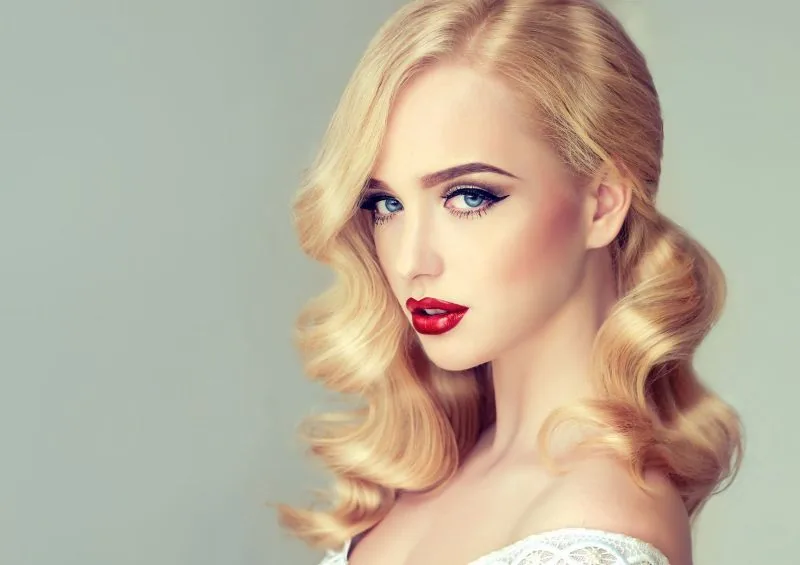
Hollywood waves are the most glamorous down style in this guide: deep, glossy, uniform waves that fall over one shoulder in a smooth, sculpted curtain. They are the style for a red-carpet-style launch, an awards presentation, or any talk where you want to look unforgettable — and they photograph like a dream, because the shine and the shape read clearly even from a distance. The key is uniformity: every wave should be the same size and fall in the same direction.
Time and cost: about 30–40 minutes at home, or a salon styling appointment — this is not a five-minute style. Maintenance: set the waves with clips while they cool, brush them out gently, and finish with a shine spray. Who should avoid it: anyone short on time, anyone presenting outdoors, and anyone whose hair drops its curl quickly — Hollywood waves need patience and the right products to hold their shape.
25. The Low Twisted Bun
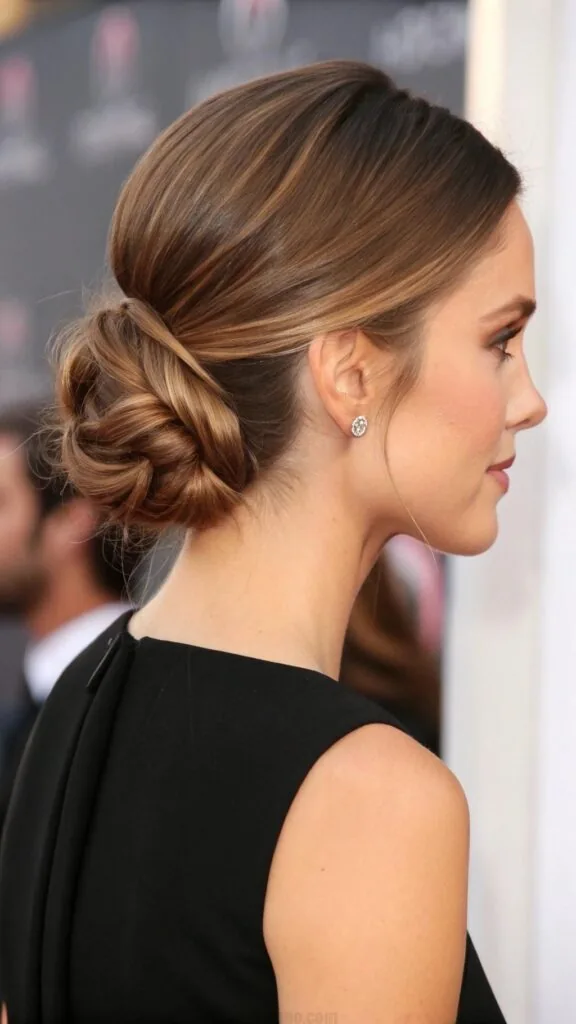
A low twisted bun is the easiest elegant updo you can do on yourself: gather the hair low, split it, twist the two sections around each other, coil the twist into a bun, and pin it. It takes five minutes, it needs no special skill, and it looks like you spent far longer on it — which is exactly what you want on a busy presentation morning. The twist gives the bun texture and grip, so it holds better than a plain bun on fine or slippery hair.
Best for: medium to long hair, busy mornings, and anyone who struggles with a classic chignon. How to style: use a little texturising spray first for grip, twist firmly but not tightly, and pin with U-pins rather than bobby pins for a stronger hold. What to ask a stylist: for a low twisted bun with a soft, slightly loose finish and a few face-framing pieces left out, so the style looks effortless rather than scraped-back.
26. Straight Hair With Curtain Bangs

Straight hair with curtain bangs is the face-framing down style that softens a presentation look without hiding your face: the bangs part in the middle and sweep to each side, framing your eyes and cheekbones, while the rest of the hair falls straight and smooth. It is modern, friendly, and it works beautifully on camera, where the bangs add shape around the face without ever falling into your eyes.
Pros: softens the face, adds instant style to straight hair, and looks great in photos. Cons: bangs need regular trims, they can go limp under warm lights, and they show grease faster than the rest of your hair. Quick verdict: if you already have curtain bangs, this is a five-minute presentation style — smooth them with a round brush, pin them back slightly if they fall forward, and keep a travel-size dry shampoo in your bag.
27. The Controlled Messy Low Bun
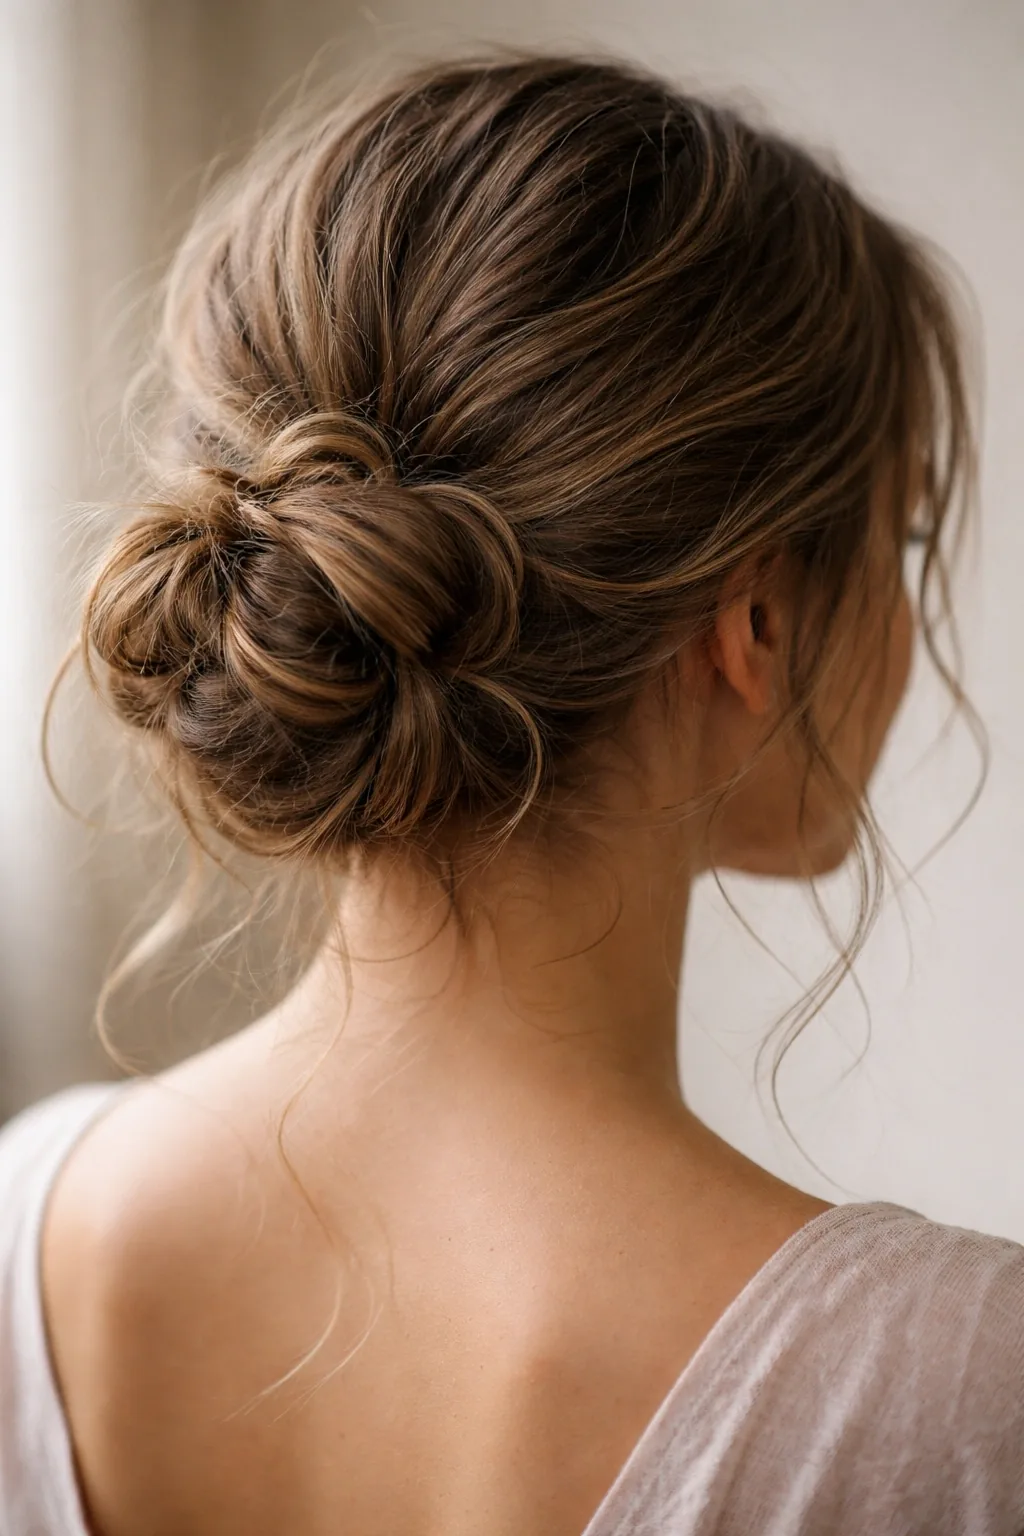
A controlled messy low bun is the relaxed, modern updo that looks effortless but is actually carefully constructed: the bun is loose and textured, a few pieces are pulled out deliberately, and the whole thing is pinned securely underneath. It is the style for creative presentations, workshops, and talks where a tight, formal bun would feel too stiff — polished, but with personality.
Common mistakes: making it too messy, so it looks unfinished on camera, and pulling out too many pieces, which then fall into your face mid-talk. Quick fixes: keep the pulled-out pieces short and to the sides, pin the bun firmly underneath, and spray the hairline lightly. What to ask a stylist: for a low bun with a textured, slightly undone finish and the front pieces kept beside the face — and to show you which pieces to pull out, because the difference between messy-chic and messy is just two or three strands.
28. The Fishtail Braid Low Ponytail
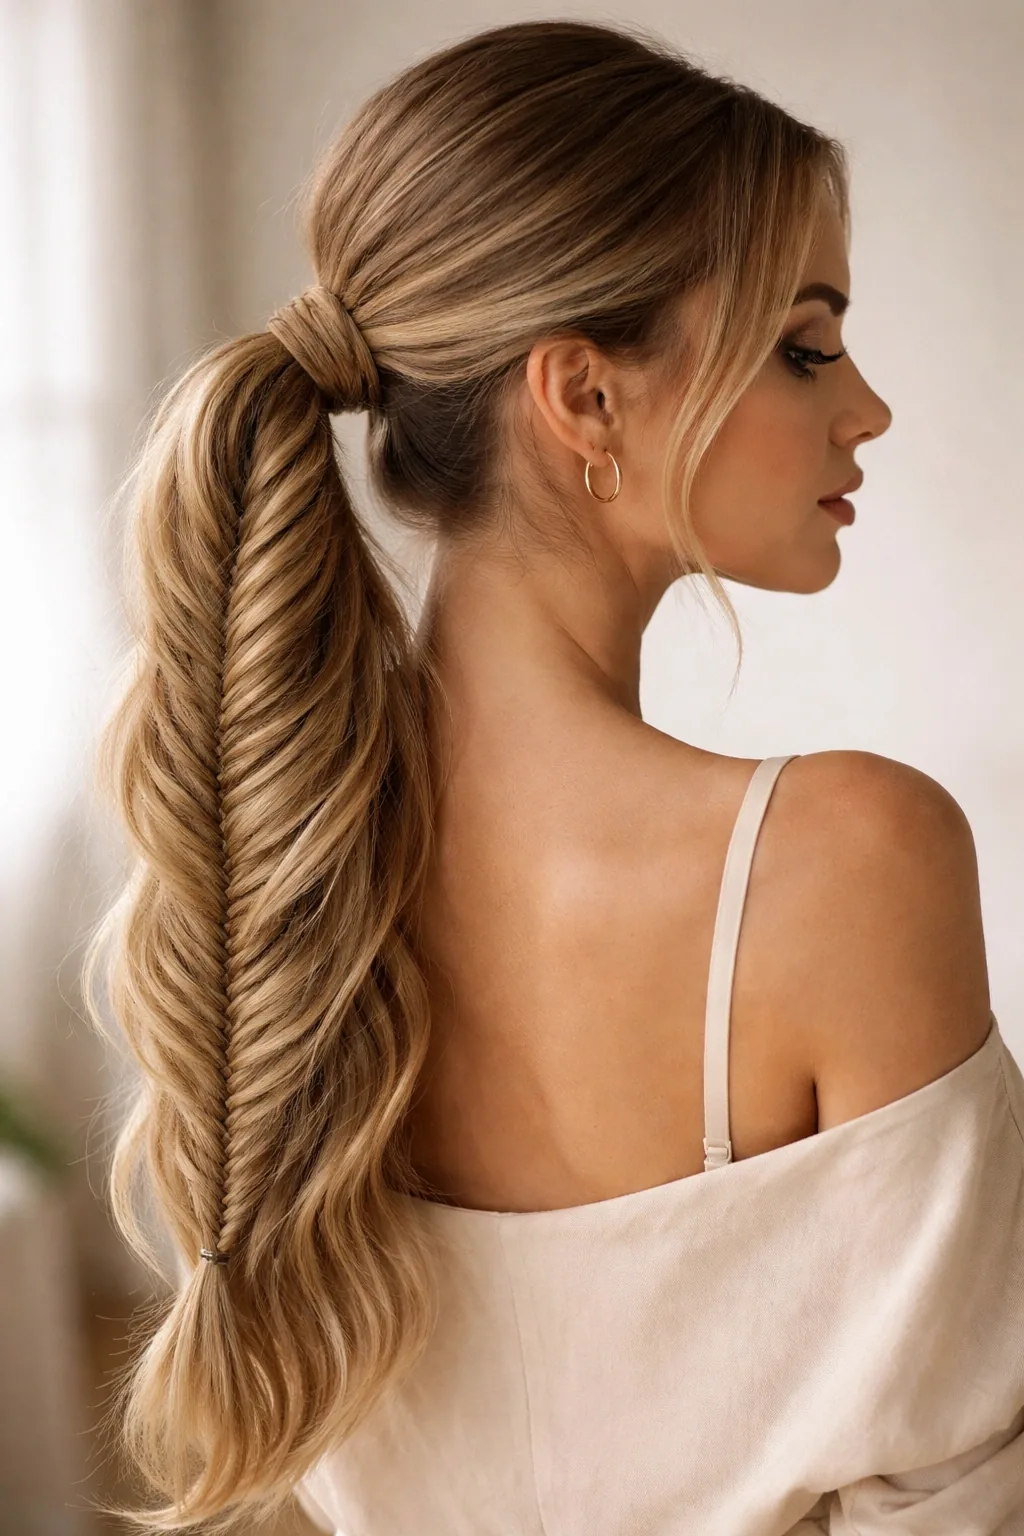
A fishtail braid that ends in a low ponytail is the intricate-looking style that is secretly simple: two sections crossed over each other in small pieces, gathered low, and tied off with a wrapped elastic. It keeps long hair completely controlled, it looks impressive from the back — which matters when you turn to a screen — and it holds its shape for hours, making it a smart choice for an all-day conference or a long teaching session.
Time and cost: about 10–15 minutes once you know the technique, and no salon visit needed. Maintenance: it is one of the most secure styles here, but carry a spare elastic — a fishtail that comes undone is hard to redo quickly. Who should avoid it: anyone with very short layers, which will poke out of the braid, and anyone presenting in under ten minutes — learn it the day before, not the morning of.
29. The Sleek Bob With a Deep Side Part
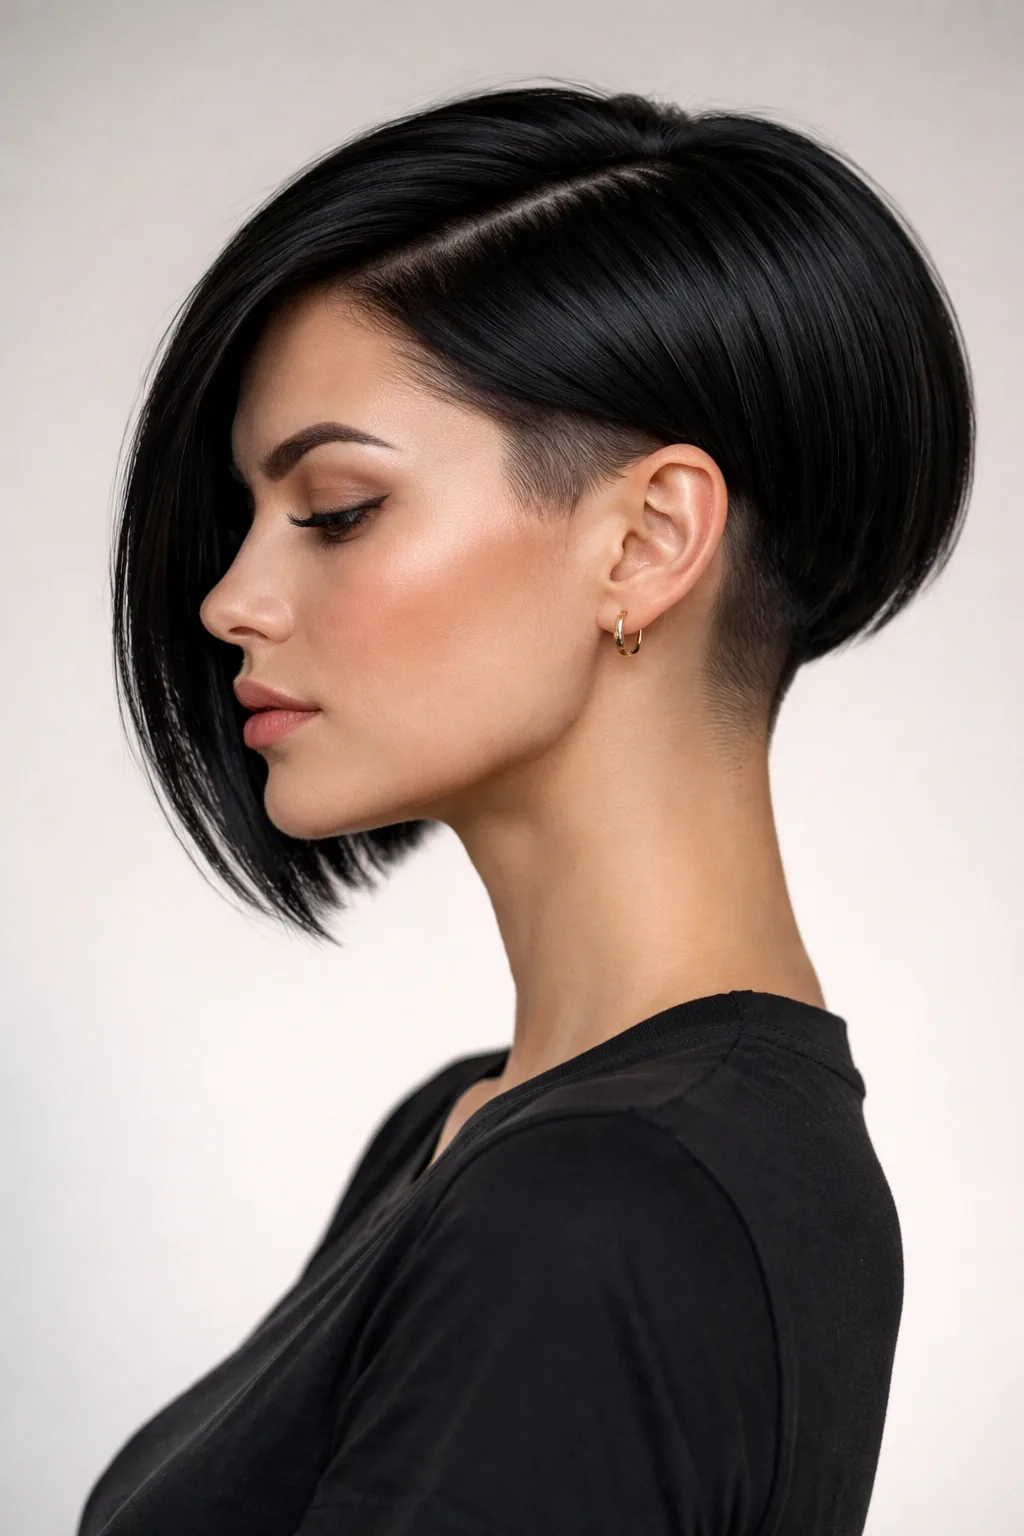
A sleek bob with a deep side part is the sharp, confident short style that means business: the deep part creates instant drama and asymmetry, the sleek finish looks expensive, and the length keeps everything neat and controlled. It is the bob for a pitch, a panel, or a presentation where you want to look like the most polished person in the room, and it works on straight and slightly wavy hair alike.
Best for: short to medium hair, formal and creative settings alike, and video calls, where the strong shape reads clearly on screen. How to style: blow-dry smooth with a paddle brush, set the deep part with a comb, and finish with a shine serum on the ends. What to ask a stylist: for a bob with a deep side part and the longer side shaped to fall just past the cheekbone, so the style frames your face without covering it.
30. The Half-Up Bun
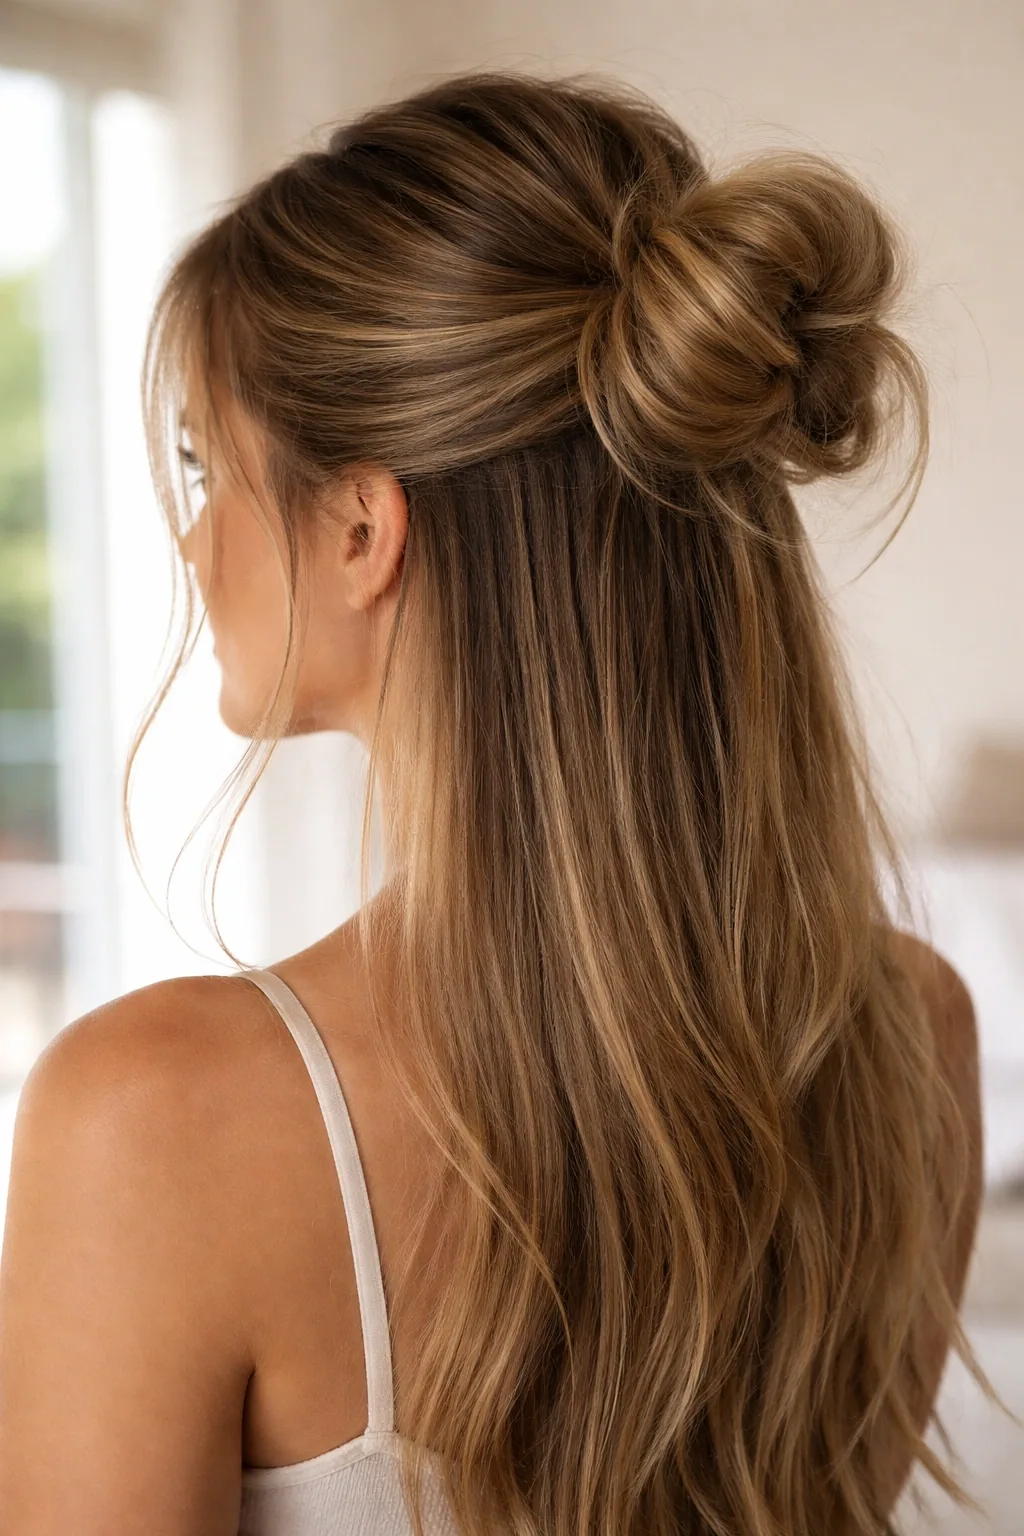
A half-up bun — the top section gathered into a small bun while the rest falls loose — is the casual-cool presentation style for creative workplaces, classrooms, and informal talks. It keeps the hair off your face and adds a little height at the crown, which photographs well, while the loose lengths keep the look friendly and approachable. It is also one of the fastest styles in this guide, which makes it a lifesaver on a busy morning.
Step by step: gather the top half of your hair, twist it into a small bun, pin it with two bobby pins, and leave the rest smooth or lightly waved. What to ask a stylist: for a half-up bun with the bun sitting high on the crown and the loose hair left sleek — and to keep the bun small and neat, because a large, loose bun can look unfinished on camera.
31. Pinned-Back Straight Hair With Clips
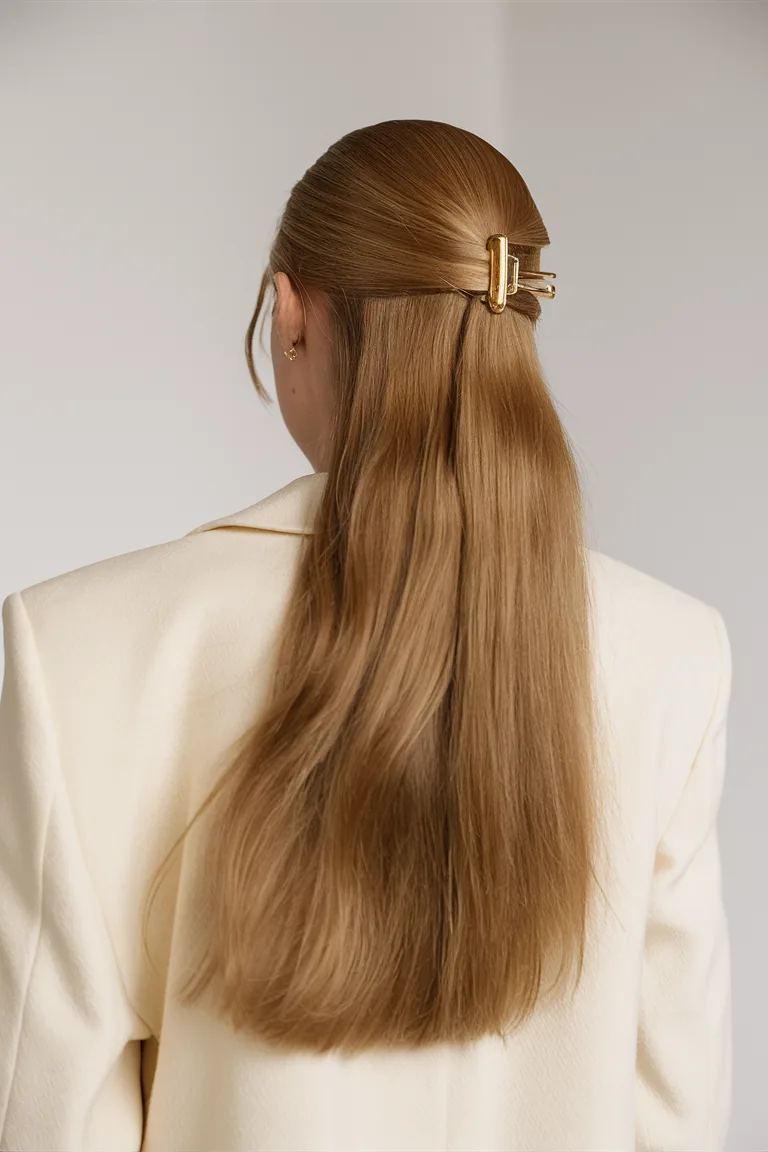
Pinned-back straight hair with simple clips is the minimalist presentation style for anyone who loves their hair down but needs it out of their face: two small sections are pinned back at the sides, the rest falls straight and smooth, and the clips add a quiet, polished detail. It is neat, modern, and it takes about two minutes, which makes it the best emergency presentation style in this guide.
Pros: fast, simple, works on almost every length, and the clips stop the hair falling forward when you look down at notes. Cons: it is the least secure style here — the pins can slip, and the hair can fall forward if you move a lot. Quick verdict: choose flat, strong clips that match your hair colour, pin the sections back firmly, and keep a spare clip in your pocket — this style is brilliant, but only if the pins hold.
32. Soft Curls With Pinned Sides
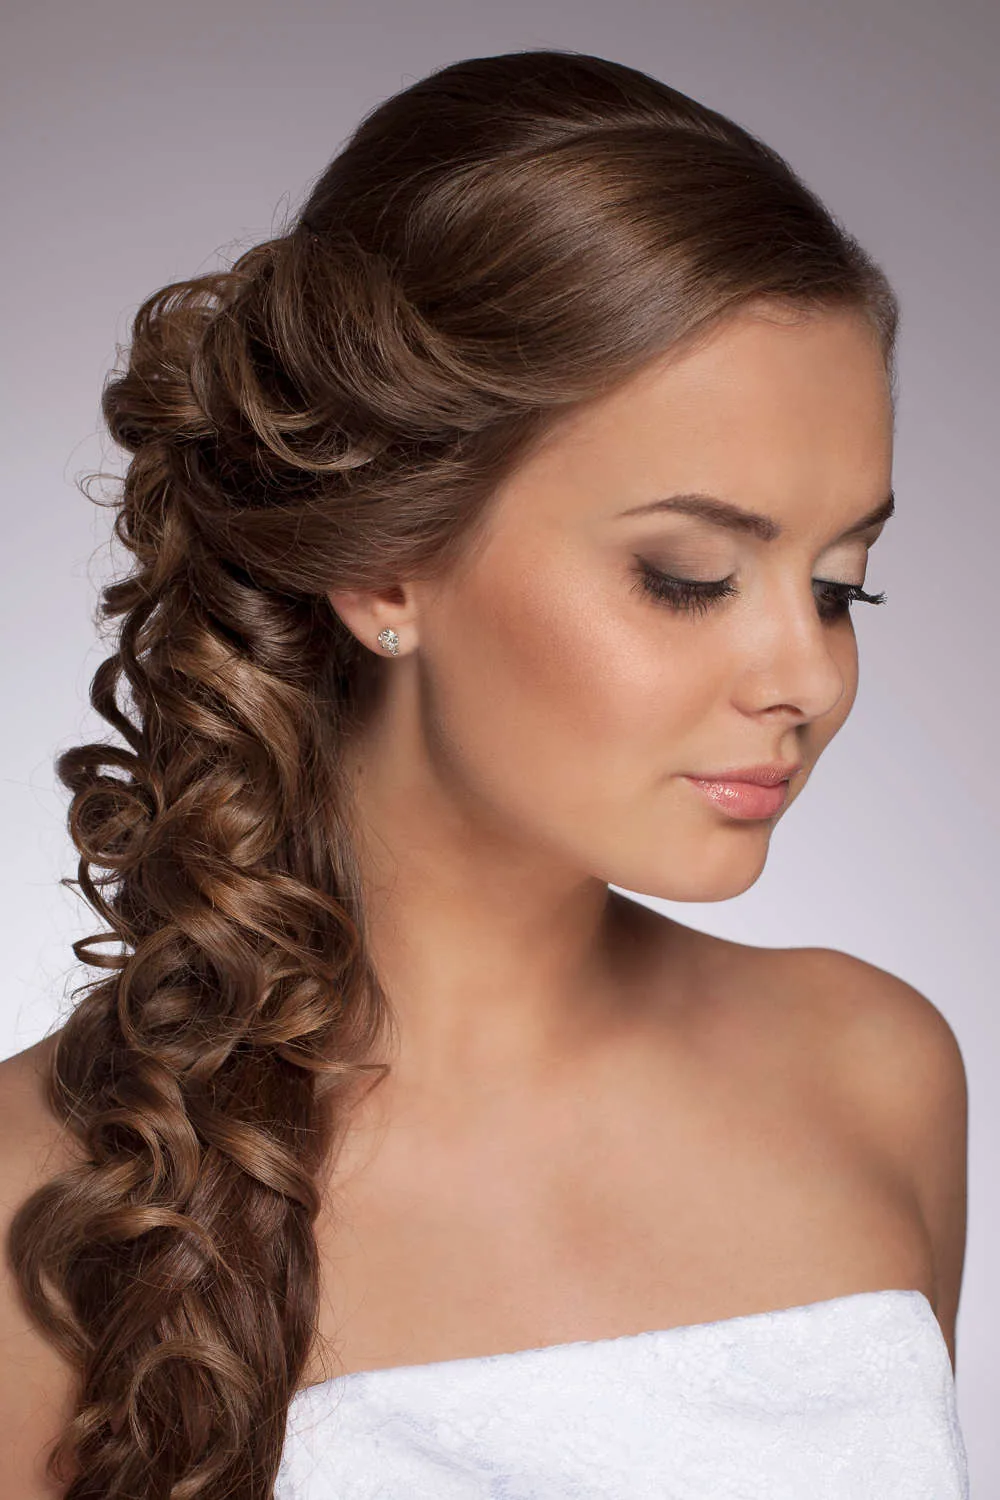
Soft curls with the sides pinned back are the warm, friendly presentation style that works for almost everyone: the curls add volume and movement, the pinned sides keep your face clear, and the whole look feels approachable rather than formal. It is ideal for teaching, community talks, and creative presentations, and it suits wavy, curly, and permed hair especially well, because the curls are doing the work rather than being fought.
Time and cost: about 15 minutes with a curling iron, or a wash-and-go on naturally curly hair. Maintenance: pin the sides with flat clips, set the curls with a light spray, and avoid touching them — the more you touch curls, the more they frizz. Who should avoid it: anyone presenting in high humidity without an anti-frizz product, and anyone whose curls drop within an hour — in that case, a braided or pinned-up style will hold far longer.
33. The Modern Beehive-Inspired Volume
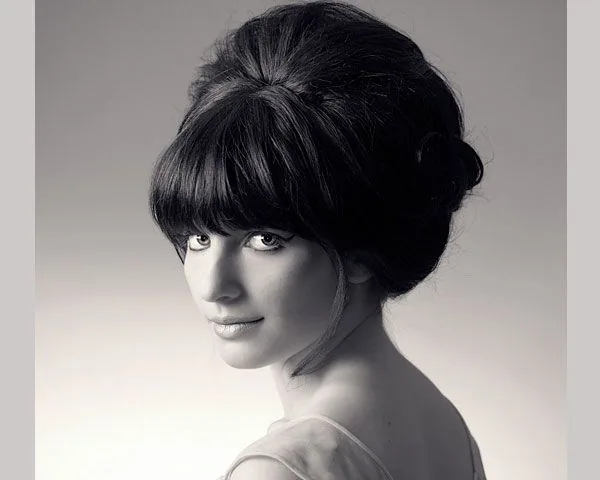
A modern beehive-inspired style — height at the crown, smooth sides, and the length gathered low or left down — is the bold, vintage-flavoured presentation look for anyone who wants to be remembered. The height lifts the face and adds presence on stage, and the smooth finish keeps it looking polished rather than costume-like. It is not an everyday style, but for a big keynote or a special occasion talk, it is unforgettable.
Best for: stage talks, keynotes, and formal events where presence matters. How to style: backcomb the crown gently, smooth the top layer over it, pin the sides back, and gather the length into a low bun or leave it in soft waves. What to ask a stylist: for a modern, soft beehive with height at the crown and a smooth, polished finish — and to keep the volume moderate, because the goal is presence, not a costume.
34. The Low Ponytail With a Wrapped Hair Tie
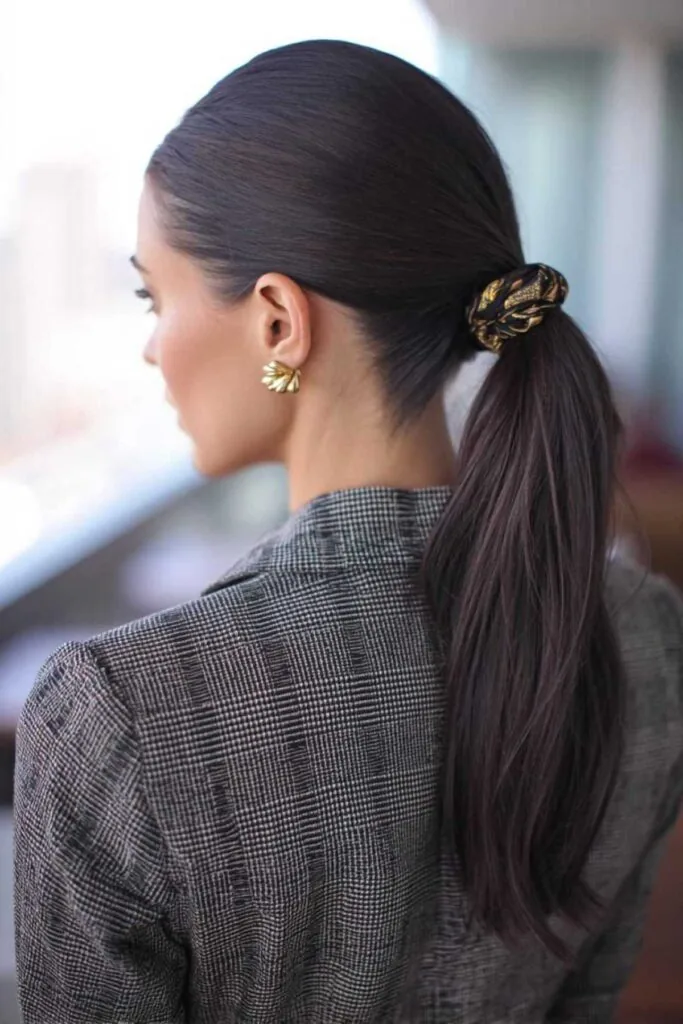
A low ponytail with a wrapped hair tie is the small detail that turns an ordinary ponytail into a presentation style: instead of a visible elastic, a strand of your own hair is wrapped around the base and pinned underneath, giving the ponytail a seamless, salon-finished look. It is a tiny change that makes a big difference on camera, where a bright elastic would catch the eye for all the wrong reasons.
Common mistakes: wrapping the strand too loosely, so it unravels, and using a strand that is too thin, so the elastic shows through. Quick fixes: take a thick strand from underneath the ponytail, wrap it twice, and pin the end firmly underneath with a bobby pin. What to ask a stylist: for a low ponytail with the elastic fully hidden by a wrapped strand and the tail left straight and smooth — and to show you the wrapping technique, because it is a skill worth learning for every future presentation.
35. The Wavy Lob With a Side Part
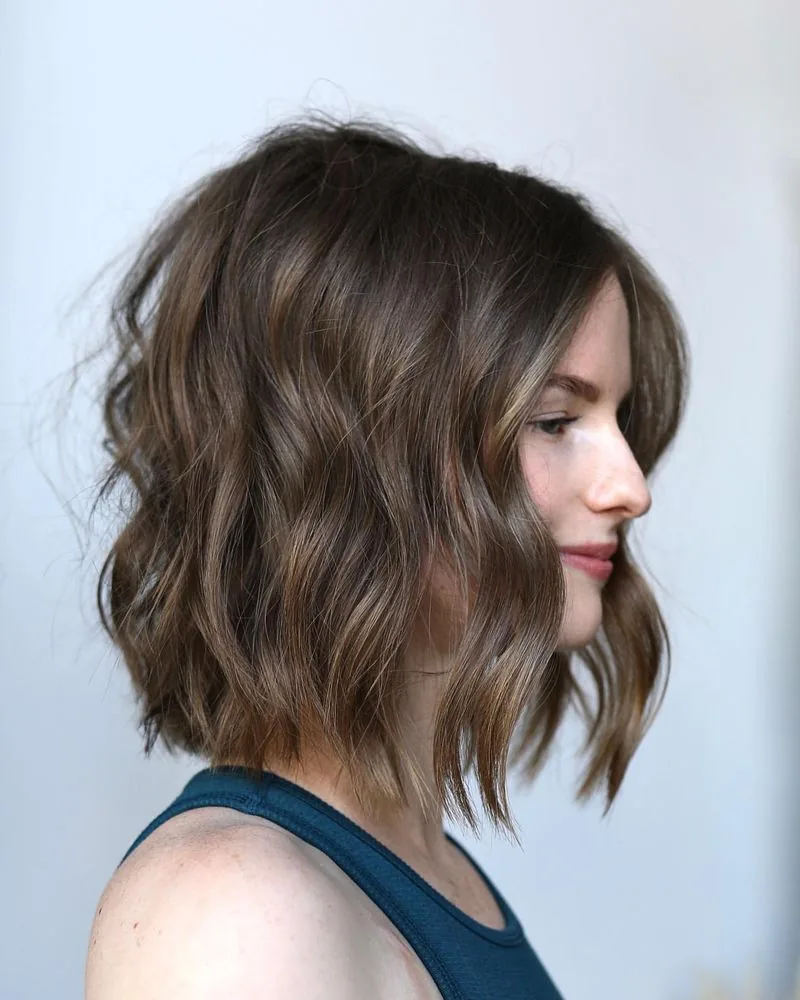
A wavy lob with a side part is the relaxed, confident medium-length style that works for almost any presentation: the waves add movement and life, the side part adds polish, and the length is short enough to stay out of your way but long enough to feel feminine and full. It is the style to choose when you want to look like yourself on your good hair day, rather than like someone in a costume.
Pros: versatile, flattering on most face shapes, and it looks great on camera. Cons: the waves need refreshing if the talk runs long, and fine hair can lose its wave within an hour. Quick verdict: curl the hair in large sections, brush the waves out softly with your fingers, set the side part with a little spray, and this easy style will carry you through a whole presentation without a single touch-up.
36. The Curly High Puff Styled Back
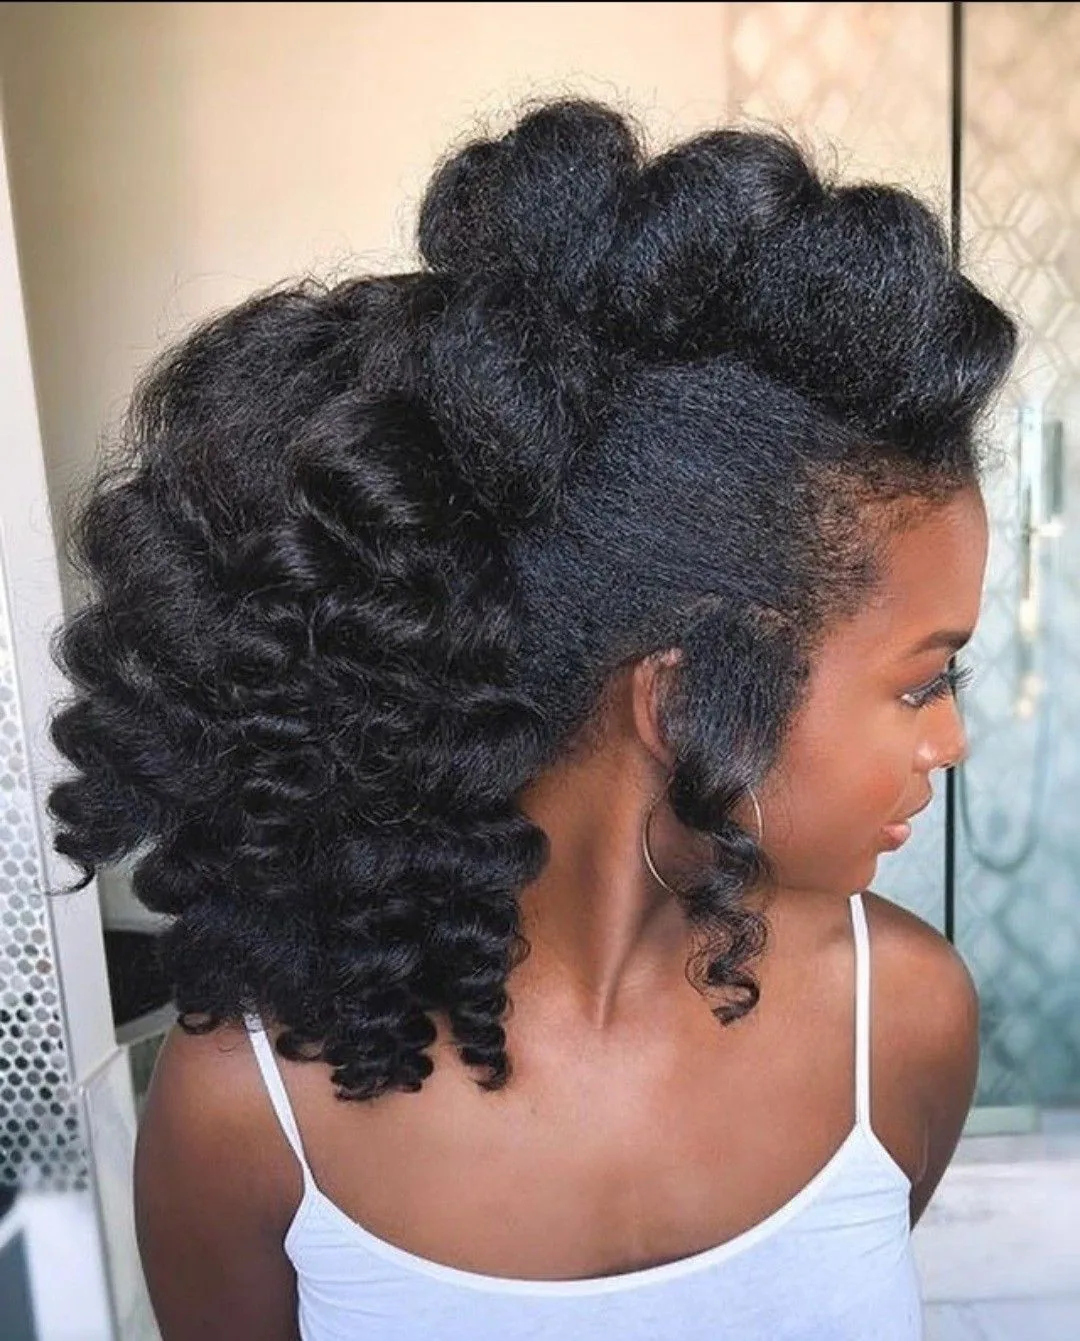
A curly high puff styled back is the joyful, confident presentation style for naturally curly and coily hair: the curls are gathered high and shaped into a full, rounded puff, the edges are smoothed, and the face is completely clear. It is bold, beautiful, and it celebrates your texture rather than hiding it — and because the hair is gathered up and back, it stays put through a whole talk, however much you move.
Best for: curly and coily hair, stage talks, and any presentation where you want your personality to shine. How to style: define the curls with cream or gel, gather the hair high with a wide, soft tie, shape the puff gently with your hands, and smooth the edges with a brush and a little gel. What to ask a stylist: for a high puff with smoothed edges and a rounded, balanced shape — and to keep the puff secure with a strong, wide tie, so it holds its height through the entire presentation.
What is the best hairstyle for a presentation?
For most people, the best hairstyle for a presentation is a sleek low bun or a polished low ponytail, because both keep hair off your face, stay secure for hours, and look polished from every angle. If you prefer your hair down, a smooth blowout with a side part or soft low waves are the safest choices. Whichever style you pick, rehearse in it first — a style you trust is always better than a fancier one you have never worn for a full day.
Should I wear my hair up or down for a presentation?
Both work, as long as the style keeps your face clear and stays put. Hair up — a low bun, a French twist, a braided updo — is the safer choice for long talks, warm rooms, and formal settings, because it cannot fall into your face. Hair down works well for shorter talks and on camera, provided it is smooth, pinned back at the sides, and tested through a full rehearsal. If you are unsure, choose up: it removes one whole category of worry.
How do I keep my hair from falling in my face while presenting?
Start with a style that is anchored — a low bun, a braid, or pinned-back sections — rather than relying on willpower. Use bobby pins that match your hair colour, crossed in an X for a stronger hold, and set the style with a flexible-hold hairspray. Keep a spare pin and a travel spray in your pocket, and do the five-minute check before you go on: shake your head gently, and if anything moves, pin it now rather than during your second slide.
What hairstyle is best for a presentation on camera or Zoom?
For a video call or a recorded presentation, choose a smooth, face-framing style with clean edges — a sleek low bun, a smooth blowout with a side part, or straight hair with the sides pinned back. The camera exaggerates frizz and flyaways, so smooth the hairline with a little serum and check your style on camera before the call starts, not just in the mirror. Avoid very dark, flat styles that disappear against a dark background, and avoid anything that needs constant adjusting.
Can I wear a ponytail for a formal presentation?
A low, polished ponytail with a wrapped hair tie is perfectly appropriate for a formal presentation, and it is one of the most popular choices among professional speakers. A high, swinging ponytail is less formal and better suited to a pitch or a stage talk. The difference is in the finish: smooth the crown, hide the elastic, keep the tail straight and neat, and a ponytail reads as deliberate and polished rather than casual.
How far in advance should I try a new presentation hairstyle?
Try any new hairstyle for a presentation at least a week before the real event, and wear it for a full day — through a rehearsal, a walk, and a few hours of normal activity. That trial run tells you whether it slips, pulls, frizzes, or gives you a headache, and it gives you time to practise the technique or choose a different style. Never try a brand-new style on the morning of a presentation; the morning is for a style you already trust.
What hairstyles for a presentation suit short hair?
Short hair suits a sleek pixie styled smooth, a classic bob with tucked ends, and a sleek bob with a deep side part — all three keep the face clear and look polished with almost no pinning. A little shine serum and a clean part are usually all the styling short hair needs, and a small clip can hold back any piece that falls forward. The advantage of short hair is that there is almost nothing to go wrong, which is exactly what you want on presentation day.
How do I make my presentation hairstyle last all day?
Start with clean, dry hair, add a texturising spray or a little mousse for grip, and anchor the style with crossed bobby pins rather than a single pin. Set it with a flexible-hold hairspray from a distance, and carry a small kit — spare pins, a travel spray, and a little serum — for touch-ups. Avoid touching your hair during the talk, because hands add oil and loosen pins, and do a quick mirror check between sessions rather than waiting until the style has already fallen.
What should I ask my stylist before a big presentation?
Tell your stylist the setting, the length of the talk, and whether there will be a camera, then ask for a style that keeps your face clear, stays secure for hours, and looks the same from the front, side, and back. Ask them to show you how to re-pin it yourself, which products they used, and whether the style will survive wind, humidity, or warm stage lights. A trial run a week before is worth more than any single piece of advice.
Do I need to match my hairstyle to my outfit for a presentation?
Your hairstyle and outfit should work together, but they do not need to match exactly. A formal outfit — a suit or a structured dress — pairs best with a classic updo or a sleek down style, while a softer outfit suits a softer hairstyle. The simplest rule is balance: if your outfit is bold, keep your hair simple, and if your outfit is plain, your hair can carry a little more style. Above all, the combination should look intentional, like one outfit rather than two separate decisions.
Conclusion: Hairstyles for a Presentation That Let Your Words Shine
The best hairstyles for a presentation are not the most complicated ones — they are the ones that keep your face clear, stay exactly where you put them, and let the audience focus on what you came to say. A sleek low bun, a polished ponytail, a smooth blowout, or defined curls pinned back: whichever you choose, the test is the same. Does it survive a full rehearsal? Does it look the same from the side and the back? And can you forget about it completely once you start talking?
Pick your style a week ahead, practise it, run the five-minute check before you walk in, and pack the small kit that fixes the three things that actually go wrong. Then forget about your hair entirely and give the presentation you prepared. When your hair is doing its job properly, nobody in the room will notice it at all — and that is exactly the point.

