

Okay, let’s be real. We’ve all had those days where our hair feels like a chore. You want it up and out of the way, but a basic ponytail just feels… blah. I get it. That’s why I’m obsessed with the laced-up ponytail. It’s the perfect fix.
It takes that simple, trusty style and adds a touch of intricate, romantic detail that feels special. It’s easier than it looks, works for everything from the gym to a wedding, and is the ultimate way to look polished in seconds.
Think of this as your ultimate guide. I’m breaking down exactly how to do it, plus giving you a ton of ideas to match your vibe, whether you’re into old money hair simplicity or something with a bit more edge. Let’s turn that everyday ponytail into your new signature look.
What Is a Laced Ponytail, Anyway?
Simply put, it’s a regular ponytail with a beautiful braided detail woven right down the center. Instead of a plain hair tie holding everything, you create a “lace” or braid with small sections of hair from the ponytail itself.
You then wrap that braid around the base to hide the elastic. The result is elegant, secure, and looks like you spent an hour when it really takes minutes. It’s a game-changer for 2026 hairstyles that are both pretty and practical.
Gather Your Tools (You Don’t Need Much)
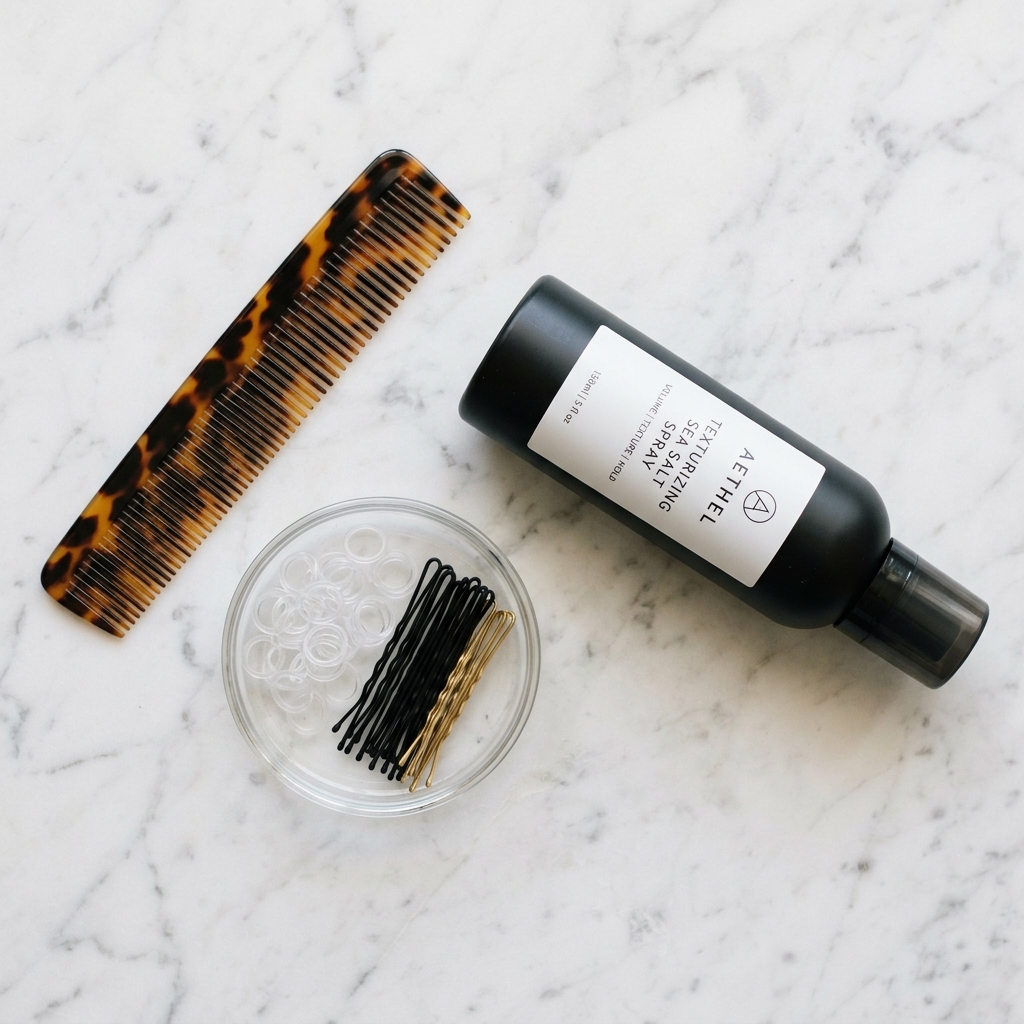
You likely have everything already. Here’s your checklist:
- A fine-tooth comb for smoothness.
- Two clear or small elastic bands that match your hair color.
- A few bobby pins (the mini ones are great).
- Light-hold hairspray or a texture spray.
That’s it! No fancy equipment needed. The magic is all in the technique. A little spray helps grip, especially if your hair is very silky.
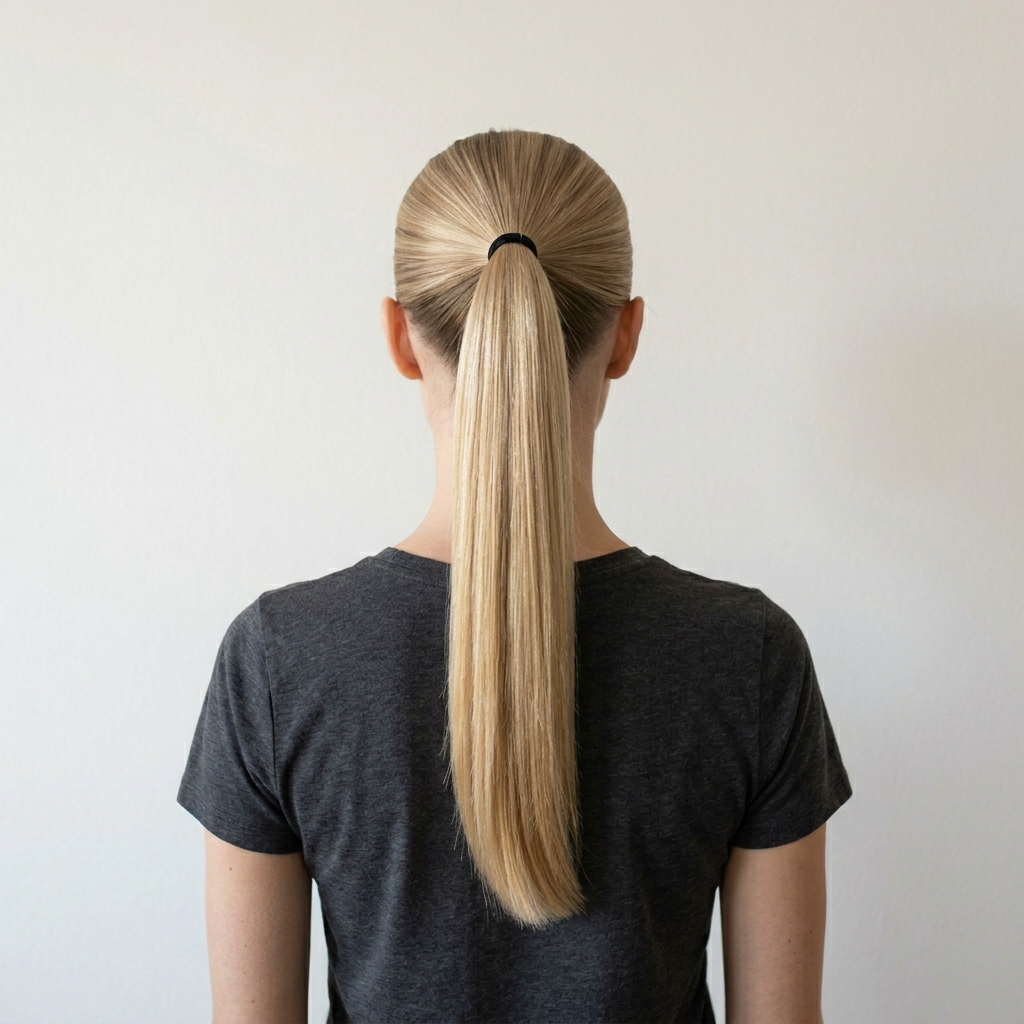
The Foundational Step: The Perfect Base Ponytail
Everything starts here. A messy base means a messy laced style. For a classic look, brush all your hair back smoothly. Use the comb to gather it at your desired height.
Secure it tightly with one of your clear elastics. For extra polish, take a tiny section of hair from underneath the ponytail and wrap it around the elastic, pinning it beneath. This gives you a clean canvas to work with.
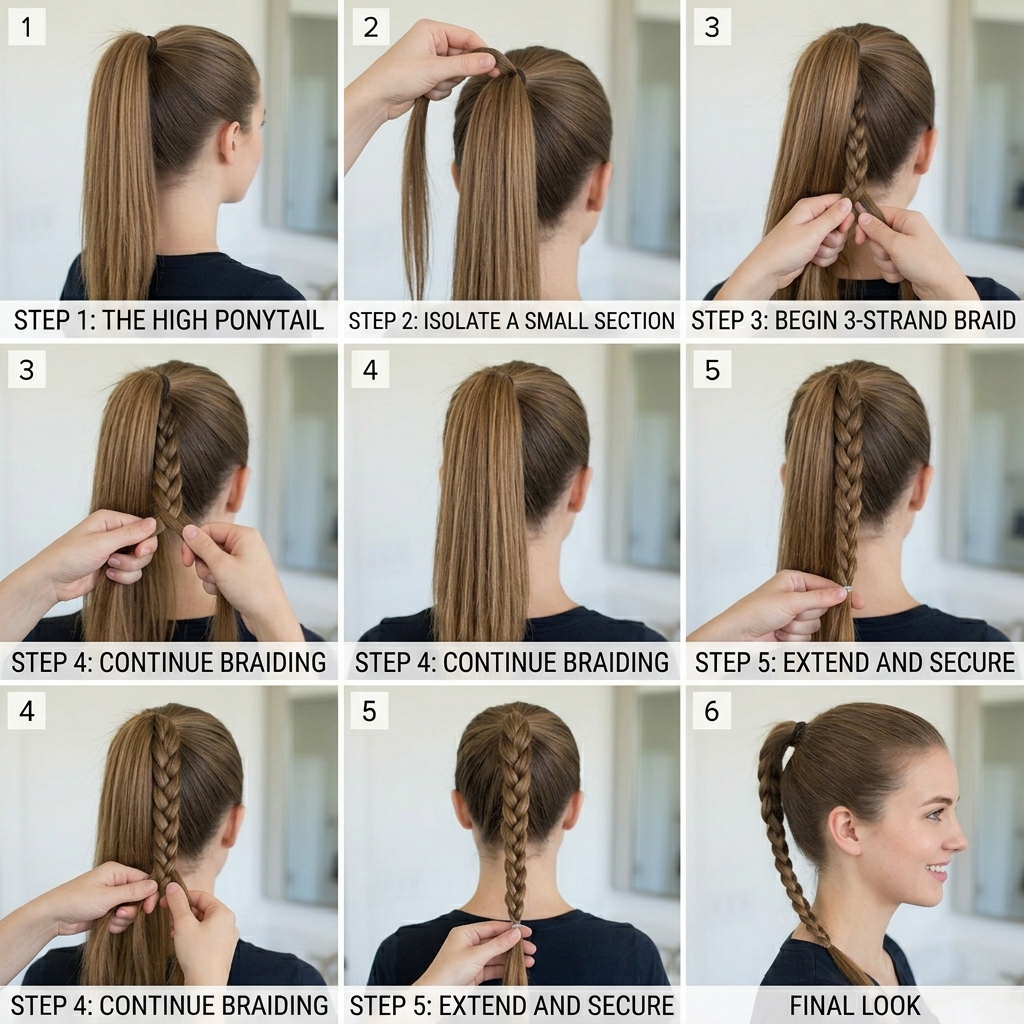
Classic Laced Ponytail: Step-by-Step
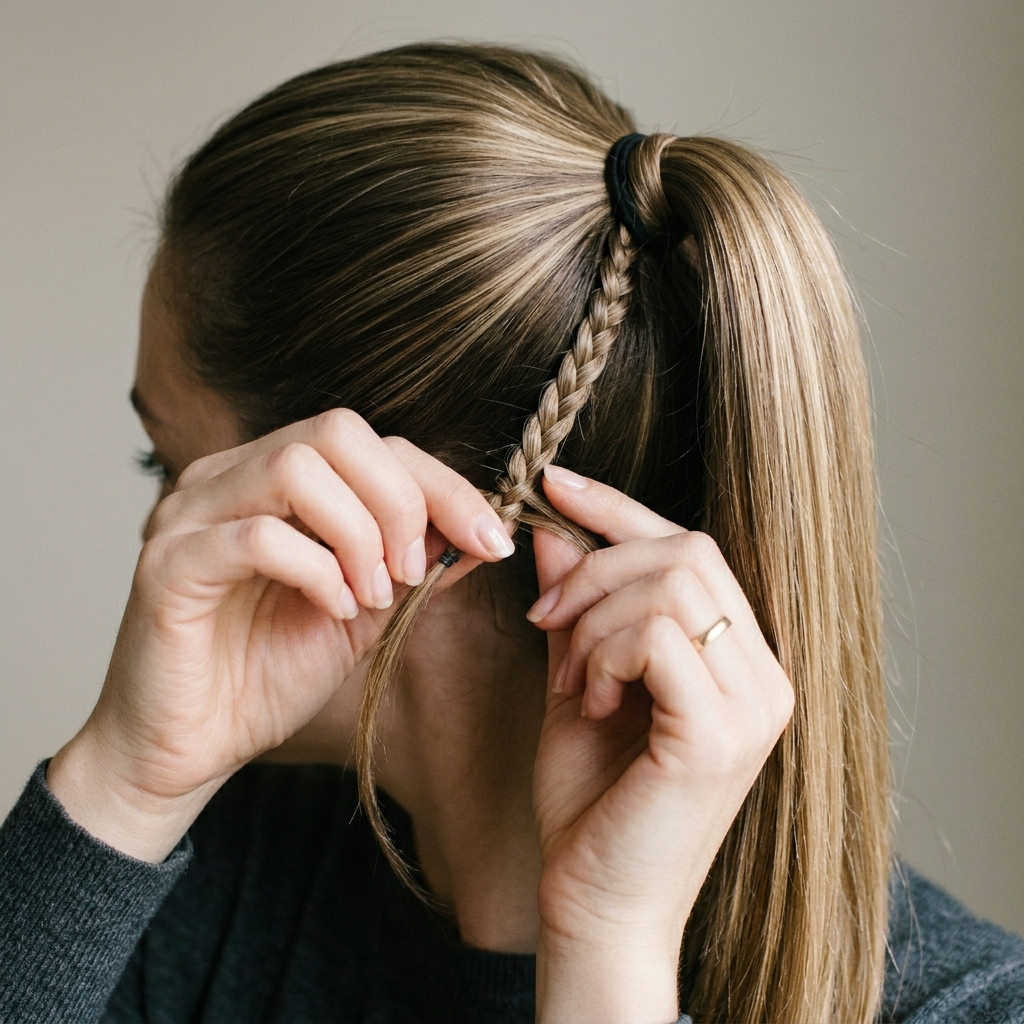
- From your secured ponytail, take a small, thin section of hair from the top.
- Divide this section into three strands and begin a simple three-strand braid.
- Braid down about two inches, then secure the end with the second small elastic.
- Now, gently pull the braid to loosen it slightly, creating that “laced” effect.
You’ll now have a delicate braid hanging from your ponytail. This is your lace! The next steps show you what to do with it.
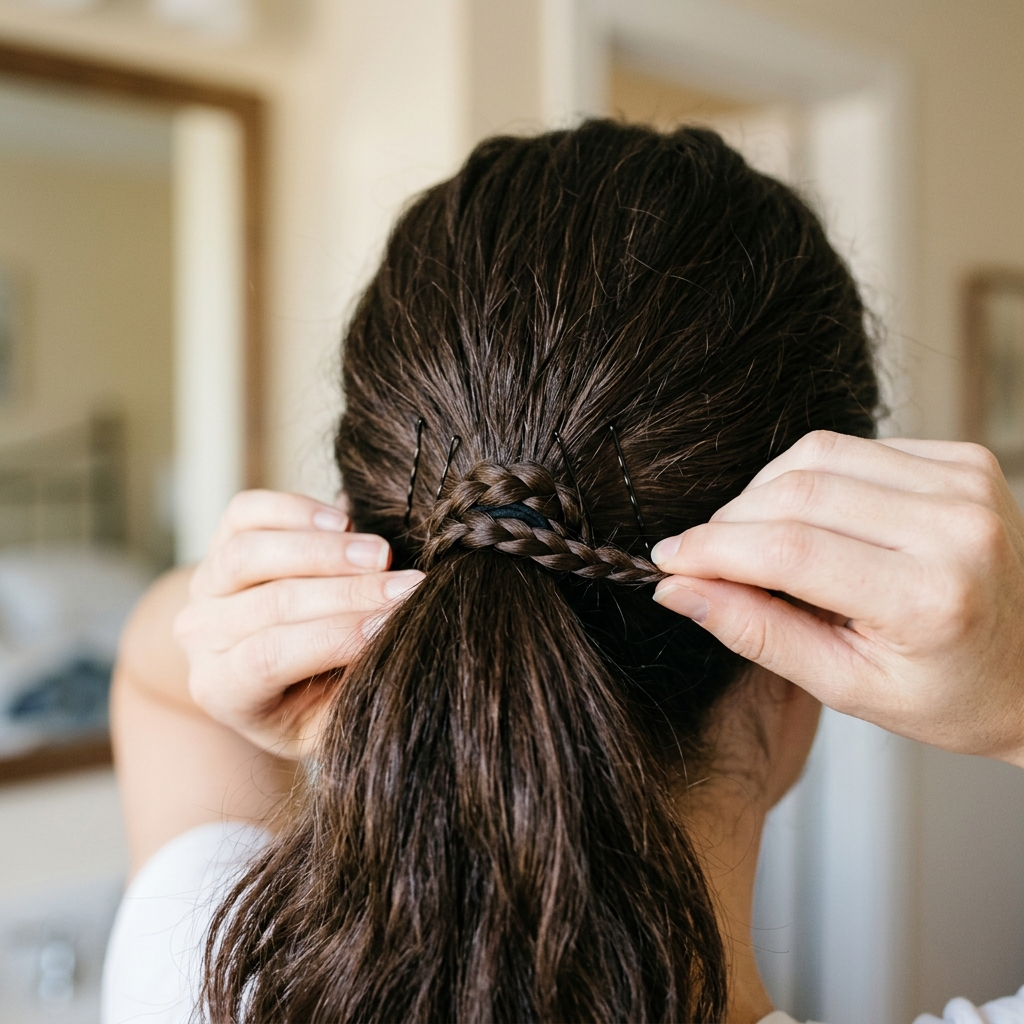
The Simple Wrap & Tuck Finish
This is the easiest finish. Take your new little braid and wrap it around the base of your ponytail, covering the original elastic. Tuck the braid’s elastic end under the wrapped section.
Secure it in place with 1-2 bobby pins, pushing them through the wrapped braid and into the base of your ponytail. Give it a gentle tug to adjust. This creates a beautiful, seamless look that hides all the mechanics.
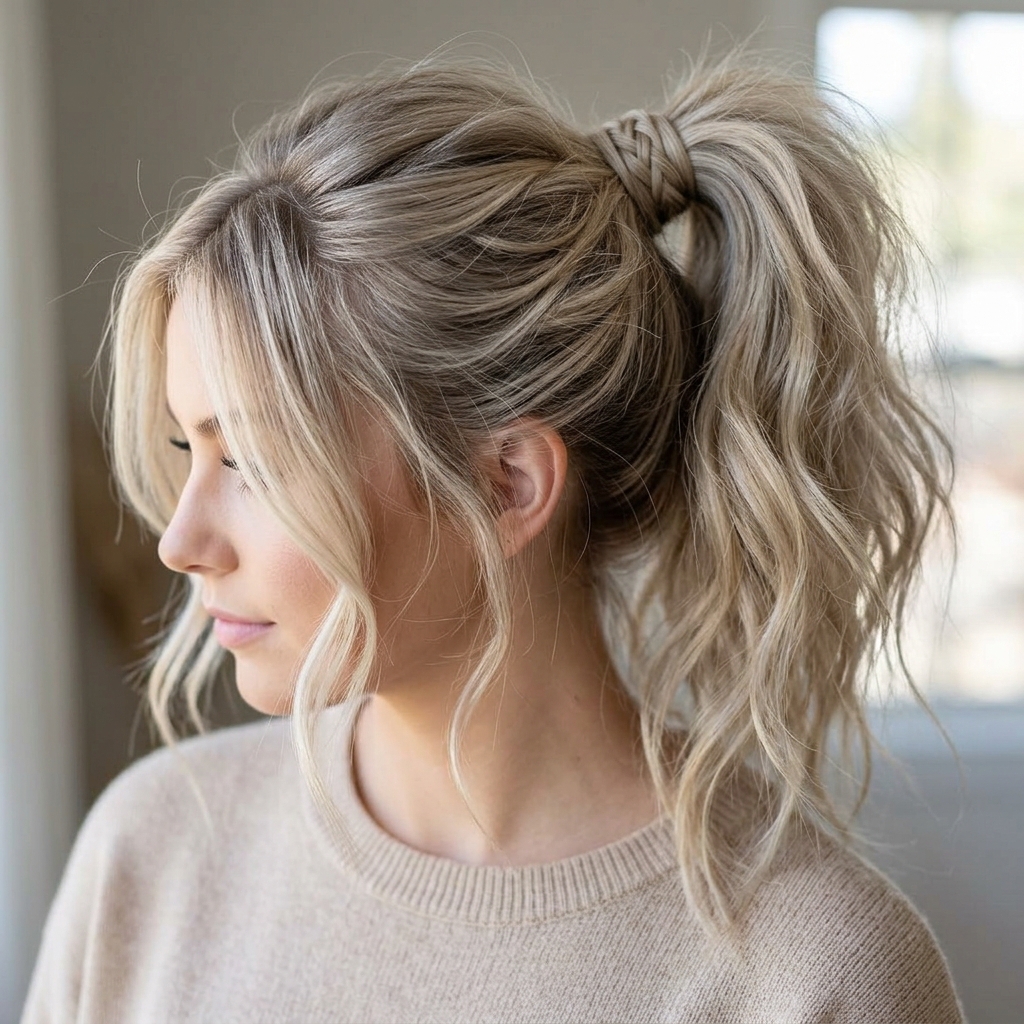
For a Soft, Romantic Vibe
Loosen everything up! After you’ve wrapped and pinned the braid, gently pull on the sides of your ponytail to create soft volume. Pull out a few face-framing pieces near your temples and curl them lightly.
This style pairs perfectly with flowy dresses and has that effortless, romantic feel. It’s a far cry from a severe ballerina bun and feels very “done but not overdone.”

The Sleek & Polished Office Look
This is old money hair meets modern polish. Start with a middle part and use a strong gel or pomade to slick down any flyaways. Your base ponytail should be extremely tight and low at the nape of your neck.
Execute the lace braid neatly and wrap it tightly. The result is powerful, elegant, and will stay impeccable through back-to-back meetings. It’s a quiet luxury bob alternative for long hair.

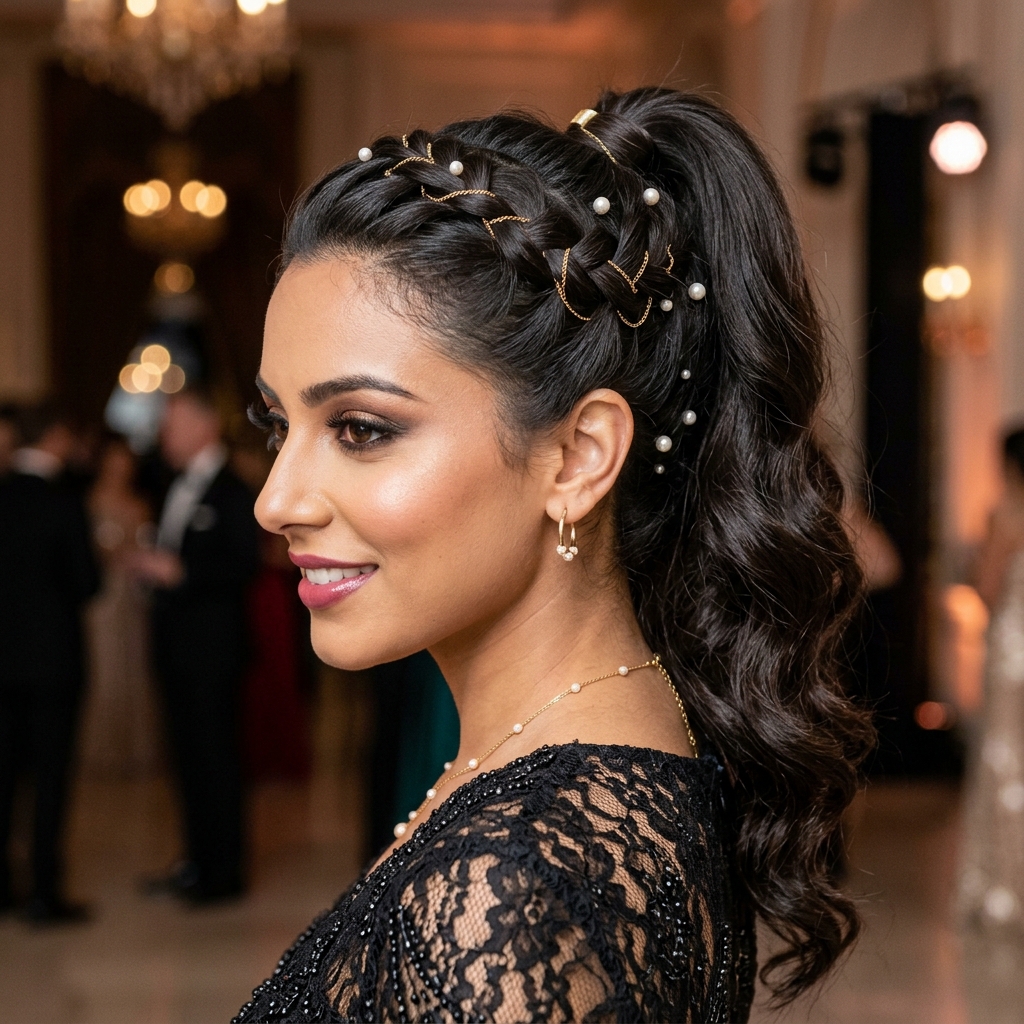
Add Some Glam with Accessories
Don’t be afraid to dress it up. After wrapping your braid, slide in a few pearl-ended pins or a delicate chain hair accessory. You can also use a silk scarf as your “lace.”
Just tie a thin scarf around the base of your ponytail and incorporate it into your braid. This instantly elevates the style for a night out and taps into the glitchy glam hair trend of mixing textures.
The Boho Festival Twist
Go bigger and more textured! Start with second-day hair or add texturizing spray. Create a messy, side-swept base ponytail. Make your lace braid chunkier and looser.
Instead of a tight wrap, let the braid drape along the side before pinning. Add a few colorful threads or tiny flowers woven into the braid for that ultimate festival feel.

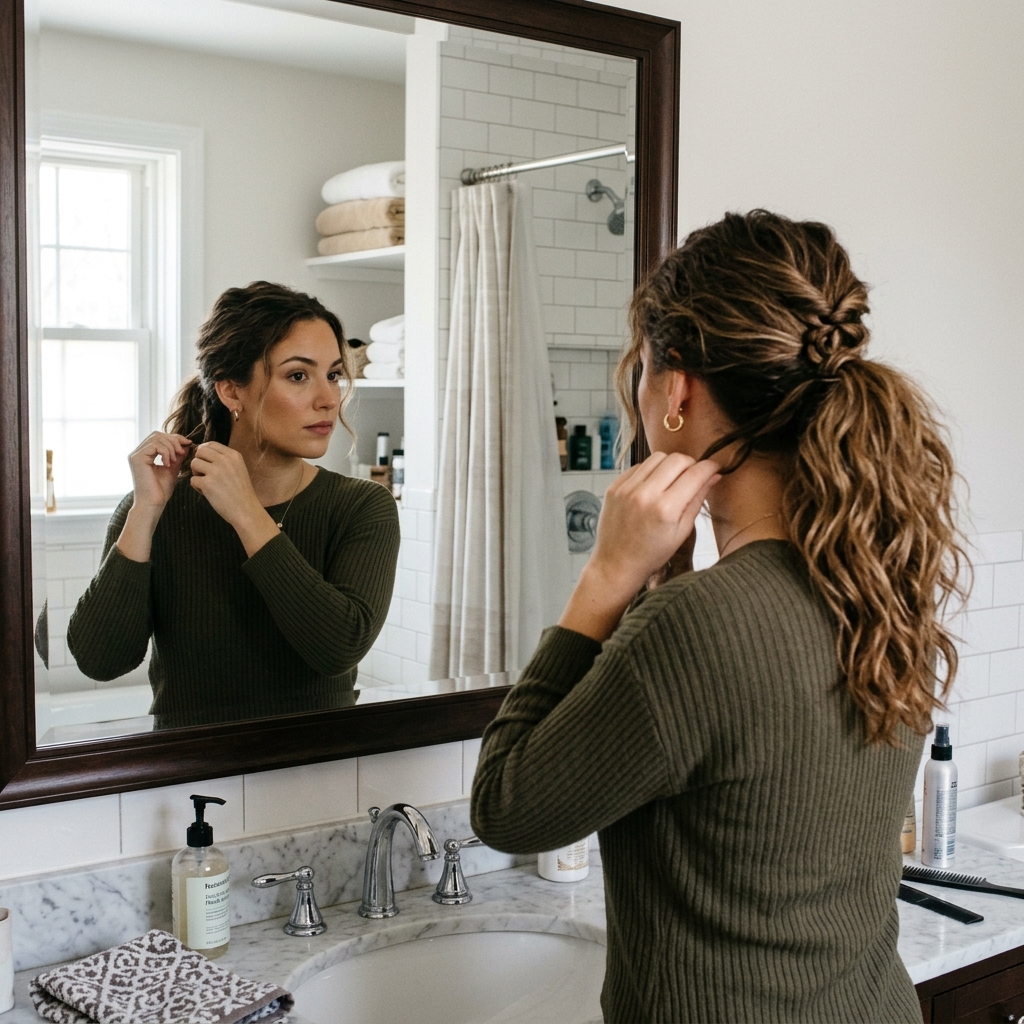
Half-Up, Half-Down Laced Style
Perfect for when you want to show off your length. Gather just the top section of your hair, as if you’re making a half-up ponytail. Create your laced braid with this top section only.
Wrap and pin it at the crown. Let the rest of your hair flow down. This gives you all the beautiful detail without putting all your hair up. It’s romantic and incredibly flattering.

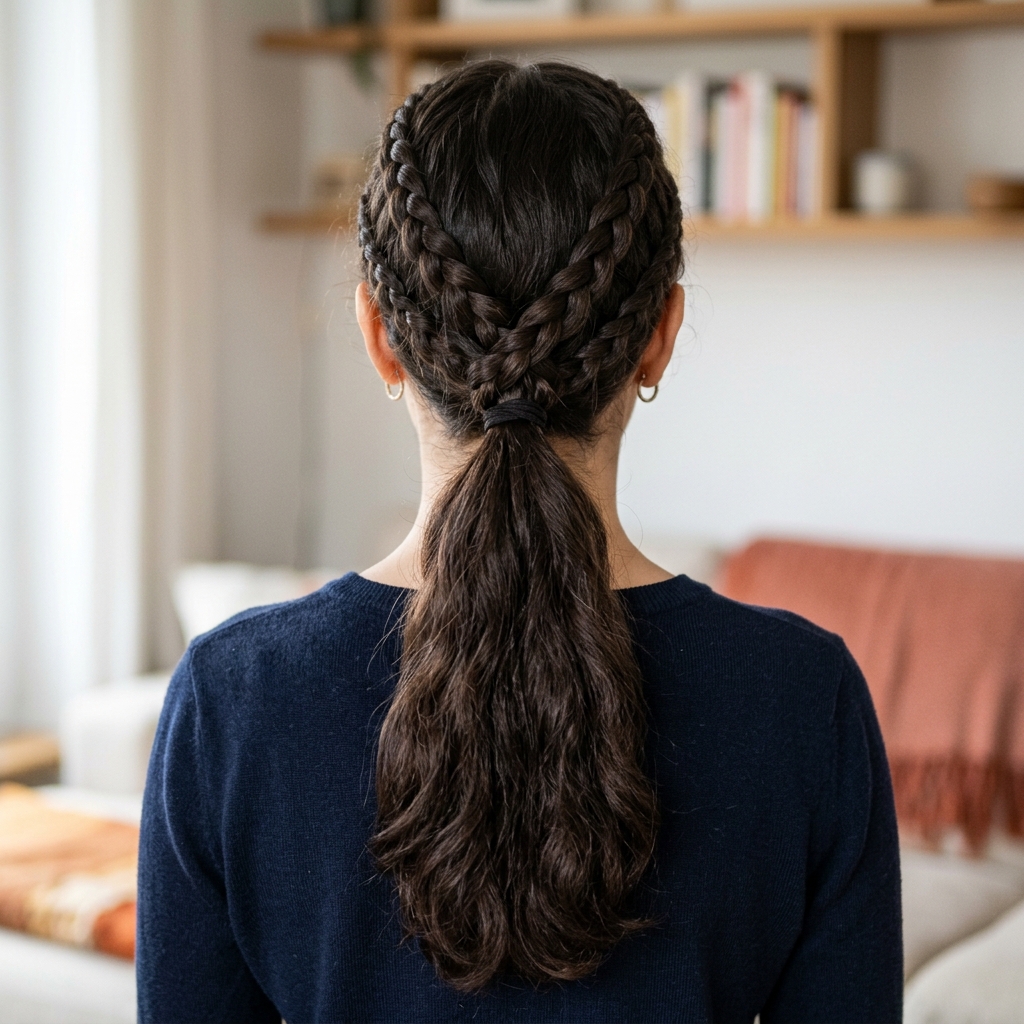
Double Laced Ponytail for Maximum Impact
Why have one braid when you can have two? Create two small, separate braids from the top of your ponytail, placing them next to each other. Braid each one down and secure.
Then, wrap them around the base in opposite directions, crossing them over each other before pinning. This looks intricate and is perfect for thick hair that can handle more detail.
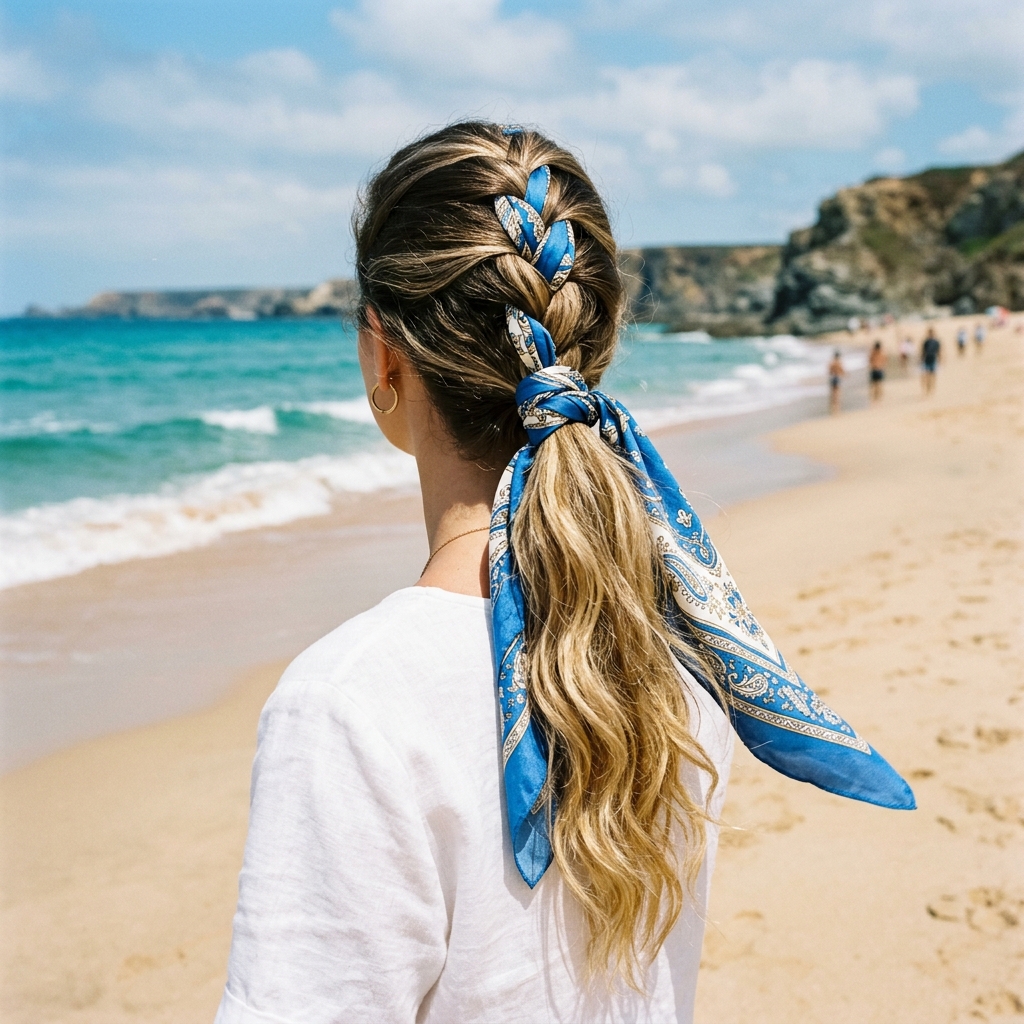
Incorporate a Cute Hair Scarf
This is my favorite summer trick. Take a long, thin silk scarf. Tie it around the base of your ponytail with the ends hanging. Split your ponytail in half and use the scarf ends as the third strand in two braids, or simply braid them into your lace.
It adds a gorgeous pop of color and pattern. Let the scarf ends flow with your hair for a playful touch.
Textured & Tousled for Fine Hair
If your hair is fine or slippery, texture is your best friend. Before starting, spray a texturizing or dry shampoo spray at the roots and through the lengths. Tease the crown slightly before making your base ponytail.
The added grit will help the braid hold and keep the style from slipping. A looser, messier lace will also add the illusion of more volume.
The Athletic & Secure Version
This won’t budge during a workout. After making your base ponytail, create a tight, neat lace braid. Instead of just wrapping, use the braid to create a second anchor point.
Wrap it around and then pin it not just at the base, but also pin the tail of the braid further down the ponytail. This double security keeps everything locked in place through any movement.

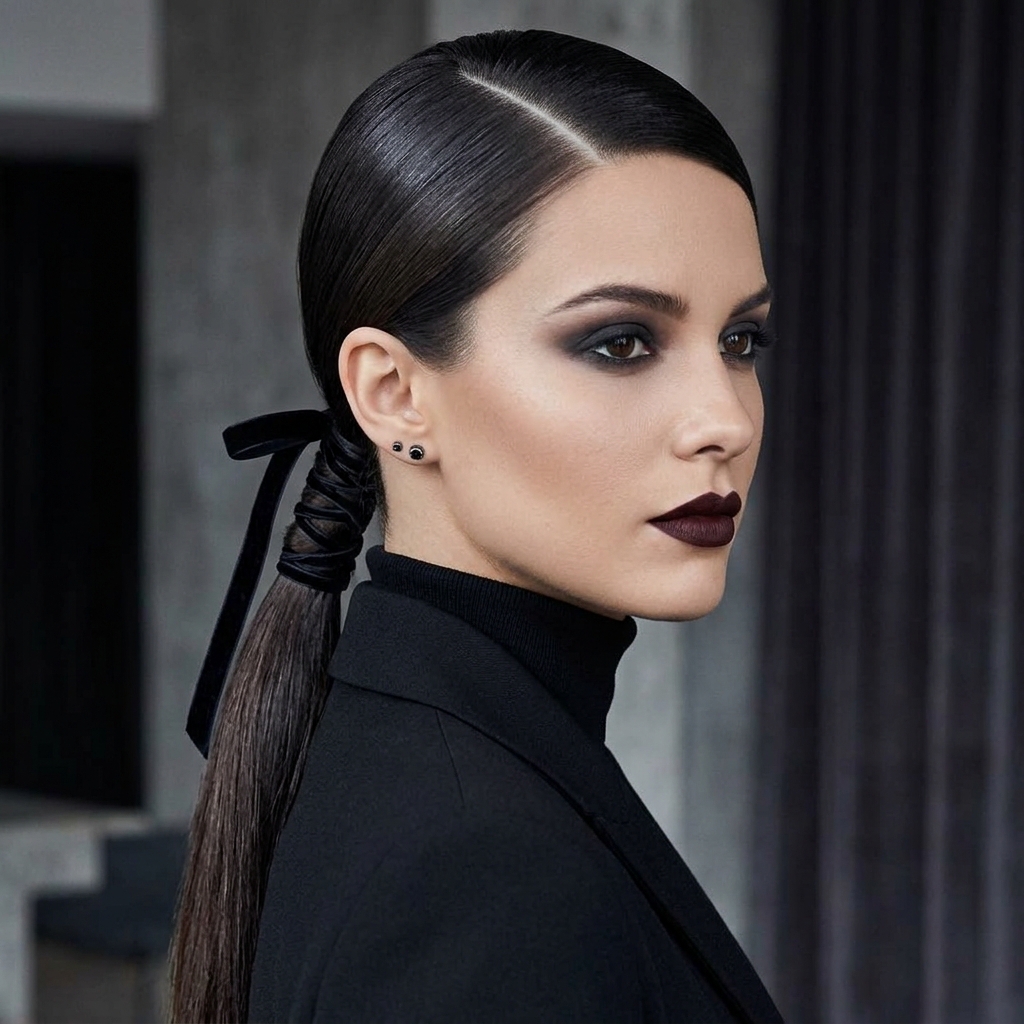
Channel Romantic Goth Vibes
This is for my darker, romantic souls. Think romantic goth hairstyles or a softer take on the vampire haircut. Go for a deep side part and a very sleek, low ponytail.
Make your lace braid sharp and precise. Add a single, dramatic accessory like a black velvet ribbon or a silver antique brooch at the wrap point. Keep the rest moody and polished.
Modern Edge with an Asymmetrical Touch
Inspired by the asymmetrical lob but for long hair. Create your ponytail dramatically off to one side, almost behind your ear. Execute the lace braid as normal.
The asymmetric placement instantly makes the style feel modern and edgy. It shows off your neckline and earrings beautifully. Perfect for a fashion-forward look.

Inspired by the Hime Cut Detail
The hime cut is all about strong, blunt sections. You can mimic this feel. Before making your ponytail, leave out two distinct, blunt face-framing sections in the front.
Put the rest up in your laced ponytail. Then, neatly trim or tuck those front sections behind your ears, or leave them down as sharp, dramatic accents. It frames the face beautifully.

Quick Fix for Second-Day Hair
This style is a lifesaver for non-wash days. Second-day hair has more grip, which is ideal. If your hair is looking flat, focus the volume at the crown by teasing lightly before gathering.
The texture will help the braid hold its shape better, and any slight oiliness will add to the sleek, polished effect of the final wrapped look. A true win-win.
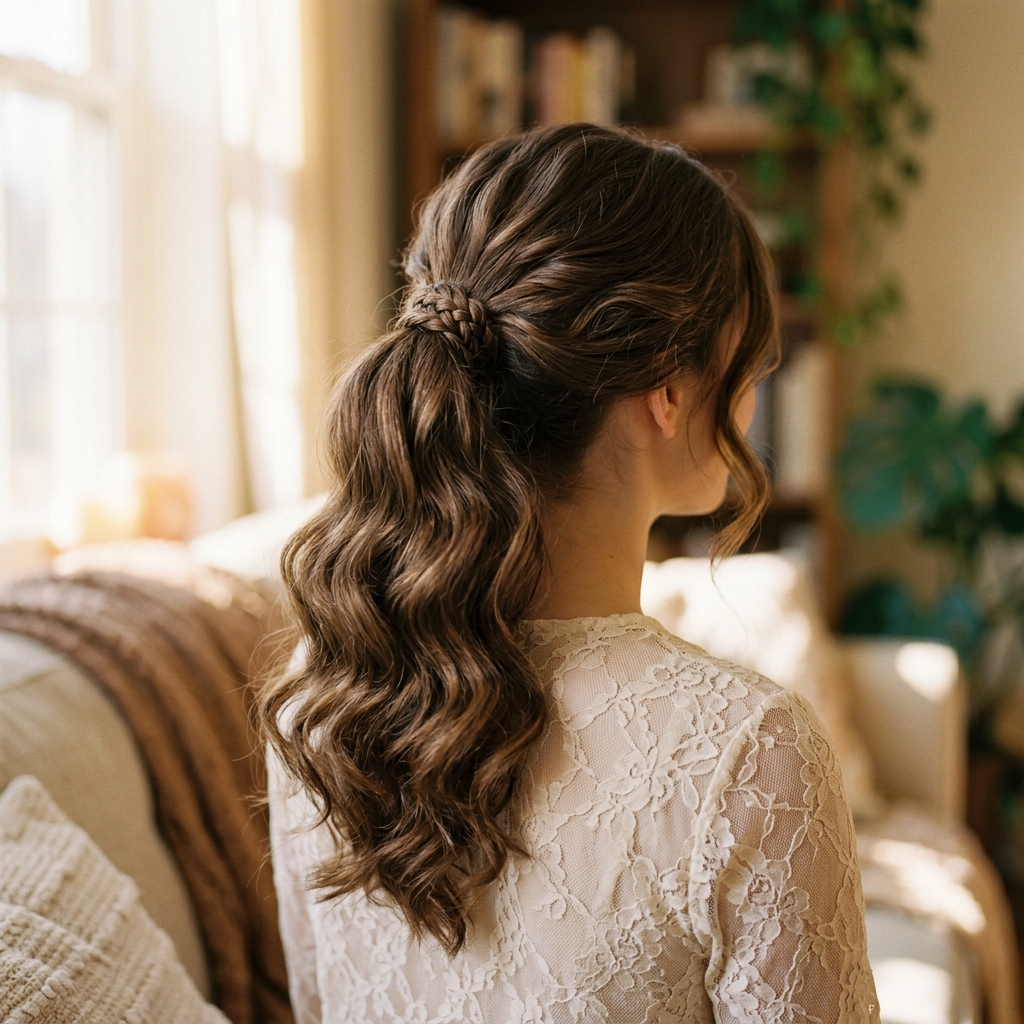
Pair It with Heatless Waves
For a stunning, full look, start with heatless waves from a robe tie or rollers. Once you take them out, you’ll have gorgeous, voluminous waves.
Gather your hair into a mid-height ponytail. The laced detail will look beautiful against the textured waves, creating a romantic, vintage-inspired feel with minimal effort.
Keeping It Fresh All Day Long
To combat flyaways, keep a travel-sized hairspray or a small boar bristle brush in your bag. A light mist can reset any pieces that come loose.
If the wrap feels like it’s slipping, you can always discreetly add another bobby pin through the center. Carrying a couple of extra pins and a clear elastic is a pro move.
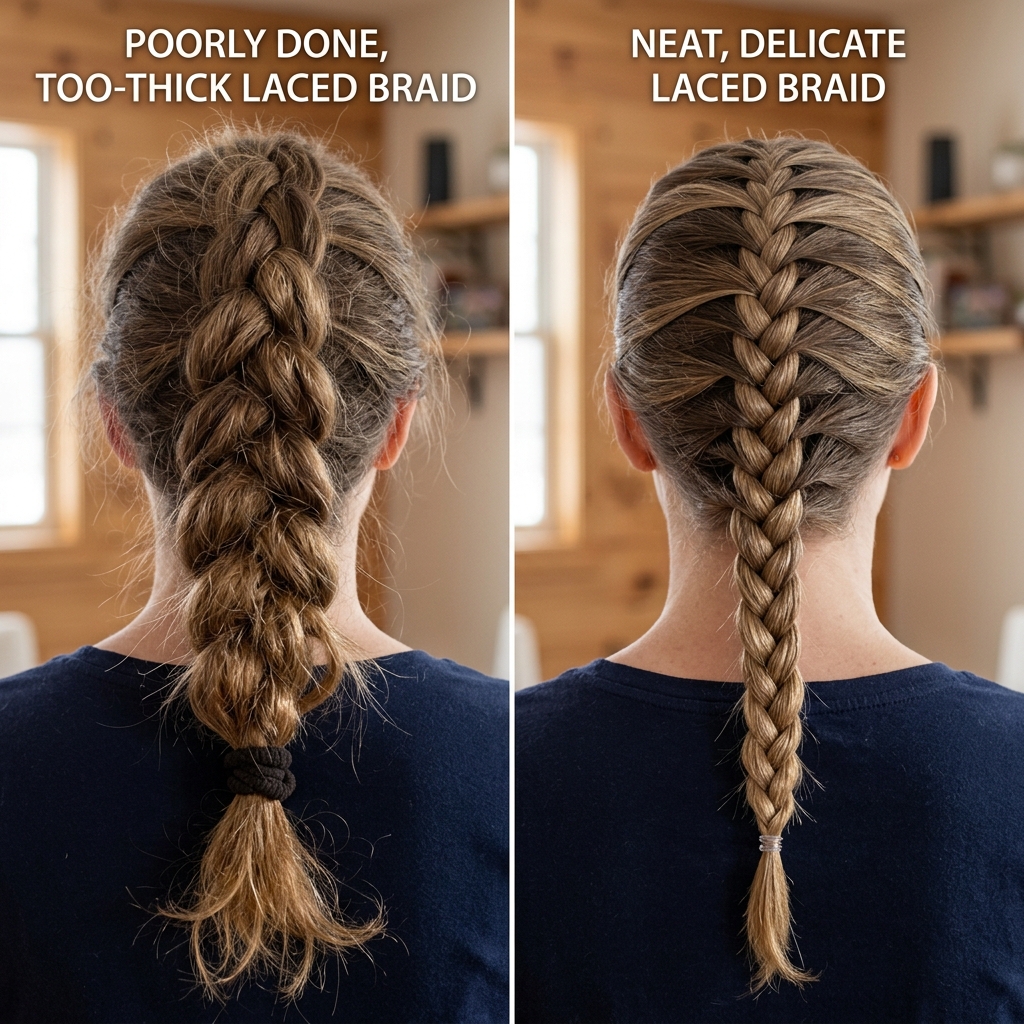
Common Mistakes to Avoid
- Taking too big a section for the braid: Keep it small and delicate for the true “lace” effect.
- Braiding too tightly: A looser braid is easier to wrap and looks softer.
- Forgetting to pin securely: Cross your bobby pins for a stronger hold.
- Using a thick, colored elastic: It will be hard to hide. Always start with a clear, thin one.
How to Take It Down Without Damage
Be gentle! Carefully remove the bobby pins first. Then, slide out the clear elastic from the end of your lace braid and unravel it slowly with your fingers.
Finally, remove the base ponytail elastic. Use a detangling spray if needed and brush from the ends up. This prevents unnecessary breakage and keeps your hair healthy for the next style.
And there you have it! Your simple ponytail just got a major upgrade. The best part about the laced-up style is how adaptable it is. It can be whatever you need it to be: sleek, messy, romantic, or edgy.
It’s one of those tricks that looks incredibly impressive but is truly so simple once you get the hang of it. I promise, after you do it two or three times, it’ll become your five-minute, go-to look for making any outfit feel complete.
I’d love to see your creations! Which version are you trying first? Did you add your own twist? Tell me in the comments below!
Save this post to Pinterest so you always have these ideas handy for your next hair day. Just hover over any image to pin it!

