

Hey there. Have you ever scrolled through those “old money hair” or “quiet luxury” mood boards and just sighed? It all looks so perfect, but also like it would take an hour and a ton of product. I get it. That’s why I’m obsessed with this look.
It’s the answer to wanting that polished, subtle shine without any fuss. We’re taking the easiest low bun you’ll ever do and elevating it with a single, gorgeous detail: pearl pins.
This is your secret weapon for looking pulled-together in five minutes flat. It works for the office, a dinner date, or just feeling a bit more ‘you’ on a Tuesday. It’s that effortless vibe we all want.
Let’s ditch the complicated tutorials. This is quick, practical, and seriously chic. Ready to get that subtle shine?
Why This Low Bun Is Your New Go-To
In a world of glitchy glam hair and bold 2026 hairstyles predictions, sometimes quiet is the loudest statement. This bun is the definition of that. It’s not about being messy or overly perfect.
It’s about looking intentional and elegant with minimal effort. Think of it as the hairstyle version of a perfect white tee and great jeans.
- Universal Flattery: It suits every face shape and hair length (even if you have shorter layers!).
- Time Saver: This is a true five-minute style, maybe less once you practice.
- Versatile Base: It’s a perfect canvas. Today, pearls. Tomorrow, maybe a bold clip for a different feel.
Gathering Your Tools: You Don’t Need Much
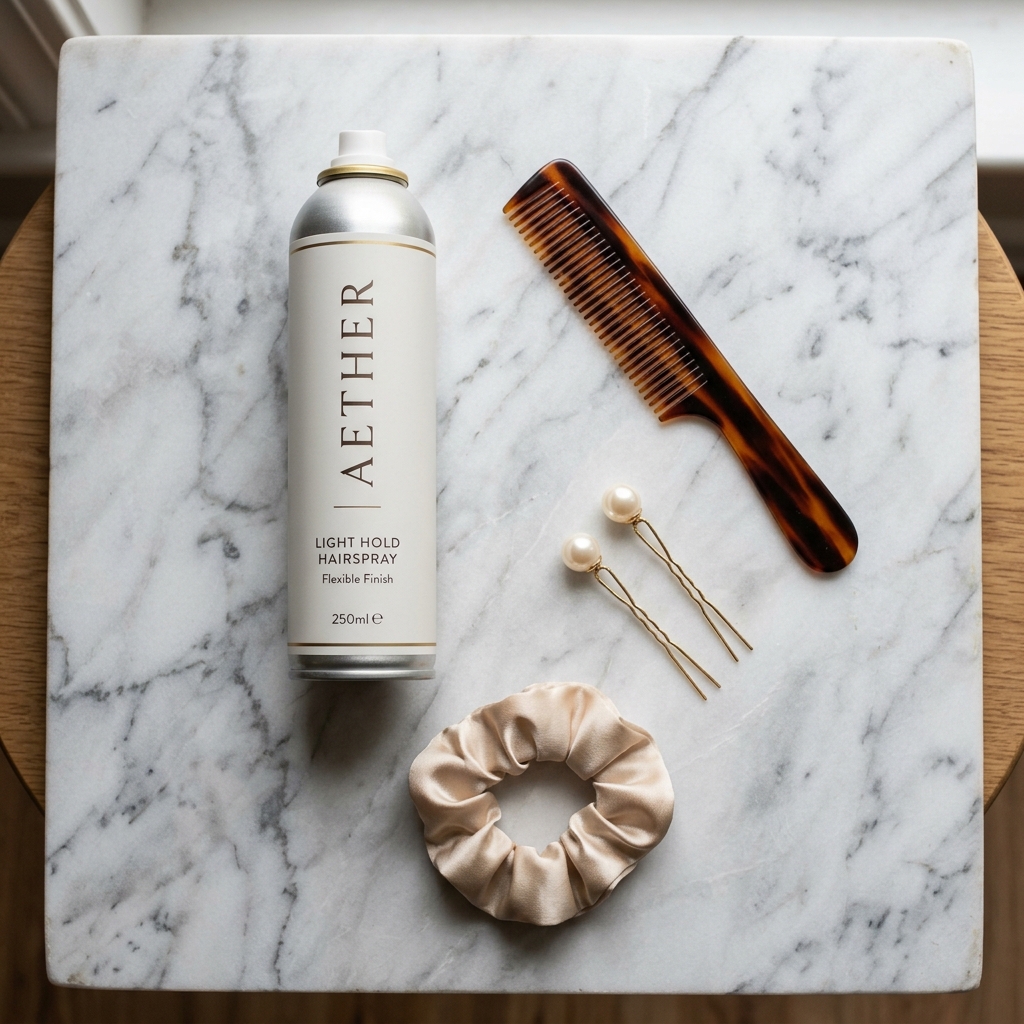
Part of the quiet luxury philosophy is using fewer, better things. We’re applying that here. You likely have most of this already.
The key is the pins. You want pearl-tipped pins with a good, strong metal stem so they actually hold. A flimsy pin will ruin the vibe. A light-hold spray is just for flyaways, not shellacking.
- Hair Tie: A thin, elastic one that matches your hair color is ideal.
- Pearl Pins: 2-4 is plenty. Look for ones with a matte or real pearl finish for that subtle shine.
- Comb & Spray: A tail comb helps with precision. A light misting spray finishes it.
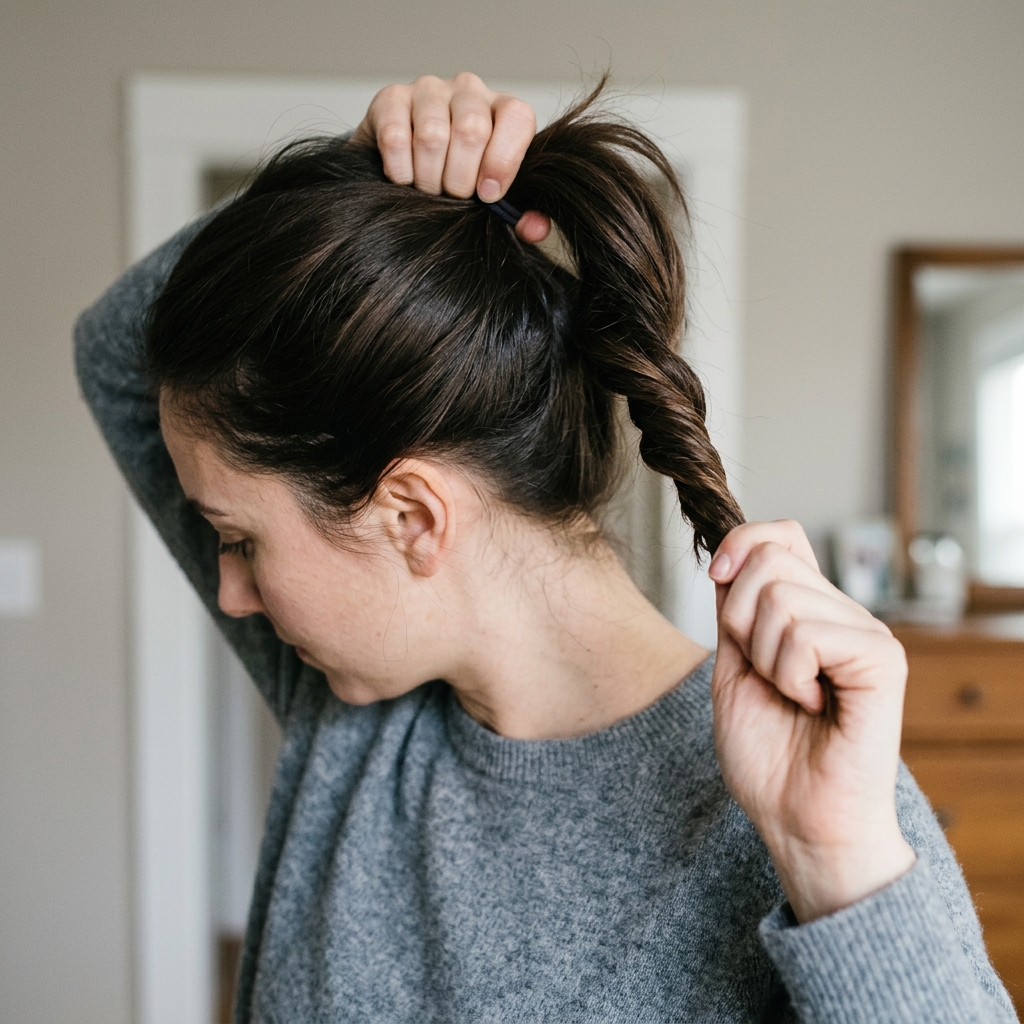
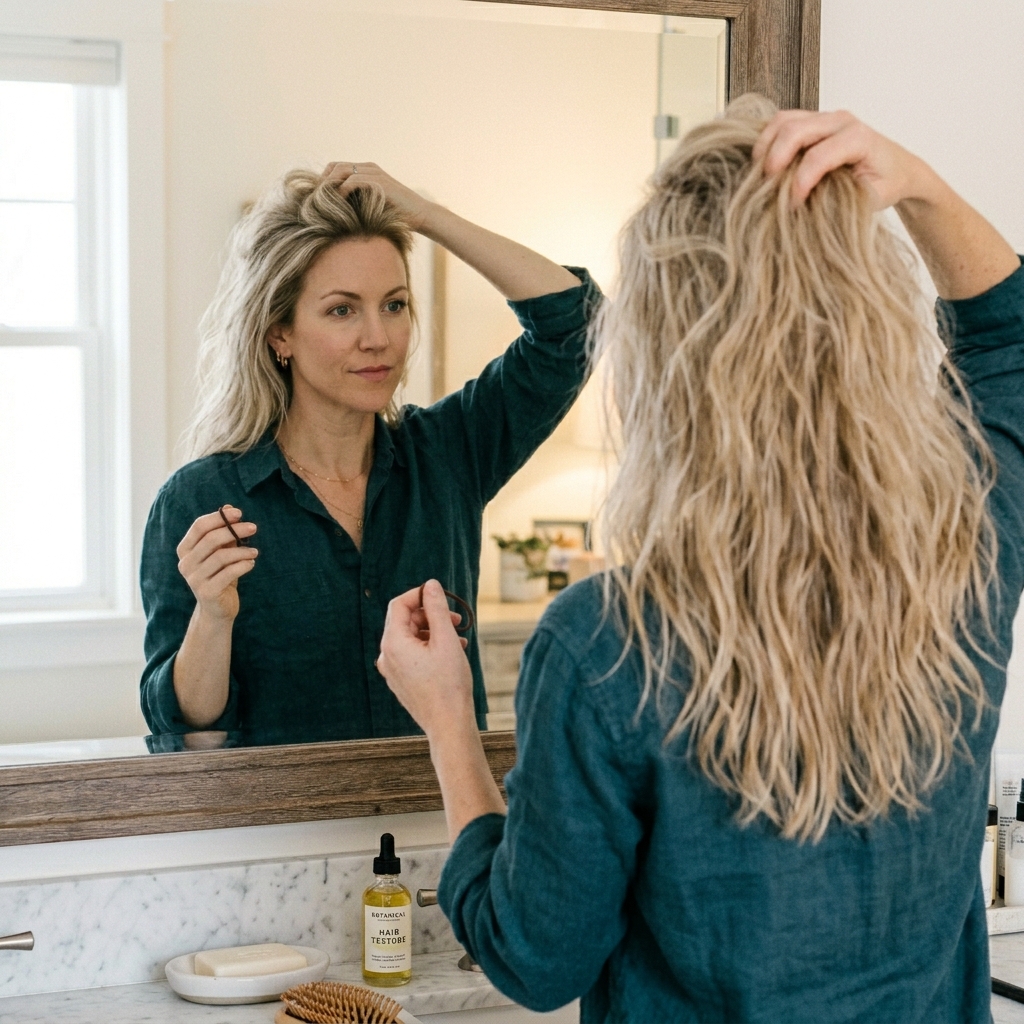
Step 1: The Perfect Base Ponytail
Don’t just gather your hair and tie it. The base is everything. I like to flip my head over, gather all my hair at the crown, and then stand up slowly, letting it fall naturally at the nape.
This gives volume without teasing. Secure it with your hair tie. Now, here’s the trick for that “lived-in” elegance.
- Gently pull the hair just above the tie forward a tiny bit to loosen it. This creates softness.
- If you have a middle part, keep it. A deep side part also works beautifully for a more romantic feel.
Step 2: Twisting vs. Coiling Your Bun
There are two easy ways to form the bun itself. The twist method is my favorite for a more structured, sleek look. It lays flatter against the head.
The coil method is perfect if you have thinner hair and want the bun to look a bit fuller and softer. Try both to see what you like!
- Twist Method: Twist the ponytail tightly until it naturally coils on itself. Wrap it around the base.
- Coil Method: Simply coil the ponytail around the base like a cinnamon roll, tucking the end under.
Step 3: Securing The Bun Simply
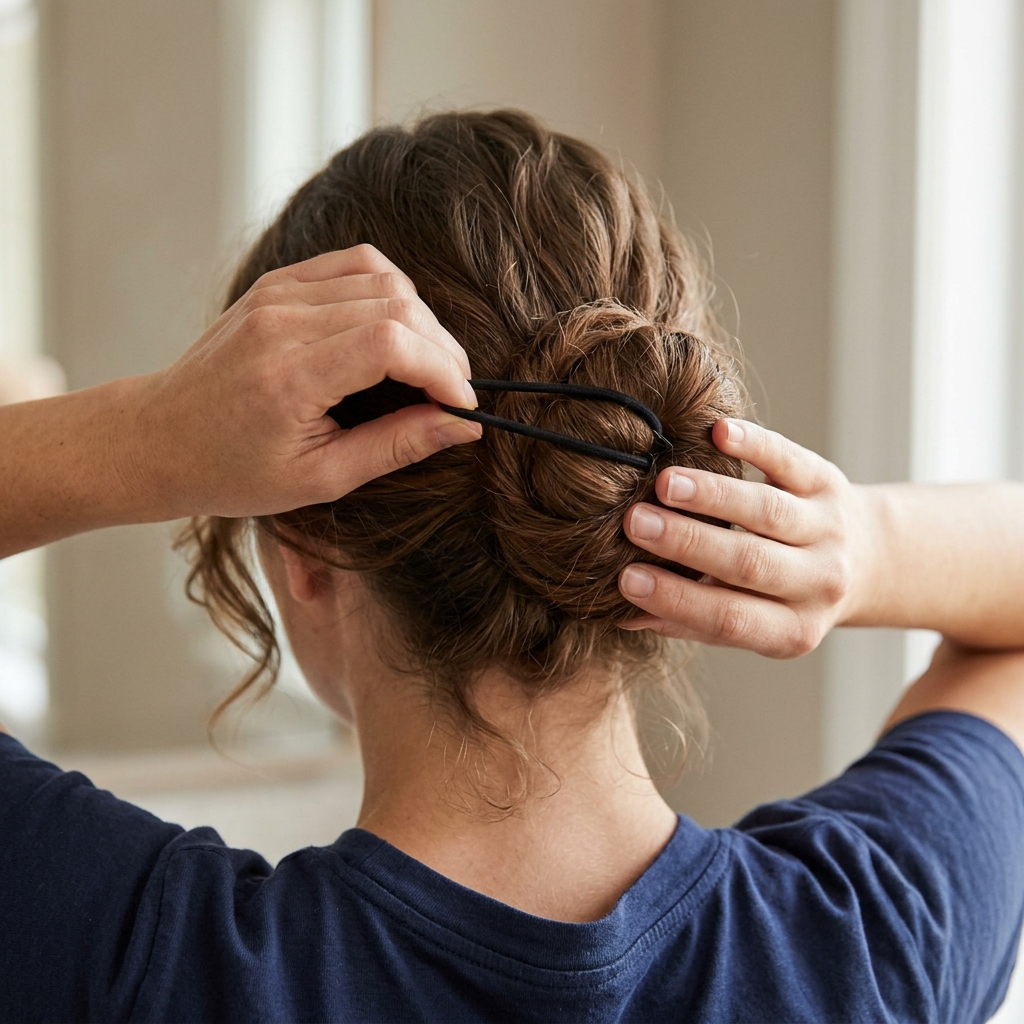
Once your bun is wrapped, you need to hold it in place. I find a second, smaller hair tie is the easiest and most secure method.
It also creates a cleaner base for adding our pins. Just slide it over the bun. Don’t worry about perfection—a few loose pieces are good!
- Wrap the bun and hold the end against the base.
- Use a second thin elastic to secure the whole bundle.
- Adjust any loops or pieces you want to be more prominent.
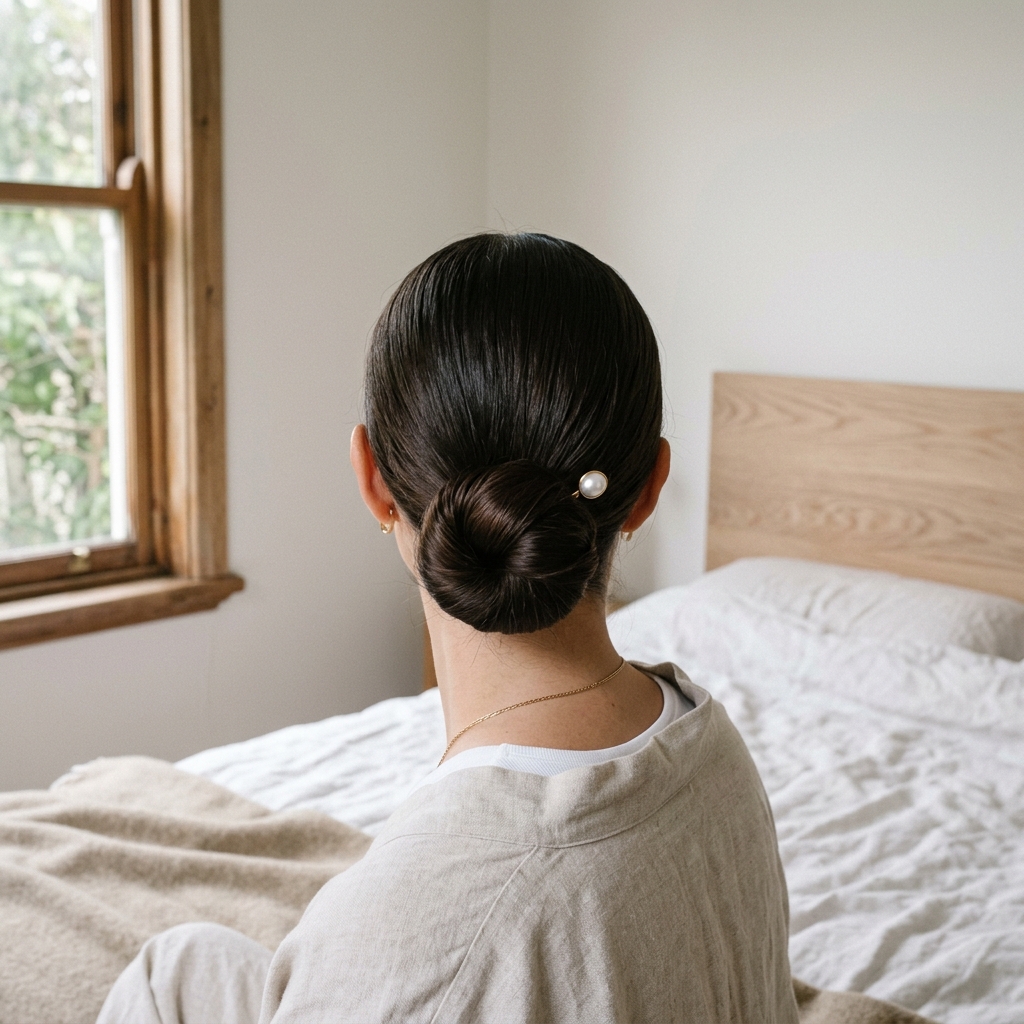
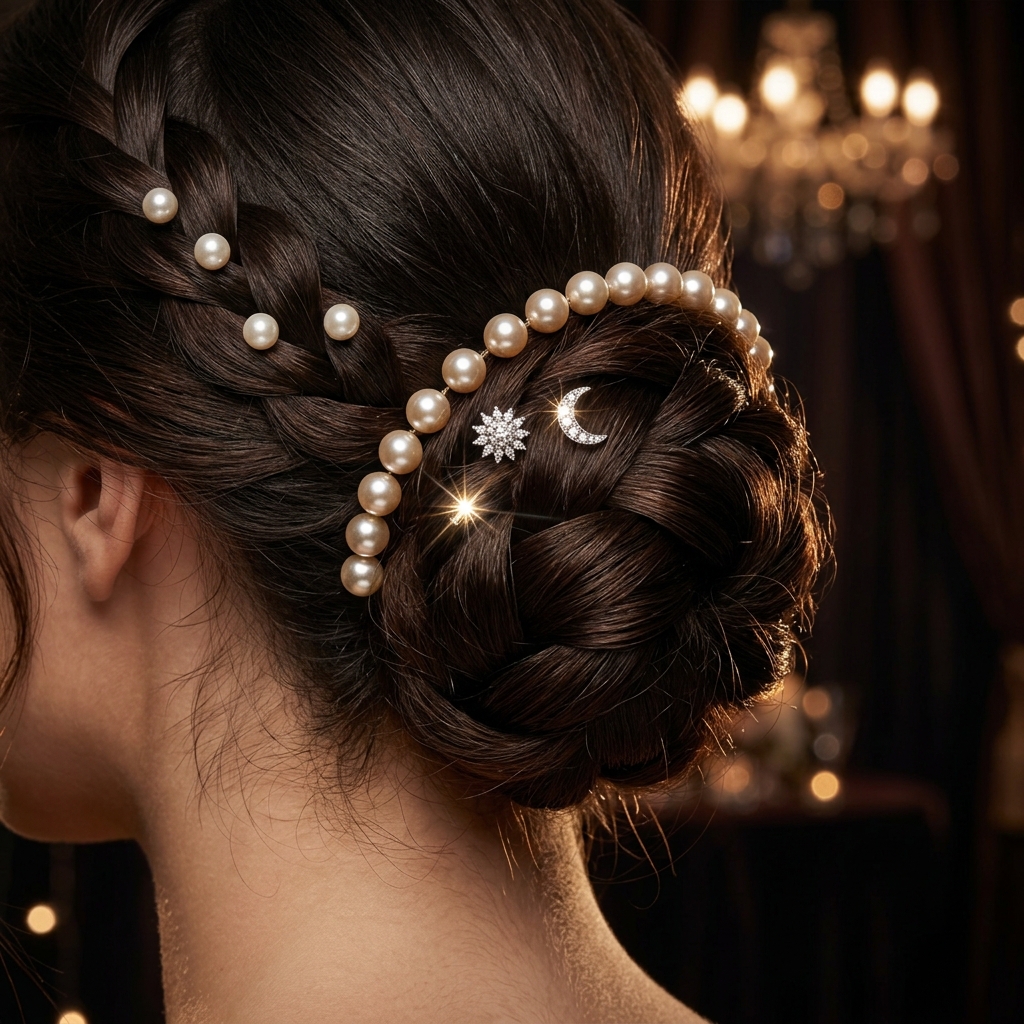
Step 4: Placing The Pearl Pins For Subtle Shine
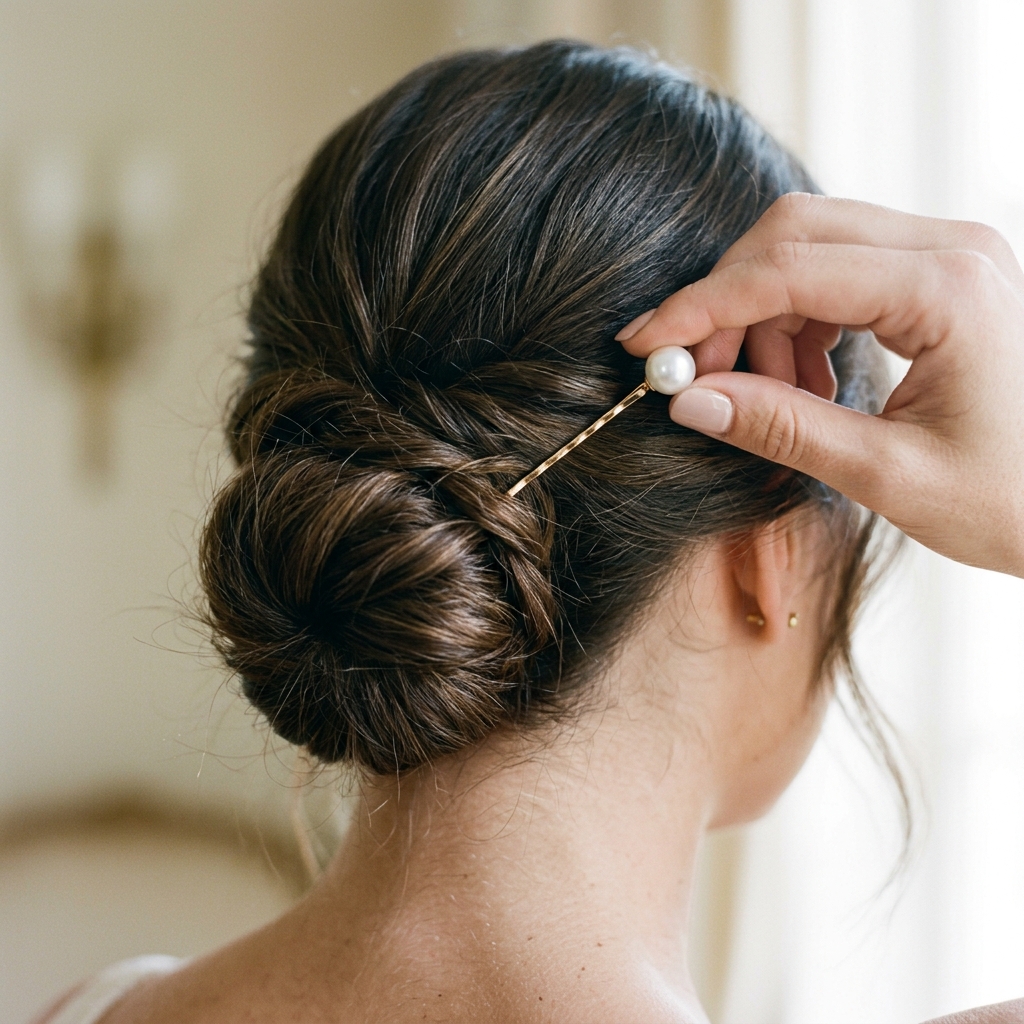
This is where the magic happens. The pearls catch the light just so, giving you that “subtle shine” we’re after. Don’t just stab them in straight.
Think of them as a tiny piece of jewelry. Cross them over a section of the bun to anchor it. One is enough. Two is classic. Three makes a statement.
- Angle is Key: Insert the pin on a diagonal, crossing through a chunk of the bun and into the base hair.
- Strategic Placement: Place them where they’ll be seen from the side or back view.
- Less is More: Start with one, step back, look in the mirror, then decide if you want another.
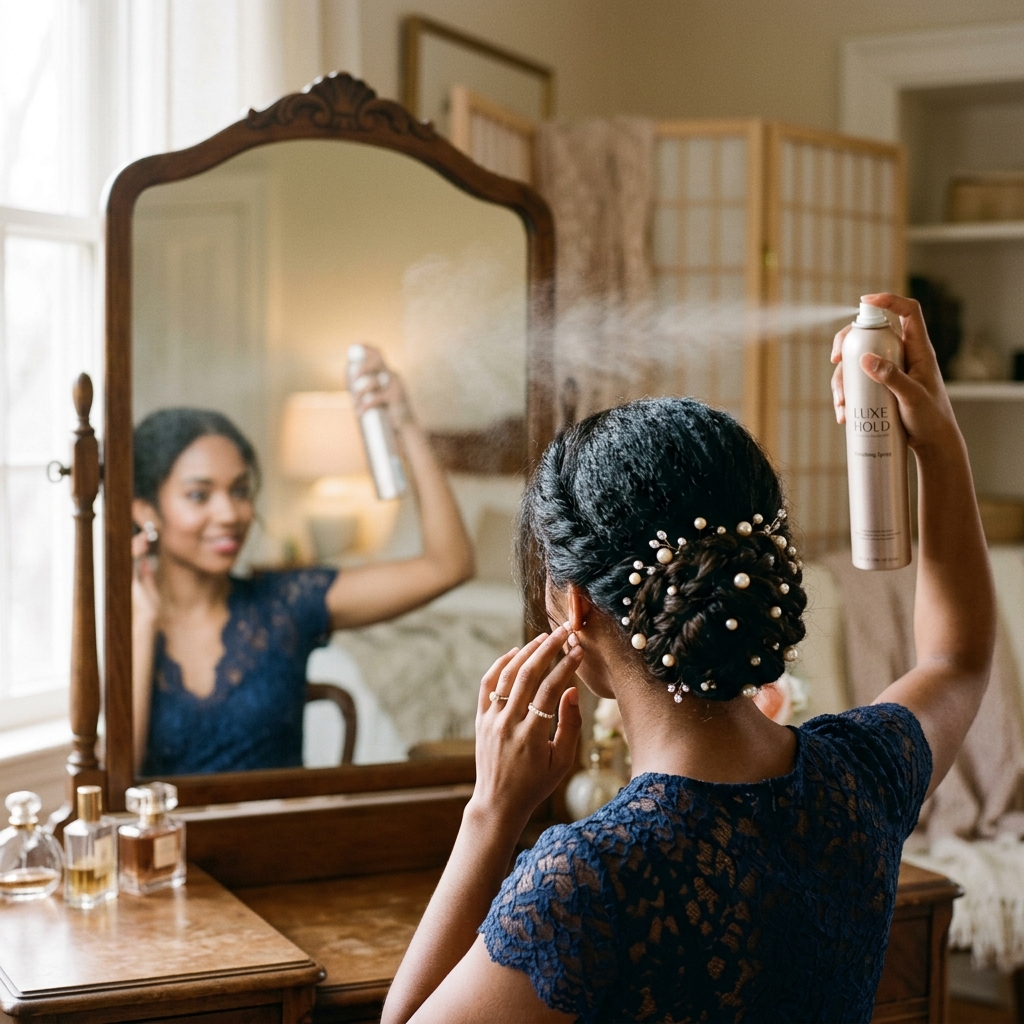
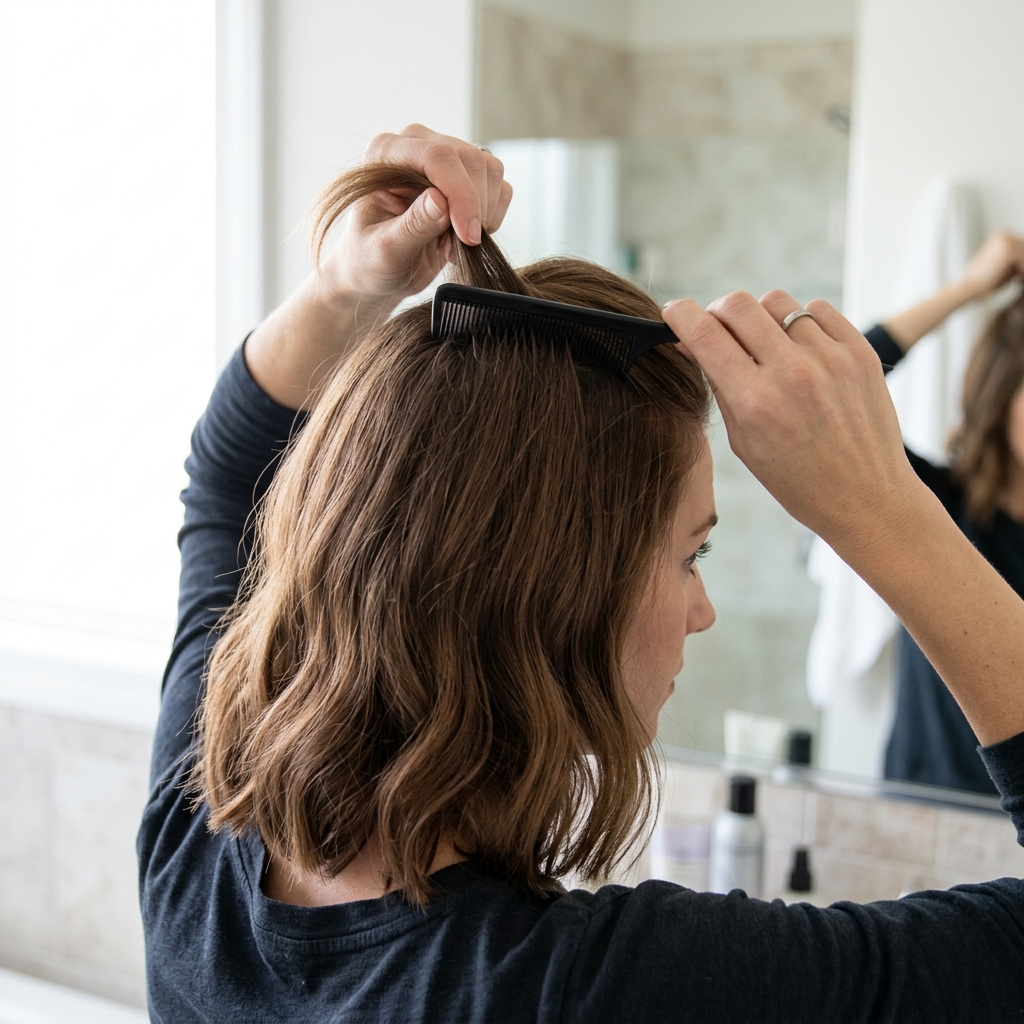
Step 5: The Final Touch: Polishing The Look
Now, step back and look. Use the tail of your comb to gently pull out a few tiny face-framing pieces if you want a softer look. This is especially pretty if you’re growing out an asymmetrical lob or a hime cut.
Finally, a light mist of hairspray from a distance just to tame any wild flyaways. You’re not going for helmet head, just polished peace of mind.
Adapting It For Fine or Thin Hair
If you have fine or thin hair, this style is still for you! The key is creating the illusion of volume before you even start. A light texturizing spray at the roots can work wonders.
Use the coil method for your bun—it will look fuller. You can also gently pull on the sides of the bun after it’s secured to loosen and enlarge it.
Making It Work For Thick or Curly Hair

For thick or curly hair, control is the goal. A strong-hold gel or cream applied to damp hair before styling can help smooth and define. Make sure your hair ties are strong.
You might need three or four pearl pins to anchor the style securely. Embrace the volume you have—it makes the bun look even more luxurious.
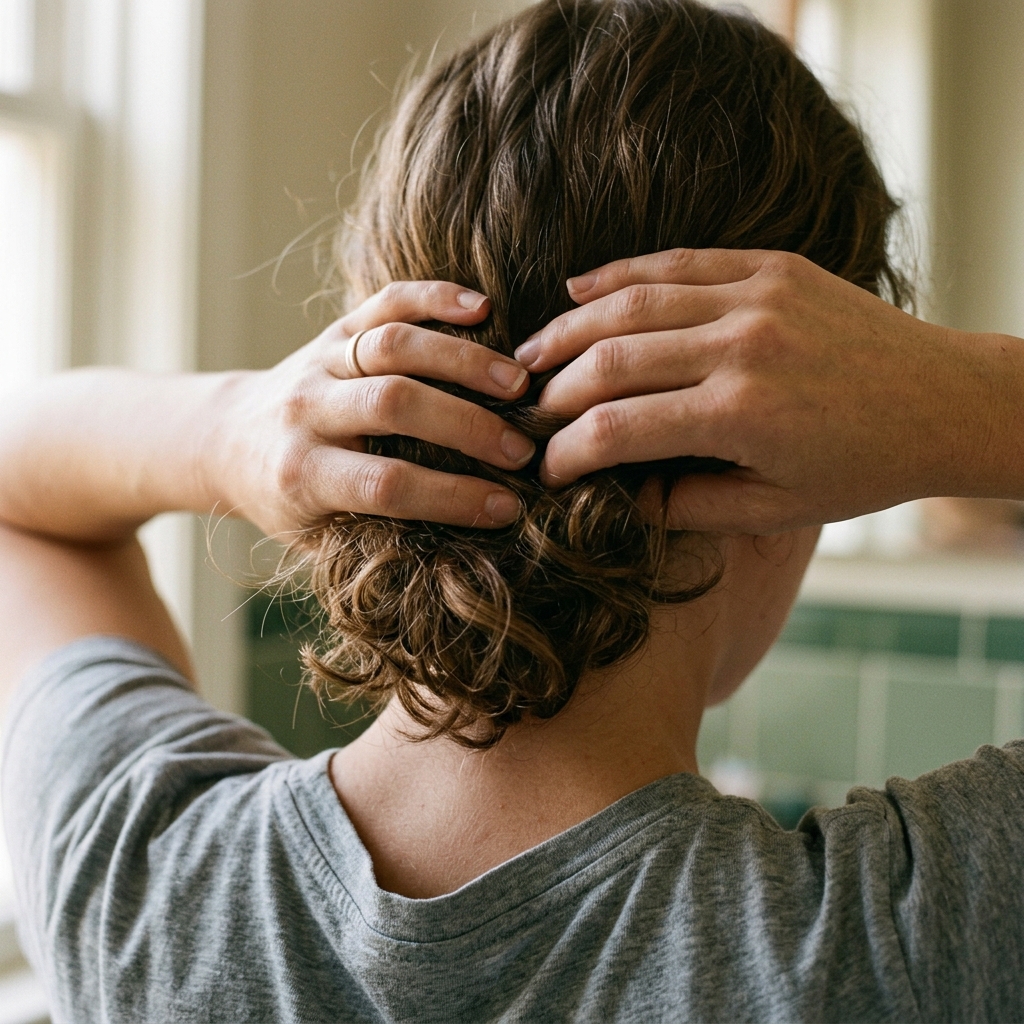
The “Undone” Version For Day Two Hair

This style might be even better on day two or three hair! The natural oils give you grip and texture. Skip the comb entirely.
Use your fingers to gather your hair. Let more pieces fall out naturally. The pearl pin will make even the most effortless bun look deliberate and chic.
From Day To Night In Seconds
Got dinner plans? This bun transitions perfectly. Swap out one pearl pin for a more dramatic, sparkly hairpin. Or, add a second pearl pin on the opposite side.
You can also pull out a more defined face-framing curl. It’s that easy to go from desk to date night without a full re-do.
Why It Fits The “Quiet Luxury” Aesthetic
Quiet luxury isn’t about logos; it’s about impeccable quality and subtle details. This hairstyle embodies that. It’s not a loud vampire haircut or dramatic romantic goth hairstyles.
It’s a masterclass in understatement. The pearl pin is that one perfect accessory that shows you pay attention to the small things. It speaks volumes without saying a word.
How It Compares To Other 2026 Hairstyle Trends
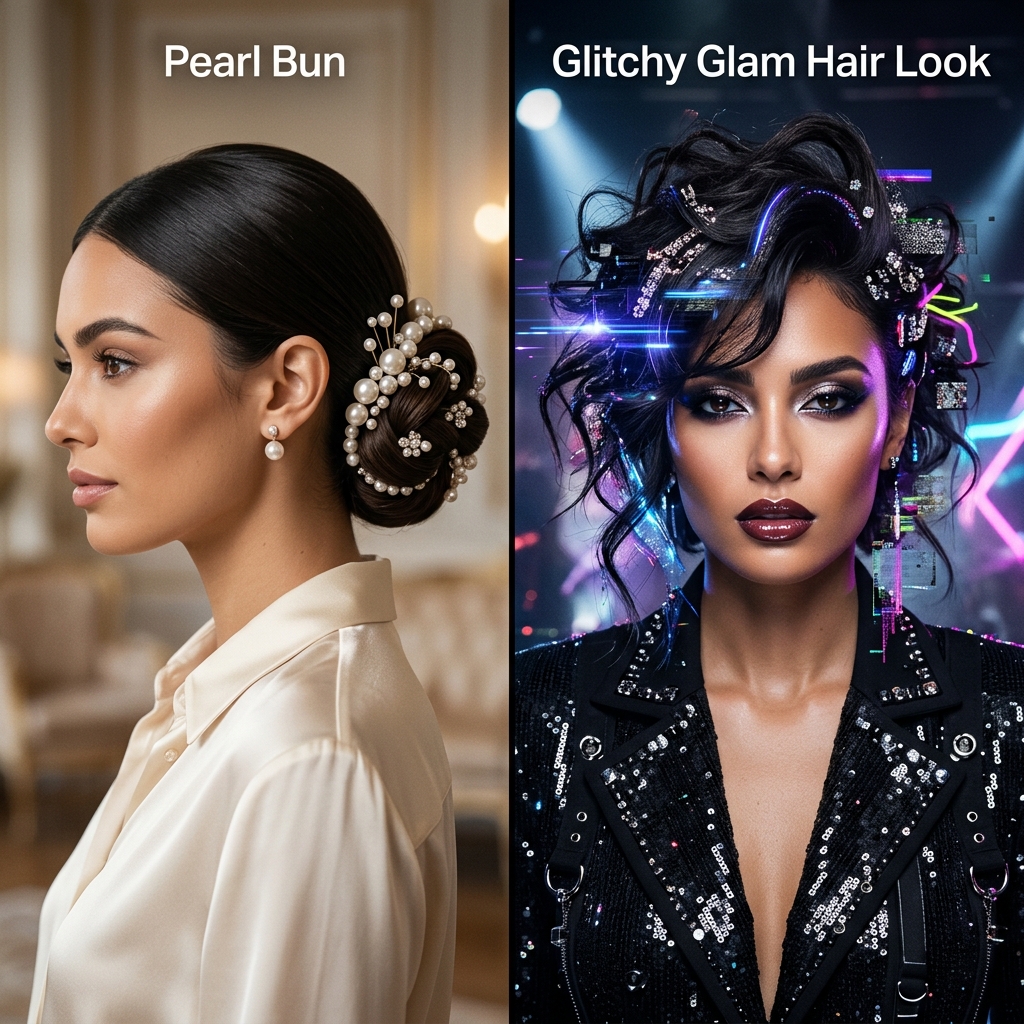
While 2026 hairstyles are pointing toward bold shapes and glitchy glam hair with unexpected colors, this look is the timeless anchor. Trends come and go, but a perfectly executed low bun is forever.
It’s the style you master now and will still be wearing in years to come. It complements trends without being trendy itself.
Pairing It With Different Necklines
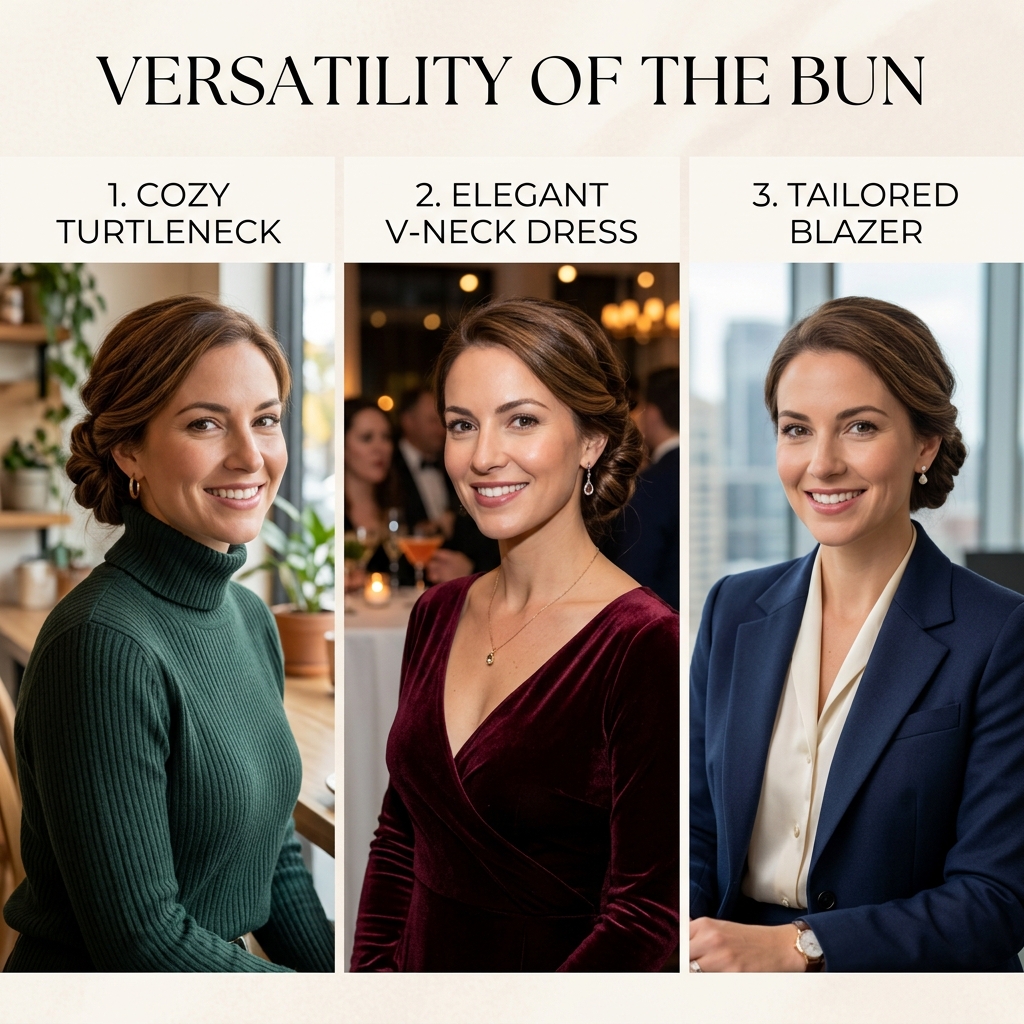
This is why it’s a wardrobe hero. It beautifully showcases the neck and collarbone. It looks amazing with turtlenecks, off-the-shoulder tops, classic button-downs, and deep V-necks.
It keeps the focus on your outfit and your face. No competing volumes or fussy details to clash with your clothes.
Adding A Romantic Touch Easily
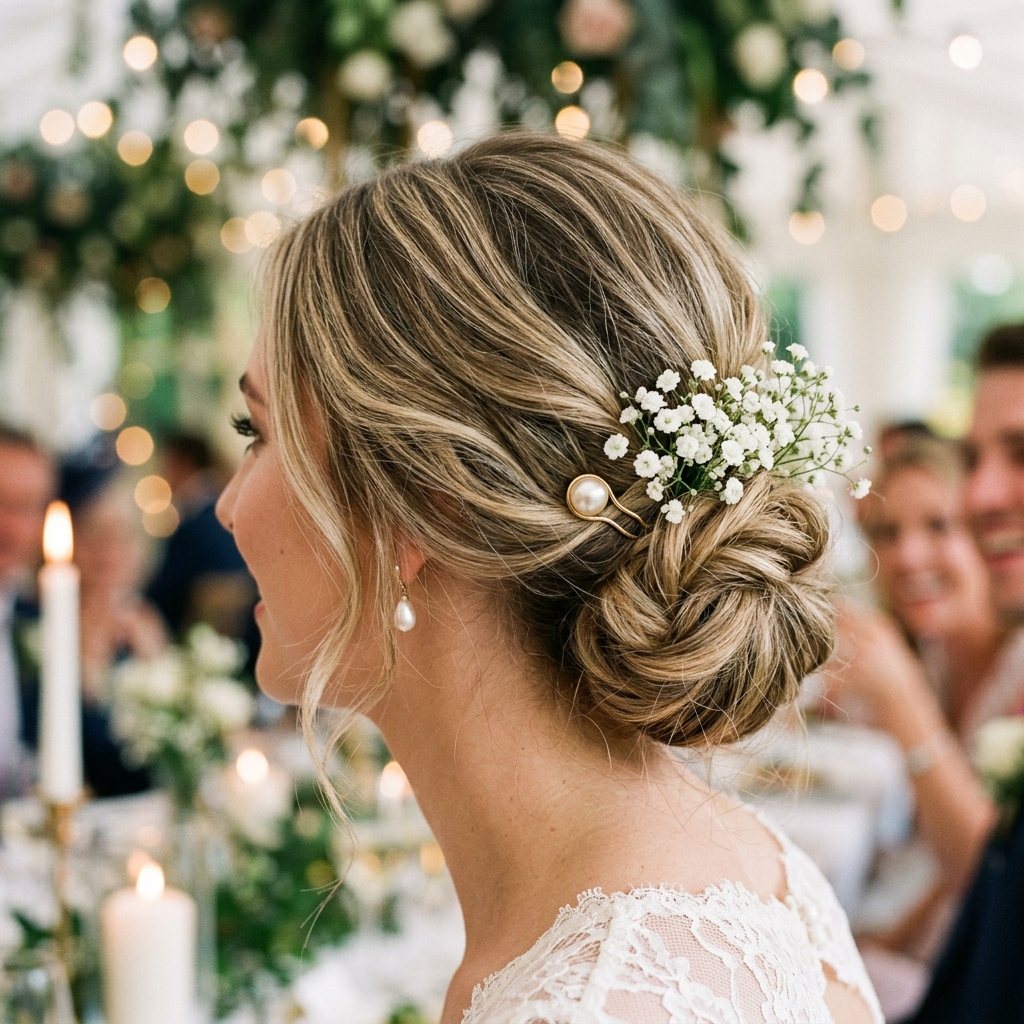
Want to lean into those romantic goth hairstyles vibe but keep it light? After securing your bun, tuck in a single small sprig of baby’s breath or a tiny dried flower near the pearl pin.
It instantly adds a soft, ethereal feel. This is perfect for a garden party or a brunch with a romantic, feminine outfit.
Creating Subtle Volume At The Crown
For that truly polished “old money hair” silhouette, a little lift at the crown makes all the difference. Before you make your ponytail, take a small section at the top of your head.
Lightly backcomb it at the roots only. Then, smooth the top layer over it. This gives you hidden volume that looks naturally full, not teased.
Choosing The Right Pearl Pin For You
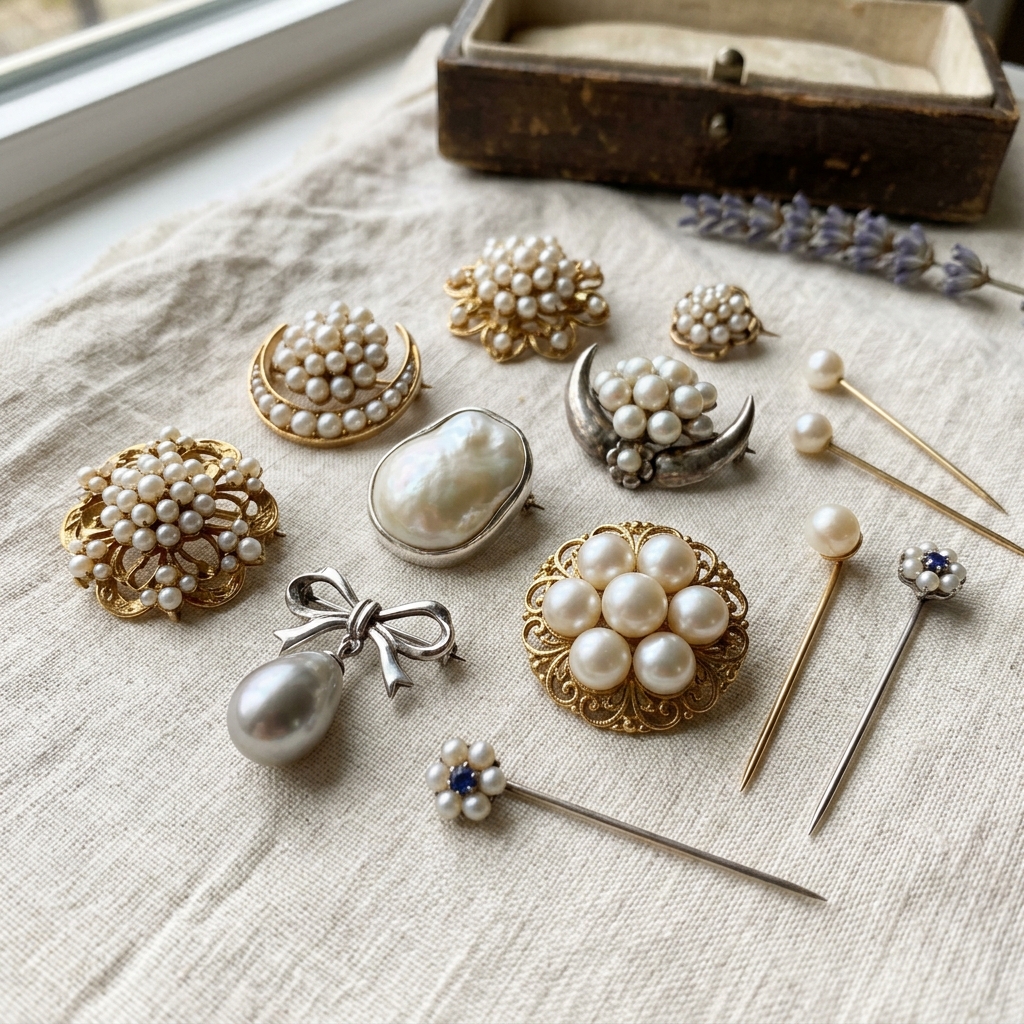
Pearls come in many forms! If your style is ultra-minimal, look for tiny seed pearl pins. For more impact, a baroque pearl pin is stunning.
Match the metal to your jewelry. Gold gives warmth, silver or platinum reads cooler and more modern. Choose what makes you feel most like you.
Common Mistakes & How To Avoid Them
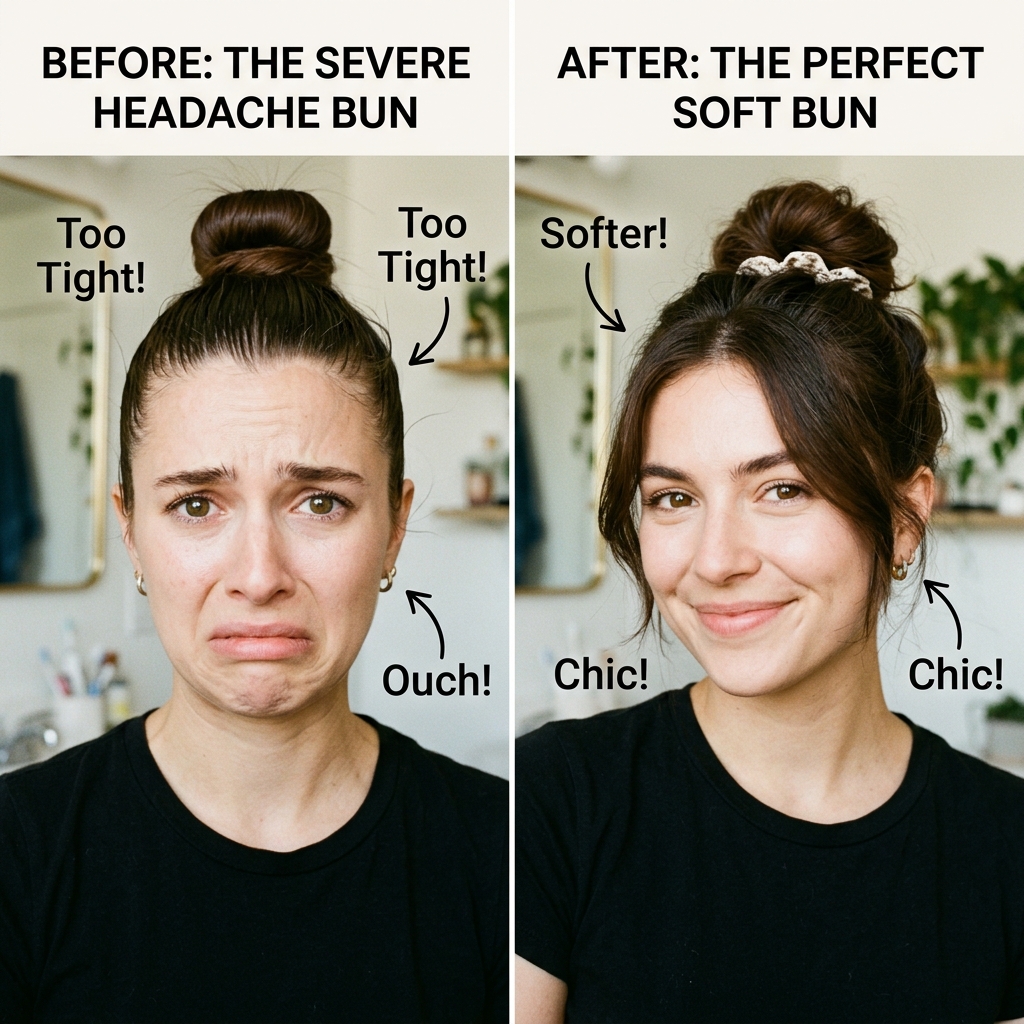
The biggest mistake is making it too tight and slick. This isn’t a ballet bun. Leave some softness at the temples and let the bun have a little body.
Another error is using pins that are too decorative and not functional. If they don’t have a strong grip, they’ll fall out. Test them first!
Hair Health Tips For The Best Shine
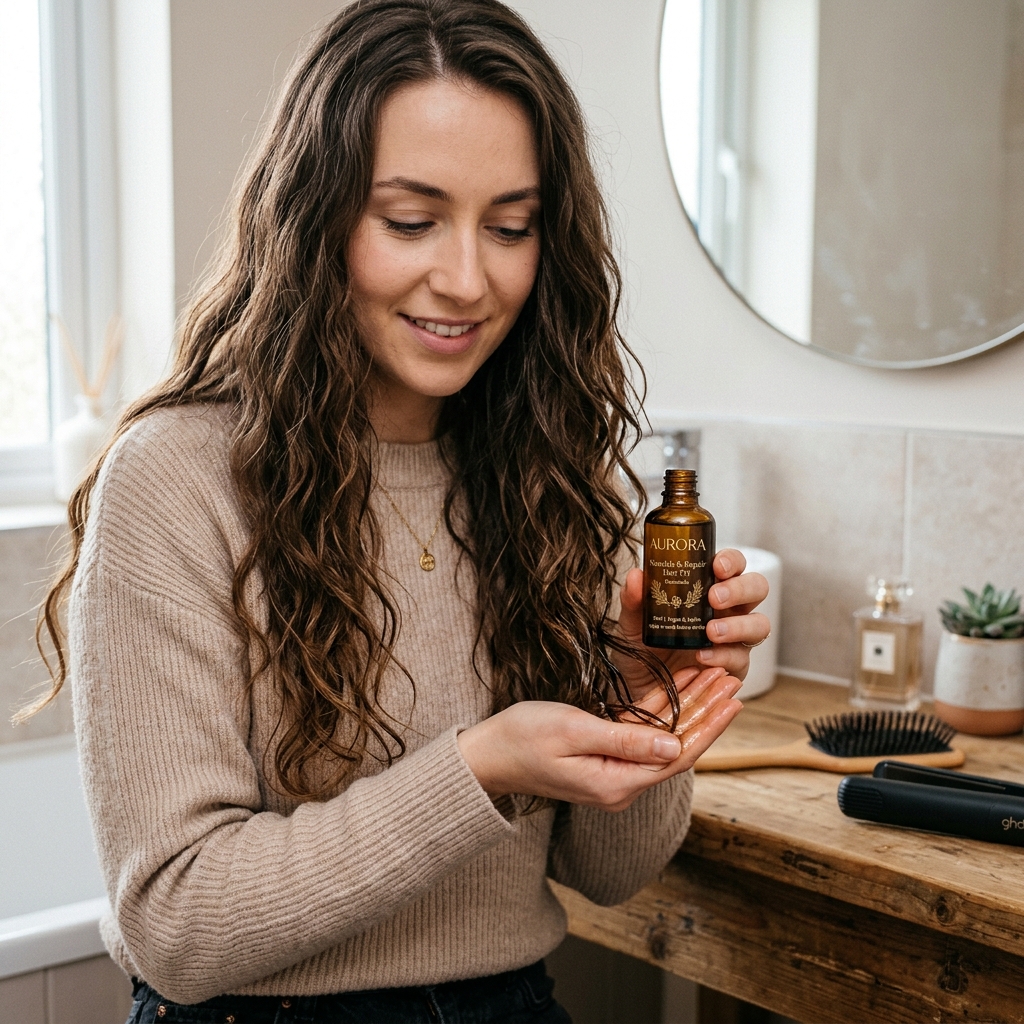
True subtle shine starts with healthy hair. A tiny drop of hair oil on your ends before styling adds a gorgeous, healthy gleam.
Using a silk scrunchie at night and getting regular trims will keep your hair in top shape, making every style look better, especially sleek ones like this.
Inspiration From “Old Money Hair” Icons
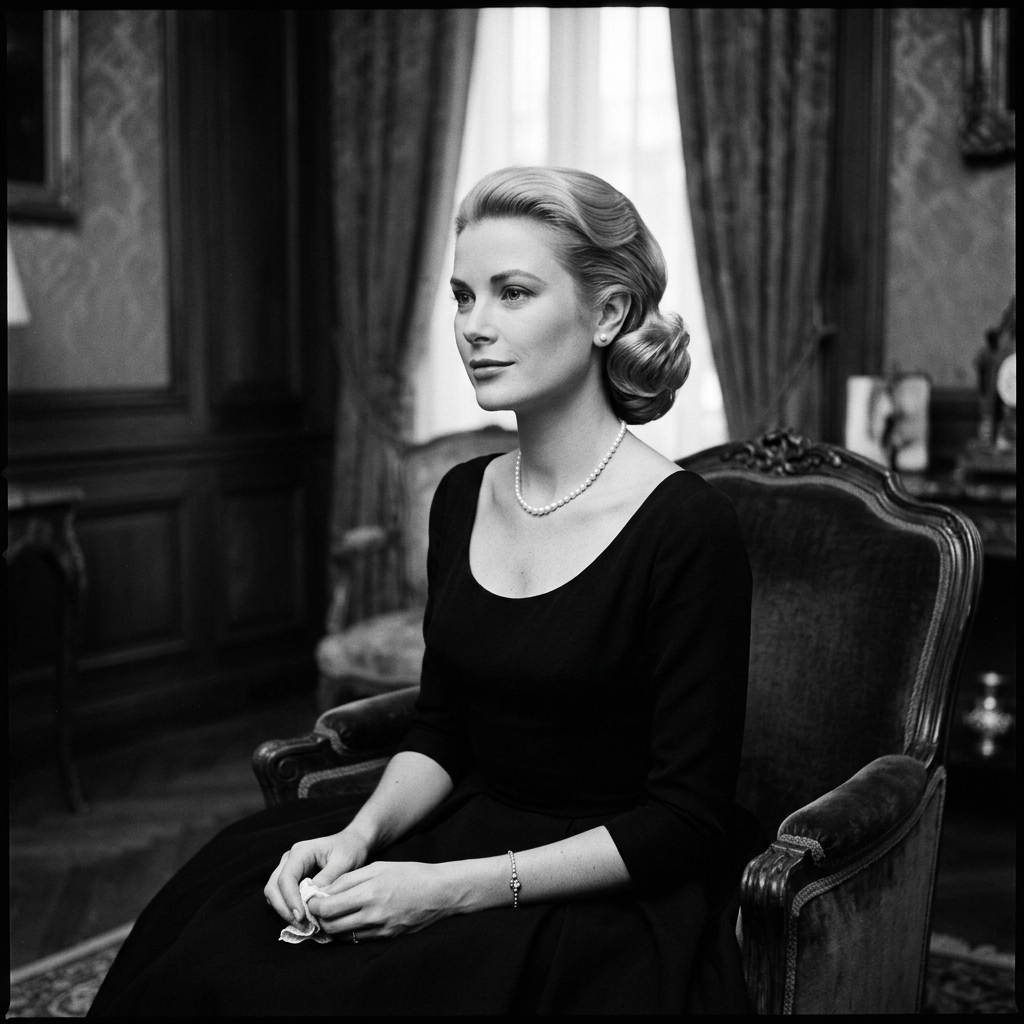
Look at the classics. Grace Kelly, Carolyn Bessette-Kennedy. Their hair was always perfectly groomed but never looked like it tried too hard.
That’s the energy we’re channeling. It’s not about being stuffy; it’s about looking effortlessly appropriate and refined in any setting. It’s a powerful feeling.
Your New Secret Weapon Style
And that’s it. You now have a five-minute, impossibly chic hairstyle in your back pocket. It’s the one you’ll reach for when you have no time but need to look like you have it all together.
It proves that style doesn’t have to be complicated. Often, the most beautiful things are the simplest, touched with one perfect, personal detail.
So, there you have it—your step-by-step guide to looking polished in practically no time. I promise, once you do this two or three times, it’ll become second nature. It’s that easy.
This bun has saved me on more rushed mornings and last-minute invites than I can count. It’s my little style secret, and now it’s yours too. I’d love to hear how it goes for you!
Save this post to Pinterest so you always have the steps handy! And tell me in the comments—what’s your go-to five-minute hairstyle when you’re in a rush?

