
Okay, let’s be real. We’ve all been there. You see a gorgeous, intricate half-up style on Pinterest, spend 20 minutes trying to copy it, and… it falls flat in an hour. Your arms are tired and you have a pile of broken bobby pins. I feel you.
That’s why I’m obsessed with laced-up styles. They look incredibly detailed, like something straight out of a romantic goth or old money hair inspiration board, but the secret is they’re built to last. The criss-cross pattern locks everything in place.
This is your no-fuss guide to creating beautiful, laced-up half-updos that actually stay put all day. No fancy skills required, just a few tools and these simple steps. Let’s get into it.
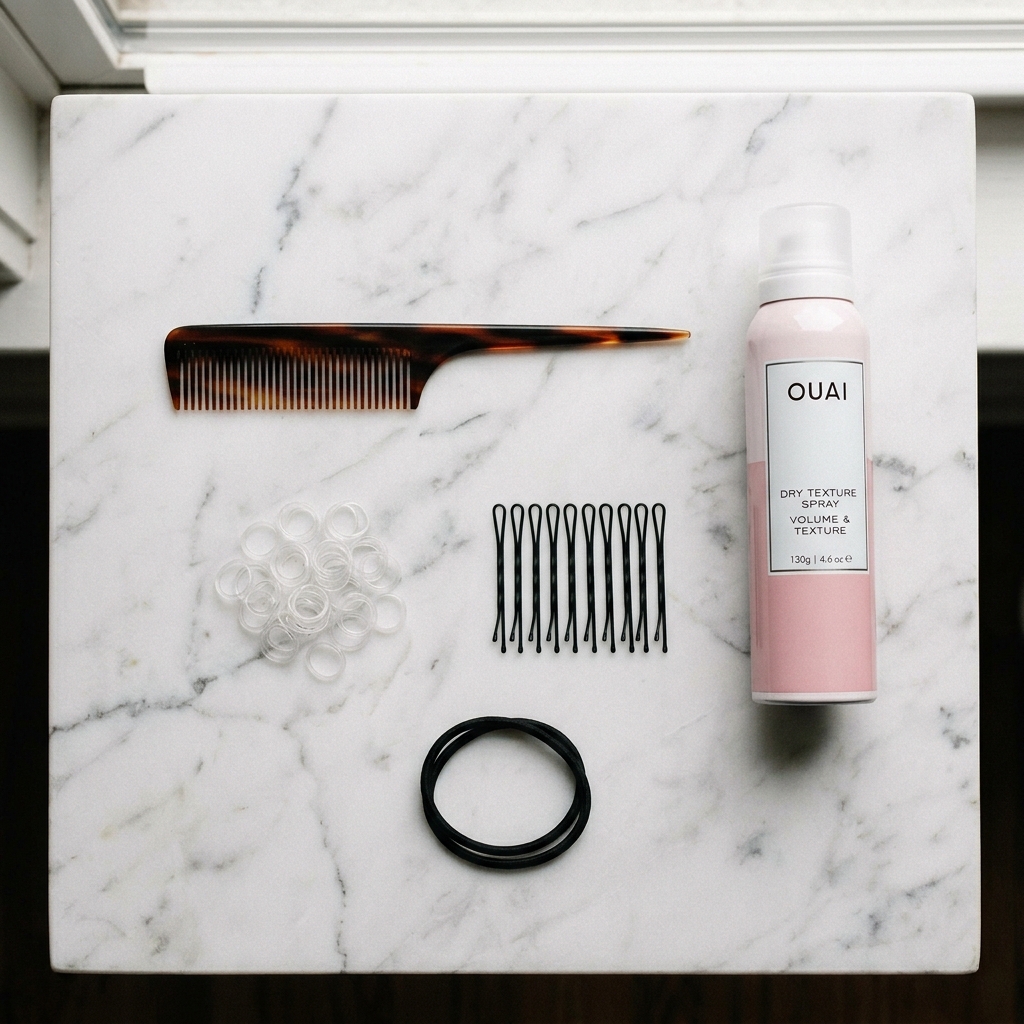
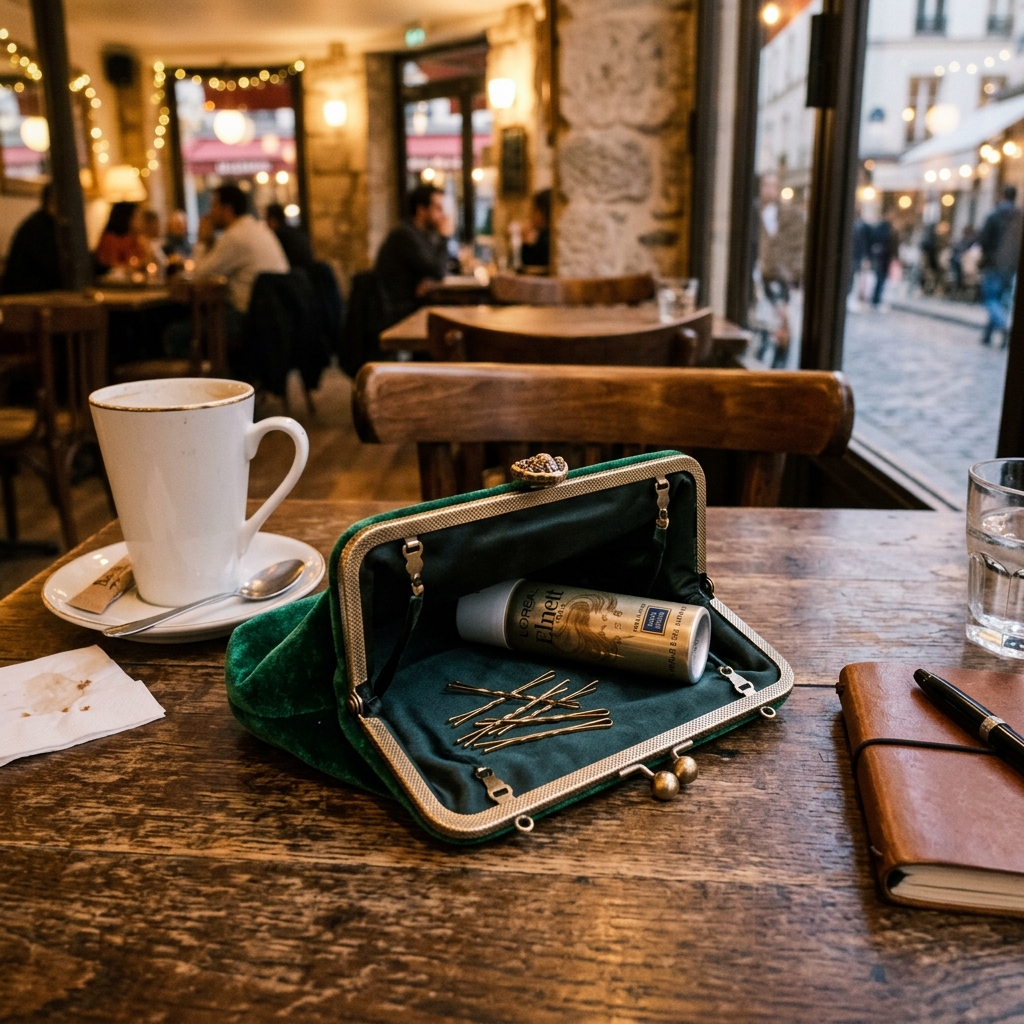
What You’ll Need to Get Started
Gathering the right tools before you start is half the battle. You don’t need a salon full of products, but these key items make all the difference between a style that lasts and one that slips.
Here’s your simple toolkit:
- Fine-Toothed Comb: For clean, sharp parts and smoothing.
- Strong, Clear Elastic Bands: The small, thin ones are best for hiding.
- Bobby Pins (Matte Finish): They grip better than shiny ones. Have a good handful.
- Light-Hold Hairspray or Texture Spray: A little grit helps hold the lace pattern.
- Hair Ties (Optional): For securing the final half-up section.
Start with Day-Old Hair for Grip
If your hair is freshly washed and super silky, even the best technique can struggle. The natural oils and slight texture from day-old hair give your style something to hold onto.
If you must style clean hair, spray a light texture or dry shampoo at the roots and in the mid-lengths where you’ll be working. This creates the perfect base, much like prepping a canvas for a piece of glitchy glam hair art.

Sectioning is Your Secret Weapon
Don’t just grab random sections. Clean part lines are what make this style look polished and intentional, giving off those quiet luxury hair vibes. It also makes the lacing process much easier to follow.
Use the end of your comb to create a clean, horizontal part from ear to ear, separating your top half from the bottom. Then, part the top section down the middle from your forehead back. You now have two front sections to work with.
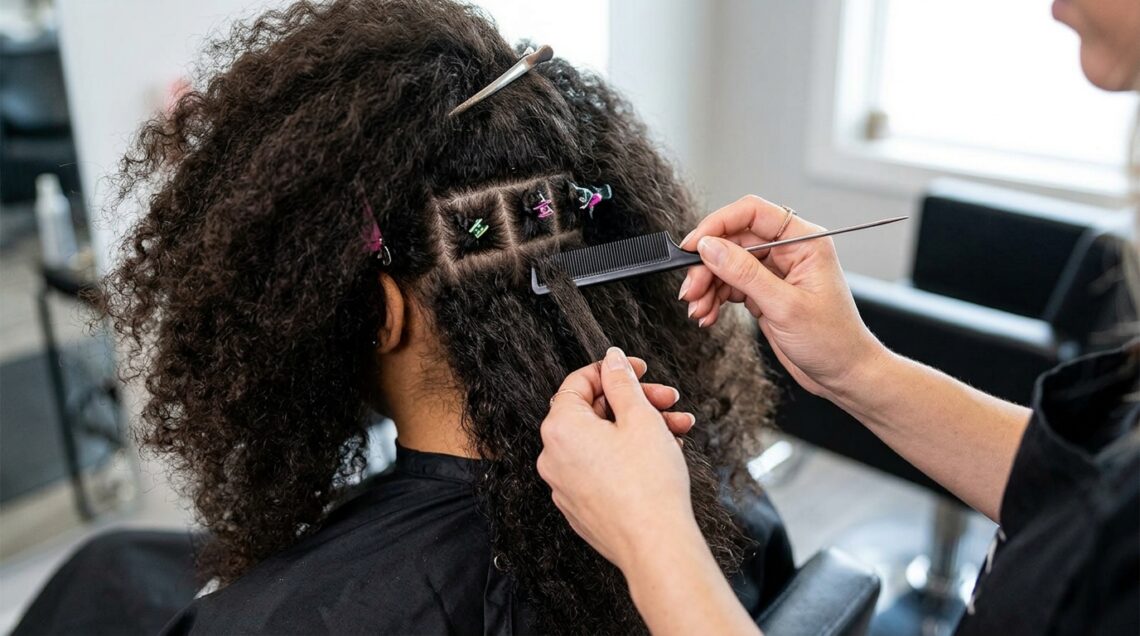
The Basic Lacing Technique
This is the fundamental move you’ll use over and over. Think of it as a simple braid, but with only two sections. Once you get this, the whole style opens up.
- Take a small, thin section of hair from the front of one side.
- Cross it over to the opposite side, holding it taut.
- Take a matching section from that opposite side and cross it back over.
- Secure where they cross with a bobby pin inserted horizontally.

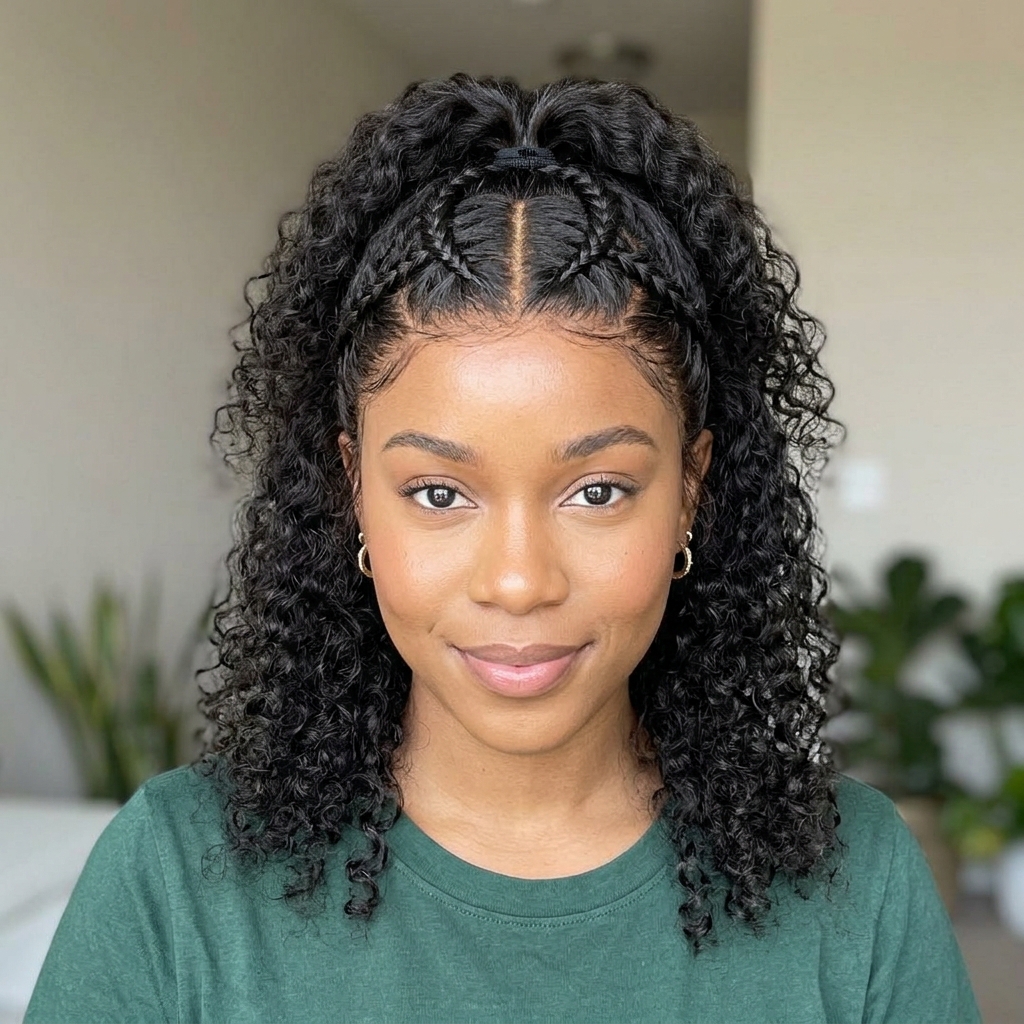
Style 1: The Simple Front Lace
This is the perfect beginner style. It keeps hair out of your face with a beautiful, detailed touch. It works with any hair texture and is a great base for more elaborate 2026 hairstyles.
After sectioning, take a small piece from the front of your right temple. Cross it over to the left side, just above your ear. Take a piece from the left front and cross it back to the right. Pin at the cross. Repeat 2-3 times, then gather all the laced hair into a small half-up ponytail.
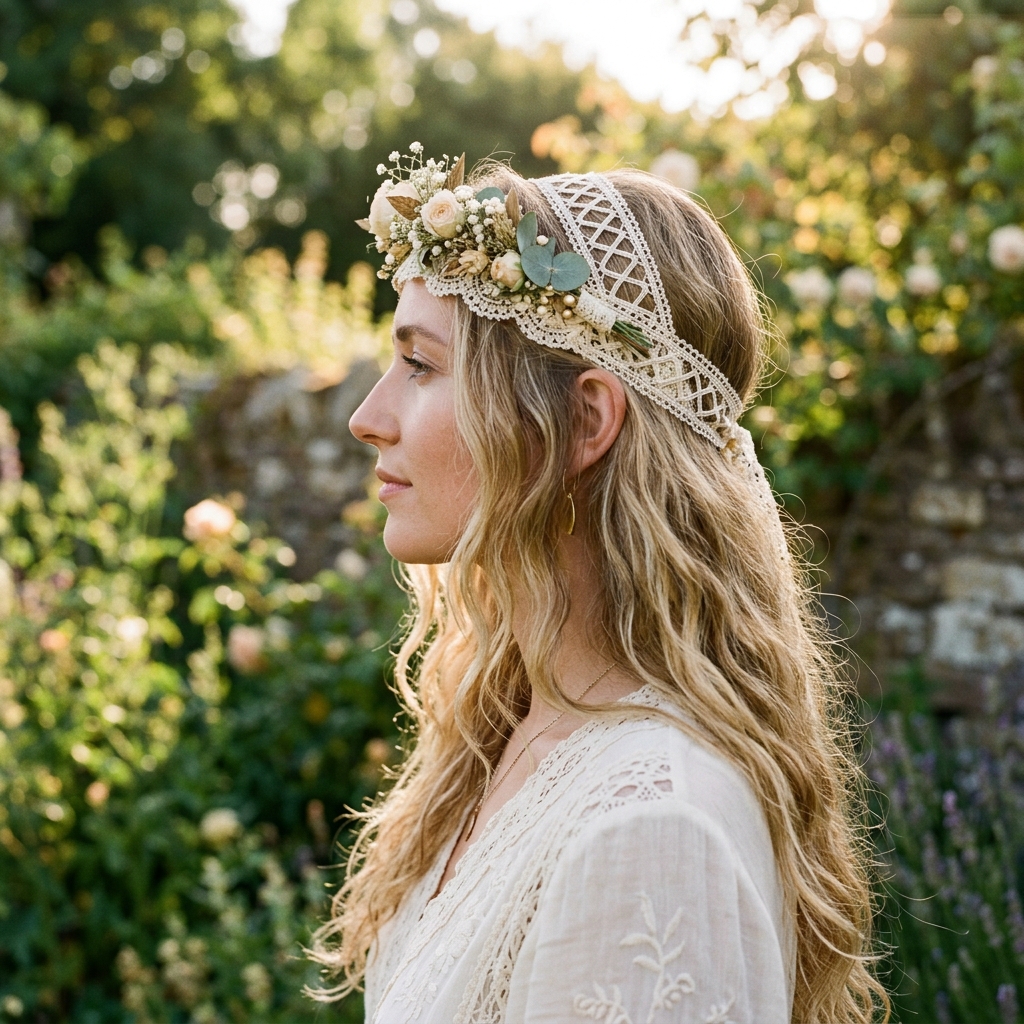
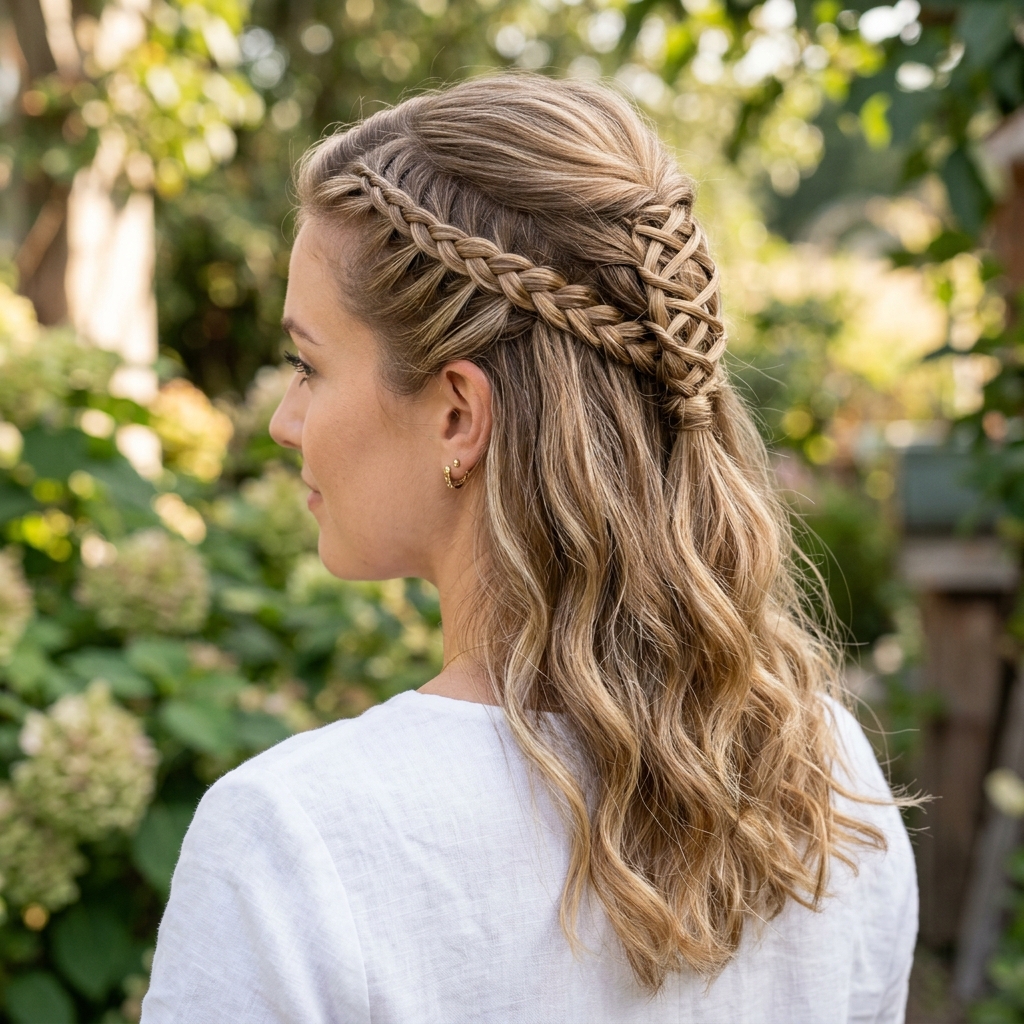
Style 2: The Boho Crown Lace
This style wraps around your head like a crown, perfect for festivals or adding a romantic touch to everyday looks. It has a very soft, romantic feel that’s far from overdone.
Start with a deep side part. Beginning on the heavier side, take a front section and cross it back over your head. Add in new hair with each cross, moving toward the back of your head on the opposite side. Secure the end with a pin and let the rest of your hair flow down.
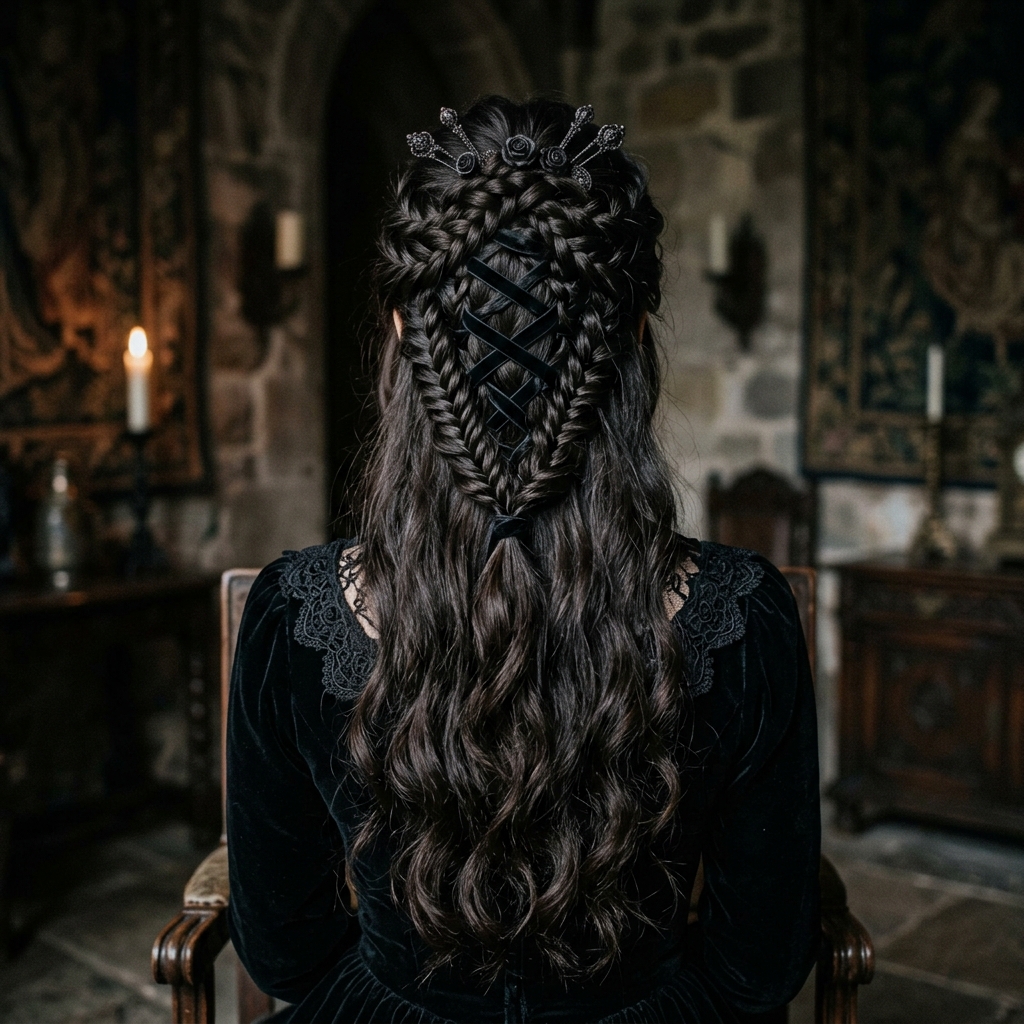
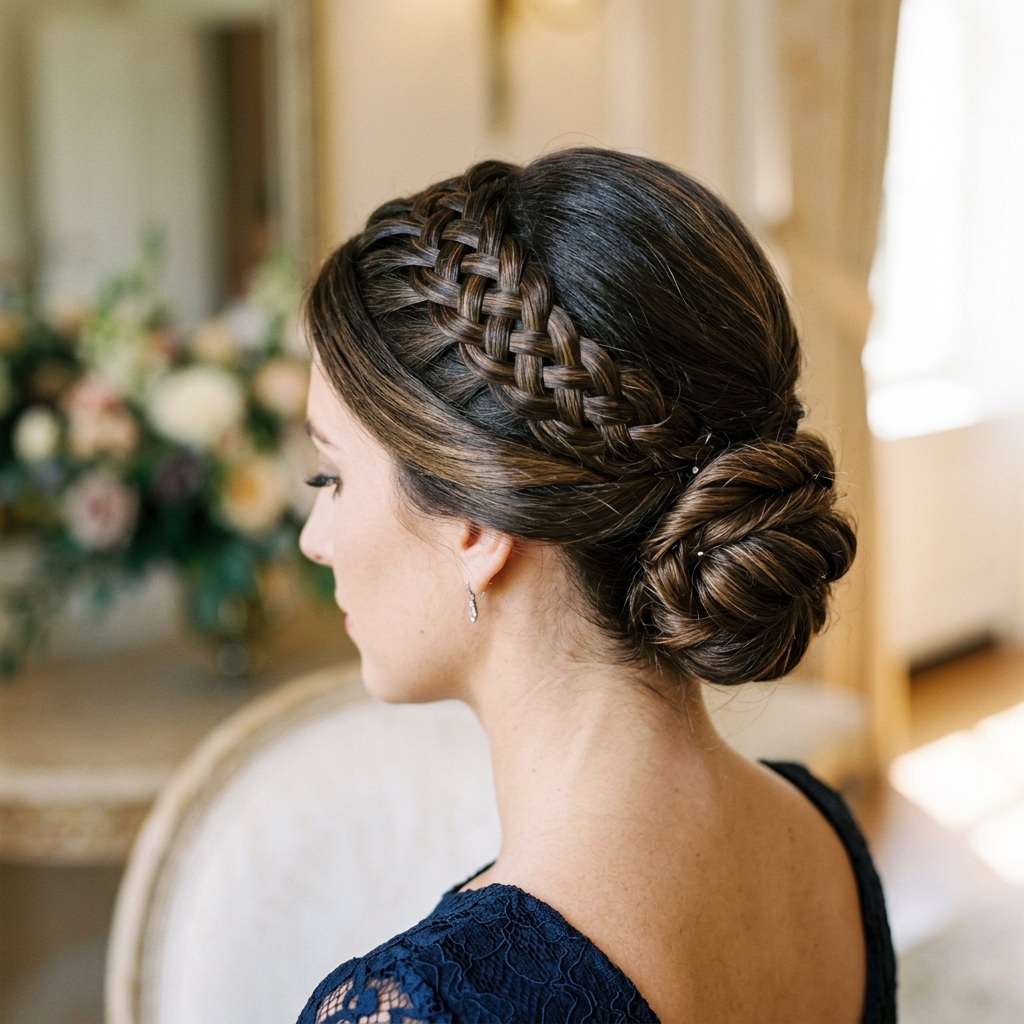
Style 3: The Vampire Cathedral Lace
Inspired by romantic goth hairstyles and that timeless vampire haircut aesthetic, this style is dramatic and elegant. It’s all about creating a high, intricate focal point.
Create a high, centered half-up section. Divide it into two vertical columns. Lace small pieces from the outer edges of each column toward the center, building a detailed, woven look. Pull it tight for a severe look, or leave it soft for a more romantic goth feel.
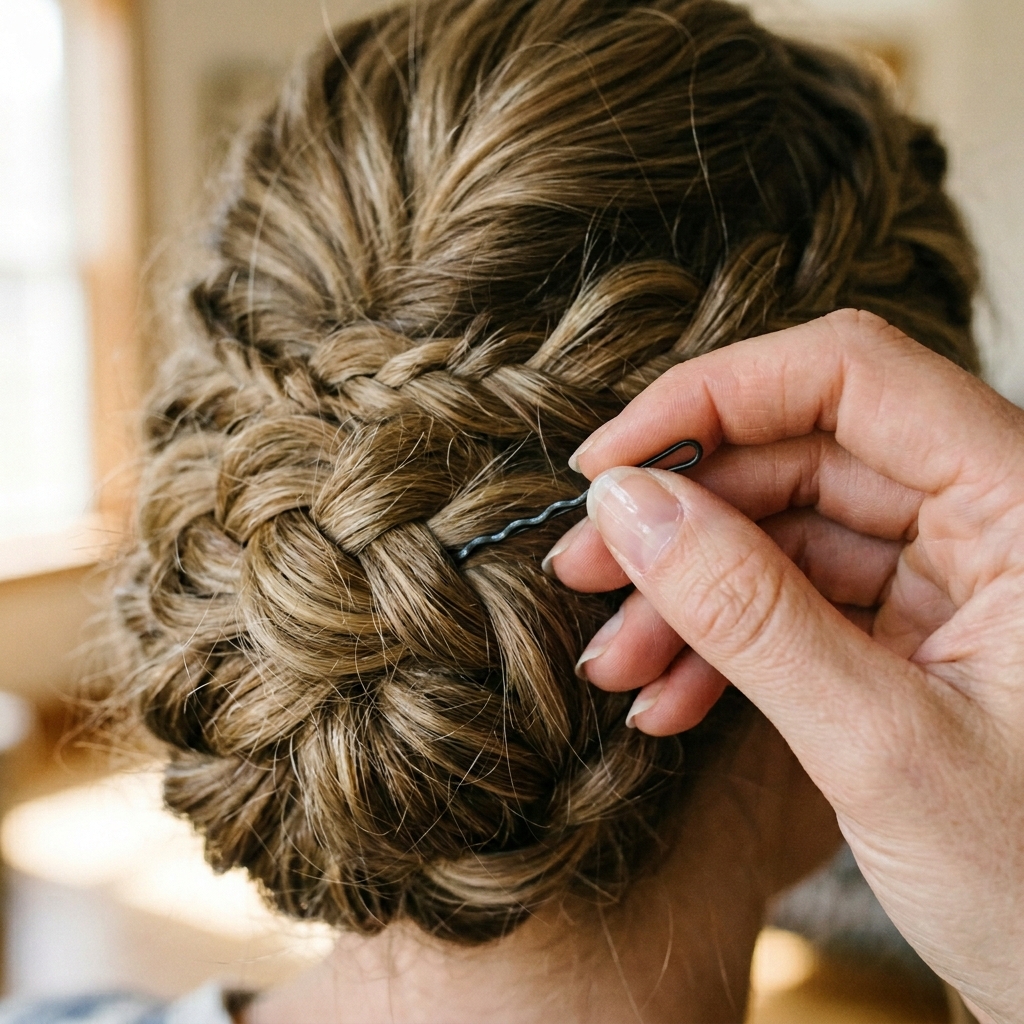
How to Hide Your Bobby Pins
Visible bobby pins can ruin the magic. The trick is to insert them correctly. Always slide the pin into the style with the wavy side down against your scalp. This is how it grips.
Push the pin in, then use the tip to catch a tiny bit of hair from underneath the section you’re securing. Slide it back in the opposite direction to lock it. It should seem to disappear into the weave of your hair.
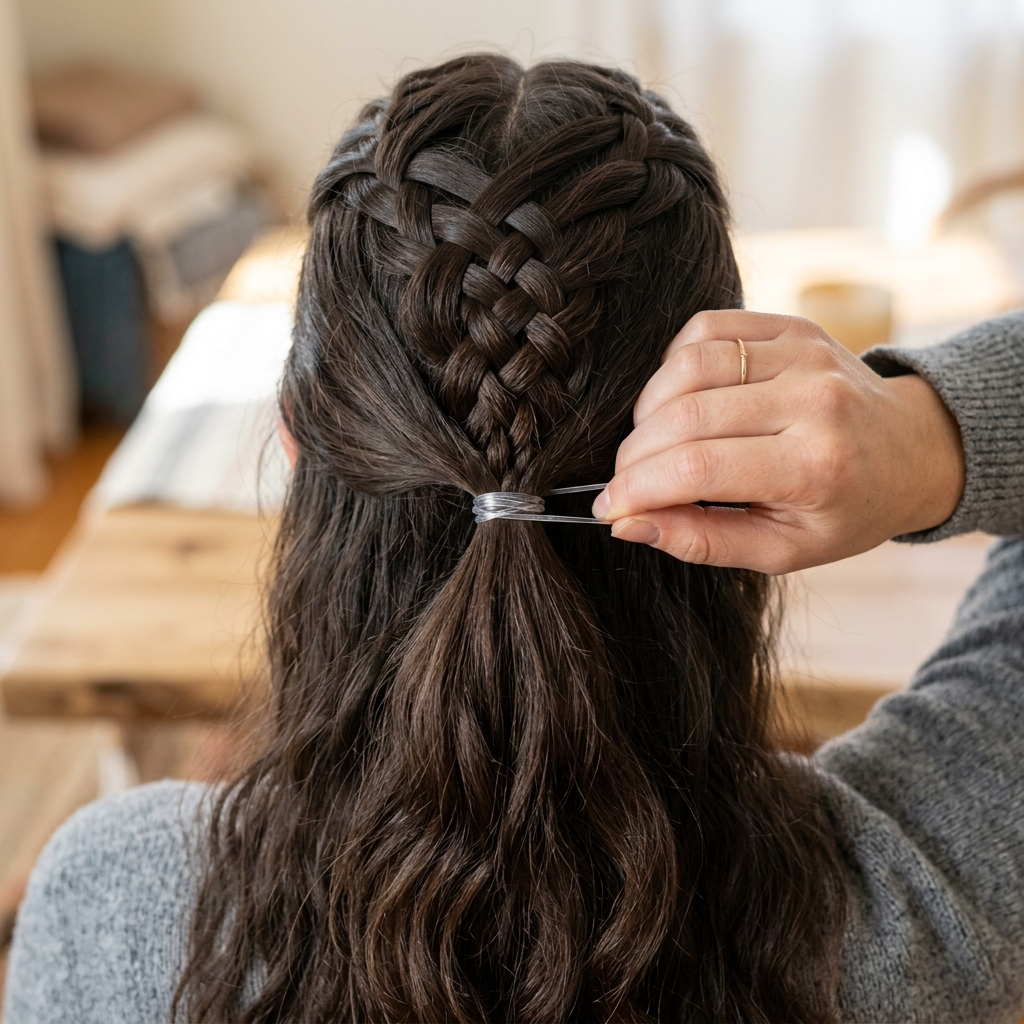
Securing the Final Half-Up Ponytail
Once your lace pattern is pinned, you need to secure the gathered hair. A clear elastic is your best friend here. Wrap it tightly around the base of the gathered sections.
For extra hold and a seamless look, take a tiny piece of hair from the ponytail and wrap it around the elastic. Secure the end underneath with a discreet bobby pin. This is a classic old money hair trick for a polished finish.
Adding Texture for a “Lived-In” Look
If your style looks too perfect or tight, gently pull on the edges of the laced sections to loosen them. This adds softness and volume, making it look effortless.
Lightly mist texture spray over the entire style, then use your fingers to gently separate and fluff the woven pieces. This lived-in texture is key to that cool-girl glitchy glam hair aesthetic—perfectly imperfect.
What to Do With Wispy Pieces
Don’t fight baby hairs or wispy pieces—embrace them. They add softness and movement. After you’re done, use a small amount of pomade or wax on your fingertips to smooth them slightly, or just let them fly free for a romantic touch.
If they’re bothering you, you can also twist a few of the tiniest wisps and pin them back discreetly with a mini bobby pin, hiding it under the main pattern.

Adapting for Super Thick Hair
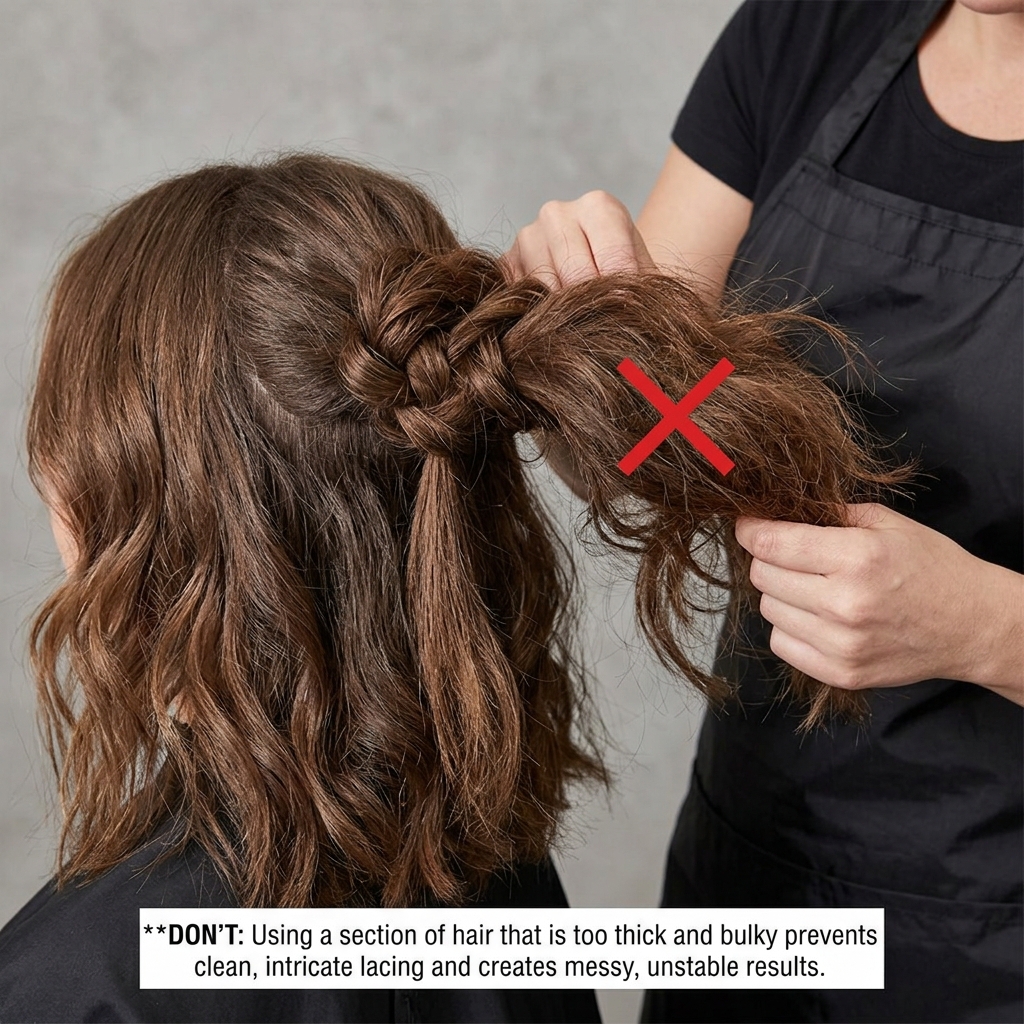
If you have thick hair, use smaller sections. Larger sections can become too heavy and pull the style down. Make your laced pieces about half the width you think you need.
Double up on bobby pins at each crossing point for extra security. You might also need a stronger-hold spray. The good news? Thick hair holds intricate patterns like this beautifully once it’s secured.
Adapting for Fine or Silky Hair
Fine hair needs that texture base we talked about. Dry shampoo is non-negotiable. Also, try lightly backcombing (teasing) the very root of each section before you lace it. This gives the pins something to anchor to.
Use more, smaller bobby pins rather than fewer big ones. And opt for a strong-hold hairspray, spraying lightly at each cross as you build the style.

Incorporating Braids for Extra Detail
Take this style to the next level by adding a braid into the mix. Before you start lacing, create a small Dutch braid along your hairline on one side. Then, incorporate the tail of that braid into your first lace cross.
This hybrid look is stunning and adds a beautiful, intricate detail that feels fresh and modern, like a twist on the hime cut’s dramatic front pieces.
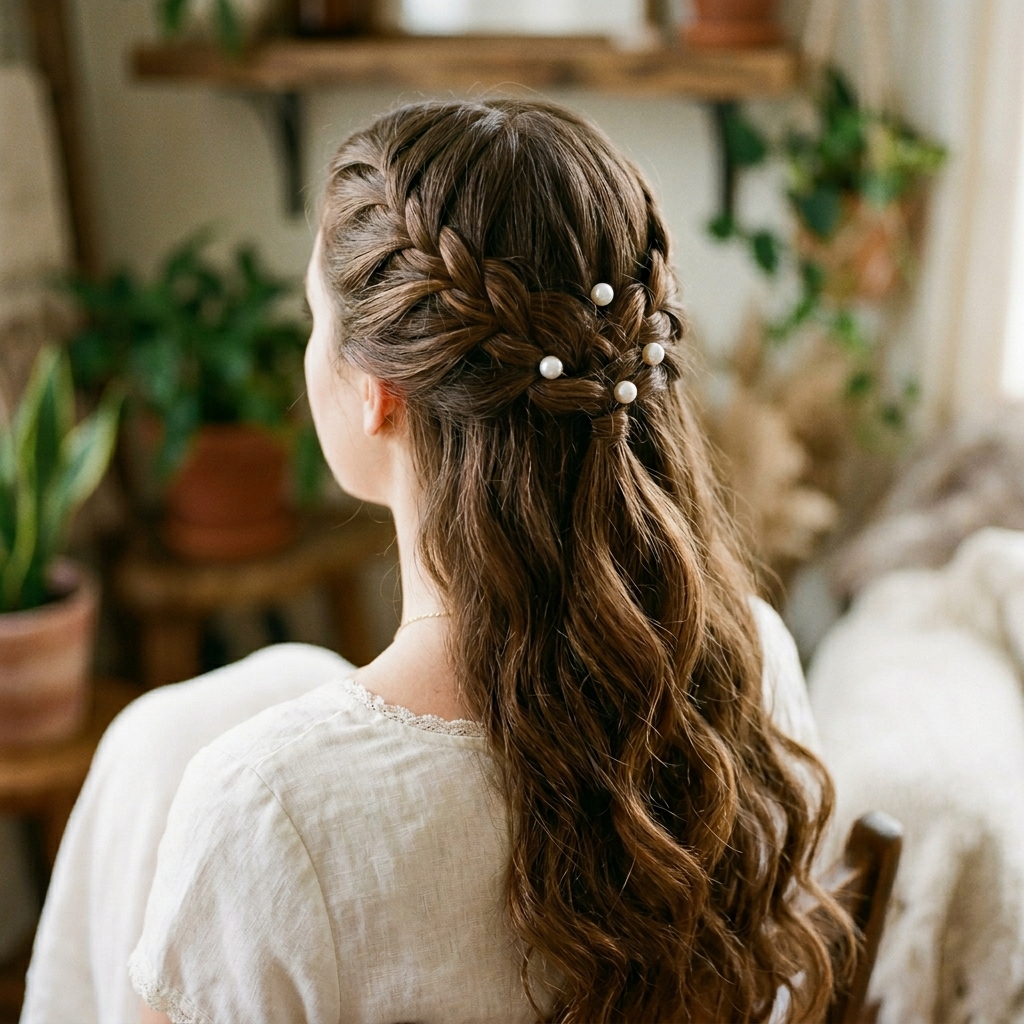
Accessorizing Your Laced Style
Simple accessories can elevate this look instantly. Slide a few delicate pearl-ended pins into the crosses. Or, weave a thin, delicate chain into the laced pattern after you’re done.
For a bolder look, add a statement barrette or clip at the base of the half-up ponytail. This is an easy way to tap into the quiet luxury bob accessory trend, even with long hair.
Turning It Into a Full Updo
This technique isn’t just for half-up hair! Once you’ve created your laced front, gather all your hair—including the loose bottom section—into a low bun or chignon at your nape.
The beautiful laced detail at the crown remains, making a simple bun look incredibly elegant and complex. It’s a perfect wedding or event style.
Quick Fix for a Long Day
If your style starts to sag by afternoon, don’t panic. Keep a few bobby pins and a travel hairspray in your bag. Find the crosses that feel loose, gently lift the section, and slide a new bobby pin in next to the old one for reinforcement.
A quick spritz of hairspray aimed at the roots under the style will reactivate the hold. Fixing takes 30 seconds.
Common Mistakes to Avoid
The biggest mistake is using sections that are too thick. This makes the style bulky and hard to secure. Start smaller than you think. Another is not pinning at the exact cross point, which lets the tension slip.
Also, avoid using heavy products like gels or creams before styling. They can weigh hair down and make it slippery. Stick to light sprays.
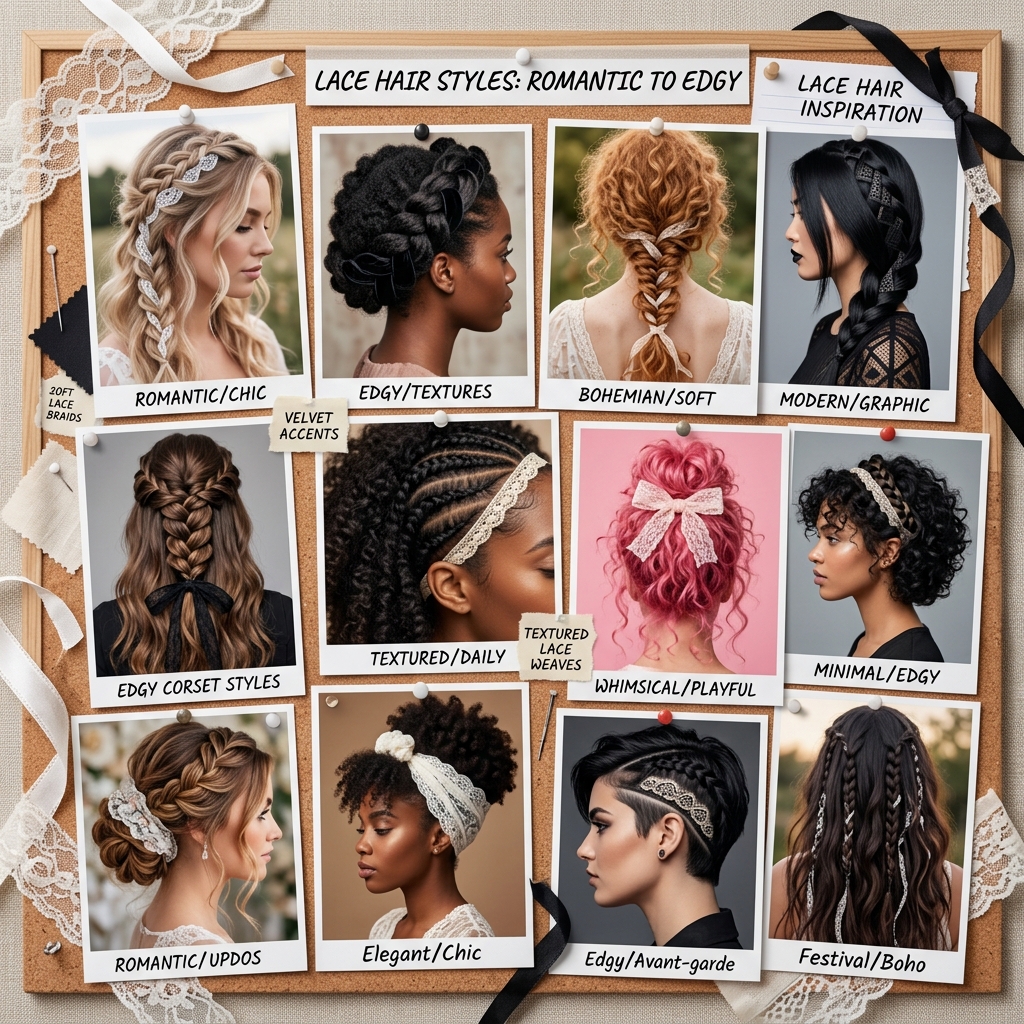
How This Style Fits Modern Trends
This laced technique is so versatile. It can be adapted to fit the softness of old money hair, the edge of romantic goth hairstyles, or the cool distortion of glitchy glam hair. It’s all in how you accessorize and finish it.
It also works with virtually any cut—long layers, an asymmetrical lob, or even as a detail with a hime cut. It’s a timeless technique that feels very now.
Practice Makes Perfect (Seriously)
Your first try might not be perfect, and that’s okay. It’s a new motor skill. Practice while watching TV or before you wash your hair. The muscle memory will build quickly.
Start with the Simple Front Lace style and master it before moving to the more intricate ones. Within a few tries, you’ll be able to do it without even looking in a mirror.

Your Hair, Your Rules
The best part about this style is there’s no single “right” way. Once you know the basic cross technique, you can create your own patterns. Try starting with a zig-zag part instead of a straight one, or lace only on one side for an asymmetrical lob-inspired look.
Play with it. Make it tight and precise, or loose and messy. It’s your canvas. The goal is a beautiful style that makes you feel confident and that lasts.
And there you have it! Everything you need to create those gorgeous, stay-put laced hairstyles you’ve been pinning. It’s really about the simple technique and those few key prep steps. Once those click, a whole world of beautiful, secure updos opens up.
Remember, the goal isn’t perfection. It’s a style that looks complicated but feels easy to you, and lasts from your morning coffee to whatever the evening brings. That’s the real win.
Save this post to Pinterest to keep this guide handy for your next hair day! And I’d love to know—which style are you most excited to try? Drop a comment below and tell me how it goes!

