

Okay, let’s be real. You have a formal event coming up, and you want to look polished, elegant, and like you didn’t spend three hours wrestling with a curling iron. I get it. We’ve all been there, scrolling through endless 2026 hairstyles that look amazing on a model but feel impossible to recreate.
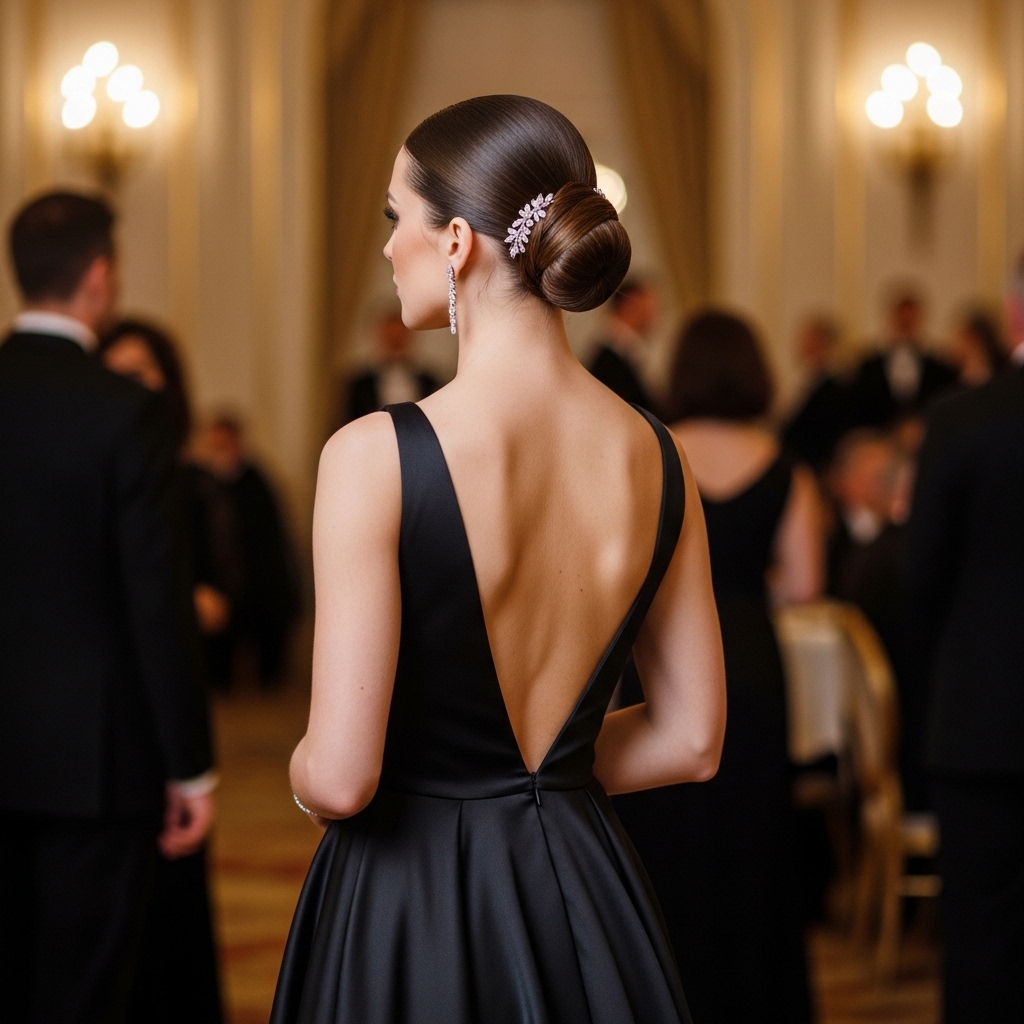
That’s why I’m obsessed with the Old Money Hair sleek bun. It’s the ultimate quiet luxury statement—effortless, timeless, and incredibly chic. It whispers confidence instead of shouting for attention.
This isn’t about being stuffy. It’s about looking put-together with a serene kind of grace. And the best part? It’s way easier than it looks. I’m breaking down everything you need, from prep to perfect finish, so you can nail this look for your next big night out.
What Is “Old Money Hair” Anyway?
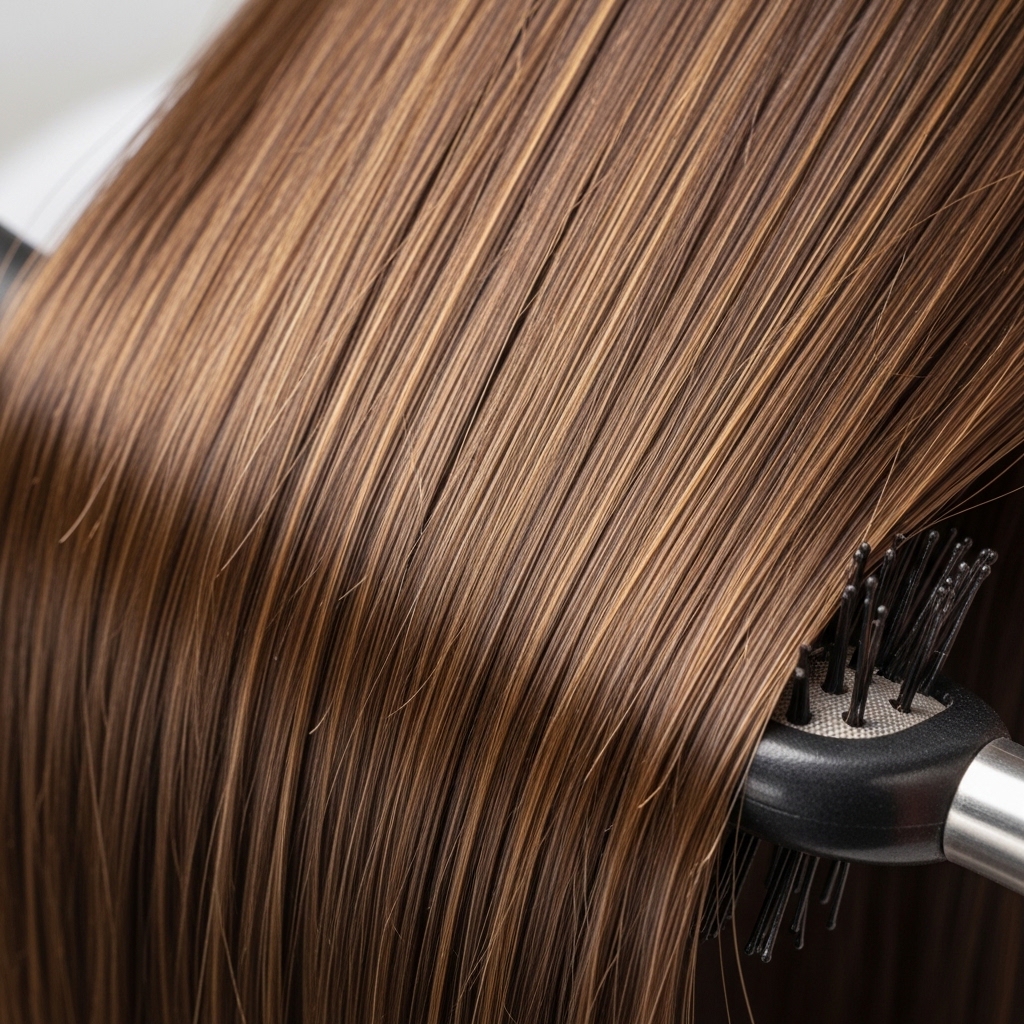
It’s a vibe, not just a haircut. Think less about flashy trends and more about timeless health and elegance. Old money hair is perfectly conditioned, has a beautiful natural shine, and is styled in classic, sophisticated shapes.
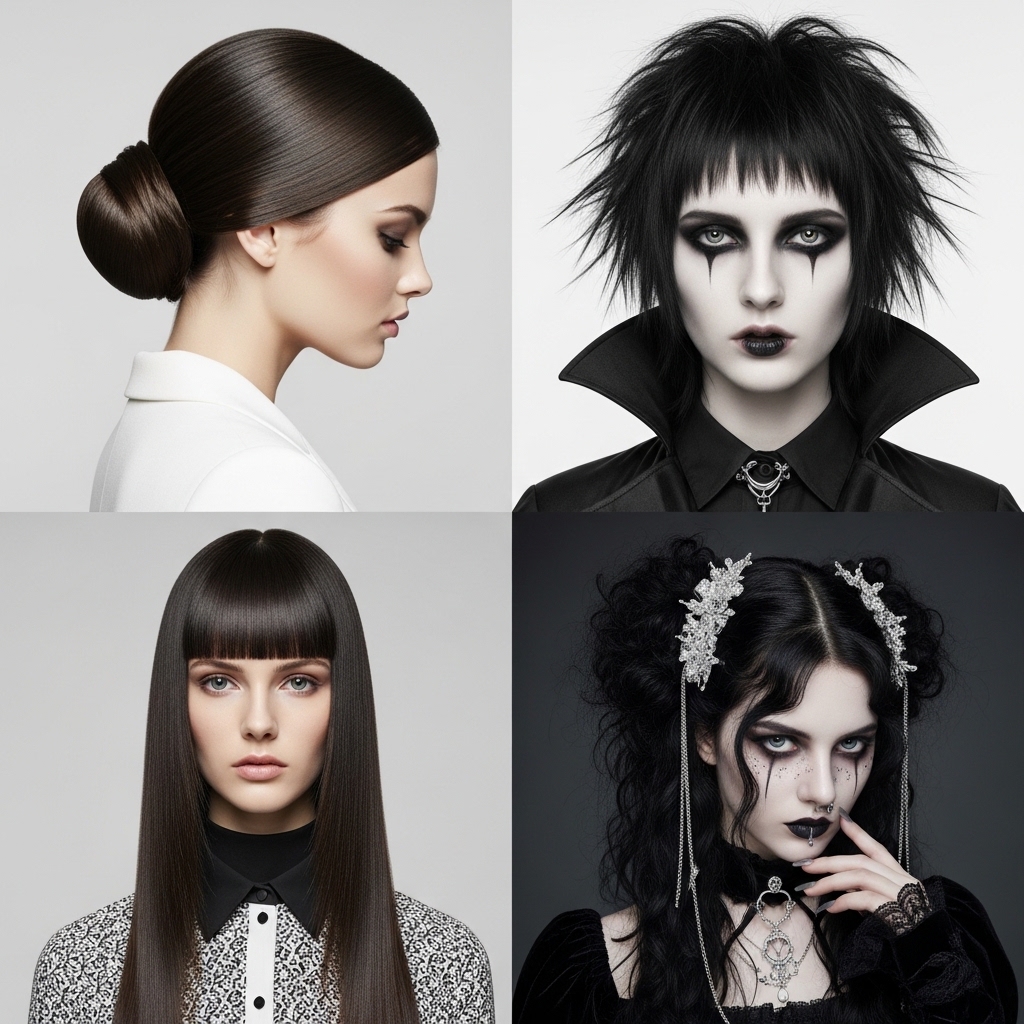
It’s the opposite of glitchy glam hair or romantic goth hairstyles. While those are gorgeous and artistic, this aesthetic is about understated wealth and maintenance. The sleek bun is its ultimate formal expression—clean, controlled, and impossibly chic.
Why the Sleek Bun is a Formal Event Winner
This hairstyle works for every formal setting, from weddings to galas. It keeps hair completely off your face and neck, which is a blessing in crowded rooms. It showcases your features and jewelry beautifully.
Plus, it pairs perfectly with any neckline. Unlike a quiet luxury bob or an asymmetrical lob, which are great cuts, the bun creates a blank canvas. It lets your dress and accessories truly shine without any competition.
Hair Prep: The Non-Negotiable First Step
Great styling starts with great prep. You cannot create a sleek, flyaway-free bun on dry or frizzy hair. Start with freshly washed hair, or dampen it slightly if it’s day-old.
Apply a smoothing leave-in conditioner or a light hair oil to the mid-lengths and ends. Then, use a strong-hold gel or styling cream from roots to ends. This creates a uniform, manageable base. Comb it through thoroughly with a fine-tooth comb.
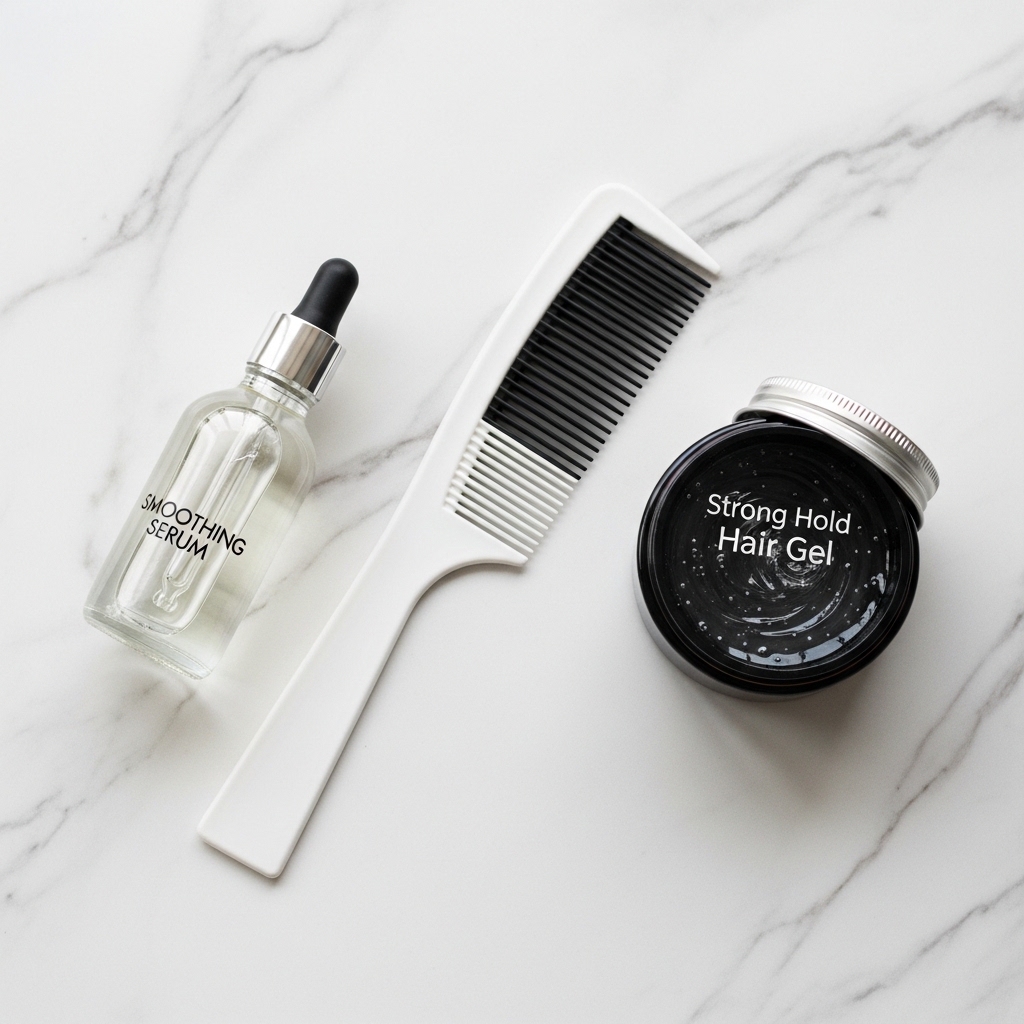
The Essential Tools You’ll Need
- Fine-Tooth Comb: This is your best friend for creating tension and smoothness.
- Strong-Hold Gel & Hairspray: Look for formulas that offer shine, not crunch.
- Hair Elastics: Use a snag-free, color-matched elastic. I like the spiral ones.
- Bobby Pins: Good quality, matte-finish pins that grip and hide easily.
- Boar Bristle Brush: Perfect for smoothing the surface once the bun is secured.

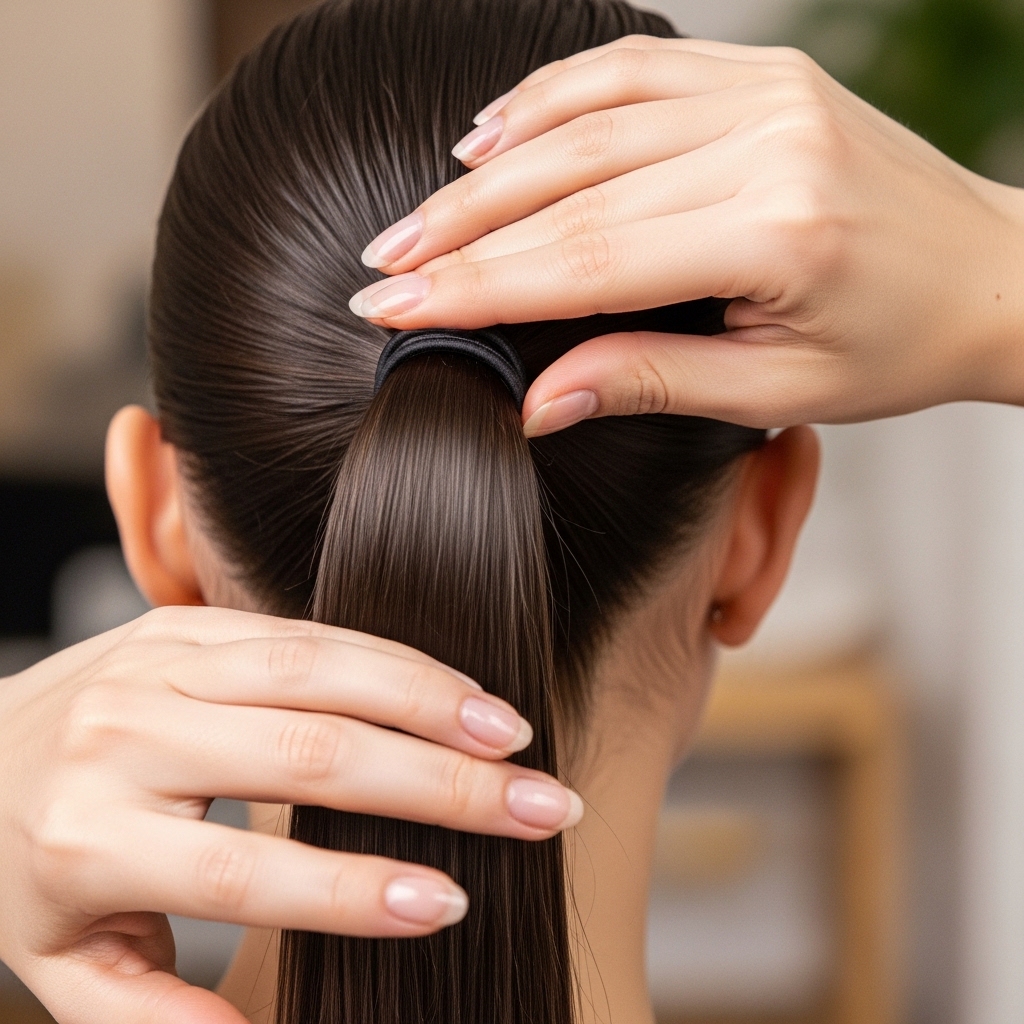
Step 1: Creating the Perfect Ponytail
This is the foundation. Brush all your hair back smoothly. No part, or a very deep side part for a slight twist. Gather it at your desired height—low for classic, at the crown for more drama.
As you secure the ponytail with your elastic, do not pull the last loop all the way through. Leave the end as a small loop. This creates an anchor for wrapping the hair and prevents a bulky base. Smooth any bumps with the tail of your comb.
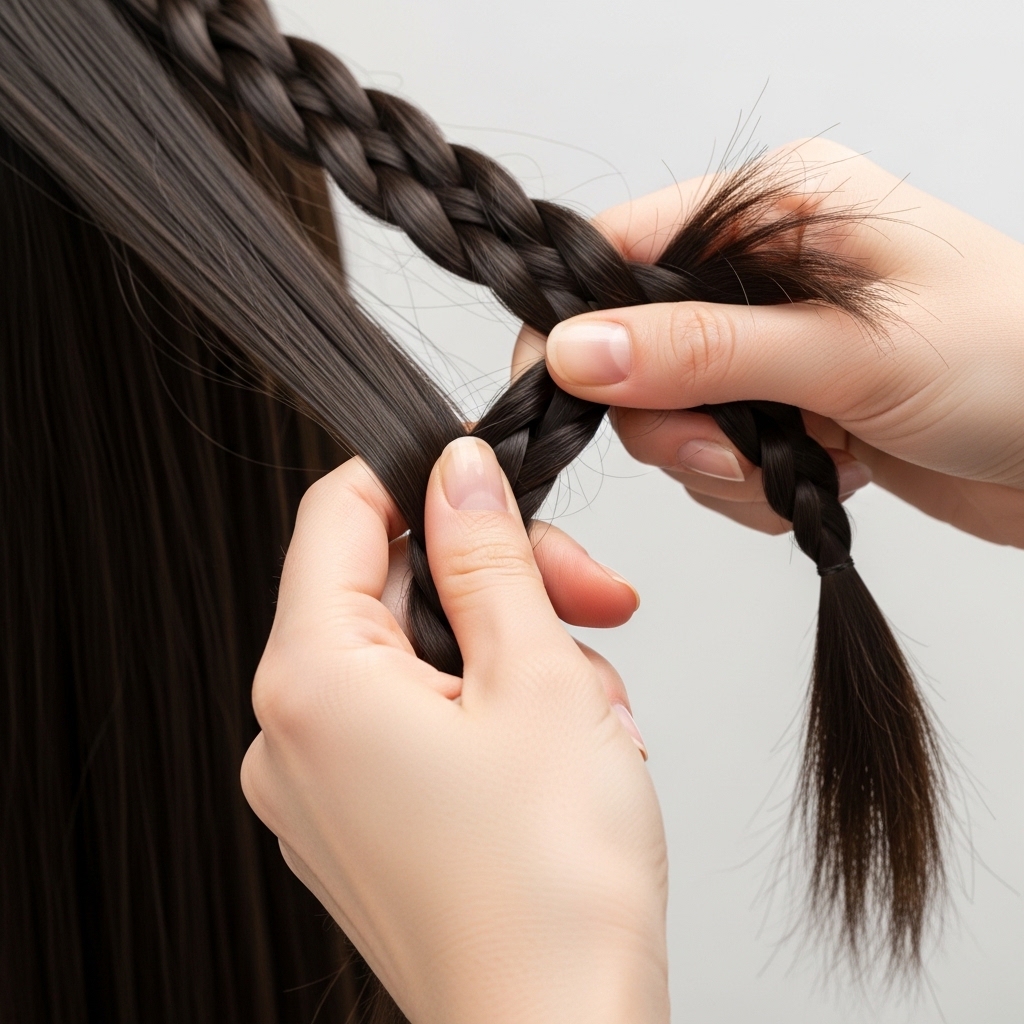
Step 2: Twisting for Elegant Texture
Take your ponytail and twist it tightly in one direction, clockwise or counter-clockwise. Twist it all the way down to the ends. You’ll feel it start to coil on itself.
This twist is what gives the bun its neat, rope-like texture and helps it lie flat. It’s a simple trick that makes the next step so much easier and gives a more polished result than just wrapping loose hair.
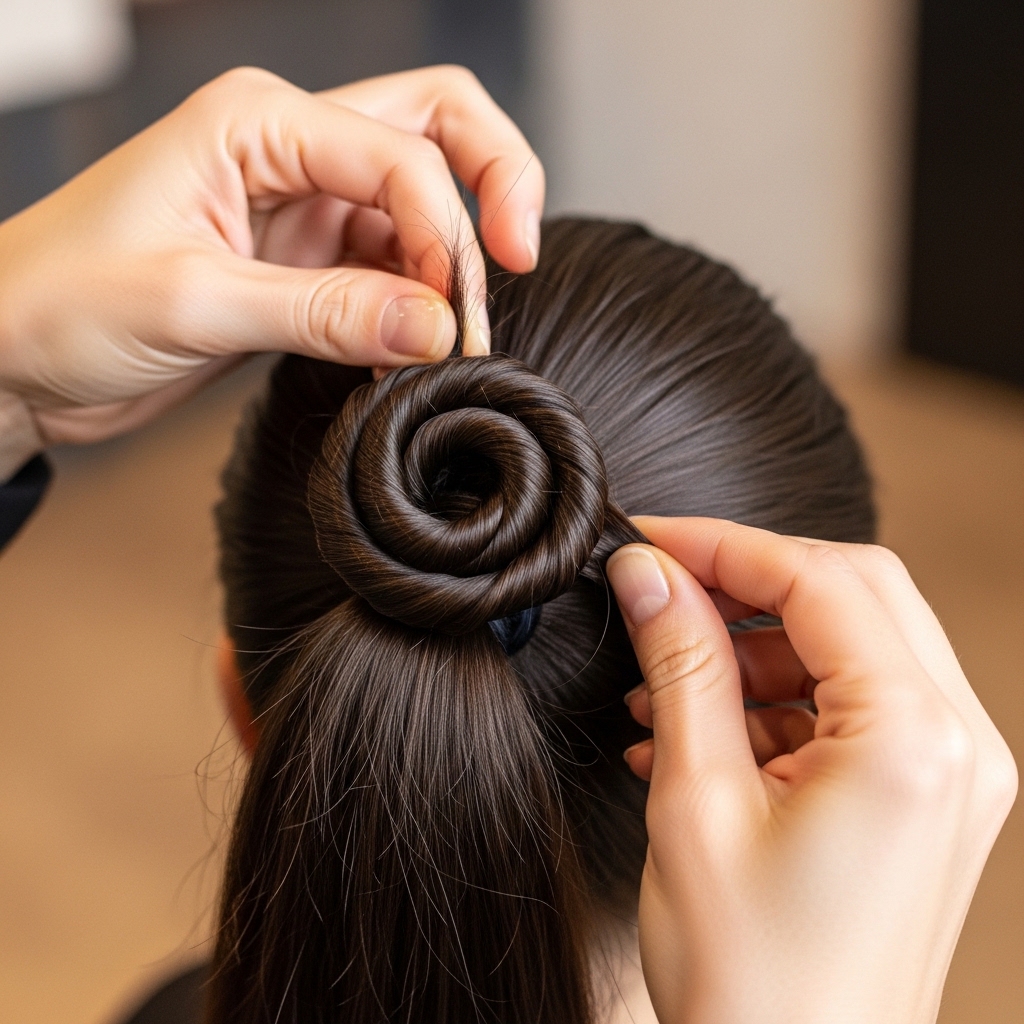
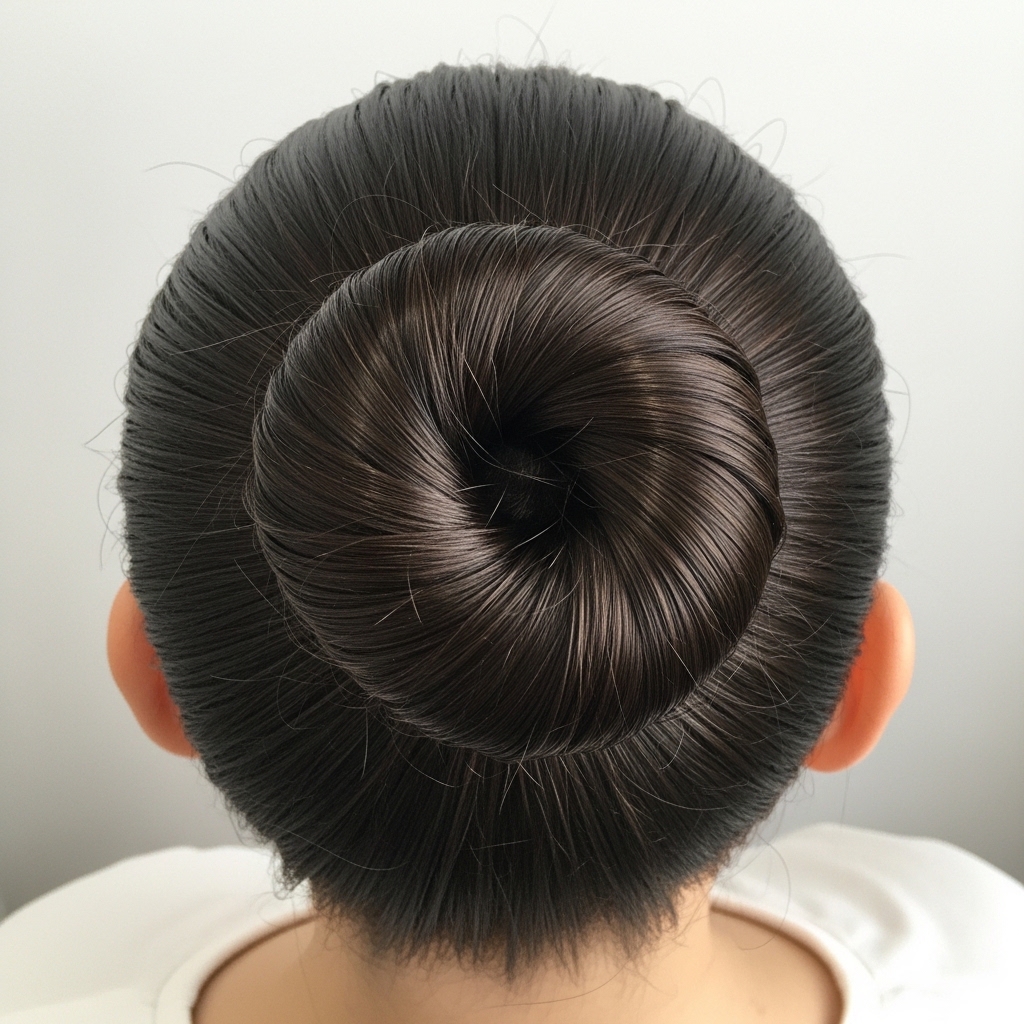
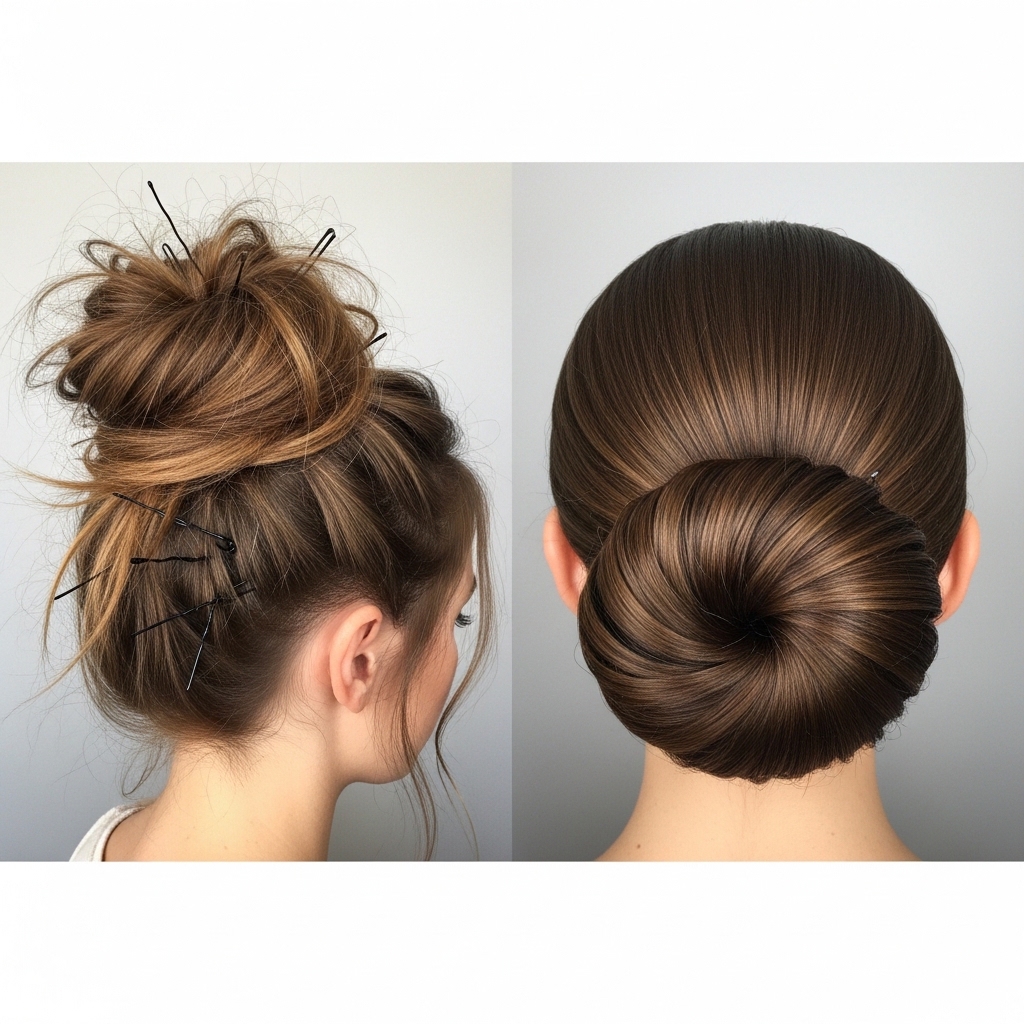
Step 3: Wrapping the Classic Bun
Now, wrap the twisted ponytail around the base. Coil it neatly, following the direction of the twist. Tuck the very end of the hair underneath the bun.
As you coil, use your other hand to hold the base steady. The goal is a flat, compact disc, not a puffy ball. This is the core shape of your old money hair moment.
Step 4: Securing with Bobby Pins
This is the secret to all-day hold. Use more pins than you think! Slide bobby pins into the bun, following the coil, to lock the hair in place. Open the pin, insert it into the bun, then push it towards the scalp, catching the base hair.
Use a criss-cross pattern for security. Aim for at least 4-6 pins. Don’t just pin the outer layer; anchor the bun to the hair at your scalp.

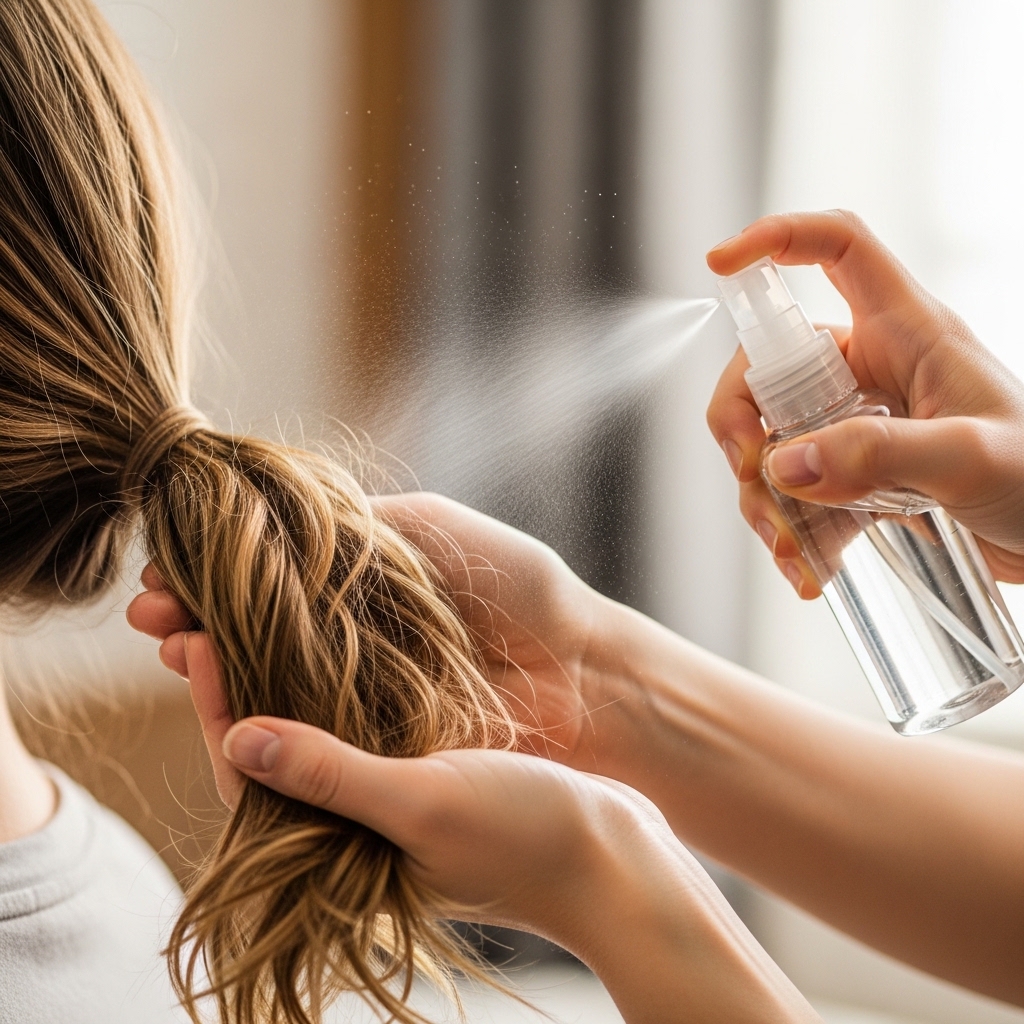
Step 5: The Final Smoothing & Spray
Take your boar bristle brush and gently brush over the surface of the bun to tame any tiny wisps. Then, mist a light-hold hairspray over the entire style.
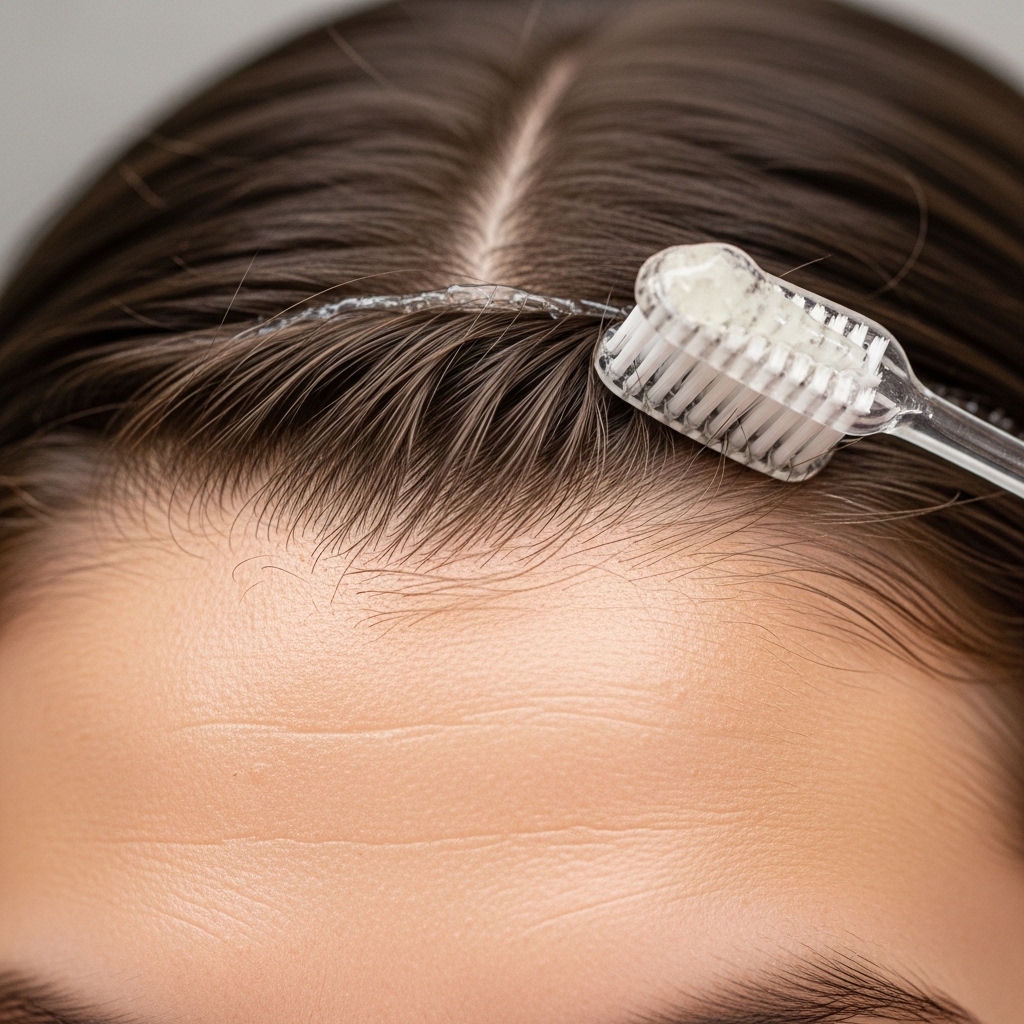
For the front, spray a tiny bit of hairspray on your finger or a clean toothbrush and gently smooth down your baby hairs and hairline. This gives that flawless, sealed finish.
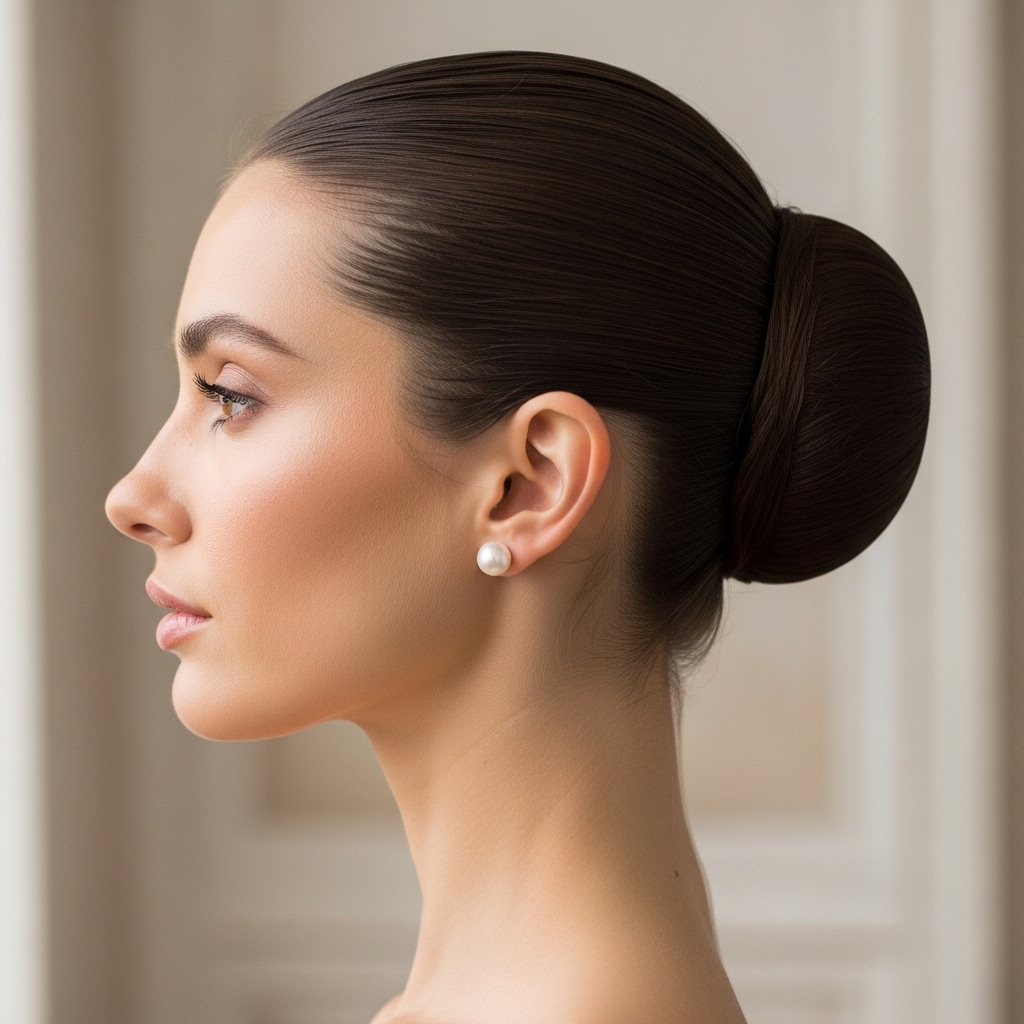
Variation 1: The Low “Ballerina” Bun
This is the most classic and universally flattering placement. Position your ponytail right at the nape of your neck. It elongates your neck and looks incredibly graceful.
Keep the bun itself tight and compact. This is the go-to for black-tie events and exudes that quiet, confident luxury we’re aiming for. It’s the hairstyle equivalent of a perfect little black dress.
Variation 2: The Crown Chignon
For a bit more drama and height, place your ponytail at the crown of your head. When you wrap the bun, keep it centered. This style draws the eye upward and adds a regal feel.
It’s perfect if you want to feel a bit more “done” and formal. It pairs beautifully with statement earrings, as it keeps the ears and jawline completely clear.
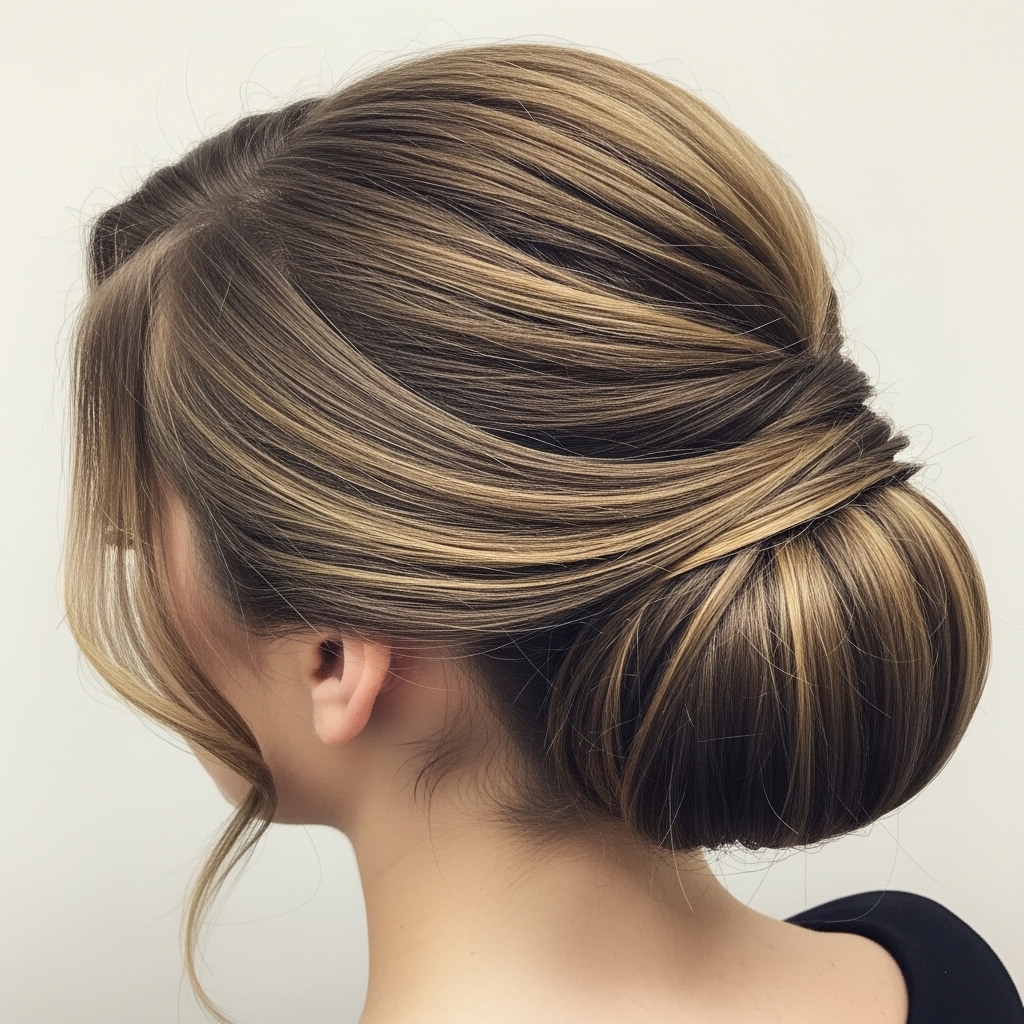
Variation 3: The Twisted Side Bun
This adds a touch of softness. Create a deep side part and gather your hair into a low ponytail on the heavier side of the part. Follow the same steps, but let the bun rest gently against your neck.
It has a slightly more romantic, less severe feel while still being perfectly polished. It’s a beautiful option for softer formal events like garden weddings.
How to Hide Thin or Shorter Hair
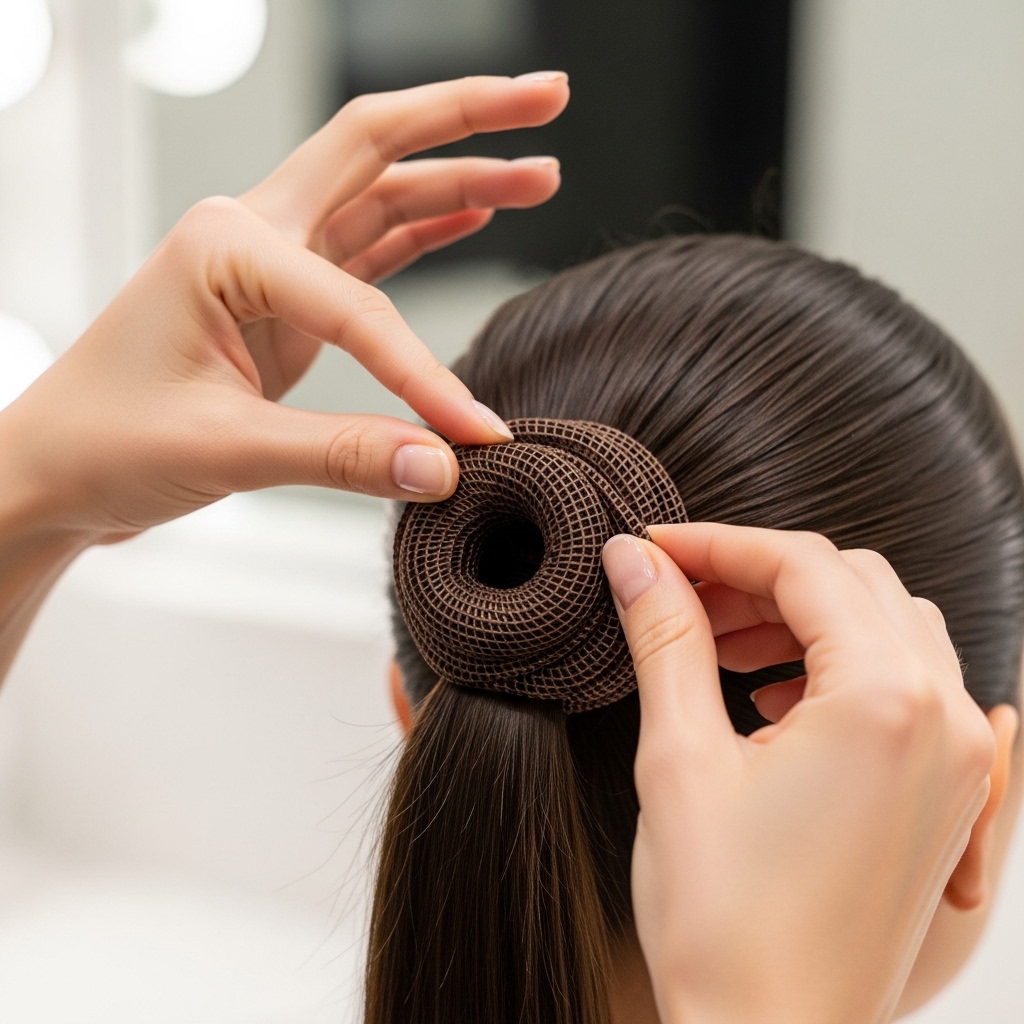
Don’t have a thick ponytail? No problem. Use a small, color-matched hair donut or bun form. Place it over your ponytail base before you start wrapping.
Distribute your hair evenly over the form as you wrap and pin. This instantly creates a fuller, more luxurious-looking bun. It’s a total game-changer for fine hair.
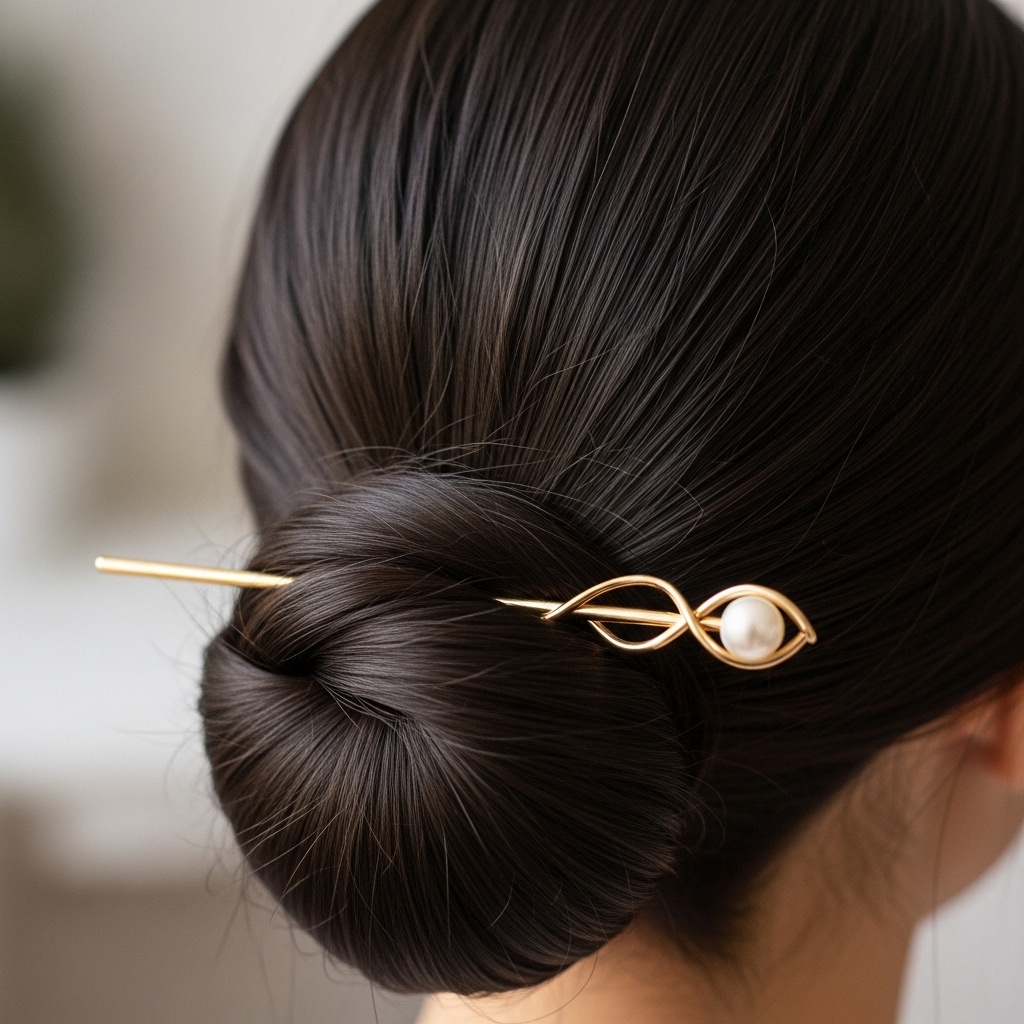
Adding Subtle Accessories
Accessorize with intention. A simple, elegant hairpin slid horizontally through the bun adds a touch of sparkle. Or, use a delicate chain or pearl strand pinned around the base.
The key is one piece. This isn’t the place for glitchy glam hair accents. Choose a piece that feels like heirloom jewelry—understated and precious.
What to Do With Baby Hairs & Flyaways
Embrace them or sleek them! For a controlled look, use a tiny bit of gel or a clean mascara wand with hairspray to lay them down in soft waves along your hairline.
For a more modern take, you can let them be. A few soft wisps can actually make the style feel less severe and more personal. Just ensure they’re intentional, not chaotic.
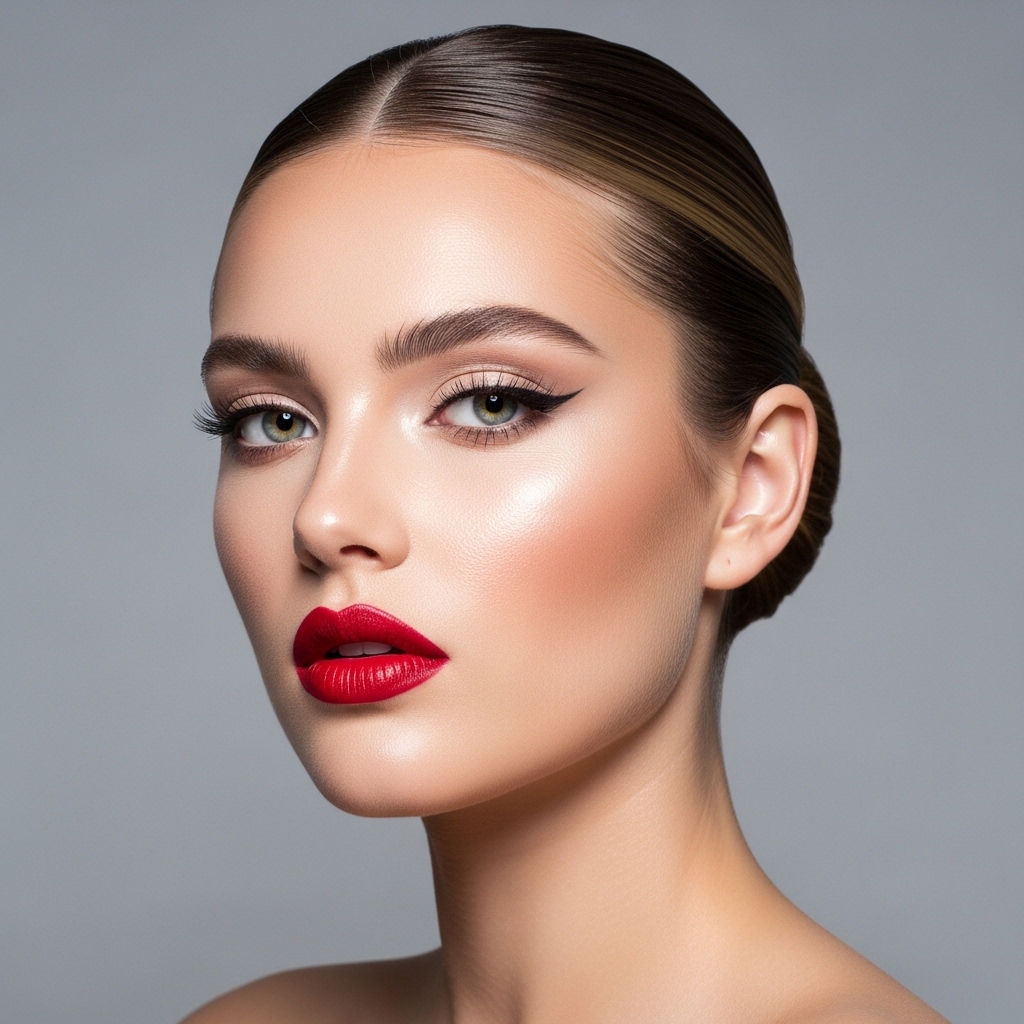
Makeup Pairings for This Look
With such a clean hairstyle, your makeup can really shine. Go for glowing skin, a bold lip, or a smoky eye—but not both. Let one feature be the star.
A classic red lip with this bun is a powerful, timeless combo. It feels very modern old money hair—like you woke up looking that impeccable.
Avoiding Common Mistakes
- Too Tight: It shouldn’t give you a headache. Keep tension smooth, not painful.
- Greasy Product Overload: Use water-based gels. Start with less, you can add more.
- Pins Showing: Always insert pins with the wavy side down, following the hair.
- Ignoring the Sides: Smooth the hair above your ears thoroughly. This area loves to puff up.
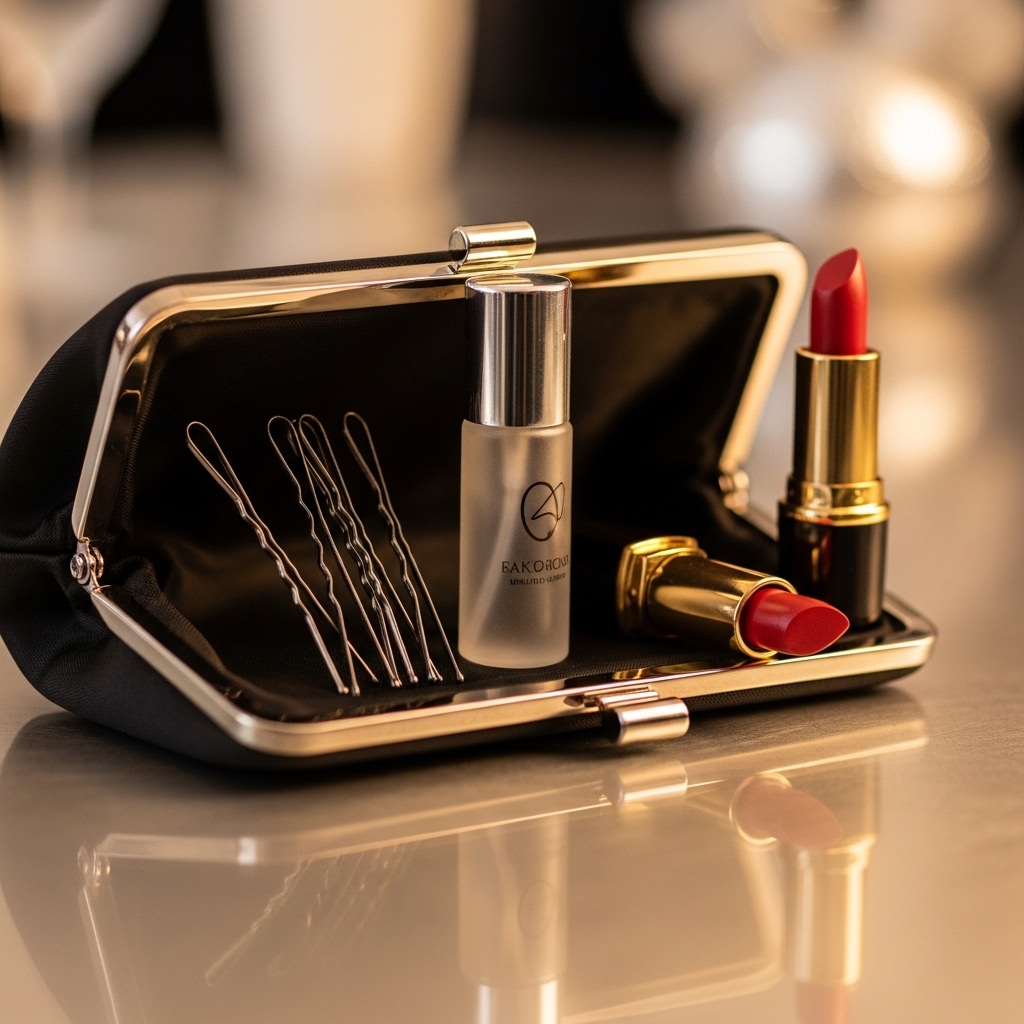
How to Make It Last All Night
Prep is 90% of the battle. Using the right strong-hold products from the start is key. Toss a few extra bobby pins and a travel hairspray in your clutch for touch-ups.
If you feel a wisp or a pin loosening, find a bathroom, spray the pin before re-inserting, and secure it. A quick brush-over with a clean toothbrush can resmooth the surface.
From Day to Night: A Quick Transform
Wearing your hair down for the day? You can still create this bun without a full re-wash. Mist your hair with a water bottle until it’s damp all over.
Apply a bit more smoothing product, then comb and style as usual. The dampness will reset any waves or frizz from the day and give you that fresh, sleek look.
This vs. Other Formal 2026 Hairstyles
Unlike the edgy vampire haircut or the bold hime cut, this style is about timelessness. It’s not trying to be the trendiest look in the room.
It’s also more polished than loose, romantic goth hairstyles. Think of it as your style anchor—always appropriate, always chic, and always making you look pulled together.
Your Confidence is the Best Accessory
Walking into a room with this hairstyle, you know you look good. There’s no hair in your face, nothing to fuss with. That peace of mind is everything.
It allows you to focus on the moment, the people, the experience. That’s the real luxury—feeling so put-together that you can forget about your hair and just enjoy yourself.

Final Touch: The Outfit Check
Before you walk out the door, do a 360-check in a full-length mirror. See how the bun looks with your dress’s neckline and back detail.
Make sure no stray pins are peeking out. Give your hair one last light mist of hairspray from a distance. Then, take a deep breath. You’re ready.
And that’s it, friend! My complete guide to mastering the Old Money sleek bun. It might take one or two practice runs in your bathroom, but I promise, once you get the steps down, it becomes a five-minute lifesaver.
This look is your secret weapon for any event where you want to feel elegant without the effort. It’s less about following fleeting 2026 hairstyles and more about mastering a look that will serve you for decades.
I’d love to hear from you! Which variation are you most excited to try for your next event? Do you have any sleek bun tips of your own? Share them in the comments below!
Save this post to Pinterest so you can easily find these steps when you’re getting ready. Trust me, future-you will be so grateful on the day of your big event.

