
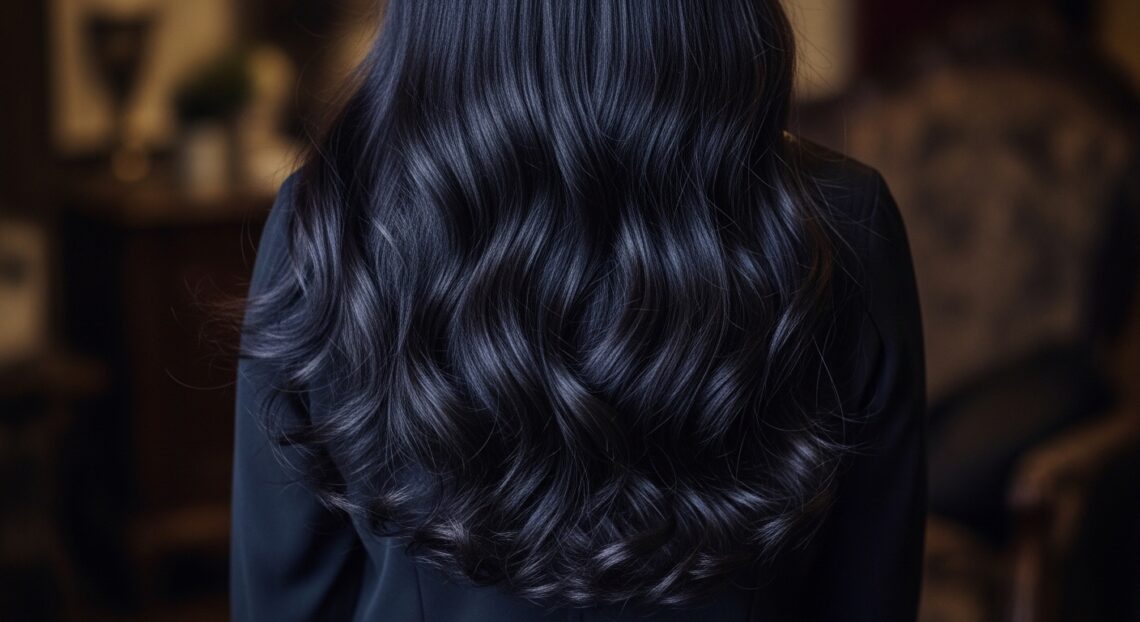
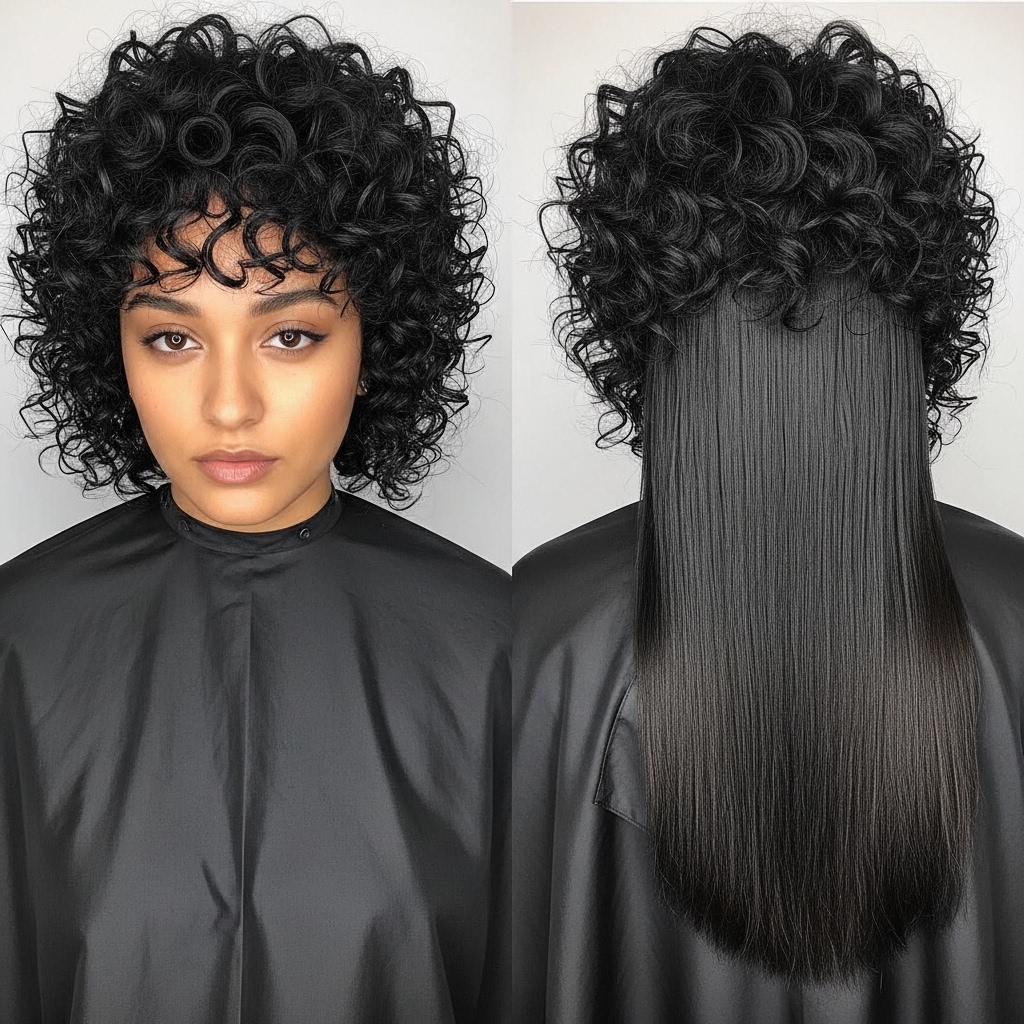
Okay, let’s talk about one of the coolest haircuts to style right now: the hime cut. If you’ve been scrolling through 2026 hairstyle trends, you’ve definitely seen it. It’s that gorgeous, dramatic mix of short, sharp front pieces and long, flowing hair in the back.
Maybe you took the plunge and got the cut, but now you’re staring in the mirror thinking, “How do I actually style this?” I’ve been there. The default middle part is iconic, but switching it up with a side part? Game changer.
It transforms the whole vibe, leaning into romantic goth hairstyles or even a softer, old money hair aesthetic. This post is your quick, no-fuss guide to mastering the hime cut with a side part. We’re going to cover everything from the basic blow-dry to some seriously fun, glitchy glam hair moments. Let’s get into it.
Why a Side Part Changes Everything
That classic, centered hime cut is powerful and direct. But sweeping your hair to one side instantly adds a different kind of drama. It creates more asymmetry, which feels very now and plays beautifully with trends like the asymmetrical lob.
A deep side part feels inherently vintage and luxurious, tapping into that quiet luxury bob energy. A softer, more relaxed side part gives off romantic, effortless vibes. It’s all about playing with the balance between the short front strands and the long back.
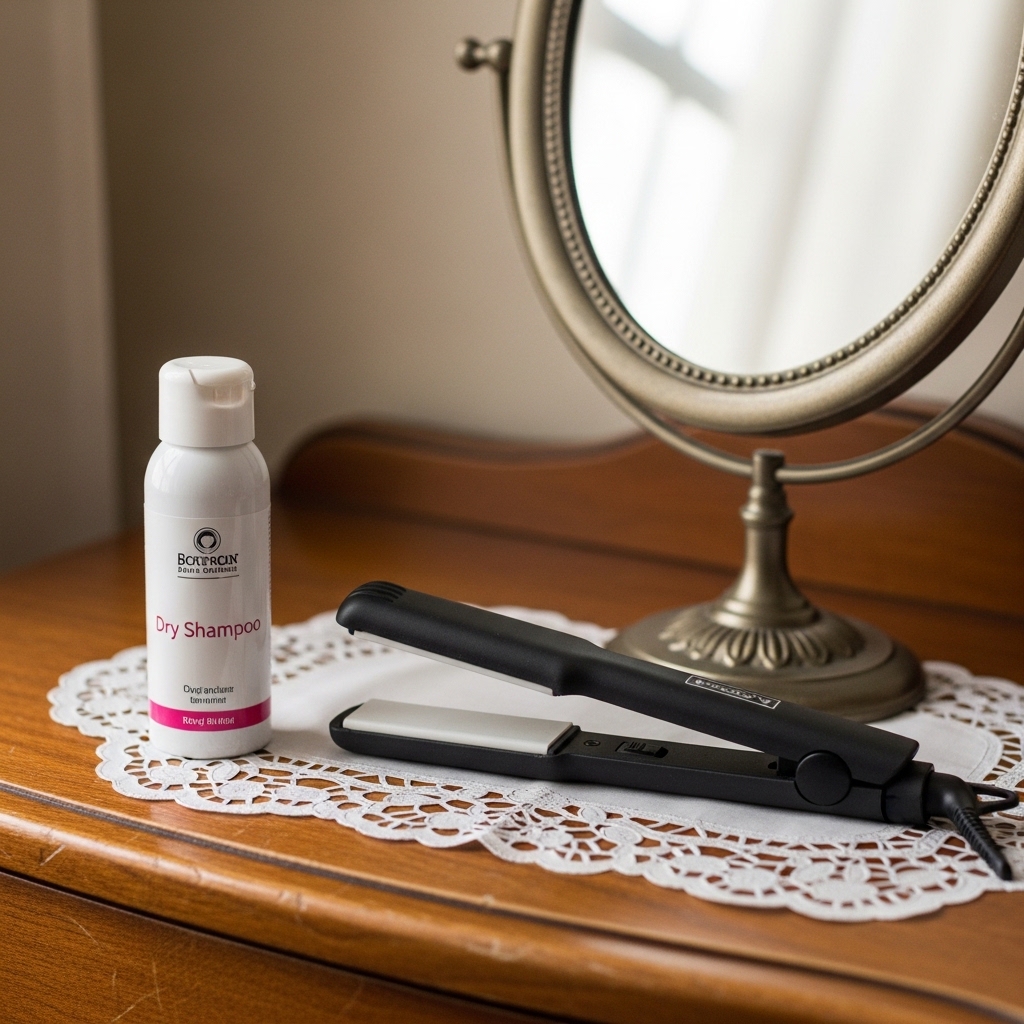
Tools You Absolutely Need
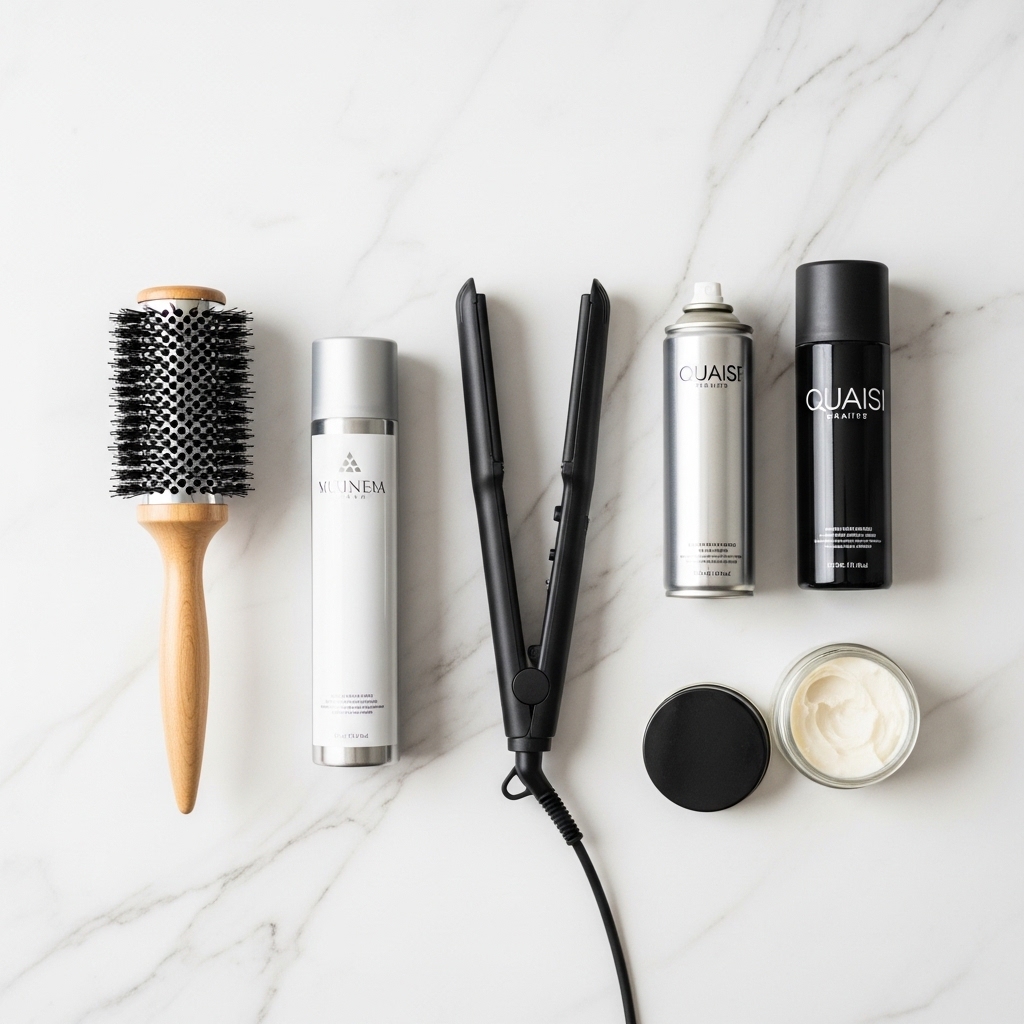
You don’t need a salon full of products, but a few key tools will make your life so much easier. First, a good quality round brush for blow-drying is non-negotiable. A medium-barrel one works best for this cut.
You’ll also want a strong-hold hairspray for those piece-y finishes and a light-hold texture spray or mousse for volume. A flat iron with rounded edges is perfect for smoothing or adding soft bends. Keep it simple!
- A medium-round brush
- Heat protectant spray
- Strong-hold hairspray
- Texture spray or mousse
- A flat iron or curling wand
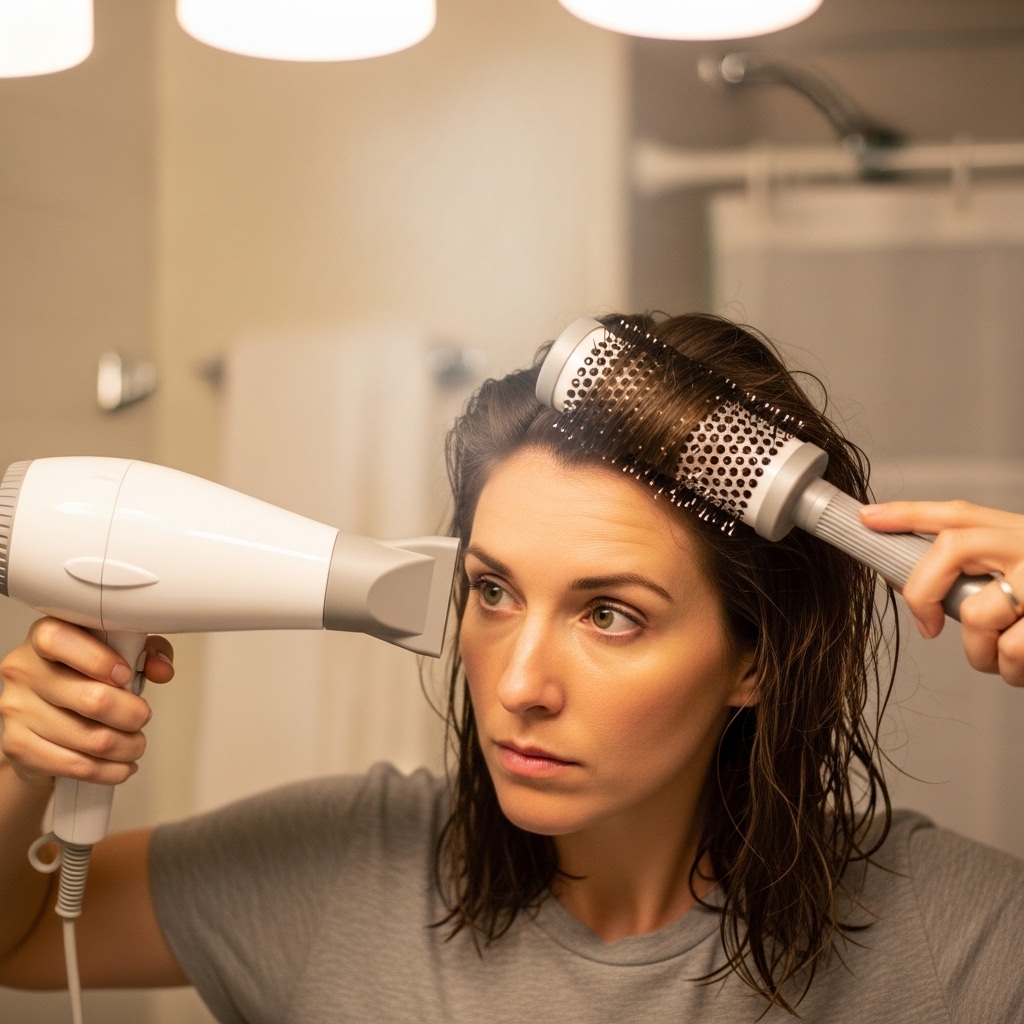
The Perfect Blow-Dry Foundation
Start with towel-dried hair. Apply a heat protectant and a volumizing mousse from roots to ends. This gives your hair the “grip” and body it needs to hold the side part style all day.
Using your round brush, blow-dry your hair in sections, directing everything to your chosen side. Really focus on lifting the roots at your part for maximum volume. Smooth the long back sections, but keep the front pieces separate for now.
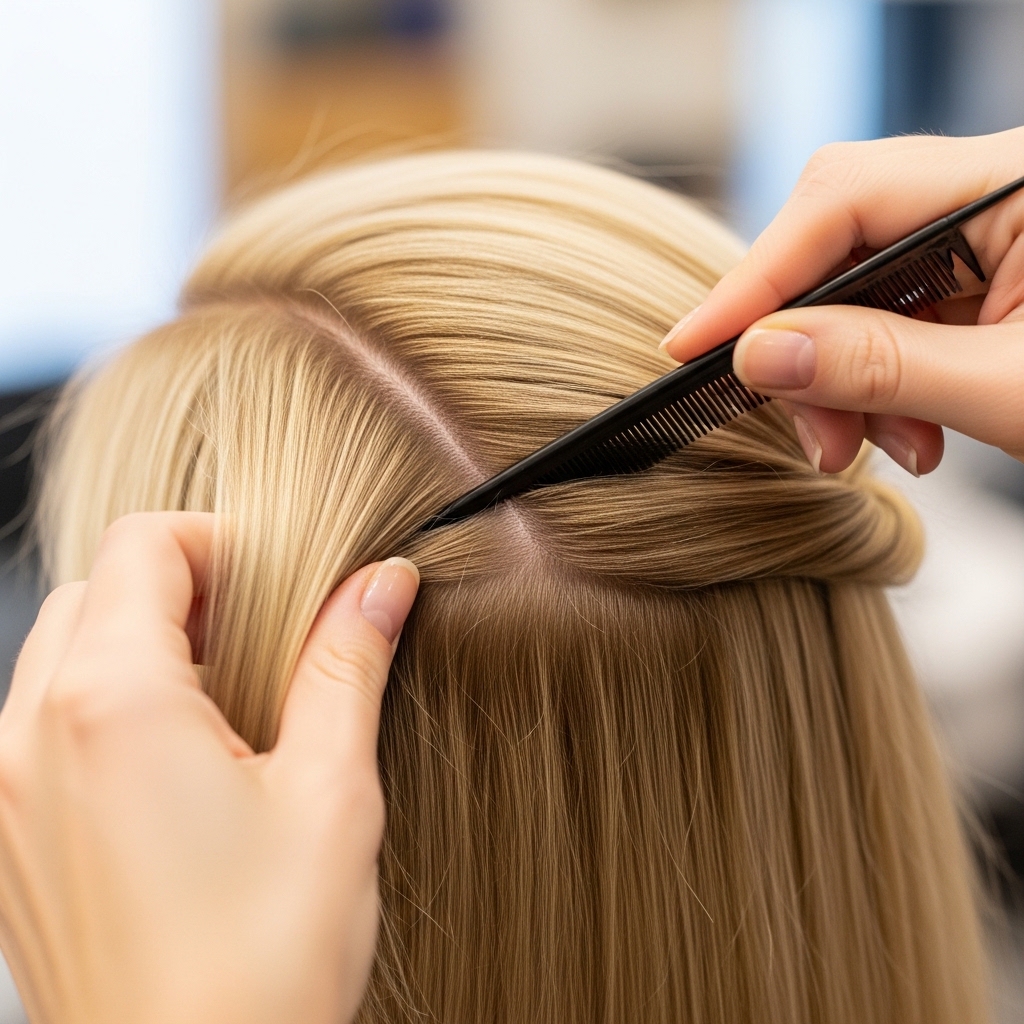
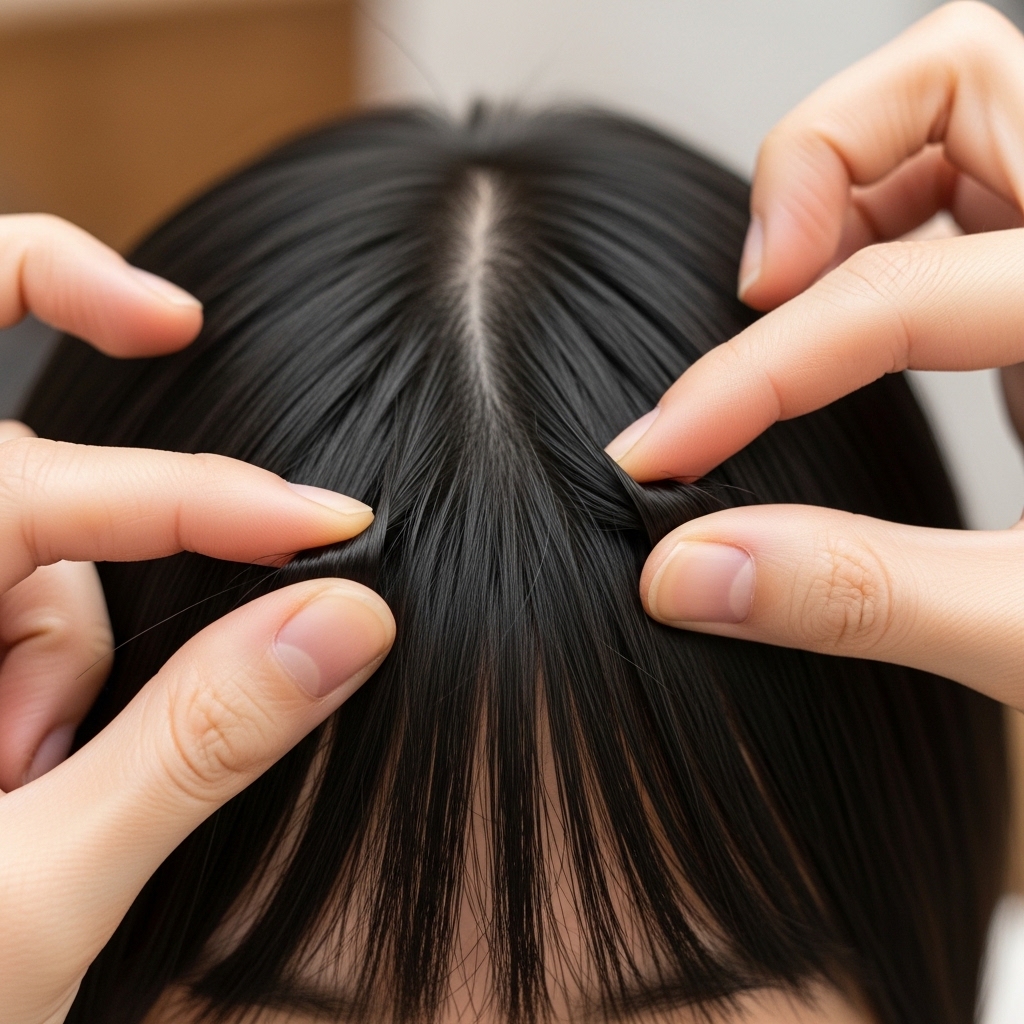
Creating Your Defining Side Part
Once your hair is about 90% dry, it’s time to carve out that part. Use the tail of a comb for precision. For a bold look, go for a deep side part. For something softer, find a natural spot where your hair wants to fall.
Press the comb along the part line to really define it. Then, finish blow-drying that front section, rolling the brush under to create a slight curve away from your face. This sets the stage for all your styling.
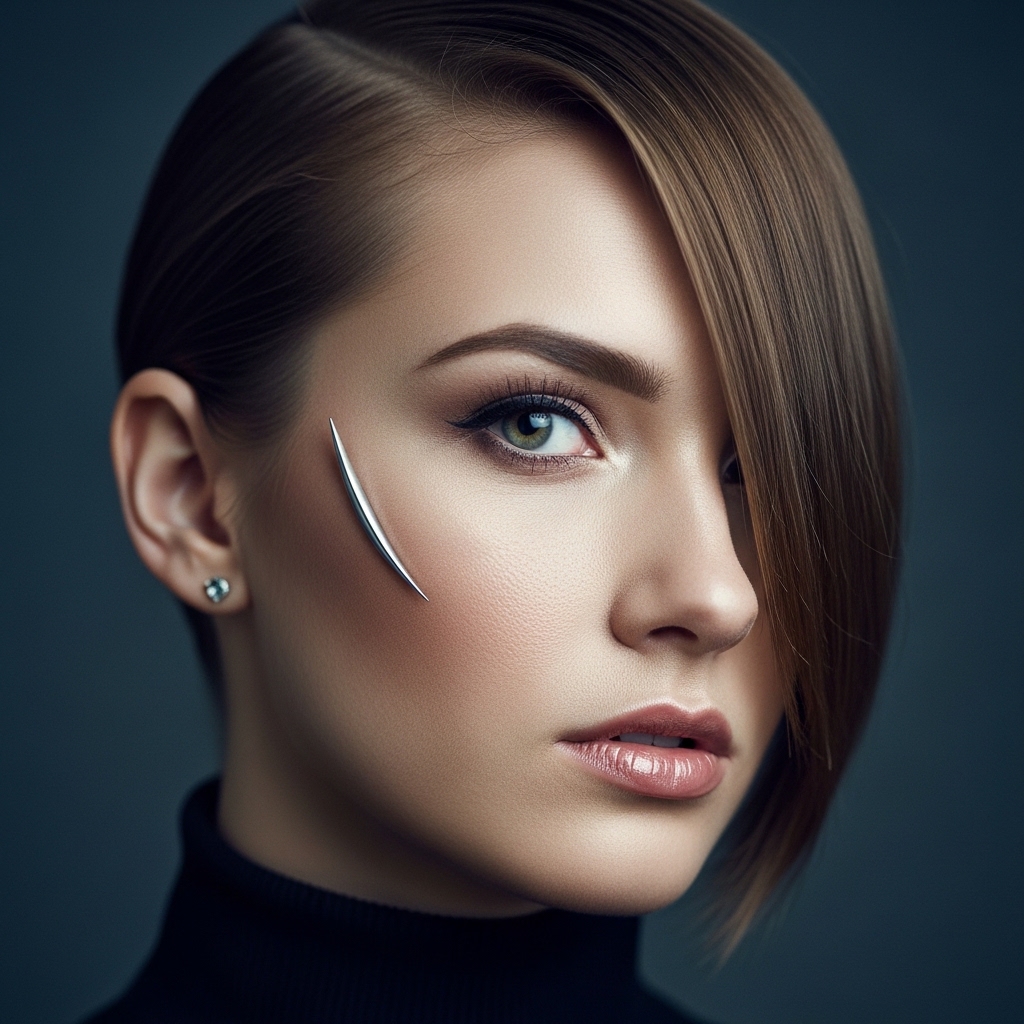
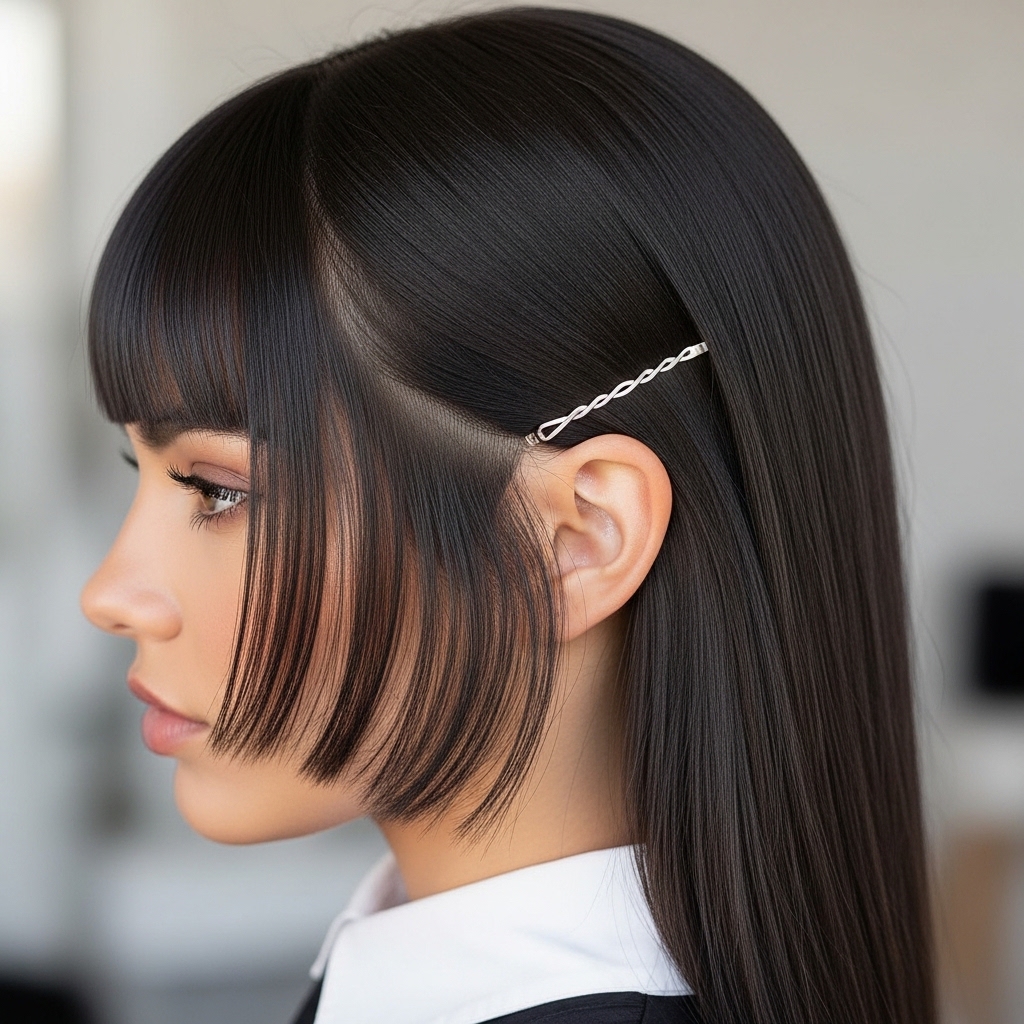
Styling the Signature Front Pieces
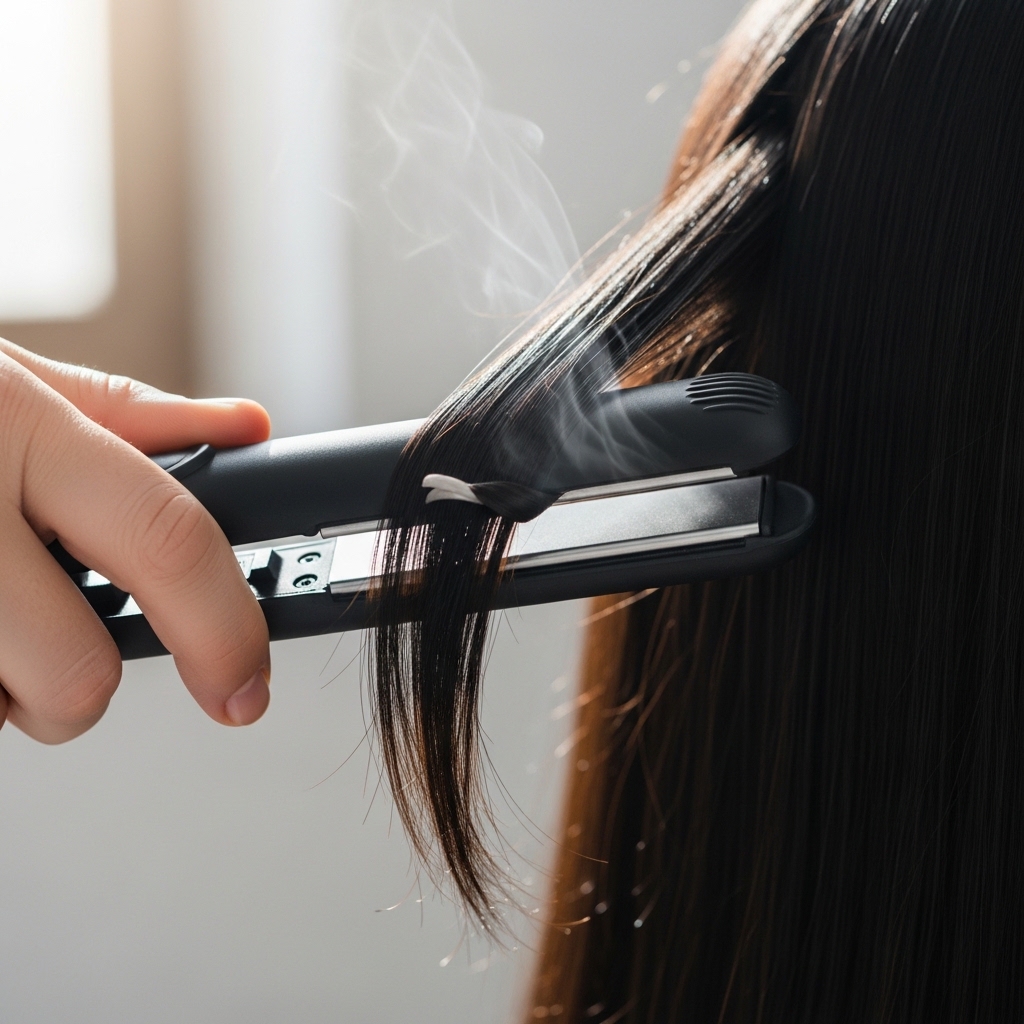
This is where the magic happens. Take one of the short front sections. Using your flat iron, clamp near the root and gently twist the iron as you pull it down, ending with a slight inward bend.
Repeat on the other side. The goal is to have them frame your face beautifully, not just hang straight. They should look intentional and sharp, a key element of the vampire haircut allure.
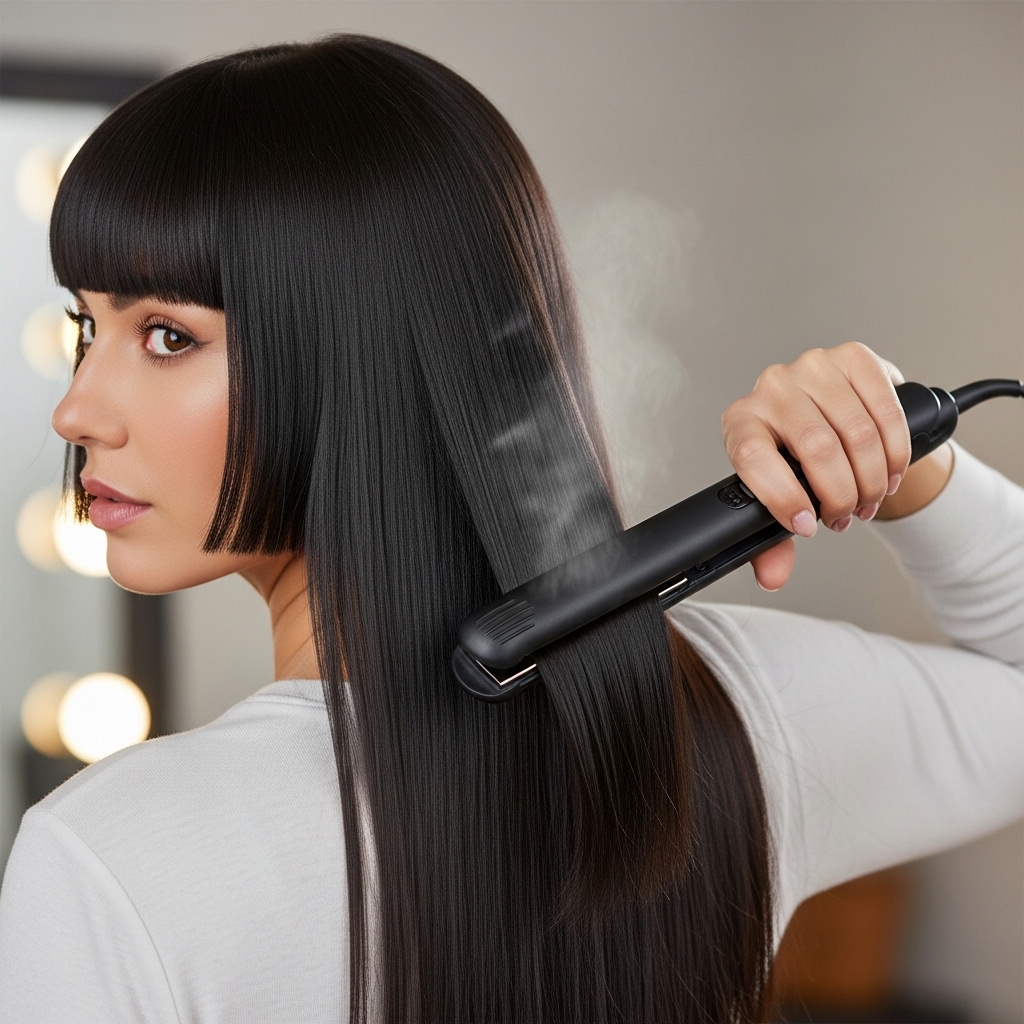
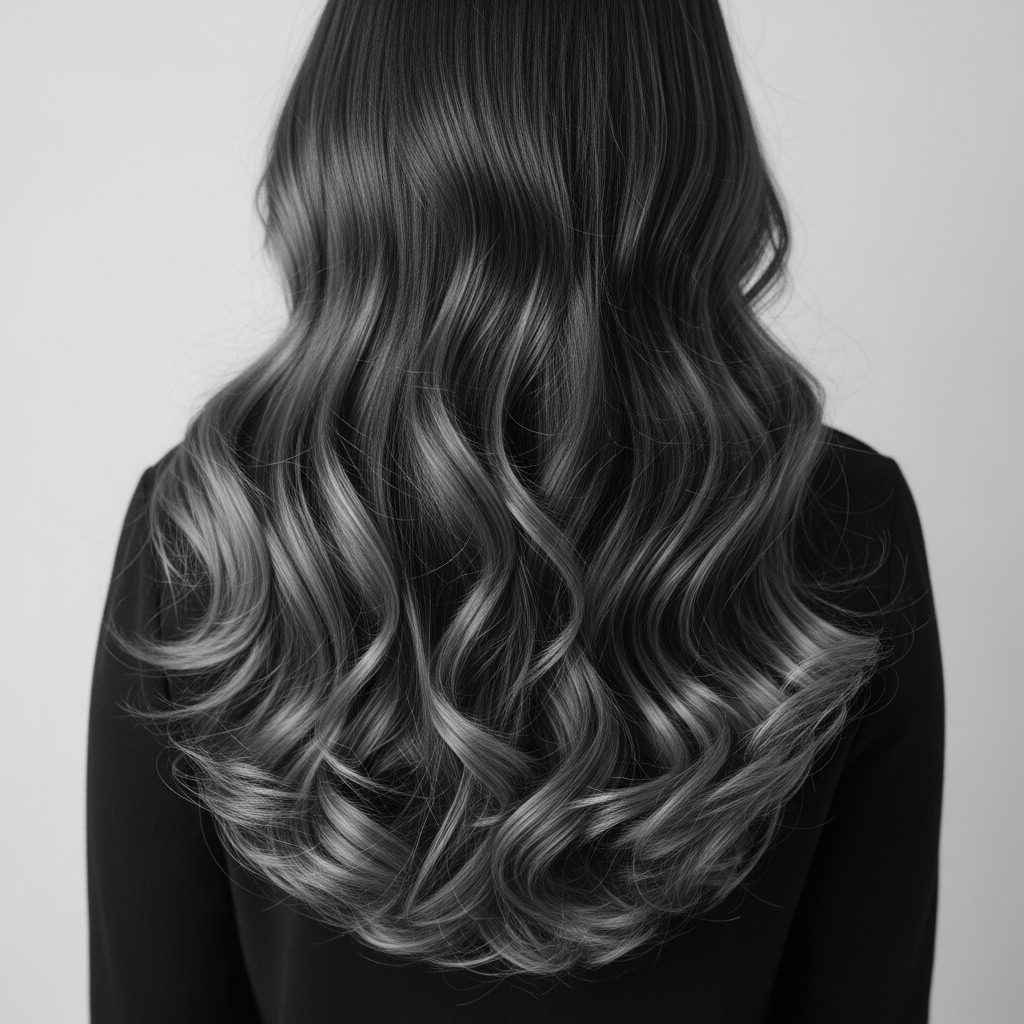
Smoothing the Long Back Sections
For a sleek, polished look, you’ll want the long hair in the back to be smooth. Divide it into two sections. Run your flat iron down each section in slow, steady passes.
If you have natural wave, you might just need to smooth the top layer. The contrast between the sleek back and the textured front is a core part of the hime cut’s drama.
Adding Texture and Piece-y Details
Too sleek can look flat. Spritz a texture spray lightly on the ends of your front pieces and the layers in the back. Scrunch gently with your fingers.
Then, take small sections of the front pieces and gently pinch them between your fingers, twisting slightly. This breaks up the uniformity and adds that cool, glitchy glam hair texture.
The Voluminous, Old Money Vibe
To get that coveted old money hair look, volume is key. Once styled, flip your head upside down and mist the roots at your part with a light-hold hairspray. Let it dry for a second before flipping back.
Gently tease the roots at the crown with a comb for subtle lift. The goal is soft, abundant volume, not stiff height. It speaks of quiet luxury and effortlessness.
The Romantic, Undone Wave
For a romantic goth hairstyles twist, add waves to the long back section. Use a curling wand to create loose, irregular waves. Don’t curl the front pieces.
Once all the waves are in, run your fingers through them to break them up completely. The result is a beautiful, ethereal contrast between the sharp front and the messy, romantic back.
Half-Up, Half-Down Charm
A half-up style is perfect for growing out phases or just a cute change. Gather the top section of your hair, from your part back to your ears, and secure it loosely at the crown.
Let the short front pieces fall free. Gently pull at the half-up section to loosen it and create volume. This style highlights the asymmetry beautifully.

Accessorizing Your Side-Part Hime
A simple accessory can elevate everything. Try a delicate clip on the side opposite your part. Or, use a thin headband just behind your front pieces.
For a darker vibe, a velvet ribbon or a ornate barrette complements the vampire haircut roots of this style. Keep it to one accessory to let the cut itself shine.
- Delicate pearl or metal clip
- Thin, fabric headband
- Black velvet ribbon
- Ornate vintage-style barrette
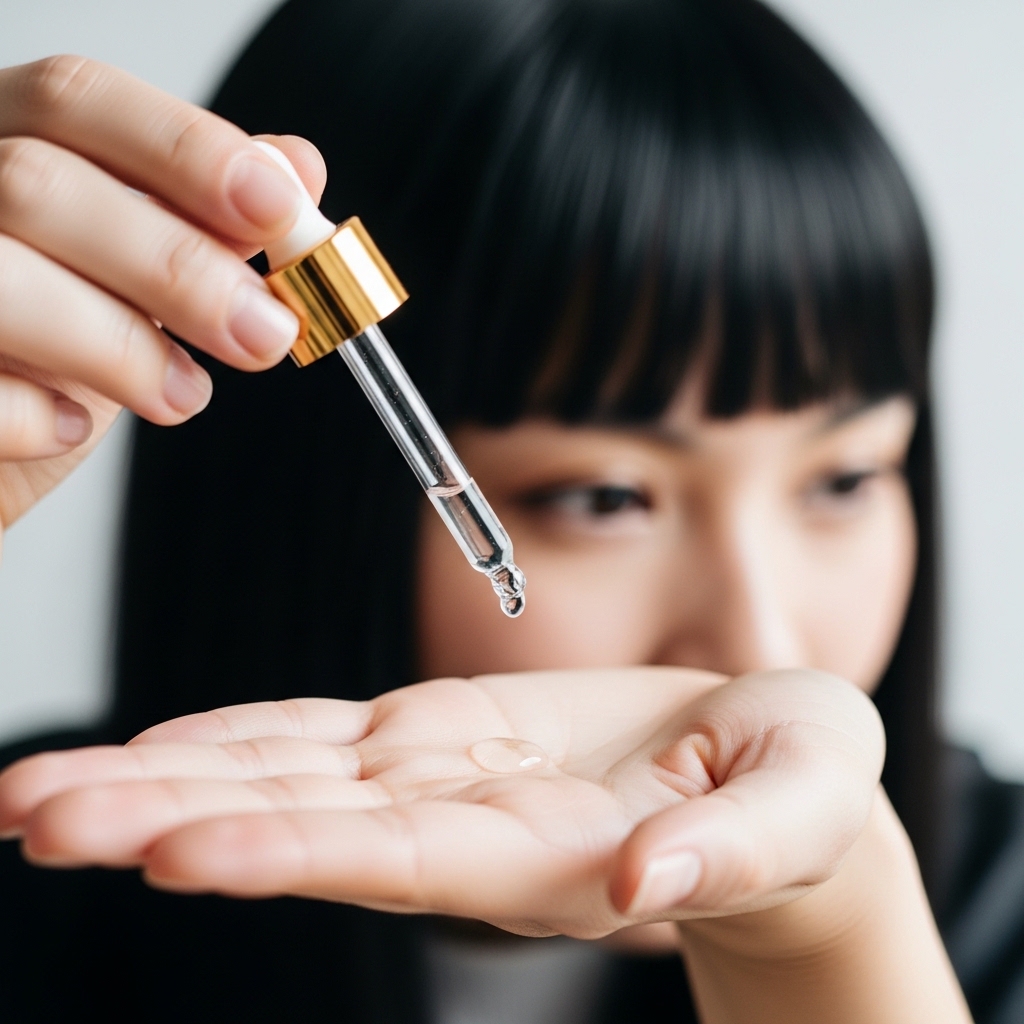
Taming Frizz for a Sleek Look
Frizz can blur the sharp lines of this cut. After heat styling, rub a tiny drop of hair serum or smoothing cream between your palms.
Lightly glaze it over the surface of your hair, focusing on the front pieces and the top layer of the back. Avoid the roots to keep your volume intact.
Making It Last All Day & Night
Lock your style in. Hold a can of strong-hold hairspray about 10 inches away from your head. Give a light, all-over mist.
Then, for the front pieces, spray a little on your finger tips and gently shape and hold them in place for a few seconds. This targeted approach keeps everything perfect without helmet-head.

Adapting for Fine or Thin Hair
If you have fine hair, focus on products that add body without weight. A root-lifting spray and a volumizing powder are your best friends.
When blow-drying, spend extra time on each section to really build volume. Texturizing spray is great, but use it sparingly only on the ends to avoid making hair look stringy.

Adapting for Thick or Curly Hair
For thick or curly hair, smoothing is often the goal. Use a smoothing cream before blow-drying with a paddle brush for tension.
You might need to use your flat iron on a higher heat setting to really smooth the back sections. Embrace your natural texture in the front by just defining curls with a twist, rather than forcing them straight.
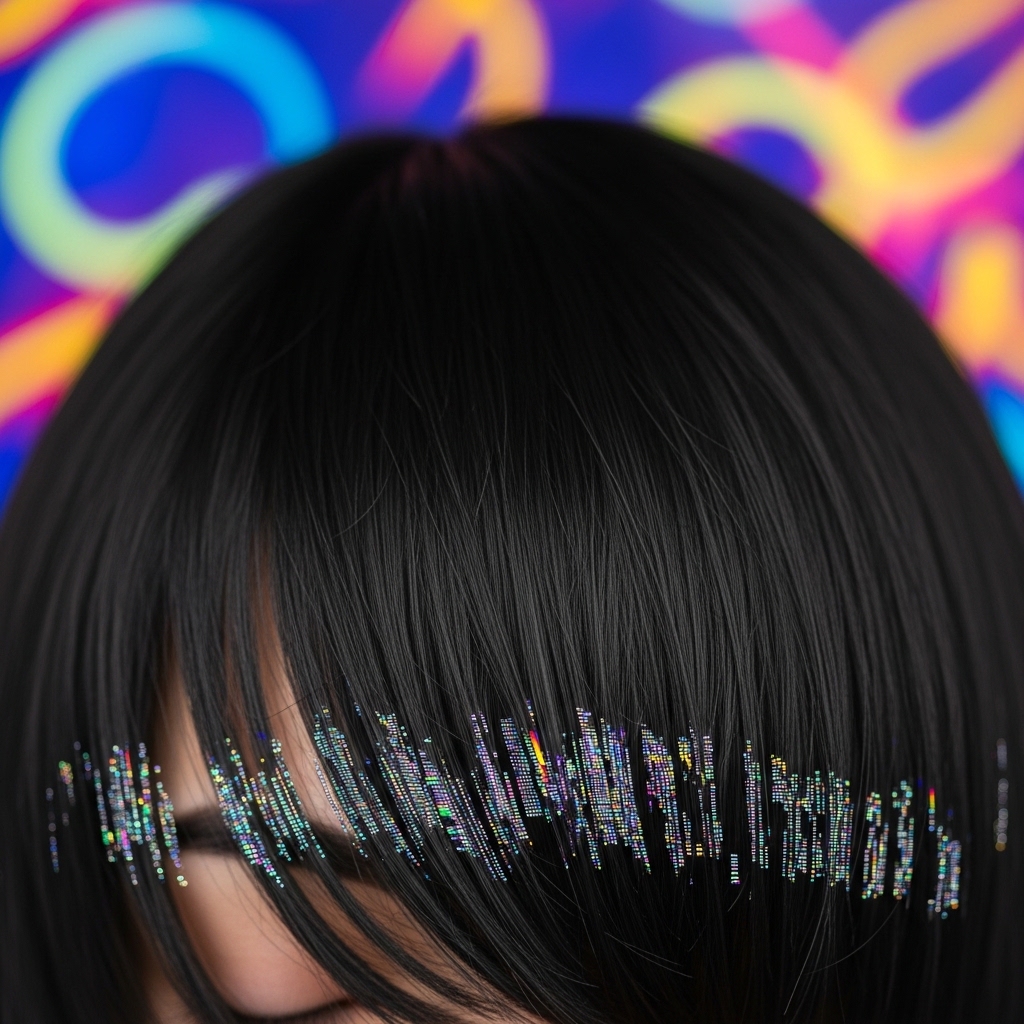
The “Glitchy Glam” Textured Finish
Glitchy glam hair is all about imperfect, digital-age texture. After styling, take small, random sections of hair—especially the front pieces—and wrap them loosely around your finger.
Spritz with a strong-hold spray while they’re coiled. Let them fall for a piece-y, crinkled effect. It’s a bold, editorial take on the hime.
Quick 5-Minute Refresh Routine
Second-day hair can be amazing. Spritz dry shampoo at your roots for volume and to absorb oil. Use your flat iron to quickly re-define the bends in your front pieces.
If the back is wavy, dampen your hands and scrunch in a little texture spray to revive the shape. In five minutes, you look freshly styled.
Common Mistakes to Avoid
First, don’t cut your own front pieces. That’s a job for a pro. When styling, avoid over-curling the front strands; a soft bend is better than a tight curl.
Also, don’t forget to style the back. A perfect front with a messy, unkempt back loses the intentional contrast that makes this cut so special.
- Trimming the front pieces yourself
- Over-curling or over-teasing
- Ignoring the back sections
- Using too much heavy product

Growing Out Gracefully
As your hime cut grows, the side part becomes your best friend. It helps blend the lengths. You can start tucking the longer front pieces behind your ear on the heavier side.
Regular trims on the back are key to maintain shape while the front catches up. Soon, you’ll be rocking a chic asymmetrical lob!

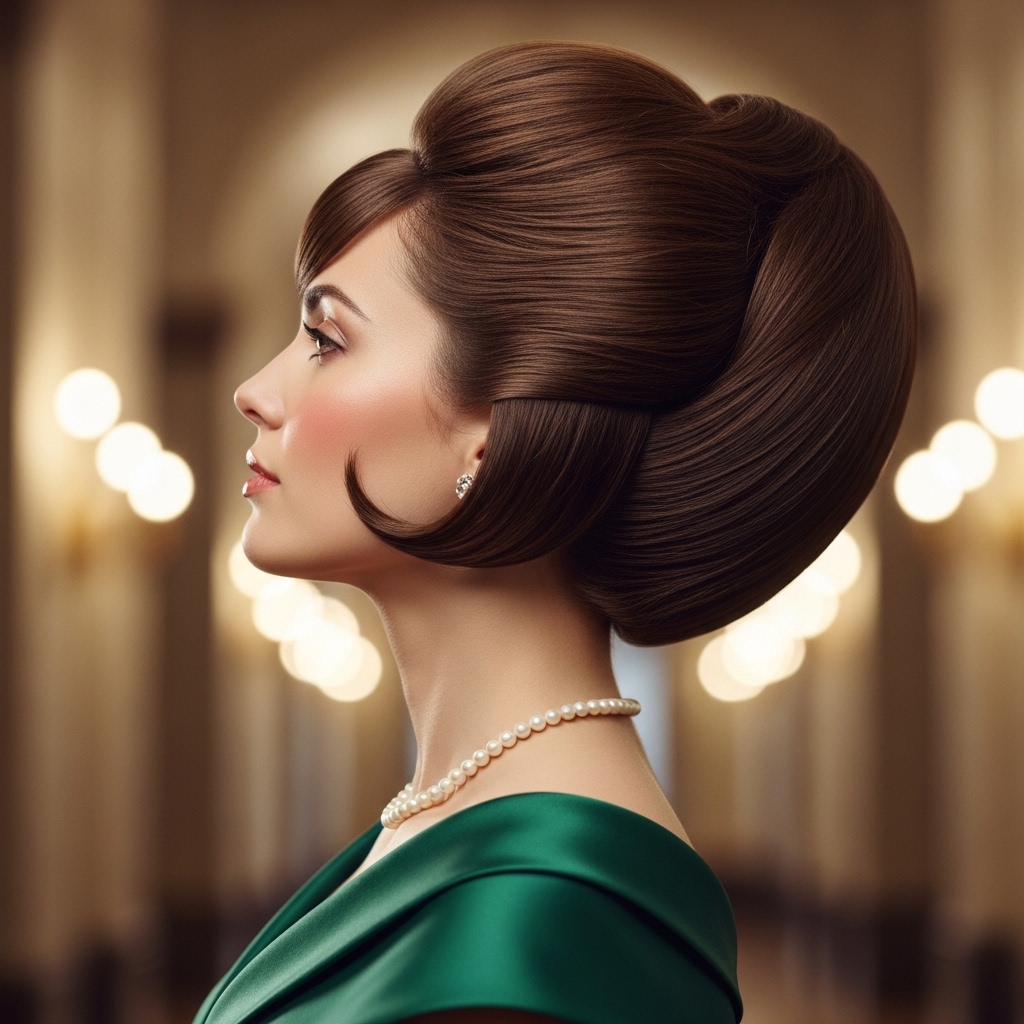
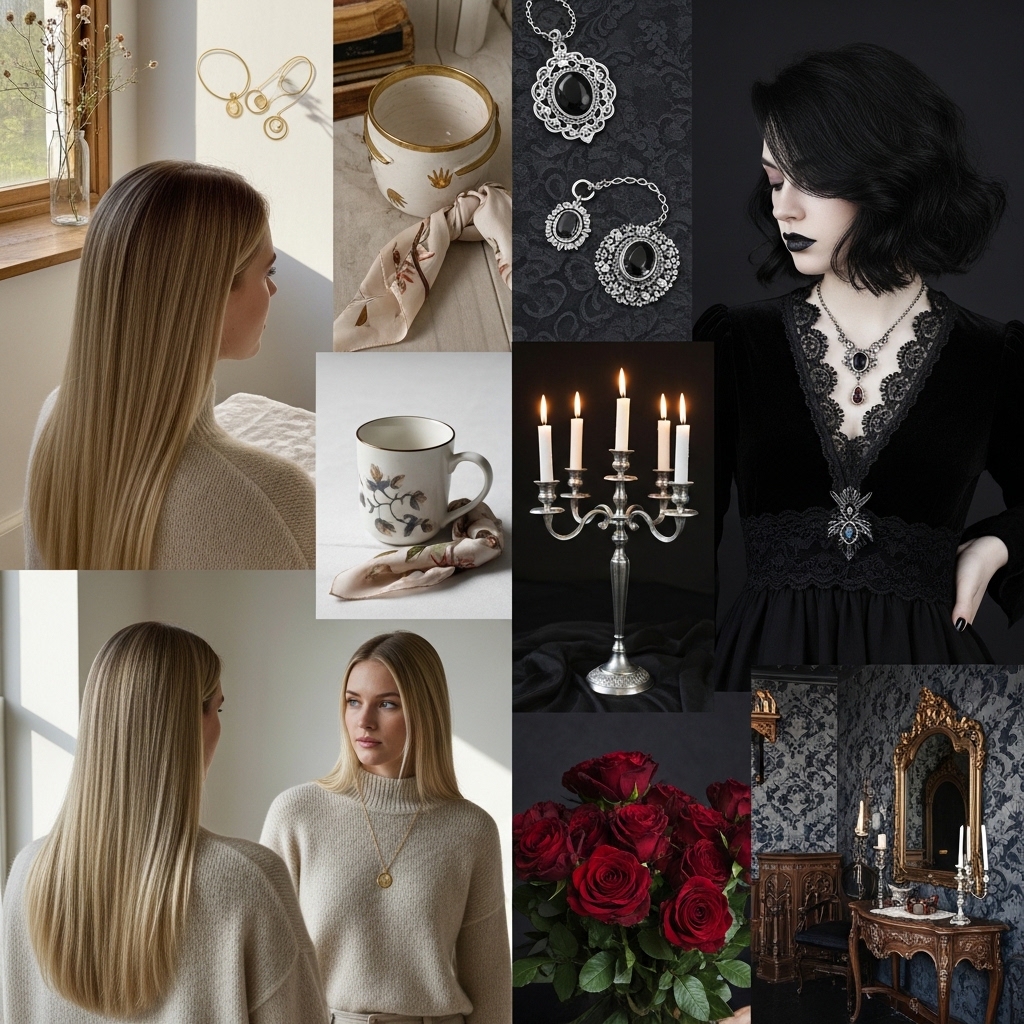
Inspiration: From Quiet Luxury to Romantic Goth
The side-part hime is incredibly versatile. Pair it with a trench coat and pearls for a quiet luxury bob feel. Or, go dark with a deep side part, sharp eyeliner, and a velvet choker for romantic goth hairstyles.
Play with accessories and your makeup to take the same foundational style in totally different directions. It’s your personal canvas.
Your Final Checklist Before You Leave
Do a final mirror check. Is your side part clean? Are your front pieces framing your face nicely? Is there enough volume at the roots?
Give your hair one last light mist of hairspray from a distance. Then, you’re ready to go. This cut is meant to be seen and to make you feel powerful.
- Side part defined
- Front pieces shaped
- Roots have volume
- Back is smooth or intentionally textured
- Light hold from hairspray
And that’s it, friend! Styling your hime cut with a side part isn’t about complicated routines. It’s about mastering a few key techniques that let you play with the cut’s incredible versatility.
Whether you’re feeling the old money hair vibe one day or channeling romantic goth hairstyles the next, this one cut can do it all. It’s all in the part, the texture, and your confidence.
Did you find a favorite method from this guide? I’d love to hear which style you’re trying first! And if you want to keep these tips handy, save this post to Pinterest so you can always come back to it. Happy styling!
