
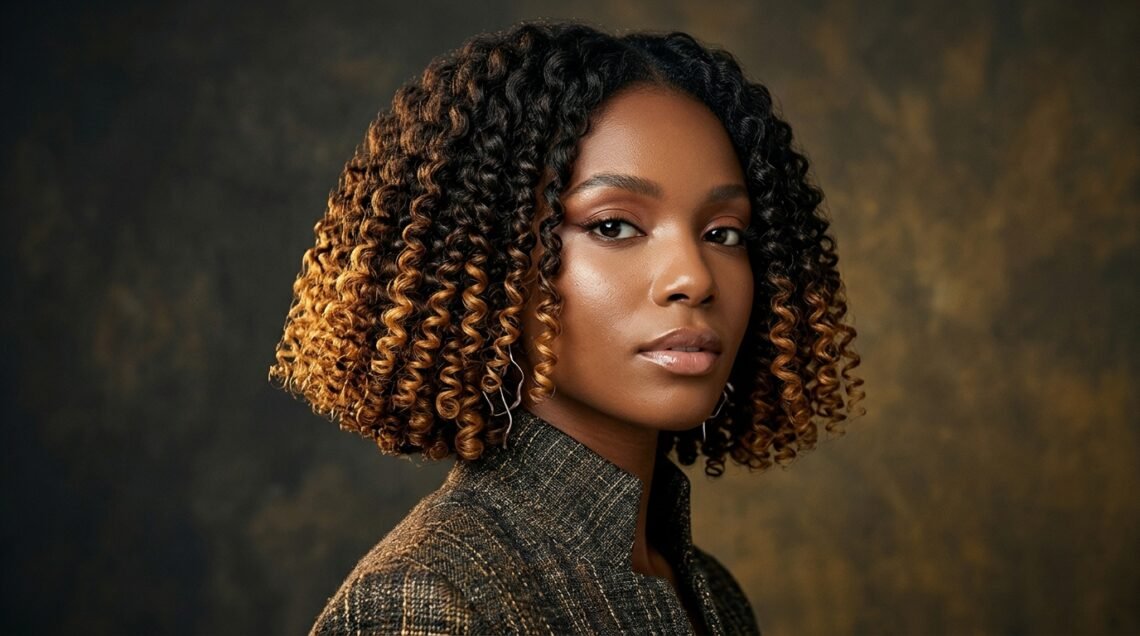
I used to think finger coils were for people with endless patience and perfect hands. Then I tried them on a random Sunday with a jar of gel and a podcast playing in the background, and my whole hair routine changed.
Finger coils are one of the few styles that look intentional even when they’re a little messy. They give natural hair beautiful movement, that soft swing when you turn your head. And they work on almost any length or texture.
So I pulled together 33 finger coil hairstyles for beginners. No fancy tools, no six-hour sessions. Just styles you can actually finish this weekend, plus the small care tips that make them last.
Grab a spray bottle and a wide-tooth comb. Let’s do this.
What Are Finger Coils, Exactly?

Finger coils are exactly what they sound like. You take a small section of hair and twirl it around your finger with product until it springs into a coil. You hold for a few seconds while it sets, then move to the next one.
They’re different from comb coils, which use a comb to start each twist. Finger coils give a softer, more natural finish, and honestly they’re more forgiving for beginners.
- Best on damp, detangled hair
- Needs a product with real hold
- Springs up tighter as it dries
- Works on short, medium, and long hair
What You Need Before You Start
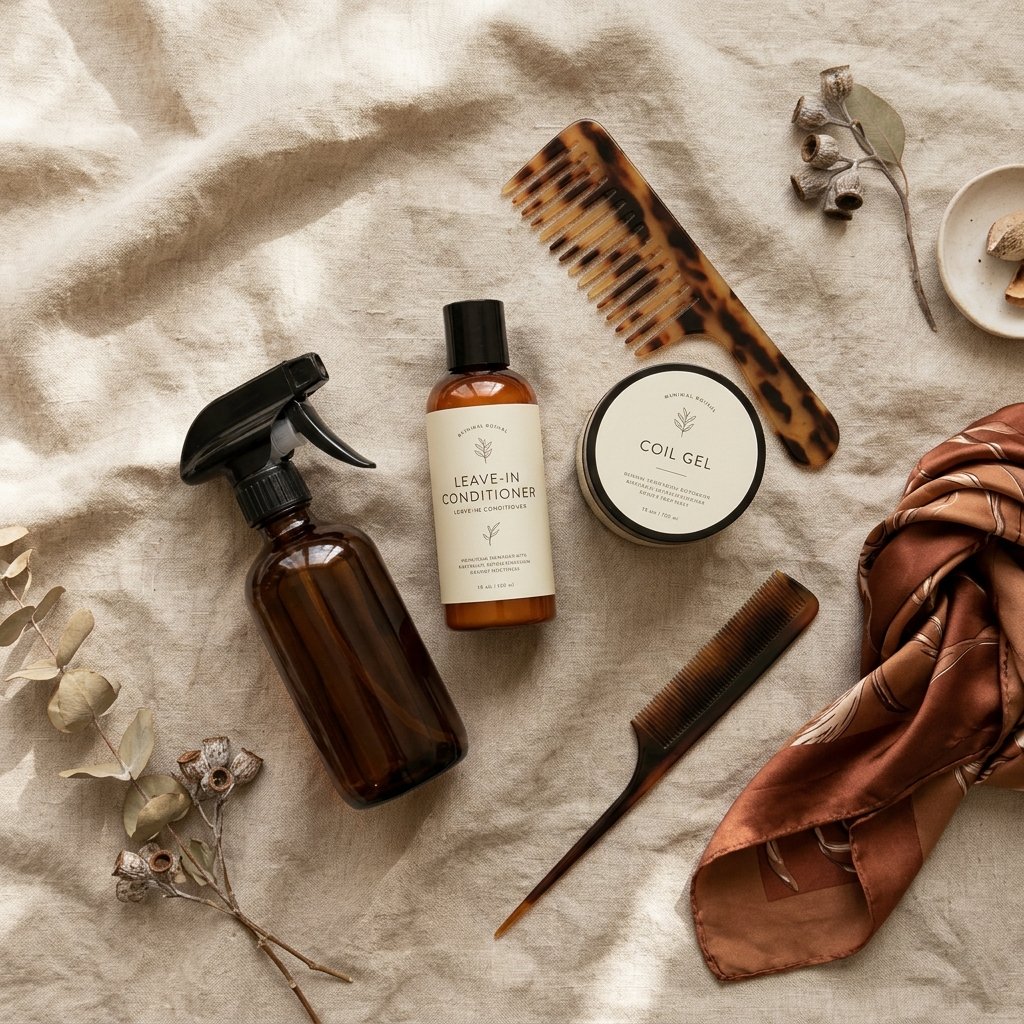
You don’t need a drawer full of products. You need four things and a mirror. That’s it.
- A spray bottle with water (or water plus a little leave-in)
- A leave-in conditioner for moisture
- A gel, cream, or mousse with hold
- A rat-tail comb or your fingers for parting
Add a satin scarf or bonnet for sleeping. Skip the heavy butters for this style, they weigh coils down and stretch them out before they can set.
How to Do Finger Coils: Step by Step
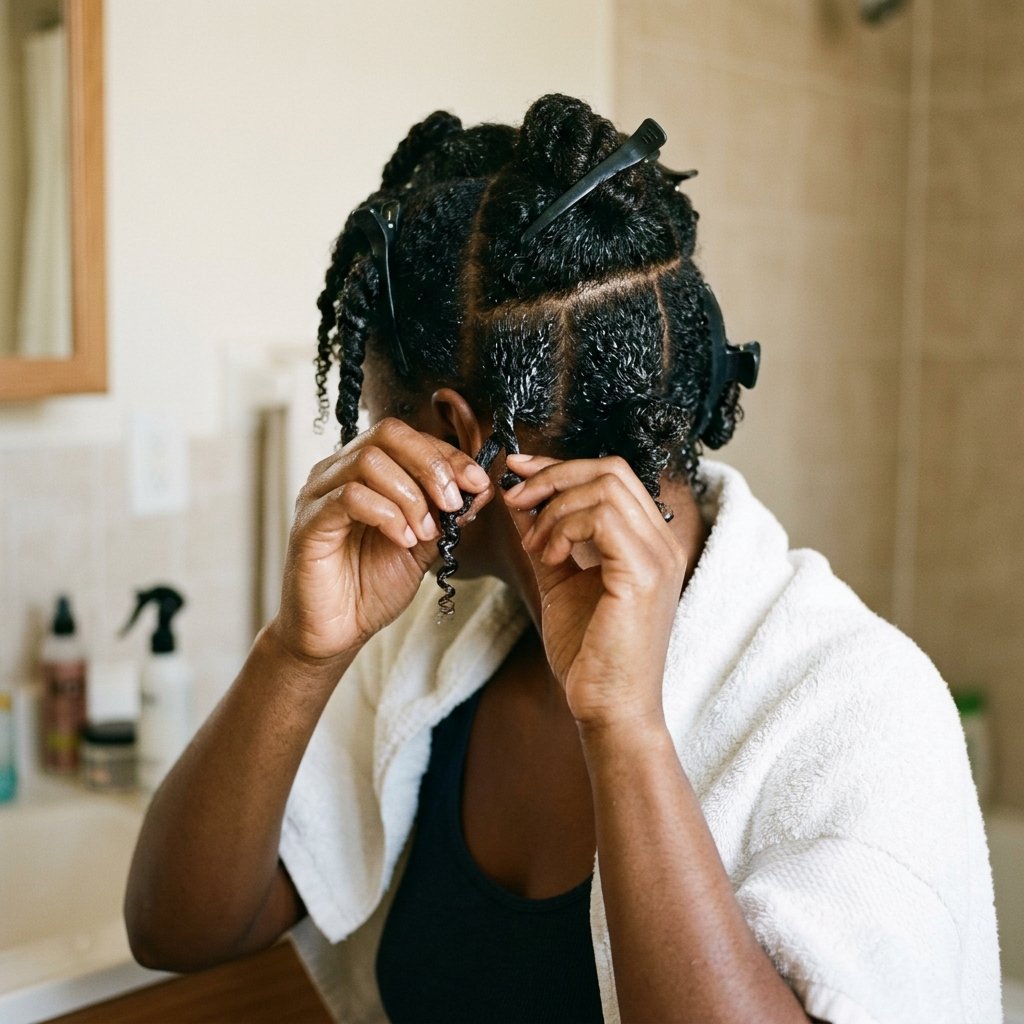
Here’s the whole process in five steps. Read it once, then just do it.
- Start on clean, conditioned hair that’s about 70 percent dry.
- Section hair into four parts with clips.
- Take a small section, add leave-in, then your hold product.
- Twirl the hair around your finger from root to tip and hold for five to ten seconds.
- Release gently and let it fall. Don’t touch it until it’s fully dry.
Smaller sections mean more definition. Bigger sections mean more volume and less time.
How Long Should This Take You?

Your first time will be slow. Mine took almost three hours because I kept undoing and restarting. That’s normal, so plan for it.
After a few rounds, here’s what to expect:
- Short hair: 45 minutes to 1.5 hours
- Medium hair: 1.5 to 2.5 hours
- Long or dense hair: 2.5 to 4 hours
Put on a show, grab a snack, and stop checking the clock. Speed comes with practice, not pressure.
Finger Coils on 4C Hair

4C hair takes to finger coils beautifully because the natural pattern already wants to coil. The key is moisture first, hold second.
- Work in smaller sections than you think you need
- Use a cream plus a light gel on top
- Keep a spray bottle nearby so hair never dries mid-section
- Let them air dry or use a diffuser on low heat
Don’t skip the leave-in. Dry 4C coils frizz within a day, and frizz is what makes them look old fast.
Finger Coils on 4A and 4B Hair

Looser textures coil fast and stretch out fast. You’ll get definition quickly, but you need a stronger hold product to keep it.
- Use a gel rather than a cream for staying power
- Coil with a slightly smaller finger for tighter results
- Skip heavy oils until the coils are fully dry
One bonus: 4A and 4B hair shows movement more easily, so you get that pretty swing without much effort.
Gel, Cream, or Mousse?
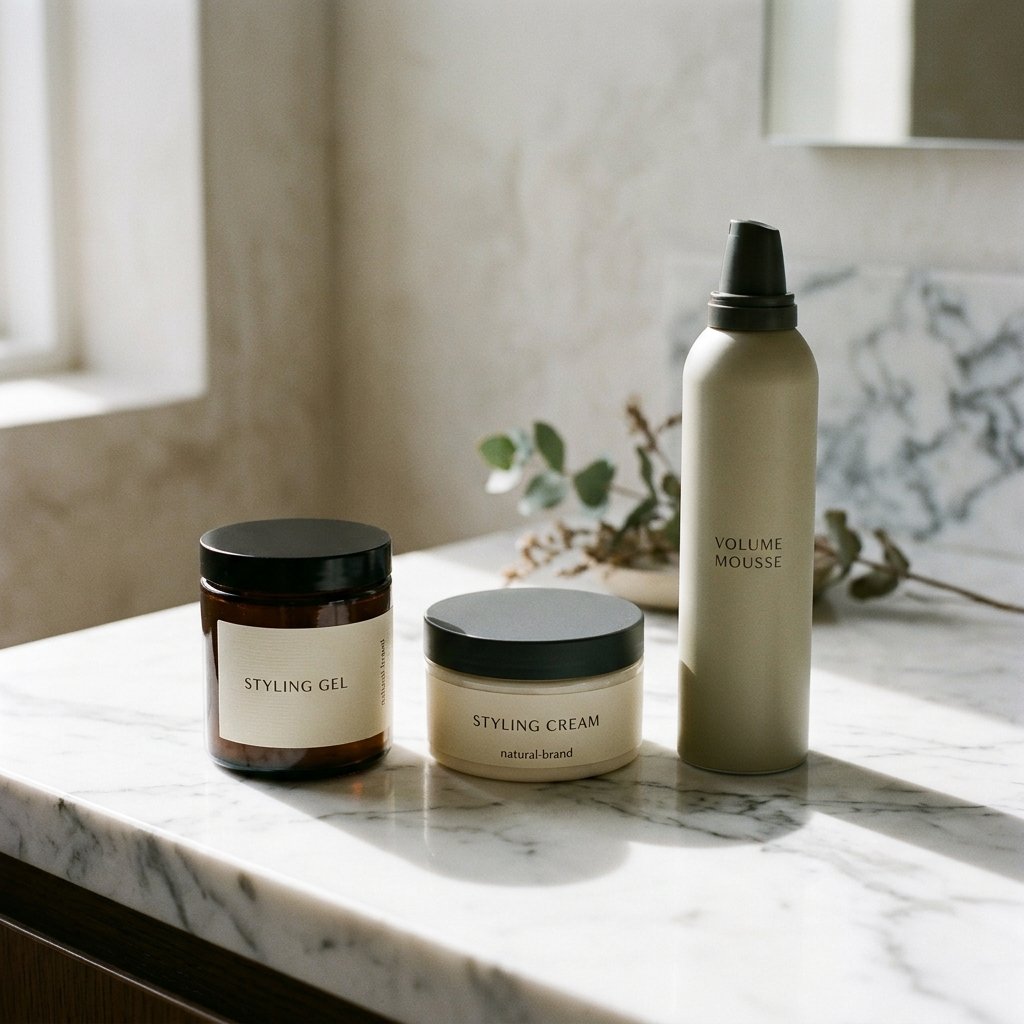
This is the question I get most, so here’s the short version.
- Gel: best hold, shinier finish, great for 4C and humid weather
- Cream: softer feel, more moisture, less crunch
- Mousse: lightest option, good for fine or loose textures
My go-to combo is a leave-in, a cream for moisture, and a thin layer of gel on top. You get softness and hold in one pass.
Why Shrinkage Isn’t the Enemy
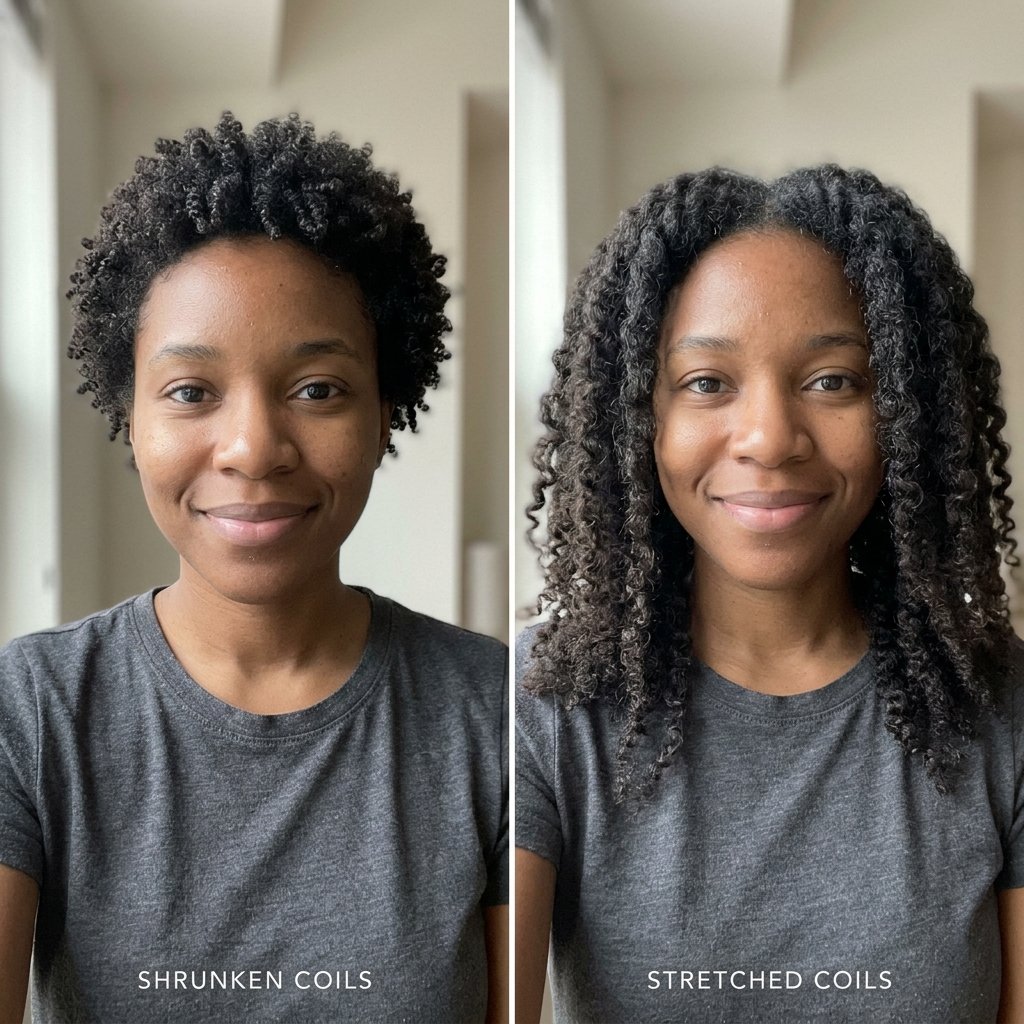
Beginners panic when their coils shrink up halfway through. Don’t. Shrinkage is the sign your coils are actually forming.
If you want more length, band the roots after coiling or stretch gently with a blow dryer on low. Give it a day and the weight pulls them down a little too.
Honestly, shrunken coils look healthier and last longer. Embrace it and let the movement do the work.
Classic Medium Finger Coils

This is the style I recommend to every beginner. Not too small, not too big. Just clean, even coils from root to tip.
Medium sections take less time, get great movement, and look good on literally anyone. This is the one that reads as “I have my life together” without screaming for attention.
Stretch them gently at the roots on day two and you’ll get extra softness without losing definition.
Mini Finger Coils for Maximum Definition
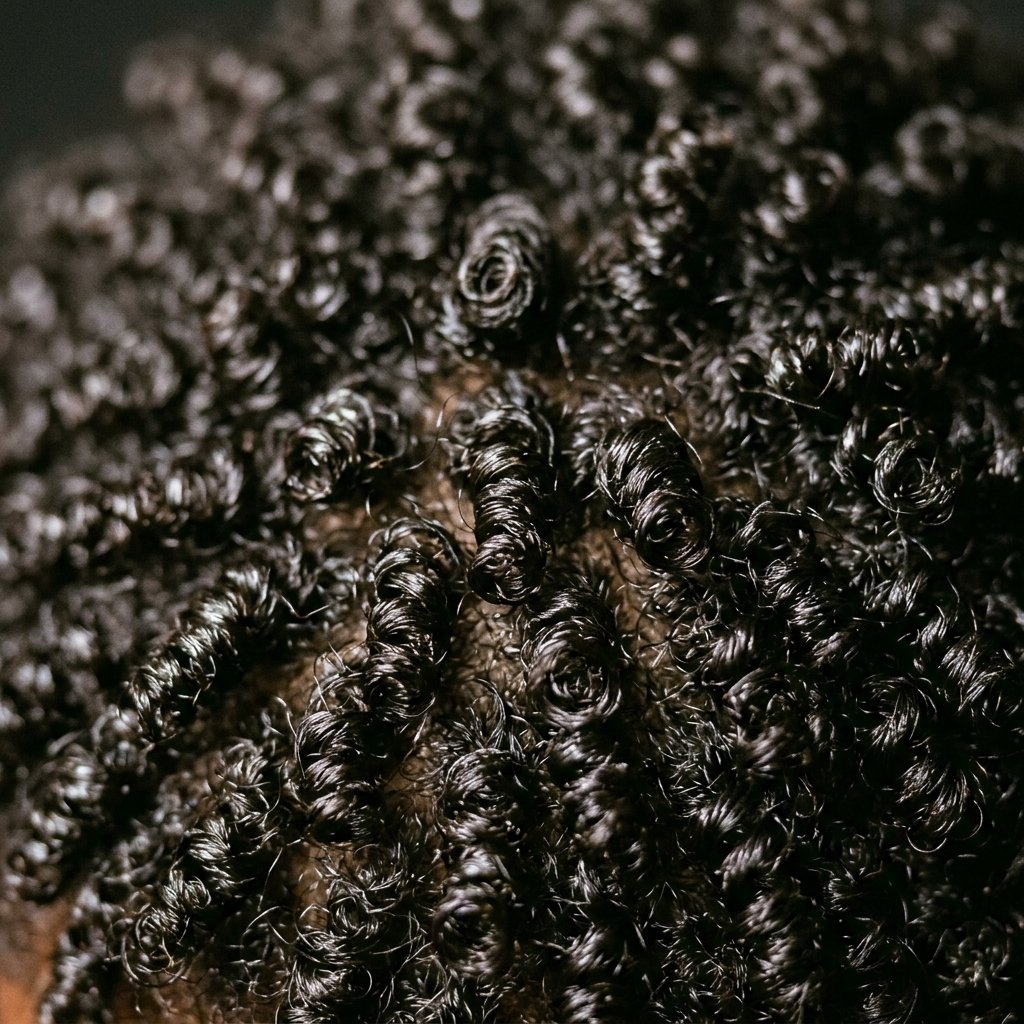
Mini coils are the definition champs. Tiny sections, tiny coils, zero frizz. They also take forever, so commit on a day you’re not rushing.
- Use a rat-tail comb for clean, small sections
- Keep a spray bottle handy, damp hair coils best
- Expect two to four hours on medium hair
The payoff is huge. Mini coils last up to two weeks with proper night care and they photograph beautifully.
Chunky Finger Coils for Volume

If you want softness and shape instead of razor-sharp definition, go chunky. Bigger sections, bigger coils, bigger hair.
- Coil with two fingers instead of one
- Use cream instead of gel for a softer set
- Separate gently once dry for maximum fluff
This is your everyday, I’m-not-doing-too-much look. It pairs perfectly with jeans and a blazer, and it reads polished without looking stiff.
The Quiet Luxury Bob with Finger Coils

The quiet luxury bob is everywhere in 2026 hairstyles, and natural hair can absolutely get the look. You just need a blunt shape and clean coils.
Ask for a blunt cut around chin or jaw length, then coil everything forward and down so the coils hang instead of shrinking sideways.
- Keep sections the same size for a clean line
- Use gel for a smoother, glossier finish
- Sleep with a scarf to protect that blunt edge
Asymmetrical Lob with Coils

An asymmetrical lob is a collarbone-length cut that’s longer in the front or on one side. On coils it reads sharp, modern, and a little unexpected.
Coil the longer side downward to show off the length, and let the shorter side spring upward for contrast.
- Keep the front coils slightly larger so they hang
- Pin the heavier side back for a quick reshape
- Great with a middle part or a deep side part
Hime Cut-Inspired Face-Framing Coils

The hime cut is a Japanese style with blunt, straight side panels framing the face and longer hair in the back. It sounds hard to do on coils, but the concept translates easily.
Coil the front two sections downward so they hang blunt and even, then let the back coil up naturally for contrast.
- Keep front sections identical in size
- Stretch front coils so they hang instead of shrink
- Use a clip to hold each side while you work
Vampire Haircut Energy with Tapered Coils

The vampire haircut is all about contrast: tight on the sides, dramatic on top. On natural hair, a taper fade with finger coils on top absolutely delivers.
- Taper or fade the sides and back
- Coil the top with medium sections for height
- Add shine with a light oil on dry coils only
This one looks expensive and slightly dramatic, which is the point. Bonus: it’s easier to maintain than you’d think.
Romantic Goth Hairstyles with Dark Coils

Romantic goth hairstyles mix soft texture with moody details. Finger coils are perfect for it because they’re already a little romantic by nature.
- Add a dark plum or burgundy rinse for depth
- Pin one side back with a vintage clip
- Keep coils slightly separated for a softer edge
Pair it with a sheer sleeve or a lacy top and you’ve got a look that works for a night out without feeling costume-y.
Glitchy Glam Hair: Coils with Gems and Clips
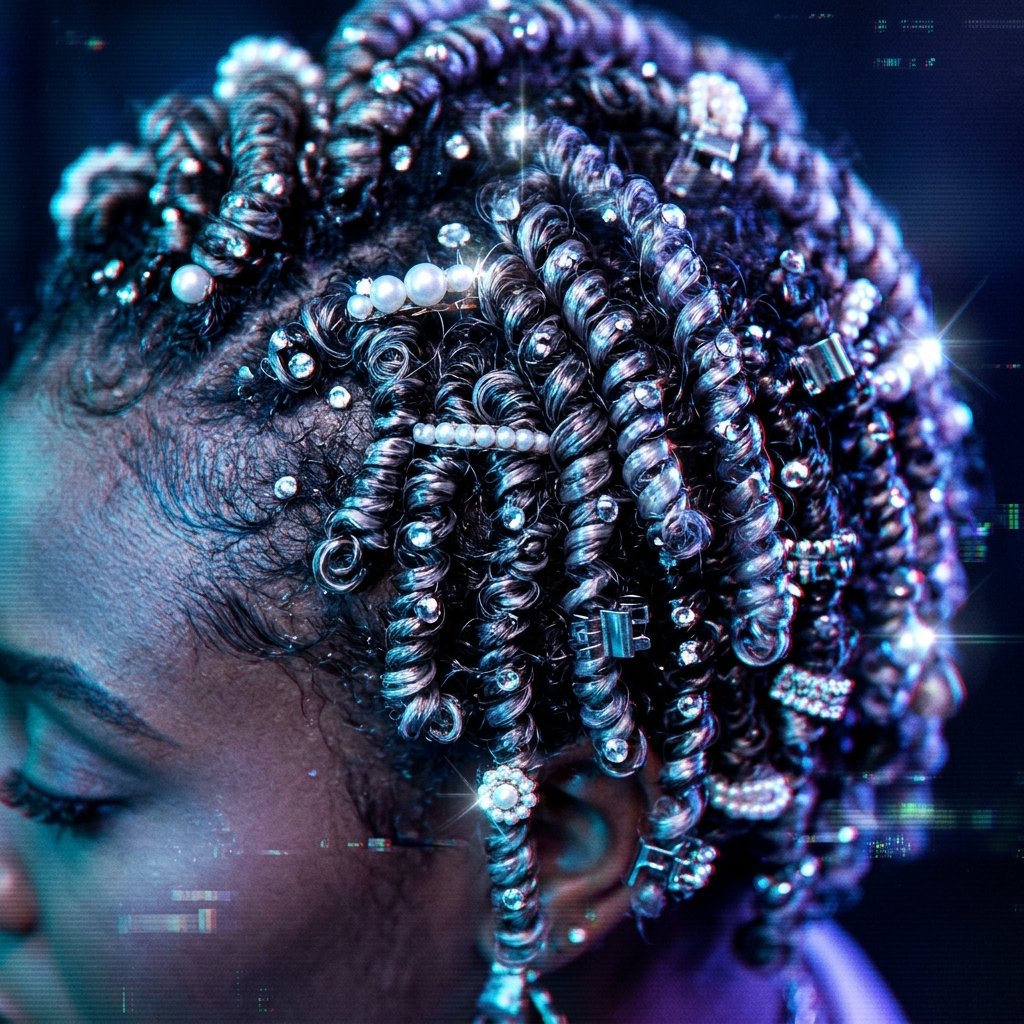
Glitchy glam hair is playful and a little futuristic. Think tiny accessories scattered through your coils like sparkle caught in your hair.
- Place small gems along your part or temple
- Scatter pearl or metallic clips through the top
- Keep accessories light so they don’t pull coils down
Start with three or four pieces and build from there. It’s the easiest way to dress up day-old coils without redoing them.
Old Money Hair: Sleek Low Bun with Coiled Accents

Old money hair is smooth, understated, and polished. Finger coils can still fit the vibe if you use them as detail instead of the main event.
- Slick the front back with gel or edge control
- Gather the rest into a low bun
- Leave one or two coiled pieces loose at the nape
This is my favorite way to stretch a coil set into a formal look. It takes five minutes and looks like you spent an hour.
Half-Up, Half-Down Coils

Half-up, half-down is the rescue style. Day three, slightly frizzy, no time? Pull the top half back and you’re done.
- Use a claw clip for instant volume
- Pull a few coils loose around the face
- Skip the brush, hands only for softness
It works on short, medium, and long coils, which makes it the most flexible style on this list.
Coiled High Ponytail with Movement

Coils in a high ponytail move like nothing else. Every step gives you that swing, and it looks effortless in photos.
- Gather hair high on the crown
- Use a gentle scrunchie, not a tight elastic
- Smooth the front edges with a little gel
To keep the tail from tangling, mist it lightly with water and leave-in before you head out. Small thing, big difference.
Finger Coils on Short Hair

Short hair is honestly the best place to learn finger coils. Less hair, faster finish, and the results show up immediately.
- Use tiny sections for a sculpted look
- Coil downward so the pattern lies flat
- Refresh weekly with water and a light gel
Short coils also give you a built-in fade shape that looks sharp with almost anything in your closet.
Finger Coils on Long Hair

Long coils take time, but they show movement best. That swing when you walk is the whole reward.
- Work in four or six sections so nothing dries out
- Coil downward to encourage length
- Band the roots while drying to reduce shrinkage
Split the work over two evenings if you need to. Half up in a clip, finish tomorrow. Nobody will know.
Finger Coils for Weddings and Big Days
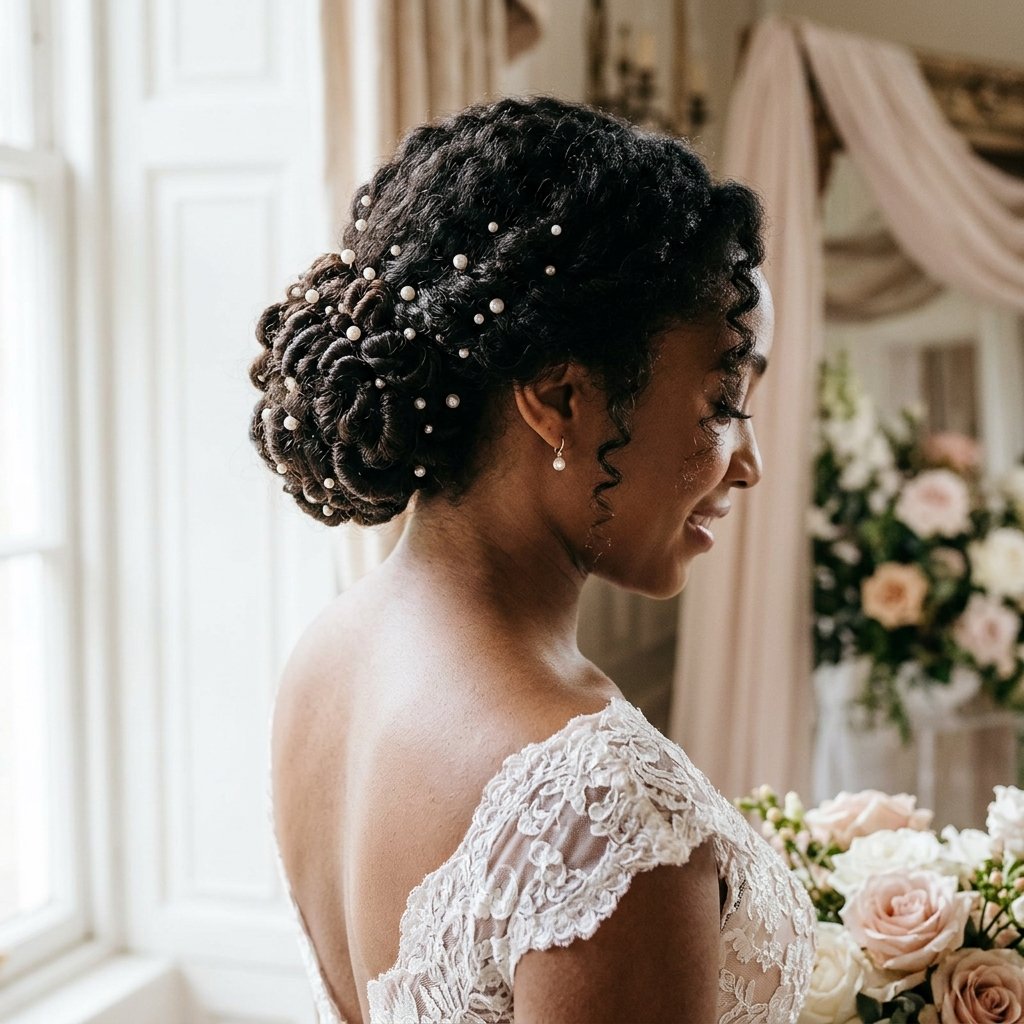
Finger coils make lovely event hair because they already look styled. You just need to shape them.
- Pin a low chignon and leave coils loose at the front
- Add small pins or baby’s breath through the back
- Set with a light hold spray, not a heavy one
Coil two or three days before the event, then style the day of. Fresh coils are too wet to pin, and older coils hold shape better.
2026 Hairstyles: Coils with Color and Shape

For 2026 hairstyles, shape matters more than length. Clean outlines, deliberate color placement, and lots of texture.
- Honey or copper tips on dark coils
- Blunt bob shape with uniform coils
- Deep side part for instant drama
- Lived-in texture instead of perfect definition
Pick one statement and let the rest stay simple. That’s the whole formula.
Overnight Protection That Actually Works

Your coils live or die by what you do at night. This is the part most beginners skip, and it’s the reason day three looks rough.
- Sleep on satin or silk, not cotton
- Pineapple loosely with a satin scrunchie
- Or wear a bonnet, whichever you’ll actually keep on
Don’t tie anything tightly around the coils themselves. Pressure flattens them and leaves dents that won’t come out.
How to Refresh Coils on Day 2, 3, and 4

You don’t need to redo your whole head every morning. A little water goes a long way.
- Mist the frizzy areas only, not the whole head.
- Twirl the loose coils around your finger to reshape.
- Add a tiny dot of gel on the ends.
- Let it dry before you touch again.
By day four, most people move to a bun or a half-up style. That’s not giving up, that’s strategy.
Mistakes Beginners Make (And How to Fix Them)

I made every single one of these, so you’re in good company.
- Too much product: coils get flaky and stiff. Use less and build up.
- Hair too dry: coils frizz before they set. Keep it damp.
- Touching while wet: this breaks the coil. Hands off until dry.
- Sections too big: you get lumps instead of coils. Go smaller.
Fix one thing at a time and your next set will be noticeably better.
How to Take Coils Down Without Frizz
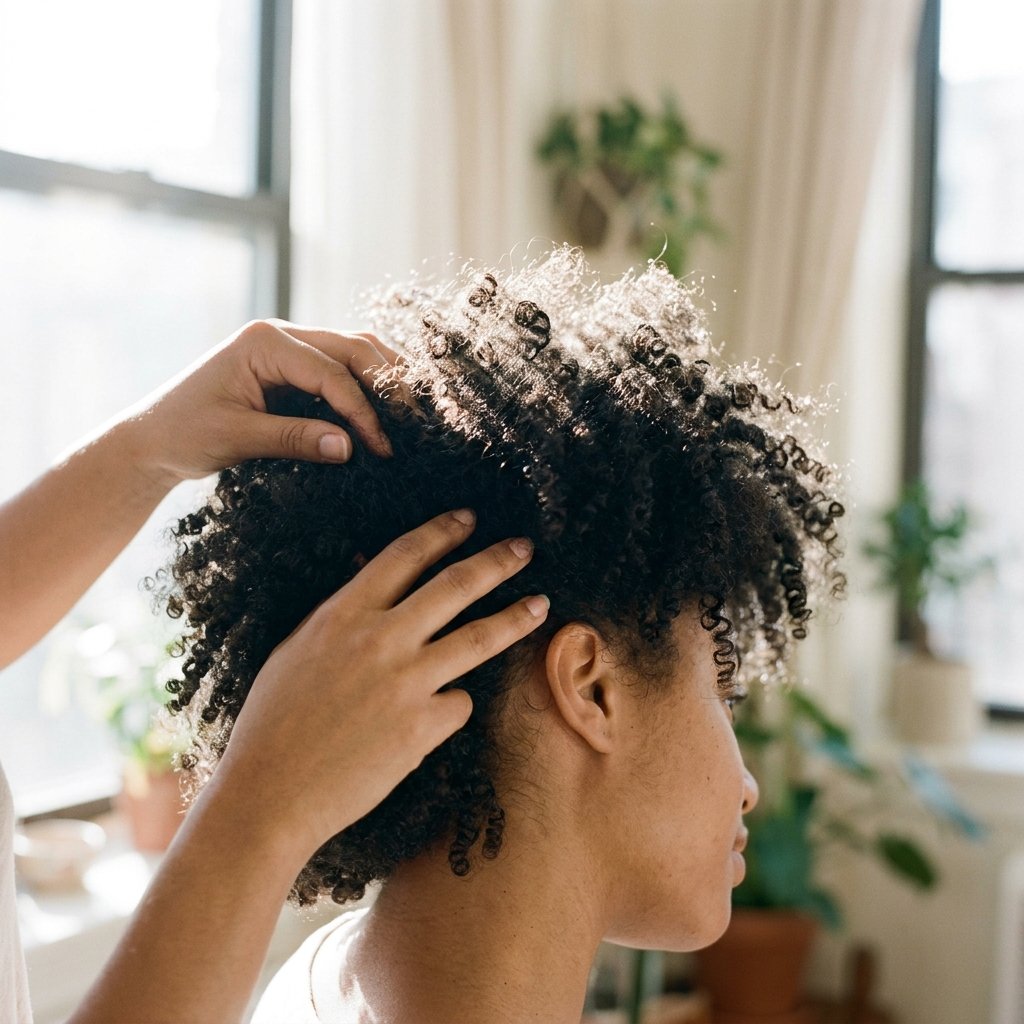
Sometimes you want definition. Sometimes you want softness. Taking coils down is how you get the second one.
- Wait until coils are 100 percent dry
- Coat your fingers with a light oil first
- Separate slowly in the direction of the coil
Go section by section and stop when it looks good. Over-separating is how a beautiful set turns into a cloud of frizz.
A Little Heart-to-Heart Before You Go
Here’s the truth: your first set of finger coils probably won’t be perfect. Mine wasn’t. But you’ll learn your own hair rhythm faster than you expect, and by the third try you’ll have a style you can do half-asleep.
Start small. Pick one style from this list, give yourself a full afternoon, and don’t judge it until it’s completely dry. Most coil sets look terrible at 70 percent dry and beautiful at 100 percent.
Your hair is already doing the hard part. You’re just helping it along.
Save this post to Pinterest so you can find it the next time you’re standing in front of the mirror with a spray bottle and no plan. And tell me in the comments: which style are you trying first? I read every single one, and I’ll cheer you on.

