
Nail art has blossomed into an exciting form of self-expression, offering endless possibilities to adorn your fingertips.
With the right tools and a pinch of creativity, anyone can step into the world of trendy nail designs. From bold colors to intricate patterns, there’s a design waiting just for you, regardless of your skill level.
In this collection, we’ve gathered 15 easy yet stunning nail designs that will inspire you to pick up that polish and get creative. Whether you’re prepping for a night out or just want to add a little flair to your daily routine, these designs will make your nails the talk of the town!
1. Minimalist Line Art

Less is definitely more with minimalist line art! This design is perfect for anyone who wants to keep things sleek yet stylish.
Using a neutral base, simply paint thin lines in a contrasting color to create delicate shapes or abstract designs. You can even incorporate dots or small hearts for a touch of whimsy. This design is super versatile; you can stick to black and white for a classic look or experiment with soft pastels for a springtime vibe.
– Use a thin brush or nail striper for precise lines.
– Allow your base coat to dry completely before adding lines.
– Seal with a clear top coat for a glossy finish.
Trust me, this one will have everyone asking how you made it look so effortless!
2. Colorful Ombre
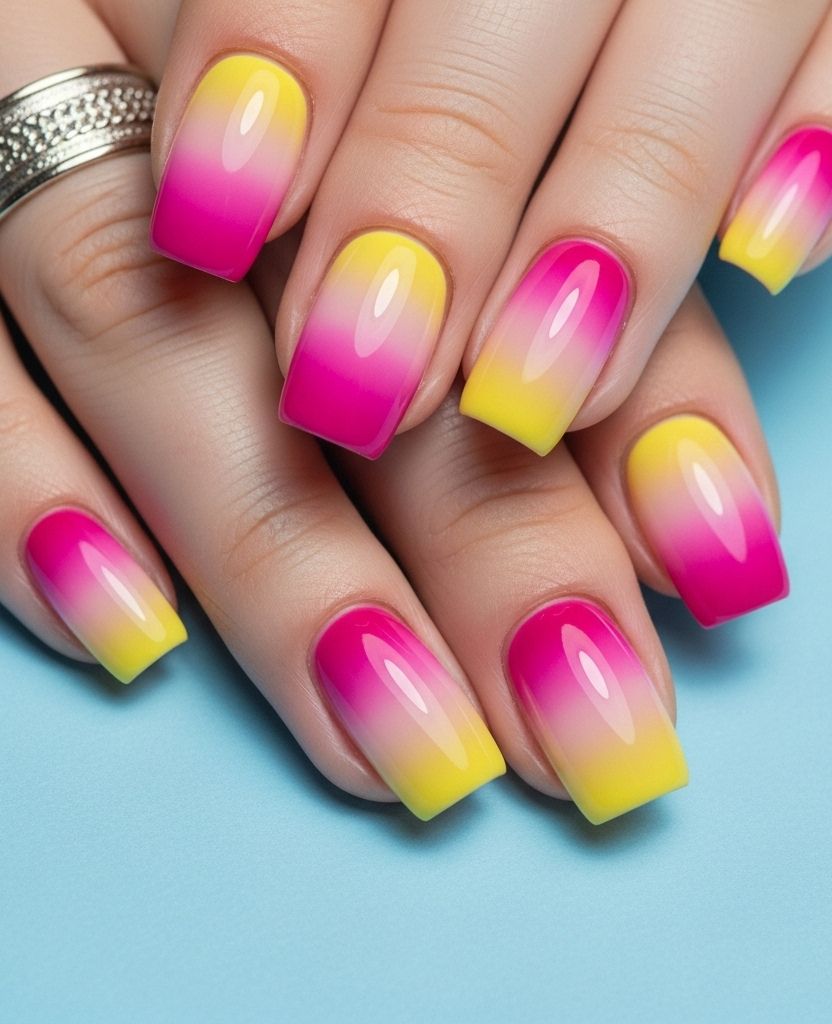
Ombre nails are a fun way to blend colors seamlessly! This trendy look gives that soft gradient effect that can be totally mesmerizing.
Start with a clear or light-colored base, then choose two or three colors that complement each other. Using a makeup sponge, dab the colors onto your nails, blending them as you go. Finish with a glossy top coat to lock in the look. This design is perfect for summer, but you can mix darker shades for a chic winter vibe too!
– Use a base coat to protect your nails.
– Try blending unexpected colors for a unique twist.
– Don’t rush the dabbing process; take your time for a smooth blend.
You’ll be amazed at how easy it is and how stunning the final look turns out!
3. Floral Accents

Bring a touch of nature to your nails with adorable floral accents! This design is perfect for spring or any time you want to feel a bit more feminine.
Choose a solid base color like pastel pink or soft lavender. Once dry, use a detail brush to paint tiny flowers, leaves, or vines. You don’t need to be an expert; a simple daisy or a couple of dots can do the trick! Adding this design to just one or two accent nails gives a nice contrast.
– Use dotting tools for smaller flowers and details.
– Experiment with different flower shapes and colors.
– Seal with a matte or glossy top coat to enhance your artwork.
The floral look is trendy and exudes a cheerful vibe that’s hard to resist!
4. Geometric Shapes

Get ready to unleash your inner artist with geometric shapes! This design is bold and attractive, perfect for making a statement.
Choose a base color, and once it’s dry, use tape to create various shapes—triangles, squares, or even stripes. Paint over the tape with contrasting colors and peel off the tape for sharp lines. The contrast creates an eye-catching effect that’s super trendy.
– Ensure your base coat is completely dry before applying tape.
– Use a top coat to smooth out any uneven edges after removing the tape.
– Mix different colors for an eclectic look, or stick with monochromes for a chic feel.
This nail art trend makes for an adventurous design that is surprisingly easy to replicate!
5. Classic French Twist

The French manicure is a timeless classic, but you can give it a trendy update! Swap the traditional white tips for fun colors or designs.
Start with a base coat of nude or soft pink, then create the tips using your favorite nail polish colors—think bright neon or pastel shades. You can even add glitter or a design over the tips for a modern twist. This simple change breathes new life into the classic look!
– Use tape for clean lines when creating tips.
– Experiment with glittery or metallic colors for an eye-catching effect.
– A clear top coat will help your design last longer.
This design is perfect for anyone who loves elegance with a splash of fun!
6. Marble Effect

Marble nails add a touch of luxe to any look, making them a popular choice for special occasions or everyday chic.
Create this design by swirling two or three colors together on your nail. Start with a white base, then add drops of colors like black, grey, or even blue. Use a toothpick or nail art brush to swirl them together for that marble effect. It’s surprisingly easy but looks incredibly sophisticated!
– Practice on a piece of paper before doing it on your nails.
– Clean your brush between colors to avoid muddying.
– Seal it with a clear top coat for a shiny finish.
Everyone will think you had a professional manicure done when they see your gorgeous marble nails!
7. Sparkly Glitter

Who doesn’t love a little sparkle? Glitter nails are perfect for any celebration, from a party to a casual get-together!
You can paint your nails with a solid color and apply glitter on top or create a glitter fade effect by concentrating the glitter at the tips and fading it down. For a chic look, use fine glitter, and for something more fun, opt for chunky glitter. Layering a glitter top coat can enhance the sparkle even more!
– Apply a glitter base coat for better adhesion.
– Use a sponge to help with the glitter fade technique.
– Finish with a good top coat to even out the texture.
Glitter nails are sure to brighten up your day and add flair to every outfit!
8. Animal Prints

Channel your wild side with trendy animal print nails! Whether it’s leopard spots or zebra stripes, this design adds a fun edge to your look.
Start with a neutral or solid base and use a thin brush to create your desired animal print pattern. Brown and black work well for leopard spots, while bold colors can give a funky twist to zebra stripes. This design is surprisingly easy to replicate and adds a bit of personality to your nails!
– Use a dotting tool for better control when creating spots.
– Try mixing colors to create unique animal print styles.
– Seal with a top coat to keep your design intact.
You’ll love how playful and trendy these animal prints can be!
9. Color Block

Color blocking is making waves in nail art, and it’s easier than you think! This design involves using bold blocks of color to create a striking look.
Choose two or three colors that pop together, and use tape to section off areas on your nails. Apply each color to its designated area for an organized, colorful finish. The clean lines and vibrant colors make your nails stand out!
– Use a base coat for better adhesion.
– Allow each color to dry before applying the next.
– A top coat helps to prevent chipping and enhances shine.
Color block nails are a fabulous way to show off your personality and creativity!
10. Neon Dots

Add a pop of fun to your nails with neon dot designs! This playful look is perfect for summer or any time you want to brighten your day.
Start with a light or clear base coat and use a dotting tool to create dots of neon colors. You can randomize the placement or create stripes. This design can be as simple or as elaborate as you like!
– Use a variety of sizes for the dots for a dynamic look.
– Consider contrasting colors for more drama.
– Always seal your design with a top coat to make it last.
These neon dots are sure to make your nails the life of the party!
11. Half-Moon Manicure

The half-moon manicure is a chic twist on the classic look! This design brings a modern edge while still keeping it classy.
To achieve this look, paint your nails with a solid color and leave a crescent-shaped area at the base unpainted, or use a contrasting color for the moon. This design is super trendy and can work for any occasion!
– Use a guide or a sticker to ensure clean lines.
– Experiment with different color combos to find what works for you.
– A top coat will enhance shine and protect your nails.
This design is a fabulous way to add a hint of glamour without going overboard.
12. Tie-Dye Nails

Bring the festival vibe to your fingertips with tie-dye nails! This fun design is all about blending colors in a whimsical way.
Start with a white base coat, then use a sponge to apply various colors using a swirling technique. Each nail can be unique, making this design perfect for those who want to showcase their creativity.
– Blend colors carefully to avoid muddying.
– Use a top coat to smooth out the texture.
– Practice on a spare nail or piece of paper first.
Tie-dye nails are perfect for expressing your individuality and love for color!
13. Rainbow Stripes

Celebrate colors with fun rainbow stripes! This design is perfect for spreading joy and positivity.
Choose a base color, preferably white or light, and paint horizontal or vertical stripes in all colors of the rainbow. You can use tape to ensure the lines are clean and sharp. This design is suitable for all occasions, showing off your vibrant personality!
– Use thin brushes for precise stripes.
– Make sure each color is dry before applying the next.
– Top coat for longevity and shine.
Your nails will definitely stand out with this eye-catching design!
14. Metallic Shine
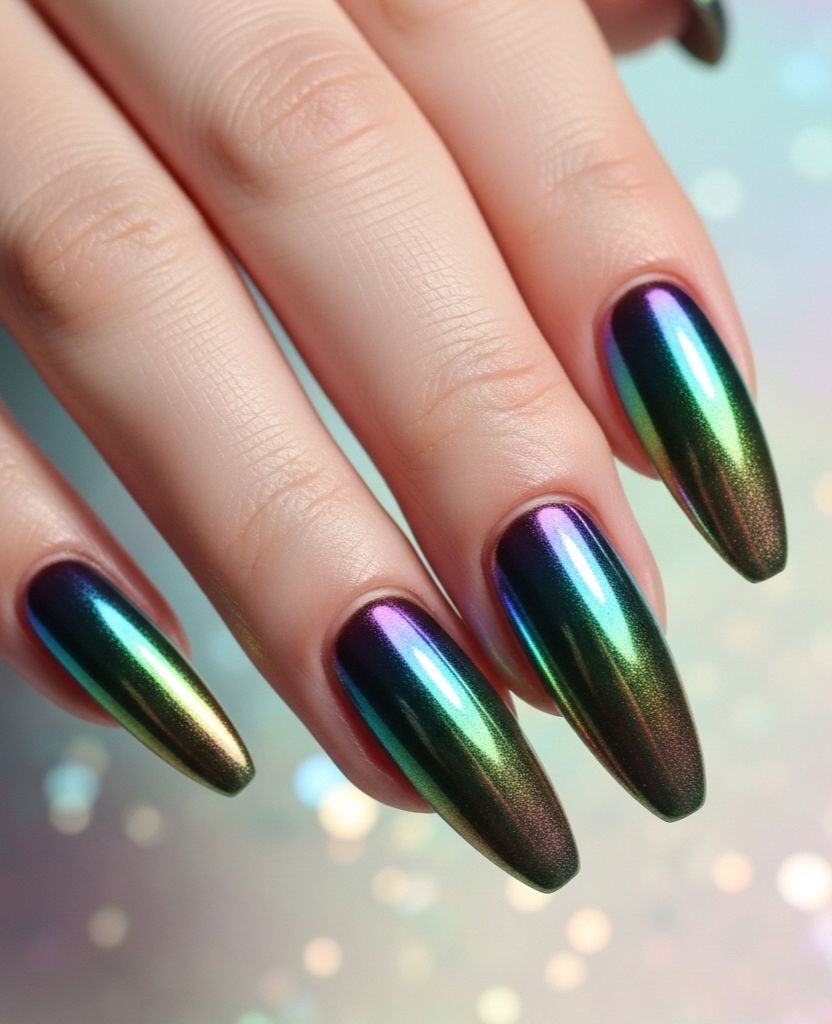
Add some glam to your nails with metallic shine! This trend is all about bold, reflective colors that catch the light.
Choose metallic polishes in shades like gold, silver, or copper. You can go for a full metallic nail or create patterns with it over a matte base for contrast. This design is great for evenings or parties when you want to make a statement!
– Metallic shades tend to show brush strokes, so apply carefully.
– A glossy top coat can enhance the shine even more.
– Experiment with accent nails for a sophisticated touch.
Metallic nails will definitely give you that wow factor and elevate any look!
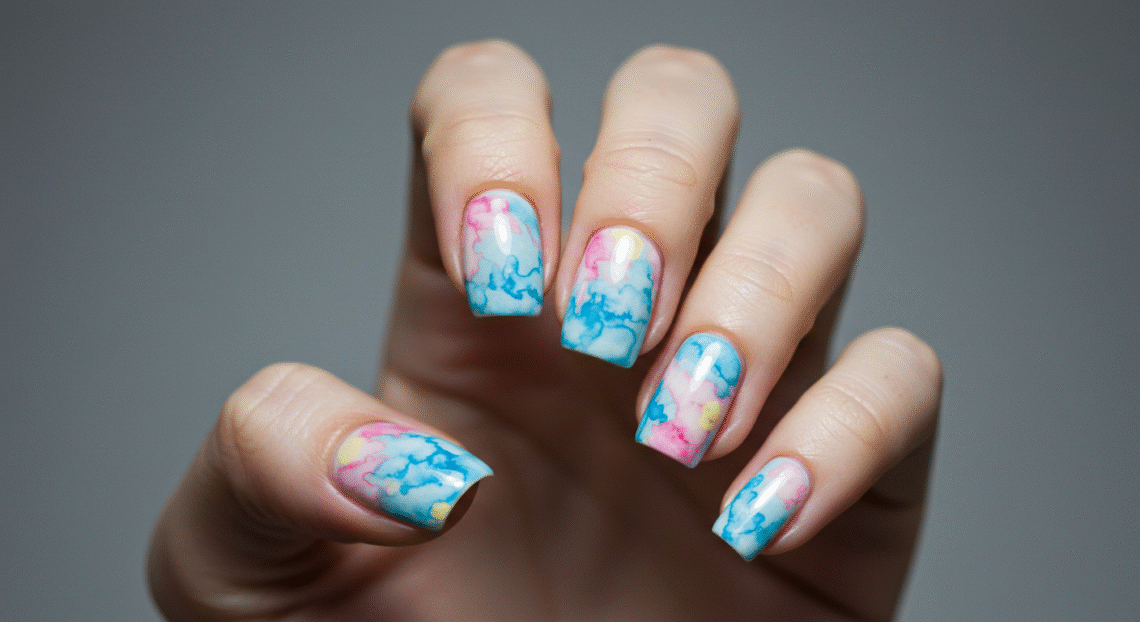
15. Watercolor Nails
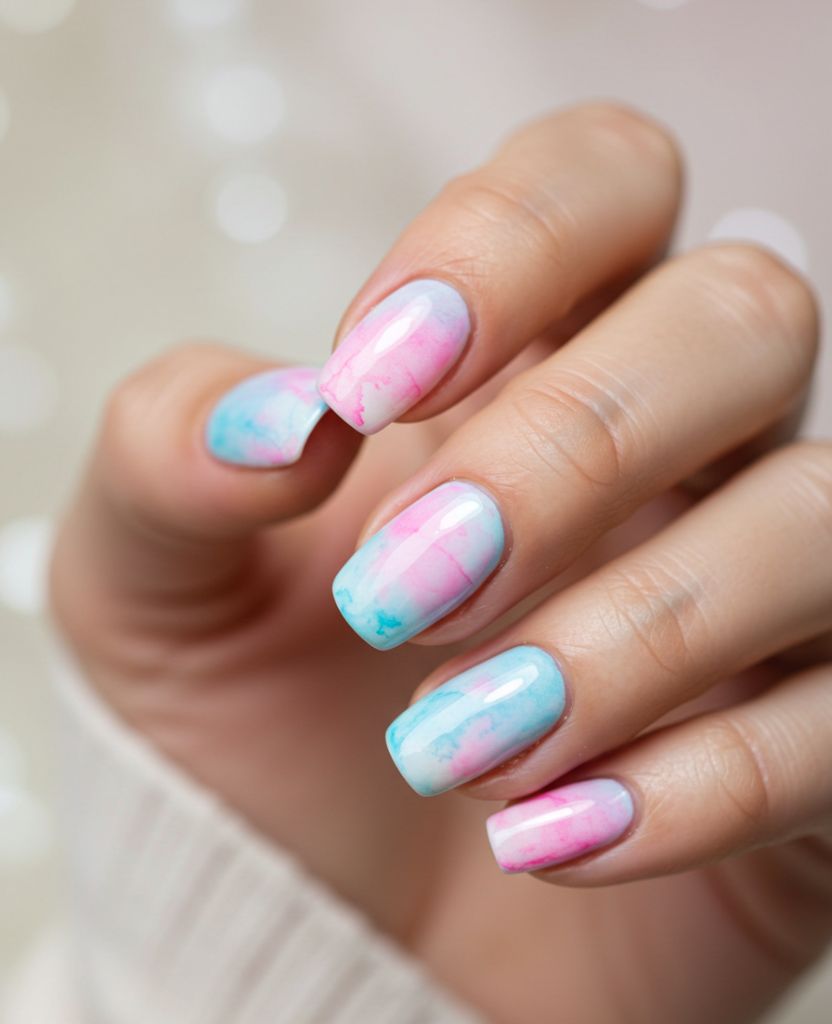
Watercolor nails bring an artistic flair to your fingertips! This design mimics the soft, blended look of watercolor paintings.
Start with a clear or light base and use sheer nail polishes. Apply a few strokes of different colors, letting them blend into each other for a washed-out effect. This technique allows for creativity and a unique outcome on each nail!
– Use a small brush for detailed work.
– Layer colors gently to achieve the watercolor effect.
– Seal with a top coat for added durability.
With watercolor nails, your fingers will truly become a canvas!
Conclusion
The world of nail designs is bursting with creativity, and these 15 trendy styles showcase just how easy it can be to elevate your nail game!
From minimalist lines to vibrant watercolor, each design offers a unique way to express yourself. Whether you’re a beginner or a seasoned pro, there’s a style here for everyone to enjoy. So grab some polish and start experimenting!
Who knows, you may just discover your new favorite nail art trend!

