
Have you ever scrolled through Instagram, mesmerized by pictures of intricate, impossibly sleek braids, only to think, “I could never do that”? You’re not alone. The world of braiding can seem like a secret society with skills passed down through generations or reserved for salon professionals. But what if we told you that those stunning, polished braids are well within your reach?
Gearing Up for Braiding Success
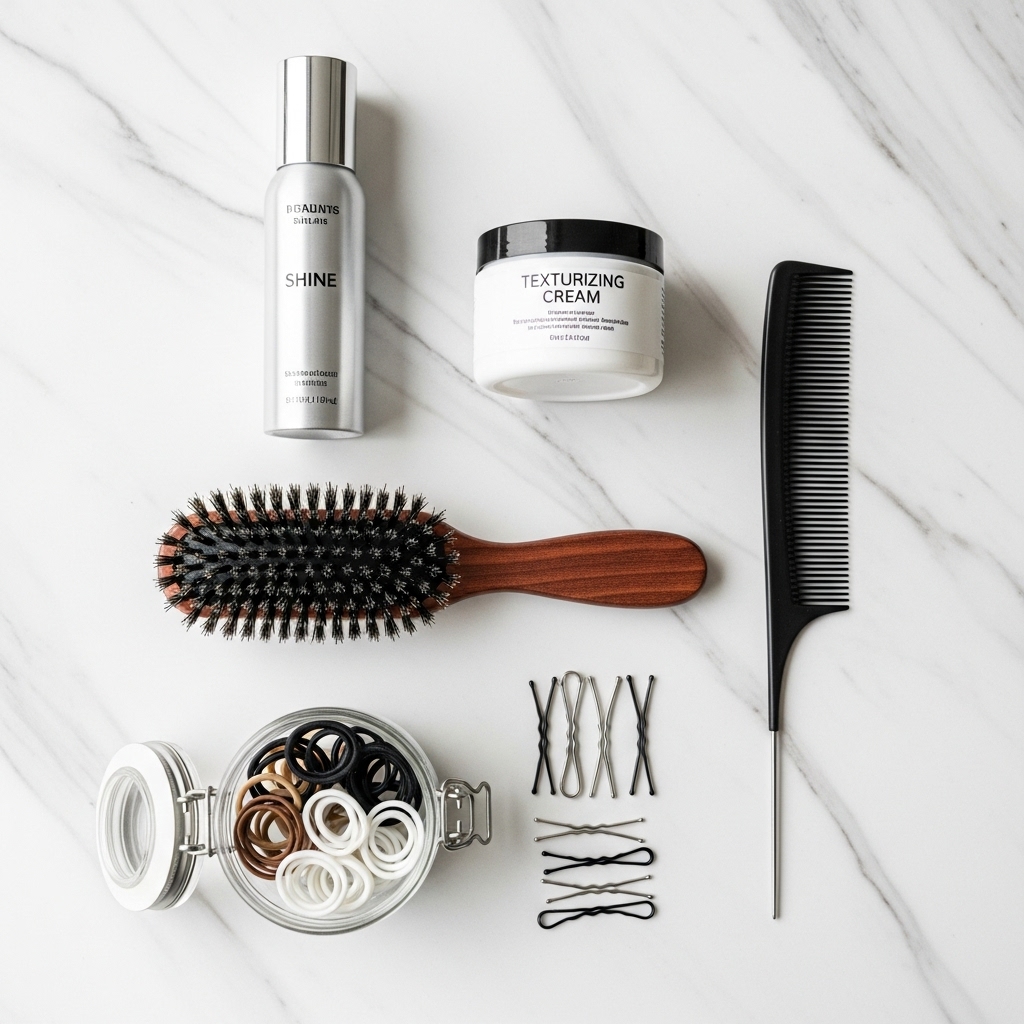
Before we dive into the braids themselves, let’s talk preparation. The foundation of any sleek braid is, unsurprisingly, sleek hair. Starting with the right base will make the entire process smoother and your final result infinitely more polished.
First, consider your hair’s texture. If your hair is freshly washed and prone to flyaways, a light-hold styling mousse or cream applied to damp hair can provide control and smoothness. For second-day or oily hair, a dry shampoo is your best friend. It not only soaks up excess oil but also gives your hair a bit of grit and texture, making it easier to grip and braid. The key tool for that ultra-sleek look is a boar bristle brush or a fine-tooth comb. These are essential for smoothing down sections and creating clean parts. Finally, have a supply of snag-free hair elastics, bobby pins that match your hair color, and a light-hold hairspray or shine spray on hand for finishing touches.
The Foundation: Mastering the Classic French Braid
You can’t run before you can walk, and in the world of braiding, the French braid is your fundamental stride. This technique of adding hair to a traditional three-strand braid as you go is the building block for many more complex styles. Don’t be intimidated; it’s all about the rhythm.
Start by brushing your hair to remove any tangles. Take a triangular section of hair at the very top of your crown. Divide this section into three equal strands. Begin braiding as you normally would: cross the right strand over the middle, then the left strand over the new middle. Now, here’s the French braid part: before you cross the right strand over again, gather a small section of hair from the right side of your head and combine it with the current right strand. Do the same on the left side. Cross this now-thicker right strand over to the middle. Repeat this process—adding hair from the right and left sides each time you cross a strand over—all the way down your head. Once you run out of hair to add, continue with a regular three-strand braid to the ends and secure with an elastic.
Pro Tip: Keep your hands close to the head and maintain even tension. It’s better to make smaller, tighter additions of hair for a neater, more controlled look.
The Reverse French Braid: An Instant Upgrade
If the classic French braid is elegant, the reverse French braid (or Dutch braid) is edgy and dramatic. It creates a beautiful, raised braid that sits on top of your head, and it’s just as easy as its traditional counterpart. The only difference is the direction you cross the strands.
Begin exactly as you would with a French braid: a top section divided into three. This time, instead of crossing the strands *over* into the middle, you will cross them *under*. So, take the right strand and pass it *under* the middle strand. Then, take the left strand and pass it *under* the new middle strand. As you do this, continue adding small sections of hair from the sides, just like before. This “underhand” technique is what pushes the braid upwards, making it pop out from your head. Continue all the way down and secure the end.
Pro Tip: For an even more voluminous look, once the braid is secured, you can gently pull apart the loops of the braid to make it appear wider and fuller.
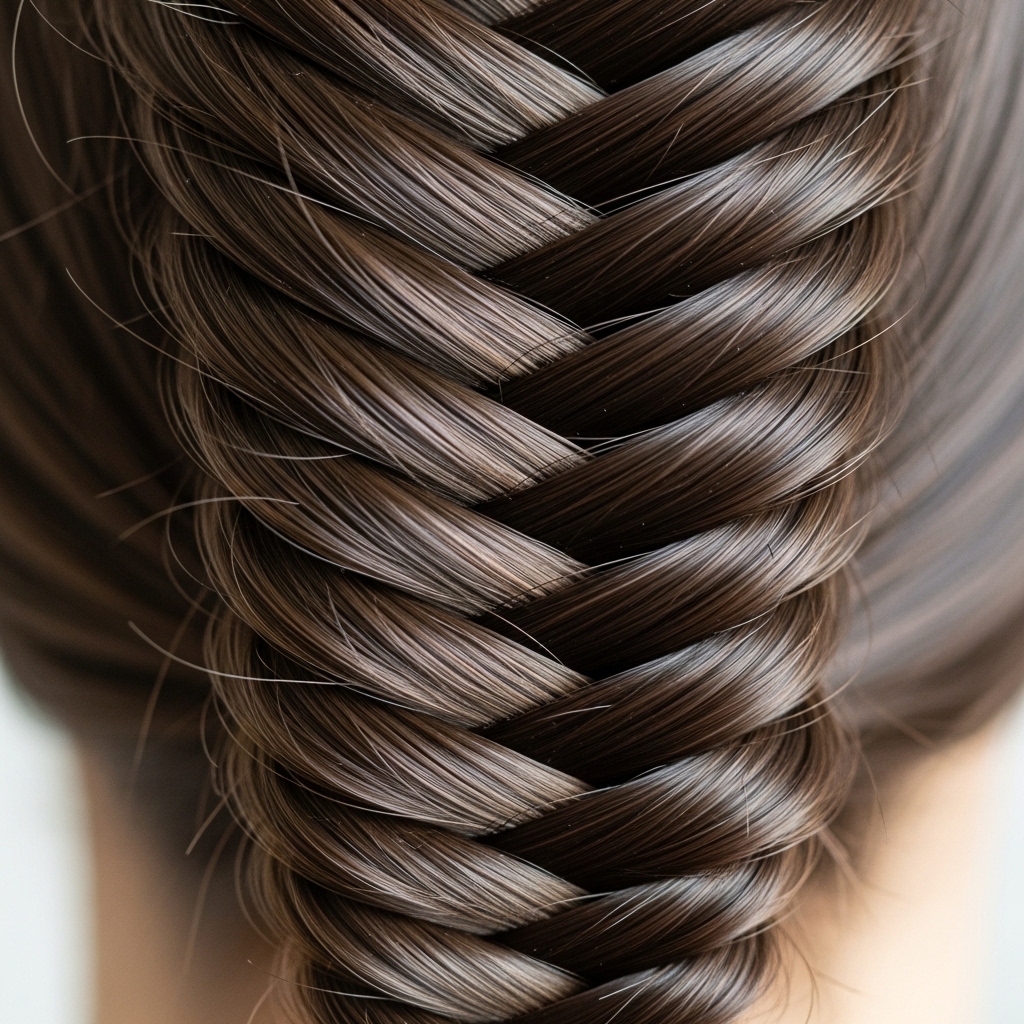
The Effortlessly Chic Fishtail Braid
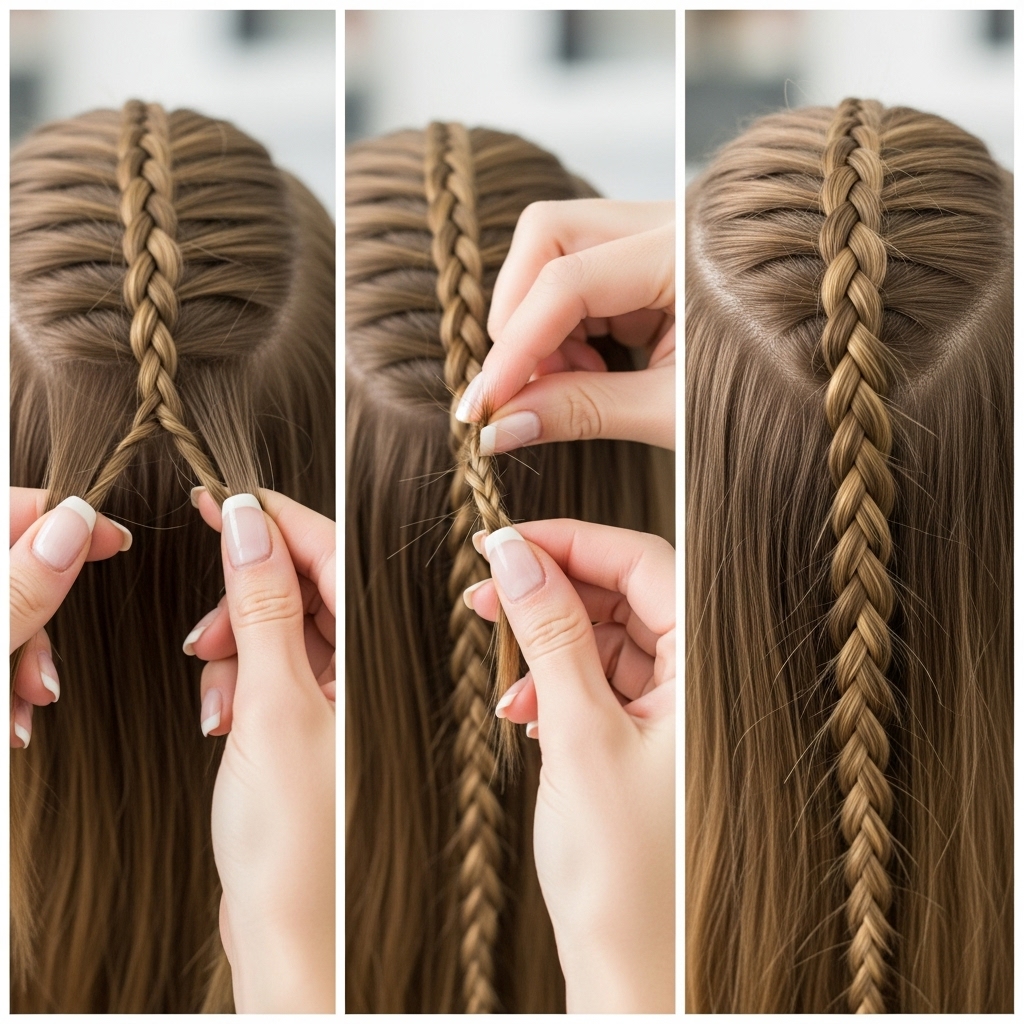
The fishtail braid looks incredibly complex, but it’s deceptively simple. It creates a intricate, woven effect that is perfect for a boho-chic or red-carpet look. It works best on mid-length to long hair and requires a bit of patience, but the technique itself is straightforward.
Begin by pulling your hair into a low ponytail (this makes it easier to learn) and divide the entire ponytail into two equal sections. Take a thin, outside piece of hair from the left section, cross it over, and combine it with the right section. Now, take a thin, outside piece from the right section, cross it over, and combine it with the left section. Repeat this process, alternating sides. The key is to take small, consistent sections. As you work your way down, you’ll see the signature fishtail pattern emerge. Secure the end with an elastic.
Pro Tip: Once you’re comfortable with the technique, try a fishtail French braid. Simply start with two small sections at the top of your head and, as you cross pieces over, add small sections of free hair into them before combining with the opposite side.
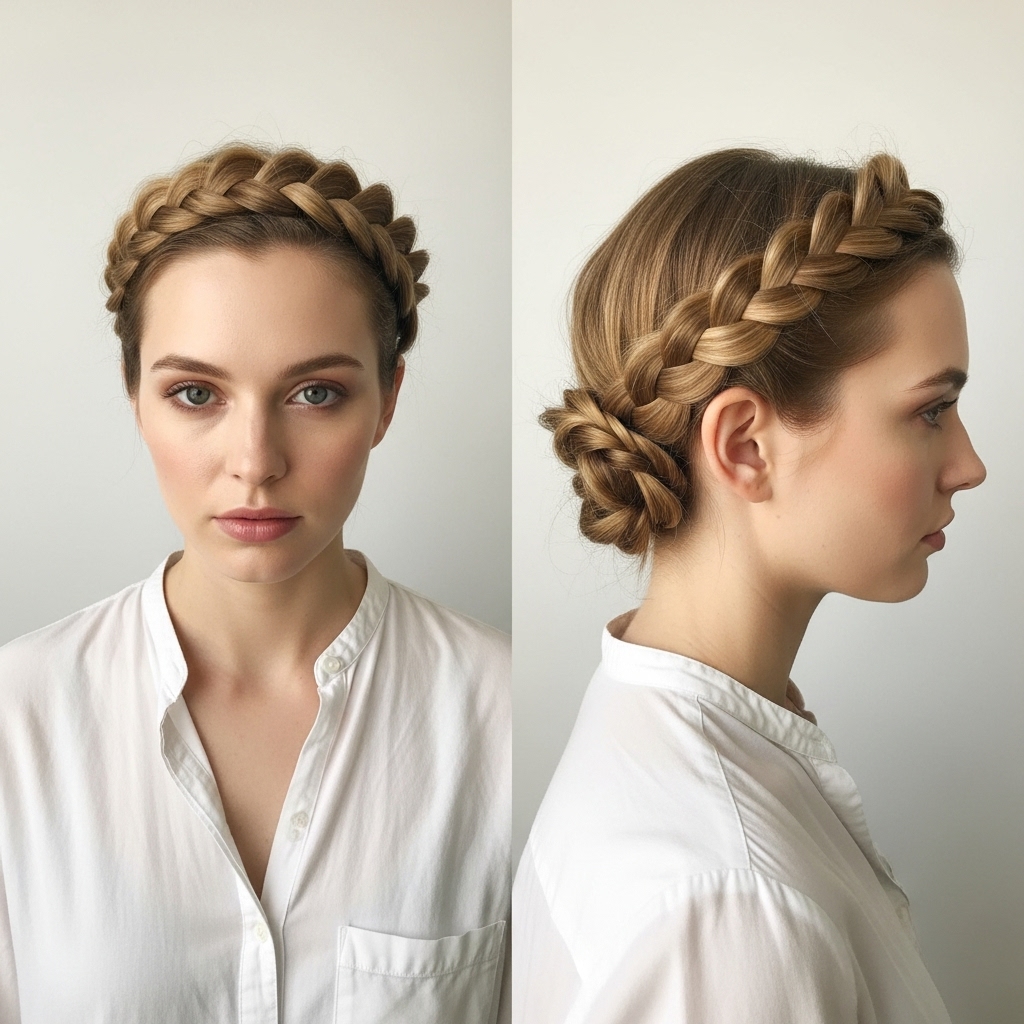
The Regal Halo Braid
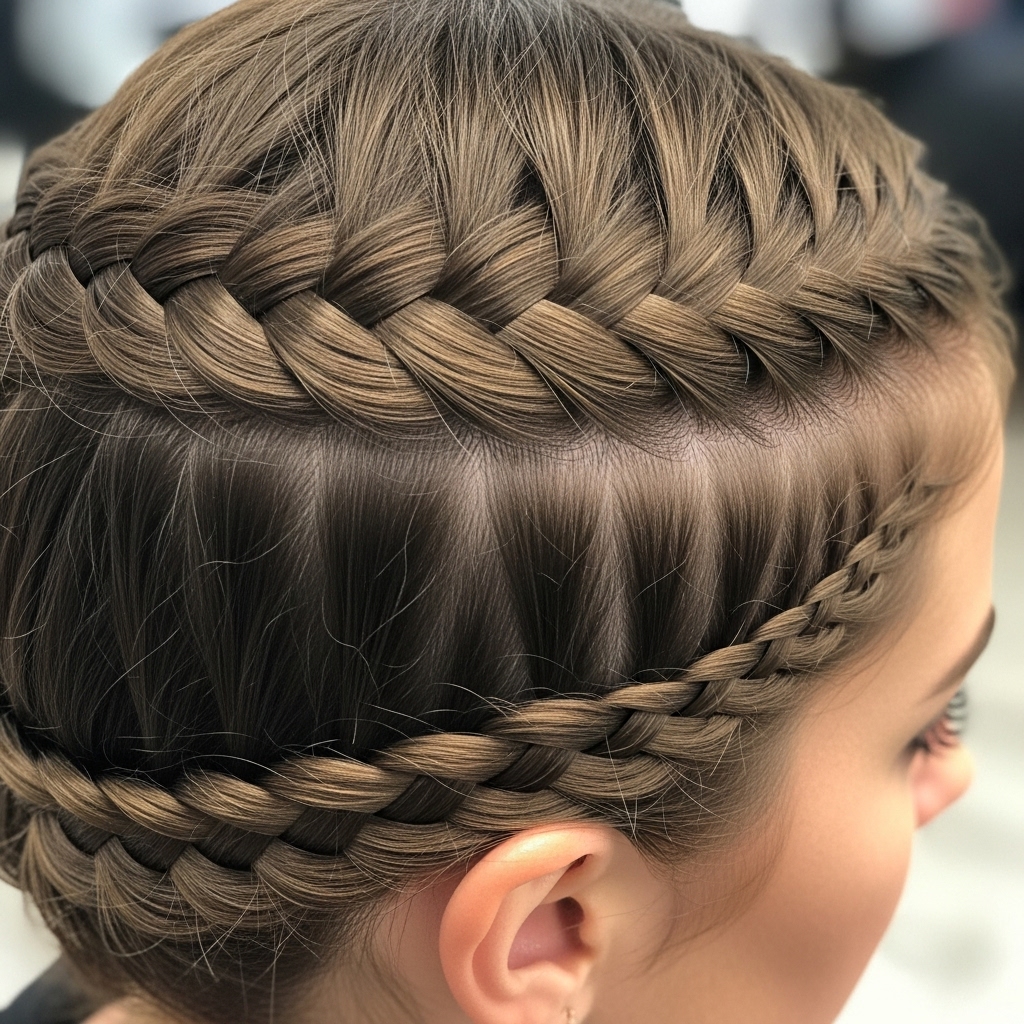
The halo braid is the epitome of ethereal, romantic beauty. It crowns your head like a wreath and keeps your hair completely off your face. It’s essentially a reverse French braid that travels around your head.
Start with a deep side part. On the side with more hair, take a section at your hairline and begin a reverse French braid. As you braid, follow your hairline, working your way around the back of your head towards the other side. The braid should sit like a headband. When you reach the end (just behind your ear on the other side), stop adding new hair and continue with a simple reverse braid for a few more stitches, then secure it with a small elastic. Now, tuck the tail of the braid underneath the start of the braid, using bobby pins to secure it discreetly. Fluff out the braid slightly for a softer look, and you have a gorgeous, crown-like hairstyle.
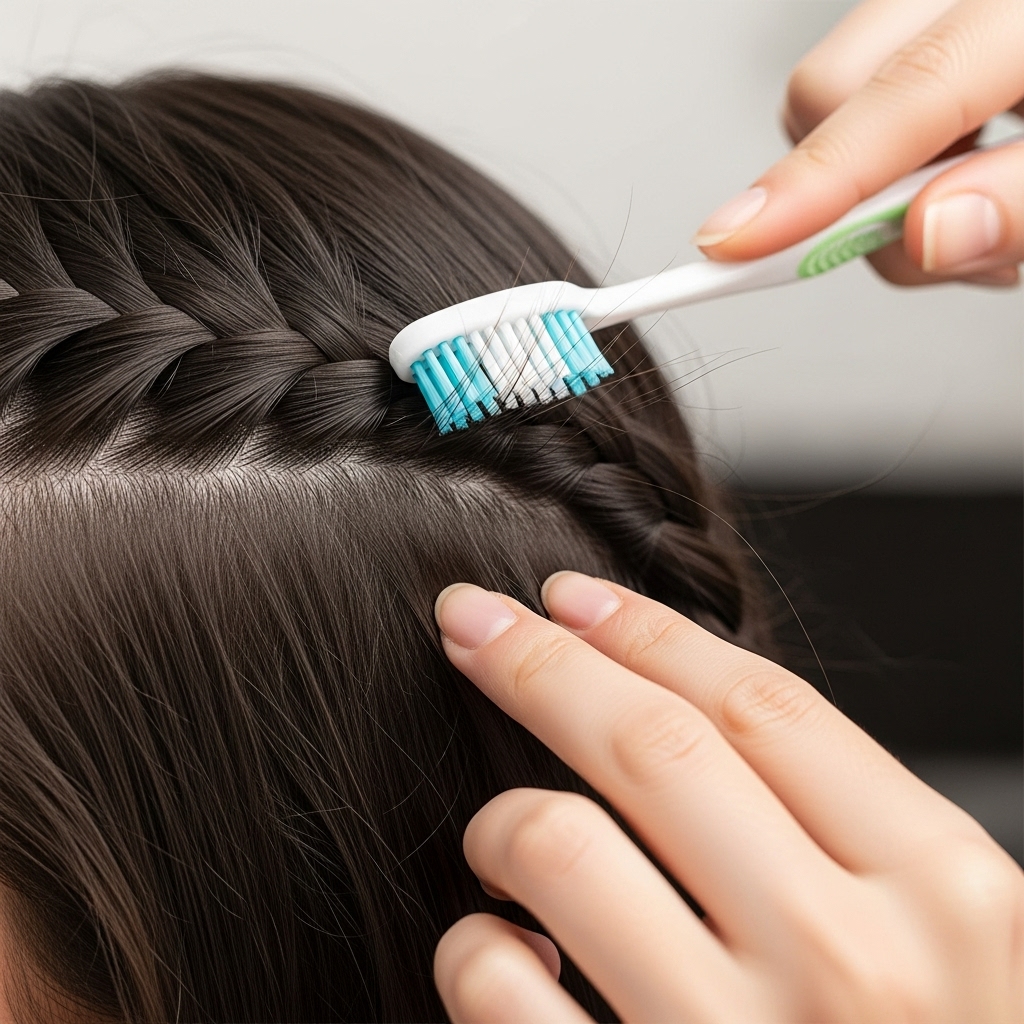
Pro Tip: If you have shorter layers that pop out, use a strong-hold gel on a toothbrush to gently slick them down and secure them to your scalp before you begin braiding.
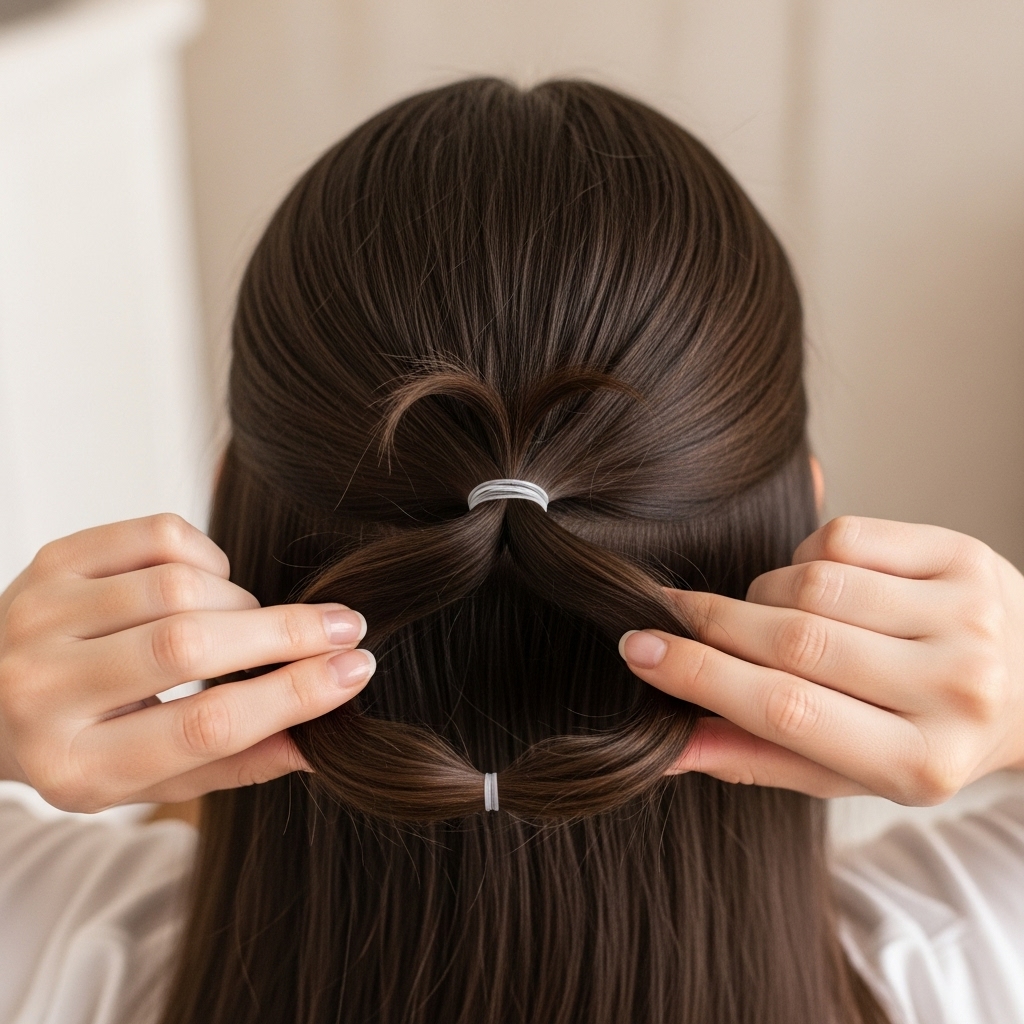
The Sleek & Simple Pull-Through Braid
If you’ve struggled with the techniques above, the pull-through braid is your secret weapon. It creates the illusion of a complex, cascading braid with almost zero technical skill required. It’s all about the setup.
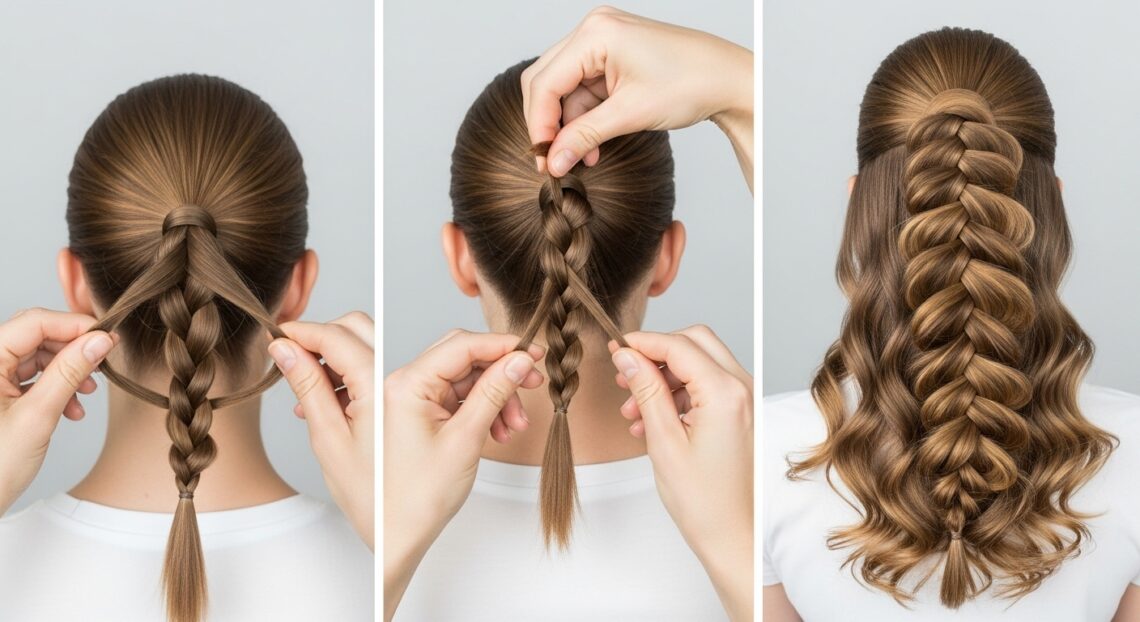
Begin by brushing your hair into a high or low ponytail and secure it with an elastic. Now, a few inches below that first elastic, place a second elastic. Right before you pull the hair all the way through on the second loop, stop, so you have a loop of hair. Gently pull the loop apart to create a hole. Take the ponytail above and pull it down through this hole. Repeat this process down the length of your hair: add another elastic, create a loop, and pull the previous section through. Continue until you reach the ends of your hair. Fluff and adjust the “braid” sections to make them even and voluminous.
Pro Tip: For a truly seamless look, you can go back and gently tug on the sides of each loop to hide the hair elastics completely.
Pro Tips for a Flawless, Salon-Worthy Finish
Creating the braid is only half the battle; the other half is making it look impeccably sleek and long-lasting.
Fight the Flyaways: After you’ve finished your braid, spray a light-hold hairspray on a clean toothbrush or a boar bristle brush and gently smooth it over the surface of the braid. This tames baby hairs without making your hair look crunchy or stiff.
Hide the Evidence: To conceal the hair elastic at the end of your braid, take a small section of hair from the tail, wrap it around the elastic, and secure it with a bobby pin tucked underneath.
Add Shine: A spritz of shine spray or a tiny drop of argan oil rubbed between your palms and lightly smoothed over the braid can make it look healthy, glossy, and professionally done.
Practice Makes Permanent: Don’t get discouraged if your first attempt isn’t perfect. Braiding is a skill that improves with practice. Try these styles when you’re at home with no pressure, like while watching TV.
Your Braiding Journey Starts Now
Braiding is an accessible and rewarding form of self-expression. These styles—from the foundational French braid to the deceptive pull-through—prove that you don’t need a professional stylist on speed dial to achieve beautiful, sleek hair. Each braid offers a different vibe, from athletic and practical to romantic and elegant.
The most important step is to simply start. Grab your brush, your elastics, and give one of these styles a try. Your hands will learn the motions, your confidence will grow, and soon, you’ll be the one turning heads with your intricate, sleek, and beautifully braided hair. Which style will you try first?

