
You have long hair. It’s your glory, your blanket, your… constant companion. But sometimes, that beautiful length can feel more like a burden than a blessing. You scroll through social media, seeing intricate braids and impossibly perfect updos, and think, “I could never.” The ponytail becomes your default, and the messy bun your savior. Sound familiar?
Well, it’s time to break free from the cycle. This guide is not for the professional hairstylist; it’s for you. The one with the hair, the will, and maybe just a few hair ties and bobby pins. We’re demystifying the art of styling long hair, focusing on looks that are achievable, elegant, and perfect for everything from a busy Tuesday to a special Saturday night. Get ready to fall in love with your long locks all over again.
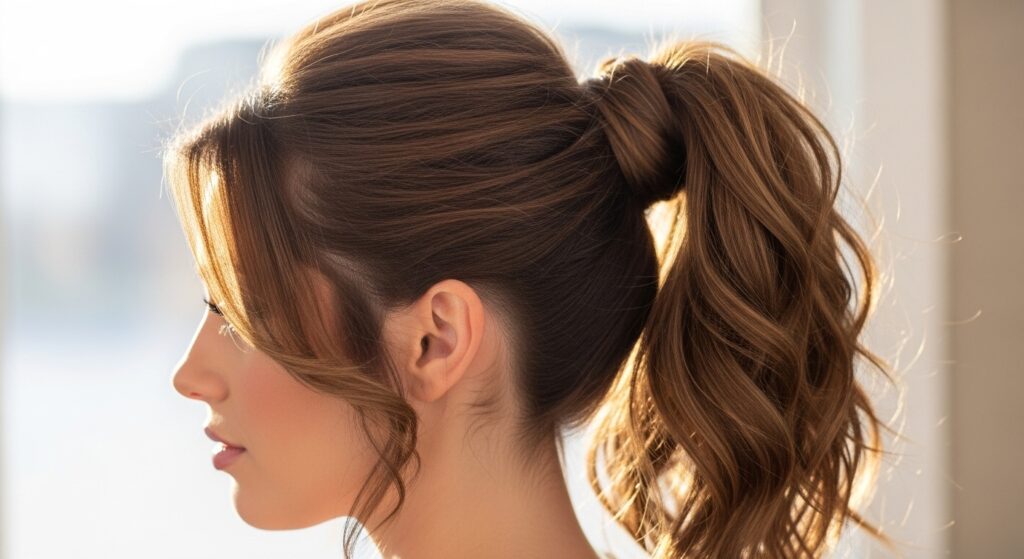
1. The Effortless Textured Ponytail: Beyond the Basics
Let’s start with a classic, but we’re giving it a major upgrade. The goal here is a ponytail that looks chic and intentional, not like you just rolled out of bed. The secret lies in texture and placement.
How to Achieve It: Begin by adding some wave or texture to your hair. If it’s straight, use a curling wand to create soft, loose waves, or simply braid damp hair overnight. This texture is the foundation for volume. Next, instead of pulling your hair straight back, flip your head over and gather your hair at the crown. This instantly gives you lift at the roots. Secure it with a hair tie, but not too tightly. Now for the magic: gently pull apart the sections of the ponytail to create a fuller, more lived-in look. Take a small section of hair from underneath the ponytail and wrap it around the base to conceal the hair tie, securing it with a bobby pin. Finally, pull out a few face-framing pieces to soften the look.
Pro Tip: For a sleeker look, run a small amount of smoothing serum or hairspray over your palms and lightly glaze over the front sections before pulling them back.
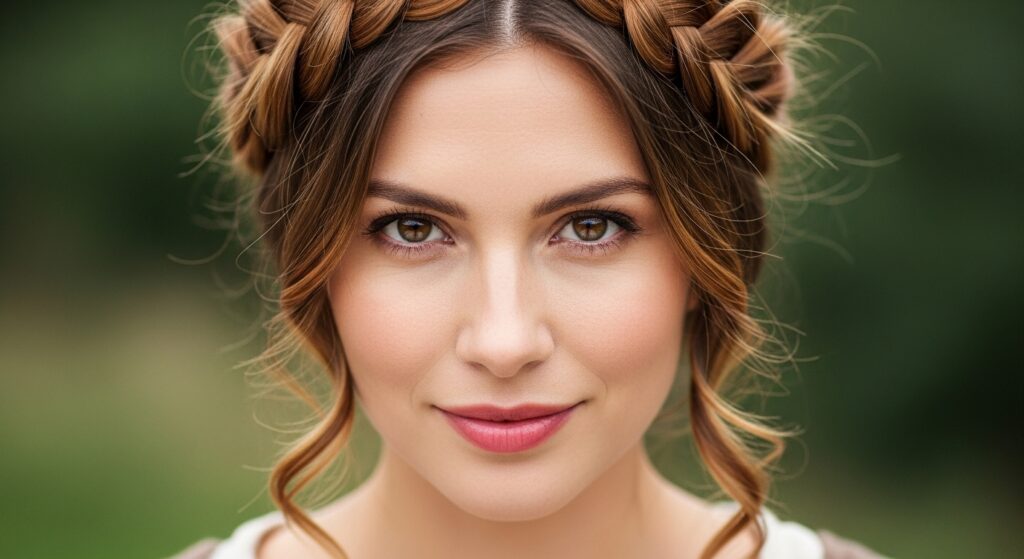
2. The Modern Milkmaid Braid: Romantic & Surprisingly Simple
This style looks like it belongs in a fairytale, but its construction is wonderfully straightforward. It’s perfect for keeping hair off your face while looking incredibly elegant.
How to Achieve It: Part your hair down the middle. On one side, create a simple three-strand braid, starting from your temple and braiding back towards your ear. Do the same on the other side. You don’t need them to be perfect—a slightly loose, messy braid adds to the charm. Now, take the first braid and pull it across the top of your head, just above your forehead, and secure it with bobby pins, tucking the end under. Repeat with the second braid, placing it just behind the first, and pin it securely. The ends of the second braid should meet the tucked end of the first. Gently pull on the edges of the braids to loosen them and create a fuller, more crown-like effect.
Pro Tip: If you have layers or shorter pieces that won’t braid, don’t worry! You can leave them out to frame your face, or use a texturizing spray to blend them in.
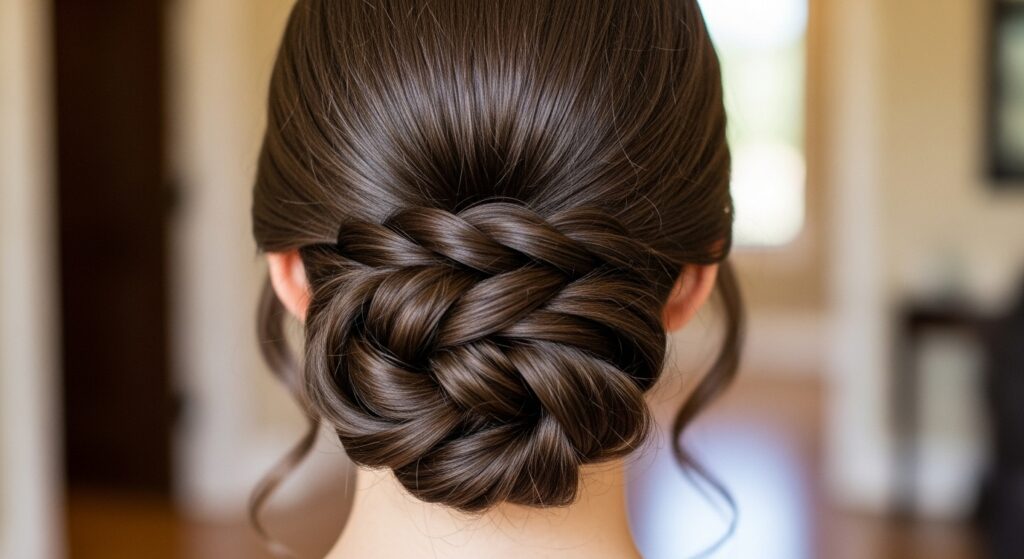
3. The 5-Minute Elegant Twist: Your Go-To Updo
For those days when a bun feels too casual but a full updo feels like too much work, this twisted style is your answer. It’s sophisticated, secure, and deceptively simple.
How to Achieve It: Gather your hair into a low ponytail, but instead of pulling it all the way through the hair tie on the last loop, leave it as a loop, creating a half-ponytail or “messy bun” base. Split this loop in half vertically, creating a hole in the middle. Now, take the loose tail of hair from the ponytail and pull it up through the hole. Then, pull it down and tuck it underneath the base, or wrap it around the base of the bun, securing everything with bobby pins. You can leave the ends out for a soft, boho feel or tuck them in for a cleaner finish. Gently pull at the sides of the twist to add volume and make the style look more effortless.
Pro Tip: A little backcombing at the crown before you start will give this style extra volume and prevent it from looking flat.
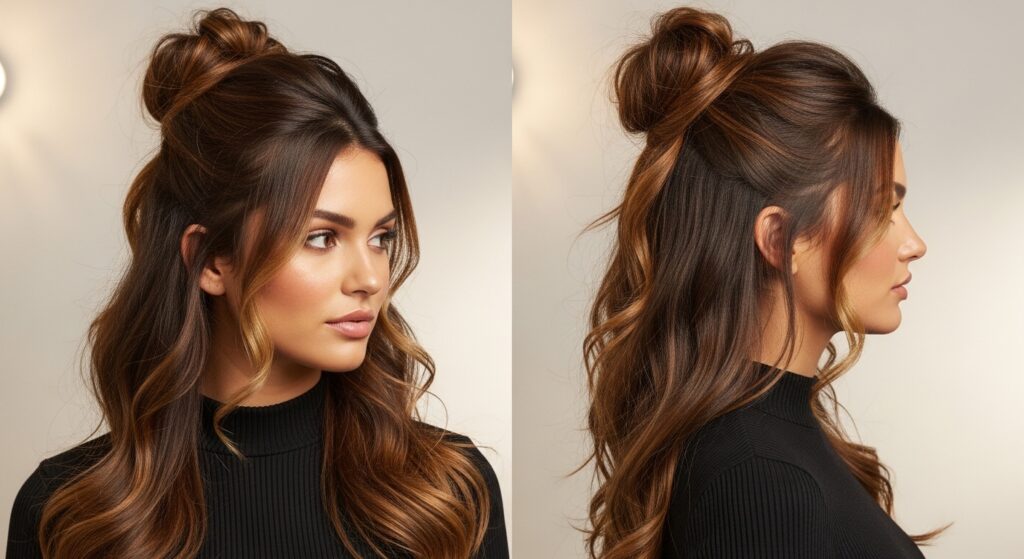
4. The Half-Up, Half-Down Voluminous Topknot
This style gives you the best of both worlds: the polish of an updo with the freedom of wearing your hair down. It’s fantastic for second or third-day hair when the roots need a little lift.
How to Achieve It: Section off the top half of your hair, from about the crown of your head to your temples. Tease this section lightly at the roots for volume. Then, gather it as if you were making a high ponytail on top of your head, but instead of pulling the hair all the way through the hair tie on the last loop, leave the ends out to form a small, perky topknot. You can twist the ponytail before securing it for a more defined look. Gently pull the knot apart to make it look fuller. Let the rest of your hair flow down your back, and consider adding waves for extra texture and drama.
Pro Tip: For a more bohemian vibe, pull out a few pieces around your face and at the temples after you’ve secured the topknot.
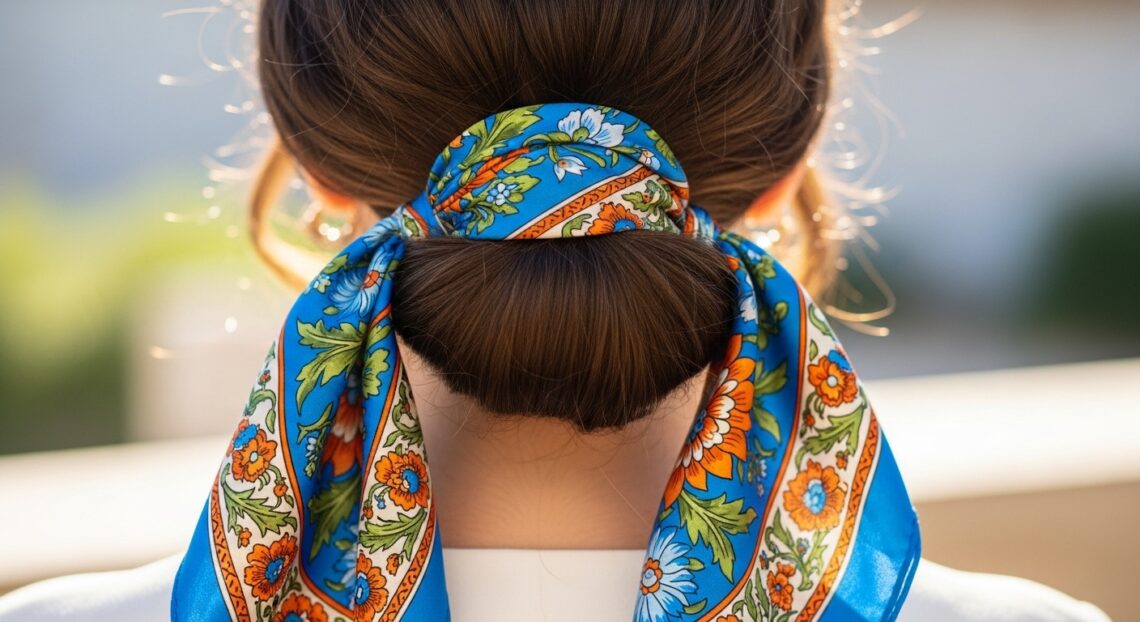
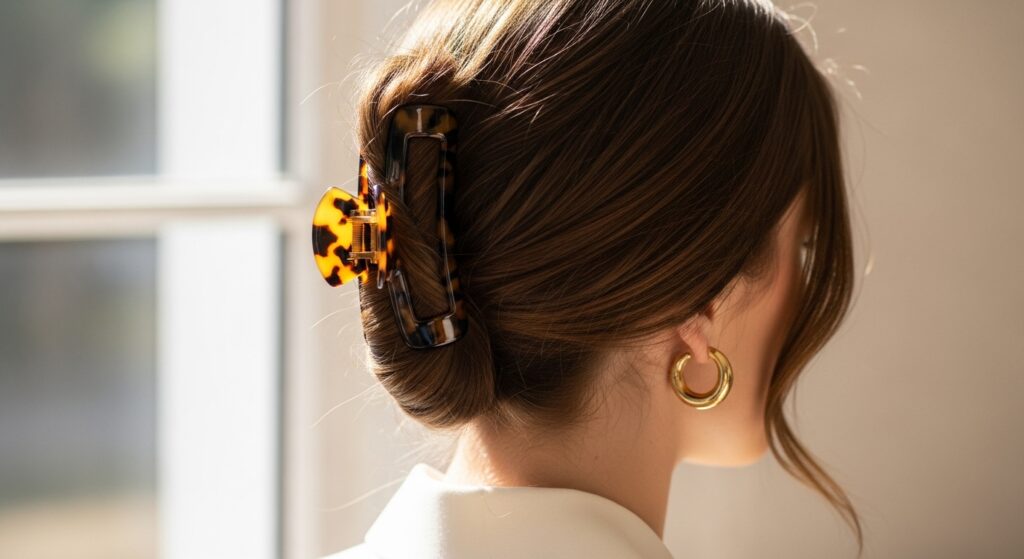
5. The Accessorized “Do”: Leveling Up with Scarves & Clips
Never underestimate the power of a good accessory. When you’re short on time or inspiration, a beautiful clip or a silk scarf can transform a simple style into something special.
How to Achieve It: For a statement clip, create a deep side part or sweep all your hair to one side. Pull a section of hair from the opposite side, twist it loosely back, and secure it behind your ear with a large, elegant claw clip or barrette. Let the rest of your hair flow naturally. For a headscarf, fold a square silk scarf into a triangle and then into a long band. Tie it around your head like a headband, with the knot at the nape of your neck, or tie it around a low ponytail or bun for a pop of color and pattern. You can also use a thin scarf to wrap around a basic ponytail, covering the hair tie for an instant chic upgrade.
Pro Tip: When using clips, make sure to grab a good section of hair and push the clip upward into your hair against the scalp for a secure hold, rather than just clipping it on the surface.
Mastering the Fundamentals: Tools & Products You’ll Need
You don’t need a salon’s worth of equipment, but a few key items will make all the difference.
The Essentials: A good-quality heat protectant is non-negotiable if you use hot tools. Texturizing spray is your best friend for adding grit and hold to second-day hair, making braids and updos easier to manage. A boar bristle brush is perfect for smoothing, while a teasing brush is ideal for backcombing. Don’t forget a reliable supply of coiled hair ties (they don’t leave creases) and a stash of bobby pins that match your hair color.
Building Your Skills: Styling long hair is a practice. Don’t get discouraged if a braid is lopsided the first time or a twist comes undone. Try these styles when you’re not in a rush—maybe while watching TV in the evening. The muscle memory will build, and soon, that elegant twist will truly take you only five minutes.

Conclusion: Embrace Your Length with Confidence
Long hair is a canvas for creativity, not a chore to be managed. By mastering these few, achievable styles, you’re not just changing your look for a day; you’re building a repertoire of confidence. You’re proving to yourself that you can create beautiful, elegant, and fun hairstyles without a professional degree.
So, the next time you’re staring at your reflection, wondering what to do, come back to this guide. Start with the textured ponytail, graduate to the milkmaid braid, and soon you’ll be improvising and creating your own signature looks. Your long hair is your asset. Now, you have the ultimate guide to styling it like one.

