


Have you ever looked at your hair and immediately known something wasn’t right? That instant gut feeling when your hair just doesn’t feel like itself? What if we told you there’s a simple 5-second test that can reveal exactly what’s wrong with your hair health? No fancy equipment needed – just your hands and a little observation.
In this revealing guide, we’ll walk you through this surprisingly accurate diagnostic method that hairstylists and trichologists have used for years. You’ll learn how to decode your hair’s secret messages and take action before damage becomes visible to the naked eye.
What Is the 5-Second Hair Test?
The 5-second hair test is a quick diagnostic method that evaluates your hair’s condition based on three simple factors: texture, elasticity, and porosity. Unlike complicated lab tests, this method gives you immediate feedback about your hair’s health status using nothing but your senses.
Why it works: Hair is essentially a protein fiber that changes its physical properties based on its internal health. Damage, moisture imbalance, and chemical stress all manifest in ways you can feel if you know what to look for.
How to Perform the Hair Health Check
Follow these steps to perform your own hair diagnosis:
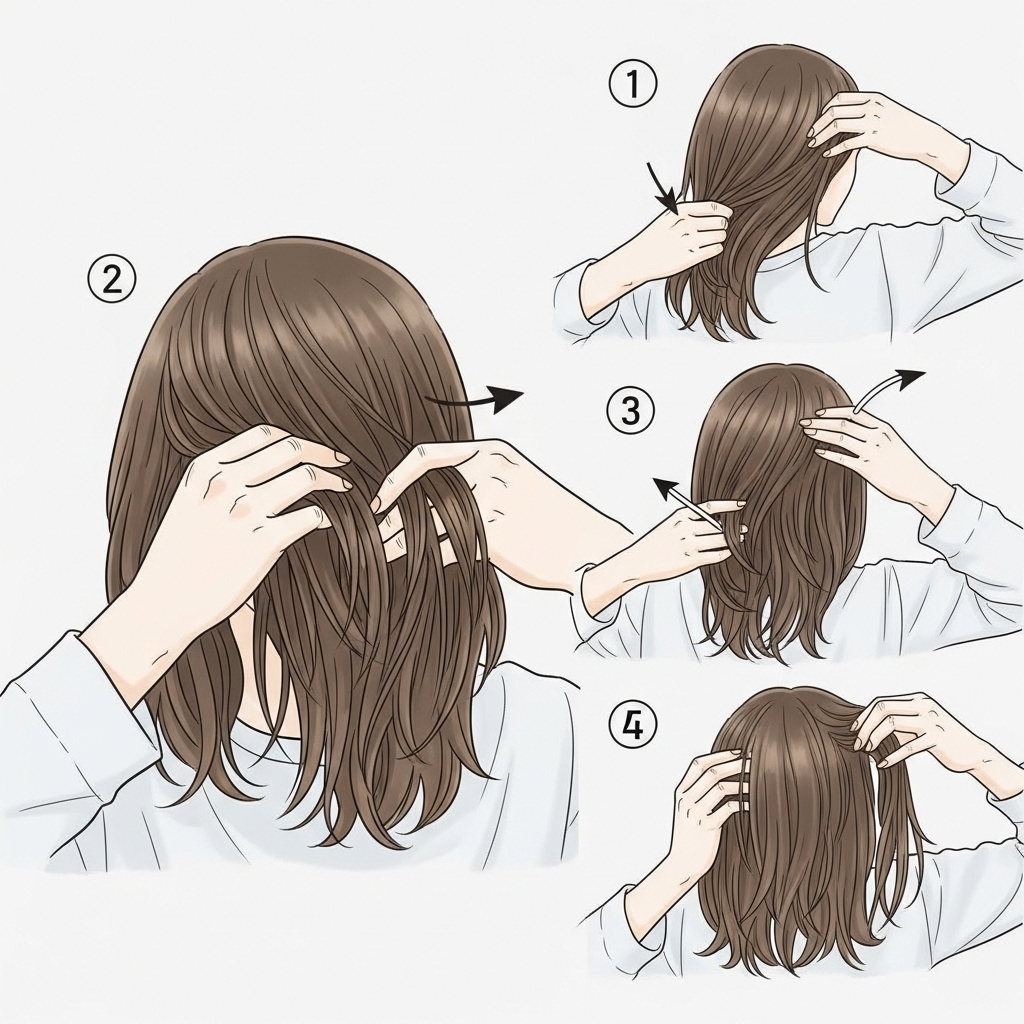
Step 1: Take a dry strand of hair (about 6 inches long) from your brush or comb. Morning hair works best as it hasn’t been affected by daily styling products yet.
Step 2: Hold it at both ends and gently stretch it. Healthy hair should stretch about 20% of its length before returning to normal without breaking.
Step 3: Run your fingers along the strand from root to tip. Note any variations in texture – rough patches, extreme smoothness, or grittiness.
Step 4: Examine the strand against a white background in good lighting. Look for changes in color, thickness, or transparency along its length.
Step 5: Finally, drop the strand into a glass of water. Observe whether it floats (good) or sinks quickly (warning sign).

Decoding Your Test Results
Now that you’ve performed the test, here’s what your hair is trying to tell you:
Scenario 1: Hair stretches then returns
What it means: Your hair has good elasticity and moisture balance. The protein structure is intact.
Scenario 2: Hair stretches but doesn’t return
What it means: Moisture overload. Your hair has lost its protein structure and needs strengthening treatments.
Scenario 3: Hair breaks immediately
What it means: Extreme protein deficiency or chemical damage. Your hair needs protein treatments and reduced manipulation.
Scenario 4: Strand feels rough or bumpy
What it means: Cuticle damage. Your hair needs sealing treatments and gentler washing techniques.
Scenario 5: Strand sinks quickly in water
What it means: High porosity. Your hair is absorbing too much moisture from the environment, leading to frizz.
The Hidden Health Clues in Your Hair
Your hair test results don’t just reveal surface-level issues – they can indicate deeper health concerns:
Sudden changes in texture: Could signal hormonal imbalances or nutritional deficiencies. Many women notice hair texture changes during pregnancy or menopause.
Increased breakage: Might indicate protein deficiency in your diet or excessive stress on your body.
Extreme dryness: Could mean you’re lacking essential fatty acids or dealing with dehydration.
Unusual porosity changes: Sometimes related to thyroid issues or metabolic changes.
While not a substitute for medical diagnosis, these hair changes can serve as early warning signs to investigate with your healthcare provider.

Customized Solutions for Every Hair Type
Now that you’ve identified your hair’s specific issues, here are targeted solutions:
For moisture-deficient hair:
Try the 60-second conditioning method: Apply conditioner to damp hair, cover with a shower cap, and apply gentle heat for 1 minute before rinsing.
For protein-deficient hair:
Use a rice water rinse twice monthly. The amino acids in rice water help rebuild hair’s protein structure naturally.
For high-porosity hair:
The LOC method works wonders: Liquid (water-based leave-in), Oil (sealing oil), Cream (butter or cream styler) applied in that exact order.
For damaged cuticles:
Cold water rinses help flatten the cuticle layer. Always finish your wash with a cool rinse.
Remember that hair health changes gradually. Perform this test monthly to track your progress and adjust your routine accordingly.

Preventive Care: Stop Damage Before It Starts
The best hair care happens before problems become visible. Incorporate these preventive measures:
1. The Microfiber Test: Sleep on a microfiber pillowcase. If you wake up with significantly less frizz, your regular pillowcase is causing unnecessary friction.
2. The Water Temperature Check: Wash your hair with water that’s body temperature (test on your wrist like baby formula). Too hot equals instant cuticle damage.
3. The Product Buildup Test: After shampooing, soak a strand in apple cider vinegar diluted with water (1:3 ratio). If it becomes noticeably softer, you have product buildup.
4. The Sun Damage Check: Hold a strand up to bright light. If you see multiple colors reflecting (not just your natural color), your hair has UV damage.
These simple checks take seconds but can prevent months of repair work down the line.

When to Seek Professional Help
While the 5-second test is remarkably accurate for home use, certain signs warrant professional attention:
• Sudden, unexplained hair texture changes
• Clumps of hair coming out at the root
• Scalp pain accompanying hair changes
• Bald patches or significant thinning
If you notice any of these red flags along with poor test results, consult a trichologist or dermatologist. They can perform more advanced tests like hair mineral analysis or scalp biopsies if needed.
Remember that hair grows slowly – about half an inch per month. Improvements from lifestyle changes or treatments may take 3-6 months to become fully visible in your test results. Consistency is key!

Your Hair Health Action Plan
Now that you’re armed with knowledge, here’s your 30-day plan to transform your hair health:
Week 1: Perform the 5-second test and document your baseline results with photos.
Week 2: Implement one targeted treatment based on your test results.
Week 3: Add one preventive measure from our list above.
Week 4: Retest and compare results. Adjust your routine as needed.

