

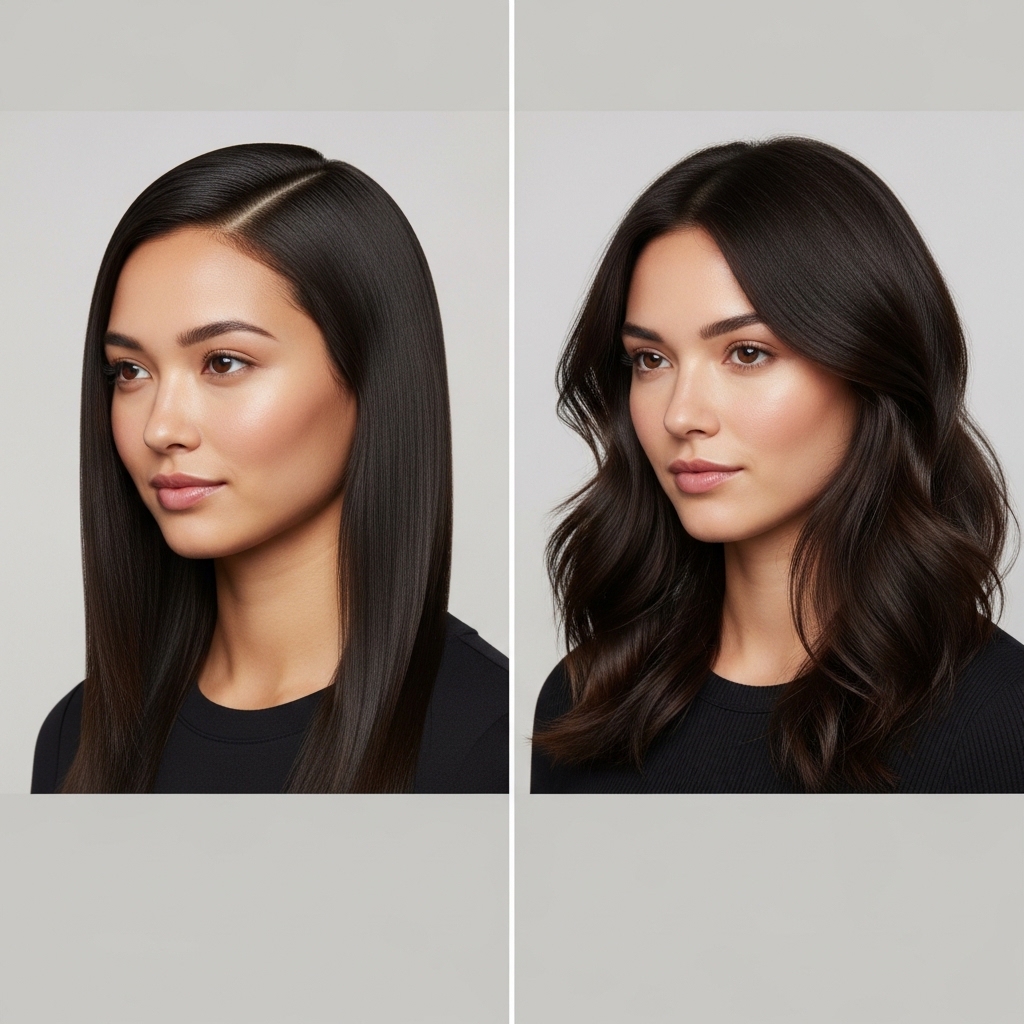
Hey you. I see you scrolling through those moody, beautiful romantic goth hairstyles on your feed, feeling that pull. You want something dramatic but soft, edgy but totally wearable. I get it. That perfect balance of dark romance and everyday cool is what we’re after.
Today, we’re ditching the complicated tutorials. I’m breaking down exactly how to get those smudged, lived-in waves on dark hair. It’s that “I just woke up like this” vibe, but make it intentional and gorgeous.
Think less “costume,” more “core personal aesthetic.” This look works for a date night, a coffee run, or just feeling like the main character on a Tuesday. It’s one of those 2026 hairstyles that’s already trending, and it’s surprisingly easy to nail. Let’s get into it.
What Are Romantic Goth Smudged Waves?
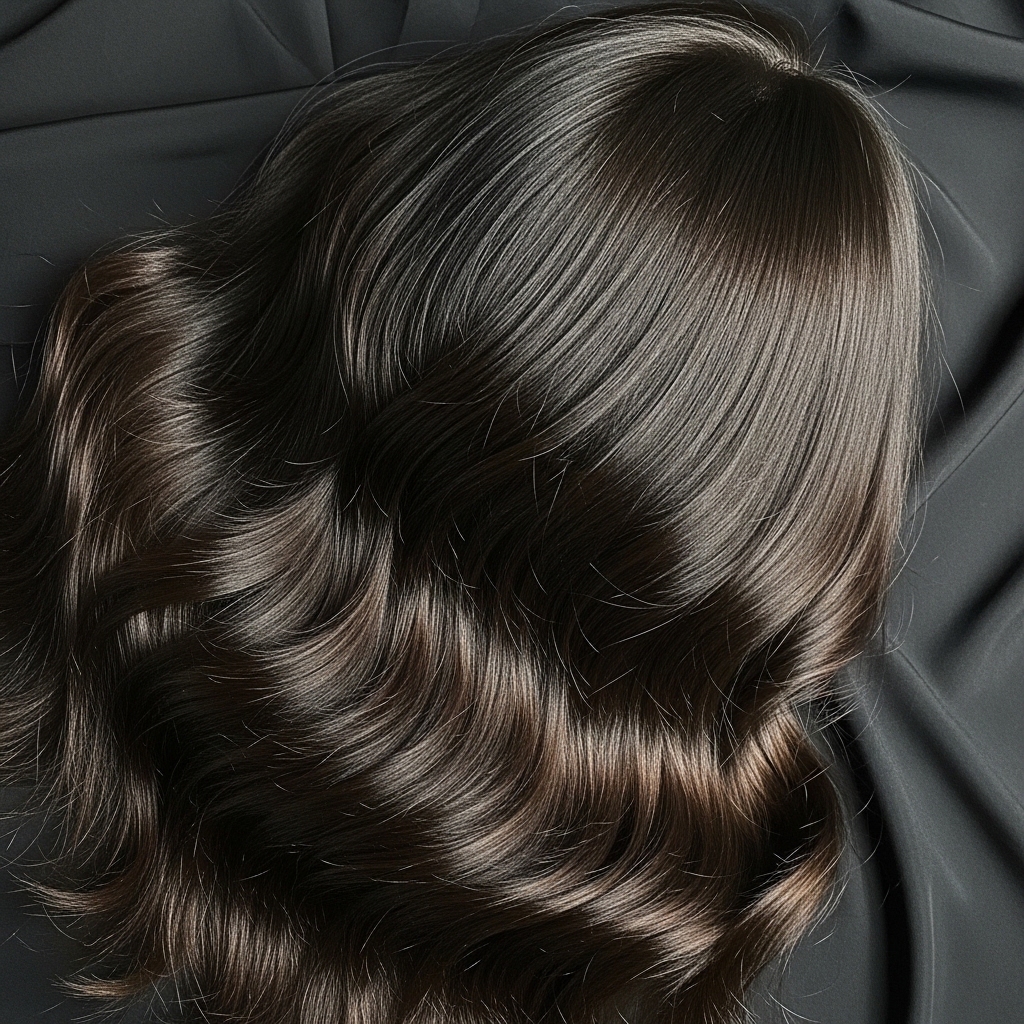
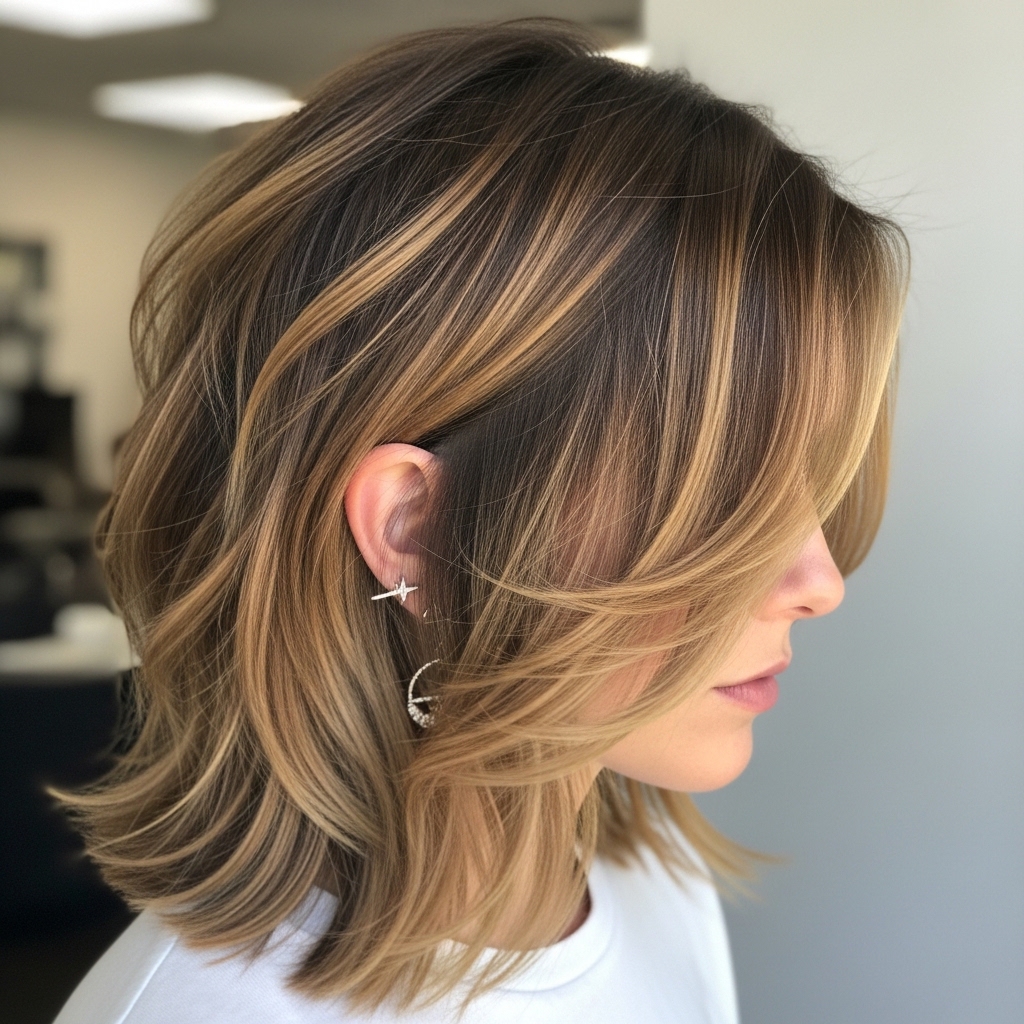
Let’s paint a picture. Imagine your typical sleek, dark waves. Now, add a bit of texture, a touch of undone separation, and a soft, almost smoky finish. That’s the smudged wave.
It’s not about perfect curls. It’s about movement and shadow. The “romantic goth” part comes from the depth and the feeling—it’s poetic, a little mysterious, and deeply flattering. It pairs perfectly with dark hair, letting the natural richness of your color be the star.
Why This Look is Perfect for Dark Hair
Dark hair has a built-in drama that this style amplifies. The shadows and highlights created by the smudged waves add incredible dimension. It keeps your hair from looking flat or one-dimensional.
This technique also blends regrowth seamlessly, making it low-maintenance. Whether you have jet black, deep brown, or a dark tint, this style makes your color look expensive and multi-faceted, giving off major quiet luxury bob energy, even on longer hair.
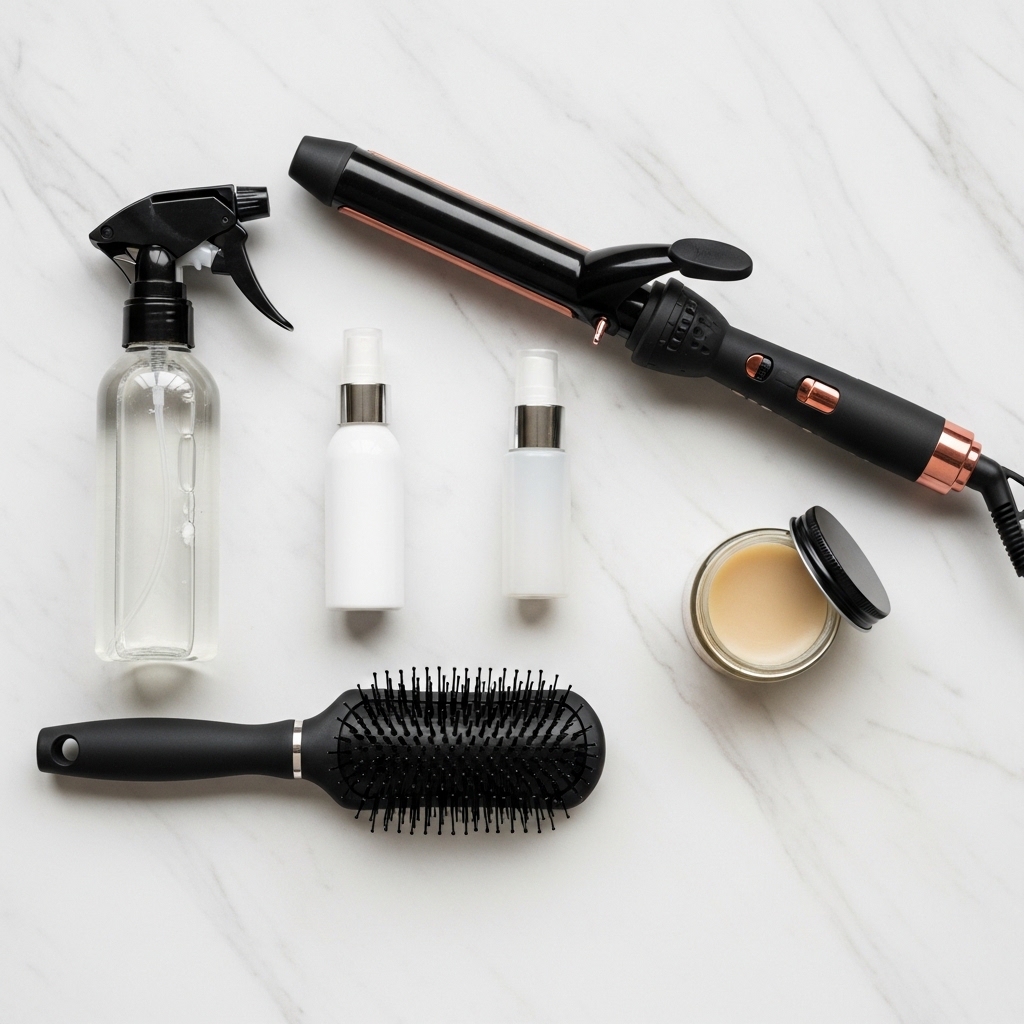
Tools You’ll Need to Get Started
You don’t need a salon full of equipment. Keep it simple. A good 1-inch curling wand or iron is your main tool. Clamp-less wands are great for this. You’ll also need:
- A heat protectant spray (non-negotiable!).
- A texturizing spray or sea salt spray.
- A light-hold hairspray.
- A boar bristle brush or wide-tooth comb for separating.
- A tiny bit of hair wax or pomade on your fingertips.
Start With the Right Haircut
The right cut makes all the difference. Blunt cuts can look too heavy. Ask your stylist for long layers or face-framing layers to encourage movement. This style works on everything from long hair to an asymmetrical lob.
If you’re feeling bold, elements of a hime cut or a sharp vampire haircut can add incredible graphic lines that look amazing when smudged out. A good cut is the foundation of any great style.
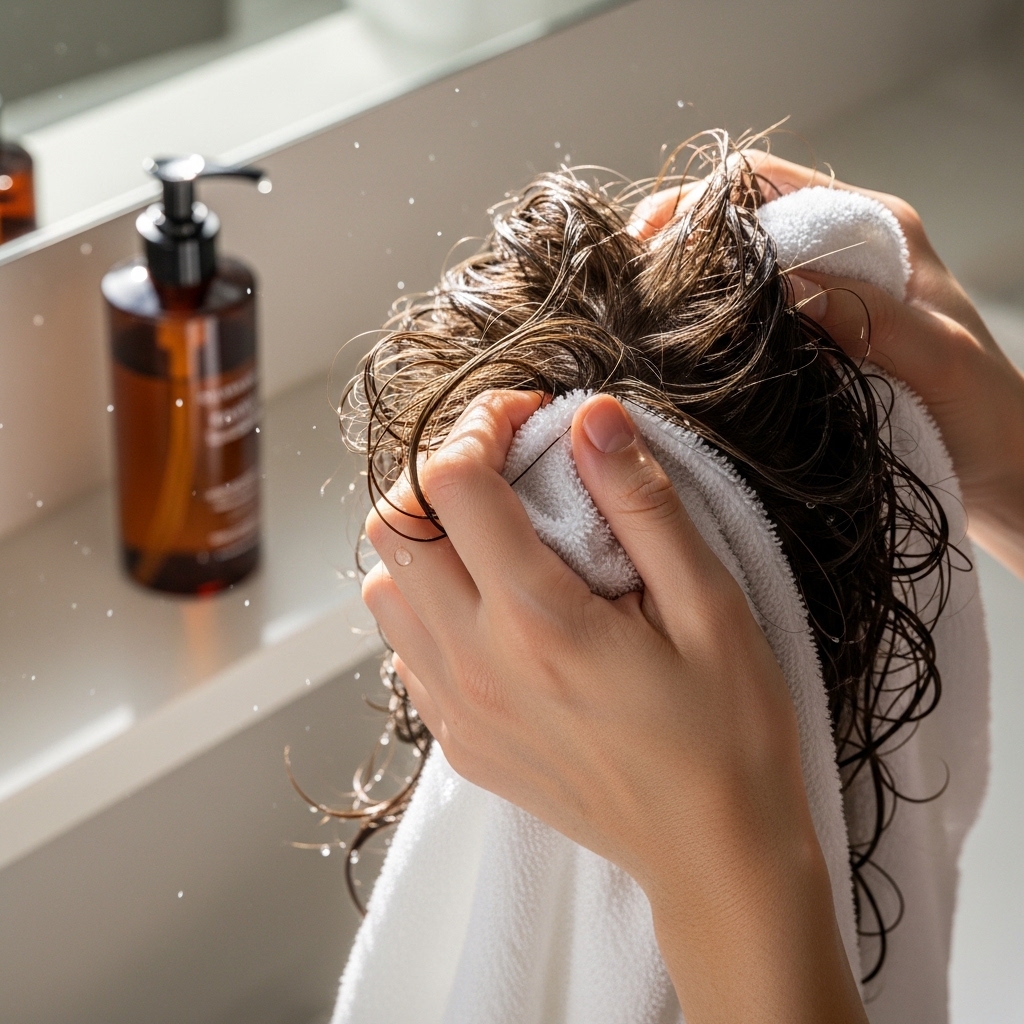
Wash Day Prep is Key
Don’t start with squeaky-clean hair. Day 2 or even day 3 hair has the perfect amount of natural oil to hold texture. If you must wash, skip the conditioner on your mid-lengths and ends, or use a volumizing shampoo.
When you towel-dry, don’t rub. Scrunch your hair gently. Then, apply your heat protectant from roots to ends. Let your hair air dry about 80% of the way before you even think about heat. This saves your hair and gives a better base.
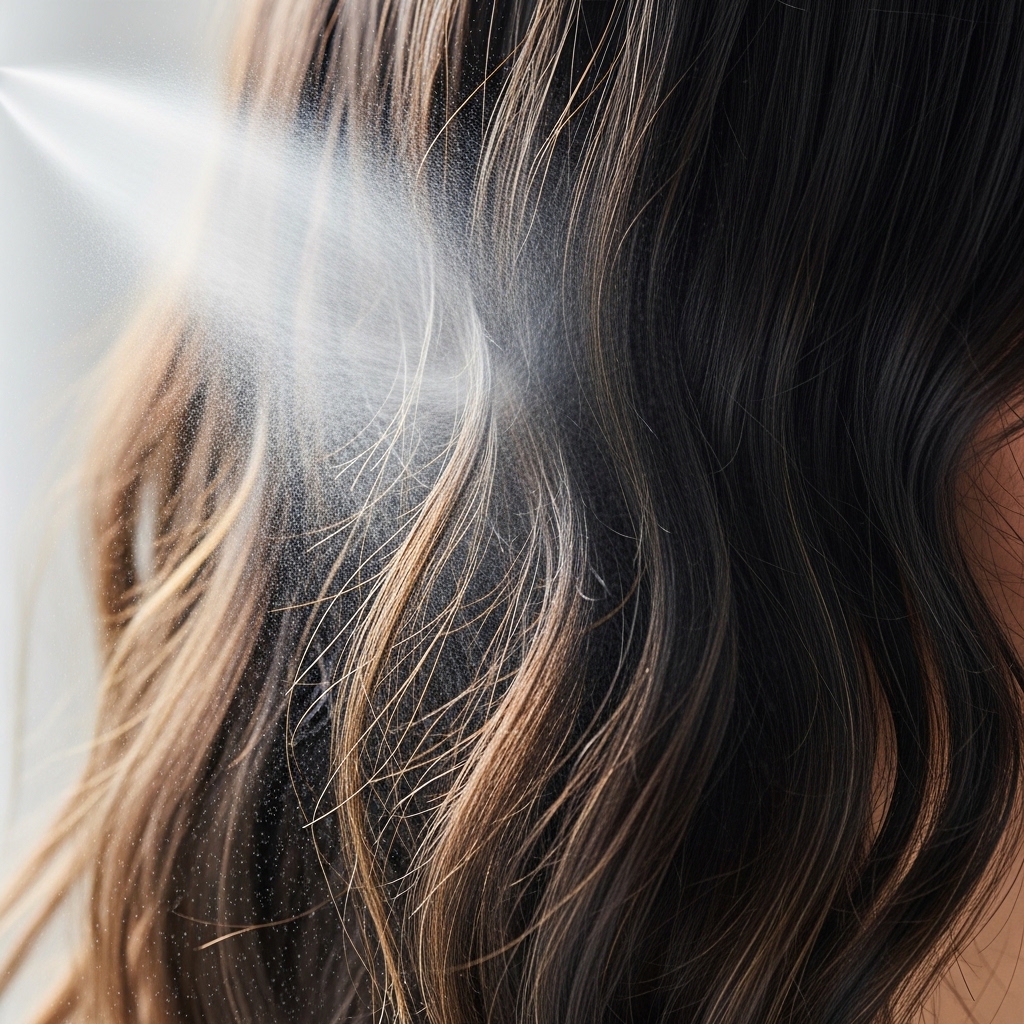
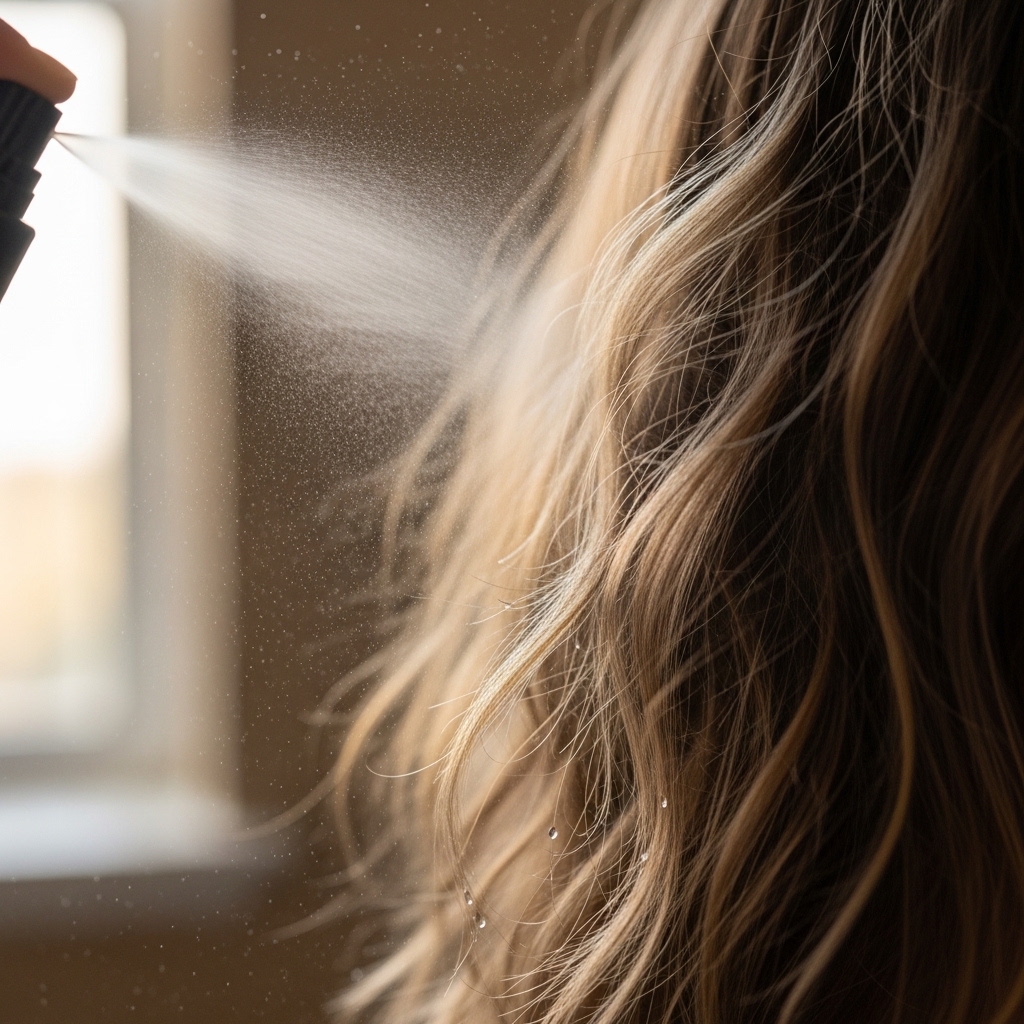
Apply Your Base Products
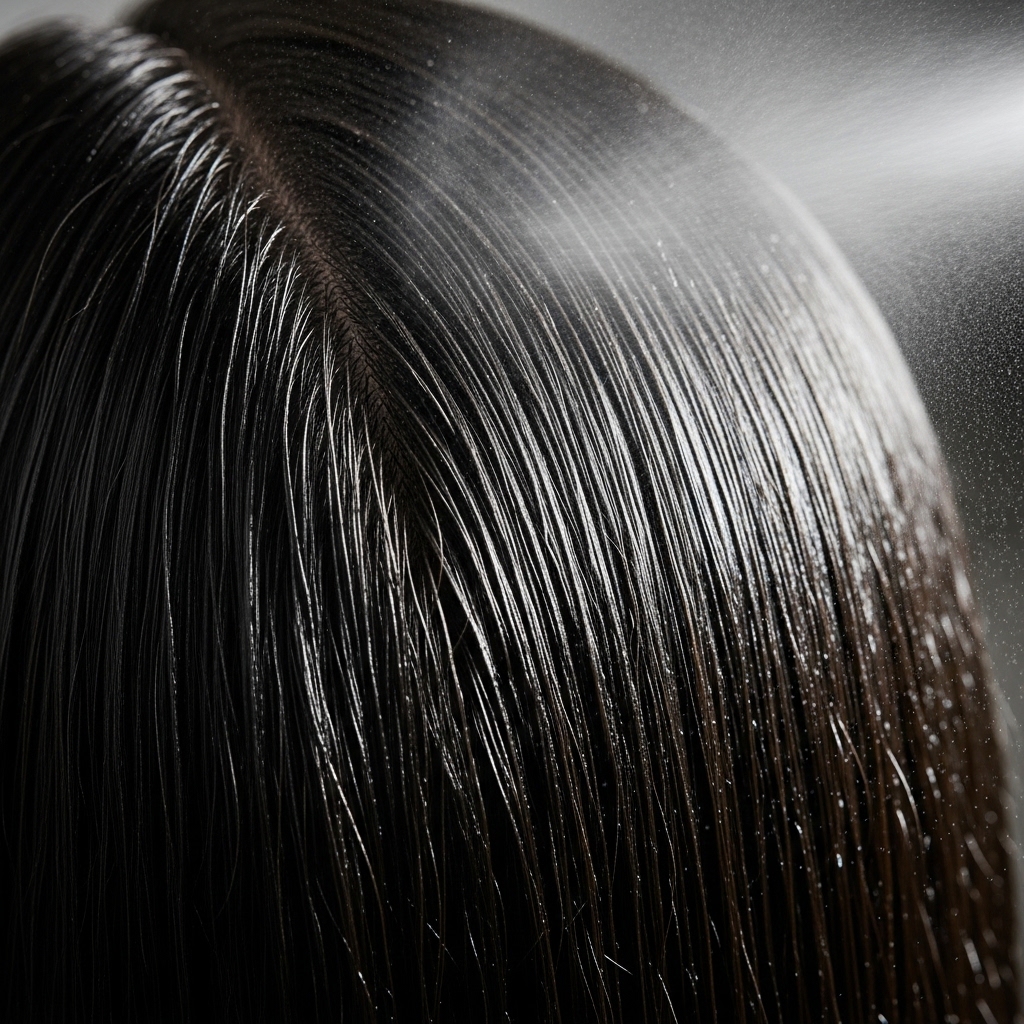
Before any heat, we need texture. Spritz a sea salt or texturizing spray through your mid-lengths and ends. Don’t soak it—just a light mist. This gives the waves something to grip.
If your hair is very fine or slippery, a light mousse at the roots can add lift. The goal is to create a slightly gritty, piece-y foundation. This is what prevents the waves from falling into perfect, uniform curls later.
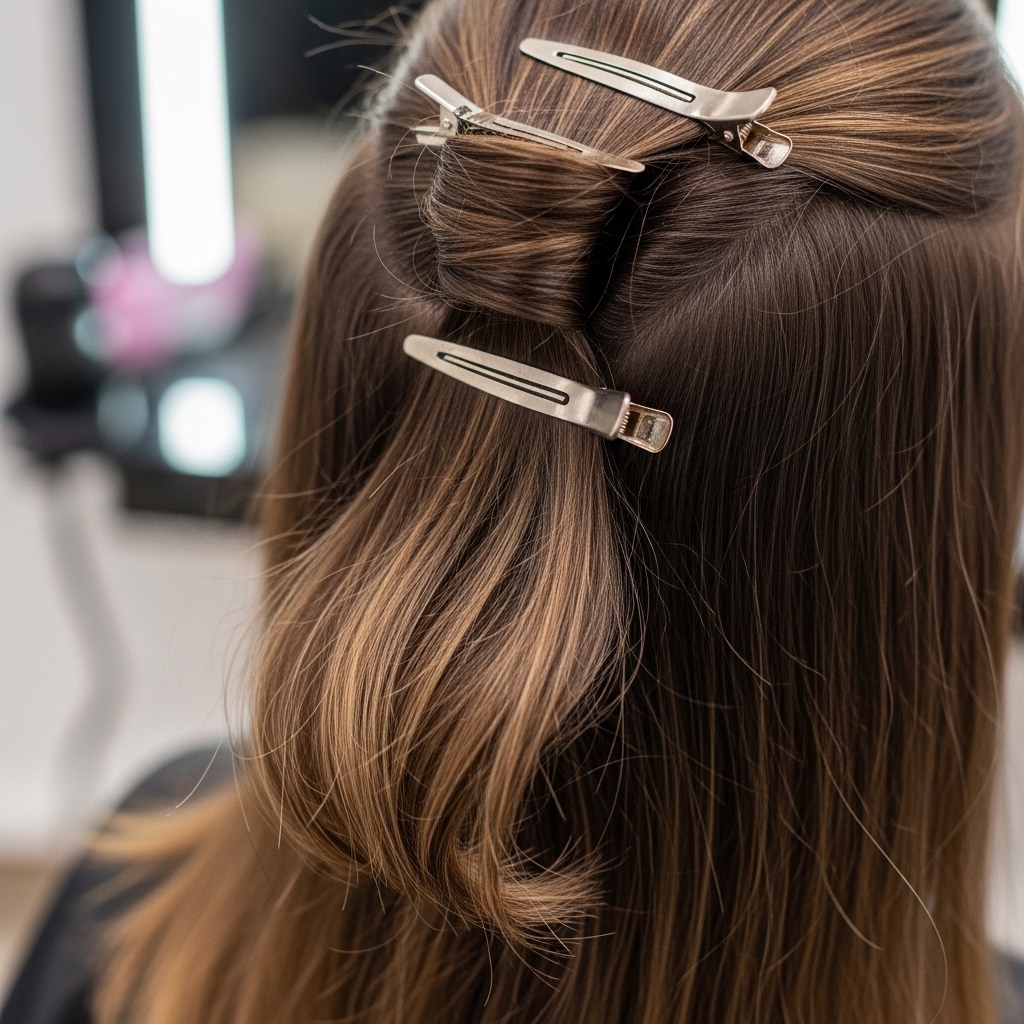
Section Your Hair Properly
This isn’t the time to curl huge chunks. For that smudged effect, we need control. Clip the top half of your hair up. Start with the bottom layer, working in horizontal sections.
Take sections that are about 1-2 inches wide. Smaller sections mean more defined waves you can break up later. Larger sections give a looser wave. I prefer smaller for maximum control and texture.
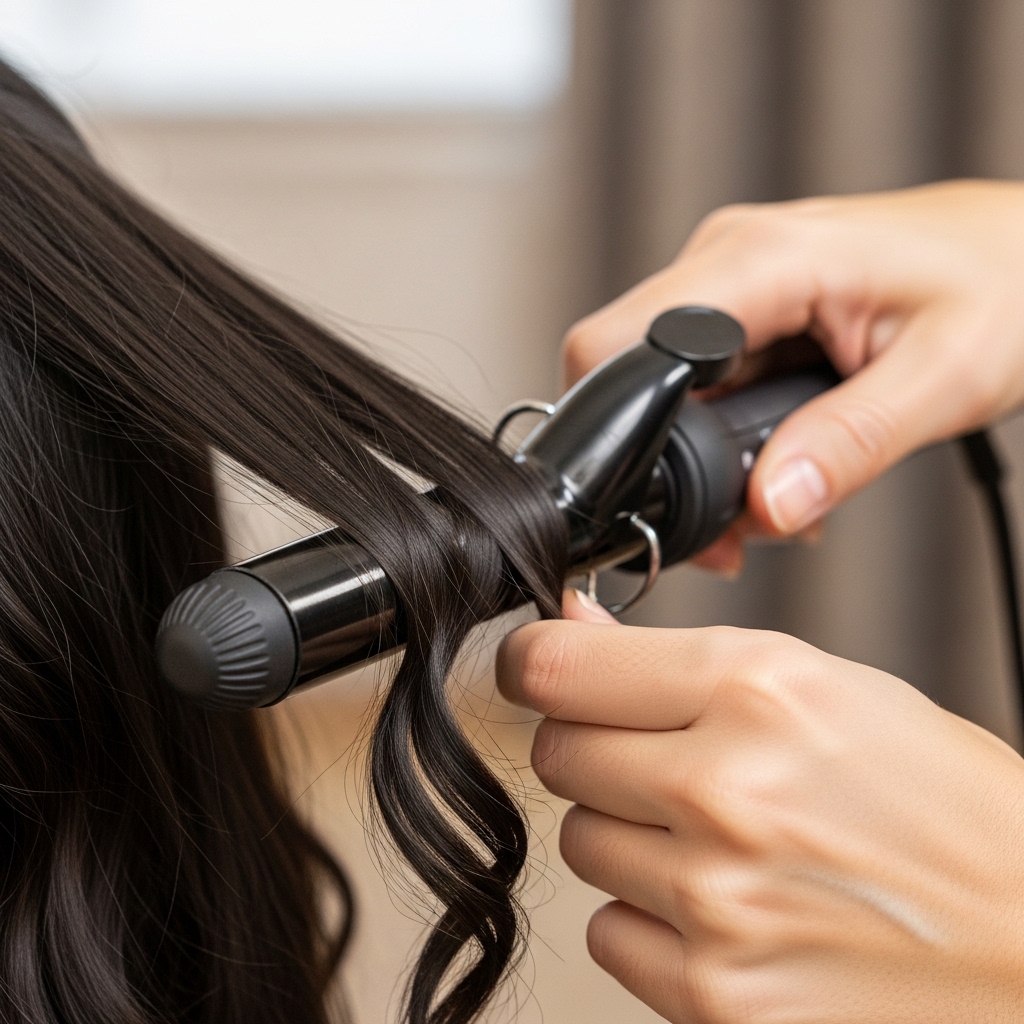
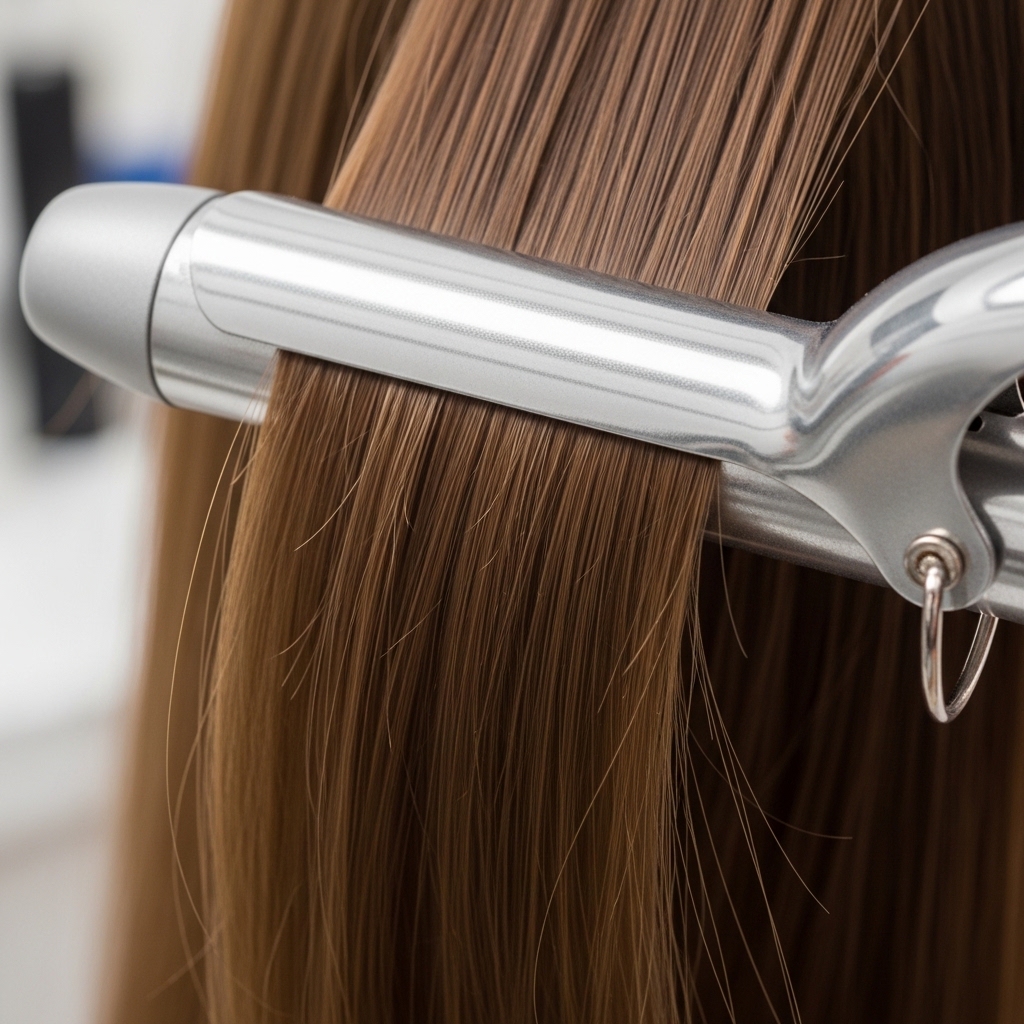
How to Curl for “Smudged” Texture
Here’s the magic step. Wrap a section around your wand, but only hold it for 5-7 seconds. We don’t want a tight, springy curl. We want a soft bend.
As you release the curl, don’t let it fall. Gently squeeze the warm hair in your hand (carefully!) to set the shape. Alternate the direction of your curls—one toward your face, the next away. This creates natural-looking, non-uniform waves.
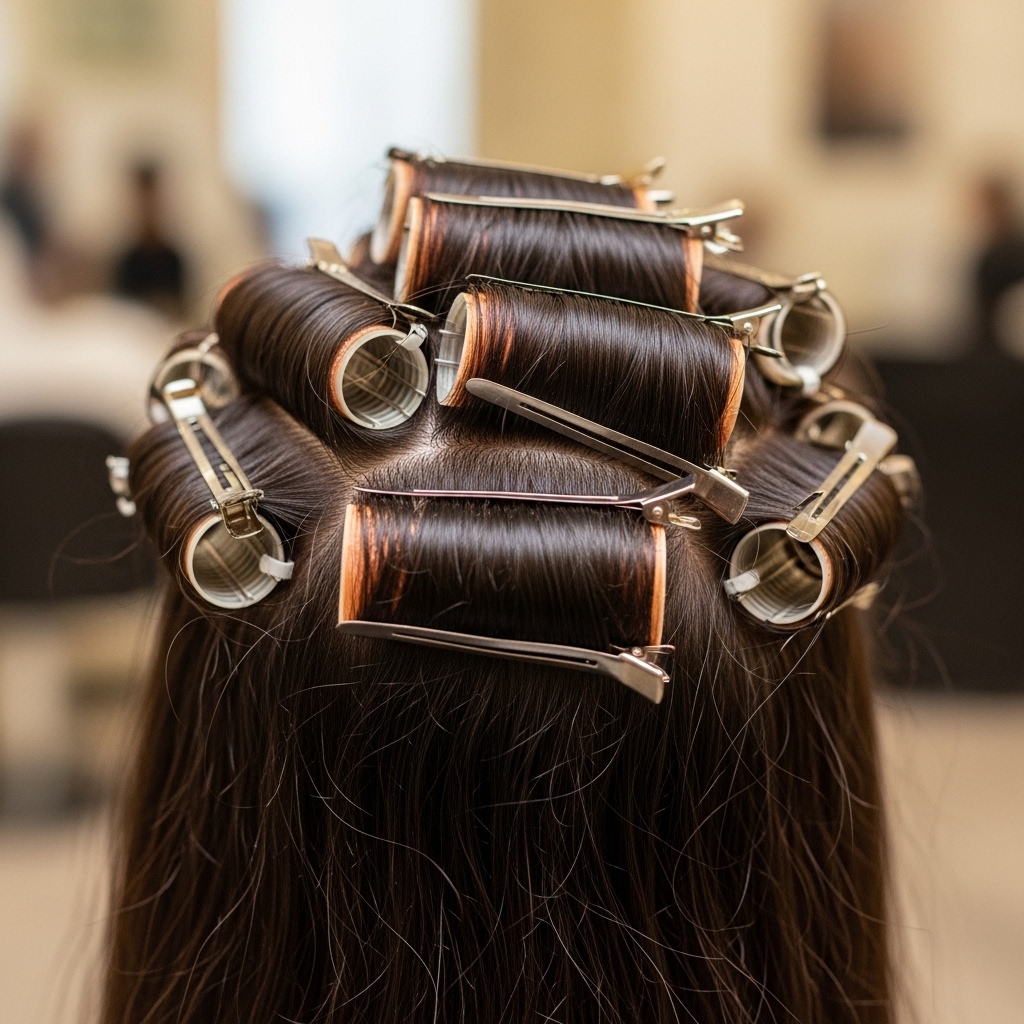
Let the Curls Cool Completely
This is the step everyone skips and then wonders why their style falls. After curling a section, gently coil it up and pin it to your head with a clip. Let it cool completely pinned.
This “sets” the wave in its most curled state. When you take it down later and break it up, it will hold that shape all day instead of dropping straight. Patience here pays off big time.
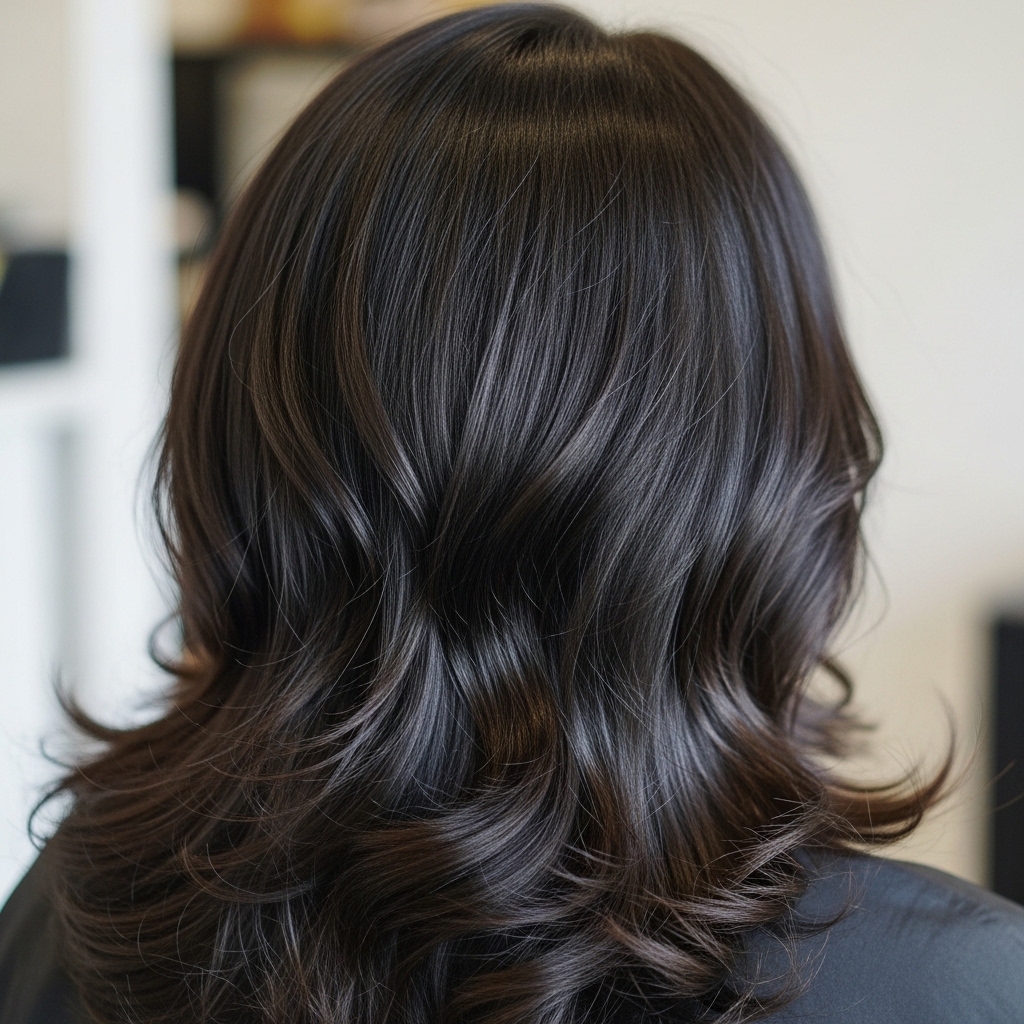
Time to Break Them Up
Once all your hair is cool, take down all the clips. Your hair will probably look a little crazy and too curly. Perfect! Now, take your boar bristle brush or wide-tooth comb.
Gently run it over the surface of your hair, just once or twice. Don’t brush it through. You’re just breaking the hard lines of the curl clumps. Then, use your fingers to shake at the roots and separate the waves into softer pieces.

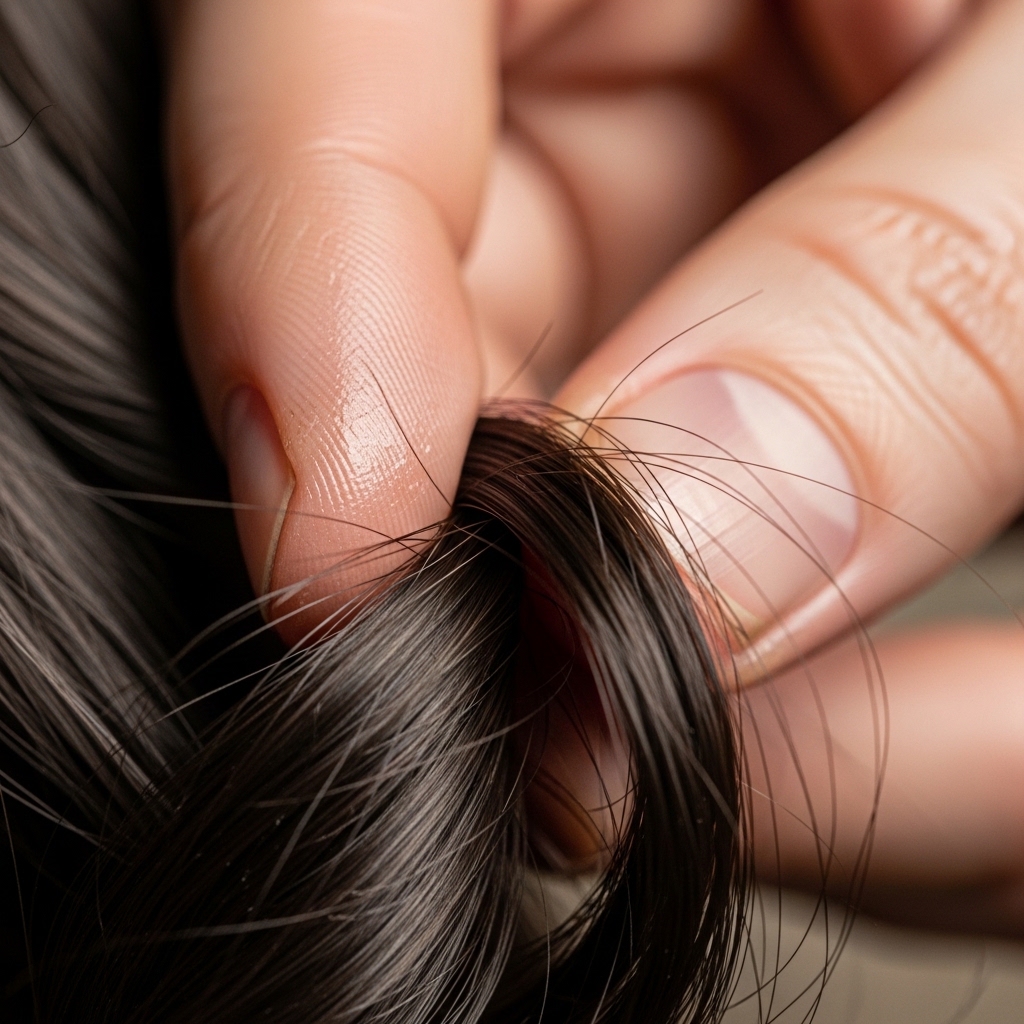
Add Definition with Your Fingers
Now for the “smudge.” Take a tiny dab of hair wax or pomade on your fingertips. Rub them together to warm it up. Then, gently twist a few random pieces of hair around your face and at the ends.
You’re not re-curling. You’re just defining and slightly clumping some pieces together to create that artistic, lived-in messiness. This is where the glitchy glam hair vibe comes in—intentionally imperfect.
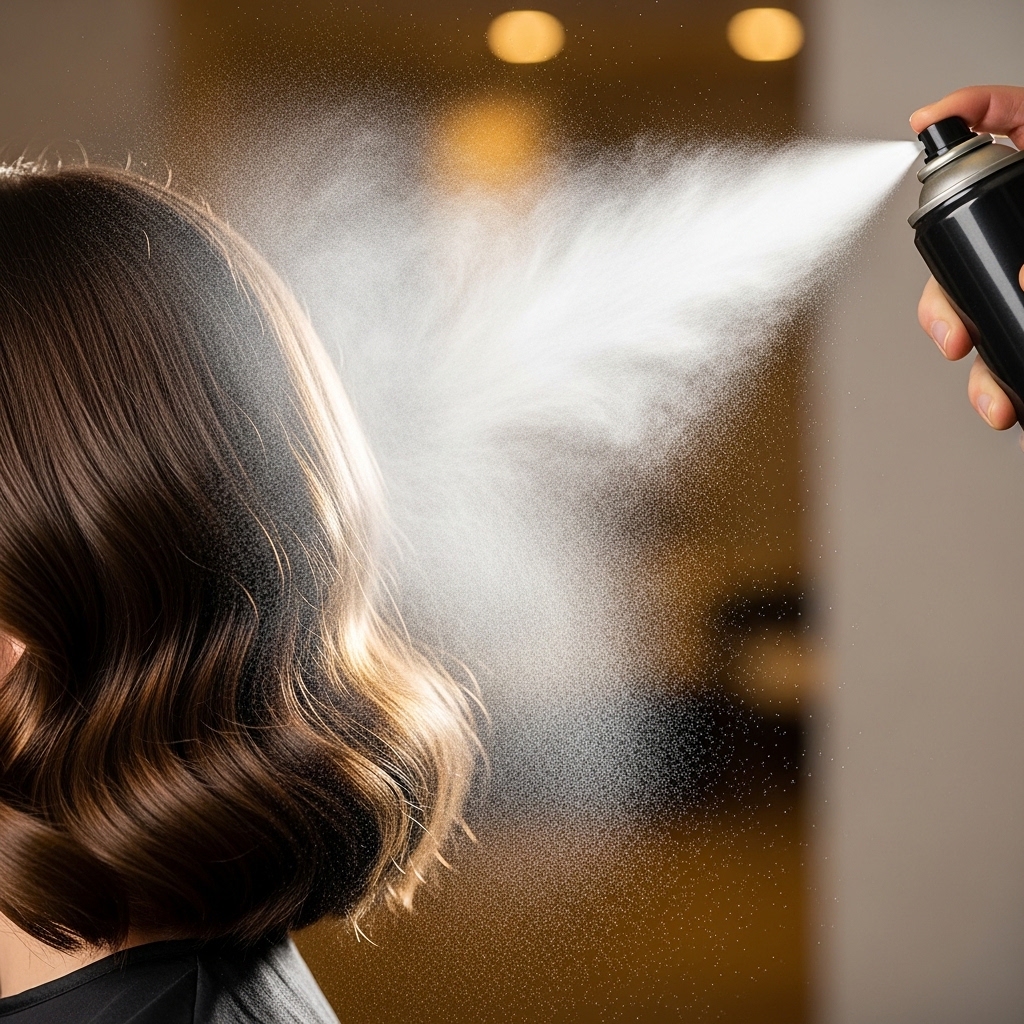
Lock It In with the Right Hairspray
Don’t use a super-strong, crunchy hairspray. You want movement. Hold a light-hold or texture spray about 10 inches away from your head and mist it lightly all over.
While it’s still damp, scrunch your hair upwards gently with your hands. This reactivates any product and redefines the waves without making them stiff. The goal is hold, not a helmet.
How to Style the Front Pieces
The pieces around your face are your framing moment. For a true romantic goth feel, keep them softer. You can curl them away from your face or create a deep, soft wave back.
If you have bangs or a hime cut fringe, style them separately. A slight bend or a smooth, blunt sweep to the side can look incredible against the textured waves.

Create Root Volume for Drama
Flip your head upside down. Gently massage your roots with your fingertips to loosen them. Spritz a tiny bit of dry shampoo or texturizing spray at the roots for extra grip.
Flip back up and use the tips of your fingers to gently lift sections at the crown. Don’t over-tease. We want soft volume, not 80s big hair. This lift adds to the overall romantic silhouette.

What to Do If Your Hair is Too Silky
If your hair is very healthy and silky, it might not hold. That’s okay! Prep is even more important. Use a stronger-hold texturizing spray as a base.
You can also try curling your hair, then pinning the curls while they’re still warm AND cooling them completely pinned. The extra setting time helps. A light-hold mousse before curling can also be a game-changer.
Quick Refresh for Day 2 and 3
This style gets better on day two! To refresh, spritz a mix of water and a drop of conditioner in a spray bottle onto your ends. Scrunch.
For flat spots, wrap a few front pieces around a large-barrel curling iron for just 3 seconds to reactivate the bend. Add a bit more wax to piece-y ends, and you’re good to go. It’s the ultimate low-maintenance, high-impact look.
Pairing with Makeup and Outfits
This hair is a statement, so keep your makeup balanced. A bold lip with a soft eye, or a smoky eye with a nude lip works perfectly. It’s all about that romantic contrast.
For outfits, it pairs beautifully with everything from a crisp white shirt (major old money hair contrast) to a lace top or a leather jacket. It bridges the gap between soft and edgy effortlessly.

Common Mistakes to Avoid
Don’t curl your hair when it’s soaking wet or bone dry. Damp-dry is best. Don’t use a curling iron with a clamp for too long—it leaves a harsh line. Don’t brush out your curls completely.
Avoid heavy oils or serums before styling—they’ll weigh down the texture. And don’t skip the cool-down step! That’s the secret to lasting waves that you can smudge without them disappearing.
Adapting This for Short Hair
Got a bob or lob? The technique is the same, just on a smaller canvas. Focus on creating bend rather than curl. Use a smaller barrel for more definition.
The smudging happens more at the ends. Twist small pieces with wax to create that piece-y, artistic finish. An asymmetrical lob with this texture is absolutely stunning and feels very modern.
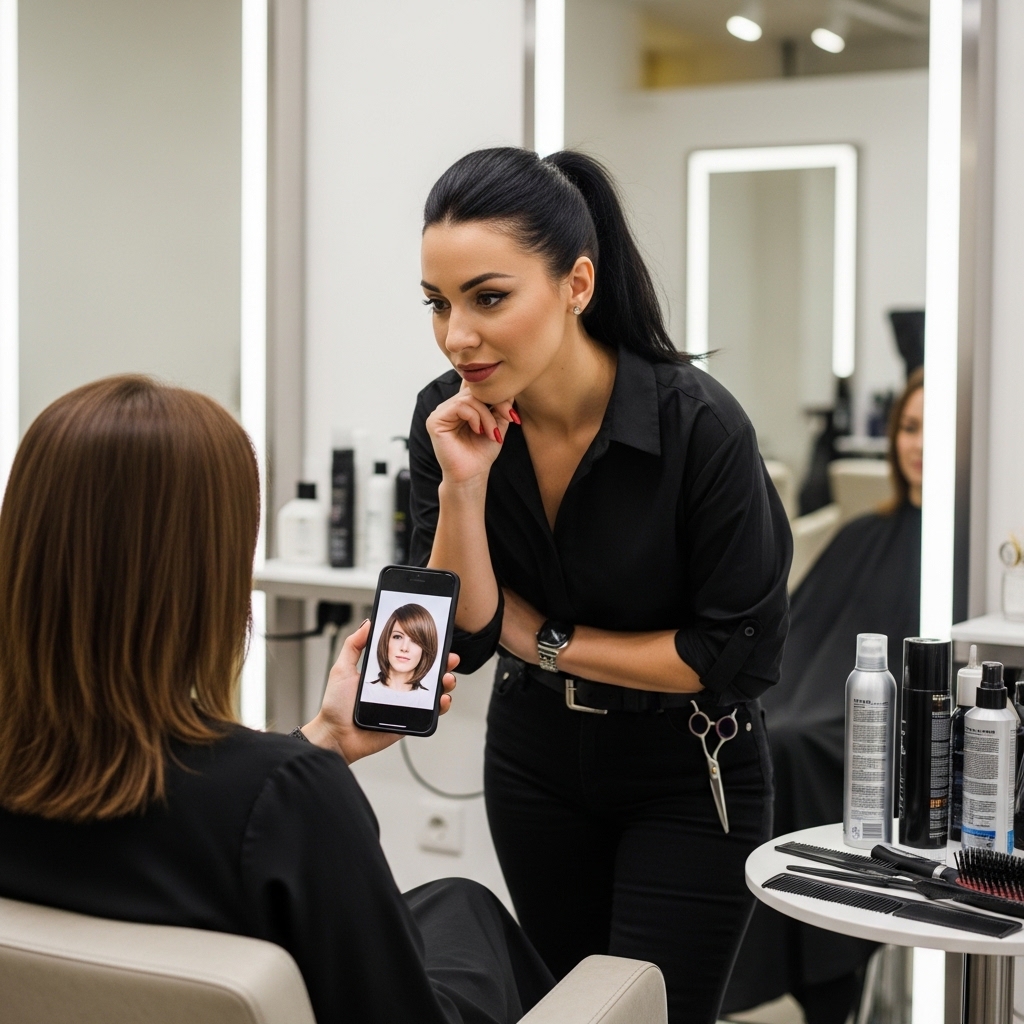
When to See a Professional
If you’re considering a cut to enhance this style, talk to your stylist. Show them pictures of the smudged wave texture along with your desired cut, whether it’s a vampire haircut or a shag.
A good colorist can also add shadow roots or balayage to make the waves pop even more. Sometimes, the right cut and color are the best first step toward nailing the look at home.
Your Final Checklist
- Start on day 2 hair or use volumizing shampoo.
- Apply heat protectant and texture spray.
- Section hair and curl in alternating directions for 5-7 secs.
- Pin curls up to cool completely.
- Take down, gently brush surface, and separate with fingers.
- Apply wax to fingertips to define and smudge random pieces.
- Finish with a light-hold hairspray scrunch.

You’ve Got This, I Promise
It might feel like a lot of steps the first time, but it gets so fast. The second or third time you try it, it’ll take you 15 minutes tops. It’s all about the technique, not the time.
This look is meant to be easy and lived-in. Don’t strive for perfection. Embrace the pieces that fall differently. That’s where the magic and the personal style happens. You’re not just doing your hair; you’re creating a vibe.
And just like that, you’ve got a signature look that feels both timeless and totally now. It’s that perfect mix of effort and ease—the kind of style that makes you feel put-together without looking like you tried too hard.
Remember, the best part about hair is that it washes out. So play, experiment, and make it your own. Twist a few more pieces, add a pin, or leave it as is. This is your romantic goth era, and it looks incredible on you.
Save this post to Pinterest so you can find the steps whenever you need them! Did you try it? Tag me in your pictures or leave a comment below telling me how it went—I love seeing your versions!

