

Okay, let’s be real. The hime cut is everywhere right now, and it’s easy to see why. It’s that perfect mix of edgy and elegant, sitting right at the crossroads of romantic goth hairstyles and old money hair. It feels special, like a signature look.
But booking a salon appointment just to ask for “princess cut” layers can feel like a lot. What if you could skip the awkward explanation and the price tag?
I totally get the fear. Cutting your own hair is intimidating. But I promise, the hime cut is one of the most forgiving DIY styles out there. It’s all about clean, blunt lines.
This guide will walk you through it, step-by-step, with zero stress. We’ll use simple techniques and tools you probably already have. Let’s create your own custom, at-home masterpiece.
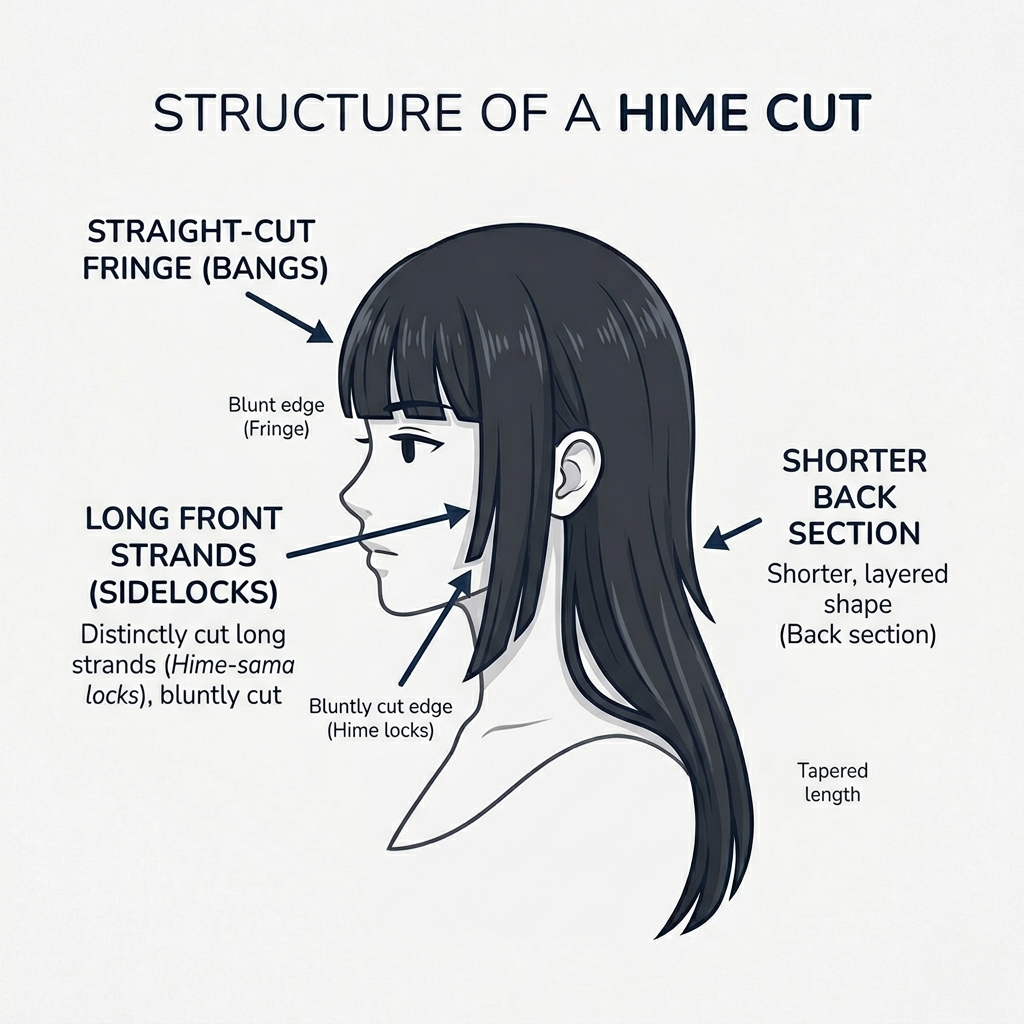
What Exactly Is a Hime Cut?
The hime cut, or “princess cut,” is a traditional Japanese style that’s been totally reinvented for modern times. It’s defined by two key features: straight, blunt-cut front strands that frame your face (like long bangs) and the rest of your hair cut shorter, usually at jaw-length or longer.
This creates a striking, layered silhouette that’s both dramatic and soft. It’s a fantastic way to add structure and personality without a huge chop. Think of it as a more artistic cousin to the asymmetrical lob.
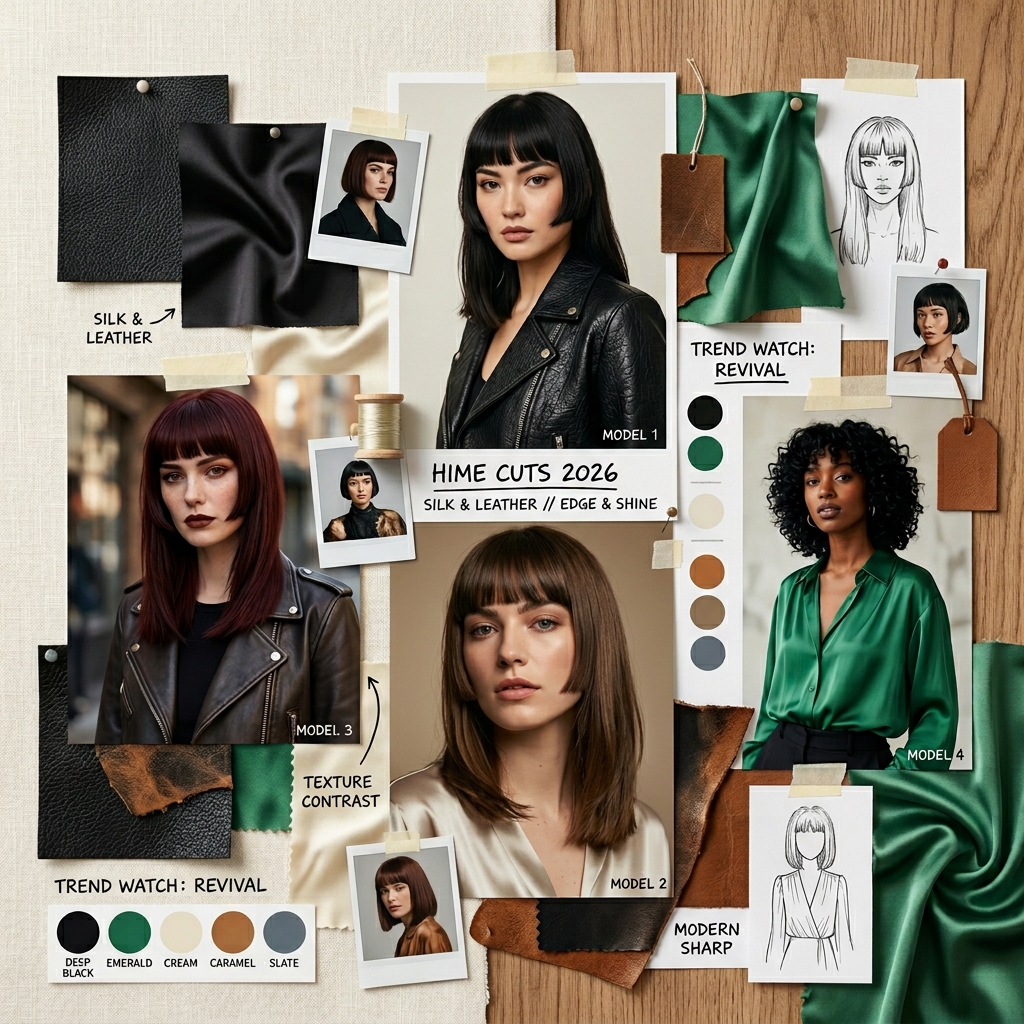
Why the Hime Cut is a Perfect 2026 Hair Trend
As we look ahead to 2026 hairstyles, individuality is key. The hime cut is the opposite of a generic salon blowout. It’s a personal statement. It plays into the “glitchy glam hair” trend—something intentionally imperfect and eye-catching.
It also taps into the “quiet luxury” vibe when styled sleek, or the “vampire haircut” aesthetic when worn more textured. It’s incredibly versatile, which is why it’s staying power is real.
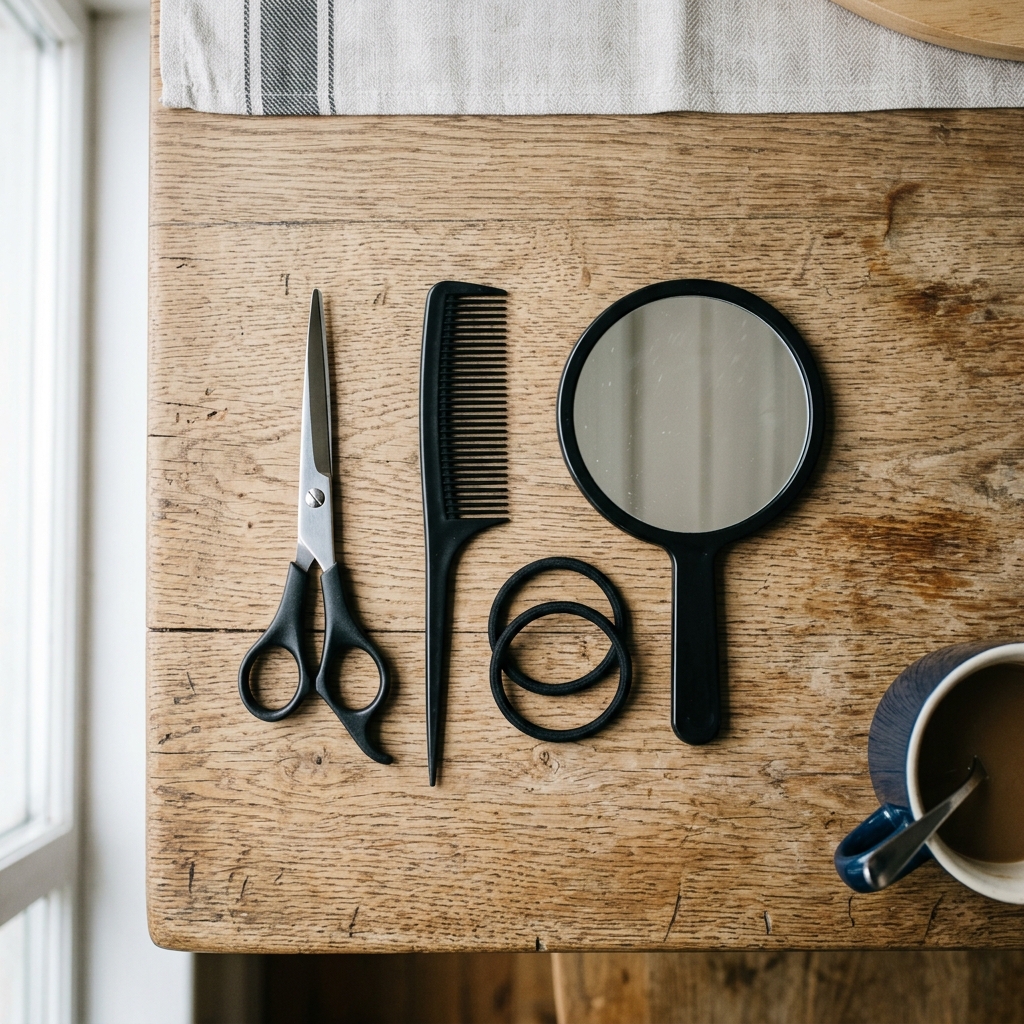
Gathering Your Tools (You Don’t Need Much)
Don’t worry, you don’t need professional shears. You just need a pair of sharp scissors. Fabric scissors will rip your hair, so use any scissors dedicated to paper or crafts.
- Two hair elastics
- A fine-tooth comb
- Hair-clipping shears (optional, but helpful)
- A hand mirror (to check the back)
- Your regular shampoo and conditioner
Step 1: Start with Clean, Dry Hair
This is non-negotiable. Hair shrinks as it dries, so cutting wet hair is a recipe for ending up shorter than you wanted. Wash, dry, and style your hair as you normally would.
If you have waves or curls, blow-dry it straight for this process to ensure your lines are even. We want to see the true length and work with the hair’s natural fall.

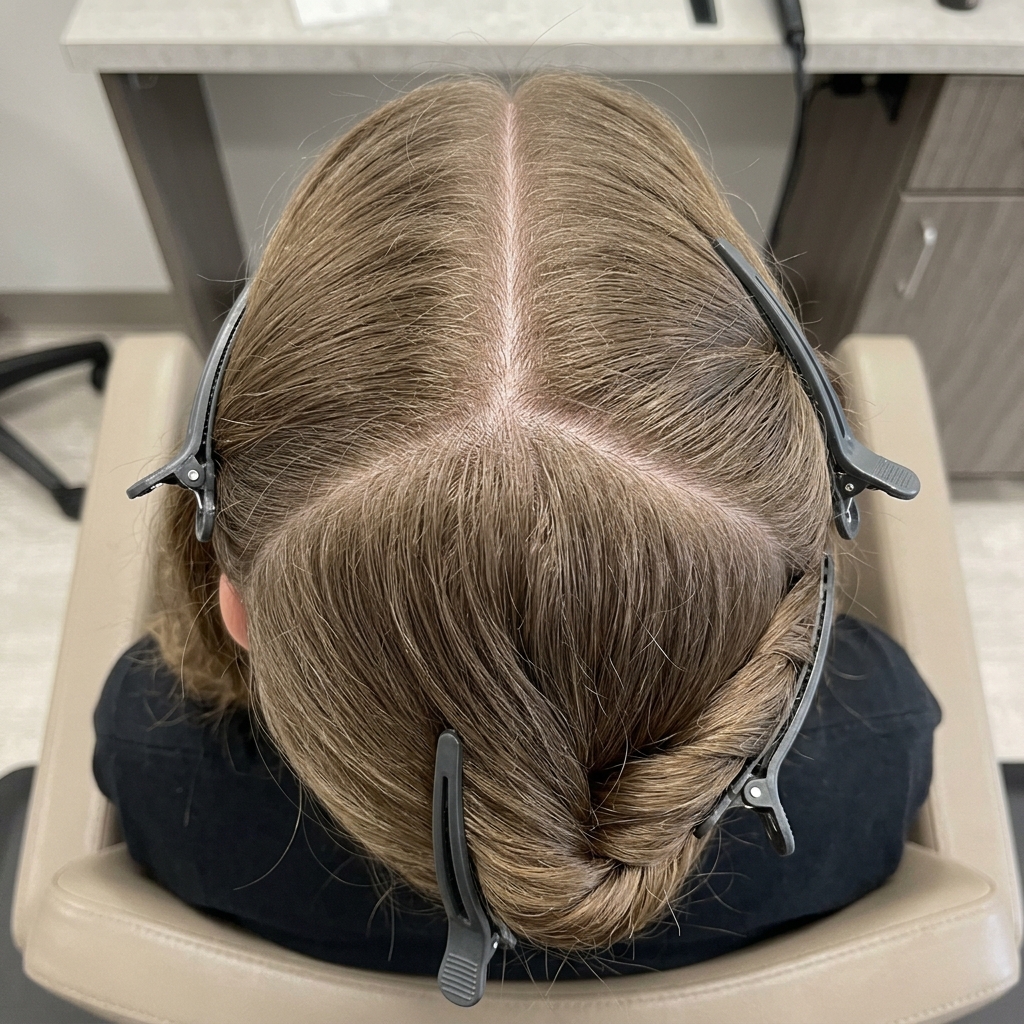
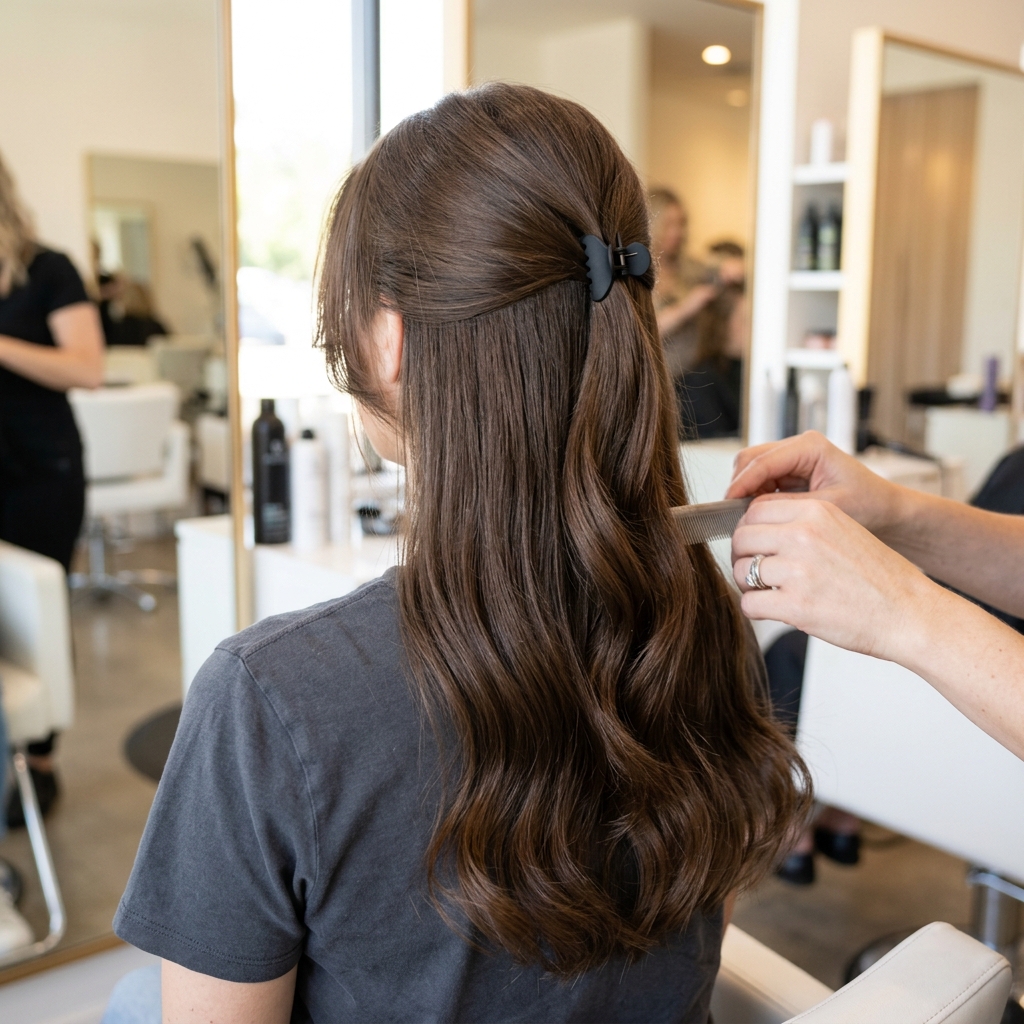
Step 2: Section Your Hair Like a Pro
This is the most important step for getting clean lines. Use your comb to create a part down the middle of your head, from forehead to nape. Be precise.
Then, create a second part from the top of each ear, going straight up to meet your center part. This isolates the front “hime” sections. Clip the back section out of the way.
Step 3: Isolating Your Front Princess Strands
Take the front, unclipped sections on either side of your part. These are your signature face-framing pieces. Comb them forward so they fall in front of your shoulders.
Feel the thickness. You can make these sections thinner for a subtle look or wider for a more dramatic effect. Symmetry is your goal here.

Step 4: How to Find Your Perfect Length
How long do you want your front pieces? A classic hime cut often has them reaching between the collarbone and chest. Hold a piece straight down in front of you.
Use your free hand to pinch the hair at your desired length point. This is where you’ll cut. Remember, you can always cut more later, so start longer.

Step 5: The First Snip (Take a Deep Breath!)
Hold the hair taut between your fingers. Position your scissors horizontally. Take a deep breath, and make one confident, straight cut right below your fingers.
Don’t saw at it! One clean snip gives you the bluntest, most polished line. Do this for the front section on one side first.
Step 6: Matching the Other Side Perfectly
Now, take the front section from the other side. Bring it forward and hold it against the piece you just cut. Match them up carefully.
Use your first cut piece as a guide. Pinch and cut the second piece to the exact same length. Check in the mirror to ensure they look even when you face forward.

Step 7: Releasing the Back Section
Unclip the back section of your hair. Let it all fall down. Comb it through so it’s smooth. You should now see a clear difference between your long front strands and the rest of your hair.
This is where the shape starts to come alive! Tie the front strands back loosely so they don’t get mixed in.
Step 8: Deciding on Your Back Length
The classic hime cut has a blunt, jaw-length bob in the back. But you can customize this! A quiet luxury bob at the chin is gorgeous. Or go for a longer, collarbone-length blunt cut.
Look in the mirror and decide what feels right for you. Remember, the contrast with the front is what makes the style.

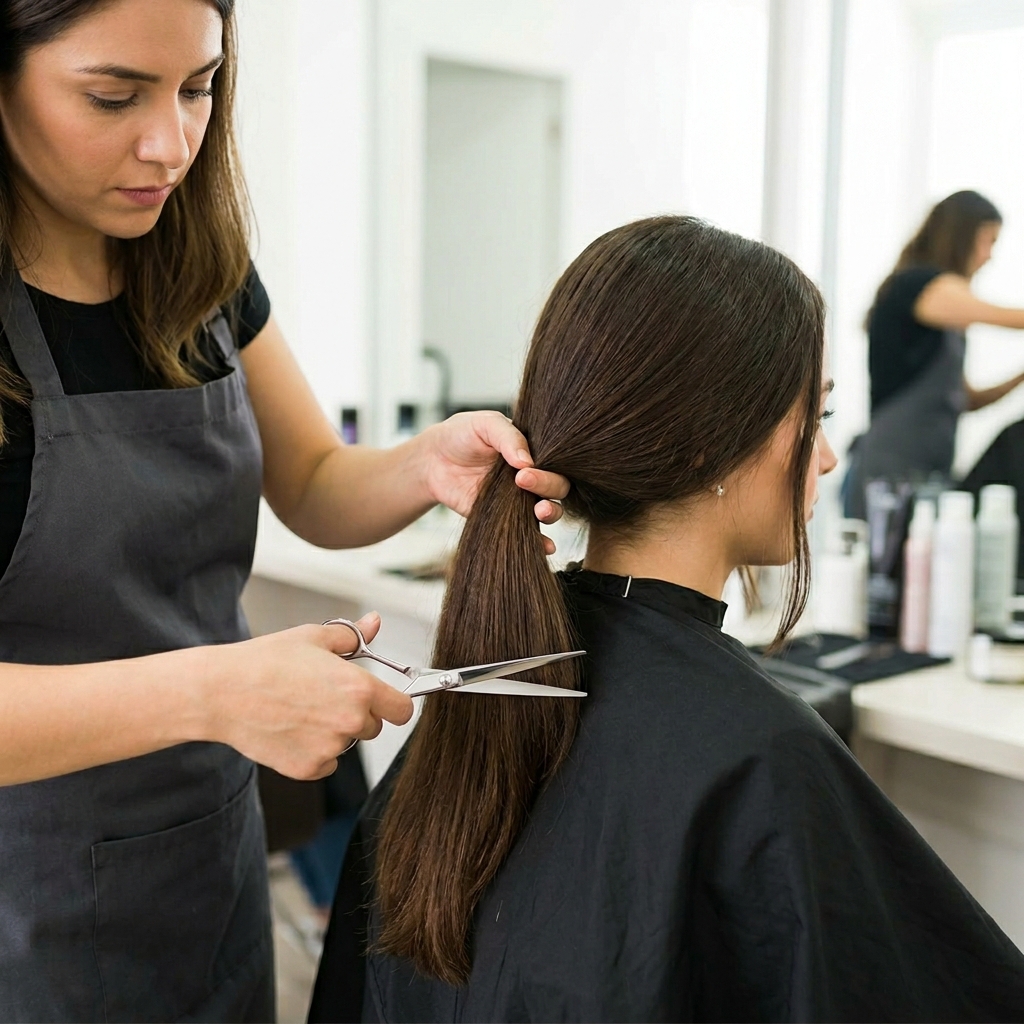
Step 9: Cutting the Back Blunt Line
Comb all the back hair straight down. Gather it at the nape of your neck as if you’re making a low ponytail. Pull it forward over one shoulder so you can see it.
Determine your length, pinch, and make one straight, horizontal cut. Cutting it this way (pulled forward) helps ensure the line is even when it falls in the back.
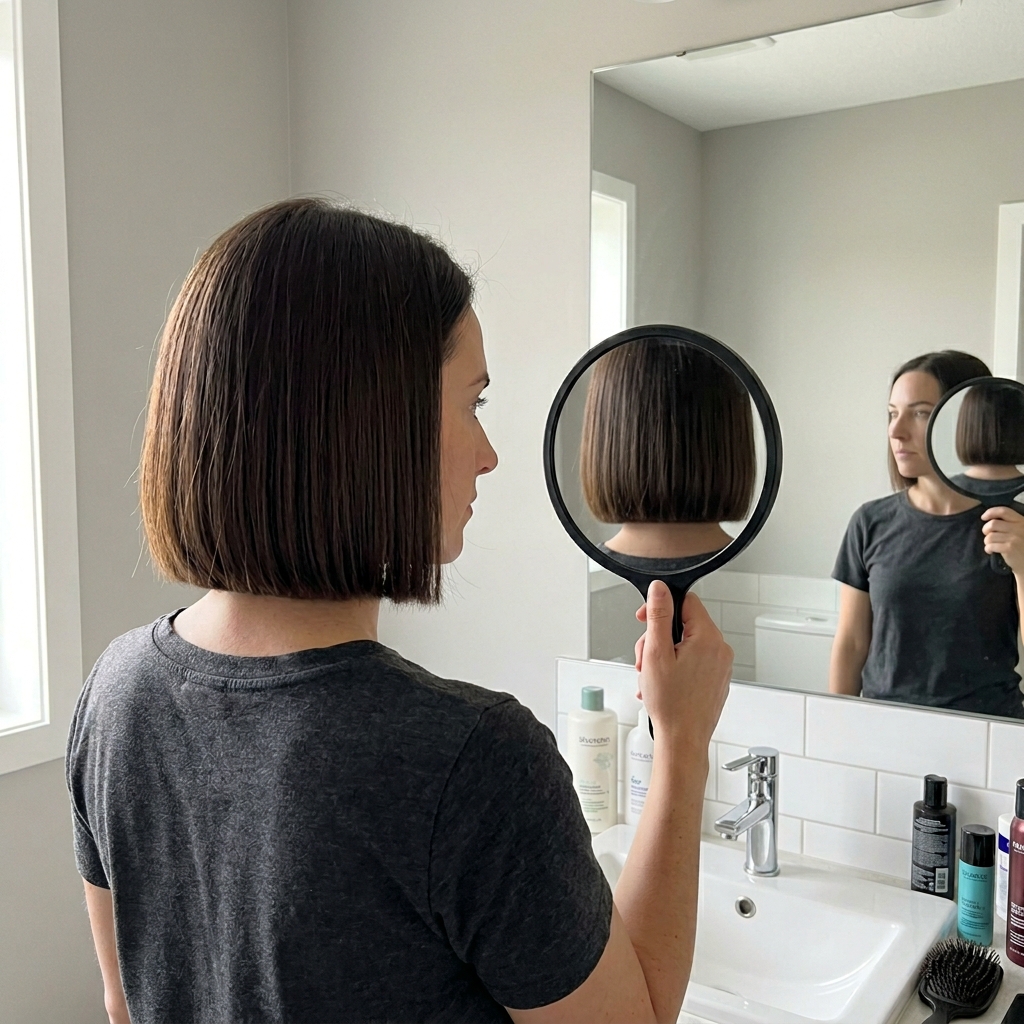
Step 10: Checking for Balance and Symmetry
Let all your hair down. Shake your head. Look straight into the mirror. Do the front pieces frame your face evenly? Does the back look like a straight, clean line?
Use your hand mirror to check the back view. Look for any obvious uneven spots. Don’t seek perfection—seek a shape you love.
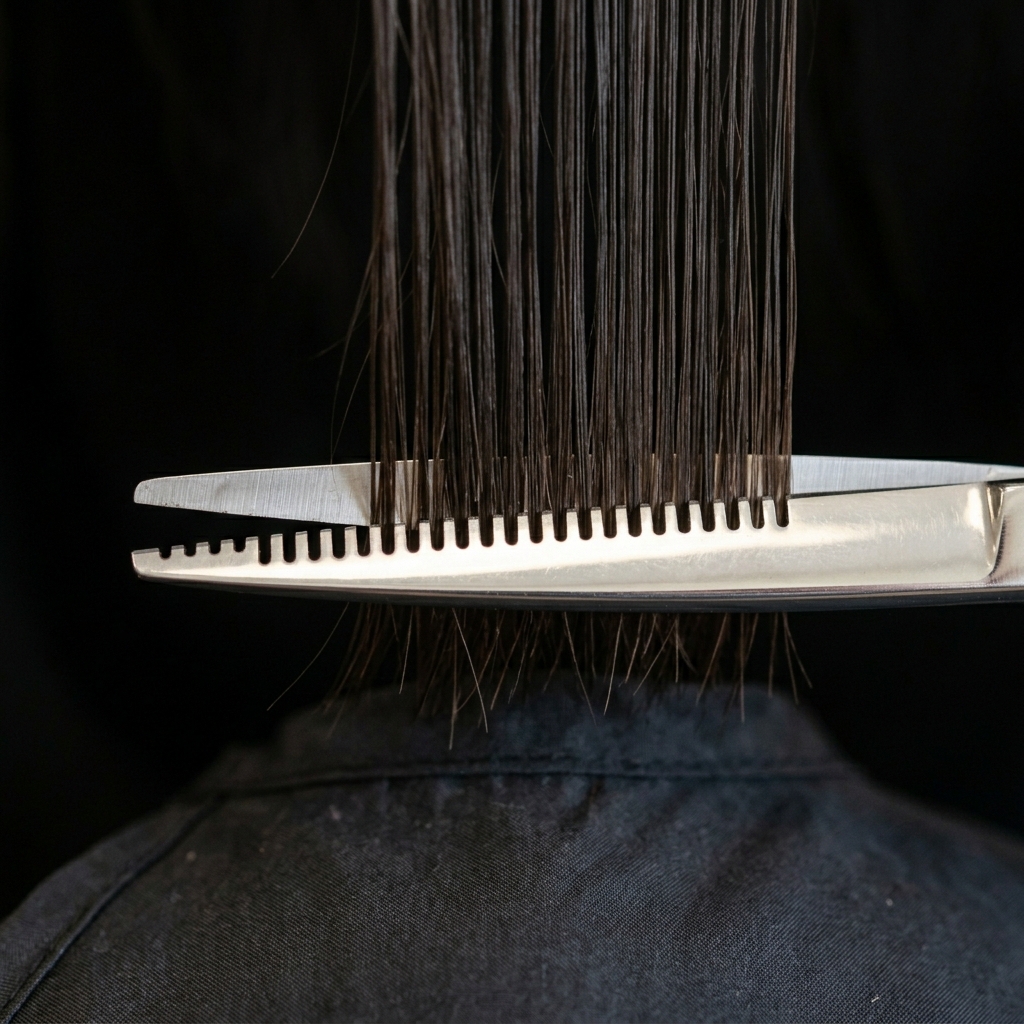
Step 11: Trimming for Texture (Optional)
If your ends look too heavy or “helmet-like,” you can add subtle texture. Take tiny vertical sections from the very ends of your back piece.
Point your scissors upward and make small, snip-like cuts into the ends. This is called point-cutting and it softens the line without removing length.
Styling Option 1: The Sleek “Old Money” Look
For that old money hair feel, apply a heat protectant and use a flat iron. Straighten everything until it’s pin-straight and glossy.
The contrast between the deep black hair and sharp lines is stunning. It’s a powerful, elegant look that feels very “quiet luxury.”

Styling Option 2: Romantic Goth Waves
This is my favorite for weekend vibes. Curl your front long sections and the back section with a large-barrel iron, but leave the ends straight for a modern touch.
Brush out the curls gently for soft waves. It gives major romantic goth hairstyles energy—soft, dramatic, and beautiful.

Styling Option 3: Glitchy Glam Texture
Embrace the raw, undone texture. Work a texturizing paste or sea salt spray through damp hair. Scrunch and let it air dry or diffuse.
The goal is piece-y, separated ends and a bit of frizz. This leans into the glitchy glam hair trend—beautifully imperfect and cool.

How to Master the Asymmetrical Variation
Want an edgier twist? Try an asymmetrical lob in the back. Cut the back so it’s longer on one side and shorter on the other, while keeping the front hime strands even.
This adds another layer of geometric interest and feels very fashion-forward. It’s a bolder take on the classic.

Accessorizing Your Hime Cut
Accessories take this cut to the next level. Small barrettes pinned behind the front sections are adorable. A velvet ribbon tied at the nape adds a vampire haircut romance.
Even simple, large hoop earrings look amazing because they complement the strong lines framing your face.

Maintenance Tips Between Cuts
The beauty of blunt cuts is they grow out nicely. To keep it sharp, trim your front strands and back line every 8-10 weeks.
You can do this yourself by following the same steps! Just take off a tiny bit to maintain the shape. Use a good hair mask weekly to keep ends healthy.

Common Mistakes and How to Avoid Them
- Cutting wet hair: It will end up shorter. Always cut dry.
- Using dull scissors: This causes split ends. Use the sharpest you have.
- Cutting too much at once: Go slow. You can always cut more.
- Forgetting to check symmetry: Always use two mirrors for the back.

Your Confidence is the Best Styling Tool
At the end of the day, a self-cut is an act of creativity and trust. Any slight imperfection just adds to the unique character of your haircut.
Walking out of your bathroom with a haircut you gave yourself? That’s a powerful feeling. Own it. Your confidence will make the style.
And just like that, you’ve done it. You’ve navigated what felt like a scary process and came out the other side with a fresh, personalized haircut. That’s something to be seriously proud of.
The hime cut is such a fun style to play with because it truly changes with your mood. One day it’s sleek and sophisticated, the next it’s full romantic goth waves. It grows out beautifully, and now you have the skills to maintain it yourself forever.
I’d love to see your creation! Did you go for a sleek look or something more textured? What was the easiest part? Tell me everything in the comments below—I read every single one.
Save this post to Pinterest so you can easily find the steps next time you need a trim, or to inspire your friends to try their own DIY haircut adventure. You’ve got this!

